
Gathering around the table for a delicious meal shouldn’t require hours in the kitchen. If you’re craving hearty comfort food but short on time, you’re in the right place. We’ve rounded up the simplest, most satisfying crock pot recipes to make your weeknights a breeze. Get ready to toss in the ingredients, set it, and forget it—your stress-free dinner solution starts here.
Savory Pot Roast with Vegetables
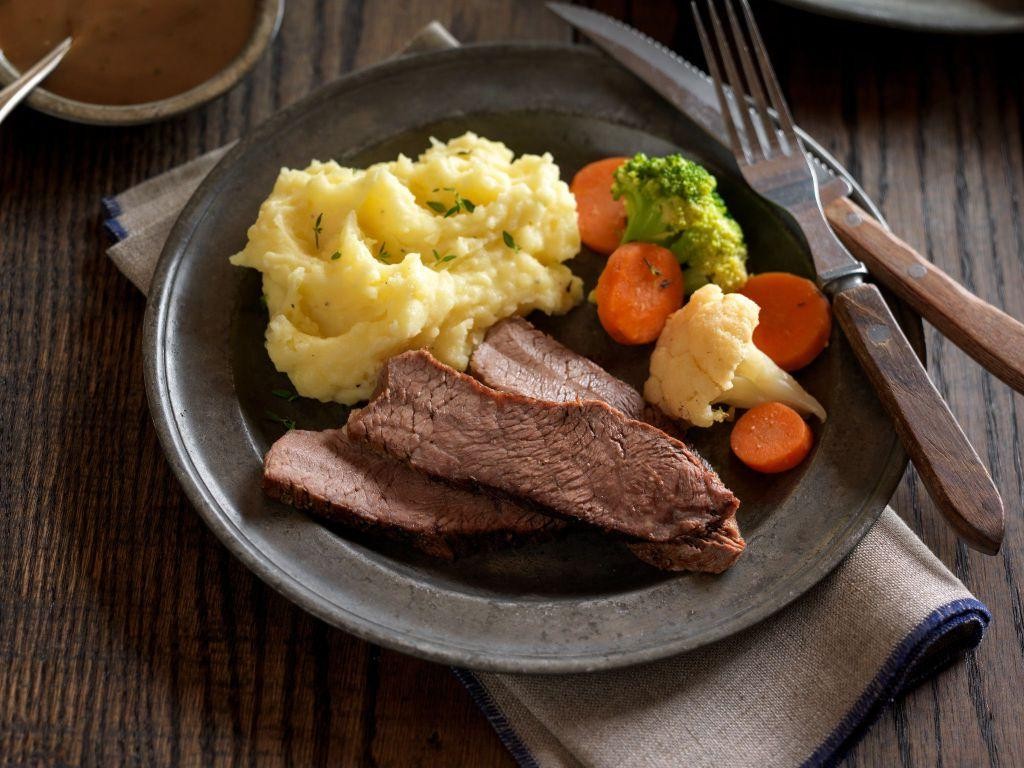
Nostalgia has a way of settling into the kitchen on quiet afternoons, wrapping itself around the slow, steady rhythm of a simmering pot. This savory pot roast, with its humble vegetables, feels like a gentle exhale—a warm, familiar embrace after a long day. It’s the kind of meal that fills the house with comforting aromas, inviting you to pause and savor the simplicity.
Serving: 6 | Pre Time: 20 minutes | Cooking Time: 3 hours 30 minutes
6
servings20
minutes210
minutesIngredients
– 3 pounds chuck roast (I always look for one with good marbling—it melts into such tender shreds)
– 2 tablespoons extra virgin olive oil (my go-to for its fruity depth)
– 1 large yellow onion, roughly chopped (I like big, rustic pieces that hold their shape)
– 4 carrots, peeled and cut into 2-inch chunks (fresh from the farmers’ market if you can)
– 4 Yukon Gold potatoes, scrubbed and quartered (their creamy texture is perfect here)
– 4 cloves garlic, minced (I press mine for a more even distribution)
– 2 cups beef broth (homemade stock adds an extra layer of richness)
– 1 tablespoon tomato paste (a little tube keeps it handy in the fridge)
– 2 sprigs fresh rosemary (from my windowsill herb garden)
– 1 teaspoon kosher salt (I prefer it for its clean flavor)
– ½ teaspoon freshly ground black pepper
Instructions
1. Pat the chuck roast completely dry with paper towels—this helps it sear beautifully without steaming.
2. Heat the extra virgin olive oil in a large Dutch oven over medium-high heat until it shimmers, about 2 minutes.
3. Sear the roast for 4–5 minutes per side until deeply browned, developing a flavorful crust.
4. Remove the roast to a plate and reduce the heat to medium.
5. Add the chopped onion to the pot and cook for 5 minutes, stirring occasionally, until softened and translucent.
6. Stir in the minced garlic and cook for 1 minute until fragrant, being careful not to let it burn.
7. Add the tomato paste and cook for 1 minute, stirring constantly to caramelize it slightly.
8. Pour in the beef broth, scraping up any browned bits from the bottom of the pot—this builds incredible depth of flavor.
9. Return the seared roast to the pot, along with any accumulated juices.
10. Add the carrot chunks, quartered potatoes, rosemary sprigs, kosher salt, and black pepper around the roast.
11. Bring the liquid to a gentle simmer, then cover the pot and reduce the heat to low.
12. Cook for 3 hours, checking occasionally to ensure it maintains a low simmer—the meat should become fork-tender.
13. Carefully remove the roast and vegetables to a serving platter, tenting loosely with foil to keep warm.
14. Skim any excess fat from the cooking liquid, then simmer it uncovered for 10 minutes to reduce slightly into a rich gravy.
15. Pour the gravy over the plated roast and vegetables before serving.
Remarkably tender, the roast falls apart at the touch of a fork, mingling with the sweet carrots and creamy potatoes in a rich, savory broth. For a cozy twist, I love shredding the leftovers into the gravy the next day and serving it over buttery mashed potatoes—it’s like a whole new comforting dish.
Creamy Chicken Alfredo

Just now, as the afternoon light slants through my kitchen window, I find myself craving the kind of meal that feels like a warm embrace—a simple, creamy chicken Alfredo. It’s the sort of dish that turns an ordinary Monday into something quietly special, a reminder that comfort can be found in a single, simmering pot.
Serving: 4 | Pre Time: 15 minutes | Cooking Time: 25 minutes
4
servings15
minutes25
minutesIngredients
– 1 lb boneless, skinless chicken breasts, cut into 1-inch pieces (I find this size cooks evenly and stays tender)
– 2 tbsp unsalted butter (I always keep a good European-style butter on hand for its rich flavor)
– 3 cloves garlic, minced (freshly minced makes all the difference—it’s worth the extra minute)
– 1 cup heavy cream, at room temperature (this helps prevent curdling when it hits the heat)
– 1 cup grated Parmesan cheese, plus extra for serving (I grate my own from a block for a smoother melt)
– 12 oz fettuccine pasta (the classic choice, but any long pasta works)
– Salt and freshly ground black pepper (I use a coarse sea salt for seasoning throughout)
– 2 tbsp chopped fresh parsley, for garnish (it adds a bright, fresh finish)
Instructions
1. Bring a large pot of salted water to a rolling boil over high heat—it should taste like the sea.
2. Add the fettuccine to the boiling water and cook according to package directions, stirring occasionally, until al dente, about 10-12 minutes.
3. While the pasta cooks, pat the chicken pieces dry with paper towels to ensure a good sear.
4. Heat a large skillet over medium-high heat and add the butter, letting it melt and foam slightly, about 1 minute.
5. Add the chicken to the skillet in a single layer and cook without moving for 4-5 minutes, until golden brown on one side.
6. Flip the chicken pieces and cook for another 4-5 minutes, until cooked through and no longer pink in the center.
7. Reduce the heat to medium-low and add the minced garlic to the skillet, stirring for 30 seconds until fragrant but not browned.
8. Pour in the heavy cream, scraping up any browned bits from the bottom of the skillet with a wooden spoon.
9. Let the cream simmer gently for 2-3 minutes, until it thickens slightly and coats the back of a spoon.
10. Remove the skillet from the heat and stir in the grated Parmesan cheese until fully melted and smooth.
11. Drain the cooked pasta, reserving ½ cup of the pasta water, and add the pasta directly to the skillet with the sauce.
12. Toss everything together, adding pasta water a tablespoon at a time if needed to loosen the sauce to a creamy consistency.
13. Season with salt and pepper to taste, then divide among plates and garnish with chopped parsley.
Gently, the sauce clings to each strand of pasta, rich and velvety with a subtle garlic warmth. The tender chicken adds a savory depth, making each bite feel indulgent yet comforting. For a twist, try serving it with a side of roasted asparagus or a simple green salad to cut through the creaminess.
Slow Cooker Beef Stew
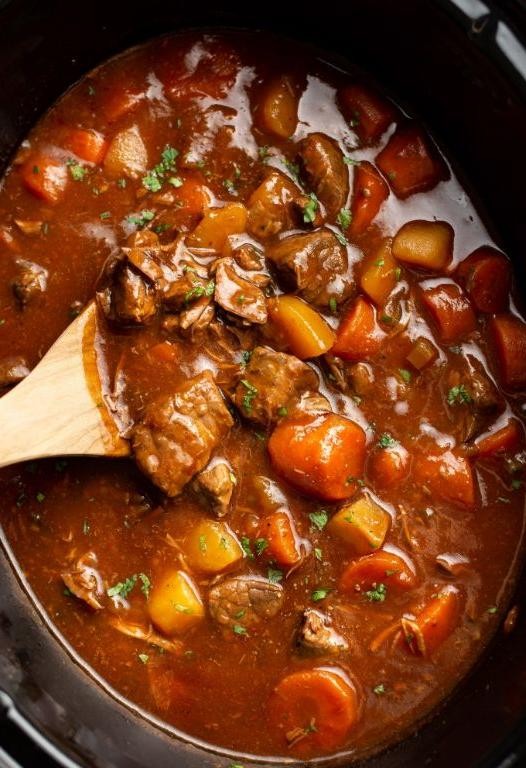
Now, as the chill settles in and the light fades earlier, there’s a quiet comfort in letting a meal come together slowly, almost on its own. This stew simmers patiently, filling the kitchen with a warmth that feels like a gentle exhale after a long day, transforming simple ingredients into something deeply nourishing.
Serving: 6 | Pre Time: 20 minutes | Cooking Time: 8 hours
6
servings20
minutes495
minutesIngredients
– 2 lbs beef chuck roast, cut into 1-inch cubes (I find chuck has the perfect balance of flavor and tenderness for the long cook)
– 1/4 cup all-purpose flour, for dredging
– 2 tbsp extra virgin olive oil (my go-to for its fruity note)
– 1 large yellow onion, diced
– 4 cloves garlic, minced (freshly minced makes all the difference)
– 4 medium carrots, peeled and cut into 1-inch chunks
– 3 medium Yukon Gold potatoes, peeled and cut into 1-inch cubes (their creamy texture holds up beautifully)
– 4 cups beef broth, low-sodium
– 1 tbsp tomato paste
– 2 tsp dried thyme
– 2 bay leaves
– 1 tsp kosher salt
– 1/2 tsp freshly ground black pepper
– 1 cup frozen peas
Instructions
1. Pat the beef cubes completely dry with paper towels. Tip: Dry meat browns much better, creating a flavorful fond in the pot.
2. Place the flour in a shallow bowl and dredge each beef cube, shaking off any excess.
3. Heat the olive oil in a large skillet over medium-high heat until it shimmers, about 2 minutes.
4. Working in batches to avoid crowding, add the dredged beef and sear for 3-4 minutes per side until deeply browned. Transfer the browned beef to the bowl of a 6-quart slow cooker.
5. To the same skillet, add the diced onion. Cook for 5 minutes, stirring occasionally, until softened and translucent.
6. Add the minced garlic and cook for 1 more minute, just until fragrant.
7. Transfer the onion and garlic mixture to the slow cooker with the beef.
8. Add the carrot chunks, potato cubes, beef broth, tomato paste, dried thyme, bay leaves, kosher salt, and black pepper to the slow cooker. Stir gently to combine.
9. Cover the slow cooker and cook on the LOW setting for 8 hours. Tip: Resist the urge to lift the lid; keeping it sealed ensures even, steady heat.
10. After 8 hours, carefully remove the lid. Stir in the frozen peas. Tip: Adding the peas at the end preserves their bright color and fresh flavor.
11. Cover again and let the stew cook on LOW for an additional 15 minutes, just until the peas are heated through.
12. Discard the bay leaves before serving.
Kindly ladle this stew into deep bowls. The beef becomes impossibly tender, falling apart at the slightest nudge of a spoon, while the potatoes and carrots soften into the rich, savory broth. For a delightful contrast, serve it over a mound of buttery egg noodles or with a thick slice of crusty bread to soak up every last drop.
Teriyaki Glazed Pulled Pork
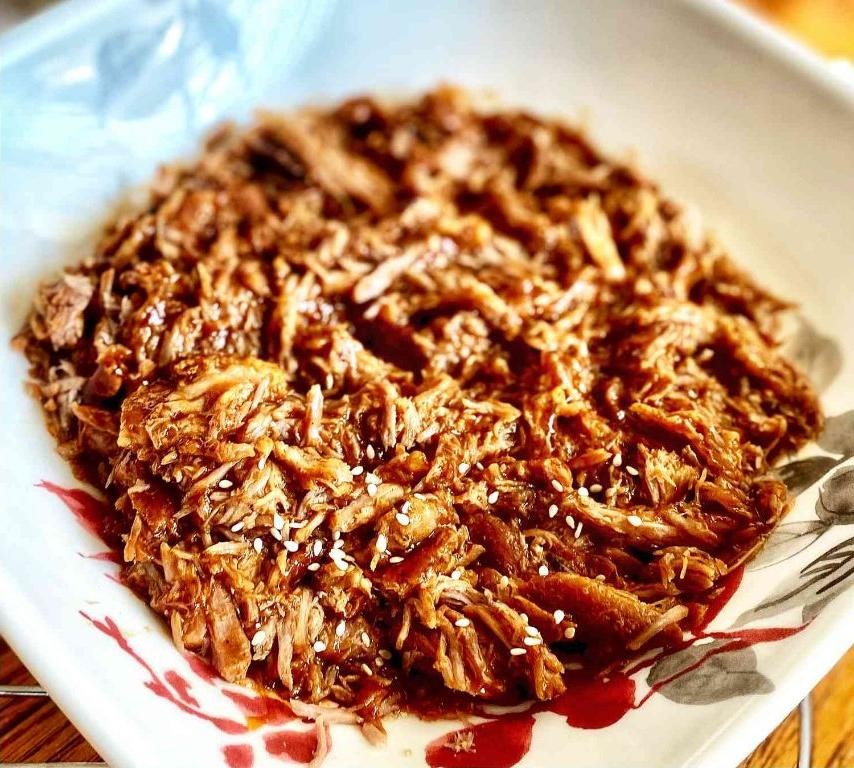
Zigzagging through my kitchen memories, I often return to this comforting dish—a slow-cooked pulled pork that transforms with a sweet-savory teriyaki glaze, perfect for those quiet evenings when the world outside feels too loud.
Serving: 6 | Pre Time: 15 minutes | Cooking Time: 8 hours
6
servings15
minutes515
minutesIngredients
– 3 pounds pork shoulder, trimmed of excess fat (I like to use a well-marbled cut for tenderness)
– 1 cup low-sodium soy sauce (my go-to for better flavor control)
– 1/2 cup brown sugar, packed (dark brown adds a richer molasses note)
– 1/4 cup honey (local wildflower honey is my favorite here)
– 3 cloves garlic, minced (freshly minced makes all the difference)
– 1 tablespoon grated fresh ginger (I keep a knob in the freezer for easy grating)
– 1/2 cup water
– 2 tablespoons cornstarch
– 1 tablespoon vegetable oil (a neutral oil works best for searing)
– 1 teaspoon sesame seeds, for garnish (toasted lightly if you have time)
Instructions
1. Pat the pork shoulder dry with paper towels to ensure a good sear.
2. Heat vegetable oil in a large skillet over medium-high heat until shimmering, about 2 minutes.
3. Sear the pork on all sides until browned, approximately 3-4 minutes per side, to develop flavor.
4. Transfer the seared pork to a slow cooker insert.
5. In a medium bowl, whisk together soy sauce, brown sugar, honey, minced garlic, grated ginger, and water until the sugar dissolves.
6. Pour the mixture over the pork in the slow cooker, ensuring it’s mostly submerged.
7. Cover and cook on low heat for 8 hours, until the pork shreds easily with a fork (tip: avoid opening the lid during cooking to maintain temperature).
8. Carefully remove the pork to a cutting board, leaving the liquid in the slow cooker.
9. Use two forks to shred the pork into bite-sized pieces, discarding any large fat pockets.
10. Skim excess fat from the cooking liquid in the slow cooker with a spoon.
11. In a small bowl, mix cornstarch with 2 tablespoons of cold water to create a slurry.
12. Turn the slow cooker to high and whisk in the cornstarch slurry until fully incorporated (tip: add slurry slowly to prevent clumping).
13. Cook the sauce on high for 15-20 minutes, stirring occasionally, until thickened to a glaze consistency.
14. Return the shredded pork to the slow cooker and toss with the glaze until evenly coated (tip: let it sit for 5 minutes to absorb flavors).
15. Garnish with sesame seeds before serving.
Pulling apart the tender pork reveals strands that soak up the glossy teriyaki glaze, offering a sticky-sweet bite with a savory undertone from the soy and garlic. Serve it over steamed rice for a classic pairing, or stuff it into soft buns with a crunch of quick-pickled vegetables for a playful twist.
Honey Garlic Chicken Thighs

Wandering through the kitchen on a quiet afternoon, I find myself drawn to the simple comfort of chicken thighs—their rich flavor and forgiving nature make them perfect for a cozy meal. This honey garlic version has become my go-to when I want something both sweet and savory, with minimal fuss but maximum reward.
Serving: 4 | Pre Time: 10 minutes | Cooking Time: 25 minutes
3
servings10
minutes25
minutesIngredients
– 1.5 lbs boneless, skinless chicken thighs (I like to pat them dry with paper towels for better browning)
– 1/4 cup honey (local raw honey adds a lovely floral note)
– 4 cloves garlic, minced (freshly minced makes all the difference)
– 2 tbsp soy sauce (I use low-sodium to control the saltiness)
– 1 tbsp olive oil (extra virgin olive oil is my go-to for its fruity aroma)
– 1/2 tsp black pepper (freshly ground for a brighter flavor)
– 1/4 tsp red pepper flakes (optional, but I love the subtle heat)
– 2 tbsp chopped fresh parsley for garnish (it adds a pop of color and freshness)
Instructions
1. Pat the 1.5 lbs boneless, skinless chicken thighs dry with paper towels on both sides to remove excess moisture, which helps them brown evenly in the pan.
2. Heat 1 tbsp olive oil in a large skillet over medium-high heat until it shimmers, about 2 minutes.
3. Place the chicken thighs in the skillet in a single layer, cooking them for 5-6 minutes per side until golden brown and cooked through to an internal temperature of 165°F, using a meat thermometer to check doneness.
4. While the chicken cooks, whisk together 1/4 cup honey, 4 cloves minced garlic, 2 tbsp soy sauce, 1/2 tsp black pepper, and 1/4 tsp red pepper flakes in a small bowl until well combined.
5. Remove the cooked chicken from the skillet and set it aside on a plate, covering it loosely with foil to keep warm.
6. Reduce the heat to medium-low and pour the honey garlic mixture into the same skillet, stirring constantly for 2-3 minutes until it thickens slightly and bubbles gently.
7. Return the chicken thighs to the skillet, spooning the sauce over them to coat evenly, and simmer for an additional 2 minutes to let the flavors meld.
8. Transfer the chicken to a serving platter, drizzle any remaining sauce from the skillet over the top, and sprinkle with 2 tbsp chopped fresh parsley for garnish.
Relishing this dish, the chicken emerges tender and juicy with a sticky-sweet glaze that caramelizes beautifully in the pan. Serve it over a bed of fluffy rice to soak up every drop of sauce, or pair it with roasted vegetables for a balanced meal—the garlicky aroma will fill your kitchen with warmth.
Classic Chili with Ground Beef

O
n a chilly evening like this, when the wind whispers against the windowpane, there’s a quiet comfort in stirring a pot of something hearty and familiar. This classic chili, with its humble ground beef and gentle spices, feels like a warm embrace—a simple ritual that slows the world down for just a little while.
Serving: 6 | Pre Time: 15 minutes | Cooking Time: 60 minutes
6
servings15
minutes60
minutesIngredients
– 2 tablespoons extra virgin olive oil, my go‑to for its fruity depth
– 1 large yellow onion, diced small—I like the sweetness it brings
– 4 cloves garlic, minced (freshly crushed releases the best aroma)
– 1 pound lean ground beef, 85/15 works well for flavor without too much grease
– 2 tablespoons chili powder, the heart of the spice blend
– 1 teaspoon ground cumin, toasted lightly if you have time
– 1 teaspoon smoked paprika, for a whisper of smokiness
– 1/2 teaspoon dried oregano, rubbed between your palms to wake it up
– 1 (28‑ounce) can crushed tomatoes, with their juices—I prefer fire‑roasted for extra depth
– 1 (15‑ounce) can kidney beans, drained and rinsed (I sometimes use pinto beans for a creamier texture)
– 1 (15‑ounce) can black beans, drained and rinsed
– 1 cup beef broth, low‑sodium so you can control the salt
– 1 teaspoon kosher salt, added gradually
– 1/2 teaspoon freshly ground black pepper
– Optional garnishes: shredded cheddar cheese, sour cream, sliced green onions—set these out for everyone to customize
Instructions
1. Heat the extra virgin olive oil in a large Dutch oven or heavy‑bottomed pot over medium heat until it shimmers, about 2 minutes.
2. Add the diced yellow onion and cook, stirring occasionally, until softened and translucent, 5–7 minutes.
3. Stir in the minced garlic and cook until fragrant, about 30 seconds—be careful not to let it brown.
4. Add the lean ground beef, breaking it up with a wooden spoon, and cook until no pink remains, 7–8 minutes. Tip: Drain any excess fat for a cleaner chili.
5. Sprinkle the chili powder, ground cumin, smoked paprika, and dried oregano over the beef, stirring to coat everything evenly. Toast the spices for 1 minute to bloom their flavors.
6. Pour in the crushed tomatoes with their juices, drained and rinsed kidney beans, drained and rinsed black beans, beef broth, kosher salt, and freshly ground black pepper. Stir well to combine.
7. Bring the mixture to a gentle boil, then reduce the heat to low. Cover the pot partially, leaving a small gap for steam to escape.
8. Simmer the chili, stirring every 15 minutes to prevent sticking, for 45 minutes. Tip: The longer it simmers, the deeper the flavors meld—taste and adjust salt if needed after 30 minutes.
9. After 45 minutes, check the consistency; if it’s too thick, add a splash of broth or water. Tip: Let it rest off the heat for 10 minutes before serving to allow the flavors to settle.
10. Ladle the chili into bowls and top with optional garnishes like shredded cheddar cheese, sour cream, and sliced green onions.
M
ellow and rich, this chili thickens beautifully as it rests, with the beans softening into the tomato base and the spices weaving into every bite. Serve it over a bed of fluffy rice or with a side of cornbread for scooping up the last bits, and let the warmth linger long after the bowl is empty.
Vegetarian Minestrone Soup

Remembering how the first chill of December settles in, I find myself drawn to the kitchen, where a pot of vegetarian minestrone soup simmers gently on the stove. It’s a quiet ritual, a way to gather warmth and color from the pantry as the light fades outside. This soup, with its humble vegetables and tender beans, feels like a comforting embrace for the season.
Serving: 6 | Pre Time: 20 minutes | Cooking Time: 45 minutes
6
servings20
minutes45
minutesIngredients
– 2 tablespoons extra virgin olive oil, my go-to for its fruity depth
– 1 medium yellow onion, diced small—I like the sweetness it brings
– 2 medium carrots, peeled and chopped into half-inch pieces
– 2 celery stalks, sliced thinly, for that classic aromatic base
– 3 cloves garlic, minced finely, releasing their pungent fragrance
– 1 (28-ounce) can crushed tomatoes, preferably San Marzano for their bright acidity
– 6 cups vegetable broth, homemade if you have it, but store-bought works fine too
– 1 (15-ounce) can cannellini beans, rinsed and drained, adding creamy texture
– 1 cup small pasta, like ditalini—it holds up beautifully in the broth
– 1 teaspoon dried oregano, a pinch of earthy warmth
– 1/2 teaspoon salt, to start, adjusting as needed later
– 1/4 teaspoon black pepper, freshly ground for a subtle kick
– 2 cups fresh spinach, roughly chopped, stirred in at the end for a pop of green
Instructions
1. Heat the extra virgin olive oil in a large Dutch oven or heavy-bottomed pot over medium heat until it shimmers lightly, about 2 minutes.
2. Add the diced yellow onion, chopped carrots, and sliced celery to the pot, stirring occasionally with a wooden spoon until the vegetables soften and the onion turns translucent, roughly 8–10 minutes.
3. Stir in the minced garlic and cook for 1 minute exactly, until fragrant but not browned, to avoid bitterness.
4. Pour in the crushed tomatoes and vegetable broth, then add the cannellini beans, dried oregano, salt, and black pepper, bringing the mixture to a gentle boil over medium-high heat.
5. Reduce the heat to low, cover the pot partially with a lid, and let the soup simmer for 20 minutes, allowing the flavors to meld and the carrots to become tender when pierced with a fork.
6. Add the small pasta to the pot, stirring to submerge it in the broth, and cook uncovered for 10–12 minutes, until the pasta is al dente—check by tasting a piece to ensure it’s firm but not hard.
7. Stir in the fresh spinach and cook for 2 more minutes, just until the spinach wilts and turns bright green, preserving its delicate texture.
8. Remove the pot from the heat and let the soup rest for 5 minutes off the burner, which helps the pasta absorb a bit more broth without becoming mushy.
Tip: For a richer flavor, toast the dried oregano in your palm before adding it to release its oils.
Tip: If the soup thickens too much upon standing, thin it with a splash of hot vegetable broth just before serving.
Tip: Taste the broth after adding the pasta and adjust the salt if needed, as the beans and tomatoes can vary in seasoning.
This soup settles into a hearty, brothy texture, with the beans lending creaminess and the pasta offering a satisfying bite. The flavors deepen as it sits, making it even better the next day—try serving it with a drizzle of olive oil and a sprinkle of grated Parmesan for a cozy finish.
BBQ Ribs with Tangy Sauce
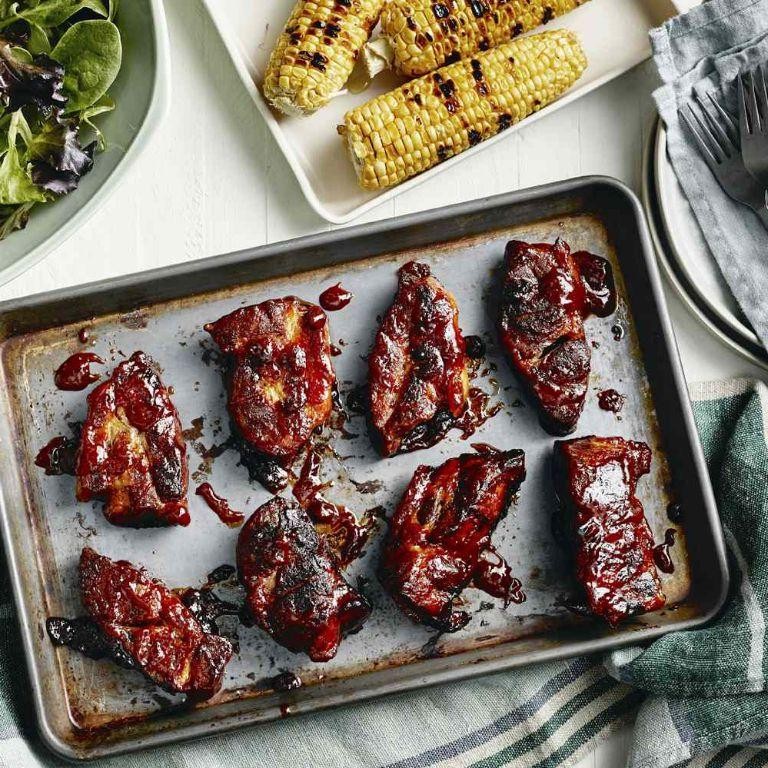
Zigzagging through memories of summer gatherings, I find myself craving the slow-cooked comfort of ribs that fall tenderly from the bone, glazed with a sauce that balances sweet and tangy in every sticky bite. It’s a dish that asks for patience, rewarding you with layers of flavor built over hours—a quiet kitchen project perfect for a reflective afternoon.
Serving: 4 | Pre Time: 20 minutes | Cooking Time: 3 hours
2
servings20
minutes180
minutesIngredients
– 2 racks of pork baby back ribs (about 4 pounds total)—I always ask the butcher to remove the membrane for easier prep.
– 1/4 cup brown sugar, packed—this adds a deep molasses sweetness that caramelizes beautifully.
– 1 tablespoon smoked paprika—my go-to for that warm, smoky base without overpowering.
– 1 teaspoon garlic powder and 1 teaspoon onion powder—these pantry staples build a savory foundation.
– 1 teaspoon salt and 1/2 teaspoon black pepper, freshly ground—season generously to enhance the meat’s natural richness.
– 1 cup ketchup—I use a standard brand for its consistent tang.
– 1/4 cup apple cider vinegar—this brings a bright acidity that cuts through the richness.
– 2 tablespoons Worcestershire sauce—a splash adds umami depth, something I learned from my grandma’s recipes.
– 2 tablespoons honey—local honey is my preference for its floral notes.
– 1 tablespoon Dijon mustard—just a bit gives the sauce a subtle sharpness.
Instructions
1. Preheat your oven to 275°F—low and slow is key for tender ribs.
2. Pat the ribs dry with paper towels to help the seasoning adhere better.
3. In a small bowl, mix the brown sugar, smoked paprika, garlic powder, onion powder, salt, and black pepper until well combined.
4. Rub this spice mixture evenly over both sides of the ribs, pressing gently to coat all surfaces.
5. Place the ribs on a baking sheet lined with aluminum foil, meat-side up, and cover tightly with another sheet of foil to trap steam.
6. Bake in the preheated oven for 2.5 hours—the low temperature breaks down connective tissues slowly.
7. While the ribs bake, combine the ketchup, apple cider vinegar, Worcestershire sauce, honey, and Dijon mustard in a saucepan over medium heat.
8. Bring the sauce to a simmer, stirring occasionally, then reduce heat to low and cook for 10 minutes until slightly thickened—tip: let it bubble gently to meld the flavors without burning.
9. After 2.5 hours, remove the ribs from the oven and carefully uncover them, draining any accumulated juices.
10. Brush a generous layer of the tangy sauce over the ribs, reserving some for serving.
11. Increase the oven temperature to 350°F and return the ribs, uncovered, to bake for 30 minutes until the sauce is sticky and caramelized—watch for a glossy finish as a visual cue.
12. Let the ribs rest for 10 minutes before slicing between the bones to keep them juicy.
13. Serve with the reserved sauce on the side for extra dipping.
Tip: For extra tenderness, I sometimes wrap the ribs in foil after seasoning and refrigerate them overnight before baking.
Tip: If the sauce thickens too much, thin it with a tablespoon of water while warming.
Tip: Use a meat thermometer to check for an internal temperature of 190–203°F for fall-off-the-bone texture.
These ribs emerge with a sticky glaze that crackles slightly, giving way to meat so tender it pulls apart with a gentle tug. The tangy sauce, with its hint of vinegar and honey, clings to each rib, creating a sweet-and-savory balance that lingers on the palate. Try serving them over a bed of creamy coleslaw or with grilled corn to soak up every last drop of sauce—a messy, joyful meal best shared with good company.
Mediterranean Lemon Chicken

Venturing into the kitchen today feels like a gentle escape, a quiet moment to craft something that carries the warmth of distant shores right to my table. This Mediterranean lemon chicken is one of those dishes that seems to slow time, its bright, herby aroma filling the room with a sense of calm and comfort.
Serving: 4 | Pre Time: 15 minutes | Cooking Time: 45 minutes
Ingredients
– 4 boneless, skinless chicken breasts (I like to pat them dry with a paper towel for better browning)
– 1/4 cup extra virgin olive oil (my go-to for its fruity depth)
– 1/3 cup fresh lemon juice (from about 2 large lemons, squeezed just before using)
– 4 cloves garlic, minced (freshly minced makes all the difference)
– 1 tbsp dried oregano
– 1 tsp kosher salt
– 1/2 tsp black pepper
– 1 lemon, thinly sliced (for garnish and extra zest)
– 1/4 cup chopped fresh parsley (I add it at the end for a burst of color)
Instructions
1. Preheat your oven to 375°F (190°C) to ensure even cooking later.
2. In a small bowl, whisk together the extra virgin olive oil, fresh lemon juice, minced garlic, dried oregano, kosher salt, and black pepper until well combined.
3. Place the boneless, skinless chicken breasts in a baking dish, arranging them in a single layer without overlapping.
4. Pour the lemon-herb marinade evenly over the chicken breasts, coating each piece thoroughly.
5. Cover the baking dish with aluminum foil and let the chicken marinate at room temperature for 10 minutes to allow the flavors to penetrate.
6. Remove the foil and arrange the thinly sliced lemon on top of the chicken for added aroma during baking.
7. Bake the chicken in the preheated oven at 375°F (190°C) for 30 minutes, or until the internal temperature reaches 165°F (74°C) when checked with a meat thermometer.
8. Remove the baking dish from the oven and let the chicken rest for 5 minutes to allow the juices to redistribute, keeping it moist.
9. Sprinkle the chopped fresh parsley over the chicken just before serving for a fresh, vibrant finish.
10. During the baking, if the lemon slices start to brown too quickly, you can loosely cover the dish with foil again to prevent burning.
Delightfully tender, the chicken emerges with a subtle tang from the lemon and a fragrant herb crust that crisps slightly at the edges. Serve it over a bed of fluffy couscous or alongside roasted vegetables to soak up the bright, garlicky pan juices, making each bite a quiet celebration of simple, sun-drenched flavors.
Cheesy Potato Casserole

Lately, I’ve been craving the kind of comfort that only comes from a dish that feels like a warm hug, something simple yet deeply satisfying to pull together on a quiet afternoon. This cheesy potato casserole is exactly that—a humble, bubbling dish that turns basic ingredients into pure, nostalgic joy. It’s the perfect project for when you want to move slowly in the kitchen, letting the aromas fill your home.
Serving: 6 | Pre Time: 20 minutes | Cooking Time: 60 minutes
Ingredients
– 2 pounds russet potatoes, peeled and thinly sliced (I find a mandoline slicer works wonders here for even cooking)
– 1 medium yellow onion, thinly sliced (I love the sweet caramelization it brings)
– 2 cups shredded sharp cheddar cheese, divided (I always keep a block on hand to grate fresh—it melts so much better)
– 1 cup heavy cream (it creates the richest, silkiest sauce)
– 1/2 cup whole milk
– 3 tablespoons unsalted butter, melted (I prefer unsalted to control the seasoning myself)
– 2 cloves garlic, minced (freshly minced garlic makes all the difference in flavor)
– 1 teaspoon kosher salt
– 1/2 teaspoon freshly ground black pepper
– 1/4 teaspoon ground nutmeg (just a pinch adds a lovely warmth without overpowering)
Instructions
1. Preheat your oven to 375°F (190°C) and lightly grease a 9×13-inch baking dish with butter or non-stick spray.
2. In a large bowl, combine the sliced potatoes and onions, tossing them gently to mix evenly.
3. In a separate medium saucepan over medium heat, combine the heavy cream, milk, melted butter, minced garlic, kosher salt, black pepper, and ground nutmeg. Heat the mixture for about 5 minutes, stirring occasionally, until it is warm and just begins to steam—do not let it boil.
4. Arrange half of the potato and onion mixture in an even layer at the bottom of the prepared baking dish.
5. Sprinkle 1 cup of the shredded cheddar cheese evenly over the potato layer.
6. Top with the remaining potato and onion mixture, spreading it out smoothly.
7. Carefully pour the warm cream mixture over the top layer of potatoes, ensuring it seeps down into the dish evenly.
8. Cover the baking dish tightly with aluminum foil and bake in the preheated oven for 45 minutes.
9. After 45 minutes, remove the foil and sprinkle the remaining 1 cup of cheddar cheese over the top. Tip: For a golden-brown crust, switch your oven to broil on high for the last 2-3 minutes, watching closely to prevent burning.
10. Return the dish to the oven, uncovered, and bake for an additional 15 minutes, or until the top is bubbly and the potatoes are tender when pierced with a fork. Tip: Let the casserole rest for 10 minutes after baking—this allows the sauce to thicken slightly for easier serving.
11. Serve warm, garnished with fresh herbs like chives or parsley if desired. Tip: For a crispy edge, use a ceramic or cast-iron baking dish, which retains heat beautifully.
Out of the oven, this casserole emerges with a golden, cheesy crust that gives way to tender, creamy potatoes beneath. Each bite is a comforting blend of savory cheese and subtle garlic, perfect alongside a simple green salad or as the star of a cozy dinner. I love serving it straight from the dish at the table, letting everyone scoop up generous portions while it’s still steaming hot.
Moroccan Lamb Tagine
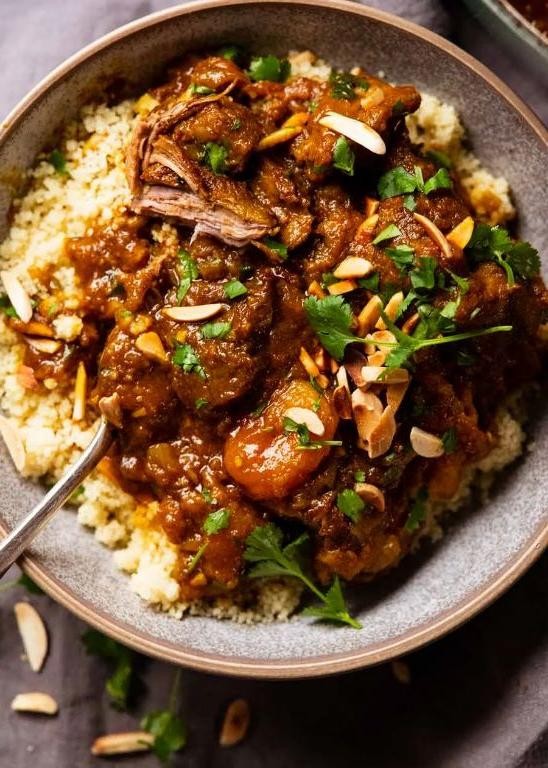
Falling into the rhythm of slow cooking on a quiet afternoon, I find myself drawn to the aromatic warmth of a Moroccan lamb tagine—a dish that feels like a gentle embrace, with spices that whisper stories of distant markets and tender meat that yields to the slightest touch. It’s a recipe that invites patience, turning simple ingredients into something deeply comforting, perfect for a reflective day when time seems to stretch out like a soft blanket.
Serving: 4 | Pre Time: 20 minutes | Cooking Time: 2 hours
4
servings20
minutes120
minutesIngredients
– 2 pounds lamb shoulder, cut into 1-inch cubes (I like to trim excess fat for a cleaner taste)
– 2 tablespoons extra virgin olive oil, my go-to for its fruity depth
– 1 large yellow onion, finely chopped (it adds a sweet base that mellows beautifully)
– 3 cloves garlic, minced (freshly crushed releases the best aroma)
– 1 teaspoon ground cumin, toasted lightly in a dry pan for extra warmth
– 1 teaspoon ground cinnamon, a pinch more if you love its cozy scent
– 1/2 teaspoon ground ginger, for a subtle kick that lingers
– 1/4 teaspoon saffron threads, soaked in 2 tablespoons warm water to bloom its golden hue
– 1 (14.5-ounce) can diced tomatoes, with their juices for a tangy backbone
– 1 cup chicken broth, low-sodium so you can control the seasoning
– 1 cup dried apricots, halved (they plump up into sweet jewels)
– 1/2 cup green olives, pitted and sliced for a briny contrast
– Salt, to layer flavors gradually as you cook
– Fresh cilantro, chopped for a bright finish just before serving
Instructions
1. Pat the lamb cubes dry with paper towels to ensure a good sear, which locks in juices and adds depth.
2. Heat the extra virgin olive oil in a large Dutch oven or tagine over medium-high heat until shimmering, about 2 minutes.
3. Add the lamb in a single layer, working in batches if needed to avoid crowding, and sear for 3–4 minutes per side until browned all over, then transfer to a plate.
4. Reduce the heat to medium and add the chopped onion to the pot, sautéing for 5–7 minutes until softened and translucent, stirring occasionally to prevent burning.
5. Stir in the minced garlic and cook for 1 minute until fragrant, being careful not to let it brown.
6. Add the ground cumin, cinnamon, and ginger, toasting them with the onions for 30 seconds to release their oils and enhance the flavor.
7. Pour in the bloomed saffron with its soaking water, scraping up any browned bits from the bottom of the pot for added richness.
8. Return the seared lamb to the pot, along with any accumulated juices, and toss to coat in the spice mixture.
9. Add the diced tomatoes with their juices and the chicken broth, stirring to combine everything evenly.
10. Bring the mixture to a gentle simmer over medium heat, then reduce the heat to low, cover, and let it cook for 1 hour and 30 minutes, checking occasionally to ensure it’s bubbling softly.
11. Stir in the dried apricots and green olives, then cover and continue cooking for another 30 minutes until the lamb is fork-tender and the sauce has thickened slightly.
12. Season with salt gradually throughout the cooking process, tasting as you go to build layers of flavor without over-salting.
13. Remove from heat and stir in the chopped fresh cilantro just before serving to preserve its vibrant color and aroma.
The lamb becomes so tender it nearly falls apart, mingling with the sweet apricots and briny olives in a sauce that’s richly spiced yet balanced. Serve it over fluffy couscous or with crusty bread to soak up every drop, and let the warm, aromatic steam fill your kitchen with a sense of calm.
Hearty Black Bean Chili

Kindly, as the afternoon light fades on this December day, I find myself drawn to the kitchen, craving something warm and grounding—a pot of black bean chili that simmers slowly, filling the house with the gentle scent of cumin and garlic.
Serving: 6 | Pre Time: 15 minutes | Cooking Time: 45 minutes
6
servings15
minutes45
minutesIngredients
– 2 tablespoons extra virgin olive oil, my go-to for its fruity depth
– 1 large yellow onion, diced—I like it finely chopped for even sweetness
– 3 cloves garlic, minced, fresh from the farmer’s market if possible
– 1 red bell pepper, seeded and diced, adding a pop of color and mild sweetness
– 1 tablespoon ground cumin, toasted lightly in a dry pan first for maximum aroma
– 1 teaspoon smoked paprika, which gives a lovely smoky undertone
– 1/4 teaspoon cayenne pepper, just enough for a subtle warmth
– 2 (15-ounce) cans black beans, drained and rinsed—I prefer low-sodium to control the salt
– 1 (28-ounce) can crushed tomatoes, with their juices for a rich base
– 2 cups vegetable broth, homemade if I have it on hand
– 1 teaspoon salt, adjusted carefully as the beans soak up flavor
– Fresh cilantro, chopped, for garnish—a handful brightens everything up
Instructions
1. Heat the extra virgin olive oil in a large Dutch oven or heavy-bottomed pot over medium heat until it shimmers, about 2 minutes.
2. Add the diced yellow onion and cook, stirring occasionally, until softened and translucent, 5-7 minutes—this builds a sweet foundation.
3. Stir in the minced garlic and diced red bell pepper, cooking for another 3-4 minutes until fragrant and slightly tender.
4. Sprinkle in the ground cumin, smoked paprika, and cayenne pepper, toasting the spices for 30 seconds to release their oils and deepen the flavor.
5. Pour in the drained black beans, crushed tomatoes with juices, and vegetable broth, stirring to combine all ingredients evenly.
6. Bring the mixture to a gentle boil, then reduce the heat to low, cover the pot, and let it simmer for 30 minutes, stirring every 10 minutes to prevent sticking.
7. After 30 minutes, uncover the pot, add the salt, and continue simmering uncovered for an additional 10-15 minutes until the chili thickens to your desired consistency—it should coat the back of a spoon.
8. Remove from heat and let it rest for 5 minutes to allow the flavors to meld together.
9. Ladle the chili into bowls and garnish with fresh chopped cilantro.
Rustic and comforting, this chili develops a velvety texture as the beans soften into the tomato broth, with the smoked paprika lending a whisper of campfire warmth. Serve it over a bed of fluffy rice or with a side of cornbread for dipping, letting each spoonful soothe the soul on a chilly evening.
Spiced Thai Red Curry

Nestled in my quiet kitchen this afternoon, I find myself drawn to the warm, aromatic embrace of a curry pot. There’s something deeply comforting about the slow simmer of spices, a gentle reminder to pause and savor the process.
Serving: 4 | Pre Time: 15 minutes | Cooking Time: 25 minutes
2
servings15
minutes25
minutesIngredients
– 1 tablespoon vegetable oil (I keep a bottle by the stove for quick sautés)
– 1 medium yellow onion, finely diced (I love the sweet foundation it builds)
– 3 cloves garlic, minced (freshly crushed releases the best aroma)
– 1 tablespoon fresh ginger, grated (I keep a knob in the freezer for easy grating)
– 2 tablespoons Thai red curry paste (my favorite brand has a balanced heat)
– 1 (13.5-ounce) can full-fat coconut milk (shaken well—the creaminess is key)
– 1 pound boneless, skinless chicken thighs, cut into 1-inch pieces (thighs stay juicier than breasts)
– 1 red bell pepper, sliced into thin strips (for a pop of color and crunch)
– 1 tablespoon fish sauce (it adds that essential umami depth)
– 1 tablespoon brown sugar (just a touch to round out the flavors)
– 1 cup fresh basil leaves (torn by hand right at the end for maximum fragrance)
– Cooked jasmine rice, for serving (I always make extra—it soaks up the sauce beautifully)
Instructions
1. Heat the vegetable oil in a large, heavy-bottomed pot over medium heat until it shimmers lightly.
2. Add the diced onion and cook, stirring occasionally, for 5 minutes until translucent and fragrant.
3. Stir in the minced garlic and grated ginger, cooking for 1 minute until aromatic but not browned.
4. Add the Thai red curry paste and cook, stirring constantly, for 2 minutes to toast the spices and deepen their flavor.
5. Pour in the coconut milk, scraping the bottom of the pot to incorporate any browned bits.
6. Add the chicken pieces, ensuring they are submerged in the liquid.
7. Bring the mixture to a gentle simmer, then reduce heat to medium-low and cook uncovered for 15 minutes, stirring occasionally.
8. Add the sliced red bell pepper and cook for 5 minutes until slightly softened but still vibrant.
9. Stir in the fish sauce and brown sugar until fully dissolved.
10. Remove the pot from heat and fold in the fresh basil leaves just until wilted.
11. Serve immediately over cooked jasmine rice.
When you lift the lid, the steam carries a symphony of lemongrass and chili that settles into a rich, velvety broth. I love how the chicken melts tenderly against the bright pepper strips, perfect for spooning over fluffy rice on a chilly evening—sometimes I add a squeeze of lime for a tangy finish.
Garlicky Tuscan Chicken

Kindly, as the afternoon light fades, I find myself drawn to the kitchen, where the promise of something warm and comforting awaits. There’s a quiet magic in preparing a meal that feels both rustic and refined, a dish that whispers of sun-drenched hillsides and shared tables. Today, that magic is in the simple, aromatic alchemy of garlic, herbs, and tender chicken, a recipe that has become a gentle anchor in my weekly rhythm.
Serving: 4 | Pre Time: 15 minutes | Cooking Time: 25 minutes
4
servings15
minutes25
minutesIngredients
– 1.5 lbs boneless, skinless chicken breasts, sliced into 1-inch thick cutlets (I find this thickness cooks evenly and stays wonderfully juicy)
– 3 tbsp extra virgin olive oil, my go-to for its fruity depth
– 6 cloves garlic, minced (don’t be shy—this is the heart of the dish)
– 1 cup heavy cream, at room temperature to prevent curdling
– 1/2 cup low-sodium chicken broth
– 1 cup sun-dried tomatoes in oil, drained and roughly chopped (their sweet-tart bite is essential)
– 2 cups fresh baby spinach, packed (it wilts down so beautifully)
– 1/2 cup grated Parmesan cheese, plus more for serving
– 1 tsp dried oregano
– 1/2 tsp red pepper flakes, for just a hint of warmth
– Salt and black pepper
Instructions
1. Pat the chicken cutlets completely dry with paper towels, then season both sides generously with salt and black pepper.
2. Heat 2 tablespoons of the olive oil in a large skillet over medium-high heat until it shimmers, about 1 minute.
3. Add the chicken to the skillet in a single layer, working in batches if needed to avoid crowding.
4. Cook the chicken for 5-6 minutes per side, until golden brown and the internal temperature reaches 165°F on an instant-read thermometer.
5. Transfer the cooked chicken to a clean plate and cover loosely with foil to keep warm.
6. Reduce the skillet heat to medium and add the remaining 1 tablespoon of olive oil.
7. Add the minced garlic and cook for 1 minute, stirring constantly, until fragrant but not browned.
8. Pour in the chicken broth and use a wooden spoon to scrape up any browned bits from the bottom of the skillet—this builds incredible flavor.
9. Stir in the heavy cream, dried oregano, and red pepper flakes, then bring the mixture to a gentle simmer.
10. Let the sauce simmer for 3-4 minutes, stirring occasionally, until it slightly thickens and coats the back of a spoon.
11. Add the sun-dried tomatoes and baby spinach to the skillet, stirring until the spinach just wilts, about 1 minute.
12. Stir in the 1/2 cup of grated Parmesan cheese until fully melted and incorporated into the sauce.
13. Return the cooked chicken and any accumulated juices to the skillet, spooning the sauce over the top.
14. Let everything warm together for 2-3 minutes over low heat so the flavors meld.
15. Remove the skillet from the heat.
Lusciously creamy and flecked with vibrant red and green, this dish feels like a hug in a skillet. The chicken remains impossibly tender, soaking up the garlicky, sun-drenched sauce, while the spinach adds a fresh, earthy note. I love serving it over a bed of al dente fettuccine or with a thick slice of crusty bread to savor every last drop of that rich, herb-infused cream.
Beef Stroganoff with Mushrooms

Fondly, I remember the first time I made this dish—the way the kitchen filled with earthy aromas and how it became an instant comfort food favorite. There’s something deeply satisfying about tender beef and mushrooms in a creamy sauce that feels like a warm embrace on a quiet evening. It’s the kind of meal that invites you to slow down and savor each bite, perfect for a reflective dinner alone or shared with someone special.
Serving: 4 | Pre Time: 15 minutes | Cooking Time: 30 minutes
3
servings15
minutes30
minutesIngredients
– 1.5 lbs sirloin steak, thinly sliced against the grain (I find this yields the most tender results)
– 8 oz cremini mushrooms, sliced (their earthy flavor pairs beautifully here)
– 1 medium yellow onion, finely diced (I prefer sweet onions for a subtle sweetness)
– 2 cloves garlic, minced (freshly minced makes all the difference)
– 2 tbsp unsalted butter (I always use unsalted to control the seasoning)
– 2 tbsp all-purpose flour
– 1 cup beef broth (low-sodium is my go-to for better flavor balance)
– 1 cup sour cream, at room temperature (this helps prevent curdling)
– 2 tbsp Worcestershire sauce
– 1 tsp Dijon mustard
– 1/2 tsp paprika
– Salt and freshly ground black pepper
– 12 oz egg noodles, for serving (the classic choice that soaks up the sauce perfectly)
– Fresh parsley, chopped, for garnish (a bright pop of color and freshness)
Instructions
1. Pat the 1.5 lbs sirloin steak dry with paper towels and season generously with salt and pepper on both sides.
2. In a large skillet or Dutch oven, melt 1 tbsp unsalted butter over medium-high heat until it sizzles, about 1 minute.
3. Add the seasoned steak in a single layer, working in batches if needed to avoid overcrowding, and sear for 2-3 minutes per side until browned but not cooked through. Tip: Don’t stir the steak too much—letting it develop a crust enhances flavor.
4. Transfer the seared steak to a plate and set aside, covering loosely with foil to keep warm.
5. In the same skillet, melt the remaining 1 tbsp unsalted butter over medium heat, then add the 1 medium yellow onion and cook for 4-5 minutes until softened and translucent.
6. Add the 8 oz cremini mushrooms and cook for 6-7 minutes, stirring occasionally, until they release their liquid and turn golden brown. Tip: Cooking the mushrooms until they’re deeply browned adds a rich, umami depth to the dish.
7. Stir in the 2 cloves minced garlic and cook for 1 minute until fragrant, being careful not to let it burn.
8. Sprinkle the 2 tbsp all-purpose flour over the mushroom mixture and cook for 1 minute, stirring constantly to form a roux and coat everything evenly.
9. Gradually whisk in the 1 cup beef broth, scraping up any browned bits from the bottom of the skillet, and bring to a gentle simmer for 3-4 minutes until slightly thickened.
10. Reduce the heat to low and stir in the 1 cup sour cream, 2 tbsp Worcestershire sauce, 1 tsp Dijon mustard, and 1/2 tsp paprika until fully combined and smooth.
11. Return the seared steak and any accumulated juices to the skillet, stirring gently to coat in the sauce, and simmer for 4-5 minutes until the steak is cooked through and tender. Tip: Avoid boiling the sauce after adding sour cream to maintain its creamy texture.
12. Meanwhile, cook the 12 oz egg noodles according to package directions in salted boiling water until al dente, then drain.
13. Serve the beef stroganoff over the cooked egg noodles, garnished with fresh chopped parsley.
Luxuriously, the creamy sauce clings to each noodle, with tender beef and earthy mushrooms offering a comforting, velvety bite. For a creative twist, try serving it over mashed potatoes or with a side of crusty bread to soak up every last drop—it’s a dish that feels both nostalgic and effortlessly elegant.
Warm Apple Cinnamon Oatmeal

Mornings like this, when the chill seeps through the window, call for something that warms from the inside out. It’s a quiet ritual, this stirring of oats and spice, a gentle start to a slow day.
Serving: 2 | Pre Time: 5 minutes | Cooking Time: 15 minutes
2
servings5
minutes15
minutesIngredients
– 1 cup old-fashioned rolled oats (I find these give the best texture, not too mushy)
– 2 cups water or milk (I often use whole milk for extra creaminess)
– 1 large apple, peeled and diced (a tart Granny Smith is my favorite here)
– 2 tablespoons pure maple syrup, plus extra for drizzling
– 1 teaspoon ground cinnamon
– 1/4 teaspoon fine sea salt (just a pinch to balance the sweetness)
– 1/2 teaspoon pure vanilla extract (I add it off the heat to preserve its fragrance)
– 2 tablespoons chopped walnuts, for topping (toasted first if you have a minute)
Instructions
1. Combine 1 cup of old-fashioned rolled oats, 2 cups of water or milk, the diced apple, 2 tablespoons of maple syrup, 1 teaspoon of cinnamon, and 1/4 teaspoon of salt in a medium saucepan.
2. Place the saucepan over medium-high heat and bring the mixture to a gentle boil, stirring occasionally to prevent sticking.
3. Once boiling, reduce the heat to low and let it simmer uncovered for 10–12 minutes, stirring every few minutes, until the oats are tender and the liquid is mostly absorbed. Tip: For creamier oatmeal, stir more frequently during this simmer.
4. Remove the saucepan from the heat and stir in 1/2 teaspoon of vanilla extract. Tip: Letting it sit off the heat for 2–3 minutes allows the flavors to meld and the texture to thicken slightly.
5. Divide the oatmeal evenly between two bowls.
6. Top each serving with 1 tablespoon of chopped walnuts and an extra drizzle of maple syrup if desired. Tip: For added warmth, sprinkle a tiny extra pinch of cinnamon over the top just before serving.
Ladling it into bowls, the oatmeal settles into a soft, creamy embrace with tender bites of apple throughout. The cinnamon whispers warmly against the maple’s gentle sweetness, and the walnuts offer a quiet crunch. Serve it straight from the pot, perhaps with a dollop of yogurt or a splash of cold milk for contrast, letting each spoonful slow the morning down just a little more.
Vegetable Lentil Soup

Wandering through the kitchen on a quiet afternoon, I find myself drawn to the simple comfort of a simmering pot. This vegetable lentil soup feels like a warm embrace, a gentle reminder that nourishment often comes from humble ingredients.
Serving: 4 | Pre Time: 15 minutes | Cooking Time: 45 minutes
3
servings15
minutes45
minutesIngredients
– 2 tablespoons extra virgin olive oil (my go-to for its fruity depth)
– 1 medium yellow onion, diced (I like the sweetness it brings)
– 2 carrots, peeled and chopped into half-inch pieces
– 2 celery stalks, chopped (the crisp texture holds up well)
– 3 cloves garlic, minced (freshly minced makes all the difference)
– 1 cup brown lentils, rinsed (I prefer these for their earthy flavor)
– 4 cups vegetable broth (homemade if you have it)
– 1 (14.5-ounce) can diced tomatoes, undrained
– 1 teaspoon dried thyme
– ½ teaspoon smoked paprika (adds a subtle warmth)
– Salt and black pepper
– 2 cups fresh spinach, roughly chopped (added at the end for vibrant color)
– 1 tablespoon lemon juice (brightens the whole pot)
Instructions
1. Heat the extra virgin olive oil in a large pot over medium heat for 1 minute until shimmering.
2. Add the diced yellow onion, chopped carrots, and chopped celery, cooking for 8–10 minutes until the onions are translucent and the vegetables soften.
3. Stir in the minced garlic and cook for 1 minute until fragrant, being careful not to let it burn.
4. Add the rinsed brown lentils, vegetable broth, diced tomatoes with their juices, dried thyme, and smoked paprika to the pot.
5. Bring the mixture to a boil over high heat, then reduce the heat to low, cover, and simmer for 30 minutes until the lentils are tender but not mushy.
6. Season with salt and black pepper, starting with 1 teaspoon of salt and ¼ teaspoon of pepper, then adjust after tasting.
7. Stir in the roughly chopped fresh spinach and cook for 2 minutes until just wilted.
8. Remove the pot from the heat and stir in the lemon juice.
9. Ladle the soup into bowls and serve immediately.
Nourishing and hearty, this soup has a velvety texture from the softened lentils, balanced by the bright acidity of lemon. The spinach adds a pop of green that makes each bowl feel fresh, perfect for savoring with a slice of crusty bread on a chilly evening.
Conclusion
Deliciously simple! This roundup proves that amazing meals don’t have to be complicated. With these 31 easy crock pot recipes, you can enjoy home-cooked goodness with minimal effort. We’d love to hear which recipes become your new favorites—drop a comment below! If you found this helpful, please share it on Pinterest to help other busy cooks discover stress-free dinner ideas. Happy, easy cooking!


