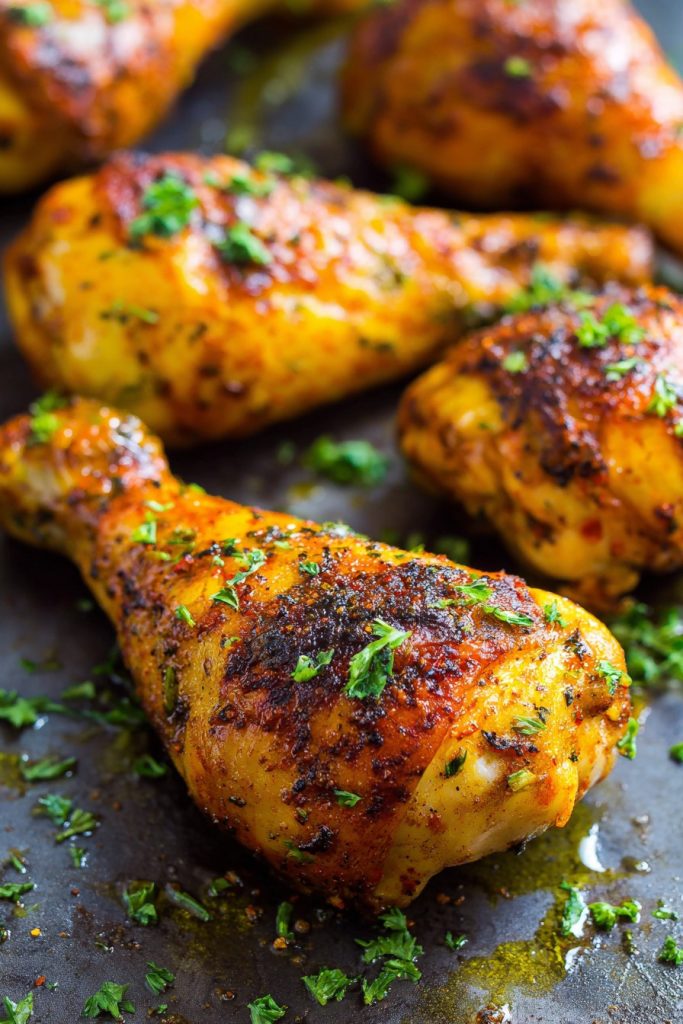
Hang onto your aprons, folks, because these oven-baked drumsticks are about to become your go-to dinner solution. How many times have you stared into the fridge wondering what to make that’s both delicious and doesn’t require a culinary degree? Hello, beautiful reader! These drumsticks deliver that perfect crispy skin and juicy interior without the fuss of deep frying or constant monitoring.
Why This Recipe Works
- The high-temperature baking method creates an incredible crispy exterior while locking in all the natural juices, giving you that fried chicken texture without the oil splatter all over your kitchen.
- Our special dry brine technique using kosher salt ensures every bite is perfectly seasoned from the inside out, not just on the surface like typical marinades.
- The simple spice blend of paprika, garlic powder, and black pepper creates layers of flavor that complement rather than overwhelm the natural chicken goodness.
- Using a wire rack set over a baking sheet allows hot air to circulate completely around each drumstick, ensuring even browning and preventing that dreaded soggy bottom.
- The resting period after baking might test your patience, but it allows the juices to redistribute throughout the meat, resulting in incredibly tender, moist chicken every single time.
Ingredients
- 3 pounds chicken drumsticks (about 8-10 pieces), patted completely dry with paper towels
- 2 tablespoons kosher salt (Diamond Crystal brand preferred for its flakier texture)
- 1 tablespoon smoked paprika
- 2 teaspoons garlic powder
- 1 teaspoon freshly ground black pepper
- 1 teaspoon onion powder
- 1/2 teaspoon cayenne pepper (optional for heat lovers)
- 2 tablespoons olive oil or avocado oil
- 1 tablespoon chopped fresh parsley for garnish (optional)
Equipment Needed
- Rimmed baking sheet (half-sheet pan recommended)
- Wire cooling rack that fits inside your baking sheet
- Mixing bowls (one large, one medium)
- Tongs or clean hands for tossing
- Paper towels for drying
- Instant-read thermometer (crucial for perfect doneness)
- Measuring spoons
Instructions
Prepare Your Chicken and Dry Brine
Start by thoroughly patting each drumstick dry with paper towels – I mean really get in there and make sure they’re as dry as the desert! This step is non-negotiable because moisture is the enemy of crispy skin. Place the dried drumsticks in a large bowl and sprinkle evenly with 1 tablespoon of the kosher salt, making sure to rub it into every nook and cranny. Arrange them in a single layer on a plate or tray, cover loosely with plastic wrap, and refrigerate for at least 1 hour or up to 24 hours. This dry brine works magic by drawing out moisture and then allowing the seasoned liquid to be reabsorbed, resulting in incredibly flavorful and moist meat throughout. Tip: For maximum flavor penetration, don’t skip the dry brine – even 30 minutes makes a difference!
Create Your Flavor Bomb Spice Blend
Coat and Arrange for Maximum Crispiness
Remove your drumsticks from the refrigerator – you’ll notice they feel firmer and look slightly darker, which means the brine is working its magic! Place them back in the large bowl and drizzle with the olive oil, then use tongs or your hands to toss until each piece is lightly but evenly coated. Now sprinkle about half of your spice mixture over the chicken and toss again, then add the remaining spices and toss until every drumstick is wearing its flavorful jacket. Line your baking sheet with aluminum foil for easy cleanup (trust me, you’ll thank yourself later) and place the wire rack on top. Arrange the drumsticks in a single layer with about an inch of space between each piece – overcrowding is the arch-nemesis of crispy skin! Tip: For extra crispy skin, place the drumsticks skin-side up and don’t move them once they’re positioned.
The Perfect Bake to Golden Perfection
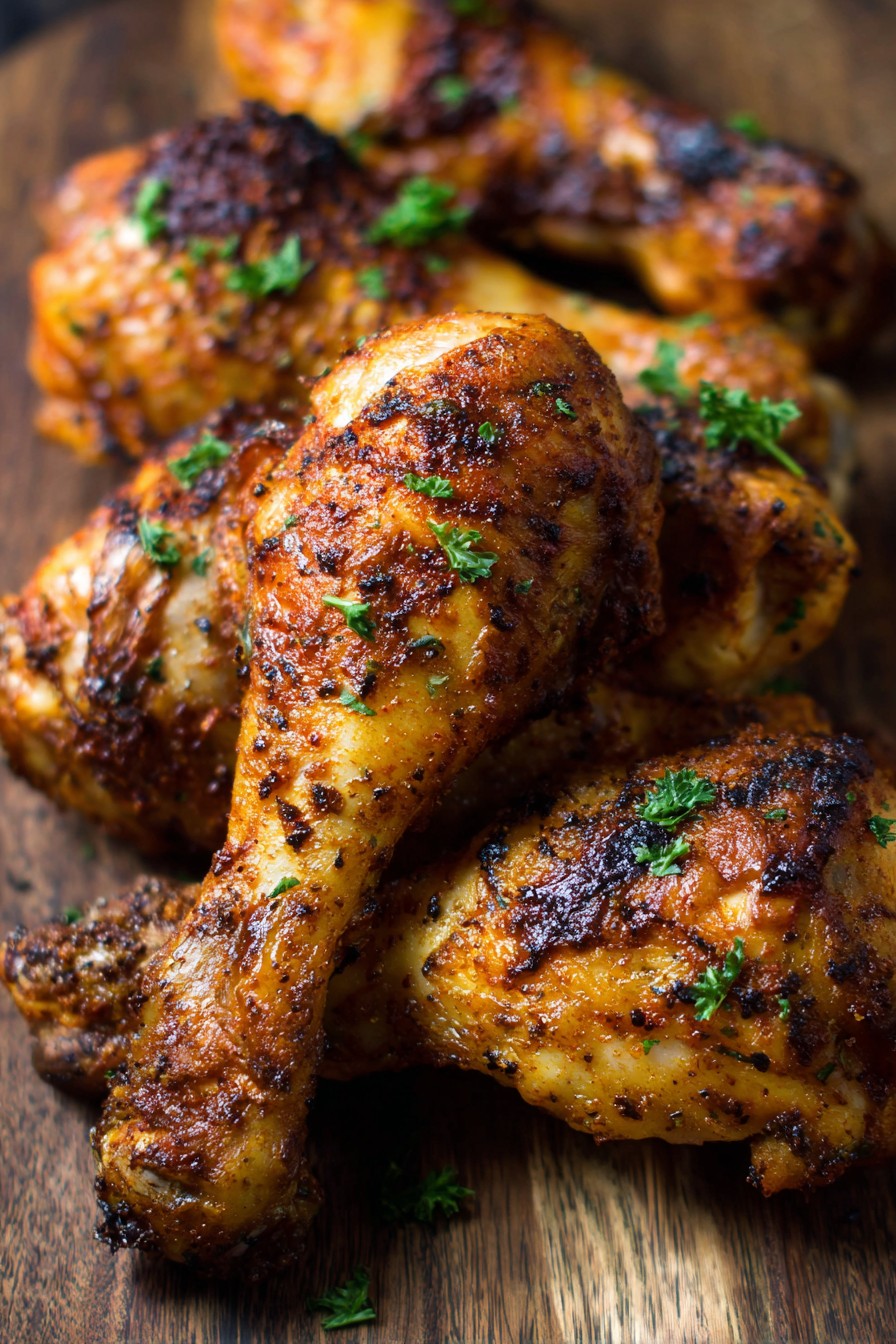
Preheat your oven to 425°F – yes, that hot! We’re going for high heat to create that beautiful crust while keeping the interior juicy. Once the oven reaches temperature, place your prepared baking sheet on the middle rack and set your timer for 35 minutes. Resist the temptation to open the oven door for at least the first 25 minutes – that blast of heat is what creates the initial sear and crispiness. At the 35-minute mark, rotate the baking sheet 180 degrees to ensure even browning (ovens often have hot spots) and continue baking for another 10-15 minutes. You’re looking for deeply golden brown skin with some darker spots – that’s where the flavor lives! The internal temperature should reach 175-180°F when measured with an instant-read thermometer inserted into the thickest part without touching bone.
The Crucial Resting Period and Serving
Once your drumsticks have reached that perfect internal temperature and gorgeous color, remove them from the oven and transfer to a clean plate or platter using tongs. Here comes the hardest part: let them rest for at least 5-7 minutes before serving. I know, I know – the aroma is driving you crazy and you want to dive right in, but this resting period allows the juices to redistribute throughout the meat instead of ending up on your plate. While resting, the internal temperature will continue to rise another 5 degrees or so, ensuring food safety while maintaining juiciness. Sprinkle with fresh parsley if desired for a pop of color and freshness. Serve immediately while still piping hot – these are best enjoyed fresh from the oven when the skin is at its crispiest! Tip: If making ahead, recrisp in a 400°F oven for 10 minutes before serving.
Tips and Tricks
Let’s talk about taking these drumsticks from great to absolutely legendary! First, if you really want to maximize crispiness, try leaving the uncovered chicken on a wire rack in the refrigerator overnight after dry brining – this air-drying technique creates the crispiest skin imaginable. For those who love extra flavor, consider adding a teaspoon of baking powder to your spice mix; it changes the pH on the skin’s surface and promotes incredible browning and crunch. When arranging your drumsticks on the rack, make sure they’re not touching each other – I know it’s tempting to cram them all on one sheet, but giving them space means better air circulation and even cooking.
If you notice some spots browning faster than others, don’t hesitate to rotate individual drumsticks with tongs rather than just rotating the entire pan. For easy cleanup that doesn’t affect cooking, line your baking sheet with heavy-duty aluminum foil – the rendered chicken fat can be saved for cooking vegetables or making gravy. If you’re cooking for a crowd and need to do multiple batches, keep the cooked drumsticks warm in a 200°F oven on a clean wire rack set over a sheet pan – this maintains crispiness better than covering them with foil which creates steam.
For perfectly cooked chicken every time, invest in an instant-read thermometer – visual cues can be deceiving, but temperature doesn’t lie. If your drumsticks vary greatly in size, consider separating them and cooking smaller ones for less time or positioning larger ones toward the back of the oven where it’s typically hotter. For extra flavor dimension, try adding a teaspoon of mustard powder or smoked salt to your spice blend – these small additions create complex flavors that make people wonder what your secret is!
If you prefer darker, more caramelized skin, you can switch to the broiler for the last 2-3 minutes – but watch carefully as they can go from perfect to burnt in seconds! For meal prep, these drumsticks reheat surprisingly well in an air fryer or toaster oven at 375°F for 8-10 minutes, which restores much of the original crispiness. Finally, don’t discard the rendered fat and juices left on the baking sheet – they make incredible base for pan sauces or for roasting vegetables later in the week!
Recipe Variations
- For a sweet and spicy twist, replace the paprika with 2 tablespoons of brown sugar mixed with 1 tablespoon of chili powder and 1 teaspoon of cumin – the sugar caramelizes beautifully in the hot oven creating a sticky, sweet glaze that balances perfectly with the heat. Reduce the salt to 1 tablespoon total since the brown sugar adds sweetness.
- Create Mediterranean-inspired drumsticks by using a spice blend of 2 teaspoons dried oregano, 1 teaspoon lemon zest, 1 teaspoon garlic powder, 1/2 teaspoon sumac (if available), and 1/2 teaspoon black pepper. After baking, squeeze fresh lemon juice over the top and serve with tzatziki sauce for dipping – perfect for a Greek-themed dinner night!
- For buffalo-style drumsticks, skip the spice blend and simply toss the oil-coated drumsticks with 1 tablespoon of baking powder (for extra crispiness) and 1 teaspoon salt. After baking and resting, toss the hot drumsticks in 1/2 cup of your favorite buffalo sauce mixed with 2 tablespoons of melted butter. Serve with celery sticks and blue cheese dressing for the ultimate game day experience.
- Try an Asian-inspired version by marinating the drumsticks for 30 minutes in a mixture of 1/4 cup soy sauce, 2 tablespoons honey, 1 tablespoon grated ginger, and 2 minced garlic cloves before patting dry and proceeding with the recipe. The marinade creates a beautiful glaze and adds incredible depth of flavor that pairs perfectly with steamed rice and vegetables.
- For herb lovers, create a paste with 1/4 cup fresh parsley, 2 tablespoons fresh rosemary, 2 tablespoons fresh thyme, 3 garlic cloves, the zest of one lemon, and 1/4 cup olive oil. Rub this herb paste under the skin of each drumstick before applying the dry brine – the herbs infuse the meat with incredible freshness and aroma.
Frequently Asked Questions
Can I use frozen drumsticks for this recipe?
Absolutely, but proper thawing is crucial for food safety and optimal results. The best method is to transfer frozen drumsticks to the refrigerator 24-48 hours before cooking, allowing them to thaw slowly and evenly. If you’re short on time, you can use the cold water thawing method: place the sealed drumsticks in a leak-proof bag and submerge in cold water, changing the water every 30 minutes until thawed. Never thaw at room temperature or in hot water as this can allow bacteria to grow in the danger zone between 40°F and 140°F. Once thawed, pat them extremely dry before proceeding with the recipe – frozen chicken releases more moisture during thawing, so extra drying is essential for crispy skin.
Why is my chicken skin not getting crispy?
Several factors could be preventing that perfect crispiness! The most common issue is not drying the chicken thoroughly enough before seasoning – any surface moisture will steam rather than brown. Ensure you’re patting with paper towels until the skin feels completely dry to the touch. Oven temperature is another culprit – make sure your oven is fully preheated to 425°F and consider using an oven thermometer to verify accuracy, as home ovens can be off by 25 degrees or more. overcrowding the pan prevents proper air circulation, so give each drumstick about an inch of space. Finally, not using a wire rack allows the bottom to steam in rendered fat – the rack is essential for all-around crispiness!
How do I know when the drumsticks are fully cooked?
The most reliable method is using an instant-read thermometer inserted into the thickest part of the meat without touching bone – you’re looking for an internal temperature of 175-180°F. At this temperature, the collagen has broken down sufficiently for tender meat, and it’s perfectly safe to eat. Visual cues include clear juices running out when pierced with a knife (no pinkness), and the meat pulling away from the bone ends. The skin should be deep golden brown with some darker spots. Remember that carryover cooking will increase the temperature another 5 degrees during resting, so remove them at 175°F if you prefer juicier meat or 180°F for more well-done results. Never serve chicken below 165°F for food safety.
Can I make these drumsticks ahead of time?
You can absolutely prepare components ahead of time to make weeknight cooking easier! The dry brine step can be done up to 24 hours in advance – just keep the salted drumsticks covered in the refrigerator. You can also mix the spice blend days ahead and store it in an airtight container. For fully cooked drumsticks, they will keep refrigerated for 3-4 days, though the skin will lose some crispiness. To reheat, avoid the microwave which makes the skin rubbery – instead, use a 400°F oven or air fryer for 10-12 minutes until heated through and re-crisped. You can also freeze fully cooked cooled drumsticks for up to 3 months, though the texture may change slightly upon thawing and reheating.
What sides pair well with oven-baked drumsticks?
These versatile drumsticks pair beautifully with so many sides! For classic comfort food, serve with creamy mashed potatoes and roasted green beans or corn on the cob. For a healthier option, try quinoa salad, steamed broccoli, or a big green salad with vinaigrette. If you’re going the buffalo route, celery sticks and carrot sticks with blue cheese dressing are mandatory! For Mediterranean versions, couscous, Greek salad, or roasted vegetables with lemon work wonderfully. Don’t forget about starches – these drumsticks love to be served with rice, roasted potatoes, or even creamy polenta. The rendered chicken fat from the baking sheet makes incredible roasted potatoes or vegetables – just toss your veggies in the pan drippings and roast alongside the chicken during the last 20 minutes of cooking!
Summary
These oven-baked drumsticks deliver restaurant-quality crispiness with minimal effort. The dry brine technique ensures perfectly seasoned, juicy meat while high heat creates that irresistible golden crust. Perfect for weeknights or entertaining, they’re versatile enough for various flavor profiles and always crowd-pleasing.
Crispy Oven-Baked Drumsticks
6
servings15
minutes45
minutesIngredients
Instructions
- 1 Pat drumsticks dry and rub with 1 tablespoon salt. Refrigerate 1-24 hours.
- 2 Mix remaining salt with spices. Toss drumsticks with oil then spice blend.
- 3 Arrange on wire rack over baking sheet. Bake at 425°F for 35 minutes.
- 4 Rotate pan and bake 10-15 minutes until 175-180°F internally.
- 5 Rest 5-7 minutes before serving. Garnish with parsley if desired.


