Get ready to elevate your chicken game with these perfectly crispy drumsticks that will have everyone fighting for the last piece. Great food brings people together, and these drumsticks are about to become your new favorite crowd-pleaser. They’re surprisingly simple to make yet deliver restaurant-quality results that will impress even the pickiest eaters.
Why This Recipe Works
- The double-dredging technique creates an extra crispy crust that stays crunchy even after baking
- Using buttermilk in the marinade tenderizes the chicken while adding tangy flavor that cuts through the richness
- The combination of high heat baking and proper spacing ensures even cooking and maximum crispiness
- Seasoning both the chicken and the flour mixture builds layers of flavor from the inside out
- Resting the coated chicken before baking allows the coating to adhere better, preventing it from falling off during cooking
Ingredients
- 8 chicken drumsticks (about 3 pounds total)
- 2 cups buttermilk
- 2 tablespoons hot sauce
- 2 cups all-purpose flour
- 1/4 cup cornstarch
- 2 tablespoons paprika
- 1 tablespoon garlic powder
- 1 tablespoon onion powder
- 2 teaspoons salt
- 1 teaspoon black pepper
- 1 teaspoon cayenne pepper (optional)
- 1/2 cup vegetable oil for drizzling
- Fresh parsley for garnish (optional)
Equipment Needed
- Large mixing bowls (2)
- Whisk
- Rimmed baking sheet
- Wire rack that fits inside baking sheet
- Tongs
- Measuring cups and spoons
- Plastic wrap or airtight container
- Paper towels
- Meat thermometer
Instructions

Prepare the Marinade
In a large bowl, whisk together 2 cups of buttermilk and 2 tablespoons of hot sauce until well combined. The acidity in the buttermilk will work magic on your chicken, tenderizing it while the hot sauce adds a subtle kick that builds flavor from within. Pat your 8 chicken drumsticks completely dry with paper towels – this crucial step helps the marinade adhere better and ensures maximum crispiness later. Submerge the drumsticks in the buttermilk mixture, making sure each piece is fully coated. Cover the bowl with plastic wrap and refrigerate for at least 4 hours, though overnight marinating will give you the most tender results. The longer marinating time allows the enzymes in the buttermilk to break down proteins, resulting in incredibly juicy chicken.
Create the Seasoned Coating
While the chicken marinates, prepare your crispy coating mixture. In another large bowl, combine 2 cups of all-purpose flour, 1/4 cup of cornstarch, 2 tablespoons of paprika, 1 tablespoon each of garlic powder and onion powder, 2 teaspoons of salt, 1 teaspoon of black pepper, and 1 teaspoon of cayenne pepper if using. The cornstarch is your secret weapon here – it creates an extra crispy texture that regular flour alone can’t achieve. Whisk everything together thoroughly until all the spices are evenly distributed throughout the flour mixture. I like to taste a tiny pinch of the dry mixture (without the raw flour, of course) to adjust seasoning if needed. Pro tip: Adding a tablespoon of baking powder to the flour mixture can create even more lift and crispiness, but it’s optional.
Coat the Chicken Pieces
Remove the marinated drumsticks from the refrigerator and let them sit at room temperature for about 20 minutes – this helps them cook more evenly. Set up your coating station with the marinated chicken, flour mixture, and a clean plate or wire rack for the coated pieces. Using tongs, take one drumstick from the buttermilk mixture, allowing excess liquid to drip off, then dredge it thoroughly in the flour mixture, pressing firmly to ensure good adhesion. Return the coated drumstick to the buttermilk mixture for a second dip, then back into the flour for a final coating. This double-dredging technique creates those craggy, extra-crispy layers that make fried chicken so irresistible. Place each coated drumstick on a wire rack set over a baking sheet while you finish the remaining pieces.
Preheat and Prepare Baking Setup
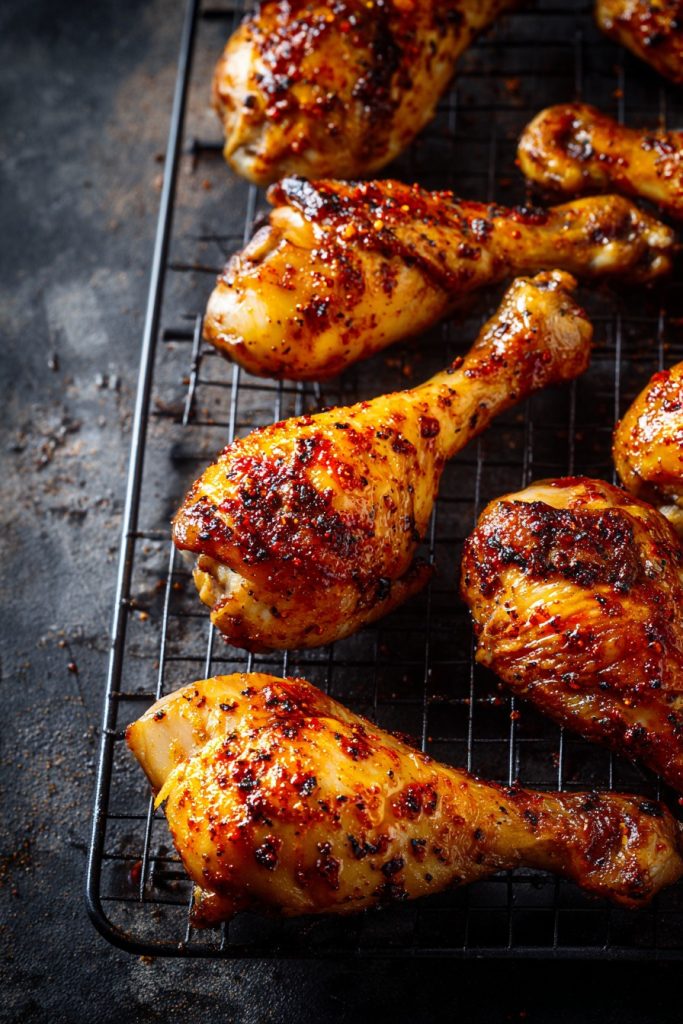
Preheat your oven to 425°F and position a rack in the center of the oven. While the oven heats, line a rimmed baking sheet with aluminum foil for easy cleanup and place a wire rack inside it. The wire rack is essential – it allows hot air to circulate around the chicken, ensuring even cooking and preventing the bottom from getting soggy. Lightly spray the wire rack with cooking spray to prevent sticking. Arrange your double-dredged drumsticks on the prepared wire rack, making sure they aren’t touching each other. This spacing is crucial for proper air circulation and even browning. Drizzle or brush each drumstick with about 2 teaspoons of vegetable oil – this helps achieve that golden brown color and crispy texture without deep frying.
Bake to Perfection
Place the baking sheet in the preheated 425°F oven and bake for 25 minutes. After 25 minutes, carefully flip each drumstick using tongs – they should be lightly golden brown on the top side. Continue baking for another 20-25 minutes until the coating is deep golden brown and incredibly crispy. The internal temperature should register 165°F when measured with an instant-read thermometer inserted into the thickest part of the drumstick without touching bone. If you notice some spots browning faster than others, you can rotate the baking sheet halfway through the second baking period. The drumsticks should make a satisfying tapping sound when you knock on them – that’s how you know the crust is properly crispy.
Rest and Serve
Once perfectly cooked, remove the baking sheet from the oven and transfer the drumsticks to a clean wire rack. Let them rest for at least 5-10 minutes before serving – this allows the juices to redistribute throughout the meat, ensuring every bite is moist and flavorful. The resting period also helps the coating set properly, making it less likely to fall off when you bite into it. While the chicken rests, you can prepare any side dishes or garnishes. Sprinkle with chopped fresh parsley if desired for a pop of color and freshness. Serve immediately while still warm and crispy – these drumsticks are best enjoyed fresh from the oven when the contrast between the crunchy exterior and juicy interior is at its peak.
Tips and Tricks
For the ultimate crispy chicken experience, consider brining your drumsticks before marinating. Create a simple brine with 1/4 cup salt and 1/4 cup sugar dissolved in 4 cups of warm water, then add 4 cups of cold water. Submerge the drumsticks in this brine for 2-4 hours before proceeding with the buttermilk marinade. This extra step ensures incredibly juicy meat that stays moist even if slightly overcooked. When measuring your flour for the coating, use the spoon-and-level method rather than scooping directly from the bag with your measuring cup. This prevents packing too much flour into your measurement, which could lead to a dense, doughy coating rather than light and crispy.
If you want to add extra flavor dimensions to your coating, consider incorporating grated Parmesan cheese, crushed cornflakes, or panko breadcrumbs into your flour mixture. About 1/2 cup of any of these additions can create interesting texture variations. For those who love heat, add an extra teaspoon of cayenne pepper or include some chili powder in the flour mixture. The type of oil you use for drizzling matters too – while vegetable oil works fine, avocado oil or peanut oil can withstand higher temperatures better and may give you slightly crispier results. If you’re cooking for a crowd, you can prepare the drumsticks through the coating stage and refrigerate them on the wire rack for up to 2 hours before baking – this can actually help the coating set even better.
Don’t overcrowd your baking sheet – if necessary, use two baking sheets and rotate them between oven racks halfway through cooking. The wire rack is non-negotiable for crispy baked chicken, but if you don’t have one, you can create a makeshift rack by crumpling aluminum foil into long snakes and arranging them on the baking sheet to elevate the chicken. Leftover drumsticks can be revived in a 400°F oven for 10-15 minutes to restore crispiness, though they’re best fresh. For extra assurance of doneness, make a small cut near the bone to check that the juices run clear and there’s no pinkness, especially if using larger drumsticks.
Recipe Variations
- Nashville Hot Style: After baking, brush the drumsticks with a mixture of 1/4 cup melted butter, 2 tablespoons hot sauce, 1 tablespoon brown sugar, 1 teaspoon paprika, and 1/2 teaspoon cayenne pepper. This creates that signature spicy-sweet glaze that makes Nashville hot chicken so addictive. The butter helps the spices adhere to the crispy coating while adding richness that balances the heat.
- Lemon Herb Version: Add the zest of two lemons and 2 tablespoons of chopped fresh herbs (like thyme, rosemary, and parsley) to the flour mixture. Serve with lemon wedges for squeezing over the finished chicken. The bright citrus notes cut through the richness of the fried coating while the fresh herbs add aromatic complexity that makes this feel like a sophisticated restaurant dish.
- BBQ Glazed Drumsticks: During the last 10 minutes of baking, brush the drumsticks with your favorite barbecue sauce and return to the oven to caramelize. The sugar in the barbecue sauce creates a sticky, sweet glaze that contrasts beautifully with the savory crispy coating. You can make your own simple glaze by mixing 1/2 cup ketchup, 2 tablespoons each of brown sugar and apple cider vinegar, and 1 teaspoon of Worcestershire sauce.
- Asian-Inspired Twist: Replace the buttermilk with a marinade of 1 cup coconut milk, 1/4 cup soy sauce, 2 tablespoons honey, and 1 tablespoon grated ginger. Add 1 tablespoon of five-spice powder to the flour mixture for an authentic Asian flavor profile. Serve with steamed rice and quick-pickled vegetables for a complete meal that brings exciting international flavors to your dinner table.
Frequently Asked Questions
Can I use chicken thighs instead of drumsticks?
Absolutely! Chicken thighs work beautifully with this recipe, though cooking times may need adjustment. Bone-in, skin-on thighs are ideal as they contain enough fat to stay juicy during the high-heat baking. You’ll want to increase the baking time by 5-10 minutes since thighs are typically thicker than drumsticks. Use your meat thermometer to ensure they reach 165°F internally. The coating technique remains exactly the same, and you might find that the higher fat content in thighs makes them even more succulent. Just be sure to arrange them skin-side up on the wire rack for maximum crispiness.
How do I prevent the coating from falling off?
The key to keeping the coating intact is proper drying and the double-dredging technique. Always pat your chicken completely dry before marinating, and let the coated chicken rest on the wire rack for at least 15 minutes before baking. This resting period allows the coating to hydrate properly and adhere to the chicken surface. Also, when dredging, press firmly to ensure the flour mixture sticks well. Avoid moving the chicken unnecessarily once coated, and use tongs rather than forks when handling to prevent piercing the coating. If you’re still having issues, you can add an egg to the buttermilk mixture for extra binding power.
Can I make this recipe gluten-free?
Yes, this recipe adapts beautifully to gluten-free needs. Simply replace the all-purpose flour with your favorite gluten-free flour blend – look for one that contains xanthan gum or add 1 teaspoon of xanthan gum to your mixture to help with binding. The cornstarch can remain as it’s naturally gluten-free. All other ingredients are typically gluten-free, but always check labels on things like hot sauce and spices to ensure they haven’t been processed in facilities that handle wheat. The cooking method and times remain exactly the same, and you’ll still achieve wonderfully crispy results that everyone can enjoy.
How long can I marinate the chicken?
While 4 hours is the minimum for good flavor and tenderness, you can marinate chicken in buttermilk for up to 24 hours in the refrigerator. Beyond 24 hours, the acidity can start to break down the proteins too much, resulting in mushy texture. If you need to marinate longer, you could use a less acidic marinade, but for buttermilk specifically, stick to the 4-24 hour window. Always marinate in the refrigerator, never at room temperature, and make sure the chicken is fully submerged in the liquid. If you’re short on time, even 2 hours will provide some benefit, though the longer marinating truly makes a difference.
Can I air fry these drumsticks instead of baking?
Absolutely! Air frying is an excellent alternative that can yield even crispier results with less oil. Preheat your air fryer to 400°F and arrange the coated drumsticks in a single layer without overcrowding – you may need to cook in batches. Cook for 15-18 minutes, flip carefully, then cook for another 10-12 minutes until golden brown and reaching 165°F internally. The circulating hot air creates exceptional crispiness on all sides. You might need to reduce the oil drizzle slightly since air fryers require less added fat. Cooking times can vary between air fryer models, so keep an eye on them during the last few minutes.
Summary
These crispy baked drumsticks deliver fried chicken satisfaction without the mess of deep frying. The buttermilk marinade ensures juicy meat, while the double-dredged coating creates incredible crunch. Perfect for weeknight dinners or game day gatherings, this recipe will become your go-to for crowd-pleasing chicken that’s actually easy to make.
Crispy Baked Drumstick Chicken
4
servings20
minutes45
minutesIngredients
Instructions
- 1 Marinate chicken in buttermilk and hot sauce for at least 4 hours
- 2 Prepare seasoned flour mixture with all dry ingredients
- 3 Double-dredge each drumstick in flour mixture
- 4 Arrange on wire rack over baking sheet, drizzle with oil
- 5 Bake at 425°F for 25 minutes, flip, bake 20-25 minutes more
- 6 Rest for 5-10 minutes before serving


