Welcome to your new favorite collection of dreamy dishes! We’ve gathered 27 irresistible recipes that transform simple ingredients into magical feasts perfect for any occasion. From quick weeknight dinners to cozy comfort foods, these creations will delight your taste buds and impress your guests. Ready to discover dishes that feel like culinary magic? Let’s dive into this delicious roundup!
Ethereal Lemon Herb Roasted Chicken
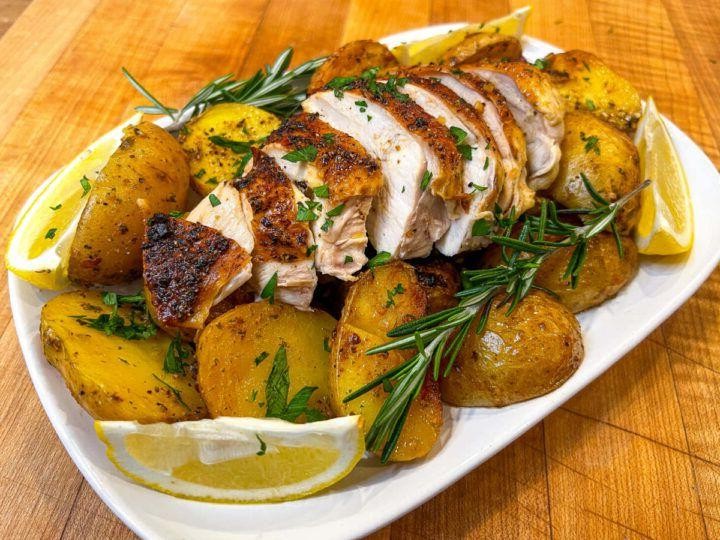
Wondering how to make roasted chicken that’s so divine, your taste buds might just write you a thank-you note? Meet the Ethereal Lemon Herb Roasted Chicken—a dish that turns humble poultry into a showstopper with zesty lemon, aromatic herbs, and a crispy, golden skin that’s practically begging for applause. It’s the kind of meal that makes weeknight dinners feel like a celebration, without any of the fuss.
Ingredients
- 1 whole chicken (approximately 4 pounds), patted dry with paper towels
- 2 tablespoons clarified butter, melted
- 2 large lemons, one thinly sliced and one juiced
- 4 cloves garlic, minced
- 2 tablespoons fresh rosemary, finely chopped
- 1 tablespoon fresh thyme leaves
- 1 teaspoon fine sea salt
- ½ teaspoon freshly cracked black pepper
- 1 cup low-sodium chicken stock
Instructions
- Preheat your oven to 425°F (218°C) and position a rack in the middle of the oven.
- In a small bowl, combine the melted clarified butter, lemon juice, minced garlic, chopped rosemary, thyme leaves, sea salt, and black pepper to create a herb-infused baste.
- Carefully loosen the skin over the chicken breast and thighs by gently sliding your fingers between the skin and meat, being cautious not to tear the skin.
- Brush half of the herb baste evenly underneath the loosened skin, ensuring it coats the meat directly for maximum flavor penetration.
- Rub the remaining herb baste all over the exterior of the chicken, including the cavity, for a thoroughly seasoned crust.
- Stuff the cavity of the chicken with the thinly sliced lemon rounds to infuse the meat with citrus aroma during roasting.
- Truss the chicken by tying the legs together with kitchen twine and tucking the wing tips under the body to promote even cooking.
- Place the chicken breast-side up in a roasting pan and pour the chicken stock into the bottom of the pan to create steam and prevent the drippings from burning.
- Roast the chicken in the preheated oven for 20 minutes to quickly crisp the skin, then reduce the oven temperature to 375°F (190°C).
- Continue roasting for 50-60 minutes, basting the chicken with the pan juices every 20 minutes to maintain moisture and enhance browning.
- Check for doneness by inserting an instant-read thermometer into the thickest part of the thigh; it should register 165°F (74°C), and the juices should run clear when pierced.
- Transfer the chicken to a cutting board and let it rest for 15 minutes to allow the juices to redistribute evenly throughout the meat.
- While the chicken rests, skim the excess fat from the pan juices and simmer them on the stovetop for 3-5 minutes to create a simple, flavorful sauce.
- Carve the chicken and serve immediately with the reduced pan sauce drizzled over the top.
Golden and crackly on the outside, this chicken delivers juicy, herb-infused meat that practically falls off the bone. The lemon slices tucked inside lend a subtle brightness that cuts through the richness, making each bite perfectly balanced. Serve it sliced over a bed of creamy polenta or alongside roasted root vegetables to soak up every last drop of that glorious pan sauce.
Celestial Creamy Mushroom Risotto
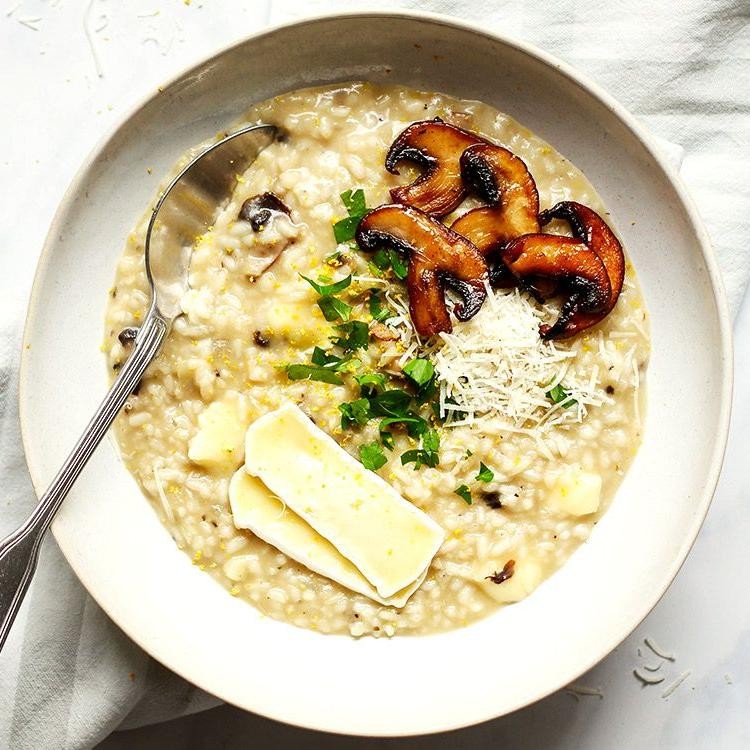
Darlings, prepare to have your earthly culinary expectations utterly demolished by a risotto that’s quite literally out of this world. This isn’t just dinner—it’s a flavor journey that will make your taste buds do the cha-cha while questioning all previous mushroom-related life choices. Get ready to cook something so divine, your nonna might just wink from heaven.
Ingredients
- 1 ½ cups Arborio rice
- 4 cups rich chicken stock, kept at a steady simmer
- 12 ounces assorted wild mushrooms (such as chanterelle, morel, and porcini), meticulously cleaned and sliced
- 1 large shallot, finely minced
- 3 cloves garlic, microplaned into a paste
- ½ cup dry white wine (a crisp Sauvignon Blanc works beautifully)
- ½ cup freshly grated Parmigiano-Reggiano cheese
- 3 tablespoons European-style cultured butter
- 2 tablespoons extra-virgin olive oil
- Kosher salt, to season throughout
- Freshly cracked black pepper, for finishing
- 2 tablespoons fresh thyme leaves, stripped from stems
- ¼ cup heavy cream, for the final enrichment
Instructions
- Heat the extra-virgin olive oil in a heavy-bottomed Dutch oven over medium-high heat until it shimmers.
- Add the assorted wild mushrooms and sauté for 6-8 minutes until deeply caramelized and any released liquid has evaporated.
- Season the mushrooms with kosher salt and transfer them to a separate bowl, reserving them for later incorporation.
- Reduce the heat to medium and melt the European-style cultured butter in the same pot.
- Sweat the finely minced shallot for 3-4 minutes until translucent and fragrant, being careful not to let it take on any color.
- Stir in the microplaned garlic paste and cook for exactly 60 seconds until aromatic but not browned.
- Add the Arborio rice to the pot and toast for 2 minutes, stirring constantly until the grains become slightly translucent at the edges.
- Pour in the dry white wine and cook while stirring continuously until the liquid is completely absorbed, about 2-3 minutes.
- Begin adding the simmering chicken stock one ladleful at a time, waiting until each addition is fully absorbed before adding the next.
- Continue this process for 18-20 minutes, maintaining a gentle simmer and stirring frequently to develop the rice’s creamy starch.
- Test the rice for doneness—it should be al dente with a slight bite at the center, not mushy.
- Fold in the reserved caramelized mushrooms and fresh thyme leaves, stirring to distribute evenly.
- Remove the pot from heat and vigorously stir in the freshly grated Parmigiano-Reggiano cheese until melted and incorporated.
- Finish by swirling in the heavy cream to create an extra-luxurious texture.
- Season with additional kosher salt if needed and garnish with freshly cracked black pepper.
Finally, behold your masterpiece—each grain suspended in a velvet universe where earthy mushrooms dance with sharp cheese in perfect harmony. The texture achieves that magical balance between structural integrity and creamy decadence that defines truly great risotto. For maximum drama, serve it in shallow bowls garnished with delicate mushroom chips and a drizzle of white truffle oil that’ll make your guests feel like they’re dining among the stars.
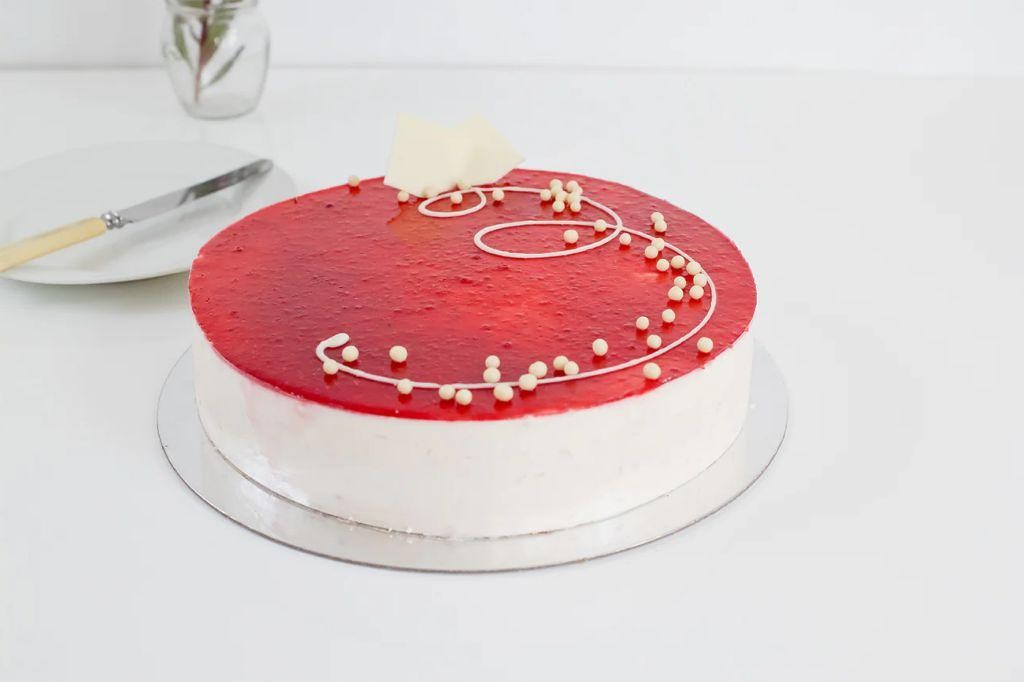
Heavenly Vanilla Bean Cheesecake
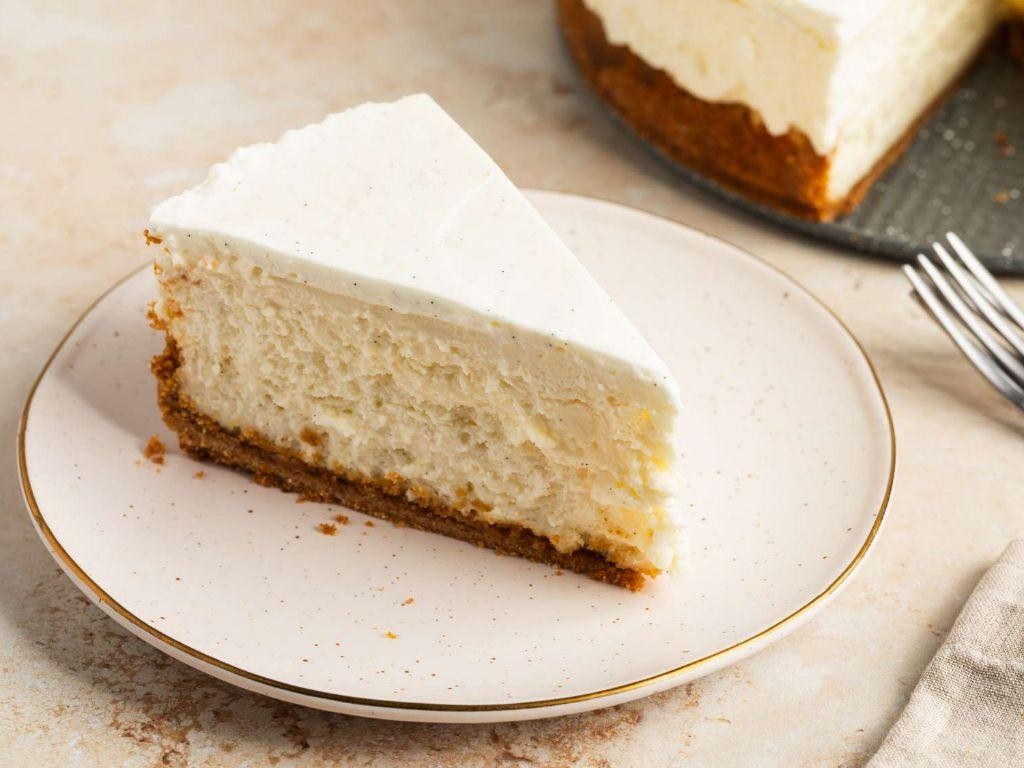
A dessert so divine it might just require a heavenly appointment to enjoy—this vanilla bean cheesecake is the stuff of sweet dreams, with a velvety texture that’ll make you question every other dessert you’ve ever met. Packed with real vanilla bean magic and a buttery crust that crumbles with purpose, it’s the kind of treat that turns ordinary Tuesdays into celebrations. Get ready to whip up a slice of pure bliss that’s as witty as it is wonderful!
Ingredients
– 1 ½ cups graham cracker crumbs, finely ground
– ⅓ cup unsalted clarified butter, melted
– 24 oz cream cheese, at room temperature
– 1 cup granulated sugar
– 1 cup sour cream
– 3 pasture-raised eggs, lightly beaten
– 1 vanilla bean, seeds scraped
– 1 tsp pure vanilla extract
– ¼ tsp fine sea salt
Instructions
1. Preheat the oven to 325°F and lightly grease a 9-inch springform pan with clarified butter. 2. Combine graham cracker crumbs and melted clarified butter in a medium bowl until the mixture resembles wet sand. 3. Firmly press the crumb mixture into the bottom of the prepared pan, ensuring an even layer. 4. Bake the crust for 10 minutes at 325°F until lightly golden, then cool completely on a wire rack. 5. In a large mixing bowl, beat the room-temperature cream cheese with granulated sugar on medium speed for 3 minutes until smooth and lump-free. 6. Add sour cream, scraped vanilla bean seeds, pure vanilla extract, and fine sea salt, mixing for 1 minute until fully incorporated. 7. Gradually pour in the lightly beaten pasture-raised eggs, mixing on low speed just until combined to avoid over-aerating. 8. Pour the filling over the cooled crust and smooth the top with a spatula. 9. Place the springform pan in a larger roasting pan and fill the outer pan with 1 inch of hot water to create a water bath. 10. Bake at 325°F for 55–60 minutes until the edges are set but the center still jiggles slightly when gently shaken. 11. Turn off the oven, prop the door open slightly, and let the cheesecake cool inside for 1 hour to prevent cracking. 12. Remove from the oven, run a knife around the edge to loosen, and refrigerate for at least 6 hours or overnight until fully chilled. Now, for the grand finale: this cheesecake boasts a luxuriously smooth, melt-in-your-mouth texture with the rich, aromatic flavor of real vanilla bean shining through. Notoriously creamy and subtly sweet, it’s perfect sliced thin and garnished with fresh berries or a drizzle of salted caramel for an extra wink of indulgence.
Mystical Lavender Honey Glazed Salmon
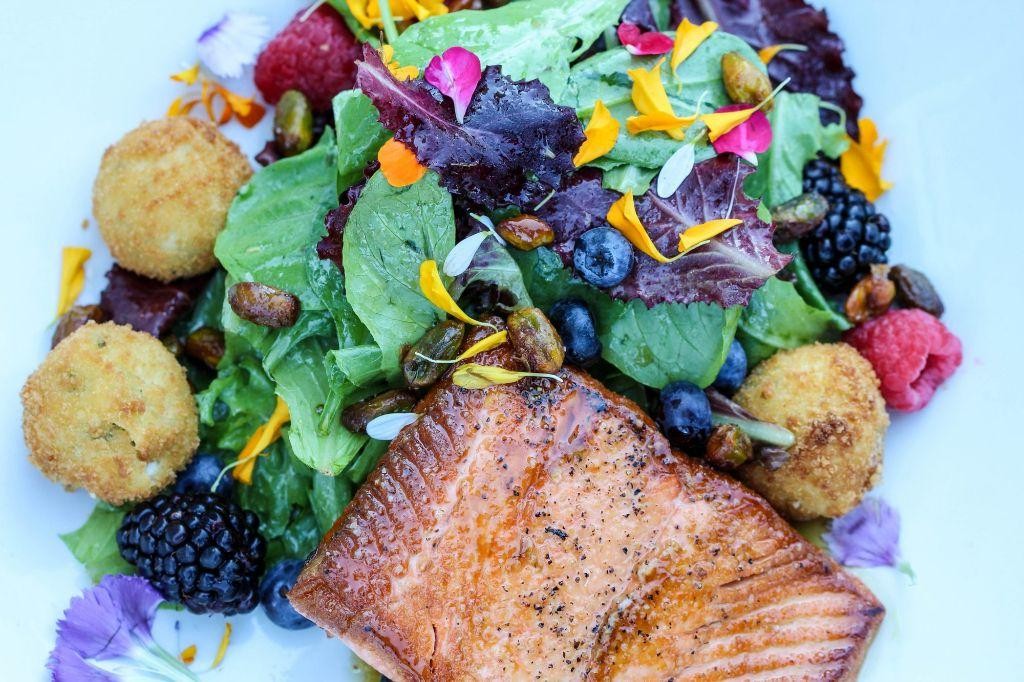
Zesty, zany, and downright magical—this lavender honey glazed salmon transforms your Tuesday dinner into a culinary adventure that’ll make your taste buds do a happy dance. Imagine flaky, tender salmon draped in a shimmering, aromatic glaze that whispers of floral fields and golden sweetness. It’s the kind of dish that turns skeptics into believers, one buttery bite at a time.
Ingredients
– 4 (6-ounce) skin-on wild-caught salmon fillets, patted dry
– 2 tablespoons culinary-grade dried lavender buds
– 1/3 cup raw wildflower honey
– 3 tablespoons freshly squeezed lemon juice
– 2 tablespoons unsalted clarified butter
– 1 teaspoon finely grated lemon zest
– 1/2 teaspoon flaky sea salt
– 1/4 teaspoon freshly cracked black pepper
Instructions
1. Preheat your oven to 400°F and position a rack in the center.
2. Combine the lavender buds, raw wildflower honey, and freshly squeezed lemon juice in a small saucepan over medium heat.
3. Whisk the mixture continuously for 3–4 minutes until the honey thins and the lavender infuses, creating a fragrant syrup.
4. Strain the syrup through a fine-mesh sieve into a bowl, pressing on the lavender buds to extract maximum flavor.
5. Stir the finely grated lemon zest into the strained syrup and set aside.
6. Season the skin-on wild-caught salmon fillets evenly with flaky sea salt and freshly cracked black pepper.
7. Heat the unsalted clarified butter in a large oven-safe skillet over medium-high heat until it shimmers.
8. Place the salmon fillets skin-side down in the skillet and sear for 3 minutes without moving to achieve a crisp crust.
9. Flip the salmon fillets carefully using a fish spatula and immediately brush the top with half of the lavender honey glaze.
10. Transfer the skillet to the preheated oven and bake for 6–8 minutes, until the salmon flakes easily with a fork but remains moist in the center.
11. Remove the skillet from the oven and brush the salmon with the remaining glaze.
12. Let the salmon rest in the skillet for 2 minutes to allow the glaze to set.
Crisp-skinned and glistening, this salmon boasts a tender, flaky interior that melts against the floral-sweet glaze. Serve it over a bed of lemony quinoa or alongside roasted asparagus to let those enchanting flavors shine—it’s a plate that’s as gorgeous as it is delicious.
Sublime Sun-Dried Tomato Basil Pasta
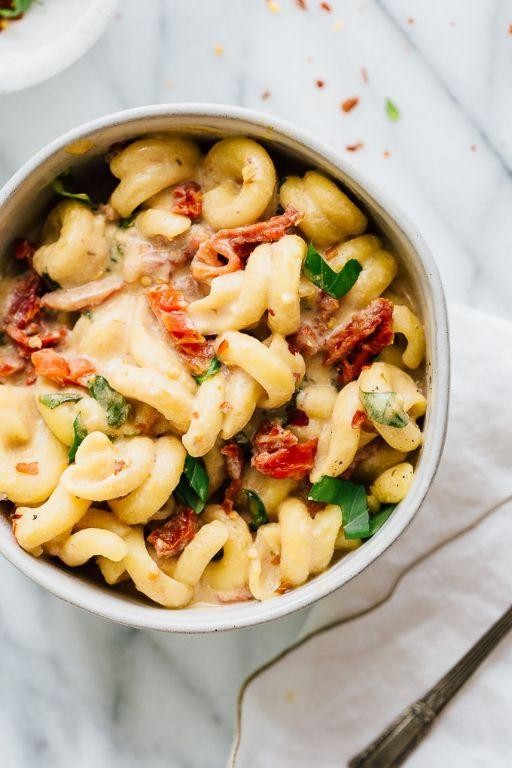
Yikes, have you ever had one of those days where your taste buds stage a full-scale rebellion against boring food? This sun-dried tomato basil pasta is the deliciously dramatic rescue mission your palate deserves—a flavor fiesta that’ll make your kitchen smell like an Italian nonna’s dream.
Ingredients
– 12 ounces dried linguine pasta
– 3 tablespoons extra virgin olive oil
– 4 cloves garlic, thinly sliced
– 1/2 cup sun-dried tomatoes in oil, julienned
– 1/4 cup dry white wine
– 1 cup heavy cream
– 1/2 cup freshly grated Parmigiano-Reggiano cheese
– 1/4 cup fresh basil leaves, chiffonade-cut
– 1 teaspoon kosher salt
– 1/2 teaspoon freshly cracked black pepper
Instructions
1. Bring 4 quarts of heavily salted water to a rolling boil in a large stockpot.
2. Add linguine and cook for 9-11 minutes until al dente, stirring occasionally to prevent sticking.
3. Meanwhile, heat olive oil in a large skillet over medium-low heat until shimmering but not smoking.
4. Add sliced garlic and cook for 90 seconds until fragrant and lightly golden, being careful not to burn.
5. Stir in julienned sun-dried tomatoes and cook for 2 minutes to intensify their flavor.
6. Deglaze the pan with white wine, scraping up any browned bits from the bottom.
7. Simmer the wine for 2 minutes until reduced by half, concentrating the acidity.
8. Pour in heavy cream and bring to a gentle simmer, stirring constantly with a wooden spoon.
9. Reduce heat to low and gradually whisk in Parmigiano-Reggiano until fully incorporated and smooth.
10. Season the sauce with kosher salt and freshly cracked black pepper.
11. Drain the cooked pasta, reserving 1/2 cup of starchy pasta water.
12. Transfer the hot pasta directly into the skillet with the sauce.
13. Toss the pasta vigorously with tongs, adding reserved pasta water 2 tablespoons at a time until the sauce coats each strand beautifully.
14. Remove from heat and fold in chiffonade-cut basil leaves just before serving.
The finished dish boasts a luxuriously creamy texture that clings to every curve of the linguine, while the sun-dried tomatoes provide chewy bursts of intense sweetness against the sharp Parmigiano-Reggiano. For an extra flourish, serve it in warmed bowls with additional basil scattered over the top like confetti at a flavor party.
Enchanting Berry Bliss Smoothie Bowl
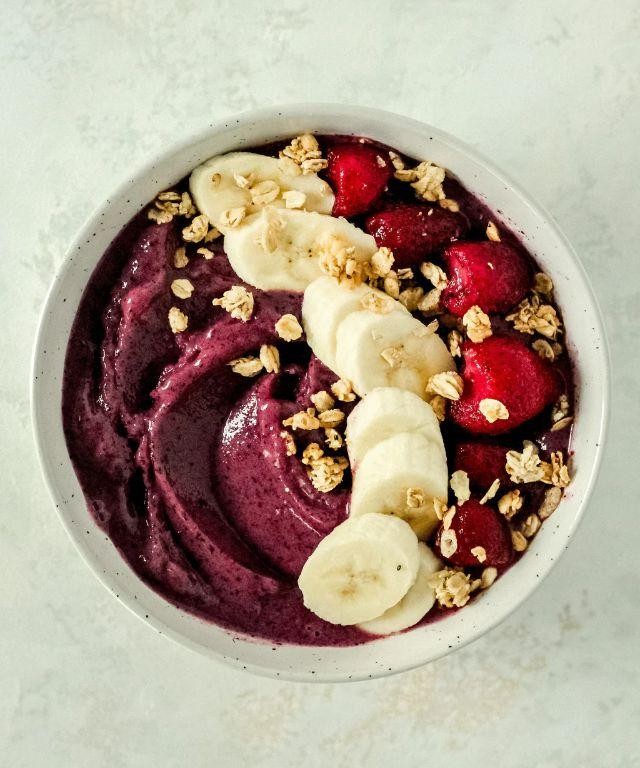
Morning, smoothie lovers! Let’s be real—your blender has been collecting dust while you’ve been chugging that sad, beige protein shake. Prepare to meet the most vibrant breakfast of your life, a technicolor dream that’ll make your taste buds do a happy dance while secretly packing enough nutrients to power you through even the most chaotic Tuesday.
Ingredients
- 1 cup frozen wild blueberries
- 1 cup frozen organic strawberries
- 1/2 cup plain Greek yogurt
- 1/4 cup unsweetened almond milk
- 1 tablespoon raw honey
- 1 teaspoon freshly squeezed lemon juice
- 1/4 teaspoon pure vanilla extract
- Pinch of fine sea salt
Instructions
- Combine 1 cup frozen wild blueberries, 1 cup frozen organic strawberries, 1/2 cup plain Greek yogurt, 1/4 cup unsweetened almond milk, 1 tablespoon raw honey, 1 teaspoon freshly squeezed lemon juice, 1/4 teaspoon pure vanilla extract, and a pinch of fine sea salt in a high-speed blender.
- Blend on medium speed for 30 seconds until ingredients begin to incorporate. Tip: Starting at a lower speed prevents frozen fruit from jamming the blades.
- Increase to high speed and blend for 45-60 seconds until the mixture reaches a thick, spoonable consistency that holds its shape when scooped.
- Stop the blender and scrape down the sides with a flexible spatula to ensure even blending.
- Blend for an additional 15-20 seconds on high speed until completely smooth and no fruit chunks remain.
- Immediately transfer the smoothie base to a chilled serving bowl using a rubber spatula. Tip: Chilling the bowl beforehand helps maintain the perfect thick texture.
- Use the back of a spoon to create decorative swirls on the surface for optimal topping adhesion.
- Arrange your chosen toppings artistically over the smoothie base. Tip: Place heavier toppings like nuts first, then delicate items like edible flowers to prevent sinking.
Now, behold your masterpiece! The texture should be luxuriously thick—think soft-serve ice cream meets velvet—with the frozen berries creating tiny crystalline bursts against the creamy yogurt base. Notice how the lemon juice brightens the berry sweetness while the honey adds floral notes that dance across your palate. For maximum Instagram-worthy presentation, serve it in a handmade ceramic bowl with a drizzle of coconut cream creating elegant marbled patterns across the vibrant purple surface.
Divine White Chocolate Raspberry Mousse
Raspberry, meet white chocolate—this isn’t just a dessert, it’s a love story that unfolds in your mouth, a fluffy cloud of sweet-tart perfection that’ll make you forget every mediocre mousse you’ve ever encountered. Seriously, this divine creation is so airy and luxurious, you’ll want to eat it straight from the bowl with a soup spoon (no judgment here).
Ingredients
– 8 ounces high-quality white chocolate couverture, finely chopped
– 1 cup heavy cream, cold
– 1/2 cup granulated sugar
– 3 large pasture-raised eggs, separated
– 1 cup fresh raspberry purée, strained
– 1/4 cup crème fraîche
– 1 teaspoon pure vanilla extract
– 1/4 teaspoon fine sea salt
Instructions
1. Place the finely chopped white chocolate couverture in a heatproof bowl.
2. Heat 1/4 cup of the heavy cream in a small saucepan over medium heat until it reaches 180°F and begins to steam.
3. Pour the hot cream over the white chocolate and let it stand undisturbed for 2 minutes to melt the chocolate.
4. Whisk the chocolate and cream mixture vigorously until completely smooth and glossy.
5. Whisk in the crème fraîche, egg yolks, and vanilla extract until fully incorporated.
6. Gently fold the strained raspberry purée into the chocolate mixture until evenly distributed.
7. In a separate chilled bowl, whip the remaining 3/4 cup cold heavy cream with the granulated sugar until it forms soft peaks that hold their shape when the whisk is lifted.
8. In another clean, dry bowl, whip the egg whites with the fine sea salt until they form stiff peaks that stand straight up when the whisk is lifted.
9. Fold one-third of the whipped cream into the chocolate-raspberry base to lighten the mixture.
10. Gently fold in the remaining whipped cream until no white streaks remain.
11. Carefully fold in the whipped egg whites until just incorporated, being careful not to deflate the mixture.
12. Divide the mousse among 6 serving glasses and refrigerate for at least 4 hours, or until set. Velvety smooth with pockets of tart raspberry cutting through the sweet white chocolate, this mousse is pure elegance. Serve it in vintage coupe glasses with fresh raspberries and mint sprigs for maximum drama, or layer it with crumbled shortbread cookies for textural contrast that’ll make your taste buds do a happy dance.
Luminous Quinoa and Avocado Salad
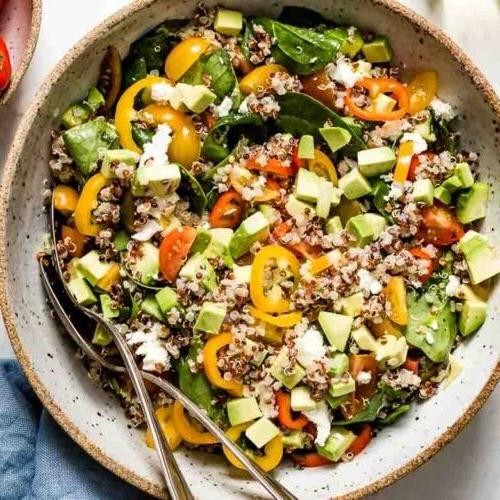
Ever find yourself staring into the fridge, hoping a gourmet meal will magically assemble itself? Enter this Luminous Quinoa and Avocado Salad—the answer to your lazy (but delicious) dreams, packed with so much vibrancy it practically glows in the dark.
Ingredients
- 1 cup tri-color quinoa, rinsed thoroughly
- 2 cups filtered water
- 1/4 cup extra-virgin olive oil
- 3 tablespoons freshly squeezed lime juice
- 1 teaspoon fine sea salt
- 1/2 teaspoon freshly cracked black pepper
- 2 ripe Hass avocados, diced into 1/2-inch cubes
- 1/2 cup finely chopped red onion
- 1/4 cup chopped fresh cilantro leaves
Instructions
- Combine 1 cup rinsed tri-color quinoa and 2 cups filtered water in a medium saucepan.
- Bring to a boil over high heat, then immediately reduce heat to low and cover with a tight-fitting lid.
- Simmer for 15 minutes exactly, then remove from heat and let stand covered for 5 minutes—this allows the quinoa to steam to fluffy perfection.
- Fluff the cooked quinoa with a fork and spread it in a thin layer on a baking sheet to cool completely to room temperature, about 20 minutes.
- While quinoa cools, whisk together 1/4 cup extra-virgin olive oil, 3 tablespoons freshly squeezed lime juice, 1 teaspoon fine sea salt, and 1/2 teaspoon freshly cracked black pepper in a small bowl until emulsified.
- Transfer cooled quinoa to a large mixing bowl and pour the dressing over it, tossing gently to coat every grain.
- Gently fold in 2 diced Hass avocados, 1/2 cup finely chopped red onion, and 1/4 cup chopped fresh cilantro leaves until just combined—avoid overmixing to keep the avocado intact.
- Let the salad rest for 10 minutes at room temperature to allow the flavors to meld before serving.
Gloriously creamy avocado chunks melt into the nutty quinoa, while the zesty lime dressing and sharp red onion keep each bite bright and balanced. Serve it heaped in butter lettuce cups for a low-carb lunch, or top with seared scallops to turn this side into a show-stopping main event.
Dazzling Citrus Herb Grilled Shrimp
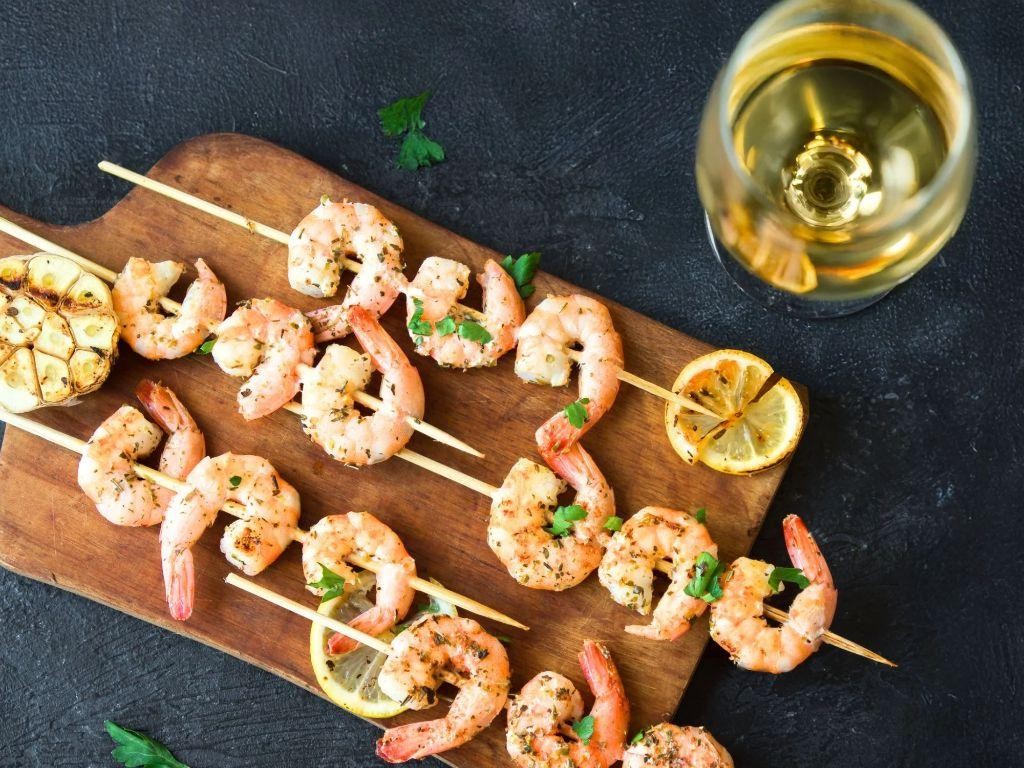
Tantalizingly tangy and herbaceous, these grilled shrimp will make your taste buds do a happy dance while convincing your dinner guests you secretly attended culinary school. This dazzling dish transforms simple shellfish into a citrus-kissed masterpiece that’s perfect for everything from backyard barbecues to fancy patio parties. Get ready to become the grill master you were always meant to be!
Ingredients
- 1 pound wild-caught jumbo shrimp (16-20 count), peeled and deveined
- 3 tablespoons extra-virgin olive oil
- 2 tablespoons freshly squeezed lemon juice
- 1 tablespoon freshly squeezed orange juice
- 2 cloves garlic, microplaned
- 1 tablespoon fresh thyme leaves, finely chopped
- 2 teaspoons fresh rosemary, minced
- ½ teaspoon crushed red pepper flakes
- ¾ teaspoon kosher salt
- ¼ teaspoon freshly cracked black pepper
- 2 tablespoons unsalted butter, clarified
- 1 lemon, cut into ¼-inch rounds
- 2 tablespoons fresh parsley, finely chopped
Instructions
- Pat the shrimp completely dry using paper towels to ensure proper searing.
- Whisk together olive oil, lemon juice, orange juice, microplaned garlic, thyme, rosemary, red pepper flakes, kosher salt, and black pepper in a medium bowl.
- Add shrimp to the marinade and toss to coat evenly, then refrigerate for exactly 20 minutes—no longer, as the citrus will begin to cook the proteins.
- Preheat your grill to medium-high heat (425°F) and lightly oil the grates with clarified butter using tongs and a folded paper towel.
- Thread the marinated shrimp onto metal skewers, placing 4-5 shrimp per skewer for even cooking.
- Grill shrimp for 2 minutes on the first side until you see prominent grill marks and the edges turn opaque.
- Flip shrimp using tongs and grill for another 1-2 minutes until the flesh is firm and completely opaque throughout.
- Simultaneously grill lemon rounds for 1-2 minutes per side until lightly charred and caramelized.
- Remove shrimp and lemon rounds from the grill, then brush shrimp with remaining clarified butter.
- Sprinkle with fresh parsley and serve immediately with grilled lemon rounds for squeezing.
What makes these shrimp truly spectacular is their perfect textural balance—firm yet juicy flesh with slightly crispy edges from the high-heat grill. The bright citrus notes dance beautifully with the earthy herbs, while the subtle heat from red pepper flakes adds just enough kick to keep things interesting. Try serving them over creamy polenta or tossing them into a vibrant summer salad for a meal that screams “I definitely have my life together.”
Radiant Coconut Lime Chia Pudding
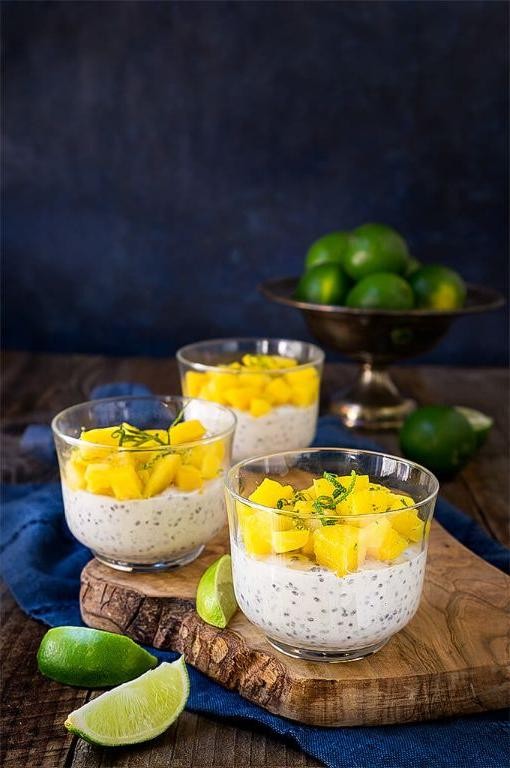
Unbelievably, this isn’t some tropical vacation in a bowl—it’s your new breakfast obsession that’ll make your taste buds do the hula. We’re talking about a chia pudding so radiant it practically glows with coconut-lime goodness, perfect for those mornings when you want to feel fancy without actually putting in fancy effort. Get ready to ditch the boring breakfast routine and embrace your inner tropical food goddess.
Ingredients
– ½ cup organic white chia seeds
– 1 ¾ cups full-fat coconut milk, well-shaken
– ¼ cup pure maple syrup, grade A
– 2 tablespoons freshly squeezed lime juice
– 1 teaspoon finely grated lime zest
– ¼ teaspoon pure vanilla extract
– ⅛ teaspoon fine sea salt
Instructions
1. Combine ½ cup organic white chia seeds and 1 ¾ cups full-fat coconut milk in a medium glass mixing bowl.
2. Whisk vigorously for 45 seconds until the mixture begins to thicken slightly and no clumps remain.
3. Add ¼ cup pure maple syrup, 2 tablespoons freshly squeezed lime juice, 1 teaspoon finely grated lime zest, ¼ teaspoon pure vanilla extract, and ⅛ teaspoon fine sea salt to the bowl.
4. Whisk continuously for 60 seconds until all ingredients are fully incorporated and the texture becomes uniform.
5. Cover the bowl tightly with plastic wrap, pressing it directly against the surface of the pudding mixture to prevent skin formation.
6. Refrigerate the pudding for exactly 8 hours at 38°F to achieve optimal gel formation and flavor development.
7. Remove the pudding from refrigeration and whisk vigorously for 30 seconds to break up any thickened areas and create a creamy consistency.
8. Divide the pudding evenly among four 8-ounce serving glasses using a rubber spatula to scrape the bowl completely.
9. Garnish each serving with additional lime zest and serve immediately at 45°F for optimal texture and flavor.
Divinely creamy with just the right amount of tropical tang, this pudding achieves a perfect gel-like texture that’s neither too firm nor too runny. The coconut milk creates a luxurious base that’s beautifully cut by the bright acidity of fresh lime, while the chia seeds provide delightful little pops of texture. Try layering it with fresh mango chunks and toasted coconut flakes for a parfait that’ll transport you straight to island time.
Transcendent Almond Butter Energy Bites
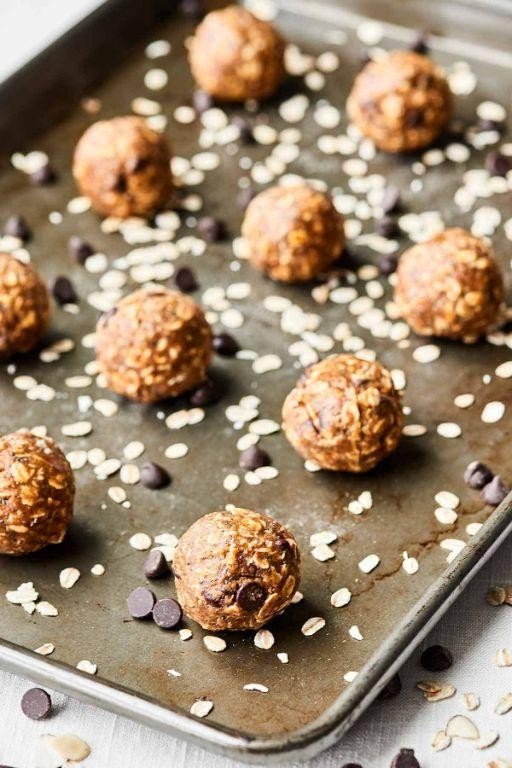
Ugh, are you tired of energy snacks that taste like sweetened cardboard? Us too. That’s why we’ve perfected these Transcendent Almond Butter Energy Bites—little spheres of bliss that’ll make your taste buds do a happy dance while actually fueling your body.
Ingredients
– 1 cup creamy almond butter
– ⅓ cup pure maple syrup
– 1 teaspoon Madagascar bourbon vanilla extract
– ¼ teaspoon Himalayan pink salt
– 1 cup old-fashioned rolled oats
– ¼ cup chia seeds
– ¼ cup finely chopped Medjool dates
– 2 tablespoons cold-pressed coconut oil, melted
Instructions
1. Combine 1 cup creamy almond butter, ⅓ cup pure maple syrup, 1 teaspoon Madagascar bourbon vanilla extract, and ¼ teaspoon Himalayan pink salt in a medium mixing bowl.
2. Whisk vigorously for 60 seconds until the mixture becomes smooth and emulsified.
3. Add 1 cup old-fashioned rolled oats and ¼ cup chia seeds to the wet ingredients.
4. Fold the dry ingredients into the wet mixture using a spatula until fully incorporated.
5. Chop ¼ cup Medjool dates into ⅛-inch pieces using a sharp chef’s knife.
6. Gently fold the chopped dates into the mixture until evenly distributed.
7. Melt 2 tablespoons cold-pressed coconut oil in a microwave-safe bowl for 15 seconds at 100% power.
8. Drizzle the melted coconut oil over the mixture and stir until the oil is completely absorbed.
9. Cover the bowl with plastic wrap and refrigerate for exactly 30 minutes to firm the mixture.
10. Remove the chilled mixture from the refrigerator and portion into 1-tablespoon amounts.
11. Roll each portion between your palms to form perfectly round balls, applying gentle pressure.
12. Arrange the energy bites in a single layer on a parchment-lined baking sheet.
13. Return the baking sheet to the refrigerator and chill for another 60 minutes to set completely.
14. Transfer the set energy bites to an airtight container, separating layers with parchment paper.
15. Store in the refrigerator until ready to serve, maintaining optimal texture. Zero excuses needed for devouring these—the chewy texture from the dates plays beautifully against the crunch of chia seeds, while the almond butter creates a rich, velvety base that’s neither too sweet nor too dense. Try rolling them in toasted coconut flakes or dipping half in dark chocolate for an extra indulgent treat that still feels virtuous.
Whimsical Pea and Mint Soup
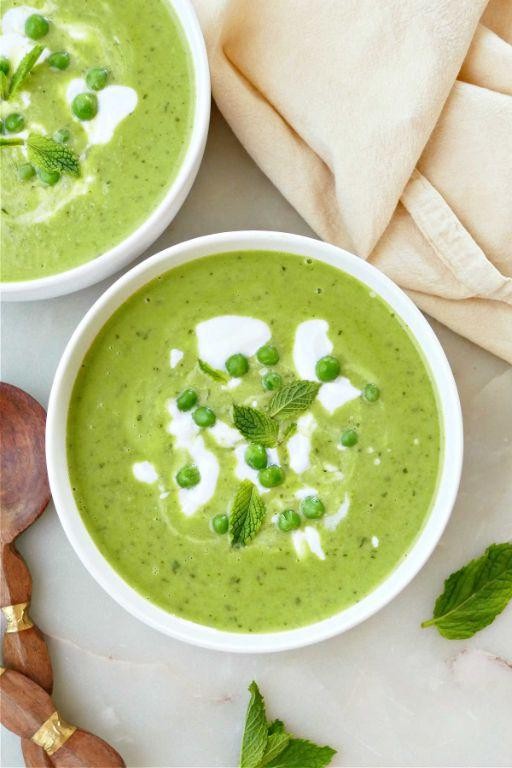
Ever had a soup that makes you feel like you’re floating on a cloud of pure, unadulterated joy? This whimsical pea and mint creation is basically springtime in a bowl, with flavors so bright they might just make your taste buds do a happy dance. It’s the kind of dish that turns a regular Tuesday into a culinary adventure—no passport required.
Ingredients
– 2 tablespoons extra-virgin olive oil
– 1 large yellow onion, finely diced
– 2 cloves garlic, minced
– 4 cups frozen petite peas
– 4 cups vegetable broth
– 1/4 cup fresh mint leaves, tightly packed
– 1/2 cup heavy cream
– 1 teaspoon fine sea salt
– 1/2 teaspoon freshly ground black pepper
– 1 tablespoon freshly squeezed lemon juice
Instructions
1. Heat the extra-virgin olive oil in a large Dutch oven over medium heat until it shimmers, about 2 minutes.
2. Add the finely diced yellow onion and sauté until translucent and fragrant, approximately 5–7 minutes, stirring occasionally to prevent browning.
3. Stir in the minced garlic and cook for 1 minute until aromatic but not browned.
4. Tip: Add the garlic just after the onions soften to avoid bitter flavors from overcooking.
5. Pour in the vegetable broth and bring to a rolling boil over high heat, which should take about 4–5 minutes.
6. Add the frozen petite peas and return to a boil, then immediately reduce the heat to low and simmer uncovered for 8 minutes until the peas are tender but still vibrant green.
7. Tip: Avoid overcooking the peas to preserve their sweet flavor and bright color.
8. Remove the pot from the heat and stir in the tightly packed fresh mint leaves, allowing them to wilt for 1 minute.
9. Carefully transfer the mixture to a high-speed blender and purée on high for 2–3 minutes until completely smooth and velvety.
10. Tip: Blend in batches if needed and hold the lid firmly to prevent steam buildup from causing spills.
11. Return the puréed soup to the pot and stir in the heavy cream, fine sea salt, and freshly ground black pepper.
12. Warm over low heat for 3–4 minutes until heated through, but do not boil to maintain the creamy texture.
13. Stir in the freshly squeezed lemon juice just before serving. Buttery smooth with a refreshing minty zing, this soup feels like a cozy hug with a surprise kick. Serve it chilled for a summer twist or garnished with crispy pancetta crumbles to play up the savory notes.
Majestic Balsamic Peach Bruschetta
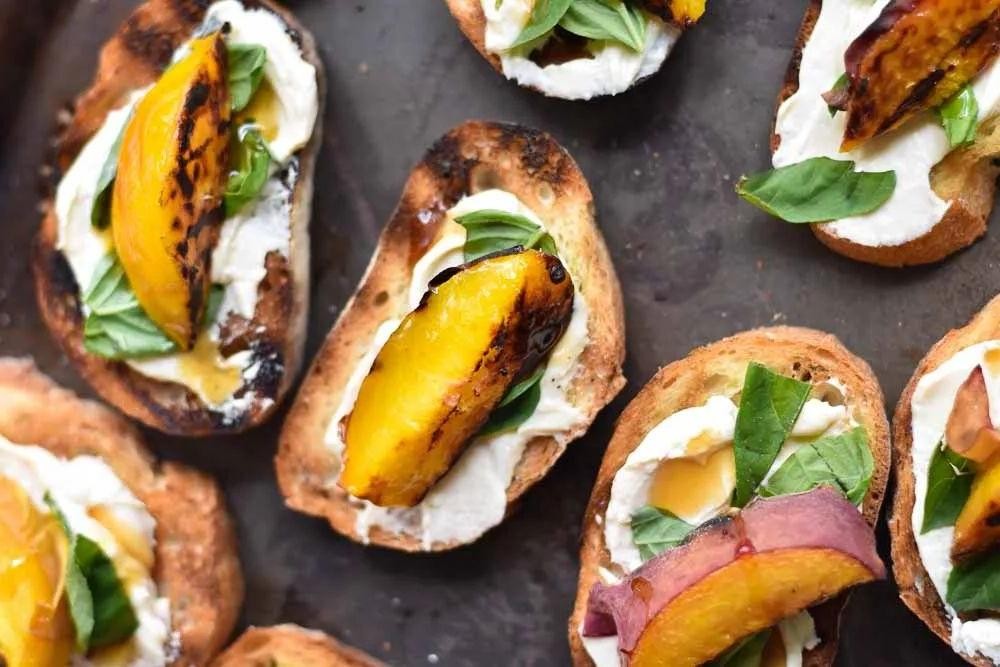
Brace yourself for a flavor explosion that will make your taste buds do a happy dance! This isn’t your grandmother’s bruschetta—unless your grandmother was a culinary rockstar who paired sweet stone fruit with tangy balsamic reduction. Get ready to impress every guest who crosses your threshold with this sophisticated yet surprisingly simple appetizer.
Ingredients
– 1 rustic artisan baguette, sliced into ½-inch thick diagonal pieces
– 3 ripe yellow peaches, pitted and diced into ¼-inch cubes
– ¼ cup high-quality extra virgin olive oil
– 2 tablespoons aged balsamic vinegar
– 4 ounces fresh burrata cheese, drained
– 8 fresh basil leaves, chiffonade-cut
– 1 teaspoon flaky sea salt
– ½ teaspoon freshly cracked black pepper
Instructions
1. Preheat your oven to 375°F using the convection setting if available.
2. Arrange the baguette slices in a single layer on a parchment-lined baking sheet.
3. Brush each slice generously with 2 tablespoons of extra virgin olive oil using a pastry brush.
4. Bake for 8-10 minutes until the edges turn golden brown and the centers become crisp. (Tip: Rotate the baking sheet halfway through for even browning.)
5. While the bread toasts, combine the diced peaches, remaining olive oil, and balsamic vinegar in a medium mixing bowl.
6. Gently fold the ingredients together until the peaches are evenly coated, being careful not to crush the fruit.
7. Let the peach mixture macerate at room temperature for 5 minutes to allow the flavors to meld.
8. Remove the toasted baguette slices from the oven and transfer to a serving platter.
9. Tear the burrata cheese into small pieces using your hands and distribute evenly among the toast points.
10. Spoon the marinated peach mixture over the cheese, ensuring each slice gets equal distribution.
11. Sprinkle the chiffonade basil over the assembled bruschetta. (Tip: Chiffonade the basil by stacking leaves, rolling tightly, and slicing crosswise into thin ribbons.)
12. Finish each piece with a delicate pinch of flaky sea salt and a crack of black pepper. (Tip: Use flaky salt for texture and burst of salinity that enhances the sweet peaches.)
Vibrant and texturally brilliant, this bruschetta delivers crisp toast against creamy burrata and juicy peaches that burst with each bite. The balsamic reduction creates beautiful crimson streaks across the plate—serve these beauties on a slate board for dramatic presentation that’ll have your Instagram followers swooning. Trust us, these disappear faster than your resolve to “just have one.”
Miraculous Lemon Poppy Seed Muffins
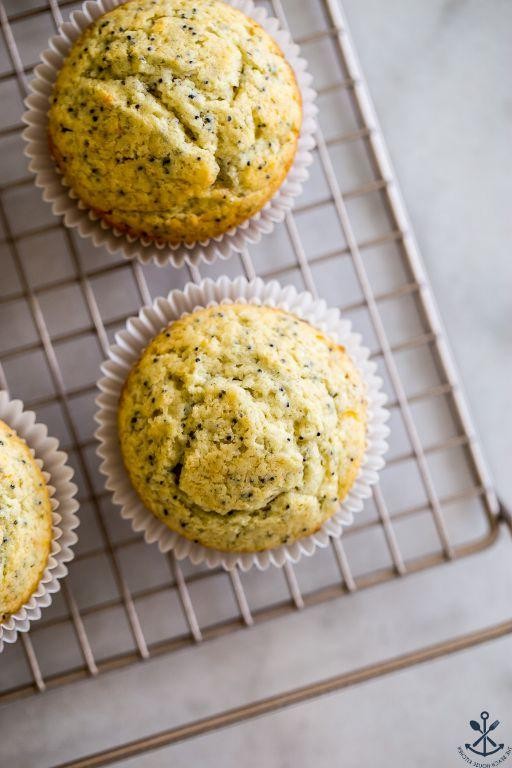
Every once in a while, a baked good comes along that makes you question all your life choices—like why you haven’t been eating these miraculous lemon poppy seed muffins every single morning. They’re the citrusy wake-up call your taste buds didn’t know they needed, packed with zesty charm and just enough poppy seed crunch to keep things interesting.
Ingredients
- 1 ¾ cups all-purpose flour, sifted
- ¾ cup granulated cane sugar
- 2 teaspoons baking powder
- ¼ teaspoon fine sea salt
- 2 tablespoons poppy seeds
- Zest of 2 large organic lemons
- 2 pasture-raised eggs, lightly beaten
- ½ cup European-style cultured butter, melted and cooled
- ¾ cup whole milk buttermilk
- ¼ cup freshly squeezed lemon juice
- 1 teaspoon pure vanilla extract
Instructions
- Preheat your oven to 375°F and line a 12-cup muffin tin with parchment liners.
- Whisk together the sifted all-purpose flour, granulated cane sugar, baking powder, fine sea salt, poppy seeds, and lemon zest in a large mixing bowl until fully incorporated.
- In a separate bowl, combine the lightly beaten pasture-raised eggs, melted European-style cultured butter, whole milk buttermilk, freshly squeezed lemon juice, and pure vanilla extract, whisking until emulsified.
- Pour the wet ingredients into the dry mixture and fold gently with a spatula until just combined—do not overmix to avoid tough muffins.
- Divide the batter evenly among the prepared muffin cups, filling each about two-thirds full.
- Bake for 18–22 minutes, or until the tops spring back when lightly pressed and a toothpick inserted into the center comes out clean.
- Cool the muffins in the tin for 5 minutes before transferring to a wire rack—this prevents steaming and ensures a crisp exterior.
Seriously, these muffins are a textural dream: tender, moist crumb with a delicate crunch from the poppy seeds and a bright lemon zing that lingers. Serve them warm with a dollop of lemon curd or crumble over vanilla bean ice cream for a next-level dessert twist.
Dreamy Roasted Vegetable Tacos
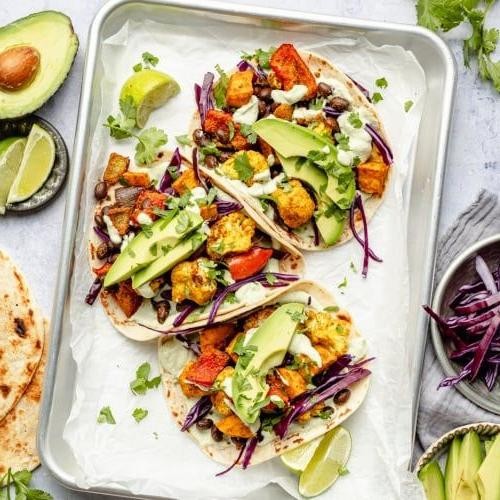
Utterly irresistible and packed with more personality than a taco truck at midnight, these roasted vegetable tacos will make you forget meat ever existed. Unapologetically vibrant and ridiculously easy to assemble, they’re the weeknight hero your taste buds have been dreaming of. Unleash your inner chef and prepare for some seriously delicious chaos.
Ingredients
- 2 cups rainbow carrots, peeled and julienned
- 1 large red bell pepper, seeded and thinly sliced
- 1 medium red onion, thinly sliced
- 2 tablespoons extra-virgin olive oil
- 1 tablespoon smoked paprika
- 1 teaspoon ground cumin
- 1/2 teaspoon garlic powder
- 1/2 teaspoon fine sea salt
- 1/4 teaspoon freshly cracked black pepper
- 8 small corn tortillas
- 1/2 cup crumbled cotija cheese
- 1/4 cup fresh cilantro leaves
- 1 lime, cut into wedges
- 1/2 cup Mexican crema
Instructions
- Preheat your oven to 425°F and line a large baking sheet with parchment paper.
- In a large mixing bowl, combine the rainbow carrots, red bell pepper, and red onion.
- Drizzle the vegetables with extra-virgin olive oil, ensuring all pieces are lightly coated.
- Sprinkle smoked paprika, ground cumin, garlic powder, fine sea salt, and freshly cracked black pepper over the vegetables.
- Toss the vegetables vigorously until evenly coated with oil and spices.
- Spread the vegetables in a single layer on the prepared baking sheet.
- Roast for 20–25 minutes, or until the carrot edges are caramelized and the peppers have softened.
- While the vegetables roast, warm the corn tortillas directly over a gas flame for 15–20 seconds per side until lightly charred.
- Transfer the warmed tortillas to a clean kitchen towel and wrap to keep warm.
- Divide the roasted vegetables evenly among the warmed tortillas.
- Top each taco with crumbled cotija cheese, fresh cilantro leaves, and a drizzle of Mexican crema.
- Serve immediately with lime wedges on the side for squeezing.
Divinely textured with crisp-tender veggies and creamy, tangy toppings, these tacos deliver a fiesta in every bite. Dreamy doesn’t even begin to cover it—the smoky paprika and bright lime create a flavor symphony that’ll have you reaching for seconds. For a next-level twist, stack them high with pickled jalapeños or serve alongside a chilled avocado-cucumber salad.
Marvelous Honey Lime Chicken Skewers
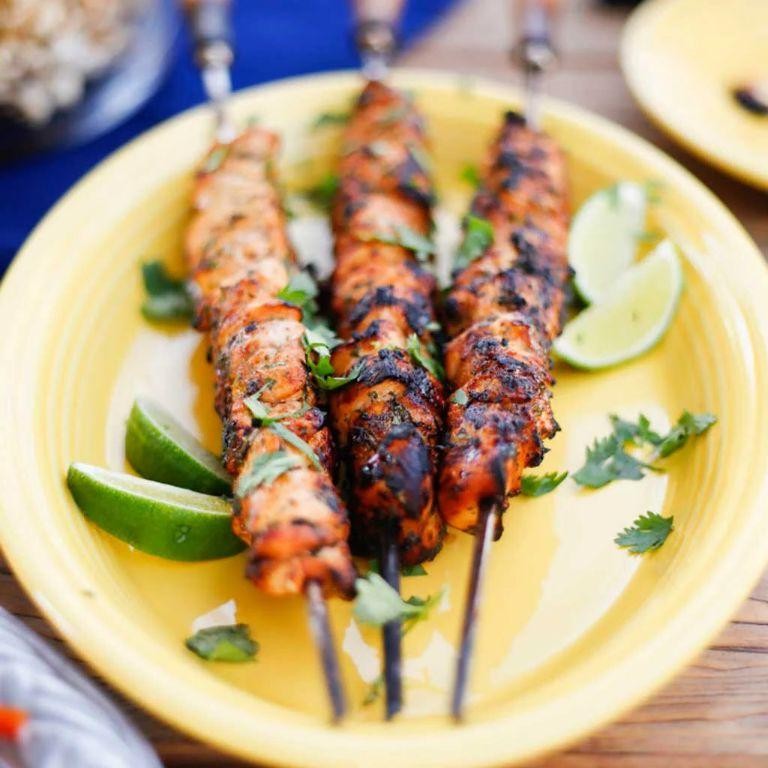
Oh, the eternal quest for that perfect sweet-savory balance that doesn’t require a culinary degree or sacrificing your entire evening! These honey lime chicken skewers are about to become your weeknight superhero, delivering restaurant-worthy flavor with minimal effort and maximum deliciousness.
Ingredients
– 1.5 pounds boneless, skinless chicken thighs, cut into 1-inch cubes
– 1/3 cup raw wildflower honey
– 1/4 cup freshly squeezed lime juice
– 2 tablespoons extra virgin olive oil
– 3 cloves garlic, finely minced
– 1 teaspoon smoked paprika
– 1/2 teaspoon fine sea salt
– 1/4 teaspoon freshly cracked black pepper
– 1 tablespoon fresh cilantro, finely chopped
Instructions
1. Soak 8-10 wooden skewers in cold water for 30 minutes to prevent burning during grilling.
2. Whisk together 1/3 cup raw wildflower honey, 1/4 cup freshly squeezed lime juice, 2 tablespoons extra virgin olive oil, 3 cloves of finely minced garlic, 1 teaspoon smoked paprika, 1/2 teaspoon fine sea salt, and 1/4 teaspoon freshly cracked black pepper in a medium bowl.
3. Add 1.5 pounds of cubed chicken thighs to the marinade, ensuring each piece is thoroughly coated.
4. Cover the bowl with plastic wrap and refrigerate for exactly 2 hours—this timing allows the acid to tenderize without breaking down the protein structure.
5. Preheat your grill to medium-high heat, approximately 425°F, while threading marinated chicken onto drained skewers, leaving small spaces between pieces.
6. Grill skewers for 5-6 minutes per side, watching for caramelization and turning only once to develop those beautiful grill marks.
7. Use an instant-read thermometer to check that the thickest piece reaches 165°F internally before removing from heat.
8. Transfer skewers to a clean platter and let rest for 3 minutes to redistribute juices.
9. Sprinkle with 1 tablespoon of finely chopped fresh cilantro just before serving.
Zesty and vibrant, these skewers deliver a perfect textural contrast between the caramelized exterior and juicy interior. The honey creates a glossy, sticky glaze that clings beautifully to each bite, while the lime cuts through with bright acidity. Try serving them over coconut rice with grilled pineapple slices for a tropical twist that’ll transport your taste buds straight to vacation mode.
Conclusion
Magical indeed! This collection proves that light recipes can be both delicious and satisfying. We hope these 27 dreamy dishes inspire your next kitchen adventure. Try your favorites, leave a comment telling us which ones you loved most, and don’t forget to share this roundup on Pinterest to spread the culinary magic!