
You’re probably here because your furry friend adores treats but peanut butter is off the menu—maybe due to allergies or preference. Well, you’ve come to the right place! We’ve gathered 34 delicious, easy-to-make dog treat recipes that skip the peanut butter entirely. From crunchy biscuits to chewy bites, there’s something to wag every tail. Ready to spoil your pup? Let’s dive into these tasty creations!
Apple and Cheddar Dog Biscuits
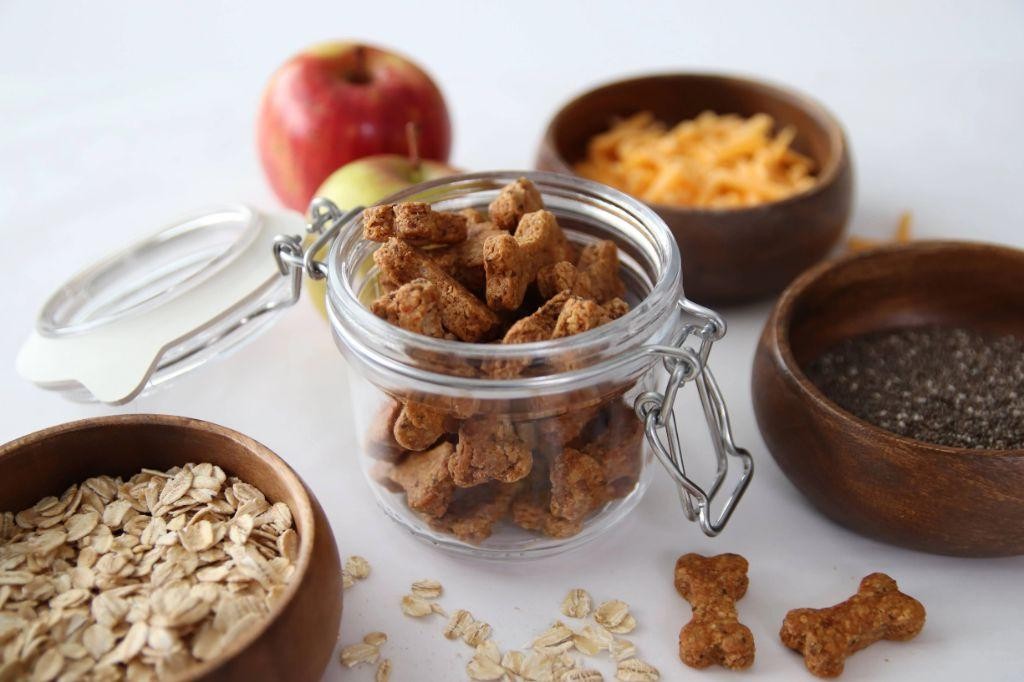
Unexpectedly, your furry friend might just become your biggest fan with these homemade treats. You’ll love how simple they are to whip up using ingredients you probably already have in your kitchen, and your dog will adore the cheesy, apple-y goodness in every bite.
24
biscuits15
minutes25
minutesIngredients
– 1 cup whole wheat flour (or oat flour for grain-free)
– 1 cup shredded sharp cheddar cheese
– 1/2 cup unsweetened applesauce
– 1/4 cup plain Greek yogurt
– 1 large egg
– 1 tbsp coconut oil (melted)
Instructions
1. Preheat your oven to 350°F and line a baking sheet with parchment paper.
2. In a large bowl, combine 1 cup whole wheat flour and 1 cup shredded sharp cheddar cheese.
3. Add 1/2 cup unsweetened applesauce, 1/4 cup plain Greek yogurt, 1 large egg, and 1 tbsp melted coconut oil to the dry ingredients.
4. Mix everything together until a stiff dough forms—it should pull away from the sides of the bowl cleanly.
5. Tip: If the dough feels too sticky, add an extra tablespoon of flour to make it easier to handle.
6. Roll the dough out on a lightly floured surface to about 1/4-inch thickness.
7. Use cookie cutters to cut out shapes, or simply slice into 1-inch squares with a knife for quick prep.
8. Tip: For crispier biscuits, roll the dough slightly thinner; for chewier ones, keep it closer to 1/2-inch thick.
9. Place the cutouts on the prepared baking sheet, spacing them about 1 inch apart.
10. Bake for 20-25 minutes, or until the edges are golden brown and the tops feel firm to the touch.
11. Tip: Rotate the baking sheet halfway through baking to ensure even browning.
12. Turn off the oven and let the biscuits cool completely inside with the door slightly ajar for extra crunch.
Very crunchy on the outside with a slightly chewy center, these biscuits have a savory cheesy flavor balanced by the subtle sweetness of apple. They’re perfect for training rewards or crumbling over your dog’s dinner for a special meal upgrade—just watch how eagerly they disappear!
Sweet Potato Carrot Bites

Craving a wholesome snack that’s both easy and delicious? You’ve got to try these sweet potato carrot bites. They’re perfect for busy days, packed with natural sweetness, and totally kid-friendly.
16
bites15
minutes25
minutesIngredients
– 2 cups mashed sweet potato (about 2 medium, baked and peeled)
– 1 cup grated carrot (packed, from about 2 medium carrots)
– 1/2 cup rolled oats (old-fashioned, or quick oats for softer texture)
– 1/4 cup almond flour (or oat flour for nut-free)
– 1 large egg (or 1 flax egg for vegan)
– 2 tbsp maple syrup (or honey, adjust sweetness to preference)
– 1 tsp cinnamon (add more for extra warmth)
– 1/2 tsp vanilla extract (optional, for depth)
– 1/4 tsp salt (fine sea salt, or to taste)
– Cooking spray or olive oil (for greasing, or any neutral oil)
Instructions
1. Preheat your oven to 375°F and lightly grease a baking sheet with cooking spray or olive oil.
2. In a large bowl, combine the mashed sweet potato, grated carrot, rolled oats, almond flour, egg, maple syrup, cinnamon, vanilla extract, and salt.
3. Mix everything together until well combined—the mixture will be slightly sticky but should hold its shape when pressed. Tip: If it’s too wet, add a tablespoon more almond flour; if too dry, a splash of milk helps.
4. Scoop about 1 1/2 tablespoons of the mixture and roll it into a ball between your palms, then gently flatten it into a 1/2-inch thick patty.
5. Place each patty on the prepared baking sheet, spacing them about 1 inch apart.
6. Bake for 20–25 minutes, flipping halfway through, until the edges are golden brown and the bites feel firm to the touch. Tip: For crispier bites, bake an extra 2–3 minutes.
7. Let them cool on the baking sheet for 5 minutes before transferring to a wire rack. Tip: They firm up as they cool, so don’t skip this step!
Deliciously soft with a hint of crunch from the oats, these bites are subtly sweet and warmly spiced. Serve them with a dollop of Greek yogurt for dipping, or crumble them over a salad for a hearty twist.
Pumpkin Oatmeal Cookies

Let’s be honest—you’ve been dreaming of pumpkin spice season since August, and these soft, chewy pumpkin oatmeal cookies are about to become your new favorite way to welcome fall. They’re packed with cozy spices, just sweet enough, and seriously simple to whip up. You’ll love how your kitchen smells while they bake!
24
cookies15
minutes14
minutesIngredients
– 1 cup canned pumpkin puree (not pumpkin pie filling)
– ¾ cup brown sugar, packed (light or dark both work)
– ½ cup unsalted butter, melted and slightly cooled
– 1 large egg
– 1 tsp vanilla extract
– 1 ½ cups old-fashioned rolled oats (for chewy texture)
– 1 cup all-purpose flour
– 1 tsp baking soda
– ½ tsp salt
– 1 tsp ground cinnamon
– ½ tsp ground nutmeg
– ¼ tsp ground ginger
– ½ cup chocolate chips or raisins (optional, for mix-ins)
Instructions
1. Preheat your oven to 350°F and line two baking sheets with parchment paper.
2. In a large bowl, whisk together the pumpkin puree, brown sugar, melted butter, egg, and vanilla extract until smooth.
3. Tip: Make sure your melted butter isn’t hot to avoid cooking the egg.
4. In a separate bowl, combine the oats, flour, baking soda, salt, cinnamon, nutmeg, and ginger.
5. Gradually stir the dry ingredients into the wet mixture until just combined—don’t overmix.
6. Fold in chocolate chips or raisins if using.
7. Drop rounded tablespoons of dough onto the prepared baking sheets, spacing them about 2 inches apart.
8. Tip: Lightly wet your fingers to press down each cookie slightly; they don’t spread much on their own.
9. Bake for 12–14 minutes, or until the edges are lightly golden and the tops look set.
10. Tip: For extra-chewy cookies, pull them out when the centers still seem a bit soft.
11. Let the cookies cool on the baking sheet for 5 minutes before transferring to a wire rack.
12. Cool completely before storing in an airtight container.
Zesty with spice and tender from the pumpkin, these cookies stay wonderfully soft for days. Try crumbling one over vanilla ice cream or dunking it into your morning coffee for the ultimate cozy treat.
Banana and Yogurt Drops
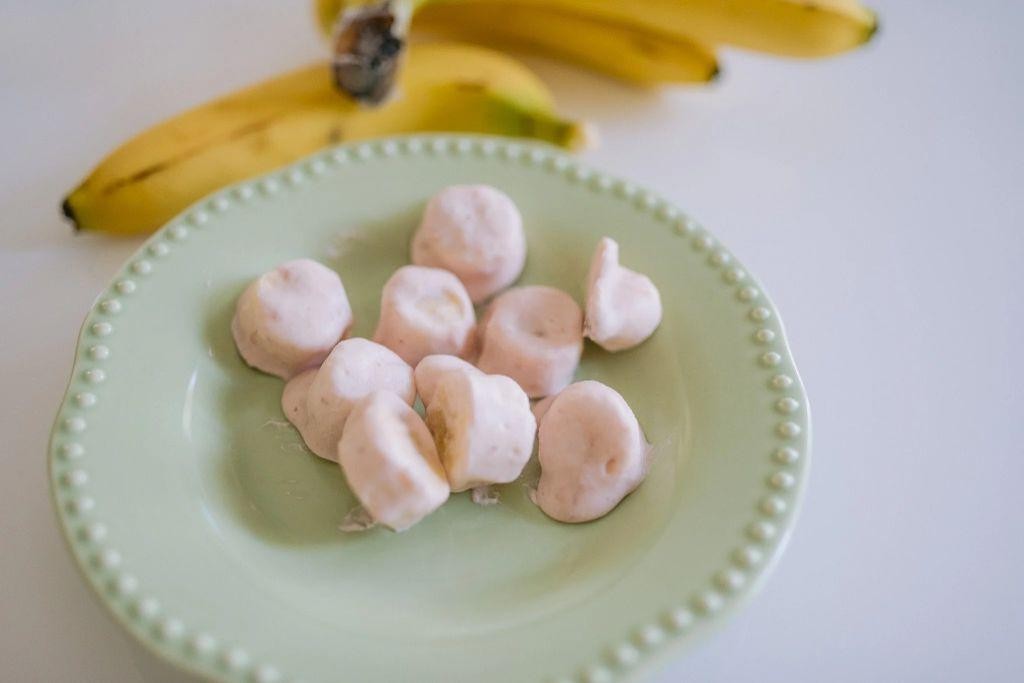
Oh, you know those bananas sitting on your counter getting a little too ripe? This is the perfect way to use them up before they go to waste. These banana and yogurt drops are a super simple, no-bake snack that you can whip up in minutes, and they’re a total hit with both kids and adults.
24
drops15
minutesIngredients
- 2 medium ripe bananas (the spottier, the sweeter)
- 1 cup plain Greek yogurt (full-fat works best for creaminess)
- 1/4 cup rolled oats (quick oats work too for a smoother texture)
- 2 tablespoons honey (or maple syrup for a vegan option)
- 1/2 teaspoon vanilla extract (pure gives the best flavor)
Instructions
- Peel the 2 medium ripe bananas and place them in a medium mixing bowl.
- Mash the bananas thoroughly with a fork until no large chunks remain, aiming for a smooth, pudding-like consistency.
- Add the 1 cup plain Greek yogurt, 1/4 cup rolled oats, 2 tablespoons honey, and 1/2 teaspoon vanilla extract to the bowl with the mashed bananas.
- Stir all ingredients together until fully combined and a thick, uniform mixture forms.
- Line a baking sheet with parchment paper to prevent sticking.
- Use a tablespoon or small cookie scoop to drop rounded mounds of the mixture onto the prepared baking sheet, spacing them about 1 inch apart.
- Place the baking sheet in the freezer and freeze for at least 2 hours, or until the drops are completely firm and solid.
- Transfer the frozen drops to an airtight container or freezer bag for storage.
Let these little bites thaw for about 5 minutes before eating for the best creamy-yet-firm texture. They taste like a cross between frozen banana pudding and a healthy cheesecake bite, making them a fantastic after-school treat or a cool dessert on a warm day. Try rolling them in crushed nuts or coconut flakes before freezing for an extra crunch.
Blueberry and Rice Flour Bones
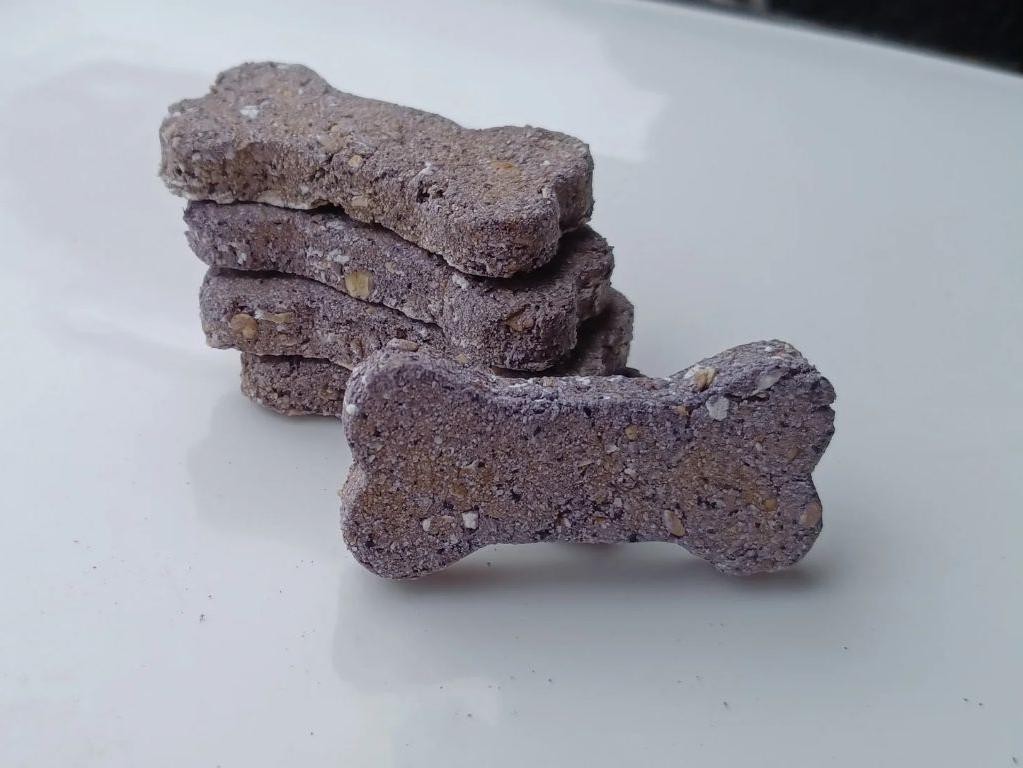
Let’s be honest—sometimes you want a treat that feels special but doesn’t require a culinary degree. These Blueberry and Rice Flour Bones are exactly that: a chewy, subtly sweet snack that’s gluten-free and surprisingly simple to make. You’ll love how the rice flour gives them a unique, tender bite, while the blueberries add little bursts of fruity flavor.
8
portions15
minutes20
minutesIngredients
- 1 cup rice flour (for a gluten-free base)
- 1/2 cup fresh or frozen blueberries (thawed if frozen)
- 1/4 cup honey or maple syrup (adjust to taste)
- 1 large egg, beaten (to bind the dough)
- 2 tbsp coconut oil, melted (or any neutral oil)
- 1 tsp vanilla extract (for extra aroma)
- 1/4 tsp salt (to balance sweetness)
Instructions
- Preheat your oven to 350°F and line a baking sheet with parchment paper.
- In a medium bowl, combine the rice flour and salt, whisking to remove any lumps.
- Add the beaten egg, melted coconut oil, honey, and vanilla extract to the dry ingredients.
- Mix until a crumbly dough forms—it should hold together when pressed.
- Gently fold in the blueberries, being careful not to crush them too much.
- Tip: If the dough feels too dry, add a teaspoon of water; if too sticky, sprinkle in a bit more rice flour.
- Divide the dough into 8 equal portions and roll each into a bone-shaped log about 4 inches long.
- Place the shaped bones on the prepared baking sheet, spacing them 1 inch apart.
- Bake for 18–20 minutes, or until the edges are lightly golden and the tops are firm to the touch.
- Tip: Rotate the baking sheet halfway through for even browning.
- Let the bones cool on the sheet for 5 minutes before transferring to a wire rack.
- Tip: They’ll firm up as they cool, so don’t worry if they seem soft right out of the oven.
- Allow to cool completely before serving.
So there you have it—these bones are delightfully chewy with a hint of graininess from the rice flour, and the blueberries add a sweet-tart pop. Serve them as a fun snack for kids, crumble over yogurt for breakfast, or pack them for a hike—they’re sturdy enough to travel well.
Coconut Chicken Chews

Haven’t you been craving something crispy, tropical, and totally snackable? These coconut chicken chews are the perfect finger food for game day, parties, or just when you need a little treat. They’re surprisingly easy to make and packed with flavor.
4
servings15
minutes20
minutesIngredients
– 1 lb boneless, skinless chicken breasts, cut into 1-inch strips (thaw if frozen)
– 1 cup all-purpose flour (for dredging)
– 2 large eggs, beaten (helps coating stick)
– 1 cup panko breadcrumbs (for extra crunch)
– 1 cup shredded sweetened coconut (or unsweetened for less sugar)
– 1 tsp garlic powder (adds savory depth)
– 1 tsp paprika (for color and mild heat)
– 1/2 tsp salt (adjust to taste)
– 1/4 tsp black pepper (freshly ground if possible)
– 1/2 cup vegetable oil (or any neutral oil with high smoke point)
Instructions
1. Preheat your oven to 375°F and line a baking sheet with parchment paper.
2. Cut chicken breasts into uniform 1-inch strips to ensure even cooking.
3. In a shallow bowl, combine flour, garlic powder, paprika, salt, and pepper.
4. Place beaten eggs in a second shallow bowl.
5. In a third bowl, mix panko breadcrumbs and shredded coconut thoroughly.
6. Dredge each chicken strip in the flour mixture, shaking off excess.
7. Dip the floured chicken into the beaten eggs, coating completely.
8. Press each chicken strip into the coconut-panko mixture, ensuring full coverage.
9. Heat vegetable oil in a large skillet over medium-high heat until it shimmers (about 350°F).
10. Fry chicken strips in batches for 2-3 minutes per side until golden brown.
11. Transfer fried chicken to the prepared baking sheet using tongs.
12. Bake for 8-10 minutes until internal temperature reaches 165°F.
13. Let chicken rest on a wire rack for 3 minutes before serving.
Tip: Don’t overcrowd the skillet while frying to maintain oil temperature and ensure crispiness. Test oil readiness by dropping in a breadcrumb—if it sizzles immediately, you’re ready to fry. Use a meat thermometer to confirm doneness rather than guessing.
They come out incredibly crunchy on the outside with tender, juicy chicken inside. The coconut adds a subtle sweetness that pairs wonderfully with the savory seasoning. Try serving them with a spicy mango dipping sauce or over a bed of greens for a complete meal.
Spinach and Sweet Potato Bites

Did you know you can turn spinach and sweet potatoes into the perfect little snack? These spinach and sweet potato bites are packed with nutrients and flavor, making them ideal for busy weeknights or casual gatherings. They’re easy to whip up and even easier to love.
20
bites15
minutes25
minutesIngredients
– 2 cups mashed sweet potato (about 2 medium potatoes, peeled and cooked)
– 1 cup finely chopped fresh spinach (packed, or frozen thawed and squeezed dry)
– 1/2 cup grated Parmesan cheese (or nutritional yeast for dairy-free)
– 1/4 cup breadcrumbs (plain, or gluten-free panko)
– 1 large egg (or flax egg for vegan)
– 1 tsp garlic powder (adjust to taste)
– 1/2 tsp smoked paprika (optional, for a smoky kick)
– 1/2 tsp salt (or to taste)
– 1/4 tsp black pepper (freshly ground if possible)
– 1 tbsp olive oil (or any neutral oil, for brushing)
Instructions
1. Preheat your oven to 375°F and line a baking sheet with parchment paper.
2. In a large mixing bowl, combine the mashed sweet potato, chopped spinach, grated Parmesan, breadcrumbs, egg, garlic powder, smoked paprika, salt, and black pepper.
3. Mix everything together until well combined, using your hands or a spatula.
4. Scoop about 1 tablespoon of the mixture and roll it into a ball between your palms.
5. Place each ball on the prepared baking sheet, spacing them about 1 inch apart.
6. Gently flatten each ball slightly with your fingers to form a small patty shape.
7. Lightly brush the tops of each patty with olive oil using a pastry brush or your fingers.
8. Bake in the preheated oven for 20–25 minutes, or until the edges are golden brown and the bites feel firm to the touch.
9. Remove the baking sheet from the oven and let the bites cool for 5 minutes on the sheet.
10. Transfer the bites to a serving plate using a spatula.
These bites come out tender with a slightly crisp exterior, thanks to the sweet potato’s natural sweetness balancing the earthy spinach. Try serving them with a dollop of Greek yogurt dip or tucking them into a pita for a quick lunch—they’re versatile enough to shine any way you enjoy them.
Cheese and Bacon Cookies

Diving into savory cookie territory might sound unconventional, but these cheese and bacon cookies are about to become your new favorite snack. They’re perfect for game day, parties, or just when you want something deliciously different that comes together in no time.
24
cookies20
minutes15
minutesIngredients
– 1 cup all-purpose flour
– 1/2 cup unsalted butter, cold and cubed (for flakier texture)
– 1 cup shredded sharp cheddar cheese
– 1/2 cup cooked bacon, crumbled (about 6 slices)
– 1/4 cup grated Parmesan cheese
– 1/4 tsp garlic powder
– 1/4 tsp smoked paprika
– 1 large egg, for egg wash
– 1 tbsp water, for egg wash
Instructions
1. Preheat your oven to 375°F and line a baking sheet with parchment paper.
2. In a large bowl, combine the all-purpose flour, shredded sharp cheddar cheese, crumbled bacon, grated Parmesan cheese, garlic powder, and smoked paprika.
3. Add the cold, cubed unsalted butter to the dry ingredients.
4. Use your fingers or a pastry cutter to work the butter into the flour mixture until it resembles coarse crumbs.
5. Mix in 3-4 tablespoons of ice water, one tablespoon at a time, until the dough just comes together.
6. Turn the dough out onto a lightly floured surface and gently knead it 2-3 times to bring it together.
7. Roll the dough out to 1/4-inch thickness using a rolling pin.
8. Use a 2-inch round cookie cutter to cut out cookies, re-rolling scraps as needed.
9. Place the cut cookies 1 inch apart on the prepared baking sheet.
10. In a small bowl, whisk together the large egg and 1 tablespoon of water to create an egg wash.
11. Brush the top of each cookie lightly with the egg wash using a pastry brush.
12. Bake at 375°F for 12-15 minutes, or until the edges are golden brown and the tops are lightly browned.
13. Remove the baking sheet from the oven and let the cookies cool on the sheet for 5 minutes.
14. Transfer the cookies to a wire rack to cool completely.
The cookies emerge with a satisfying crisp edge and tender, cheesy interior that melts in your mouth. The smoky bacon and sharp cheddar create a savory symphony that’s irresistible when served warm alongside soup or crumbled over a salad for extra crunch.
Mint and Parsley Breath Fresheners
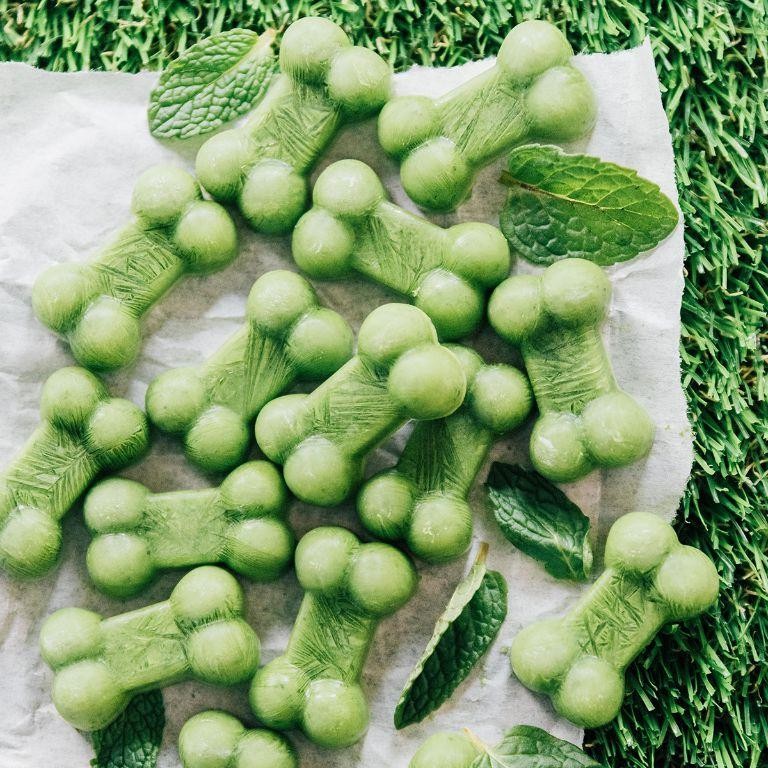
Keeping your breath fresh doesn’t have to mean reaching for mints from a packet. You can whip up these natural breath fresheners at home with just a few ingredients. They’re perfect for after meals or whenever you need a quick refresh.
1
batch15
minutesIngredients
- 1 cup fresh mint leaves, packed (or substitute with half parsley if you prefer)
- 1/2 cup fresh parsley leaves, packed (adds extra chlorophyll for freshness)
- 2 tbsp honey (use raw for more flavor, or maple syrup for vegan option)
- 1 tsp lemon juice (freshly squeezed works best)
- 1/4 cup water (filtered if you have it)
Instructions
- Wash the mint and parsley leaves thoroughly under cool running water to remove any dirt.
- Pat the leaves completely dry with a clean kitchen towel or paper towels. (Tip: Dry leaves will help the mixture blend more smoothly and prevent ice crystals if freezing.)
- Combine the mint, parsley, honey, lemon juice, and water in a blender.
- Blend on high speed for 45-60 seconds until the mixture is completely smooth with no leaf chunks remaining.
- Pour the blended mixture through a fine-mesh strainer into a clean bowl to remove any fibrous pulp.
- Press down on the pulp with a spoon to extract all the liquid, then discard the leftover solids.
- Pour the strained liquid into ice cube trays, filling each compartment about 3/4 full. (Tip: Silicone trays make removal easier later.)
- Freeze the trays for at least 4 hours, or until the cubes are completely solid.
- Pop the frozen breath freshener cubes out of the trays and transfer them to an airtight container. (Tip: Store them in the freezer with parchment paper between layers to prevent sticking.)
Here’s how these little cubes deliver: they melt slowly in your mouth, releasing a cool, herbal burst that’s both sweet and tangy. Try popping one after coffee or garlic-heavy meals for instant freshness. You could even crush a cube over fruit salad for an unexpected flavor twist.
Zucchini Doggie Muffins
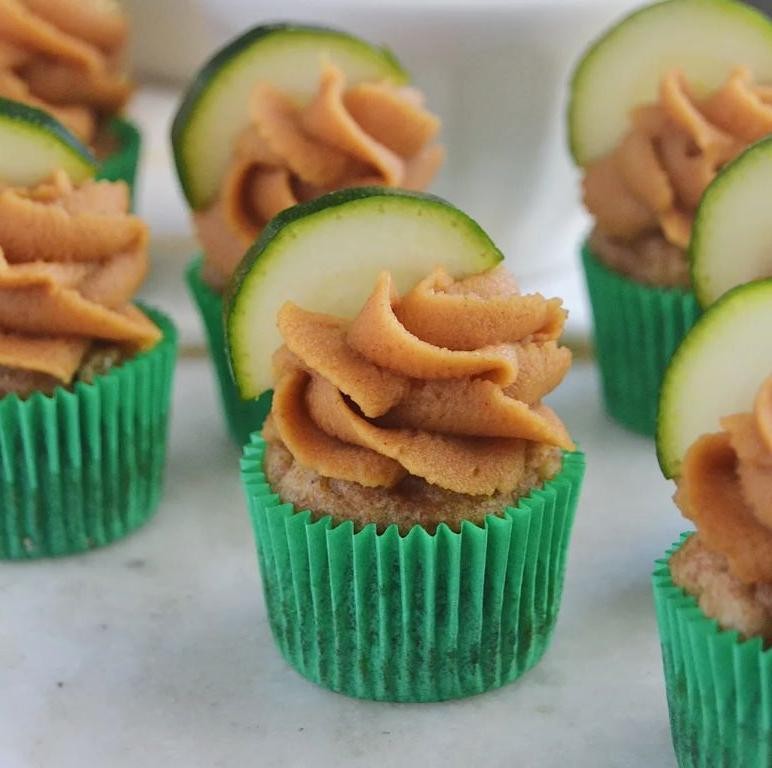
Trying to get your pup to eat their veggies just got a whole lot easier with these homemade treats. You’ll love how simple these are to whip up, and your furry friend will go crazy for the cheesy, zucchini-packed goodness. They’re perfect for training rewards or just because you’re the best pet parent ever.
6
muffins10
minutes20
minutesIngredients
– 1 cup whole wheat flour (or oat flour for grain-free)
– 1 cup shredded zucchini, squeezed dry (about 1 medium zucchini)
– 1/2 cup plain Greek yogurt (or pumpkin puree for dairy-free)
– 1/4 cup shredded cheddar cheese (optional but highly recommended)
– 1 large egg
– 2 tbsp olive oil (or any neutral oil)
– 1 tsp baking powder
Instructions
1. Preheat your oven to 350°F and line a muffin tin with 6 paper liners.
2. Squeeze excess moisture from the shredded zucchini using a clean kitchen towel or paper towels.
3. In a large bowl, whisk together the whole wheat flour and baking powder until well combined.
4. Add the shredded zucchini, Greek yogurt, shredded cheddar cheese, egg, and olive oil to the dry ingredients.
5. Mix everything together until just combined—don’t overmix or the muffins will become tough.
6. Divide the batter evenly among the 6 muffin cups, filling each about 3/4 full.
7. Bake for 18-22 minutes at 350°F until the tops are golden brown and a toothpick inserted comes out clean.
8. Let the muffins cool completely in the pan before removing them.
9. Store cooled muffins in an airtight container in the refrigerator for up to 5 days.
Out of the oven, these muffins have a moist, tender crumb with little green zucchini flecks throughout. The subtle cheesiness makes them irresistible to dogs, while the Greek yogurt adds a nice tang. Try crumbling one over your pup’s regular food as a special topper, or break them into smaller pieces for training sessions.
Carrot and Honey Treats
Perfect for when you’re craving something sweet but want to keep it wholesome, these carrot and honey treats come together with minimal fuss. You’ll love how the natural sweetness shines through without being overly decadent.
Ingredients
- 2 cups grated carrots (packed firmly, about 3 medium carrots)
- 1/2 cup honey (preferably raw, for richer flavor)
- 1 cup old-fashioned oats (or quick oats for softer texture)
- 1/4 cup coconut oil, melted (or any neutral oil like avocado)
- 1 tsp vanilla extract (pure extract recommended)
- 1/2 tsp cinnamon (add more for extra warmth)
- 1/4 tsp salt (fine sea salt works best)
Instructions
- Preheat your oven to 350°F and line a baking sheet with parchment paper.
- In a large bowl, combine the grated carrots, honey, melted coconut oil, and vanilla extract, stirring until fully incorporated. Tip: If your honey is thick, warm it slightly for easier mixing.
- Add the oats, cinnamon, and salt to the wet ingredients, mixing until no dry spots remain.
- Scoop tablespoon-sized portions of the mixture onto the prepared baking sheet, spacing them about 1 inch apart.
- Flatten each mound gently with the back of a spoon to create even disks, about 1/4-inch thick. Tip: Lightly wet the spoon to prevent sticking.
- Bake for 18-22 minutes, or until the edges turn golden brown and the centers feel set to the touch.
- Let the treats cool on the baking sheet for 5 minutes before transferring to a wire rack. Tip: They firm up as they cool, so don’t skip this step.
Just out of the oven, these treats are soft with a chewy texture and subtle crunch from the oats. The honey caramelizes slightly, giving them a warm, cozy flavor that pairs wonderfully with a drizzle of yogurt or crumbled over morning oatmeal for extra goodness.
Salmon and Spinach Snacks
Diving into a quick, healthy snack has never been easier. You’re going to love these little bites that come together fast and pack a flavorful punch. They’re perfect for when you need something satisfying but don’t want to spend hours in the kitchen.
Ingredients
- 1 lb fresh salmon fillet, skin removed (or 2 cups canned salmon, drained)
- 2 cups fresh spinach, roughly chopped (pack it lightly into the measuring cup)
- 1/4 cup plain breadcrumbs (or panko for extra crunch)
- 1 large egg, lightly beaten (helps bind everything together)
- 1 tbsp olive oil (or any neutral oil like avocado oil)
- 1 tsp garlic powder (adjust to your preference)
- 1/2 tsp smoked paprika (adds a nice smoky flavor)
- 1/4 tsp salt
- 1/4 tsp black pepper, freshly ground
Instructions
- Preheat your oven to 375°F (190°C) and line a baking sheet with parchment paper.
- If using fresh salmon, place the fillet on a microwave-safe plate and microwave on high for 2-3 minutes until just cooked through and flaky.
- Let the cooked salmon cool for 5 minutes until easy to handle, then flake it into small pieces using a fork into a large mixing bowl.
- Add the chopped spinach, breadcrumbs, beaten egg, olive oil, garlic powder, smoked paprika, salt, and black pepper to the bowl with the salmon.
- Mix all ingredients thoroughly with your hands or a spatula until well combined and the mixture holds together when pressed.
- Scoop about 1 tablespoon of the mixture and roll it into a tight ball between your palms, placing each ball on the prepared baking sheet. Tip: Wet your hands slightly to prevent sticking.
- Gently press down on each ball to form a small patty about 1/2-inch thick, spacing them about 1 inch apart on the baking sheet.
- Bake in the preheated oven for 12-15 minutes, flipping halfway through, until golden brown and firm to the touch. Tip: For extra crispness, broil for the final 1-2 minutes, watching carefully to prevent burning.
- Remove from the oven and let cool on the baking sheet for 5 minutes before serving. Tip: They firm up as they cool, making them easier to handle.
Flaky salmon and tender spinach create a wonderful texture contrast in every bite. The smoky paprika adds depth without overpowering the delicate fish flavor. Try serving these warm with a squeeze of lemon or cool them completely for an easy pack-and-go lunch option.
Turkey and Cranberry Cookies

Cranberry and turkey might sound like holiday leftovers, but trust me, these savory cookies are a game-changer any time of year. You get that perfect salty-sweet combo in a crispy, snackable bite that’s seriously addictive.
24
cookies20
minutes15
minutesIngredients
- 1 cup cooked turkey, finely shredded (leftover roast turkey works great)
- 1/2 cup dried cranberries, chopped (or substitute with dried cherries)
- 1 1/2 cups all-purpose flour
- 1/2 cup unsalted butter, softened (or use salted butter and reduce added salt)
- 1/4 cup brown sugar, packed
- 1 large egg
- 1 tsp dried sage
- 1/2 tsp baking powder
- 1/4 tsp black pepper, freshly ground
- 1/4 tsp salt
- 2 tbsp whole milk, if needed for dough consistency
Instructions
- Preheat your oven to 350°F and line two baking sheets with parchment paper.
- In a large mixing bowl, cream together the softened butter and brown sugar using a hand mixer on medium speed for about 2 minutes until light and fluffy.
- Beat in the egg until fully incorporated, scraping down the sides of the bowl with a spatula.
- In a separate bowl, whisk together the flour, dried sage, baking powder, black pepper, and salt to evenly distribute the leavening and spices.
- Gradually add the dry ingredients to the wet ingredients, mixing on low speed just until a crumbly dough forms.
- Fold in the shredded turkey and chopped cranberries by hand until evenly distributed throughout the dough.
- If the dough feels too dry and doesn’t hold together when pressed, add milk 1 tablespoon at a time until it reaches a workable consistency.
- Using a tablespoon or small cookie scoop, portion the dough into 1-inch balls and place them 2 inches apart on the prepared baking sheets.
- Flatten each ball slightly with the bottom of a glass or your palm to about 1/2-inch thickness for even baking.
- Bake for 12–15 minutes, rotating the pans halfway through, until the edges are golden brown and the centers are set.
- Let the cookies cool on the baking sheets for 5 minutes before transferring them to a wire rack to cool completely.
Just out of the oven, these cookies have a delightful crisp edge with a slightly chewy center from the cranberries. The savory turkey and earthy sage balance beautifully with the sweet fruit—perfect for packing in lunchboxes or serving with a sharp cheddar cheese board for your next gathering.
Beef and Pumpkin Chews
Diving into fall flavors just got more exciting with these beef and pumpkin chews. You’ll love how the savory beef pairs with sweet pumpkin in these tender, chewy bites. They’re perfect for cozy evenings or game day snacks.
12
portions15
minutes30
minutesIngredients
– 1 lb ground beef (80/20 works best for flavor)
– 1 cup canned pumpkin puree (not pumpkin pie filling)
– 2 tbsp olive oil (or any neutral oil)
– 1 tsp garlic powder
– 1 tsp onion powder
– 1/2 tsp smoked paprika
– 1/2 tsp salt (adjust to taste)
– 1/4 tsp black pepper
– 1/4 cup breadcrumbs (for binding)
Instructions
1. Preheat your oven to 375°F and line a baking sheet with parchment paper.
2. In a large bowl, combine the ground beef and pumpkin puree using your hands until fully incorporated.
3. Add the garlic powder, onion powder, smoked paprika, salt, and black pepper to the mixture.
4. Mix in the breadcrumbs until the mixture holds together when pressed.
5. Shape the mixture into 1-inch thick rectangular strips, about 3 inches long each.
6. Brush each strip lightly with olive oil on all sides for better browning.
7. Arrange the strips on the prepared baking sheet, leaving 1 inch between them for even cooking.
8. Bake at 375°F for 25-30 minutes until the edges are crispy and internal temperature reaches 160°F.
9. Let the chews rest on the baking sheet for 5 minutes before serving to allow juices to redistribute.
Remarkably tender with a satisfying chew, these bites offer a wonderful balance of savory beef and subtle pumpkin sweetness. The crispy edges give way to a moist interior that’s perfect for dipping in your favorite sauce. Try serving them alongside a cool ranch dip or crumbling them over a fall salad for extra protein.
Cinnamon and Apple Delight
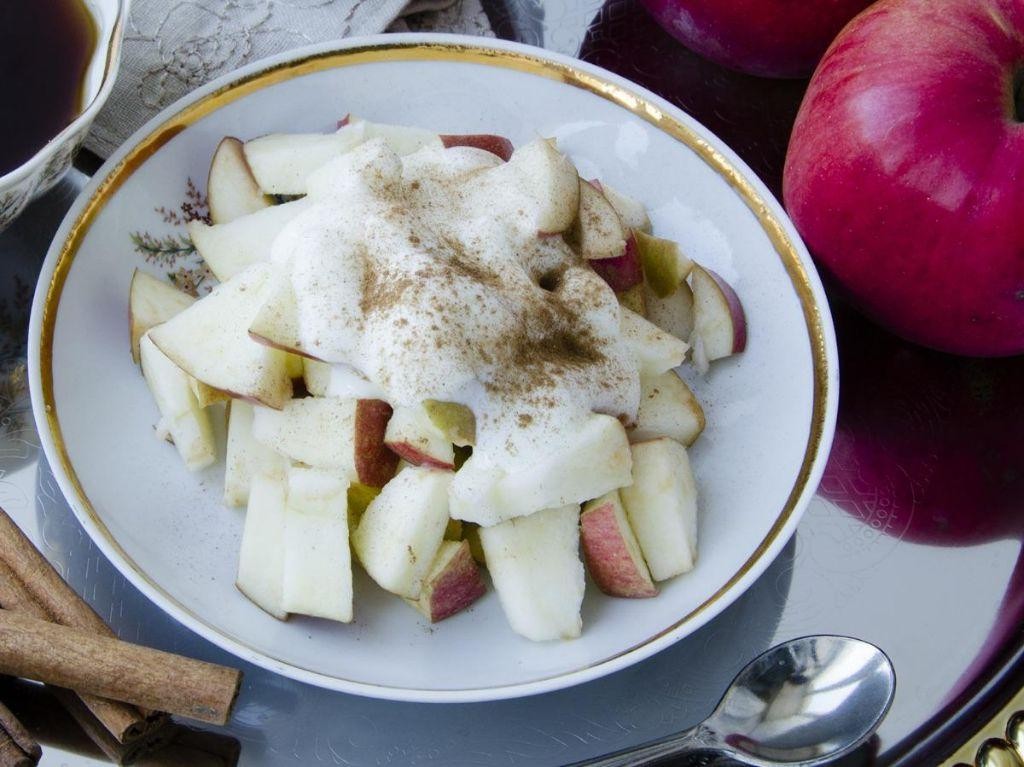
Kind of craving something cozy and sweet? You know those days when you want dessert but don’t want to fuss with complicated baking? This cinnamon and apple delight is your answer—it’s like a warm hug in a bowl.
6
servings15
minutes40
minutesIngredients
- 4 medium apples, peeled and sliced (use Granny Smith for tartness or Honeycrisp for sweetness)
- 1/4 cup granulated sugar (adjust for apple sweetness)
- 1 tsp ground cinnamon
- 1/2 cup all-purpose flour
- 1/2 cup old-fashioned oats
- 1/3 cup brown sugar, packed
- 1/4 cup cold unsalted butter, cubed
- 1/2 tsp vanilla extract
- Pinch of salt
Instructions
- Preheat your oven to 375°F (190°C) and lightly grease an 8×8 inch baking dish.
- Toss the sliced apples with granulated sugar, cinnamon, and vanilla extract in a medium bowl until evenly coated. Tip: If your apples are very juicy, add 1 tbsp of flour to prevent a soupy filling.
- Spread the apple mixture evenly in the prepared baking dish.
- In the same bowl, combine flour, oats, brown sugar, and salt.
- Add the cold cubed butter to the flour mixture.
- Use your fingers or a pastry cutter to work the butter into the dry ingredients until crumbly. Tip: Keep the butter cold for a flakier topping—don’t overmix.
- Sprinkle the oat mixture evenly over the apples.
- Bake for 35–40 minutes, or until the topping is golden brown and the apples are bubbling at the edges. Tip: Place a baking sheet underneath to catch any drips if your dish is very full.
Out of the oven, this delight offers a tender, spiced apple base with a crisp, buttery oat topping. The cinnamon warmth pairs perfectly with the soft fruit, making it ideal served warm with a scoop of vanilla ice cream or even for breakfast with yogurt.
Strawberry and Banana Crunchies

Let’s be real – sometimes you just need that perfect sweet-crunchy snack that feels indulgent but won’t ruin your healthy eating goals. These strawberry and banana crunchies are exactly that magical combination you’ve been searching for, and they come together in minutes with ingredients you probably already have on hand. You’re going to love how the sweet fruit pairs with that satisfying crispy texture.
5
servings15
minutes25
minutesIngredients
– 2 cups sliced fresh strawberries (about 1 pound, remove stems first)
– 2 ripe bananas (spotted ones work best for natural sweetness)
– 1 cup old-fashioned rolled oats (not quick-cooking for better texture)
– 2 tablespoons honey (or maple syrup for vegan option)
– 1 tablespoon coconut oil, melted (or any neutral oil like avocado)
– ½ teaspoon cinnamon (add more if you love warm spice flavor)
– Pinch of salt (balances the sweetness perfectly)
Instructions
1. Preheat your oven to 325°F and line a baking sheet with parchment paper.
2. Slice the strawberries into ¼-inch thick pieces and place them in a medium bowl.
3. Peel the bananas and mash them thoroughly with a fork until no large chunks remain.
4. Add the mashed bananas to the bowl with the sliced strawberries.
5. Pour in the rolled oats, honey, melted coconut oil, cinnamon, and pinch of salt.
6. Mix everything together until all ingredients are evenly distributed and coated.
7. Spread the mixture in a thin, even layer on your prepared baking sheet, about ¼-inch thick.
8. Bake for 25 minutes at 325°F until the edges turn golden brown and the center feels firm to touch.
9. Remove from oven and let cool completely on the baking sheet for 30 minutes – this is crucial for getting that perfect crunch.
10. Break the cooled sheet into irregular, bite-sized pieces with your hands.
Enjoy how these crunchies deliver that wonderful contrast between the chewy fruit centers and crispy oat edges. The strawberry bits become almost jam-like while the bananas caramelize beautifully with the honey. Try sprinkling these over Greek yogurt for breakfast or just keep them handy for when that afternoon snack craving hits!
Vegetable Medley Biscuits

Fancy something cozy and packed with veggies? These vegetable medley biscuits are your new go-to comfort food. You’ll love how the colorful veggies peek through the flaky layers, making them as pretty as they are delicious.
8
biscuits20
minutes18
minutesIngredients
– 2 cups all-purpose flour
– 1 tablespoon baking powder
– 1 teaspoon salt
– ½ cup cold unsalted butter, cubed
– ¾ cup buttermilk, cold
– 1 cup mixed vegetables (carrots, peas, corn), finely chopped
– ½ cup shredded cheddar cheese
– 1 large egg, for egg wash
Instructions
1. Preheat your oven to 425°F and line a baking sheet with parchment paper.
2. In a large bowl, whisk together the flour, baking powder, and salt until well combined.
3. Add the cold, cubed butter to the flour mixture.
4. Use a pastry cutter or your fingers to work the butter into the flour until the mixture resembles coarse crumbs with some pea-sized butter pieces remaining.
5. Pour in the cold buttermilk and stir gently with a fork until the dough just starts to come together.
6. Gently fold in the mixed vegetables and shredded cheddar cheese until evenly distributed throughout the dough.
7. Turn the dough out onto a lightly floured surface and knead it 2-3 times just to bring it together.
8. Pat the dough into a ¾-inch thick rectangle.
9. Use a 2½-inch round biscuit cutter to cut out biscuits, pressing straight down without twisting.
10. Place the cut biscuits onto the prepared baking sheet, spacing them about 1 inch apart.
11. Gather the dough scraps, pat them out again, and cut remaining biscuits until all dough is used.
12. Beat the egg with 1 tablespoon of water in a small bowl to create an egg wash.
13. Brush the top of each biscuit lightly with the egg wash using a pastry brush.
14. Bake for 15-18 minutes until the biscuits are golden brown on top and sound hollow when tapped on the bottom.
15. Transfer the biscuits to a wire rack to cool for 5 minutes before serving.
Ready to dig in? These biscuits come out wonderfully flaky with tender vegetable bits throughout. Serve them warm with a pat of butter, or slice them open for mini breakfast sandwiches with scrambled eggs.
Conclusion
Great news for all dog lovers! This collection of 34 peanut-free treats offers safe, delicious options your furry friend will adore. We hope you’ll whip up some of these recipes, share your favorites in the comments below, and pin this article to your Pinterest boards for easy reference. Happy baking for your happy pup!


