Buckle up, comfort food lovers! Because today we’re diving headfirst into a bowl of pure nostalgia with this ridiculously simple yet soul-satisfying ditalini pasta recipe. Believe it or not, this humble dish has the power to transport you straight back to grandma’s kitchen with just one spoonful.
Why This Recipe Works
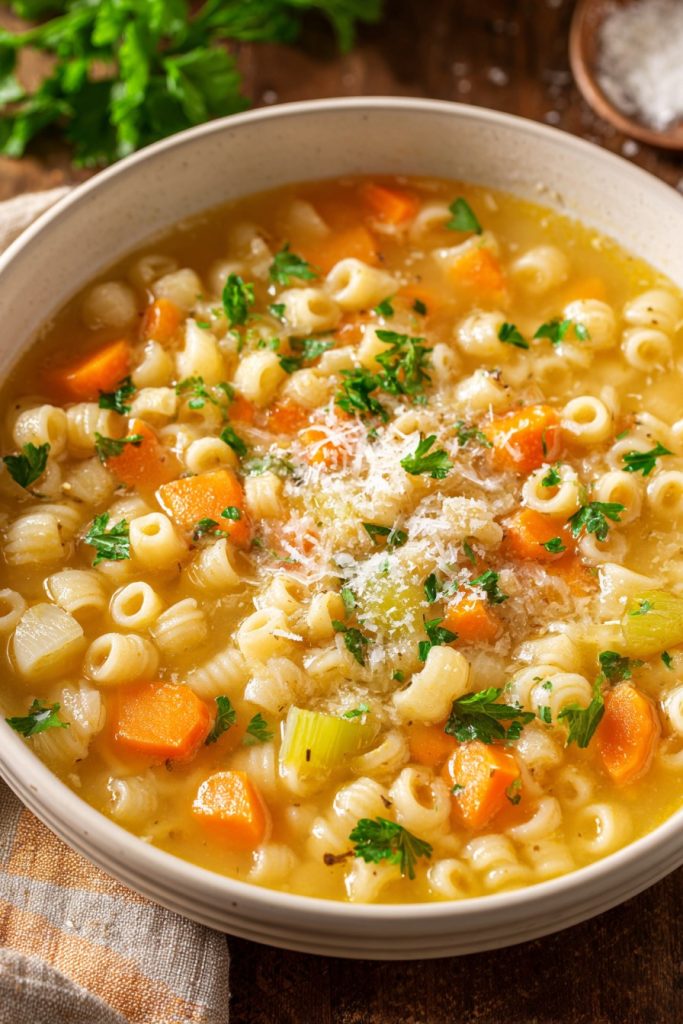
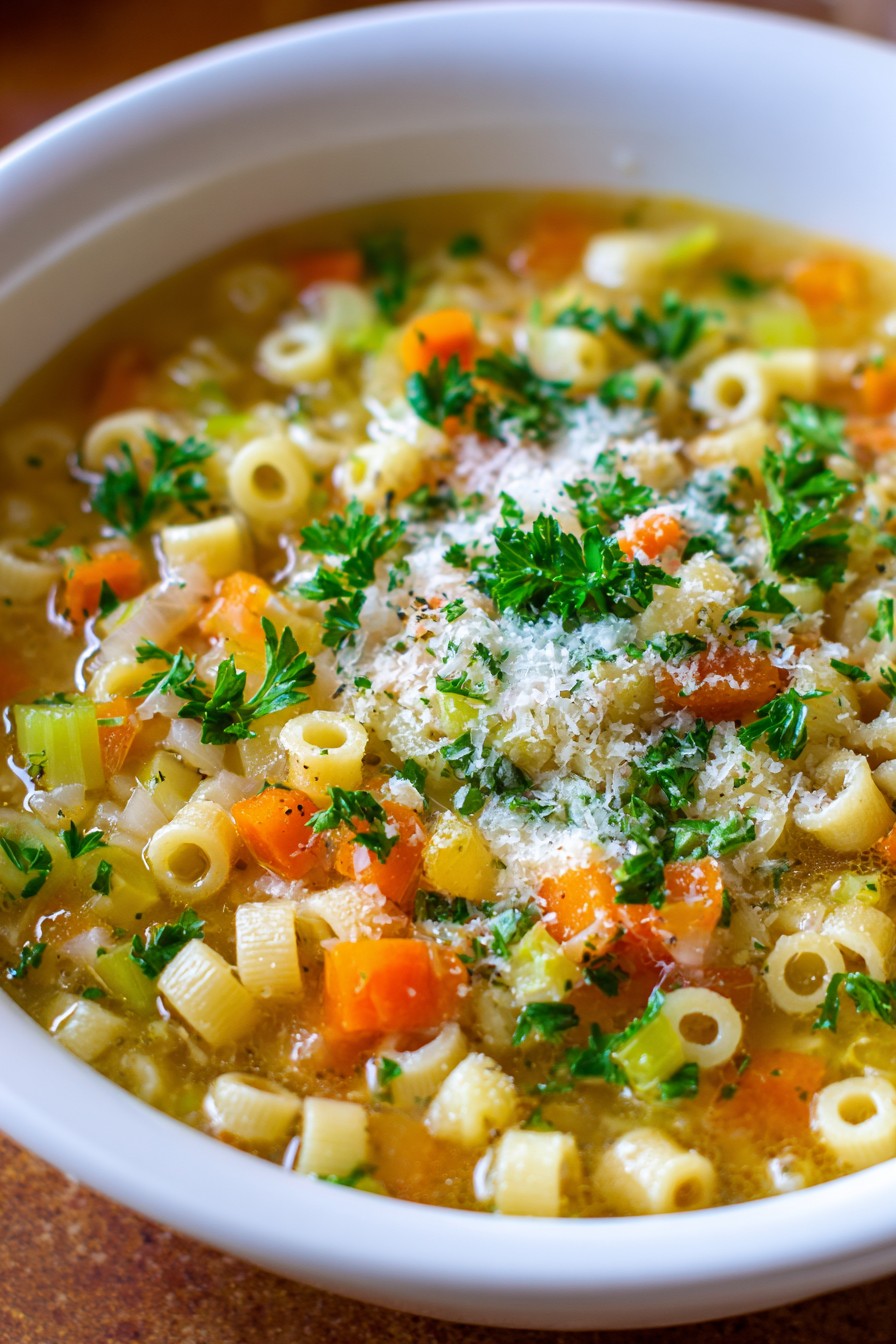
- The tiny tube-shaped ditalini pasta captures pockets of flavorful chicken broth in every bite, creating an explosion of savory goodness that larger pasta shapes simply can’t deliver.
- Using quality chicken broth as the cooking liquid means the pasta absorbs maximum flavor from the inside out, eliminating the need for complicated sauces or seasonings.
- The quick cooking time (just 8-10 minutes) makes this perfect for busy weeknights when you need comfort food fast without sacrificing taste or quality.
- This recipe serves as an excellent blank canvas for customization – add vegetables, proteins, or herbs to make it your own while maintaining that comforting base.
- The starchy pasta water naturally thickens the broth slightly, creating a velvety texture that coats each piece of pasta perfectly without any additional thickeners.
Ingredients
- 8 cups quality chicken broth (preferably low-sodium)
- 2 cups ditalini pasta (about 12 ounces)
- 3 tablespoons unsalted butter
- 4 cloves garlic, minced
- 1 medium yellow onion, finely diced
- 2 medium carrots, peeled and diced
- 2 celery stalks, diced
- 1 teaspoon black pepper, freshly ground
- 1/2 teaspoon kosher salt (adjust to taste)
- 1/4 cup fresh parsley, chopped
- 1/2 cup grated Parmesan cheese (for serving)
Equipment Needed
- Large stockpot or Dutch oven (6-8 quart capacity)
- Wooden spoon or silicone spatula
- Chef’s knife and cutting board
- Measuring cups and spoons
- Ladle for serving
- Colander (optional, for draining if desired)
Instructions
Prepare Your Aromatics and Vegetables
Begin by prepping all your vegetables – this is where the flavor foundation starts! Finely dice one medium yellow onion, making sure the pieces are uniform so they cook evenly. Peel and dice two medium carrots into small pieces about the same size as the onion dice. Chop two celery stalks similarly, and mince four cloves of garlic until they’re almost paste-like. Having everything prepped and ready before you start cooking is crucial because once things get going, you won’t have time to stop and chop. This mise en place approach not only makes cooking smoother but ensures nothing burns while you’re scrambling to prepare the next ingredient. Trust me, your future self will thank you for taking these extra few minutes of preparation!
Sauté the Flavor Base
Place your large stockpot over medium heat and add three tablespoons of unsalted butter. Allow it to melt completely and start foaming slightly before adding your diced onions, carrots, and celery. Cook these vegetables for 6-8 minutes, stirring occasionally, until the onions become translucent and the carrots begin to soften around the edges. You’ll notice the vegetables releasing their natural sugars and developing a slight sweetness. Add the minced garlic and cook for just 60 seconds more until fragrant – be careful not to burn the garlic as it will turn bitter. This step builds incredible depth of flavor that will infuse throughout the entire dish. The vegetables should be tender but still have some texture at this stage.
Bring the Broth to a Boil
Pour all eight cups of chicken broth into the pot with your sautéed vegetables. Increase the heat to high and bring the broth to a rolling boil – you’ll see large bubbles breaking vigorously across the surface. This should take about 5-7 minutes depending on your stove’s power. Once boiling, reduce the heat to maintain a steady simmer where small bubbles continuously break the surface but aren’t violent. Season with half a teaspoon of kosher salt and one teaspoon of freshly ground black pepper. Taste the broth and adjust seasoning if needed – remember the Parmesan cheese added later will contribute saltiness. The broth should be well-seasoned but not overly salty at this stage.
Cook the Ditalini Pasta
Add two cups of ditalini pasta to the simmering broth and stir immediately to prevent sticking. Cook for 8-10 minutes, stirring occasionally, until the pasta is al dente – tender but still with a slight bite. The pasta will absorb quite a bit of the broth as it cooks, so keep an eye on the liquid level. The broth should thicken slightly from the starch released by the pasta, creating a naturally creamy texture. Test the pasta at the 8-minute mark by tasting a piece – it should be cooked through but not mushy. The tiny tubes will plump up significantly during cooking, so don’t be alarmed if they look much larger than when they started!
Finish and Serve Immediately
Once the pasta is perfectly cooked, remove the pot from the heat immediately to prevent overcooking. Stir in the chopped fresh parsley, which will brighten up the entire dish with its fresh, herbal notes. Ladle the pasta and broth into warm bowls and top generously with grated Parmesan cheese – about two tablespoons per serving. The residual heat will melt the cheese beautifully into the broth. Serve immediately while hot, as the pasta will continue to absorb liquid and become softer if left standing. This dish is best enjoyed right away, though leftovers can be refreshed with a splash of additional broth when reheating.
Tips and Tricks
If you want to take your ditalini pasta game to the next level, consider using homemade chicken broth – the flavor difference is absolutely worth the effort. Simmer chicken bones with onions, carrots, celery, and herbs for several hours until rich and gelatinous. For an even deeper flavor profile, try roasting the chicken bones before making the broth – this creates incredible Maillard reaction flavors that store-bought broth simply can’t match. When selecting store-bought broth, opt for low-sodium versions so you can control the salt level yourself, and look for brands that list chicken as the first ingredient rather than water.
For texture variation, consider adding a protein element – shredded rotisserie chicken added during the last two minutes of cooking heats through perfectly without overcooking. If you prefer a vegetarian version, use vegetable broth and add white beans or chickpeas for protein. Fresh herbs make a tremendous difference – while parsley is classic, try adding a tablespoon of fresh thyme or rosemary when sautéing the vegetables for a different flavor dimension. For extra richness, stir in a tablespoon of olive oil or additional butter at the end before serving.
The cooking liquid ratio is crucial – if you find your broth reducing too much during cooking, have an extra cup of warm broth ready to add. Conversely, if you prefer a thicker, stew-like consistency, let it simmer uncovered for a few extra minutes after the pasta is cooked. Always taste and adjust seasoning after the pasta is cooked but before serving, as the pasta will absorb quite a bit of the salt. Leftovers will thicken significantly in the refrigerator – when reheating, add additional broth or water to return it to the desired consistency.
Recipe Variations
- Italian Wedding Style: Add tiny meatballs made from ground chicken or turkey mixed with breadcrumbs, Parmesan, and herbs. Brown the meatballs first before adding to the broth, then proceed with the recipe. The meatballs will cook through in the simmering broth and add wonderful protein and flavor.
- Lemon Herb Delight: Brighten things up with the zest of one lemon added at the end of cooking, along with fresh dill and chives instead of parsley. A squeeze of fresh lemon juice just before serving adds incredible freshness that cuts through the richness beautifully.
- Creamy Tomato Twist: Stir in 1/2 cup of tomato paste when sautéing the vegetables, then add a cup of heavy cream during the last two minutes of cooking. This creates a rosé-style sauce that’s both comforting and elegant.
- Spicy Arrabbiata Version: Add 1-2 teaspoons of red pepper flakes when sautéing the garlic, and finish with fresh basil instead of parsley. The heat from the pepper flakes infuses the broth with a gentle warmth that builds with each spoonful.
- Spring Vegetable Medley: Add fresh peas, asparagus tips, and spinach during the last three minutes of cooking. The bright green vegetables add color, nutrition, and fresh flavor that make this feel like a whole new dish.
Frequently Asked Questions
Can I use a different type of pasta?
Absolutely! While ditalini is traditional for its perfect broth-catching shape, you can substitute with other small pasta shapes like orzo, acini di pepe, or even small shells. The cooking time may vary slightly depending on the pasta shape and thickness, so check the package instructions and taste frequently as it cooks. Larger pasta shapes aren’t recommended as they won’t capture the broth in the same way and may require more liquid to cook properly.
How should I store and reheat leftovers?
Store leftovers in an airtight container in the refrigerator for up to 3 days. The pasta will continue to absorb liquid, so when reheating, add additional chicken broth or water to achieve your desired consistency. Reheat gently on the stove over medium-low heat, stirring frequently to prevent sticking. Avoid microwaving if possible, as it can make the pasta mushy and heat unevenly. If you know you’ll have leftovers, consider slightly undercooking the pasta initially so it holds up better upon reheating.
Can I make this recipe gluten-free?
Yes, easily! Simply substitute the regular ditalini pasta with a gluten-free small pasta shape – many brands now offer excellent gluten-free options that work beautifully in broth-based dishes. Be sure to use gluten-free chicken broth as well (some brands may contain hidden gluten). The cooking time may need adjustment as gluten-free pasta often cooks faster and can become mushy if overcooked, so check it a few minutes earlier than the package suggests.
Is this suitable for freezing?
While you can freeze this dish, the texture of the pasta may become somewhat soft upon thawing and reheating. If you plan to freeze, slightly undercook the pasta by 1-2 minutes before freezing. Store in freezer-safe containers for up to 2 months. When ready to eat, thaw overnight in the refrigerator and reheat gently on the stove, adding fresh broth to refresh the consistency. For best results, I recommend enjoying this fresh rather than frozen.
Can I make this in a slow cooker or Instant Pot?
Certainly! For slow cooker: Sauté vegetables first on the stove for best flavor, then transfer everything except the pasta to the slow cooker. Cook on low for 6-8 hours, then add pasta during the last 20-30 minutes of cooking. For Instant Pot: Use sauté function for vegetables, then add broth and pasta. Pressure cook on high for 4 minutes with quick release. The pasta will be very soft with pressure cooking, so reduce time if you prefer al dente texture.
Summary
This comforting ditalini pasta in chicken broth combines simple ingredients into magical comfort food. Perfect for chilly days or when you need a quick, satisfying meal that feels like a warm hug in a bowl.
Ditalini Pasta in Chicken Broth
5
servings15
minutes25
minutesIngredients
Instructions
- 1 Sauté diced onion, carrots, and celery in butter until softened
- 2 Add garlic and cook until fragrant
- 3 Pour in chicken broth and bring to a boil
- 4 Add ditalini pasta and simmer for 8-10 minutes
- 5 Stir in parsley and serve with Parmesan cheese


