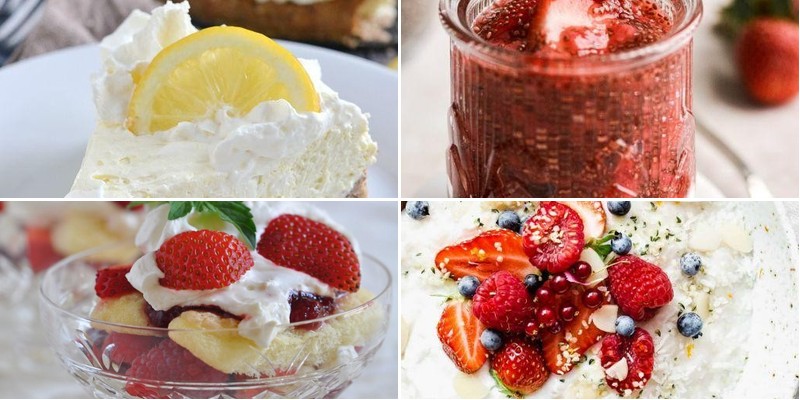
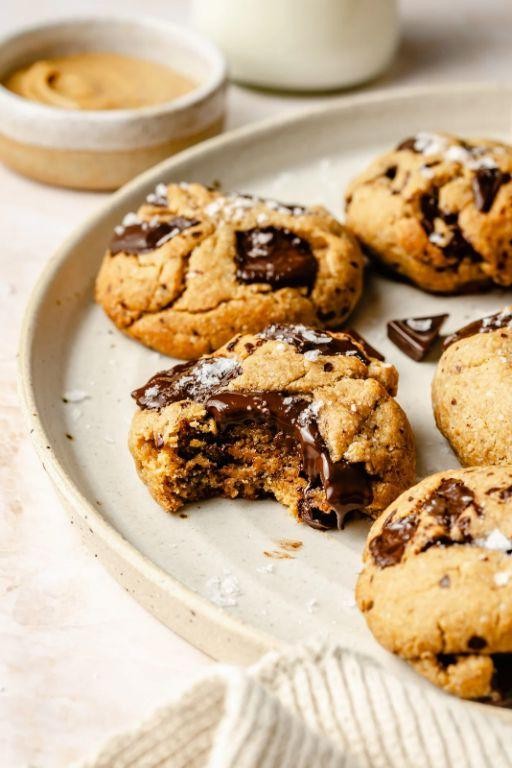
Who says managing diabetes means giving up delicious desserts? We’ve gathered 21 scrumptious, diabetes-friendly recipes that let you indulge without worry. From rich chocolate treats to fruity delights, these desserts are specially crafted to satisfy your sweet tooth while keeping blood sugar in check. Get ready to rediscover the joy of dessert—your taste buds will thank you!
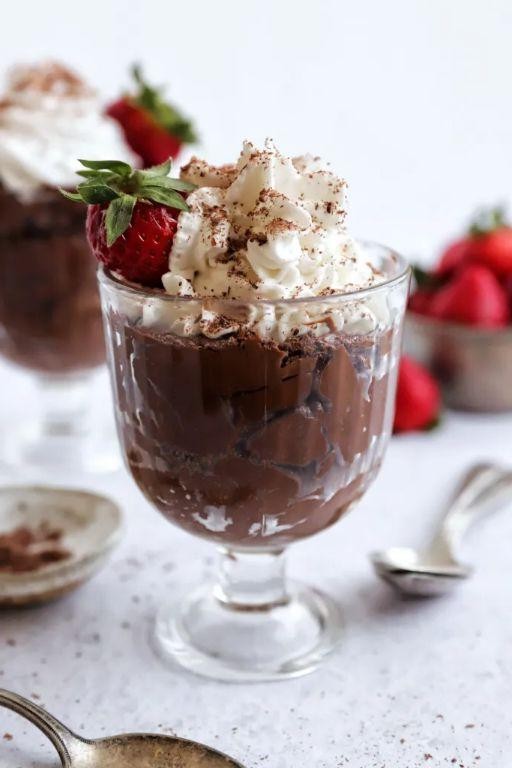
Sugar-Free Chocolate Avocado Mousse
Last week, I was desperately craving something chocolatey but wanted to avoid the sugar crash that usually follows my dessert indulgences. After some kitchen experimentation, I stumbled upon this magical combination that satisfies my sweet tooth without any guilt. Let me share my new favorite healthy dessert that even my skeptical husband now requests weekly.
3
servings15
minutesIngredients
For the mousse base:
– 2 ripe avocados, peeled and pitted
– 1/2 cup unsweetened cocoa powder
– 1/4 cup maple syrup
– 1 tsp vanilla extract
– Pinch of salt
For finishing:
– 1/4 cup heavy cream
– 2 tbsp chopped dark chocolate (85% cacao)
Instructions
1. Scoop the avocado flesh into a food processor or high-speed blender.
2. Add the cocoa powder, maple syrup, vanilla extract, and salt to the food processor.
3. Blend the mixture on high speed for 2 minutes until completely smooth, scraping down the sides halfway through.
4. Transfer the mousse to individual serving bowls using a spatula.
5. Chill the mousse in the refrigerator for at least 30 minutes to allow it to set properly.
6. While the mousse chills, whip the heavy cream in a medium bowl using an electric mixer for 3-4 minutes until stiff peaks form.
7. Melt the chopped dark chocolate in a microwave-safe bowl using 30-second intervals, stirring between each interval.
8. Remove the chilled mousse from the refrigerator and top each serving with a dollop of whipped cream.
9. Drizzle the melted chocolate over the whipped cream using a spoon.
10. Serve immediately or return to the refrigerator for up to 2 hours before serving.
Decadently rich and surprisingly creamy, this mousse has the perfect velvety texture that melts on your tongue. The deep chocolate flavor pairs beautifully with fresh berries or crushed nuts for added crunch. I love serving it in elegant martini glasses for dinner parties—it always impresses guests who can’t believe it’s sugar-free and avocado-based!
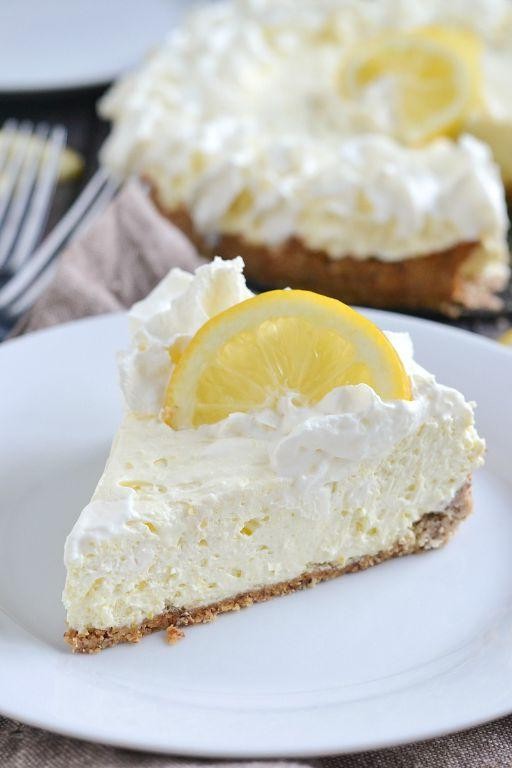
Low-Carb Lemon Cheesecake
Last week, I was craving something sweet but didn’t want to derail my healthy eating streak, so I started experimenting with this low-carb lemon cheesecake. Honestly, I’ve never been great at resisting dessert temptations, but this recipe has become my go-to when I need that creamy, tangy fix without the guilt.
8
servings20
minutes50
minutesIngredients
For the crust:
– 1 ½ cups almond flour
– ¼ cup melted butter
– 2 tablespoons granulated erythritol
For the filling:
– 16 oz cream cheese, softened to room temperature
– ½ cup granulated erythritol
– 2 large eggs
– ¼ cup fresh lemon juice
– 1 tablespoon lemon zest
– 1 teaspoon vanilla extract
Instructions
1. Preheat your oven to 325°F.
2. Combine 1 ½ cups almond flour, ¼ cup melted butter, and 2 tablespoons granulated erythritol in a medium bowl.
3. Press the crust mixture firmly into the bottom of a 9-inch springform pan.
4. Bake the crust for 10 minutes at 325°F until lightly golden.
5. Remove the crust from the oven and let it cool completely.
6. In a large mixing bowl, beat 16 oz softened cream cheese with an electric mixer on medium speed for 2 minutes until smooth.
7. Add ½ cup granulated erythritol to the cream cheese and beat for 1 minute until fully incorporated.
8. Tip: Make sure your cream cheese is truly at room temperature to avoid lumps in your filling.
9. Beat in 2 large eggs one at a time, mixing for 30 seconds after each addition.
10. Add ¼ cup fresh lemon juice, 1 tablespoon lemon zest, and 1 teaspoon vanilla extract to the mixture.
11. Mix on low speed for 1 minute until all ingredients are fully combined.
12. Tip: Use fresh lemon juice rather than bottled for the brightest, most authentic lemon flavor.
13. Pour the filling over the cooled crust and smooth the top with a spatula.
14. Tip: Tap the pan gently on the counter to release any air bubbles before baking.
15. Bake at 325°F for 35-40 minutes until the edges are set but the center still jiggles slightly.
16. Turn off the oven and crack the door open, letting the cheesecake cool slowly inside for 1 hour.
17. Remove the cheesecake from the oven and refrigerate for at least 4 hours before serving.
Zesty and refreshing, this cheesecake has the perfect balance of creamy richness and bright citrus notes that will make you forget it’s low-carb. The texture is remarkably smooth and dense, just like traditional cheesecake, without any grainy aftertaste. I love serving it with a few fresh raspberries or a dollop of whipped cream for an extra special treat that feels indulgent yet stays within my dietary goals.
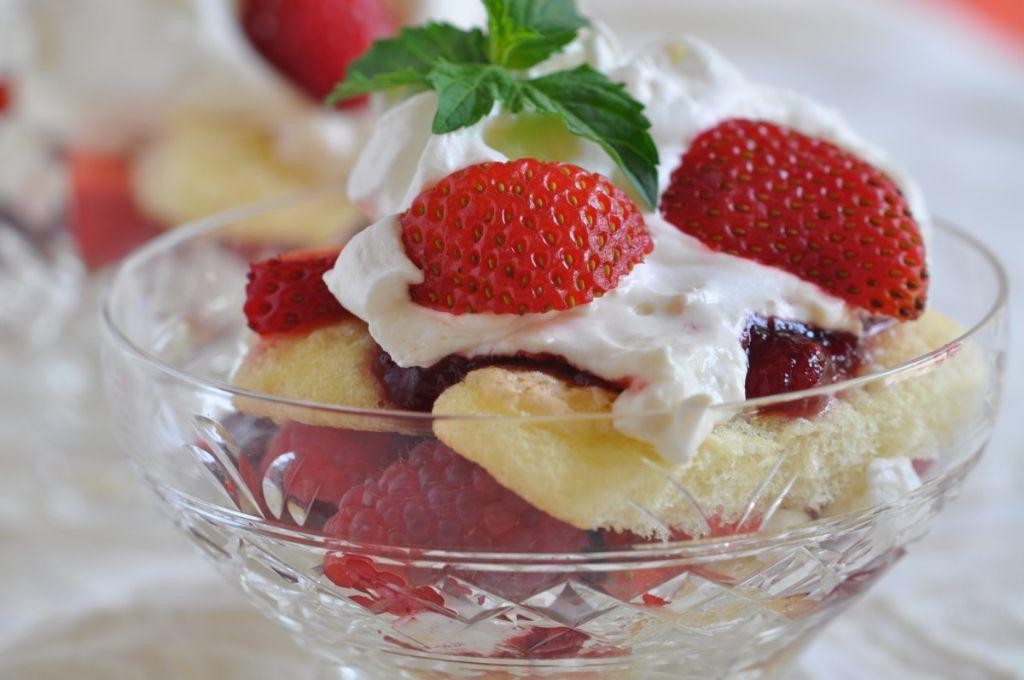
Diabetic-Friendly Berry Parfait
Unbelievably, I discovered this diabetic-friendly berry parfait when my aunt was diagnosed last year and I wanted to create something sweet she could actually enjoy without worrying about her blood sugar. It’s become my go-to breakfast when I need something quick but satisfying, and honestly, sometimes I make it for dessert too when that sweet tooth hits. The combination of tangy berries and creamy layers just hits different than your typical sugar-loaded desserts.
4
servings20
minutesIngredients
For the berry layer:
– 2 cups mixed fresh berries (strawberries, blueberries, raspberries)
– 1 tablespoon fresh lemon juice
– 1 teaspoon granulated stevia
For the creamy layer:
– 2 cups plain Greek yogurt
– 1 teaspoon vanilla extract
– 2 tablespoons sugar-free vanilla pudding mix
For assembly:
– 1/2 cup low-sugar granola
– Fresh mint leaves for garnish
Instructions
1. Wash all berries thoroughly under cold running water and pat them completely dry with paper towels.
2. Hull the strawberries and slice them into 1/4-inch thick pieces using a sharp knife.
3. Combine all berries in a medium mixing bowl with the lemon juice and stevia.
4. Gently toss the berries until they’re evenly coated with the lemon juice mixture.
5. Let the berry mixture sit at room temperature for 10 minutes to allow the natural juices to release.
6. In a separate bowl, whisk together the Greek yogurt, vanilla extract, and sugar-free pudding mix until smooth and creamy.
7. Refrigerate the yogurt mixture for 5 minutes to help it thicken slightly.
8. Spoon 2 tablespoons of the yogurt mixture into the bottom of each serving glass.
9. Add a layer of the prepared berry mixture, using about 1/4 cup per glass.
10. Sprinkle 1 tablespoon of low-sugar granola evenly over the berry layer in each glass.
11. Repeat the layers once more, ending with a final dollop of the yogurt mixture on top.
12. Garnish each parfait with a few fresh mint leaves placed decoratively on the yogurt.
Just made this for my morning routine and the contrast between the creamy yogurt and the slightly tart berries creates such a satisfying texture. I love how the granola adds that perfect crunch without making it too sweet, and sometimes I’ll swap in different seasonal fruits depending on what looks good at the market.
Guilt-Free Peanut Butter Cookies
Trying to satisfy my peanut butter cookie craving without derailing my healthy eating goals led me to create these guilt-free wonders. They’re so simple to whip up that I often make a batch while my morning coffee brews, filling the kitchen with that warm, nutty aroma I love. Let me show you how easy it is to enjoy this classic treat without any of the usual guilt.
24
cookies10
minutes12
minutesIngredients
For the cookie dough:
- 1 cup natural creamy peanut butter
- 1/2 cup maple syrup
- 1 large egg
- 1 teaspoon vanilla extract
- 1/2 teaspoon baking soda
- 1/4 teaspoon salt
Instructions
- Preheat your oven to 350°F and line a baking sheet with parchment paper.
- Combine 1 cup natural creamy peanut butter, 1/2 cup maple syrup, 1 large egg, and 1 teaspoon vanilla extract in a medium mixing bowl.
- Mix with a wooden spoon until the ingredients are fully incorporated and the texture becomes smooth.
- Add 1/2 teaspoon baking soda and 1/4 teaspoon salt to the mixture.
- Stir until the dry ingredients are evenly distributed throughout the dough.
- Scoop tablespoon-sized portions of dough and roll them into balls between your palms.
- Place the dough balls 2 inches apart on your prepared baking sheet.
- Press each ball down with a fork, creating a crisscross pattern on top.
- Bake for 10-12 minutes at 350°F until the edges turn golden brown.
- Remove the baking sheet from the oven and let the cookies cool completely on the sheet.
Light and crumbly with that perfect peanut butter richness, these cookies satisfy every craving. I love how the maple syrup adds a subtle caramel note that pairs beautifully with the salty peanut butter. Sometimes I’ll crumble them over Greek yogurt for breakfast or sandwich them with banana slices for an extra special treat.
Almond Flour Brownies
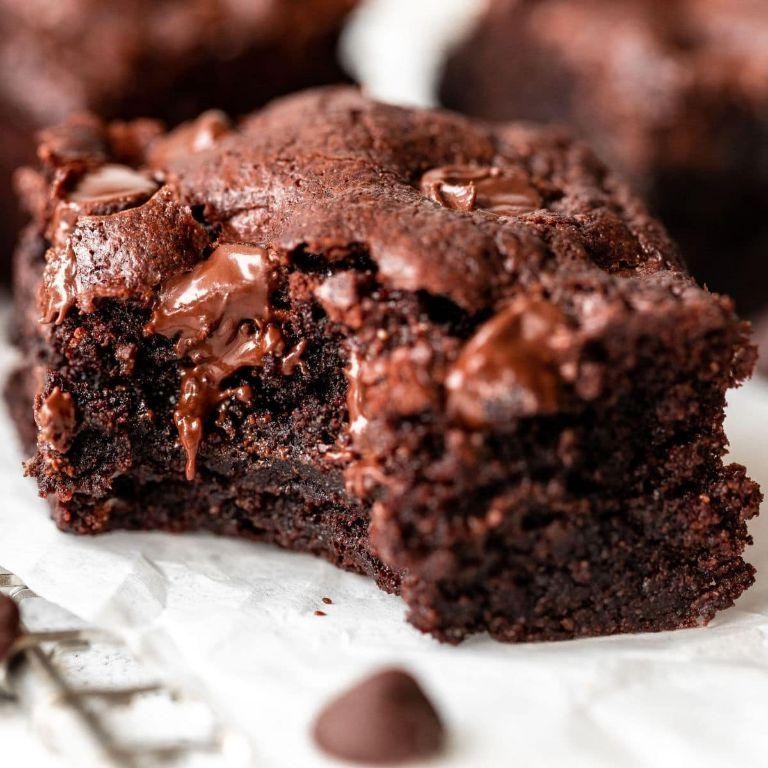
Perfectly fudgy and gluten-free, these almond flour brownies have become my go-to dessert when I want something rich without the guilt. I first discovered this recipe during my sister’s gluten-free phase, and now I make them weekly—they’re that good!
16
portions15
minutes25
minutesIngredients
For the Brownie Batter
- 1 cup almond flour
- 1/2 cup unsweetened cocoa powder
- 1/2 teaspoon baking powder
- 1/4 teaspoon salt
- 2 large eggs
- 1/2 cup melted coconut oil
- 1/2 cup maple syrup
- 1 teaspoon vanilla extract
For the Chocolate Chips
- 1/2 cup dark chocolate chips
Instructions
- Preheat your oven to 350°F and line an 8×8-inch baking pan with parchment paper.
- Whisk together 1 cup almond flour, 1/2 cup cocoa powder, 1/2 teaspoon baking powder, and 1/4 teaspoon salt in a medium bowl until no lumps remain.
- In a separate bowl, beat 2 large eggs with a fork until uniformly yellow.
- Pour 1/2 cup melted coconut oil, 1/2 cup maple syrup, and 1 teaspoon vanilla extract into the eggs and mix until fully combined.
- Tip: If your coconut oil re-solidifies, gently warm the mixture for 10 seconds in the microwave.
- Add the dry ingredients to the wet ingredients and stir with a spatula until just combined—do not overmix.
- Fold in 1/2 cup dark chocolate chips, reserving a few for topping.
- Tip: For extra fudginess, use mini chocolate chips so they distribute evenly.
- Spread the batter evenly into the prepared pan and smooth the top with your spatula.
- Sprinkle the reserved chocolate chips over the surface.
- Bake for 20–25 minutes, until the edges are set but the center still looks slightly underdone.
- Tip: Insert a toothpick—it should come out with moist crumbs, not clean.
- Let the brownies cool completely in the pan on a wire rack for at least 1 hour before slicing.
Decadently dense and moist, these brownies have a deep chocolate flavor with a subtle nuttiness from the almond flour. I love serving them warm with a scoop of vanilla ice cream, or cutting them into small squares for a party—they disappear fast!
Stevia-Sweetened Apple Crisp
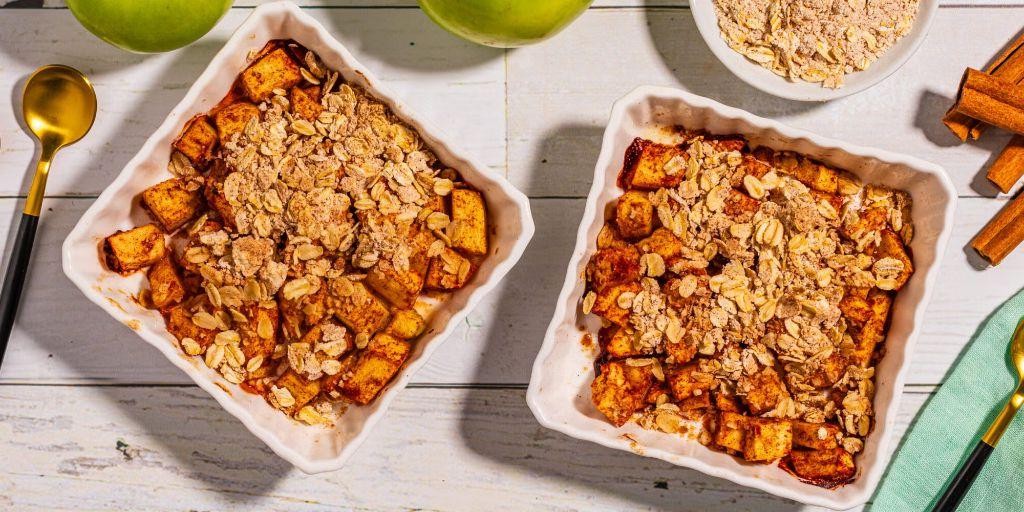
My grandmother always said the best recipes come from necessity, and this Stevia-Sweetened Apple Crisp was born when I realized I’d run out of brown sugar mid-recipe. It’s become my go-to fall dessert that satisfies my sweet tooth without the sugar crash, and honestly, I sometimes prefer it to the traditional version.
6
servings20
minutes40
minutesIngredients
For the Apple Filling:
– 6 medium apples, peeled and sliced (about 6 cups)
– 1/4 cup stevia baking blend
– 1 tablespoon lemon juice
– 1 teaspoon ground cinnamon
– 1/4 teaspoon ground nutmeg
– 2 tablespoons all-purpose flour
For the Crisp Topping:
– 1 cup old-fashioned oats
– 1/2 cup all-purpose flour
– 1/3 cup stevia baking blend
– 1/2 cup cold unsalted butter, cubed
– 1/2 teaspoon ground cinnamon
– 1/4 teaspoon salt
Instructions
1. Preheat your oven to 375°F and grease an 8×8 inch baking dish.
2. Peel all 6 apples using a vegetable peeler, then slice them into 1/4-inch thick pieces.
3. In a large mixing bowl, combine the sliced apples, 1/4 cup stevia baking blend, 1 tablespoon lemon juice, 1 teaspoon cinnamon, 1/4 teaspoon nutmeg, and 2 tablespoons flour.
4. Toss the apple mixture until every slice is evenly coated with the seasoning mixture.
5. Transfer the coated apple mixture into the prepared baking dish, spreading it into an even layer.
6. In a separate medium bowl, combine 1 cup oats, 1/2 cup flour, 1/3 cup stevia baking blend, 1/2 teaspoon cinnamon, and 1/4 teaspoon salt.
7. Add the 1/2 cup cubed cold butter to the oat mixture.
8. Use your fingertips to work the butter into the dry ingredients until the mixture resembles coarse crumbs with some pea-sized butter pieces remaining.
9. Sprinkle the crisp topping evenly over the apple filling in the baking dish.
10. Place the baking dish in the preheated oven and bake for 35-40 minutes.
11. Check the crisp at 35 minutes – the topping should be golden brown and the filling should be bubbling around the edges.
12. Remove the crisp from the oven when the topping is deeply golden and the apples are tender when pierced with a fork.
13. Let the crisp rest on a wire rack for at least 15 minutes before serving.
Let this crisp cool completely if you want clean slices, but I honestly love it warm when the cinnamon-spiced apples practically melt in your mouth. The stevia gives it just enough sweetness without overwhelming the natural apple flavor, and that oat topping provides the perfect crunchy contrast to the soft fruit beneath. Try serving it with a dollop of Greek yogurt for breakfast – it feels indulgent but won’t leave you in a sugar coma by mid-morning.
Diabetes-Friendly Chia Seed Pudding
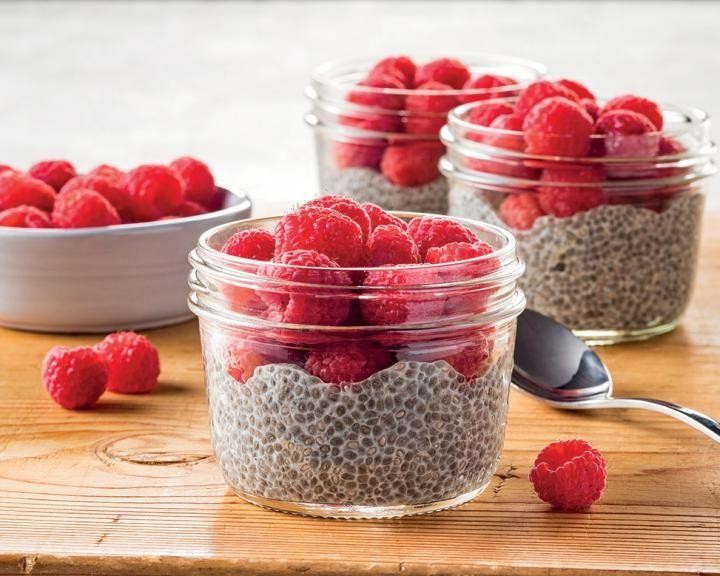
Just last week, I found myself staring at my breakfast options, feeling completely uninspired by my usual rotation. That’s when I remembered this simple chia seed pudding recipe that’s become my go-to for busy mornings—it’s not only delicious but also diabetes-friendly, which gives me peace of mind knowing I’m starting my day right.
2
servings10
minutesIngredients
For the pudding base:
– 1/2 cup chia seeds
– 2 cups unsweetened almond milk
– 1 tbsp pure maple syrup
– 1 tsp vanilla extract
– 1/4 tsp cinnamon
For serving (optional):
– 1/4 cup fresh berries
– 2 tbsp chopped walnuts
Instructions
1. Combine 1/2 cup chia seeds and 2 cups unsweetened almond milk in a medium-sized mixing bowl.
2. Add 1 tbsp pure maple syrup, 1 tsp vanilla extract, and 1/4 tsp cinnamon to the bowl.
3. Whisk all ingredients together vigorously for 30 seconds to prevent clumping.
4. Let the mixture rest for 5 minutes, then whisk again to break up any seed clusters that formed.
5. Cover the bowl tightly with plastic wrap, pressing it directly onto the surface of the mixture.
6. Refrigerate the pudding for at least 4 hours or overnight until it reaches a thick, spoonable consistency.
7. Remove the pudding from refrigerator and give it one final stir to ensure even texture.
8. Divide the pudding evenly between two serving bowls.
9. Top each serving with 2 tbsp fresh berries and 1 tbsp chopped walnuts if desired.
I love how the pudding transforms into this creamy, tapioca-like texture that’s surprisingly satisfying. The subtle sweetness from the maple syrup pairs beautifully with the nutty chia seeds, and when topped with fresh berries, it feels like a decadent treat rather than a healthy breakfast. Sometimes I’ll layer it with Greek yogurt for extra protein or pack it in mason jars for an easy grab-and-go option.
Zucchini Brownies with Dark Chocolate
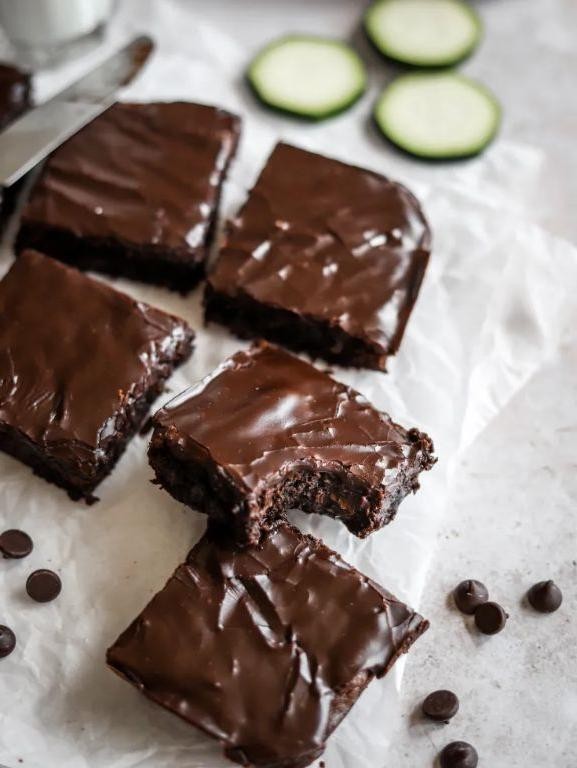
Never underestimate the power of zucchini to transform ordinary brownies into something truly magical. I first discovered this trick when my garden overflowed with summer squash, and now I sneak it into everything from muffins to these incredibly fudgy brownies. Trust me, even the pickiest eaters won’t suspect there’s a vegetable hidden in these rich, chocolatey squares.
16
squares20
minutes30
minutesIngredients
- For the brownie batter:
- 1 ½ cups all-purpose flour
- ¾ cup unsweetened cocoa powder
- 1 tsp baking soda
- ½ tsp salt
- 1 cup granulated sugar
- ½ cup vegetable oil
- 2 large eggs
- 2 tsp vanilla extract
- 2 cups shredded zucchini (unpeeled)
- For the chocolate topping:
- 1 cup dark chocolate chips
Instructions
- Preheat your oven to 350°F and line an 8×8 inch baking pan with parchment paper.
- In a medium bowl, whisk together 1 ½ cups all-purpose flour, ¾ cup cocoa powder, 1 tsp baking soda, and ½ tsp salt until well combined.
- In a separate large bowl, mix 1 cup granulated sugar, ½ cup vegetable oil, 2 eggs, and 2 tsp vanilla extract until smooth.
- Gradually add the dry ingredients to the wet ingredients, stirring just until combined.
- Fold in 2 cups shredded zucchini until evenly distributed throughout the batter.
- Spread the batter evenly into your prepared pan using a spatula.
- Sprinkle 1 cup dark chocolate chips evenly over the top of the batter.
- Bake for 25-30 minutes until the edges pull away from the pan and a toothpick inserted in the center comes out with moist crumbs.
- Allow the brownies to cool completely in the pan on a wire rack before cutting into squares.
Amazingly moist and fudgy, these brownies have a deep chocolate flavor that perfectly balances the subtle sweetness. The dark chocolate chips create delightful pockets of melted goodness throughout each bite. For an extra special treat, try serving them slightly warm with a scoop of vanilla ice cream – the contrast between the cool creaminess and rich brownie is absolutely divine.
No-Sugar-Added Raspberry Sorbet
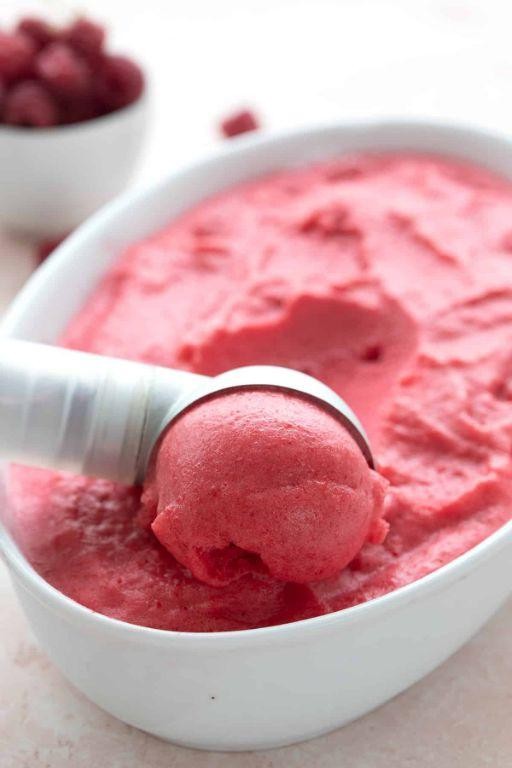
Gosh, I never thought I’d be making sorbet in October, but when my neighbor dropped off a huge basket of late-season raspberries, I knew exactly what to do with them. This no-sugar-added version is my new favorite way to enjoy that bright berry flavor without any guilt, and it’s surprisingly simple to whip up.
6
servings15
minutesIngredients
For the raspberry base:
– 4 cups fresh raspberries
– 1/2 cup honey
– 1/4 cup fresh lemon juice
For processing:
– 1/4 cup cold water
Instructions
1. Rinse 4 cups of fresh raspberries under cold running water and pat them completely dry with paper towels.
2. Combine the dried raspberries, 1/2 cup honey, and 1/4 cup fresh lemon juice in a blender.
3. Blend the mixture on high speed for exactly 60 seconds until completely smooth and no berry chunks remain.
4. Pour the blended mixture through a fine-mesh strainer into a medium bowl, using a rubber spatula to press all the liquid through while leaving the seeds behind.
5. Stir 1/4 cup cold water into the strained raspberry mixture until fully incorporated.
6. Pour the final mixture into a 9×5 inch loaf pan and spread it evenly with a spatula.
7. Cover the pan tightly with plastic wrap, pressing it directly against the surface of the sorbet mixture to prevent ice crystals from forming.
8. Freeze the covered pan for at least 6 hours or until the sorbet is completely firm to the touch.
9. Remove the pan from the freezer and let it sit at room temperature for 8-10 minutes to soften slightly before scooping.
10. Scoop the softened sorbet into serving bowls using an ice cream scoop dipped in warm water between servings.
Finally, this sorbet has the most incredible velvet-smooth texture that just melts on your tongue. The natural sweetness from the honey perfectly balances the raspberries’ slight tartness, creating this refreshingly clean flavor profile. I love serving it in chilled martini glasses with a few fresh raspberries on top for an elegant dessert that feels fancy but takes almost no effort.
Healthy Carrot Cake Muffins
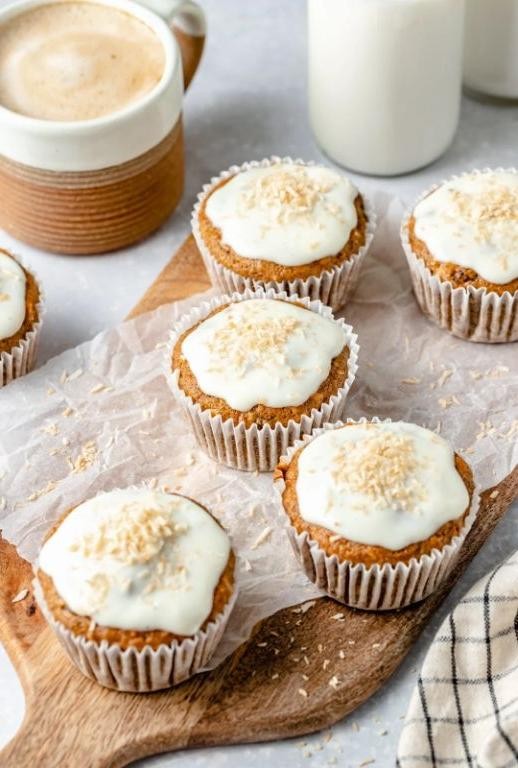
Gosh, I never thought I’d be the person craving carrot cake for breakfast, but these muffins changed everything! After my third attempt to make a healthier version that actually tasted good, I finally nailed this recipe that’s become my go-to morning treat. There’s something so comforting about the warm spices filling my kitchen while these bake.
12
muffins15
minutes22
minutesIngredients
For the wet ingredients:
– 1 cup grated carrots
– 2 large eggs
– 1/2 cup maple syrup
– 1/4 cup melted coconut oil
– 1 tsp vanilla extract
For the dry ingredients:
– 1 1/2 cups whole wheat flour
– 1 tsp baking soda
– 1 tsp cinnamon
– 1/2 tsp nutmeg
– 1/4 tsp salt
For mixing in:
– 1/2 cup chopped walnuts
Instructions
1. Preheat your oven to 350°F and line a muffin tin with paper liners.
2. Grate 1 cup of carrots using the medium holes on your box grater.
3. In a large bowl, whisk 2 large eggs until frothy.
4. Add 1/2 cup maple syrup, 1/4 cup melted coconut oil, and 1 tsp vanilla extract to the eggs, whisking until fully combined.
5. In a separate bowl, combine 1 1/2 cups whole wheat flour, 1 tsp baking soda, 1 tsp cinnamon, 1/2 tsp nutmeg, and 1/4 tsp salt.
6. Tip: Whisk dry ingredients thoroughly to evenly distribute the baking soda and spices.
7. Gradually add the dry ingredients to the wet ingredients, stirring until just combined.
8. Fold in 1 cup grated carrots and 1/2 cup chopped walnuts.
9. Tip: Don’t overmix the batter – a few lumps are fine and will keep the muffins tender.
10. Divide the batter evenly among 12 muffin cups, filling each about 3/4 full.
11. Bake at 350°F for 18-22 minutes until a toothpick inserted in the center comes out clean.
12. Tip: Rotate the muffin tin halfway through baking for even browning.
13. Let the muffins cool in the pan for 5 minutes before transferring to a wire rack.
My favorite thing about these muffins is how perfectly moist they stay thanks to the grated carrots, with just the right amount of crunch from the walnuts. They’re fantastic warm with a pat of butter, or I love crumbling one over Greek yogurt for an extra protein boost in the morning.
Keto-Friendly Pecan Pie Bars
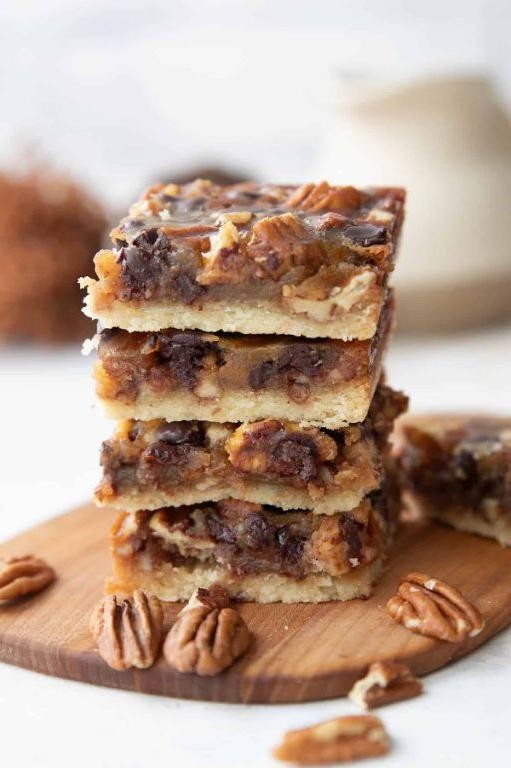
Last Thanksgiving, I watched my keto sister-in-law sadly pass on dessert, and I knew I had to create a low-carb version of our family’s beloved pecan pie. These keto-friendly pecan pie bars capture all that nostalgic flavor without the sugar crash, and they’ve become a staple in my holiday baking lineup ever since. Let’s make them!
16
squares20
minutes42
minutesIngredients
For the crust:
– 1 ½ cups almond flour
– ¼ cup melted butter
– 2 tbsp granulated erythritol
– 1 tsp vanilla extract
– ¼ tsp salt
For the filling:
– 2 cups chopped pecans
– ½ cup granulated erythritol
– ½ cup butter
– ⅓ cup heavy cream
– 2 large eggs
– 1 tsp vanilla extract
– ¼ tsp salt
Instructions
1. Preheat your oven to 350°F and line an 8×8 inch baking pan with parchment paper.
2. In a medium bowl, combine 1 ½ cups almond flour, ¼ cup melted butter, 2 tbsp erythritol, 1 tsp vanilla extract, and ¼ tsp salt until a crumbly dough forms.
3. Press the dough firmly and evenly into the bottom of the prepared pan using your fingers or the bottom of a measuring cup.
4. Bake the crust for 12 minutes at 350°F until lightly golden around the edges.
5. While the crust bakes, melt ½ cup butter in a saucepan over medium heat.
6. Whisk in ½ cup erythritol, ⅓ cup heavy cream, 2 eggs, 1 tsp vanilla extract, and ¼ tsp salt until smooth and slightly thickened.
7. Stir in 2 cups chopped pecans until fully coated in the filling mixture.
8. Pour the pecan filling over the pre-baked crust and spread it evenly with a spatula.
9. Return the pan to the oven and bake for 25-30 minutes at 350°F until the filling is set and doesn’t jiggle when shaken.
10. Cool the bars completely in the pan on a wire rack for at least 2 hours before slicing.
11. For clean cuts, chill the bars in the refrigerator for 1 hour after cooling, then use a sharp knife to slice into 16 squares.
Finally, these bars have that perfect chewy-gooey texture that makes pecan pie so irresistible, with a buttery shortbread-like crust that holds up beautifully. For an extra treat, I love serving them slightly warmed with a dollop of sugar-free whipped cream – they taste just like the real deal but won’t derail your healthy eating goals.
Vegan Coconut Milk Rice Pudding

Sometimes the coziest desserts come from the simplest ingredients, and this vegan coconut milk rice pudding is my ultimate comfort food. I first made this during a rainy weekend when I was craving something warm and nostalgic, and now it’s become my go-to when I need a little edible hug. There’s something magical about how basic pantry staples transform into this creamy, dreamy dessert.
2
servings5
minutes35
minutesIngredients
For the rice base:
- 1 cup short-grain white rice
- 2 cups water
For the pudding:
- 2 (13.5 oz) cans full-fat coconut milk
- 1/2 cup granulated sugar
- 1/4 tsp salt
- 1 tsp vanilla extract
- 1/2 tsp ground cinnamon
Instructions
- Rinse 1 cup of short-grain white rice under cold running water until the water runs clear, which removes excess starch for a creamier texture.
- Combine the rinsed rice with 2 cups of water in a medium saucepan.
- Bring the rice and water to a boil over high heat, then immediately reduce to a simmer.
- Cover the saucepan and cook for 15 minutes until the rice has absorbed all the water, checking at the 12-minute mark to prevent burning.
- Pour in both cans of full-fat coconut milk, stirring to combine with the cooked rice.
- Add 1/2 cup granulated sugar and 1/4 teaspoon salt to the mixture.
- Cook over medium-low heat, stirring constantly with a wooden spoon for 20 minutes until the pudding thickens noticeably and coats the back of your spoon.
- Remove the saucepan from the heat and stir in 1 teaspoon vanilla extract and 1/2 teaspoon ground cinnamon.
- Let the pudding rest for 10 minutes off the heat to allow the flavors to meld and the texture to set up properly.
Great creamy texture develops as it cools, with the coconut milk creating a luxurious mouthfeel that’s surprisingly rich for a vegan dessert. The subtle cinnamon warmth balances the natural sweetness perfectly, making it wonderful served warm with fresh berries or chilled with toasted coconut flakes for contrasting crunch.
Pumpkin Spice Protein Bars
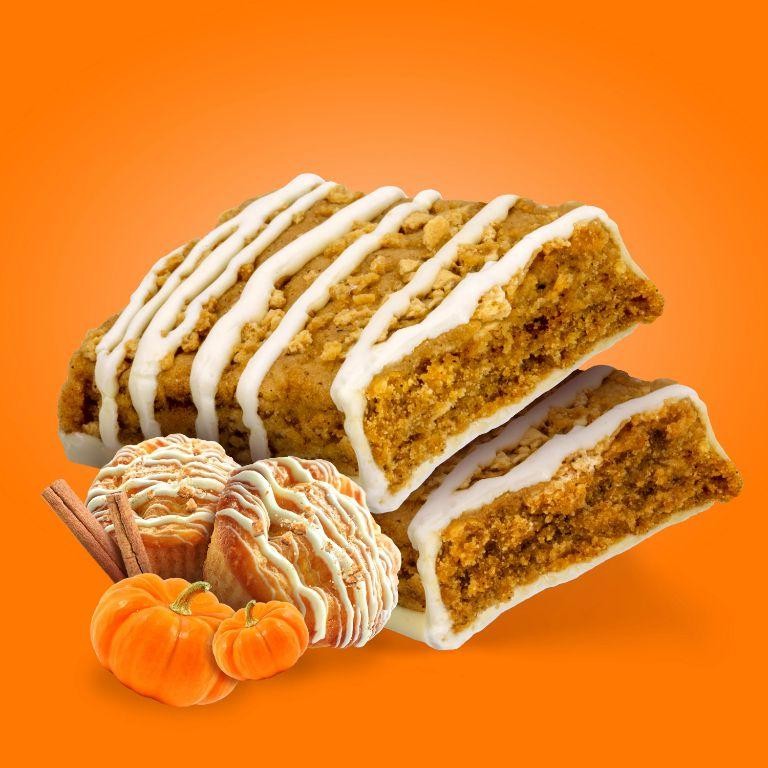
Just when I thought pumpkin spice season couldn’t get any better, I discovered how to turn my favorite fall flavor into a protein-packed snack that actually satisfies my post-workout cravings. My obsession started last October when I was rushing between yoga class and grocery shopping, desperately wishing for something that tasted like dessert but fueled like proper nutrition. These bars have become my secret weapon for busy autumn days when I need both comfort and energy.
9
bars15
minutes20
minutesIngredients
For the bar base:
– 1 cup pumpkin puree
– 2 scoops vanilla protein powder
– 1 cup old-fashioned oats
– 1/4 cup maple syrup
– 2 tbsp coconut oil, melted
– 1 tsp pumpkin pie spice
– 1/2 tsp cinnamon
For the topping:
– 1/4 cup dark chocolate chips
– 1 tsp coconut oil
Instructions
1. Preheat your oven to 350°F and line an 8×8 inch baking pan with parchment paper.
2. In a large mixing bowl, combine 1 cup pumpkin puree, 2 scoops vanilla protein powder, and 1 cup old-fashioned oats.
3. Add 1/4 cup maple syrup, 2 tbsp melted coconut oil, 1 tsp pumpkin pie spice, and 1/2 tsp cinnamon to the bowl.
4. Mix all ingredients thoroughly until a thick, uniform dough forms. Tip: If the mixture seems too dry, add 1 tablespoon of water at a time until it reaches a cookie dough-like consistency.
5. Press the mixture firmly into your prepared baking pan, using the back of a measuring cup to create an even layer.
6. Bake at 350°F for 18-20 minutes, until the edges are lightly golden brown and the center springs back when gently pressed.
7. Remove the pan from the oven and let the bars cool completely in the pan for at least 1 hour. Tip: Don’t skip the cooling step—this allows the protein bars to set properly and develop the perfect chewy texture.
8. While the bars cool, melt 1/4 cup dark chocolate chips with 1 tsp coconut oil in a microwave-safe bowl, heating in 30-second intervals and stirring between each until smooth.
9. Drizzle the melted chocolate mixture over the cooled bars in a zigzag pattern.
10. Refrigerate the bars for 15 minutes to set the chocolate topping. Tip: Use a plastic bag with the corner snipped off for professional-looking chocolate drizzles without the mess.
11. Cut into 9 equal bars using a sharp knife, wiping the blade clean between cuts for neat edges.
Perfectly chewy with just the right amount of pumpkin spice warmth, these bars have that satisfying texture that makes you forget they’re actually good for you. I love how the dark chocolate drizzle adds a sophisticated bitterness that balances the natural sweetness. Try crumbling one over Greek yogurt for breakfast or packing them in your lunchbox for an afternoon pick-me-up that tastes like autumn in every bite.
Unsweetened Strawberry Chia Jam
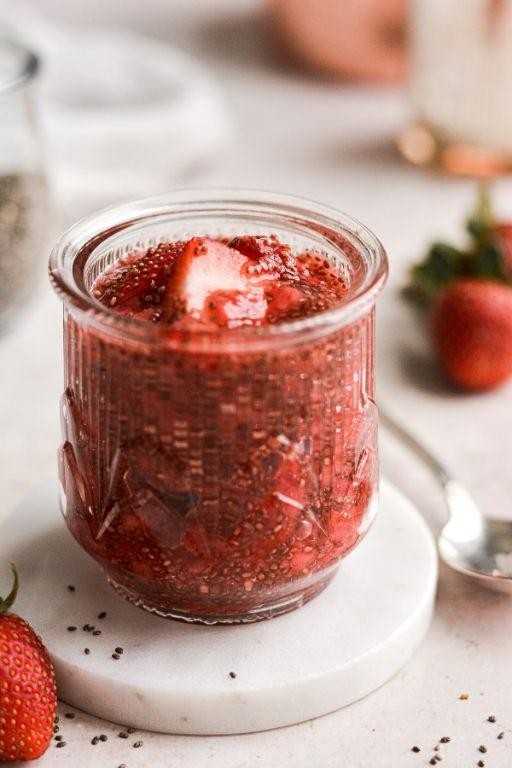
Every time strawberry season rolls around, I find myself buying way more berries than my family can possibly eat fresh—which is exactly how I ended up developing this simple, no-sugar-added jam recipe that’s become my go-to for everything from morning toast to yogurt parfaits.
1
jar15
minutes15
minutesIngredients
- For the jam base:
- 4 cups fresh strawberries, hulled and quartered
- 2 tablespoons lemon juice
- For thickening:
- 3 tablespoons chia seeds
Instructions
- Place the quartered strawberries in a medium saucepan over medium heat.
- Cook the strawberries for 10 minutes, stirring occasionally with a wooden spoon until they release their juices and soften.
- Use a potato masher to crush the strawberries to your desired consistency—I like mine with some texture rather than completely smooth.
- Stir in the lemon juice and continue cooking for another 5 minutes.
- Remove the saucepan from heat and let the mixture cool for 2 minutes (tip: if it’s too hot when you add chia seeds, they can clump).
- Sprinkle the chia seeds evenly over the strawberry mixture and stir thoroughly to combine.
- Let the jam sit at room temperature for 15 minutes, stirring once halfway through to redistribute the chia seeds.
- Transfer the jam to a clean glass jar and refrigerate for at least 4 hours, or until thickened to a spreadable consistency (tip: the jam will continue to thicken as it chills).
- Store the jam in an airtight container in the refrigerator for up to 2 weeks (tip: if liquid separates, just stir it back in before using).
Just like that, you’ve got a vibrant, spreadable jam with a delightful texture from the chia seeds and pure strawberry flavor that’s not masked by sweetness. I love how the tiny seeds create this beautiful gel-like consistency while keeping it completely natural. Try swirling it into plain Greek yogurt or using it as a filling for thumbprint cookies for a fruity surprise.
Gluten-Free Banana Nut Ice Cream
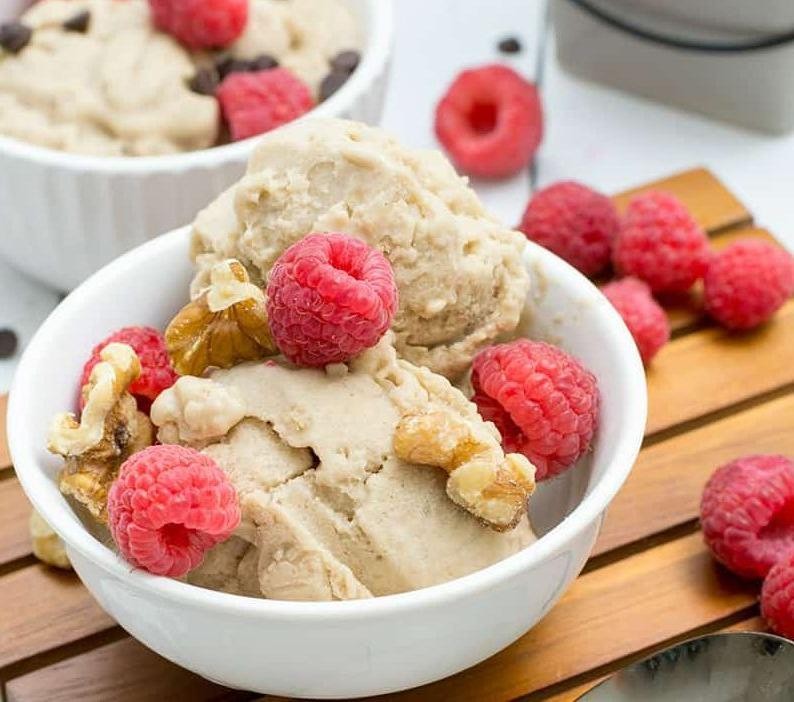
During a recent kitchen experiment gone wonderfully right, I discovered that overripe bananas and a few simple ingredients can transform into the creamiest gluten-free dessert. As someone who always seems to have brown-spotted bananas on the counter, this recipe has become my go-to solution for turning potential waste into something truly special. There’s something incredibly satisfying about creating ice cream without any special equipment—just a blender and a little patience.
2
servings15
minutes10
minutesIngredients
- For the ice cream base:
- 3 very ripe bananas, sliced and frozen
- 1/2 cup raw cashews, soaked for 4 hours
- 1/4 cup pure maple syrup
- 1 teaspoon vanilla extract
- 1/4 teaspoon sea salt
- For the nut mixture:
- 1/2 cup walnuts, chopped
- 1 tablespoon coconut oil, melted
- 1 tablespoon maple syrup
- 1/4 teaspoon cinnamon
Instructions
- Preheat your oven to 350°F and line a small baking sheet with parchment paper.
- Combine the chopped walnuts, melted coconut oil, 1 tablespoon maple syrup, and cinnamon in a small bowl, mixing until all walnuts are evenly coated.
- Spread the coated walnuts in a single layer on the prepared baking sheet and bake for 8-10 minutes until golden brown and fragrant.
- Remove the walnuts from the oven and let them cool completely on the baking sheet—this ensures they stay crispy when mixed into the ice cream.
- Drain the soaked cashews and add them to a high-speed blender along with the frozen banana slices, 1/4 cup maple syrup, vanilla extract, and sea salt.
- Blend on high speed for 60-90 seconds, stopping to scrape down the sides as needed, until the mixture becomes completely smooth and creamy.
- Transfer the blended ice cream base to a freezer-safe container and gently fold in the cooled candied walnuts using a spatula.
- Cover the container with a lid or plastic wrap and freeze for at least 4 hours until firm but scoopable.
After the freezing time, you’ll be rewarded with ice cream that’s remarkably creamy despite being dairy-free, with the caramelized walnuts adding wonderful crunch and warmth. The banana flavor shines through beautifully without being overwhelming, making this perfect for serving in waffle cones or alongside warm apple crisp for an extra special treat.
Cinnamon-Spiced Baked Peaches
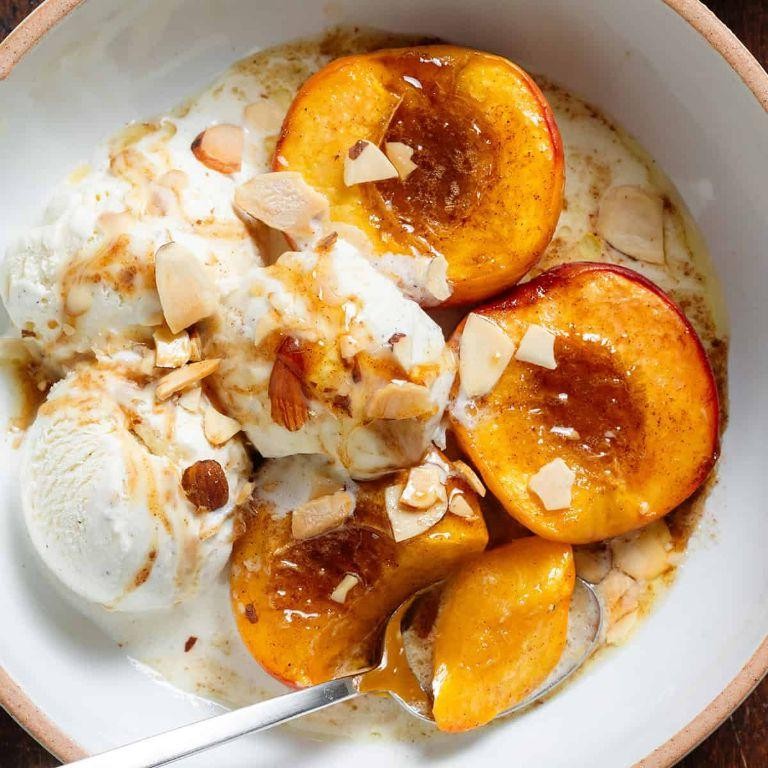
Nothing says fall comfort like the warm aroma of cinnamon filling your kitchen, and these baked peaches have become my go-to dessert when I want something fancy but effortless. I first discovered this recipe during a weekend farmers market trip when I found myself with way too many ripe peaches and a serious craving for something cozy.
3
servings10
minutes20
minutesIngredients
- For the peaches:
- 4 large ripe peaches, halved and pitted
- 2 tablespoons unsalted butter, melted
- 2 tablespoons brown sugar
- For the spice mixture:
- 1 teaspoon ground cinnamon
- ¼ teaspoon ground nutmeg
- ⅛ teaspoon ground cloves
- For serving:
- 1 cup vanilla ice cream
- 2 tablespoons chopped pecans
Instructions
- Preheat your oven to 375°F and line a baking sheet with parchment paper.
- Cut 4 large ripe peaches in half and remove the pits using a small spoon.
- Brush the cut sides of the peach halves with 2 tablespoons of melted unsalted butter.
- Sprinkle the buttered peach halves evenly with 2 tablespoons of brown sugar.
- Combine 1 teaspoon ground cinnamon, ¼ teaspoon ground nutmeg, and ⅛ teaspoon ground cloves in a small bowl.
- Evenly distribute the spice mixture over the sugared peach halves.
- Arrange the peach halves cut-side up on the prepared baking sheet.
- Bake at 375°F for 18-22 minutes until the peaches are tender and the edges are caramelized.
- Remove the baking sheet from the oven using oven mitts and let the peaches cool for 5 minutes.
- Scoop 1 cup of vanilla ice cream into 4 serving bowls.
- Place 2 baked peach halves beside the ice cream in each bowl.
- Sprinkle 2 tablespoons of chopped pecans evenly over all servings.
Unbelievably tender and fragrant, these peaches develop a beautiful caramelized texture that pairs perfectly with the creamy ice cream. The warm spices create this incredible aroma that makes your whole kitchen smell like autumn, and I love serving them in shallow bowls to catch all the delicious peach juices that mingle with the melting ice cream.
Conclusion
Here’s a sweet collection of diabetes-friendly desserts that prove you don’t have to sacrifice flavor for health. From rich chocolate treats to fruity delights, these recipes offer guilt-free indulgence for every craving. We’d love to hear which recipes become your favorites—leave a comment below and share your baking adventures! Don’t forget to pin this article on Pinterest to save these delicious ideas for later.


