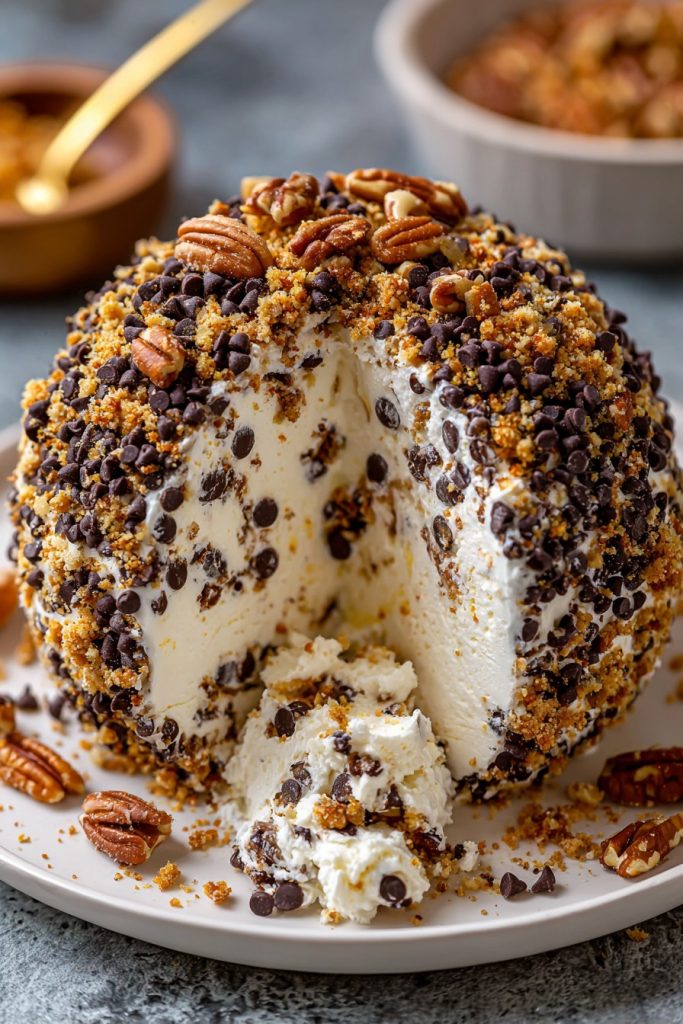
Unbelievably decadent and impossibly addictive, this dessert cheese ball will completely transform your entertaining game forever. Utterly irresistible and shockingly simple to create, this sweet and creamy masterpiece combines the sophistication of cheesecake with the playful presentation of a classic cheese ball, resulting in a dessert that will have your guests begging for the recipe before they’ve even taken their first heavenly bite.
Why This Recipe Works
- The magical combination of cream cheese and butter creates an unbelievably smooth, rich base that melts luxuriously in your mouth while maintaining perfect structural integrity for dipping and spreading across your favorite crackers and fruits
- Powdered sugar provides just the right amount of sweetness without any graininess, blending seamlessly into the creamy mixture while allowing the subtle tang of the cream cheese to shine through in every single glorious bite
- Vanilla extract and a pinch of salt work together to elevate all the flavors to new heights, creating depth and complexity that will make your taste buds dance with pure, unadulterated joy
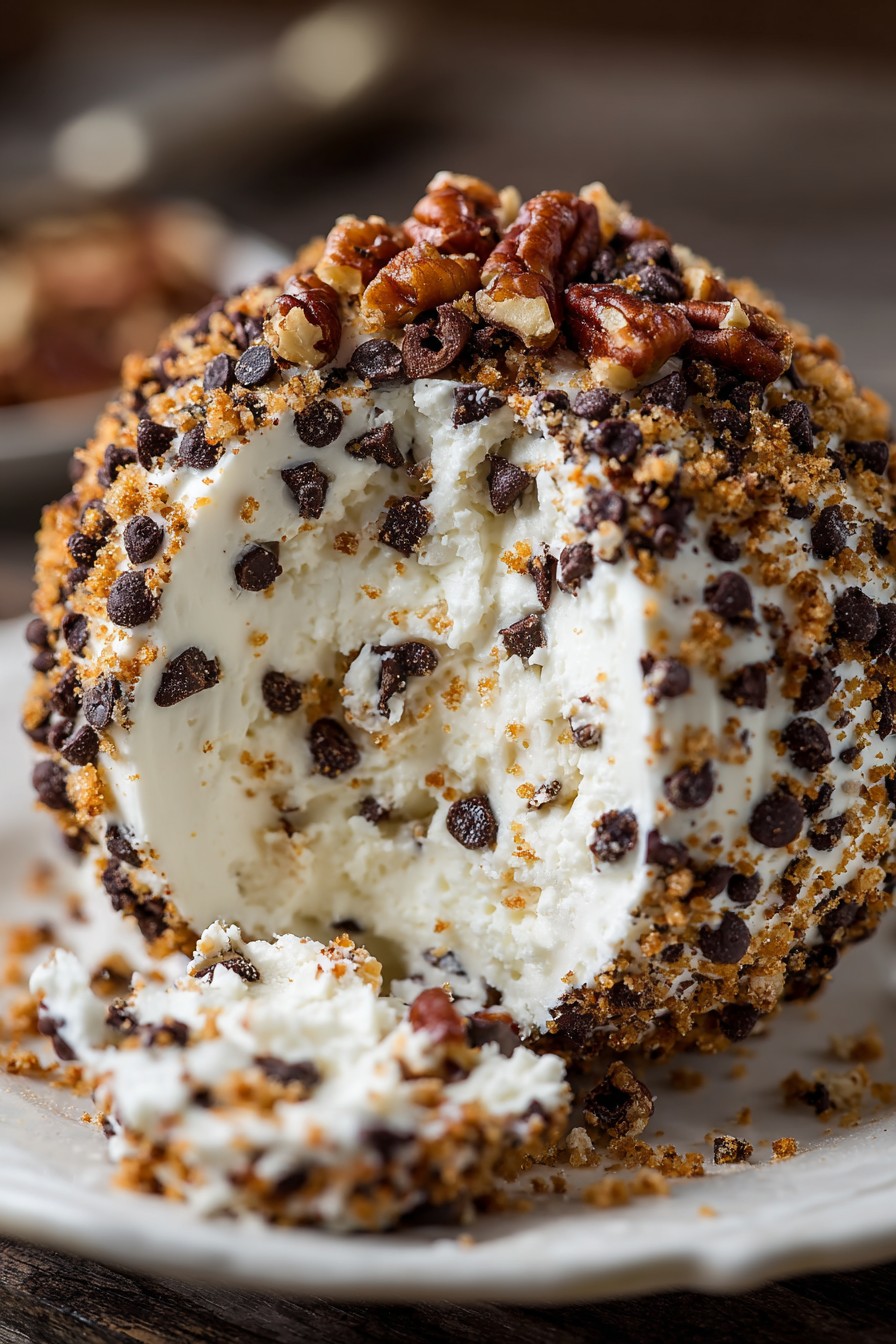
- The crunchy, sweet coating of chopped pecans and mini chocolate chips creates an incredible textural contrast that will have you closing your eyes in bliss as you experience the perfect harmony of creamy interior and crunchy exterior
- This recipe’s brilliant simplicity means even complete kitchen novices can create a dessert that looks and tastes like it came from a five-star bakery, making you an instant entertaining legend among your friends and family
Ingredients
- 16 ounces cream cheese, softened to room temperature
- 1/2 cup unsalted butter, softened to room temperature
- 2 cups powdered sugar, sifted to remove any lumps
- 2 teaspoons pure vanilla extract
- 1/4 teaspoon fine sea salt
- 1 cup semi-sweet chocolate chips, divided
- 1 cup chopped pecans, toasted for maximum flavor
- 1/2 cup mini chocolate chips for coating
- 1/4 cup graham cracker crumbs for additional coating
Equipment Needed
- Stand mixer or electric hand mixer
- Large mixing bowl
- Plastic wrap
- Baking sheet
- Parchment paper
- Measuring cups and spoons
- Spatula
- Small skillet for toasting nuts
Instructions
Prepare Your Creamy Foundation
Begin by placing your perfectly softened cream cheese and butter into the bowl of your stand mixer fitted with the paddle attachment. The cream cheese should yield easily when pressed with your finger but shouldn’t be so soft that it’s melting or oily. Beat these two ingredients together on medium speed for exactly two minutes until they become incredibly light, fluffy, and completely homogeneous with no streaks of butter visible whatsoever. This initial creaming process is absolutely crucial because it incorporates tiny air bubbles that will give your dessert cheese ball that dreamy, cloud-like texture that will make people swoon. Scrape down the sides of the bowl thoroughly with a rubber spatula to ensure every last bit gets incorporated properly, then continue beating for another thirty seconds to achieve maximum fluffiness. The transformation from separate ingredients to this gloriously smooth, pale mixture is nothing short of magical and sets the stage for the decadent masterpiece you’re about to create.
Incorporate Sweetness and Flavor
Now comes the moment where we transform this creamy base into something truly spectacular. Reduce your mixer speed to low and gradually add the sifted powdered sugar about half a cup at a time, allowing each addition to fully incorporate before adding the next. This slow, deliberate process prevents the dreaded powdered sugar cloud from exploding all over your kitchen while ensuring the sugar dissolves perfectly into the mixture. Once all the powdered sugar has been incorporated, add the pure vanilla extract and that precious quarter teaspoon of fine sea salt – trust me, that tiny amount of salt will make all the flavors pop in the most extraordinary way. Increase the mixer speed to medium-high and beat for a full three minutes until the mixture becomes noticeably lighter in color and texture, almost resembling the fluffiest buttercream frosting you’ve ever seen. The vanilla should perfume your entire kitchen with its warm, comforting aroma, signaling that you’re on the right track to creating pure dessert perfection.
Add Texture and Chocolate Bliss
This is where we take your dessert cheese ball from amazing to absolutely mind-blowing. Remove the bowl from your mixer and grab your spatula for some gentle hand mixing. Fold in three-quarters cup of the semi-sweet chocolate chips along with all of the toasted chopped pecans, using broad, sweeping motions to distribute them evenly throughout the creamy mixture without deflating all that beautiful air you worked so hard to incorporate. The toasting of the pecans beforehand is non-negotiable – it deepens their flavor dramatically and adds an incredible nutty complexity that will have people wondering what your secret ingredient might be. As you fold, you’ll notice how the chocolate chips and pecans create little pockets of texture and flavor that will provide delightful surprises in every single bite, making this dessert an experience rather than just another sweet treat.
Shape and Chill to Perfection
Lay a large piece of plastic wrap on your counter and transfer the entire mixture into the center. Using the plastic wrap as your guide, gently shape the mixture into a beautiful, round ball approximately six inches in diameter, smoothing the surface as much as possible with your hands or the plastic wrap. Don’t worry if it’s not perfectly spherical at this point – we’ll perfect the shape later. Wrap the ball tightly in the plastic wrap, ensuring no air can reach the surface, which could cause discoloration or drying out. Place this wrapped treasure in the refrigerator and let it chill for at least four hours, though overnight is even better for flavor development and firmness. This chilling time is absolutely essential because it allows the flavors to meld together beautifully while firming up the texture enough to handle the coating process without collapsing into a delicious but messy puddle.
Create the Magnificent Coating
While your cheese ball is chilling to perfection, prepare your coating station by combining the remaining quarter cup of semi-sweet chocolate chips, the half cup of mini chocolate chips, and the graham cracker crumbs on a large plate or shallow baking dish. The combination of different chocolate chip sizes and the graham crumbs will create a coating with incredible visual appeal and varied textures that will make your dessert cheese ball look professionally crafted. Remove your chilled cheese ball from the refrigerator and unwrap it carefully – it should be firm but still slightly pliable. Roll the ball gently but firmly through the coating mixture, pressing lightly to ensure good adhesion, and rotating to cover every possible surface with chocolatey, crunchy goodness. The contrast between the snowy white interior and the dark, textured exterior creates a visual drama that will have your guests reaching for their phones to capture this edible work of art before they even taste it.
Final Presentation and Serving
Transfer your beautifully coated dessert cheese ball to a serving platter and let it sit at room temperature for exactly thirty minutes before serving – this allows the texture to soften slightly to that perfect spreadable consistency that will make dipping an absolute dream. Arrange an assortment of dippers around your masterpiece: graham crackers for classic pairing, crisp apple slices for refreshing contrast, vanilla wafers for nostalgic sweetness, and even pretzel rods for that irresistible sweet-salty combination that will have people coming back for just one more bite. The moment you place this stunning creation on your table, prepare for the gasps of delight and the immediate swarm of eager guests – this dessert cheese ball doesn’t just satisfy sweet cravings, it creates an experience that people will be talking about for weeks to come.
Tips and Tricks
For the absolute best results, always use full-fat cream cheese – the reduced-fat varieties contain more water and stabilizers that can result in a looser, less luxurious texture that simply won’t hold its shape as beautifully. When toasting your pecans, spread them in a single layer on a baking sheet and toast at 350°F for 6-8 minutes, watching carefully during the final minutes because nuts can go from perfectly toasted to bitterly burned in mere moments. The aroma will tell you when they’re ready – that warm, nutty fragrance means they’ve reached peak flavor. If you find your cheese ball mixture is too soft to shape properly after mixing, don’t panic – simply refrigerate it for thirty minutes before attempting to form the ball, and remember that the initial shape doesn’t need to be perfect since we’ll be perfecting it after the chilling period. For an extra professional presentation, consider reserving a small amount of your coating mixture to press onto any bare spots after the initial rolling – this ensures every angle is picture-perfect. When serving, provide both a dedicated cheese spreader and small knives for guests who prefer to slice rather than spread, and consider placing the cheese ball on a bed of crushed graham crackers or additional chopped nuts to catch any crumbs and create an even more stunning visual presentation. If you need to make this ahead of time, the uncoated cheese ball can be refrigerated for up to three days wrapped tightly in plastic wrap, then coated on the day of serving for maximum freshness and texture contrast. For easier cleanup when mixing, line your mixing bowl with plastic wrap before adding ingredients – once mixed, you can simply lift the plastic wrap to transfer the mixture without losing a single precious bit to the bowl sides. Always taste your mixture before chilling – this is your opportunity to adjust sweetness or add a tiny pinch more salt if needed, though be careful not to overmix once you’ve added the chocolate chips and nuts. Finally, remember that the quality of your vanilla extract makes a significant difference – pure vanilla extract rather than imitation will provide a depth of flavor that elevates the entire dessert from great to absolutely extraordinary.
Recipe Variations
- Transform your dessert cheese ball into a cookies and cream masterpiece by replacing the semi-sweet chocolate chips with crushed Oreo cookies and using crushed Oreos for the coating instead of the chocolate chip and pecan mixture. The combination of creamy white filling and chocolate cookie crunch will transport you straight back to childhood while maintaining sophisticated adult appeal.
- Create a tropical paradise version by mixing in one cup of finely chopped dried pineapple and half a cup of sweetened shredded coconut into the base mixture, then rolling the finished ball in toasted coconut flakes and crushed macadamia nuts for a flavor experience that will make you feel like you’re on vacation with every single bite.
- For coffee lovers, incorporate two tablespoons of instant espresso powder into the cream cheese mixture and replace the semi-sweet chocolate chips with coffee-flavored chocolate chips, then coat with crushed chocolate-covered espresso beans for an energy-packed dessert that provides the perfect balance of sweet and bitter notes.
- Celebrate the seasons with a pumpkin spice variation by mixing half a cup of pumpkin puree and two teaspoons of pumpkin pie spice into the base, then coating with a mixture of crushed gingersnap cookies and toasted pecans for a fall-inspired treat that captures all the cozy warmth of autumn in every luxurious mouthful.
- Indulge in a s’mores-inspired creation by replacing the vanilla extract with marshmallow flavoring, folding in mini marshmallows along with the chocolate chips, and coating with a combination of graham cracker crumbs and additional mini chocolate chips for that classic campfire taste in an elegant, shareable format.
Frequently Asked Questions
Can I make this dessert cheese ball ahead of time?
Absolutely, and it actually improves with time! The flavors have more opportunity to meld together beautifully when given at least overnight to develop. You can prepare the uncoated cheese ball up to three days in advance, keeping it tightly wrapped in plastic wrap in the refrigerator. On the day you plan to serve it, remove it from the refrigerator, apply the coating, and let it sit at room temperature for that crucial thirty minutes before serving. This make-ahead flexibility makes it perfect for entertaining when you want to minimize last-minute kitchen stress while still delivering a show-stopping dessert that tastes like you spent hours working on it right before your guests arrived.
What’s the best way to store leftovers?
Leftovers – though unlikely with this crowd-pleasing dessert – should be tightly wrapped in plastic wrap or transferred to an airtight container and refrigerated for up to five days. The texture will firm up significantly in the refrigerator, so when you’re ready to enjoy your leftovers, let them sit at room temperature for about twenty minutes to regain that perfect spreadable consistency. I don’t recommend freezing the finished dessert cheese ball because the texture of the cream cheese can become slightly grainy upon thawing, and the coating may lose its delightful crunch, compromising the magical experience that makes this dessert so special.
Can I use reduced-fat cream cheese to make this healthier?
While you technically can substitute reduced-fat cream cheese, I strongly advise against it for this particular recipe. Full-fat cream cheese provides the rich, luxurious mouthfeel and structural integrity that makes this dessert cheese ball so extraordinary. The reduced-fat varieties contain more water and stabilizers that can result in a softer, less stable final product that might not hold its beautiful spherical shape as well. If you’re concerned about calories, consider serving smaller portions with fruit dippers rather than compromising on the quality and texture that makes this recipe truly unforgettable. Sometimes, enjoying the real deal in moderation is more satisfying than a compromised version that doesn’t deliver the same magical experience.
What are some creative serving suggestions beyond crackers?
The possibilities are truly endless! Beyond the classic graham crackers and vanilla wafers, consider serving your dessert cheese ball with cinnamon sugar pita chips for warm spice notes, shortbread cookies for buttery richness, strawberry slices for fresh fruity contrast, or even sweet potato chips for an unexpected savory-sweet combination that will surprise and delight your guests. For adult gatherings, pair it with amaretto-flavored biscotti or espresso-dusted chocolate cookies. During holiday seasons, gingerbread men or peppermint-shaped cookies make adorable dippers that complement the festive spirit. Don’t forget that spoons are perfectly acceptable too – some guests might prefer to simply scoop the creamy goodness directly onto their plates!
My cheese ball mixture seems too soft – what did I do wrong?
Don’t worry – this is a common issue that’s easily remedied! The most likely culprit is that your cream cheese and butter weren’t properly chilled before mixing, or your kitchen temperature was particularly warm. Simply place the mixture in the refrigerator for thirty to forty-five minutes to firm up before attempting to shape it into a ball. Another possibility is undermixing – ensure you’re beating the cream cheese and butter for the full recommended time to incorporate enough air, which helps stabilize the mixture. If neither of these solutions works, you can gently knead in an additional two tablespoons of powdered sugar to absorb excess moisture. Remember that the mixture will firm up significantly during the mandatory chilling period, so have patience – perfection is worth waiting for!
Summary
This spectacular dessert cheese ball combines creamy perfection with irresistible textures, creating an unforgettable treat that transforms ordinary gatherings into extraordinary occasions with its stunning presentation and decadent flavor profile that will have everyone begging for your secret recipe.
Dessert Cheese Ball
5
servings20
minutesIngredients
Instructions
- 1 Beat cream cheese and butter until light and fluffy, about 2 minutes
- 2 Gradually add powdered sugar, then vanilla and salt, beating until smooth
- 3 Fold in 3/4 cup chocolate chips and all toasted pecans
- 4 Shape into ball, wrap tightly in plastic, and chill 4+ hours
- 5 Combine remaining coating ingredients and roll chilled ball to coat completely
- 6 Let stand at room temperature 30 minutes before serving with assorted dippers


