Forget tossing that day-old loaf! We’ve gathered 33 clever, delicious ways to transform yesterday’s bread into today’s star—think quick dinners, cozy comfort food, and surprising snacks. Whether you’re a meal-prep pro or just hate waste, these easy revivals will make you see stale bread in a whole new light. Let’s dive in and give those leftovers a delicious second life!
Savory Bread Pudding with Cheese and Herbs

Often overlooked as just a way to use up stale bread, this savory bread pudding transforms humble ingredients into a comforting, cheesy masterpiece perfect for brunch or a cozy dinner. Our methodical approach will guide you through each step, ensuring even beginners achieve delicious results.
Serving: 6 | Pre Time: 20 minutes | Cooking Time: 45 minutes
Ingredients
– 6 cups day-old French bread cubes (about 1-inch pieces—I save leftover baguettes for this)
– 1 1/2 cups whole milk (room temperature helps everything blend smoothly)
– 4 large eggs (I prefer room temp eggs here for even mixing)
– 1 cup shredded sharp cheddar cheese (extra sharp adds a nice bite)
– 1/2 cup grated Parmesan cheese (freshly grated melts better than pre-packaged)
– 1/4 cup chopped fresh parsley (flat-leaf parsley is my go-to for its robust flavor)
– 1 tbsp chopped fresh thyme (or 1 tsp dried if fresh isn’t available)
– 1 small onion, finely diced (yellow onions work well for sweetness)
– 2 cloves garlic, minced (freshly minced gives the best aroma)
– 2 tbsp unsalted butter (melted for greasing and flavor)
– 1/2 tsp salt (I use fine sea salt for even distribution)
– 1/4 tsp black pepper (freshly ground pepper adds a subtle kick)
Instructions
1. Preheat your oven to 350°F (175°C) and grease an 8×8-inch baking dish with 1 tablespoon of the melted butter.
2. Place the bread cubes in a large mixing bowl and set aside.
3. In a medium skillet over medium heat, melt the remaining 1 tablespoon of butter, then add the diced onion and cook for 5-7 minutes until softened and translucent.
4. Add the minced garlic to the skillet and cook for 1 minute until fragrant, then remove from heat and let cool slightly.
5. In a separate bowl, whisk together the whole milk, eggs, salt, and black pepper until fully combined—tip: whisk gently to avoid too many air bubbles.
6. Stir the cooked onion-garlic mixture, shredded cheddar cheese, grated Parmesan cheese, chopped parsley, and chopped thyme into the milk-egg mixture.
7. Pour the wet mixture over the bread cubes in the large bowl and gently fold until all bread is evenly coated—tip: let it sit for 10 minutes so the bread absorbs the liquid for a creamier texture.
8. Transfer the mixture to the greased baking dish, spreading it evenly with a spatula.
9. Bake in the preheated oven for 45 minutes, or until the top is golden brown and a knife inserted in the center comes out clean—tip: check at 40 minutes to avoid over-browning.
10. Remove from the oven and let cool for 5-10 minutes before serving.
This savory bread pudding emerges with a golden, crisp top giving way to a soft, custardy interior infused with herbal notes. The sharp cheddar and Parmesan create a rich, savory depth that pairs wonderfully with a simple green salad or roasted vegetables for a complete meal. Try serving it warm with a drizzle of hot sauce or a dollop of sour cream for an extra touch of indulgence.
Classic Panzanella Salad with Fresh Tomatoes

Many home cooks overlook stale bread, but this classic Italian salad transforms it into a rustic masterpiece. Mastering panzanella means embracing simplicity—just ripe tomatoes, crusty bread, and a bright vinaigrette come together in minutes. Let’s walk through each step to build layers of flavor and texture.
Serving: 4 | Pre Time: 15 minutes | Cooking Time: 0 minutes
Ingredients
– 4 cups day-old rustic bread, torn into 1-inch chunks (I save leftover sourdough for this—it adds a tangy depth)
– 1.5 lbs ripe tomatoes, cored and cut into 1-inch pieces (heirloom varieties are my go-to for their sweet, juicy flavor)
– 1/2 cup extra virgin olive oil (a high-quality bottle makes all the difference here)
– 3 tbsp red wine vinegar
– 1 small red onion, thinly sliced (soak it in cold water for 5 minutes to mellow the sharpness)
– 1/2 cup fresh basil leaves, torn by hand (avoid chopping to prevent bruising)
– 2 cloves garlic, minced (freshly minced garlic infuses the dressing beautifully)
– 1 tsp kosher salt
– 1/2 tsp freshly ground black pepper
Instructions
1. Place the torn bread chunks in a large mixing bowl.
2. In a separate small bowl, whisk together the extra virgin olive oil, red wine vinegar, minced garlic, kosher salt, and black pepper until fully combined—this creates a balanced vinaigrette base.
3. Pour half of the vinaigrette over the bread chunks, tossing gently to coat every piece evenly; let it sit for 10 minutes to allow the bread to absorb the flavors without becoming soggy.
4. Add the tomato pieces and thinly sliced red onion to the bowl with the bread.
5. Drizzle the remaining vinaigrette over the tomato and onion mixture, tossing carefully to avoid crushing the tomatoes.
6. Fold in the torn basil leaves just before serving to keep them vibrant and aromatic.
7. Let the salad rest at room temperature for 5 minutes to allow the ingredients to meld together.
8. Transfer the salad to a serving platter or individual bowls.
You’ll love the contrast of the chewy, vinegar-soaked bread against the burst of juicy tomatoes, while the basil adds a fresh, herbal finish. Try serving it alongside grilled chicken or as a light lunch with a sprinkle of Parmesan for extra richness.
Crunchy Homemade Breadcrumbs

Sometimes the simplest kitchen staples make the biggest difference, and homemade breadcrumbs are a perfect example—they’re crispier, more flavorful, and far more satisfying than store-bought versions. Let’s walk through making them from scratch, turning leftover bread into a versatile pantry hero.
Serving: about 2 cups | Pre Time: 5 minutes | Cooking Time: 15 minutes
Ingredients
– 4 cups of stale bread cubes (I save ends of sourdough or whole wheat loaves in the freezer for this—they toast up beautifully)
– 2 tablespoons of extra virgin olive oil (my go-to for its fruity aroma)
– 1 teaspoon of kosher salt (I prefer it for its even texture)
– ½ teaspoon of garlic powder (optional, but it adds a savory kick I love)
– ¼ teaspoon of dried oregano (for a hint of herbal warmth)
Instructions
1. Preheat your oven to 300°F and line a baking sheet with parchment paper.
2. Place the stale bread cubes in a food processor and pulse until coarse crumbs form, about 10–15 seconds—tip: avoid over-processing to keep some texture.
3. In a large bowl, combine the breadcrumbs, extra virgin olive oil, kosher salt, garlic powder, and dried oregano, tossing with your hands until evenly coated.
4. Spread the mixture in a single layer on the prepared baking sheet.
5. Bake for 12–15 minutes, stirring halfway through, until the crumbs are golden brown and dry to the touch—tip: watch closely near the end to prevent burning.
6. Remove from the oven and let cool completely on the sheet, about 10 minutes, to crisp up further.
7. Transfer the cooled breadcrumbs to an airtight container for storage—tip: they’ll keep for up to a month at room temperature.
Made with care, these breadcrumbs deliver a satisfying crunch and toasty flavor that elevates everything from casseroles to salads. Try sprinkling them over roasted vegetables or mixing into meatballs for an extra layer of texture.
Garlic Bread Croutons for Soups and Salads
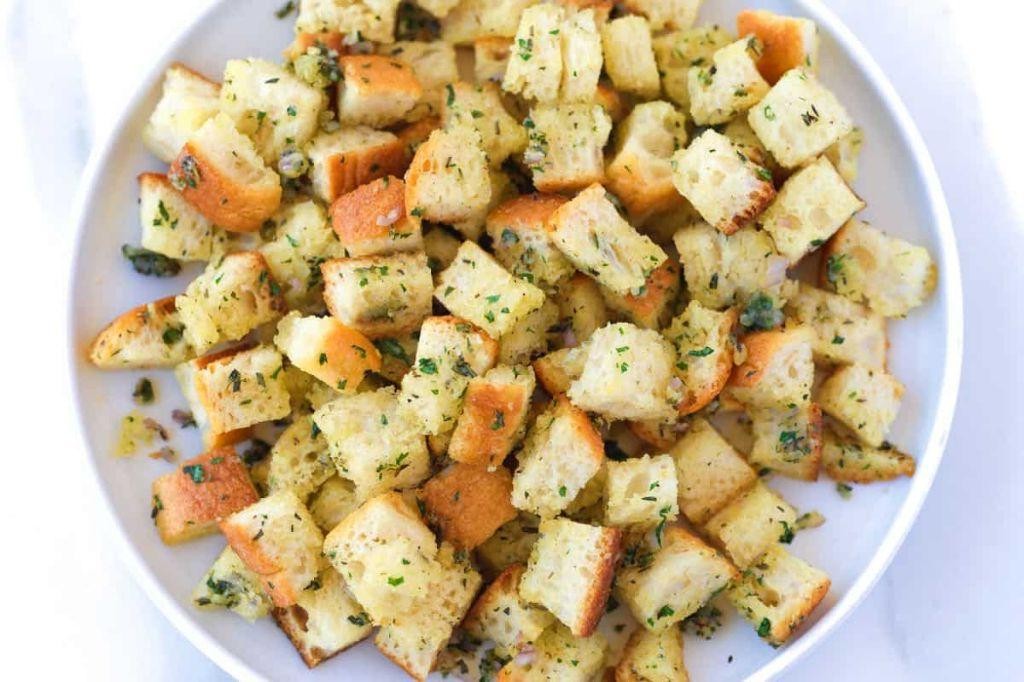
Finally, let’s transform day-old bread into crispy, garlicky croutons that’ll elevate your soups and salads. This simple method yields perfectly golden bites every time, and I’ll guide you through each step like we’re cooking together in my kitchen.
Serving: 4 cups | Pre Time: 10 minutes | Cooking Time: 20 minutes
Ingredients
– 4 cups day-old French bread cubes (about 1/2-inch pieces—I save leftover baguettes for this)
– 1/4 cup extra virgin olive oil (my go-to for its fruity notes)
– 3 cloves garlic, minced (freshly minced makes all the difference)
– 1 teaspoon dried oregano (I prefer the earthy flavor over Italian seasoning here)
– 1/2 teaspoon kosher salt (it dissolves better than table salt)
– 1/4 teaspoon freshly ground black pepper (I always grind it fresh for maximum aroma)
Instructions
1. Preheat your oven to 375°F and line a baking sheet with parchment paper for easy cleanup.
2. In a small bowl, combine 1/4 cup extra virgin olive oil and 3 cloves minced garlic—let it sit for 5 minutes to infuse the oil with garlic flavor.
3. Place 4 cups of bread cubes in a large mixing bowl and pour the garlic-oil mixture over them.
4. Add 1 teaspoon dried oregano, 1/2 teaspoon kosher salt, and 1/4 teaspoon black pepper to the bowl.
5. Toss everything thoroughly with your hands until each bread cube is evenly coated—this ensures consistent browning.
6. Spread the coated bread cubes in a single layer on the prepared baking sheet, leaving space between them for air circulation.
7. Bake at 375°F for 15-20 minutes, stirring halfway through, until the croutons are golden brown and crisp to the touch.
8. Remove from the oven and let cool completely on the baking sheet—they’ll crisp up further as they cool.
Golden and aromatic, these croutons offer a satisfying crunch with a savory garlic punch. Toss them into a Caesar salad for classic flair or sprinkle over tomato soup to add texture—they even make a tasty snack straight from the jar.
Tuscan Ribollita Soup with Rustic Bread

This hearty Tuscan soup transforms humble ingredients into a comforting, rustic meal that’s perfect for chilly evenings. Traditionally made to use up leftover bread and vegetables, it’s a forgiving, one-pot wonder that deepens in flavor overnight—making it ideal for meal prep. Let’s build it step-by-step, focusing on layering flavors for a rich, satisfying result.
Serving: 6 | Pre Time: 20 minutes | Cooking Time: 45 minutes
Ingredients
– 2 tablespoons extra virgin olive oil (my go-to for its fruity depth)
– 1 large yellow onion, diced (I like a medium dice for even cooking)
– 2 carrots, peeled and diced
– 2 celery stalks, diced
– 3 cloves garlic, minced (freshly minced releases the best aroma)
– 1 (28-ounce) can crushed tomatoes
– 4 cups vegetable broth (low-sodium lets you control the salt)
– 1 (15-ounce) can cannellini beans, drained and rinsed
– 4 cups chopped kale, stems removed (I prefer lacinato kale for tenderness)
– 4 cups day-old rustic bread, torn into 1-inch pieces (stale bread soaks up the broth beautifully)
– Salt and freshly ground black pepper
– Grated Parmesan cheese for serving (optional, but a sprinkle adds a savory finish)
Instructions
1. Heat 2 tablespoons of extra virgin olive oil in a large Dutch oven or heavy pot over medium heat until shimmering, about 2 minutes.
2. Add the diced onion, carrots, and celery to the pot. Cook, stirring occasionally, until the vegetables soften and the onion turns translucent, about 8–10 minutes.
3. Stir in the minced garlic and cook until fragrant, about 1 minute, being careful not to let it burn.
4. Pour in the can of crushed tomatoes and 4 cups of vegetable broth, scraping the bottom of the pot to release any browned bits for extra flavor.
5. Bring the mixture to a gentle boil, then reduce the heat to low and let it simmer uncovered for 15 minutes to allow the flavors to meld.
6. Add the drained cannellini beans and chopped kale to the pot. Simmer for another 10 minutes until the kale wilts and becomes tender.
7. Gently fold in the torn rustic bread pieces until they are fully submerged in the broth. Let the soup sit off the heat for 5 minutes—the bread will thicken the soup as it absorbs the liquid.
8. Season the soup with salt and freshly ground black pepper to your liking, starting with 1 teaspoon of salt and adjusting as needed.
9. Ladle the soup into bowls and top with grated Parmesan cheese if desired.
Final thoughts: For a truly authentic touch, let the soup cool completely and reheat it the next day—the flavors intensify wonderfully. Serve it with an extra drizzle of olive oil and crusty bread on the side for dipping into the thick, bean-studded broth.
Hearty French Toast Casserole
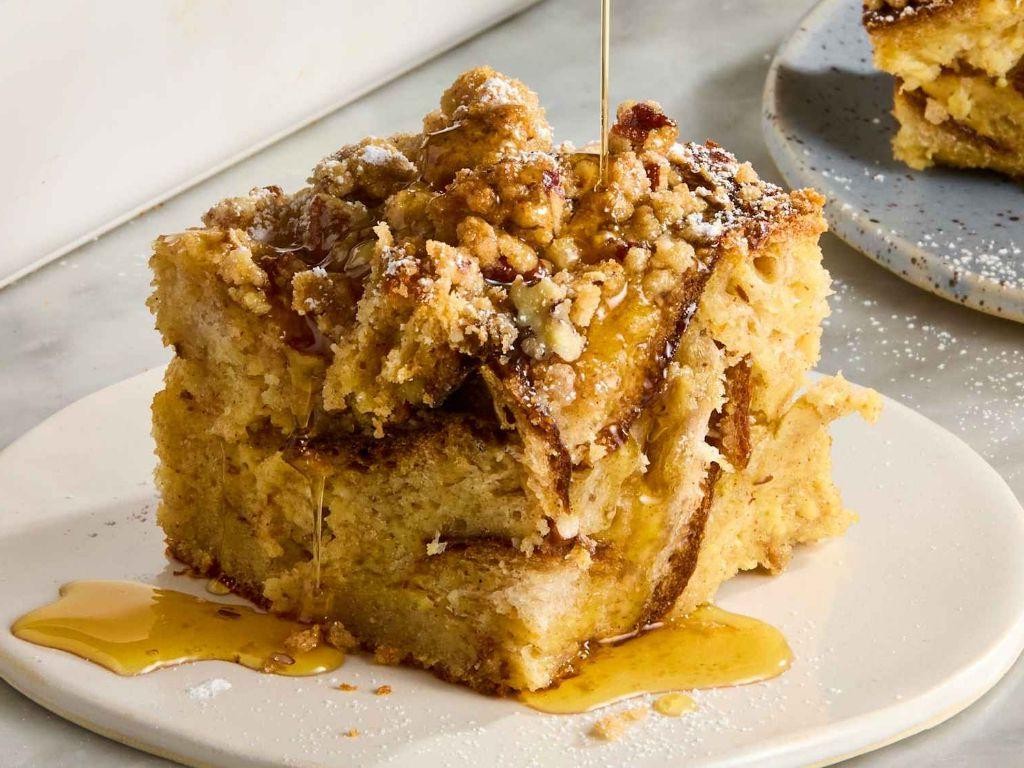
Kickstart your weekend mornings with this cozy, make-ahead breakfast that transforms humble bread into a decadent treat. This Hearty French Toast Casserole is perfect for feeding a crowd with minimal morning fuss, as it soaks overnight to develop deep, custardy flavor.
Serving: 8 | Pre Time: 15 minutes | Cooking Time: 50 minutes
Ingredients
– 1 loaf (about 16 oz) of day-old challah or brioche, torn into 1-inch pieces—stale bread soaks up the custard beautifully.
– 6 large eggs, preferably at room temperature for smoother mixing.
– 2 cups whole milk; I find the richness makes all the difference.
– 1/2 cup heavy cream for an extra luscious texture.
– 1/2 cup granulated sugar, plus 2 tablespoons for the topping.
– 2 teaspoons pure vanilla extract—the real stuff adds a warm aroma.
– 1 teaspoon ground cinnamon, my favorite spice for that classic French toast flavor.
– 1/4 teaspoon fine sea salt to balance the sweetness.
– 4 tablespoons (1/2 stick) unsalted butter, melted, for greasing and drizzling.
Instructions
1. Preheat your oven to 350°F (175°C) and position a rack in the center.
2. Generously brush a 9×13-inch baking dish with 2 tablespoons of the melted butter, coating the bottom and sides evenly.
3. In a large mixing bowl, whisk together the 6 eggs until fully blended and slightly frothy, about 1 minute.
4. Add the 2 cups of whole milk, 1/2 cup of heavy cream, 1/2 cup of granulated sugar, 2 teaspoons of vanilla extract, 1 teaspoon of cinnamon, and 1/4 teaspoon of salt to the bowl.
5. Whisk the mixture vigorously for 2-3 minutes until the sugar is completely dissolved and the custard is smooth. Tip: Whisking well prevents a grainy texture.
6. Place the torn bread pieces into the prepared baking dish, spreading them in an even layer.
7. Pour the custard mixture evenly over the bread, using a spatula to gently press down so all pieces are submerged.
8. Cover the dish tightly with plastic wrap and refrigerate for at least 4 hours or, ideally, overnight to allow the bread to fully absorb the liquid.
9. Remove the casserole from the refrigerator 30 minutes before baking to take the chill off.
10. Drizzle the remaining 2 tablespoons of melted butter over the top, then sprinkle evenly with the 2 tablespoons of sugar.
11. Bake in the preheated oven for 45-50 minutes, until the top is golden brown, puffed, and the center is set with no liquid jiggle. Tip: Check at 40 minutes—ovens vary, so look for that crisp, caramelized crust.
12. Let the casserole cool on a wire rack for 10-15 minutes before serving to allow it to firm up slightly. Tip: This resting time makes slicing cleaner.
Mornings are brighter with this casserole’s custard-soaked interior and crisp, sugary top. Serve it warm with a drizzle of maple syrup or a dollop of whipped cream for an indulgent twist, and enjoy the rich, comforting flavors that make it a family favorite.
Traditional Italian Bread Soup

A comforting bowl of traditional Italian bread soup is exactly what you need on a chilly day—this rustic dish transforms simple ingredients into something magical. Let me guide you through each step so you can recreate this cozy classic in your own kitchen.
Serving: 4 | Pre Time: 15 minutes | Cooking Time: 30 minutes
Ingredients
– 2 tablespoons extra virgin olive oil (my go-to for its fruity aroma)
– 1 medium yellow onion, diced
– 2 cloves garlic, minced (freshly minced makes all the difference)
– 2 medium carrots, peeled and chopped
– 2 celery stalks, chopped
– 4 cups vegetable broth (I prefer low-sodium to control seasoning)
– 1 (14.5-ounce) can diced tomatoes, undrained
– 4 cups day-old rustic bread, torn into 1-inch pieces (stale bread soaks up flavor beautifully)
– 1 teaspoon dried oregano
– ½ teaspoon salt
– ¼ teaspoon black pepper
– ¼ cup fresh parsley, chopped (adds a bright finish)
– Grated Parmesan cheese for serving (optional, but highly recommended)
Instructions
1. Heat the olive oil in a large pot over medium heat until it shimmers, about 1 minute.
2. Add the diced onion and cook, stirring occasionally, until translucent, about 5 minutes.
3. Stir in the minced garlic and cook until fragrant, about 30 seconds—be careful not to burn it.
4. Add the chopped carrots and celery, cooking until slightly softened, about 5 minutes.
5. Pour in the vegetable broth and diced tomatoes with their juices, then bring to a boil.
6. Reduce the heat to low, cover the pot, and simmer for 15 minutes to let the flavors meld.
7. Stir in the torn bread pieces, dried oregano, salt, and black pepper.
8. Cook uncovered for 5 minutes, stirring occasionally, until the bread softens and thickens the soup.
9. Remove from heat and fold in the chopped parsley.
10. Ladle the soup into bowls and top with grated Parmesan cheese if desired.
During the simmering, the bread breaks down to create a wonderfully thick, almost stew-like texture that’s hearty and satisfying. Each spoonful bursts with savory tomato and herb notes, making it perfect for dunking crusty bread on the side or garnishing with a drizzle of olive oil for extra richness.
Cinnamon Bread Pudding with Vanilla Sauce
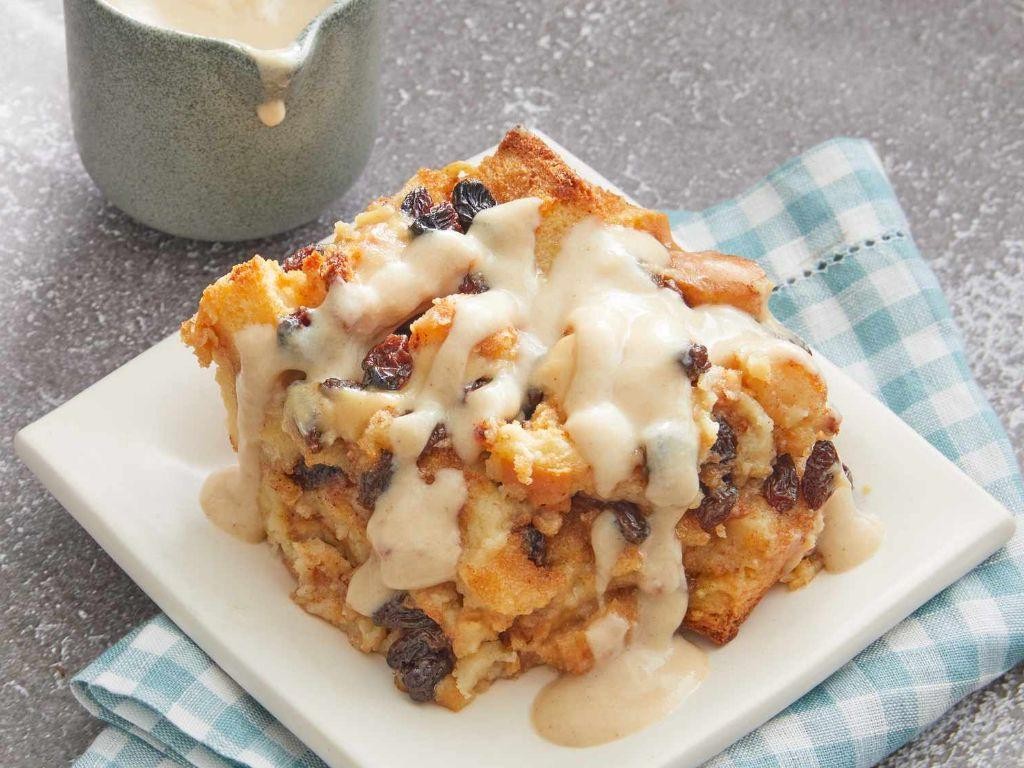
Nothing beats the cozy aroma of cinnamon-spiced bread pudding baking in the oven on a chilly day. This classic dessert transforms simple ingredients into a rich, custardy treat that’s perfect for sharing with family or enjoying as a sweet ending to any meal. Let’s walk through each step together to create this comforting dish with a silky vanilla sauce.
Serving: 8 | Pre Time: 20 minutes | Cooking Time: 50 minutes
Ingredients
– 1 loaf (about 16 oz) day-old French bread, torn into 1-inch pieces—stale bread absorbs the custard better without getting soggy.
– 4 large eggs, at room temperature for easier mixing and a smoother custard.
– 2 cups whole milk, which I find gives the pudding a creamier texture than lower-fat options.
– 1 cup granulated sugar, divided—I like to reserve ¼ cup for the sauce to control sweetness.
– 2 teaspoons ground cinnamon, plus an extra pinch for sprinkling on top before baking.
– 1 tablespoon pure vanilla extract, split between the pudding and sauce for a fragrant boost.
– ½ cup unsalted butter, melted and slightly cooled to avoid scrambling the eggs.
– ¼ teaspoon salt, to balance the sweetness and enhance flavors.
– 1 cup heavy cream, for the sauce—it creates a luxurious, velvety finish.
Instructions
1. Preheat your oven to 350°F (175°C) and grease a 9×13-inch baking dish with butter or non-stick spray.
2. In a large bowl, whisk together the eggs, milk, ¾ cup of sugar, cinnamon, 1½ teaspoons of vanilla extract, melted butter, and salt until fully combined and smooth.
3. Add the torn bread pieces to the bowl and gently fold them into the custard mixture using a spatula, ensuring all bread is evenly coated. Tip: Let the mixture sit for 10 minutes to allow the bread to soak up the custard, which prevents a dry texture.
4. Transfer the soaked bread mixture to the prepared baking dish, spreading it out evenly with the spatula.
5. Sprinkle the remaining pinch of cinnamon over the top of the pudding for a decorative touch and extra flavor.
6. Bake in the preheated oven for 45-50 minutes, or until the top is golden brown and a knife inserted into the center comes out clean. Tip: Check at 40 minutes to avoid over-baking, as ovens can vary.
7. While the pudding bakes, make the vanilla sauce: In a small saucepan over medium heat, combine the heavy cream, remaining ¼ cup of sugar, and remaining ½ teaspoon of vanilla extract.
8. Stir the sauce constantly with a whisk for 5-7 minutes, until it thickens slightly and coats the back of a spoon. Tip: Remove from heat immediately once thickened to prevent curdling, and let it cool for a few minutes before serving.
9. Remove the baked bread pudding from the oven and let it cool for 10 minutes on a wire rack to set slightly.
10. Serve the warm bread pudding in slices or scoops, drizzled generously with the vanilla sauce.
Velvety and rich, this bread pudding boasts a soft, custard-like interior with crispy edges from the baked bread. The cinnamon infuses every bite with warmth, perfectly complemented by the sweet, smooth vanilla sauce. For a creative twist, try serving it with a scoop of vanilla ice cream or a sprinkle of toasted nuts for added crunch.
Cheesy Bread Bake with Spinach and Artichokes

Meticulously combining the creamy richness of melted cheese with the earthy notes of spinach and artichokes, this Cheesy Bread Bake transforms simple ingredients into a comforting, crowd-pleasing dish. Let’s walk through each step together to ensure your bake comes out perfectly golden and bubbling. You’ll find this methodical approach makes the process straightforward, even if you’re new to the kitchen.
Serving: 6 | Pre Time: 15 minutes | Cooking Time: 30 minutes
Ingredients
– 1 loaf of crusty French bread, torn into bite-sized pieces (I like using day-old bread for better texture)
– 8 oz cream cheese, softened to room temperature for easy mixing
– 1 cup shredded mozzarella cheese, divided (I always keep a little extra for topping)
– 1/2 cup grated Parmesan cheese
– 1 (14 oz) can artichoke hearts, drained and chopped
– 2 cups fresh spinach, roughly chopped (baby spinach works great here)
– 1/2 cup mayonnaise, my go-to for added creaminess
– 2 cloves garlic, minced (freshly minced gives the best flavor)
– 1/2 tsp black pepper
– 1/4 tsp salt
– 2 tbsp unsalted butter, melted (I prefer unsalted to control the saltiness)
Instructions
1. Preheat your oven to 375°F (190°C) and grease a 9×13-inch baking dish lightly with butter or cooking spray.
2. In a large mixing bowl, combine the softened cream cheese, 3/4 cup of the mozzarella cheese, Parmesan cheese, mayonnaise, minced garlic, black pepper, and salt. Stir until smooth and well blended.
3. Tip: Let the cream cheese sit out for about 30 minutes before starting to ensure it mixes easily without lumps.
4. Fold in the chopped artichoke hearts and fresh spinach into the cheese mixture until evenly distributed.
5. Add the torn bread pieces to the bowl and gently toss to coat every piece thoroughly with the mixture.
6. Transfer the coated bread mixture to the prepared baking dish, spreading it out into an even layer.
7. Sprinkle the remaining 1/4 cup of mozzarella cheese evenly over the top of the bake.
8. Drizzle the melted butter over the cheese topping to help it brown nicely in the oven.
9. Tip: For extra crispiness, place the dish on the middle rack of the oven to ensure even heat distribution.
10. Bake in the preheated oven for 25-30 minutes, or until the top is golden brown and the edges are bubbling.
11. Tip: Check at the 25-minute mark—if the top isn’t browned enough, broil for 1-2 minutes, watching closely to prevent burning.
12. Remove the bake from the oven and let it cool for 5 minutes before serving to allow the flavors to settle.
Delightfully crispy on top with a soft, gooey center, this bake offers a savory blend of cheeses and vegetables that’s irresistible straight from the oven. Serve it warm as a hearty appetizer or pair it with a simple salad for a complete meal—leftovers reheat beautifully for a quick snack the next day.
Spicy Chorizo and Bread Skillet

Let’s dive into a cozy, one-pan wonder that’s perfect for a quick weeknight dinner or a lazy weekend brunch—this Spicy Chorizo and Bread Skillet combines savory, smoky chorizo with crispy, golden bread in a hearty, satisfying dish that comes together in under 30 minutes.
Serving: 4 | Pre Time: 10 minutes | Cooking Time: 20 minutes
Ingredients
– 1 lb fresh chorizo, casings removed (I like the spicy variety for an extra kick)
– 4 cups cubed day-old rustic bread, about 1-inch pieces (stale bread crisps up beautifully)
– 1 large yellow onion, finely diced
– 2 cloves garlic, minced (freshly minced garlic adds the best aroma)
– 1 red bell pepper, diced
– 2 tbsp extra virgin olive oil (my go-to for its fruity flavor)
– 1 tsp smoked paprika
– 1/2 tsp ground cumin
– 1/4 cup chopped fresh parsley, for garnish
– Salt, to season as needed (I often skip extra salt since chorizo is already seasoned)
Instructions
1. Heat 1 tbsp extra virgin olive oil in a large skillet over medium-high heat until shimmering, about 2 minutes.
2. Add 1 lb fresh chorizo to the skillet, breaking it into small crumbles with a wooden spoon, and cook until browned and cooked through, 5–7 minutes.
3. Transfer the cooked chorizo to a plate lined with paper towels to drain excess grease, leaving about 1 tbsp of fat in the skillet.
4. Add 1 large yellow onion and 1 red bell pepper to the skillet, stirring to coat in the fat, and cook until softened and lightly browned, 5–6 minutes.
5. Stir in 2 cloves minced garlic, 1 tsp smoked paprika, and 1/2 tsp ground cumin, cooking until fragrant, about 1 minute.
6. Push the vegetable mixture to the sides of the skillet and add the remaining 1 tbsp extra virgin olive oil to the center.
7. Place 4 cups cubed day-old rustic bread in the skillet, tossing to coat in the oil, and cook until golden and crispy on all sides, 4–5 minutes, stirring occasionally.
8. Return the cooked chorizo to the skillet, mixing everything together, and heat through for 2 minutes.
9. Remove from heat and sprinkle with 1/4 cup chopped fresh parsley for garnish.
10. Serve immediately while hot.
Keep in mind that the bread should be delightfully crispy on the outside while soaking up the chorizo’s savory juices, offering a contrast of textures with each bite. For a creative twist, top it with a fried egg or serve alongside a simple green salad to balance the richness.
Moist Coffee Cake Muffins with Streusel Topping

A moist, tender coffee cake muffin with a buttery streusel topping is the perfect treat to bake on a cozy morning. These muffins come together quickly with simple pantry staples, and that crumbly streusel adds a delightful texture contrast. Let’s walk through each step methodically so you can achieve bakery-quality results right at home.
Serving: 12 | Pre Time: 15 minutes | Cooking Time: 20 minutes
Ingredients
– 2 cups all-purpose flour (I always spoon and level it for accuracy)
– 1 cup granulated sugar (for that classic sweet base)
– 1/2 cup unsalted butter, softened (room temp blends best with the sugar)
– 2 large eggs (I prefer room temp eggs here for a smoother batter)
– 1 cup buttermilk (it adds a lovely tang and moisture)
– 1 tsp baking powder
– 1/2 tsp baking soda
– 1/2 tsp salt
– 1 tsp vanilla extract (pure vanilla is my go-to for the best flavor)
– For the streusel: 1/2 cup brown sugar, 1/4 cup all-purpose flour, 1/4 cup cold unsalted butter cubed, and 1 tsp ground cinnamon
Instructions
1. Preheat your oven to 375°F and line a 12-cup muffin tin with paper liners.
2. In a medium bowl, whisk together 2 cups all-purpose flour, 1 tsp baking powder, 1/2 tsp baking soda, and 1/2 tsp salt until well combined.
3. In a large mixing bowl, use an electric mixer to cream 1/2 cup softened unsalted butter and 1 cup granulated sugar on medium speed for about 2 minutes, until light and fluffy.
4. Add 2 large eggs one at a time to the butter mixture, beating well after each addition until fully incorporated.
5. Stir in 1 tsp vanilla extract into the wet ingredients.
6. Gradually add the dry flour mixture to the wet ingredients, alternating with 1 cup buttermilk, beginning and ending with the dry ingredients, and mix on low speed just until combined—tip: overmixing can lead to tough muffins, so stop as soon as no flour streaks remain.
7. In a small bowl, make the streusel by combining 1/2 cup brown sugar, 1/4 cup all-purpose flour, and 1 tsp ground cinnamon, then cut in 1/4 cup cold unsalted butter cubes with a fork or your fingers until crumbly.
8. Divide the muffin batter evenly among the 12 prepared muffin cups, filling each about two-thirds full.
9. Sprinkle the streusel topping generously over each muffin batter portion, pressing it lightly so it adheres—tip: for extra crunch, you can add a pinch more cinnamon to the streusel if desired.
10. Bake in the preheated oven at 375°F for 18-20 minutes, or until a toothpick inserted into the center of a muffin comes out clean—tip: rotate the pan halfway through baking for even browning.
11. Remove the muffins from the oven and let them cool in the tin for 5 minutes before transferring to a wire rack to cool completely.
Out of the oven, these muffins boast a tender, moist crumb that pairs beautifully with the crisp, cinnamon-spiced streusel. Enjoy them warm with a cup of coffee for a classic treat, or get creative by drizzling with a simple glaze or serving alongside fresh berries for a brunch spread. The aroma alone will make your kitchen feel like a cozy bakery.
Herbed Biscotti from Stale Bread
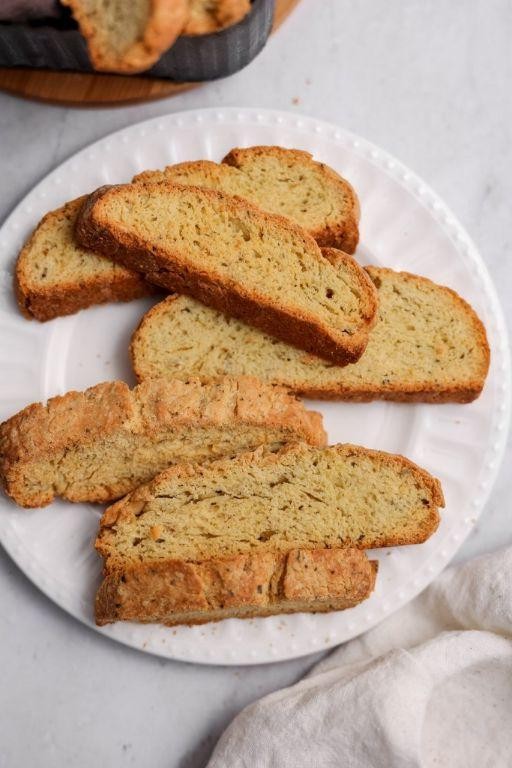
Wondering what to do with that leftover loaf turning stale on your counter? This clever recipe transforms day-old bread into crisp, herbed biscotti that are perfect for dipping in soup or enjoying with cheese. It’s a thrifty, flavorful project that feels both resourceful and rewarding.
Serving: 24 biscotti | Pre Time: 15 minutes | Cooking Time: 50 minutes
Ingredients
– 8 cups of stale bread cubes (about 1-inch pieces from a rustic loaf—I save ends in the freezer for this)
– 1/2 cup extra virgin olive oil, my go-to for its fruity depth
– 3 large eggs, ideally at room temperature for better blending
– 1/4 cup grated Parmesan cheese, the kind you grate fresh for the best flavor
– 2 tbsp chopped fresh rosemary, from my garden if possible, but dried works in a pinch
– 1 tsp garlic powder, a shortcut I love for consistent seasoning
– 1/2 tsp kosher salt, to balance the herbs
– 1/4 tsp black pepper, freshly ground for a bright kick
Instructions
1. Preheat your oven to 300°F and line a baking sheet with parchment paper.
2. In a large bowl, combine the stale bread cubes, extra virgin olive oil, eggs, grated Parmesan cheese, chopped fresh rosemary, garlic powder, kosher salt, and black pepper.
3. Toss everything together with your hands for about 2 minutes until the bread is evenly coated and the mixture holds together when squeezed—tip: if it feels too dry, add a splash more olive oil.
4. Transfer the mixture to the prepared baking sheet and shape it into a log about 12 inches long and 4 inches wide, pressing firmly to compact it.
5. Bake the log in the preheated oven for 30 minutes until it’s firm to the touch and lightly golden on top.
6. Remove the log from the oven and let it cool on the baking sheet for 10 minutes—tip: this makes slicing easier and prevents crumbling.
7. Reduce the oven temperature to 275°F.
8. Using a serrated knife, slice the cooled log diagonally into 1/2-inch thick pieces.
9. Arrange the slices cut-side down on the baking sheet in a single layer.
10. Bake for 20 minutes, then flip each slice and bake for another 10 minutes until crisp and dry—tip: watch closely at the end to avoid over-browning.
11. Turn off the oven and let the biscotti cool inside for 15 minutes to crisp up further.
12. Transfer to a wire rack to cool completely.
Delightfully crunchy with a savory herbal aroma, these biscotti offer a satisfying snap that’s ideal for dunking in tomato soup or pairing with a soft goat cheese. Store them in an airtight container, and they’ll stay crisp for days, making them a handy snack for busy weeks.
Golden Brown Breadsticks with Olive Oil

Baking these golden brown breadsticks is simpler than you might think, and the result is a crispy, flavorful snack that’s perfect for dipping or enjoying on its own. Let’s walk through each step together, ensuring you end up with perfectly baked sticks every time. You’ll be amazed at how a few basic ingredients transform into something so delicious.
Serving: 12 | Pre Time: 20 minutes | Cooking Time: 15 minutes
Ingredients
– 2 cups all-purpose flour (I like to use unbleached for a slightly heartier texture)
– 1 tablespoon active dry yeast (check the expiration date to ensure it’s fresh)
– 1 teaspoon sugar (just a pinch to help activate the yeast)
– 1 teaspoon salt (I prefer fine sea salt for even distribution)
– ¾ cup warm water (around 110°F—test it on your wrist; it should feel comfortably warm)
– ¼ cup extra virgin olive oil (my go-to for its rich flavor, plus a little extra for brushing)
Instructions
1. In a large mixing bowl, combine the warm water, sugar, and yeast, then let it sit for 5 minutes until foamy.
2. Add the flour, salt, and olive oil to the yeast mixture, stirring until a shaggy dough forms.
3. Turn the dough onto a lightly floured surface and knead for 5 minutes until smooth and elastic.
4. Place the dough in a lightly oiled bowl, cover with a damp towel, and let it rise in a warm spot for 1 hour until doubled in size.
5. Preheat your oven to 400°F and line a baking sheet with parchment paper.
6. Punch down the dough to release air, then divide it into 12 equal pieces on a floured surface.
7. Roll each piece into a 6-inch rope, about ½-inch thick, and place them on the prepared baking sheet, spacing them 1 inch apart.
8. Brush the tops of the breadsticks lightly with extra olive oil for a golden finish.
9. Bake in the preheated oven for 12-15 minutes, rotating the sheet halfway through, until they’re golden brown and sound hollow when tapped.
10. Transfer the breadsticks to a wire rack to cool for 5 minutes before serving.
Soft and chewy on the inside with a satisfyingly crisp exterior, these breadsticks offer a subtle olive oil aroma that pairs wonderfully with soups or dips. Serve them warm alongside a marinara sauce or simply enjoy their rustic charm straight from the oven—they’re sure to disappear quickly!
Nutty Granola Bars with Crumbled Bread
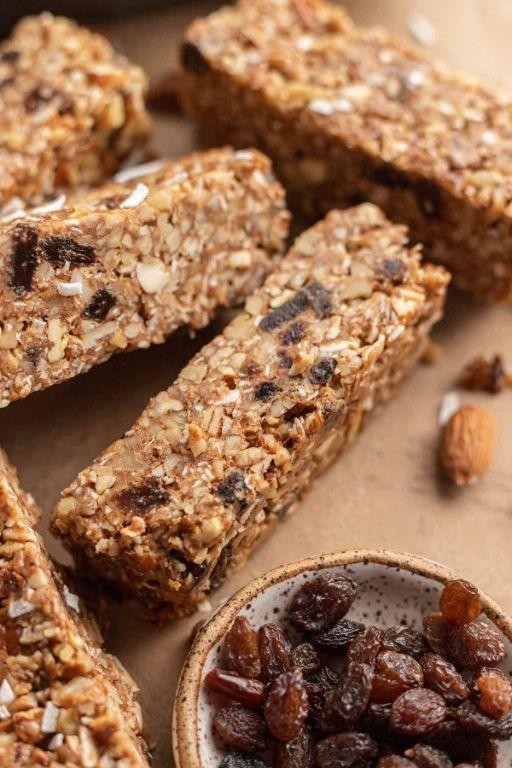
Mixing up a batch of homemade granola bars is one of my favorite ways to transform leftover pantry staples into a wholesome snack. Today, we’re using crumbled bread to add a delightful, unexpected texture that makes these bars extra satisfying and helps reduce food waste. Let’s walk through the simple steps together to create these nutty, chewy treats.
Serving: 12 | Pre Time: 15 minutes | Cooking Time: 25 minutes
Ingredients
– 2 cups old-fashioned rolled oats (not quick-cooking—they hold their shape better)
– 1 cup mixed nuts, roughly chopped (I love a combo of almonds and walnuts for crunch)
– 1/2 cup honey (local honey adds a lovely floral note if you have it)
– 1/4 cup creamy peanut butter (the natural kind without added sugar is my go-to for better binding)
– 1/4 cup unsalted butter, melted (I always use unsalted to control the saltiness)
– 1 tsp pure vanilla extract (the real stuff makes a difference in flavor)
– 1/2 tsp ground cinnamon
– 1/4 tsp fine sea salt
– 1 cup crumbled stale bread (from about 2 slices of whole wheat or white bread—it’s a great way to use up leftovers)
Instructions
1. Preheat your oven to 325°F and line an 8×8-inch baking pan with parchment paper, leaving some overhang on the sides for easy removal later.
2. In a large mixing bowl, combine the 2 cups old-fashioned rolled oats, 1 cup roughly chopped mixed nuts, 1 cup crumbled stale bread, 1/2 tsp ground cinnamon, and 1/4 tsp fine sea salt. Tip: Toast the oats and nuts in a dry skillet over medium heat for 5 minutes first for a deeper, nuttier flavor—just let them cool slightly before mixing.
3. In a medium saucepan over low heat, warm the 1/2 cup honey, 1/4 cup creamy peanut butter, 1/4 cup melted unsalted butter, and 1 tsp pure vanilla extract. Stir constantly with a wooden spoon for about 3 minutes until the mixture is smooth and fully combined. Tip: Don’t let it boil, as overheating can cause the honey to become too sticky.
4. Pour the warm honey mixture over the dry ingredients in the large bowl. Use a spatula to fold everything together until all the oats, nuts, and bread crumbs are evenly coated and no dry spots remain.
5. Transfer the mixture to the prepared baking pan. Press it down firmly and evenly with the back of a measuring cup or your hands. Tip: Really pack it in tight—this ensures the bars hold together well after baking and don’t crumble.
6. Bake in the preheated oven at 325°F for 20-25 minutes, or until the edges turn a light golden brown and the center looks set. Avoid overbaking to keep them chewy.
7. Remove the pan from the oven and let it cool completely in the pan on a wire rack for at least 1 hour. Then, use the parchment overhang to lift the slab out, place it on a cutting board, and slice into 12 even bars.
Perfectly chewy with a subtle crunch from the nuts and bread, these bars offer a balanced sweetness that’s not overly sugary. Pack them for hikes or afternoon snacks, or crumble one over yogurt for a quick breakfast—the bread adds a unique, soft texture that makes every bite interesting.
Zesty Bread and Butter Pickles
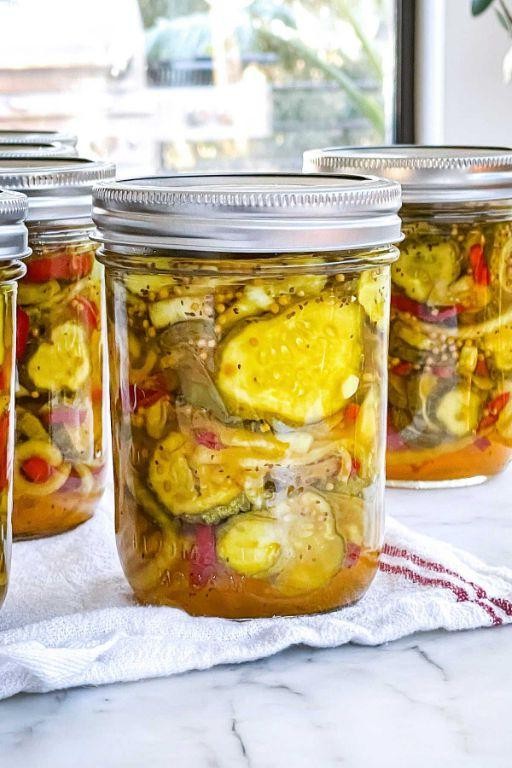
You’ll be delighted by how simple it is to make these crisp, tangy bread and butter pickles at home. With just a few basic ingredients and a little patience, you can transform fresh cucumbers into a versatile condiment that’s perfect for sandwiches, burgers, or even snacking straight from the jar. Let’s walk through each step together, ensuring you get that perfect balance of sweet, sour, and spicy every time.
Serving: 2 pints | Pre Time: 30 minutes | Cooking Time: 10 minutes
Ingredients
– 1 pound pickling cucumbers, sliced into ¼-inch rounds—I like using Kirby cucumbers for their firm texture and fewer seeds.
– 1 medium yellow onion, thinly sliced—a sweet onion like Vidalia works beautifully here to balance the acidity.
– 1 tablespoon kosher salt, which draws out excess moisture for a crisper pickle.
– 1 cup granulated sugar, my go-to for that classic sweet-and-sour profile.
– 1 cup apple cider vinegar, which adds a fruity tang that white vinegar can’t match.
– ½ cup water, to dilute the brine just enough.
– 1 tablespoon mustard seeds, for a subtle earthy kick.
– 1 teaspoon celery seeds, my secret for an extra layer of savory depth.
– ½ teaspoon turmeric powder, which gives the pickles their vibrant golden hue.
– ¼ teaspoon red pepper flakes, optional but I always add a pinch for a gentle heat.
Instructions
1. In a large bowl, combine the sliced cucumbers and onion with the kosher salt, tossing gently to coat evenly.
2. Let the mixture sit at room temperature for 30 minutes to draw out excess liquid, which helps keep the pickles crisp.
3. Tip: Rinse the cucumbers and onion under cold water in a colander to remove the salt, then pat them dry with paper towels to prevent a soggy brine.
4. In a medium saucepan over medium heat, combine the granulated sugar, apple cider vinegar, water, mustard seeds, celery seeds, turmeric powder, and red pepper flakes if using.
5. Stir the mixture constantly with a wooden spoon until the sugar fully dissolves, about 2–3 minutes.
6. Bring the brine to a gentle boil over medium-high heat, then reduce the heat to low and simmer for 5 minutes to infuse the flavors.
7. Tip: Avoid boiling too vigorously, as it can cause the vinegar to evaporate and alter the brine’s balance.
8. Add the rinsed and dried cucumber and onion slices to the saucepan, stirring gently to coat them in the hot brine.
9. Cook the mixture over low heat for exactly 3 minutes, stirring occasionally, until the cucumbers turn slightly translucent but still retain some crunch.
10. Tip: Use a slotted spoon to transfer the pickles and onions into clean, sterilized pint jars, leaving about ½ inch of headspace at the top.
11. Pour the hot brine over the pickles in the jars, ensuring they are completely submerged to prevent spoilage.
12. Seal the jars tightly with lids and let them cool to room temperature on the counter for 1 hour.
13. Refrigerate the jars for at least 24 hours before serving to allow the flavors to fully develop.
Just imagine the satisfying crunch and bright, zesty flavor these pickles bring to your meals. Their sweet-and-sour profile pairs wonderfully with grilled cheeses or as a topping for hot dogs, adding a burst of freshness that store-bought versions often lack. For a creative twist, try chopping them finely into potato salad or serving alongside a charcuterie board for a homemade touch.
Conclusion
Ultimately, this roundup proves that stale bread is a treasure trove of possibilities, from savory strata to sweet bread puddings. We hope these 33 ideas inspire you to reduce waste and create something delicious. Give a recipe a try, then drop a comment with your favorite—and don’t forget to share this article on Pinterest to help other home cooks!


