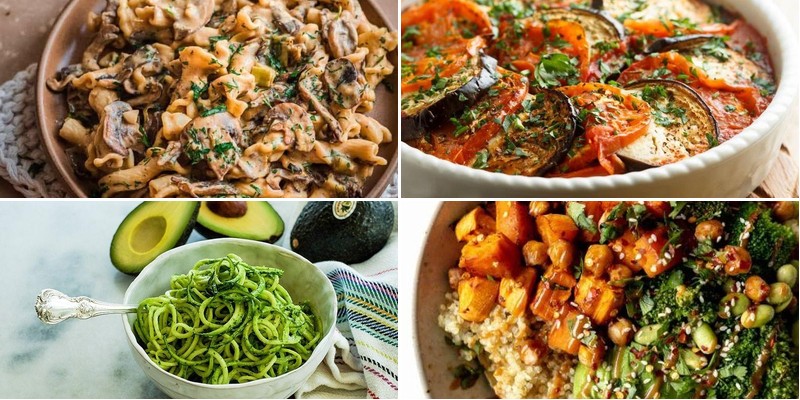
Delicious dairy-free vegetarian meals don’t have to be complicated or boring! Whether you’re looking for quick weeknight dinners, cozy comfort food, or fresh seasonal favorites, we’ve gathered 31 mouthwatering recipes that prove plant-based eating can be both satisfying and exciting. Get ready to discover your new go-to dishes that will make your taste buds dance and keep you feeling fantastic. Let’s dive into these flavorful creations!
Creamy Coconut Chickpea Curry

You know those evenings when you’re craving something cozy but don’t want to spend hours in the kitchen? Yeah, me too—that’s exactly why this creamy coconut chickpea curry has become my go-to weeknight hero. It’s hearty, comforting, and comes together in under 30 minutes, making it perfect for busy days when takeout sounds tempting but homemade feels better.
2
servings10
minutes20
minutesIngredients
– A glug of olive oil (about 2 tablespoons)
– One yellow onion, finely chopped
– Three garlic cloves, minced
– A thumb-sized piece of fresh ginger, grated (about 1 tablespoon)
– A couple of teaspoons of curry powder
– A pinch of red pepper flakes for a subtle kick
– Two 15-ounce cans of chickpeas, drained and rinsed
– One 14-ounce can of full-fat coconut milk
– A big handful of fresh spinach (about 2 cups)
– A generous squeeze of lime juice (from half a lime)
– A sprinkle of salt to season
Instructions
1. Heat 2 tablespoons of olive oil in a large skillet over medium heat until it shimmers.
2. Add the chopped onion and cook for 5 minutes, stirring occasionally, until it turns soft and translucent.
3. Stir in the minced garlic and grated ginger, and cook for 1 minute until fragrant—be careful not to burn them!
4. Sprinkle in 2 teaspoons of curry powder and a pinch of red pepper flakes, toasting them for 30 seconds to deepen the flavors.
5. Pour in the drained chickpeas, tossing to coat them evenly in the spice mixture.
6. Add the full-fat coconut milk, stirring to combine, then bring the curry to a gentle simmer.
7. Reduce the heat to low, cover the skillet, and let it cook for 10 minutes to allow the chickpeas to absorb the flavors.
8. Uncover the skillet and stir in the fresh spinach, cooking for 2–3 minutes until it wilts completely.
9. Squeeze in the juice from half a lime and season with salt to taste, stirring everything together.
10. Remove the skillet from the heat and let it sit for 2 minutes to thicken slightly. Every spoonful of this curry is velvety and rich, with tender chickpeas and a hint of warmth from the spices. Enjoy it over fluffy rice or with naan for dipping—it’s so good, you might just forget it’s plant-based!
Zucchini Noodles with Avocado Pesto
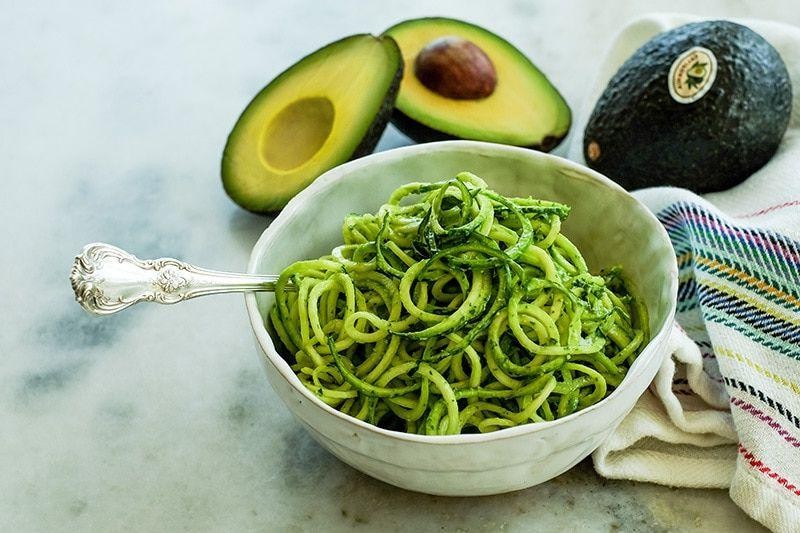
Trying to eat healthier while still craving something creamy and satisfying led me to this zucchini noodle revelation—it’s become my go-to when I want a quick, veggie-packed meal that feels indulgent without the guilt. I love how versatile it is, and it’s perfect for those evenings when I’m racing against the clock but still want something fresh and flavorful.
2
servings15
minutes3
minutesIngredients
– 2 medium zucchinis, spiralized into noodles
– 1 ripe avocado, pitted and scooped out
– A big handful of fresh basil leaves (about 1 cup packed)
– A couple of garlic cloves, peeled
– A generous squeeze of fresh lemon juice (about 2 tablespoons)
– A splash of extra virgin olive oil (around 1/4 cup)
– A pinch of salt and a crack of black pepper
– Optional: a handful of cherry tomatoes for topping
Instructions
1. Spiralize the zucchinis into noodle-like strands using a spiralizer, and set them aside in a colander to let any excess moisture drain—this keeps your dish from getting watery. Tip: If you don’t have a spiralizer, a vegetable peeler works for wide ribbons!
2. In a food processor or blender, combine the avocado, basil, garlic, lemon juice, olive oil, salt, and pepper.
3. Pulse the mixture for about 30 seconds, scraping down the sides once, until it’s smooth and creamy with no chunks. Tip: Add a tablespoon of water if it’s too thick for your liking.
4. Heat a large non-stick skillet over medium heat for 1 minute, then add the zucchini noodles.
5. Sauté the noodles for 2–3 minutes, stirring gently, until they’re just tender but still have a slight crunch—overcooking makes them mushy. Tip: Avoid adding oil here to keep it light; the noodles will soften from the heat.
6. Remove the skillet from the heat and immediately toss the zucchini noodles with the avocado pesto until evenly coated.
7. Serve right away, topped with halved cherry tomatoes if using.
Zesty and creamy, this dish delivers a burst of freshness with every forkful, and the avocado pesto clings beautifully to the tender-crisp noodles. I love serving it alongside grilled chicken or with a sprinkle of red pepper flakes for a spicy kick—it’s a meal that always feels like a treat.
Roasted Cauliflower Tacos with Chipotle Sauce

Perfectly roasted cauliflower tacos have become my go-to weeknight dinner that feels anything but ordinary. I first discovered this magical combination when trying to use up leftover veggies, and now it’s a regular in our rotation—even my cauliflower-skeptic partner asks for seconds!
8
tacos15
minutes25
minutesIngredients
- 1 large head of cauliflower, cut into bite-sized florets
- 2 tablespoons of olive oil
- 1 teaspoon of chili powder
- 1/2 teaspoon of cumin
- 1/4 teaspoon of garlic powder
- A good pinch of salt
- 8 small corn tortillas
- 1/2 cup of plain Greek yogurt
- 1 tablespoon of chipotle in adobo sauce, minced
- A squeeze of fresh lime juice
- A handful of fresh cilantro leaves
- 1/4 of a red onion, thinly sliced
Instructions
- Preheat your oven to 425°F and line a baking sheet with parchment paper.
- Toss the cauliflower florets with olive oil, chili powder, cumin, garlic powder, and salt until evenly coated.
- Spread the cauliflower in a single layer on the baking sheet, making sure pieces aren’t touching for maximum crispiness.
- Roast for 20-25 minutes until the edges are golden brown and crispy, flipping halfway through.
- While the cauliflower roasts, warm the tortillas directly over a gas flame for 15-20 seconds per side until lightly charred, or heat in a dry skillet if you don’t have gas.
- Mix the Greek yogurt, minced chipotle, and lime juice in a small bowl until smooth.
- Assemble tacos by placing roasted cauliflower in warmed tortillas.
- Drizzle each taco generously with the chipotle sauce.
- Top with fresh cilantro leaves and thinly sliced red onion.
Nothing beats the contrast between the crispy, spiced cauliflower and the cool, smoky sauce. The charred tortillas add that authentic taco stand flavor that makes these feel truly special. Sometimes I’ll add sliced avocado or pickled jalapeños for extra texture and heat when I’m feeling fancy!
Vegan Mushroom Stroganoff
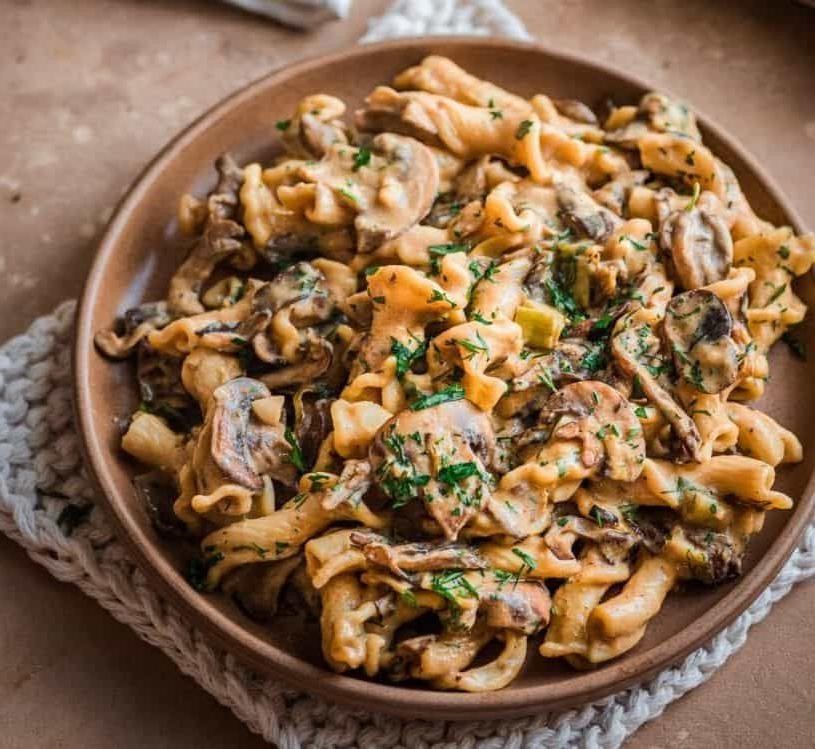
During those chilly autumn evenings when comfort food cravings hit hard, I find myself reaching for this vegan mushroom stroganoff recipe every single time. There’s something magical about how the earthy mushrooms and creamy sauce come together to create the coziest bowl of goodness that even my meat-loving husband devours without complaint.
4
servings25
minutes25
minutesIngredients
- 1 pound of cremini mushrooms, sliced
- 1 large yellow onion, diced
- 3 cloves of garlic, minced
- 2 tablespoons of olive oil
- 1 cup of vegetable broth
- 1 cup of raw cashews, soaked for at least 4 hours
- 1 tablespoon of nutritional yeast
- 1 teaspoon of smoked paprika
- A generous splash of soy sauce
- 12 ounces of wide egg-free noodles
- A handful of fresh parsley, chopped
Instructions
- Heat the olive oil in a large skillet over medium-high heat until it shimmers.
- Add the diced onion and cook for 5 minutes, stirring occasionally, until translucent and fragrant.
- Toss in the sliced mushrooms and cook for 8-10 minutes until they’ve released their liquid and started to brown nicely around the edges.
- Stir in the minced garlic and cook for just 1 minute until fragrant – careful not to burn it!
- While the mushrooms cook, bring a large pot of salted water to a rolling boil for the noodles.
- Drain the soaked cashews and blend them with vegetable broth, nutritional yeast, and smoked paprika until completely smooth and creamy.
- Pour the cashew cream mixture into the skillet with the mushrooms and onions.
- Add the splash of soy sauce and bring everything to a gentle simmer, stirring constantly.
- Cook the wide noodles according to package directions until al dente, then drain well.
- Reduce the stroganoff sauce heat to low and let it thicken for 3-4 minutes, stirring occasionally.
- Combine the drained noodles with the creamy mushroom sauce in the skillet, tossing gently to coat every strand.
- Garnish with the fresh chopped parsley right before serving.
Here’s what makes this dish truly special – the cashew cream creates this luxuriously velvety texture that clings perfectly to every noodle, while the smoked paprika adds that subtle smoky depth that makes you forget this is completely dairy-free. I love serving it in shallow bowls with an extra sprinkle of paprika on top, and it pairs beautifully with a simple arugula salad for that fresh contrast to the rich, comforting pasta.
Thai Peanut Sweet Potato Buddha Bowl

Sometimes after a long day, I crave something that feels both nourishing and exciting—that’s exactly where this Thai Peanut Sweet Potato Buddha Bowl comes in. It’s my go-to when I want a vibrant, fuss-free meal that’s packed with flavor and texture, and it always hits the spot.
15
minutes30
minutesIngredients
– 1 large sweet potato, peeled and cubed
– 1 cup of quinoa
– 2 cups of water
– a big handful of fresh spinach
– a couple of tablespoons of olive oil
– a generous 1/4 cup of creamy peanut butter
– a splash of soy sauce (about 2 tablespoons)
– a squeeze of lime juice (from half a lime)
– a pinch of red pepper flakes
– a drizzle of honey (about 1 tablespoon)
– a sprinkle of chopped peanuts for topping
Instructions
1. Preheat your oven to 400°F and line a baking sheet with parchment paper.
2. Toss the cubed sweet potato with 1 tablespoon of olive oil and spread it in a single layer on the baking sheet.
3. Roast the sweet potato for 25–30 minutes, flipping halfway through, until the edges are crispy and caramelized.
4. While the sweet potato roasts, rinse 1 cup of quinoa under cold water in a fine-mesh strainer to remove any bitterness.
5. In a medium saucepan, combine the rinsed quinoa and 2 cups of water, then bring to a boil over high heat.
6. Reduce the heat to low, cover the saucepan, and simmer the quinoa for 15 minutes until all the water is absorbed and the grains are fluffy.
7. In a small bowl, whisk together the peanut butter, soy sauce, lime juice, red pepper flakes, and honey until smooth and creamy.
8. Heat the remaining 1 tablespoon of olive oil in a large skillet over medium heat.
9. Add the fresh spinach to the skillet and sauté for 2–3 minutes, just until wilted but still bright green.
10. To assemble, divide the cooked quinoa among bowls, top with roasted sweet potato and sautéed spinach, drizzle generously with the peanut sauce, and finish with a sprinkle of chopped peanuts.
My favorite part is how the creamy peanut sauce clings to the fluffy quinoa and tender sweet potato, with a hint of spice that keeps you coming back for more. Try serving it with extra lime wedges on the side for a zesty kick that brightens every bite.
Grilled Portobello Mushroom Burgers
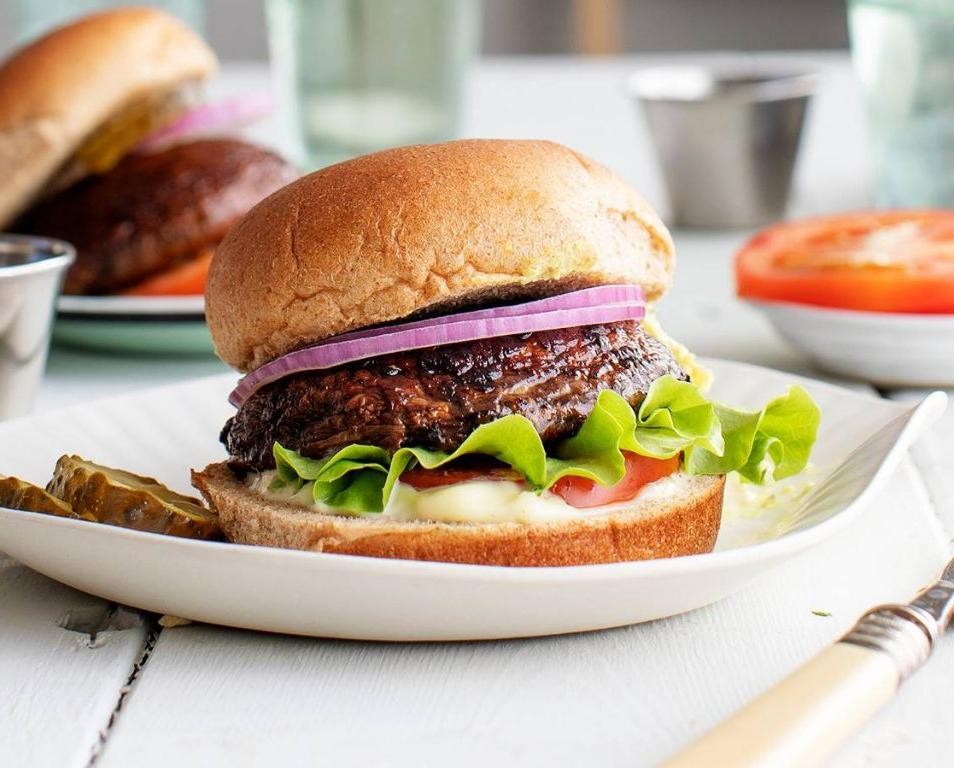
Mmm, there’s something magical about transforming humble portobello mushrooms into juicy, satisfying burgers that even my meat-loving husband requests regularly. I first discovered this trick during a vegetarian challenge week, and now these mushroom burgers are in our regular dinner rotation—they’re that good!
3
sandwiches10
minutes14
minutesIngredients
– 4 large portobello mushroom caps (stems removed)
– 2 tablespoons olive oil
– 1 tablespoon balsamic vinegar
– 2 cloves garlic, minced
– A generous pinch of salt and black pepper
– 4 burger buns
– A couple of thick slices of provolone cheese
– A handful of fresh arugula
– 1 large tomato, sliced
– A dollop of mayonnaise
Instructions
1. Preheat your grill to medium-high heat (about 400°F) or heat a grill pan over medium-high if cooking indoors.
2. Gently wipe the portobello caps clean with a damp paper towel—never soak mushrooms as they absorb water like sponges.
3. In a small bowl, whisk together the olive oil, balsamic vinegar, minced garlic, salt, and pepper.
4. Brush both sides of each mushroom cap generously with the marinade mixture.
5. Place the mushrooms gill-side down on the hot grill and cook for 5-7 minutes until grill marks appear and they release some liquid.
6. Flip the mushrooms and continue grilling for another 5-7 minutes until tender but still firm.
7. During the last minute of cooking, place a slice of provolone cheese on each mushroom cap to melt.
8. While mushrooms cook, lightly toast the burger buns on the cooler part of the grill for about 1-2 minutes until golden.
9. Spread mayonnaise on the bottom bun of each burger.
10. Layer fresh arugula and tomato slices over the mayonnaise.
11. Place the cheesy grilled mushroom cap on top of the vegetables.
12. Cap each burger with the top bun.
Unbelievably meaty in texture yet wonderfully earthy in flavor, these burgers have a satisfying chew that holds up against any toppings. The melted provolone creates this incredible creamy contrast to the smoky mushrooms, making them perfect for summer cookouts or quick weeknight dinners when served with sweet potato fries.
Quinoa and Black Bean Stuffed Peppers

Last week, I found myself staring at a bag of quinoa and some colorful bell peppers in my pantry, and inspiration struck for the perfect healthy comfort food. Let me tell you, these stuffed peppers have become my new go-to for busy weeknights when I want something nutritious but don’t feel like spending hours in the kitchen.
2
portions20
minutes50
minutesIngredients
– 4 large bell peppers (any color you like)
– 1 cup of quinoa
– 1 can of black beans, rinsed and drained
– 1 cup of corn kernels (frozen works great)
– 1 small onion, diced
– 2 cloves of garlic, minced
– 1 cup of shredded Mexican cheese blend
– 1 tablespoon of olive oil
– 1 teaspoon of cumin
– 1/2 teaspoon of chili powder
– A generous pinch of salt
– A couple of splashes of lime juice
– 1/4 cup of chopped fresh cilantro
Instructions
1. Preheat your oven to 375°F and grab a baking dish that fits all four peppers snugly.
2. Carefully slice the tops off the bell peppers and remove all the seeds and membranes inside.
3. Rinse the quinoa under cold water in a fine-mesh strainer for about 30 seconds to remove any bitterness.
4. Cook the quinoa according to package directions, which typically means combining 1 cup quinoa with 2 cups water, bringing to a boil, then simmering for 15 minutes until the water is absorbed.
5. While the quinoa cooks, heat the olive oil in a large skillet over medium heat.
6. Add the diced onion and cook for 4-5 minutes until it becomes translucent and fragrant.
7. Stir in the minced garlic and cook for just 1 more minute until you can smell that wonderful garlic aroma.
8. Add the black beans, corn, cumin, chili powder, and salt to the skillet, stirring everything together.
9. Cook the bean mixture for 3-4 minutes until everything is heated through and well combined.
10. Transfer the cooked quinoa to the skillet and mix thoroughly with all the other ingredients.
11. Remove the skillet from heat and stir in the lime juice and chopped cilantro.
12. Spoon the quinoa mixture evenly into the prepared bell peppers, packing it down gently.
13. Top each pepper with a generous sprinkle of the shredded cheese.
14. Place the stuffed peppers in your baking dish and add about 1/4 inch of water to the bottom of the dish to create steam.
15. Bake for 25-30 minutes until the peppers are tender when pierced with a fork and the cheese is golden and bubbly.
16. Carefully remove from the oven and let the peppers rest for 5 minutes before serving.
Really, what makes these peppers special is how the tender-crisp bell pepper gives way to the fluffy quinoa and creamy beans inside. The melted cheese creates this wonderful gooey layer that contrasts beautifully with the fresh lime and cilantro notes. I love serving these with a dollop of cool Greek yogurt or avocado slices for extra creaminess that balances the slight spice from the chili powder.
Spicy Lentil and Tomato Soup

Kind of like that cozy sweater you reach for when the weather turns crisp, this spicy lentil and tomato soup has become my go-to comfort food during these cooler autumn evenings. I first started making it when my friend Sarah brought over a giant bag of lentils from her pantry clean-out, and now it’s a weekly staple that fills my kitchen with the most incredible aromas.
4
servings15
minutes45
minutesIngredients
– A couple of tablespoons of olive oil
– One large yellow onion, chopped
– Three garlic cloves, minced
– A couple of teaspoons of ground cumin
– About a teaspoon of smoked paprika
– A pinch or two of red pepper flakes (depending on your heat preference)
– One 28-ounce can of crushed tomatoes
– One cup of brown lentils, rinsed
– Four cups of vegetable broth
– A splash of lemon juice
– A handful of fresh parsley, chopped
Instructions
1. Heat 2 tablespoons of olive oil in a large pot over medium heat until it shimmers.
2. Add the chopped onion and cook for 5-7 minutes, stirring occasionally, until the onion turns translucent and soft.
3. Stir in the minced garlic and cook for 1 minute until fragrant—be careful not to let it burn!
4. Add 2 teaspoons of ground cumin, 1 teaspoon of smoked paprika, and your desired amount of red pepper flakes, then toast the spices for 30 seconds to release their oils and deepen the flavor.
5. Pour in the entire 28-ounce can of crushed tomatoes, scraping the bottom of the pot to incorporate any browned bits.
6. Add 1 cup of rinsed brown lentils and 4 cups of vegetable broth, then bring everything to a boil.
7. Once boiling, reduce the heat to low, cover the pot, and simmer for 30-35 minutes until the lentils are tender but not mushy.
8. Stir in a generous splash of lemon juice to brighten all the flavors.
9. Remove the pot from heat and stir in the chopped fresh parsley.
What I love most about this soup is how the lentils create this wonderfully hearty texture that’s substantial without feeling heavy. The spicy kick from the red pepper flakes plays beautifully against the sweet acidity of the tomatoes, making each spoonful incredibly satisfying. Sometimes I’ll top it with a dollop of Greek yogurt or serve it with crusty bread for dipping—perfect for those nights when you want something nourishing that comes together with minimal effort.
Butternut Squash Risotto with Sage

There’s something so comforting about standing over a pot of creamy risotto on a crisp fall evening, and this butternut squash version has become my absolute favorite. The way the sweet squash melds with the earthy sage makes my kitchen smell like autumn itself, and I love how this dish feels fancy enough for company but simple enough for a cozy weeknight dinner.
5
servings15
minutes40
minutesIngredients
– About 2 cups of peeled and diced butternut squash (I like ½-inch cubes)
– 1½ cups of Arborio rice
– A good glug of olive oil (about 2 tablespoons)
– 1 medium yellow onion, finely chopped
– 4 cups of warm vegetable broth
– A generous splash of dry white wine (about ½ cup)
– A couple of fresh sage leaves, chopped
– A big handful of grated Parmesan cheese (about ¾ cup)
– 2 tablespoons of unsalted butter
– Salt and freshly ground black pepper
Instructions
1. Heat the olive oil in a large, heavy-bottomed pot over medium heat for 1 minute until shimmering.
2. Add the chopped onion and cook for 4-5 minutes, stirring occasionally, until translucent but not browned.
3. Stir in the diced butternut squash and cook for another 6-7 minutes until slightly softened around the edges.
4. Add the Arborio rice and stir constantly for 2 minutes until the grains look slightly translucent at the edges.
5. Pour in the white wine and cook while stirring until the liquid is completely absorbed, about 2 minutes.
6. Add 1 cup of warm vegetable broth and stir continuously until the liquid is nearly absorbed, about 5-6 minutes.
7. Continue adding the remaining broth ½ cup at a time, stirring constantly and waiting until each addition is almost fully absorbed before adding the next – this gradual process is key for creamy risotto and should take about 20-25 minutes total.
8. Test the rice for doneness – it should be tender but still slightly firm to the bite (al dente).
9. Stir in the chopped sage, Parmesan cheese, and butter until fully incorporated and creamy.
10. Season with salt and several grinds of black pepper, then remove from heat.
What I love most is how the finished risotto has this incredible creamy texture with little bursts of sweet squash throughout. The sage adds this wonderful earthy note that makes it feel so sophisticated, and sometimes I’ll top it with extra crispy sage leaves or serve it alongside some seared scallops for a special dinner.
Eggplant and Tomato Bake with Herbed Crust

Zesty flavors from the garden always remind me of late summer evenings when my neighbor would share her overflowing eggplant harvest. I’ve perfected this cozy bake over many seasons, and it’s become my go-to comfort dish when I want something satisfying but not too heavy. There’s something magical about how the eggplant soaks up all those tomato and herb flavors while the crust gets perfectly golden.
6
portions25
minutes70
minutesIngredients
– 2 medium eggplants, sliced into ½-inch rounds
– 4 ripe tomatoes, chopped into chunks
– 1 large onion, thinly sliced
– 3 cloves garlic, minced
– A generous glug of olive oil (about ¼ cup)
– A couple of handfuls of breadcrumbs
– A big handful of grated Parmesan cheese
– A good sprinkle of dried oregano
– A pinch of red pepper flakes for heat
– A splash of balsamic vinegar
– Salt and black pepper to season
Instructions
1. Preheat your oven to 375°F and grab a 9×13 inch baking dish.
2. Arrange the eggplant slices in a single layer on a baking sheet, brush both sides with olive oil, and sprinkle with salt.
3. Roast the eggplant for 20 minutes until tender and slightly golden around the edges.
4. While the eggplant roasts, heat 2 tablespoons of olive oil in a large skillet over medium heat.
5. Add the sliced onion and cook for 8-10 minutes until soft and translucent.
6. Stir in the minced garlic and cook for 1 more minute until fragrant.
7. Add the chopped tomatoes, balsamic vinegar, red pepper flakes, and a pinch of salt to the skillet.
8. Simmer the tomato mixture for 15 minutes until it thickens into a chunky sauce.
9. In a small bowl, mix the breadcrumbs, Parmesan cheese, dried oregano, and black pepper.
10. Spread half of the tomato sauce evenly across the bottom of your baking dish.
11. Layer the roasted eggplant slices over the sauce in overlapping rows.
12. Top with the remaining tomato sauce, spreading it evenly over the eggplant.
13. Sprinkle the breadcrumb mixture generously over the entire surface.
14. Bake uncovered for 25-30 minutes until the topping is golden brown and crispy.
15. Let the bake rest for 10 minutes before serving to allow the layers to set.
Fantastic straight from the oven, this bake delivers creamy eggplant beneath a crispy, herbed crust that crackles with each bite. The tomatoes break down into a sweet-tart sauce that soaks into every layer, while the Parmesan adds a salty richness that balances the vegetables perfectly. I love serving it with crusty bread to scoop up every last bit of the saucy bottom layer, or alongside a simple green salad for a complete meal that feels both rustic and refined.
Asian Stir-Fried Tofu with Vegetables
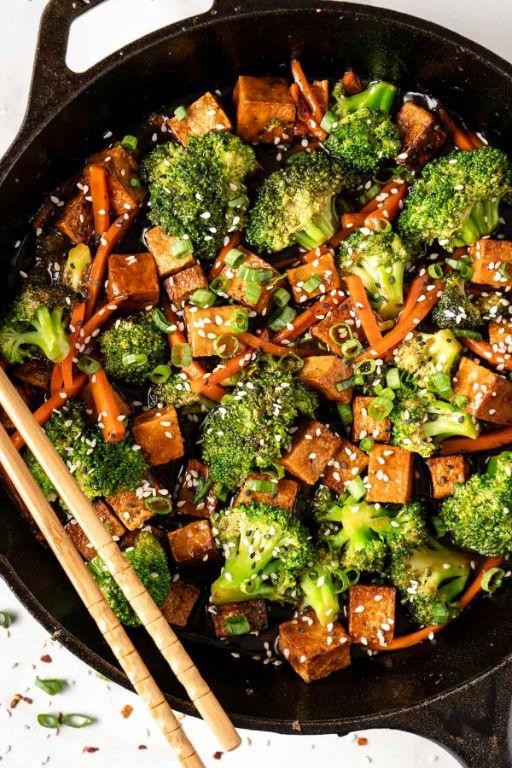
Usually, I’m all about quick weeknight dinners, but this Asian stir-fried tofu with vegetables has become my go-to when I want something that feels both wholesome and exciting. The combination of crispy tofu and vibrant veggies tossed in that savory-sweet sauce never fails to hit the spot, especially after a long day when takeout seems tempting but homemade just hits different.
3
servings20
minutes14
minutesIngredients
- One 14-ounce block of extra-firm tofu, pressed and cubed
- A couple of tablespoons of vegetable oil
- A big handful of broccoli florets
- One red bell pepper, sliced thin
- A couple of carrots, cut into matchsticks
- A splash of soy sauce (about 2 tablespoons)
- A glug of sesame oil (roughly 1 tablespoon)
- A spoonful of minced garlic (around 2 cloves)
- A pinch of red pepper flakes
- A drizzle of honey or maple syrup (about 1 tablespoon)
Instructions
- Press the tofu for 15 minutes using a tofu press or by wrapping it in paper towels and placing a heavy pan on top to remove excess water.
- Cut the pressed tofu into 1-inch cubes and pat them dry with a paper towel to ensure they crisp up nicely.
- Heat 1 tablespoon of vegetable oil in a large skillet or wok over medium-high heat until it shimmers, about 2 minutes.
- Add the tofu cubes in a single layer and cook for 4-5 minutes per side until golden brown and crispy, flipping gently with a spatula.
- Transfer the cooked tofu to a plate and set aside, keeping the skillet on the heat.
- Add the remaining tablespoon of vegetable oil to the same skillet and toss in the minced garlic and red pepper flakes, stirring for 30 seconds until fragrant.
- Tip: Don’t let the garlic burn—it should be golden, not brown, to avoid bitterness.
- Add the broccoli florets, sliced bell pepper, and carrot matchsticks to the skillet, stirring frequently for 4-5 minutes until the veggies are tender-crisp.
- Tip: If the veggies start to stick, add a splash of water to steam them slightly and loosen any browned bits.
- Return the tofu to the skillet and pour in the soy sauce, sesame oil, and honey, stirring to coat everything evenly.
- Cook for another 2 minutes, stirring constantly, until the sauce thickens and clings to the tofu and vegetables.
- Tip: For extra flavor, let it sit off the heat for a minute so the tofu absorbs the sauce fully.
That first bite delivers a satisfying crunch from the tofu against the tender veggies, all wrapped in a salty-sweet glaze. Try serving it over fluffy jasmine rice or tossing it with noodles for a heartier meal—it’s versatile enough to make leftovers something to look forward to.
Chickpea and Spinach Stuffed Sweet Potatoes

Vivid memories of cozy autumn evenings inspired this comforting dish that has become my go-to weeknight dinner. There’s something magical about how the sweet potatoes transform in the oven while the chickpea and spinach filling comes together in minutes. I love how this meal feels both nourishing and indulgent—perfect for those nights when you want something satisfying without spending hours in the kitchen.
5
portions15
minutes60
minutesIngredients
– 4 medium sweet potatoes
– A couple of tablespoons of olive oil
– 1 can (15 oz) of chickpeas, drained and rinsed
– 3 big handfuls of fresh spinach
– A generous splash of lemon juice (about 2 tablespoons)
– 2 cloves of garlic, minced
– A pinch of red pepper flakes
– A sprinkle of salt and black pepper
Instructions
1. Preheat your oven to 400°F and line a baking sheet with parchment paper.
2. Pierce each sweet potato several times with a fork to allow steam to escape during baking.
3. Rub the sweet potatoes with olive oil and place them on the prepared baking sheet.
4. Bake for 45-50 minutes until the sweet potatoes are tender when pierced with a fork and the skins are slightly crispy.
5. While the sweet potatoes bake, heat the remaining olive oil in a large skillet over medium heat.
6. Add the minced garlic and cook for 1 minute until fragrant but not browned.
7. Stir in the drained chickpeas and cook for 5-6 minutes until they’re lightly golden and heated through.
8. Add the fresh spinach to the skillet and cook for 2-3 minutes until wilted, stirring constantly.
9. Remove the skillet from heat and stir in the lemon juice, red pepper flakes, salt, and black pepper.
10. When the sweet potatoes are done baking, carefully slice them open lengthwise without cutting all the way through.
11. Use a fork to gently mash the sweet potato flesh inside the skins to create a bed for the filling.
12. Divide the chickpea and spinach mixture evenly among the four sweet potatoes, spooning it into the openings.
13. Return the stuffed sweet potatoes to the oven for 5 minutes to warm everything together.
Soft, creamy sweet potato flesh contrasts beautifully with the hearty chickpea filling and wilted spinach. The lemon juice adds a bright note that cuts through the richness, while the red pepper flakes provide just enough warmth. Serve these straight from the oven with an extra drizzle of olive oil or top with toasted pumpkin seeds for added crunch.
Lentil Bolognese with Zucchini Noodles

Craving something hearty but trying to eat lighter? I’ve been there—especially after a long day when pasta feels too heavy but salad just won’t cut it. That’s why I love whipping up this Lentil Bolognese with Zucchini Noodles; it’s cozy, satisfying, and doesn’t leave me feeling sluggish.
4
servings15
minutes36
minutesIngredients
- 1 tablespoon of olive oil
- 1 medium onion, finely chopped
- 2 cloves of garlic, minced
- 1 cup of brown lentils, rinsed
- 1 can (28 ounces) of crushed tomatoes
- 1 teaspoon of dried oregano
- A pinch of salt and black pepper
- 2 medium zucchinis, spiralized
- A splash of water, if needed
Instructions
- Heat 1 tablespoon of olive oil in a large skillet over medium heat until it shimmers.
- Add the finely chopped onion and cook for 5 minutes, stirring occasionally, until softened and translucent.
- Stir in the minced garlic and cook for 1 minute until fragrant, being careful not to burn it.
- Tip: Toasting the garlic lightly enhances flavor without bitterness.
- Add the rinsed brown lentils, crushed tomatoes, dried oregano, salt, and black pepper to the skillet.
- Bring the mixture to a simmer, then reduce the heat to low, cover, and cook for 30 minutes until the lentils are tender and the sauce has thickened.
- Tip: Stir occasionally and add a splash of water if the sauce gets too thick while cooking.
- While the sauce simmers, spiralize the zucchinis into noodle-like strands.
- Tip: Pat the zucchini noodles dry with a paper towel to prevent a watery sauce when serving.
- Serve the lentil Bolognese hot over the raw zucchini noodles, as they soften slightly from the heat.
Rich and savory, this dish has a meaty texture from the lentils that pairs perfectly with the fresh, crisp zucchini noodles. I love topping it with a sprinkle of nutritional yeast for a cheesy vibe or serving it with a side of garlic bread for dipping into that robust sauce.
Carrot and Ginger Soup with Coconut Milk

Sometimes, when the autumn chill starts creeping in, I find myself craving something that warms me from the inside out—and this carrot and ginger soup with coconut milk has become my go-to comfort. It’s the kind of recipe I whip up on a lazy Sunday, filling my kitchen with the most incredible aromas that remind me of cozy sweaters and crisp fall leaves. I love how the ginger gives it a little kick, making it feel both soothing and invigorating at the same time.
5
servings15
minutes41
minutesIngredients
– A couple of tablespoons of olive oil
– One large yellow onion, roughly chopped
– About three cloves of garlic, minced
– A thumb-sized piece of fresh ginger, peeled and grated
– Around six medium carrots, peeled and sliced into ½-inch rounds
– Four cups of vegetable broth
– One 13.5-ounce can of full-fat coconut milk
– A splash of fresh lime juice
– A pinch of salt and a generous sprinkle of black pepper
Instructions
1. Heat two tablespoons of olive oil in a large pot over medium heat until it shimmers.
2. Add one chopped yellow onion and cook for about 5–7 minutes, stirring occasionally, until the onion turns soft and translucent.
3. Stir in three minced garlic cloves and one grated ginger piece, cooking for 1 minute until fragrant to avoid burning the garlic.
4. Tip: To easily peel ginger, use the edge of a spoon to scrape off the skin—it’s faster than a knife!
5. Add six sliced carrots to the pot and cook for another 5 minutes, stirring to coat them in the oil and aromatics.
6. Pour in four cups of vegetable broth, bring to a boil, then reduce the heat to low, cover, and simmer for 20 minutes until the carrots are tender when pierced with a fork.
7. Carefully transfer the soup to a blender, working in batches if needed, and blend on high until completely smooth.
8. Tip: Leave the blender lid slightly ajar or remove the center cap to let steam escape and prevent splatters.
9. Return the blended soup to the pot and stir in one can of coconut milk until fully incorporated.
10. Heat the soup over low heat for 3–5 minutes, but do not boil, to maintain the coconut milk’s creamy texture.
11. Stir in a splash of fresh lime juice, a pinch of salt, and a generous sprinkle of black pepper.
12. Tip: Taste and adjust seasoning at this stage—if it needs more zing, add an extra squeeze of lime.
13. Ladle the soup into bowls and serve immediately.
A velvety, creamy texture makes this soup feel indulgent, while the ginger adds a warm, spicy note that balances the sweetness of the carrots. I love topping it with a drizzle of coconut milk and a sprinkle of fresh cilantro for a pop of color and freshness—it’s perfect with a slice of crusty bread for dipping.
Vegan Moroccan Vegetable Tagine

Sometimes you just need a meal that feels like a warm hug, and this Vegan Moroccan Vegetable Tagine is exactly that for me. I first fell in love with tagine on a rainy afternoon when I was craving something deeply spiced and comforting, and now it’s my go-to for cozy weeknight dinners. There’s something magical about how the vegetables soften and soak up all those incredible flavors while filling your kitchen with the most amazing aroma.
2
servings20
minutes45
minutesIngredients
– 2 tablespoons of olive oil
– 1 large yellow onion, chopped
– 3 cloves of garlic, minced
– 1 tablespoon of grated fresh ginger
– 2 teaspoons of ground cumin
– 1 teaspoon of smoked paprika
– ½ teaspoon of ground cinnamon
– A pinch of cayenne pepper
– 1 large sweet potato, cut into 1-inch chunks
– 2 carrots, sliced into ½-inch rounds
– 1 red bell pepper, chopped
– 1 can (15 ounces) of chickpeas, drained and rinsed
– 1 can (14.5 ounces) of diced tomatoes
– 2 cups of vegetable broth
– ½ cup of dried apricots, chopped
– A big handful of fresh cilantro, chopped
– Juice from half a lemon
Instructions
1. Heat 2 tablespoons of olive oil in a large Dutch oven or heavy-bottomed pot over medium heat for 2 minutes until shimmering.
2. Add 1 chopped yellow onion and cook for 6-8 minutes, stirring occasionally, until softened and translucent.
3. Stir in 3 minced garlic cloves and 1 tablespoon of grated ginger, cooking for 1 minute until fragrant.
4. Add 2 teaspoons of cumin, 1 teaspoon of smoked paprika, ½ teaspoon of cinnamon, and a pinch of cayenne, toasting the spices for 30 seconds to release their oils.
5. Tip: Toasting spices briefly before adding liquids really deepens their flavor profile.
6. Add 1 chopped sweet potato, 2 sliced carrots, and 1 chopped red bell pepper, stirring to coat with the spice mixture.
7. Pour in 1 can of diced tomatoes, 2 cups of vegetable broth, and 1 can of drained chickpeas, stirring to combine everything.
8. Bring the mixture to a boil, then reduce heat to low, cover, and simmer for 25 minutes.
9. Stir in ½ cup of chopped dried apricots and continue simmering uncovered for another 10 minutes.
10. Tip: The apricots will plump up and add natural sweetness that balances the spices perfectly.
11. Remove from heat and stir in a big handful of chopped cilantro and juice from half a lemon.
12. Tip: Always add fresh herbs and lemon juice at the end to preserve their bright, fresh flavors.
13. Let the tagine rest for 5 minutes before serving to allow the flavors to meld together. Our tagine turns out with vegetables that are tender but not mushy, each bite bursting with warm spices and subtle sweetness from the apricots. I love serving it over fluffy couscous or with crusty bread to soak up every bit of the fragrant sauce, and it somehow tastes even better the next day when the flavors have really settled in.
Conclusion
Whether you’re dairy-free by choice or necessity, these 31 vegetarian recipes prove that eating well can be delicious and satisfying. We hope this collection inspires your next kitchen adventure! Try a few recipes, then share your favorites in the comments below. Don’t forget to pin this article on Pinterest to save these tasty ideas for later.


