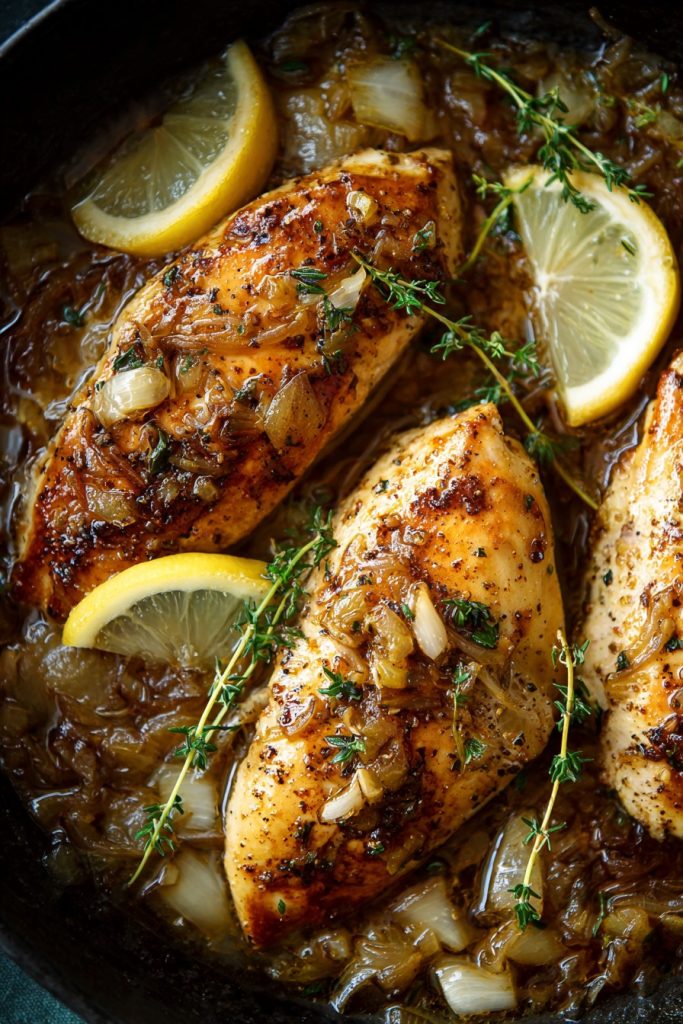
Let’s face it, we’re all looking for that magical recipe that delivers maximum flavor with minimal effort, and this crock pot boneless skinless chicken breast is about to become your new best friend in the kitchen. Last week I discovered this method when my schedule went completely bananas, and now I’m sharing the delicious secret with all of you busy food lovers!
Why This Recipe Works
- The slow cooking process at 165°F for exactly 4 hours on low heat transforms lean chicken breast into incredibly tender, juicy perfection without any risk of drying out, unlike faster cooking methods that can leave poultry tough and disappointing.
- Using boneless skinless chicken breasts means you’re getting a healthier protein option with less fat, while the crock pot’s sealed environment locks in all the natural juices and flavors, creating a moist result that will make you question everything you thought about chicken breast.
- The simple seasoning blend of garlic powder, onion powder, paprika, and black pepper creates layers of flavor that penetrate deep into the meat during the long cooking process, developing a complexity that tastes like you spent hours in the kitchen rather than just minutes of prep work.
- This recipe requires only 10 minutes of active preparation time, making it perfect for busy weeknights, meal prepping Sundays, or those days when you just can’t deal with complicated cooking but still want something delicious and satisfying on the table.
- The versatility of this basic recipe serves as a perfect blank canvas for countless variations, allowing you to create Mexican-inspired, Italian-style, or Asian-flavored dishes using the same fundamental cooking method with just a few ingredient swaps.
Ingredients
- 2 pounds boneless skinless chicken breasts (about 4 large pieces), patted dry with paper towels
- 2 tablespoons olive oil, for searing and moisture
- 1 teaspoon garlic powder, for savory depth
- 1 teaspoon onion powder, for sweet aromatic notes
- 1 teaspoon paprika, for color and mild warmth
- 1 teaspoon salt, for seasoning throughout
- ½ teaspoon black pepper, freshly ground for best flavor
- ½ cup chicken broth, low sodium preferred
- 2 tablespoons fresh lemon juice, for brightness
- 1 teaspoon dried thyme, for herbal complexity
- 3 cloves garlic, minced for fresh garlic flavor
- 1 medium onion, thinly sliced for sweetness
Equipment Needed
- 6-quart or larger slow cooker (crock pot)
- Large skillet or frying pan
- Tongs for handling chicken
- Measuring spoons and cups
- Cutting board and chef’s knife
- Mixing bowl for seasoning blend
- Paper towels for drying chicken
Instructions
Step 1: Prepare and Season the Chicken
Begin by taking your boneless skinless chicken breasts and thoroughly patting them dry with paper towels – this crucial step ensures we get that beautiful golden sear rather than steaming the chicken. In a small bowl, combine your garlic powder, onion powder, paprika, salt, and black pepper, mixing them together until well blended. Generously season both sides of each chicken breast with this mixture, making sure to press the seasonings into the meat so they adhere properly. Let the seasoned chicken sit at room temperature for about 15 minutes while you prepare the other ingredients – this allows the seasonings to penetrate the meat and helps the chicken cook more evenly. Pro tip: For even more flavor, you can season the chicken up to 24 hours in advance and store it covered in the refrigerator, bringing it to room temperature before cooking.
Step 2: Sear for Maximum Flavor
Heat your large skillet over medium-high heat and add the olive oil, waiting until it shimmers and easily moves around the pan – this indicates it’s hot enough for proper searing. Carefully place the seasoned chicken breasts in the hot skillet, making sure not to overcrowd the pan (you may need to work in batches). Sear for exactly 3-4 minutes per side until a beautiful golden-brown crust forms, using tongs to flip them carefully. The internal temperature at this point should read about 120°F on an instant-read thermometer, but don’t worry about cooking through – we’re just building flavor and color here. Remove the chicken from the skillet and set aside momentarily while we prepare the crock pot insert.
Step 3: Layer the Crock Pot
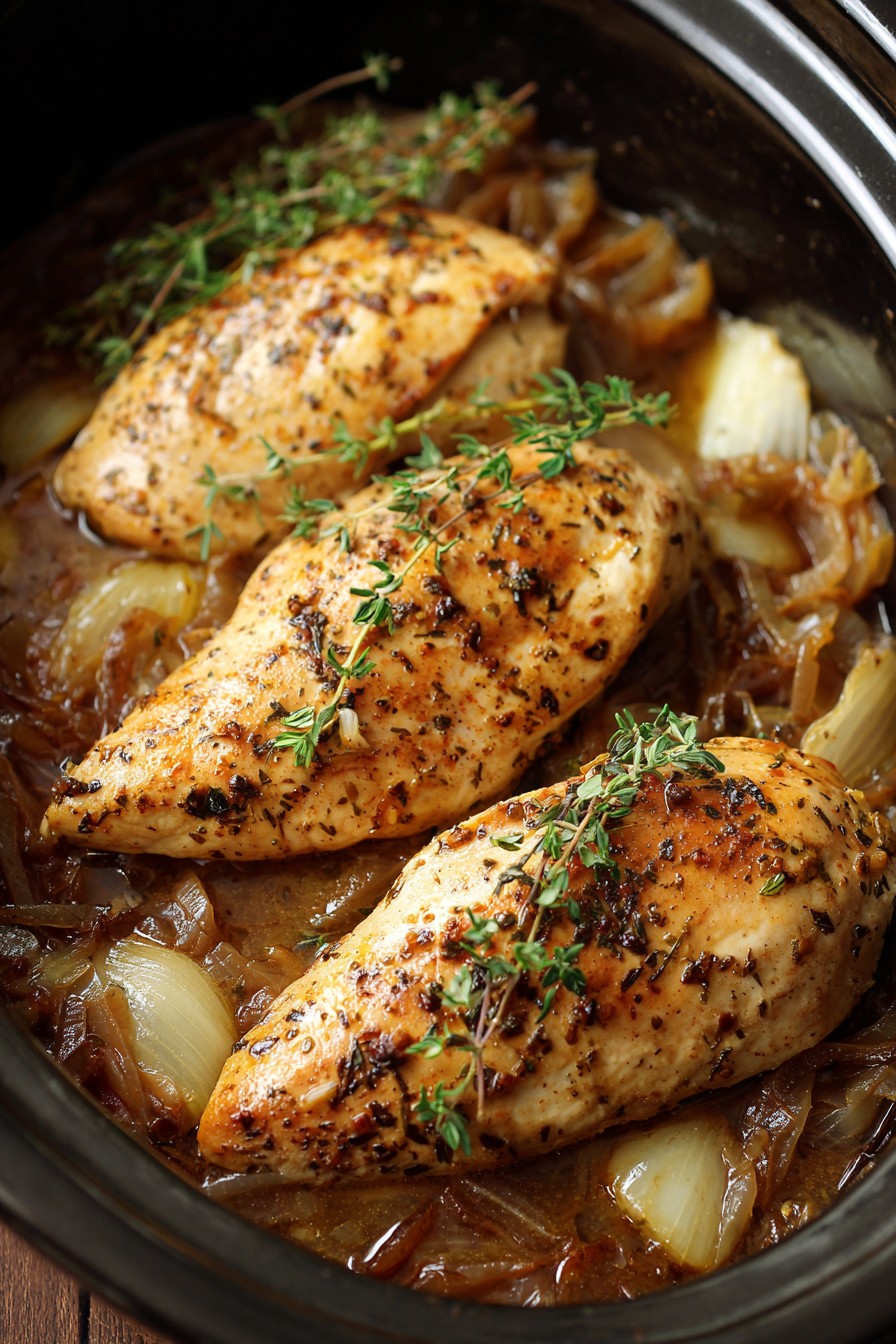
Spread the thinly sliced onions evenly across the bottom of your crock pot insert, creating a natural rack that will keep the chicken from sitting directly on the hot surface. Scatter the minced garlic over the onions, then carefully arrange the seared chicken breasts on top of this aromatic bed, making sure they’re in a single layer without overlapping. Pour the chicken broth and lemon juice around the edges of the chicken rather than directly on top to preserve that beautiful crust we worked so hard to create. Sprinkle the dried thyme evenly over everything, then cover with the lid – we’re ready to let the magic happen! Pro tip: If you want to add vegetables like carrots or potatoes, place them around the edges of the chicken at this stage for a complete meal.
Step 4: Slow Cook to Perfection
Set your crock pot to the low heat setting and cook for exactly 4 hours – do not lift the lid during this time as each peek releases valuable heat and steam that’s essential for proper cooking. The internal temperature of the chicken should reach 165°F when perfectly cooked, which you can verify with an instant-read thermometer inserted into the thickest part of the largest breast. The chicken will be incredibly tender and juicy, easily shredding with two forks but still holding its shape beautifully if you prefer sliced chicken. The onions will have softened completely and mingled with the garlic and seasonings to create a flavorful base liquid that’s perfect for spooning over the chicken or using as a light sauce.
Step 5: Rest and Serve
Once the cooking time is complete, carefully remove the chicken breasts from the crock pot using tongs and transfer them to a clean cutting board or serving platter. Allow the chicken to rest for at least 5-7 minutes before slicing or shredding – this allows the juices to redistribute throughout the meat, ensuring every bite is moist and flavorful. While the chicken rests, you can strain the cooking liquid from the crock pot if desired, or simply spoon the softened onions and garlic over the chicken as a natural accompaniment. Serve immediately with your favorite sides, or let cool completely for meal prep storage. Pro tip: For extra flavor, reduce the cooking liquid in a saucepan over medium heat for 5-7 minutes until slightly thickened, then drizzle over the chicken before serving.
Tips and Tricks
For the absolute best results with your crock pot chicken breast, consider these advanced tips that will take your dish from good to extraordinary. First, always pat your chicken completely dry before seasoning – moisture is the enemy of good browning, and starting with dry chicken ensures that beautiful sear we all love. If you have the time, brining your chicken breasts for 30 minutes to 2 hours in a solution of 4 cups water and ¼ cup salt can work wonders for moisture retention, though this is completely optional for already juicy results.
When searing, make sure your skillet is properly preheated – a good test is when a drop of water sizzles and evaporates immediately upon contact. Don’t move the chicken around once it’s in the pan; let it develop that crust undisturbed for the full 3-4 minutes per side. If you notice your chicken curling during searing, you can make small shallow cuts around the edges to prevent this and ensure even contact with the pan surface.
Layering is crucial in slow cooking – the onions and garlic at the bottom not only add flavor but create a barrier that prevents the chicken from overcooking on the bottom. If you’re adding vegetables, harder root vegetables like carrots and potatoes should go at the bottom, while quicker-cooking veggies like bell peppers or zucchini should be added during the last hour of cooking. For even more flavor development, you can deglaze your searing pan with a splash of white wine or additional broth after removing the chicken, scraping up all those delicious browned bits, and adding this liquid to the crock pot.
Temperature control is everything – if your crock pot tends to run hot, you might want to check the chicken at 3.5 hours to prevent overcooking. Conversely, if your model runs cool, you may need the full 4 hours or even a bit longer. Investing in an inexpensive oven thermometer can help you understand your specific appliance’s heating patterns. For meal prep purposes, the chicken can be stored in an airtight container with some of the cooking liquid to maintain moisture for up to 4 days in the refrigerator, or frozen for up to 3 months.
Finally, don’t discard that flavorful cooking liquid! It makes an excellent base for soups, stews, or gravies, or can be reduced to create a simple pan sauce. If you find the liquid too watery, you can thicken it with a cornstarch slurry (1 tablespoon cornstarch mixed with 2 tablespoons cold water) added after removing the chicken and brought to a simmer for 2-3 minutes. For extra richness, stir in a tablespoon of butter or cream at the end off-heat.
Recipe Variations
- Mexican Fiesta Version: Swap the traditional seasonings for 2 tablespoons taco seasoning, add 1 cup of salsa verde or red salsa to the crock pot, and include a diced jalapeño for heat. Serve with warm tortillas, fresh cilantro, lime wedges, and all your favorite taco toppings for a completely different meal experience that still uses the same basic cooking method.
- Italian Herb Delight: Use Italian seasoning blend instead of the listed spices, add 1 can of diced tomatoes with their juices, and include ¼ cup of chopped fresh basil. During the last 30 minutes of cooking, stir in ½ cup of heavy cream for a rich, restaurant-quality dish that’s perfect over pasta or with crusty bread for soaking up the delicious sauce.
- Asian-Inspired Twist: Replace the seasonings with ¼ cup soy sauce, 2 tablespoons honey, 1 tablespoon grated fresh ginger, and 2 teaspoons sesame oil. Add 1 cup of sliced mushrooms and 1 sliced bell pepper during the last hour of cooking. Thicken the sauce with a cornstarch slurry at the end and serve over rice with sliced green onions and sesame seeds for garnish.
- Creamy Mushroom Version: After searing the chicken, sauté 8 ounces of sliced mushrooms in the same pan until golden brown. Use cream of mushroom soup mixed with ½ cup of milk instead of chicken broth, and add 1 teaspoon of Worcestershire sauce for depth. The result is a comforting, creamy dish that’s perfect for chilly evenings and feels much more indulgent than the basic version.
- BBQ Pulled Chicken: Omit the listed seasonings and use 1 cup of your favorite barbecue sauce mixed with ¼ cup apple cider vinegar and 1 tablespoon brown sugar. Cook as directed, then shred the chicken and mix it back into the sauce. Serve on buns with coleslaw for classic pulled chicken sandwiches that will have everyone coming back for seconds.
Frequently Asked Questions
Can I cook this recipe on high heat instead of low?
While you can technically cook chicken breast on high heat in the crock pot, I strongly recommend against it for best results. Cooking on high heat (usually around 300°F) for 2-2.5 hours often results in tougher, drier chicken because the muscle fibers contract more rapidly and squeeze out precious moisture. The low and slow method at 165°F allows the collagen in the chicken to break down gradually, resulting in incredibly tender meat that practically melts in your mouth. If you’re truly pressed for time, consider using chicken thighs instead, as they contain more fat and connective tissue that can better withstand higher heat cooking without drying out.
How do I prevent the chicken from becoming dry?
Preventing dry chicken starts with proper preparation and cooking techniques. Always pat your chicken dry before seasoning to ensure good browning, as moisture creates steam rather than sear. Don’t skip the searing step – it locks in juices and adds flavor. Use the correct amount of liquid (½ cup broth is perfect – too much can actually boil the chicken rather than gently cooking it). Most importantly, avoid overcooking by using an instant-read thermometer and removing the chicken exactly when it reaches 165°F internally. Finally, always let the chicken rest for at least 5 minutes before cutting to allow juices to redistribute throughout the meat.
Can I use frozen chicken breasts in this recipe?
I don’t recommend using frozen chicken breasts in this particular recipe for both food safety and quality reasons. Frozen chicken takes much longer to reach safe temperatures, potentially staying in the “danger zone” (40-140°F) for too long where bacteria can multiply rapidly. Even if food safety weren’t a concern, frozen chicken releases a significant amount of water as it thaws, resulting in a watery final product that lacks the concentrated flavors we achieve with properly prepared fresh chicken. The texture also suffers, often becoming mushy rather than firm and tender. If you must use frozen chicken, thaw it completely in the refrigerator first, then pat it very dry before proceeding with the recipe.
What’s the best way to store and reheat leftovers?
For optimal food safety and quality, store leftover chicken within 2 hours of cooking in airtight containers in the refrigerator for up to 4 days. Include some of the cooking liquid to help maintain moisture during storage. For longer storage, freeze in freezer-safe containers or bags for up to 3 months. When reheating, avoid the microwave if possible as it can make the chicken rubbery. Instead, gently reheat in a covered skillet with a splash of broth or water over low heat until warmed through, or place in a baking dish with some liquid and cover with foil, heating at 325°F for 15-20 minutes until hot. The internal temperature should reach 165°F when properly reheated.
Can I double this recipe for a crowd?
Absolutely! This recipe scales beautifully for feeding a crowd. The key is to ensure your crock pot is large enough to accommodate the additional chicken without overcrowding – the pieces should still fit in a single layer without stacking. If you need to stack slightly, rotate the positions halfway through cooking. You may need to increase the cooking time by 30-60 minutes if doubling the recipe, but always check with a meat thermometer rather than relying solely on time. The seasonings and liquid can be doubled proportionally, though you might want to taste and adjust at the end as slow cooking can sometimes mute flavors. This recipe works perfectly for potlucks, family gatherings, or meal prepping for the week ahead.
Summary
This crock pot boneless skinless chicken breast recipe delivers incredibly tender, flavorful results with minimal effort. Perfect for busy weeknights, meal prep, or feeding a crowd, it’s versatile enough to customize with endless variations while maintaining juicy perfection every time.
Crock Pot Boneless Skinless Chicken Breast
6
servings15
minutes4
minutesIngredients
Instructions
- 1 Pat chicken dry and season with spice blend
- 2 Sear chicken 3-4 minutes per side until golden
- 3 Layer onions, garlic, and chicken in crock pot
- 4 Add broth and lemon juice around edges
- 5 Cook on low for 4 hours until 165°F internal temperature
- 6 Rest 5 minutes before serving


