Brace yourselves, crispy chicken lovers! Because today we’re ditching the deep fryer but keeping all that glorious crunch in a healthier oven-baked version that’ll make your taste buds do a happy dance. Believe me when I say this recipe delivers that perfect golden exterior and juicy interior without all the greasy mess.
Why This Recipe Works
- The secret double-dip coating method creates multiple layers of crispiness that stand up to baking, giving you that satisfying fried chicken texture without actual frying.
- Using panko breadcrumbs instead of regular breadcrumbs provides superior crunch and texture that stays crispy even after baking, thanks to their larger, flakier structure.
- Preheating the baking sheet ensures immediate sizzle when the chicken hits the surface, creating that perfect sear and preventing sticking while promoting even browning.
- The combination of buttermilk marinade and proper resting time tenderizes the chicken while allowing the coating to adhere perfectly, preventing that dreaded breading slide-off.
- Baking at high temperature (400°F) with a wire rack allows hot air to circulate around the chicken, crisping all sides evenly without the need for flipping.
Ingredients
- 4 boneless, skinless chicken breasts (about 2 pounds total), pounded to ½-inch uniform thickness
- 2 cups buttermilk, well-shaken
- 2 tablespoons hot sauce (like Frank’s RedHot)
- 2 cups panko breadcrumbs, finely crushed with rolling pin
- 1 cup all-purpose flour, spooned and leveled
- 2 teaspoons garlic powder
- 2 teaspoons paprika
- 1 teaspoon onion powder
- 1 teaspoon dried thyme
- 1 teaspoon kosher salt
- ½ teaspoon black pepper, freshly ground
- ½ teaspoon cayenne pepper (optional for heat)
- 2 large eggs, beaten until frothy
- ¼ cup neutral oil (like avocado or canola)
- Fresh parsley, chopped for garnish
- Lemon wedges for serving
Equipment Needed
- Rimmed baking sheet
- Wire rack that fits inside baking sheet
- 3 shallow bowls or pie plates
- Whisk
- Meat mallet or rolling pin
- Measuring cups and spoons
- Tongs
- Paper towels
- Instant-read thermometer
Instructions

Prepare the Chicken and Marinade
Place each chicken breast between two pieces of plastic wrap and gently pound with a meat mallet or rolling pin until they’re uniformly ½-inch thick – this ensures even cooking and maximum crispy surface area. In a large bowl, whisk together the buttermilk and hot sauce until fully combined. The acidity in the buttermilk acts as a natural tenderizer while the hot sauce adds subtle flavor depth. Submerge the pounded chicken breasts completely in the buttermilk mixture, making sure every surface is coated. Cover the bowl with plastic wrap and refrigerate for at least 4 hours, though overnight marinating yields even more tender results. This marinating step is non-negotiable for achieving that perfect juicy interior. Pro tip: Always pat your chicken completely dry before marinating to help the buttermilk adhere better.
Create the Breading Station
Set up three shallow bowls or pie plates in an assembly line. In the first bowl, combine the all-purpose flour, 1 teaspoon of garlic powder, 1 teaspoon of paprika, ½ teaspoon of onion powder, ½ teaspoon of thyme, ½ teaspoon of salt, and ¼ teaspoon of black pepper. Whisk these dry ingredients until thoroughly combined and any lumps are broken up. In the second bowl, beat the two large eggs until they’re completely smooth and frothy – this creates the perfect glue for the breading. In the third bowl, combine the panko breadcrumbs (make sure to crush them slightly with a rolling pin for better adhesion), remaining spices, and the neutral oil. The oil helps the panko brown beautifully in the oven. This organized setup makes the coating process efficient and mess-free.
Coat the Chicken Thoroughly
Remove the chicken from the buttermilk marinade, allowing excess liquid to drip off but don’t shake it vigorously. Working with one piece at a time, dredge the chicken in the flour mixture, pressing firmly to ensure an even coating on all sides. Shake off any excess flour, then dip completely into the beaten eggs, allowing excess to drip off. Finally, press the chicken firmly into the panko mixture, making sure every centimeter is covered with the crispy breading. Use your hands to gently press the panko onto the chicken to ensure it adheres properly. Place the coated chicken on a clean plate or wire rack while you finish the remaining pieces. This double-dip method creates layers of texture that result in superior crunch.
Preheat and Prepare Baking Setup
Place a wire rack inside your rimmed baking sheet – this is crucial for air circulation and preventing soggy bottoms. Position your oven rack in the center position and preheat your oven to 400°F. About 10 minutes before you’re ready to bake, place the empty baking sheet with wire rack in the oven to preheat. This step might seem extra, but it’s the secret weapon for achieving that initial sizzle and crisp base. When you’re ready to bake, carefully remove the hot baking sheet from the oven using oven mitts and quickly arrange the breaded chicken pieces on the wire rack, leaving about 1 inch between each piece for proper air flow. The immediate sizzle you hear means you’re on the right track!
Bake to Perfection
Place the baking sheet in the preheated oven and bake for 18-22 minutes. The exact time will depend on your chicken’s thickness, but you’re looking for golden brown coloration and an internal temperature of 165°F when measured with an instant-read thermometer inserted into the thickest part of the chicken. Avoid opening the oven door during the first 15 minutes to maintain consistent temperature. Around the 18-minute mark, check for color – the chicken should be deeply golden brown with some darker spots. If it needs more color, you can switch to broil for the final 1-2 minutes, but watch carefully as panko can burn quickly. Pro tip: Let the chicken rest on the wire rack for 5 minutes before serving – this allows the juices to redistribute and the coating to set up extra crispy.
Serve and Enjoy
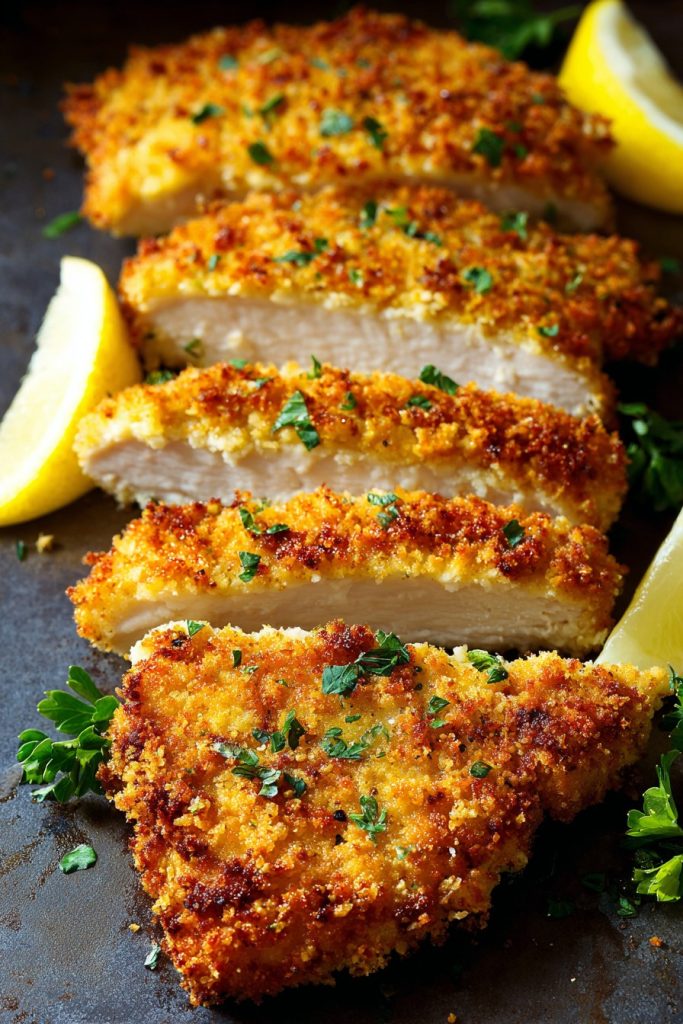
Transfer the crispy baked chicken to a serving platter using tongs, being careful not to disrupt that beautiful crust. Garnish with freshly chopped parsley and serve immediately with lemon wedges for squeezing over the top. The acidity from the lemon brightens all the flavors and cuts through the richness perfectly. This chicken is fantastic served hot from the oven, but it also holds its crispiness surprisingly well at room temperature, making it great for picnics or packed lunches. If you have leftovers, store them in an airtight container in the refrigerator – they reheat beautifully in a 375°F oven for about 10 minutes to restore the crunch. Pro tip: For extra crispy reheating, use an air fryer at 375°F for 3-4 minutes.
Tips and Tricks
If you really want to take your crispy baked chicken to the next level, here are some professional tips that make all the difference. First, consider brining your chicken before marinating – dissolve ¼ cup kosher salt and 2 tablespoons sugar in 4 cups warm water, then submerge chicken for 1-2 hours before the buttermilk step. This extra step ensures maximum juiciness and flavor penetration throughout the meat. For the coating, try adding ¼ cup grated Parmesan cheese to the panko mixture – it adds incredible umami flavor and helps create an even crispier texture. If you’re gluten-free, substitute the flour with rice flour or almond flour, and use gluten-free panko breadcrumbs – the results are equally fantastic.
Temperature control is everything with oven-frying. Invest in an oven thermometer to ensure your oven is actually at 400°F – many home ovens run hot or cold. If your chicken is browning too quickly but isn’t cooked through, tent loosely with aluminum foil for the remaining cooking time. For extra insurance against sticking, you can spray the wire rack with cooking spray before preheating, though the oil in the panko mixture usually prevents sticking. If you want to prep ahead, you can bread the chicken completely and refrigerate on the wire rack for up to 4 hours before baking – this actually helps the coating set up and adhere even better.
The type of baking sheet matters more than you might think. Dark-colored, heavy-duty baking sheets conduct heat better and promote browning, while light-colored sheets may require slightly longer cooking times. If you don’t have a wire rack, you can bake directly on a parchment-lined baking sheet, but flip the chicken halfway through cooking to ensure even crisping on both sides. For maximum crunch, some chefs recommend adding a tablespoon of cornstarch to the flour mixture – it creates an extra-crispy layer that holds up beautifully to baking. Finally, don’t overcrowd the baking sheet – if necessary, use two sheets and rotate them halfway through cooking for even results.
Recipe Variations
- For a Nashville Hot version, whisk together ¼ cup melted butter, 2 tablespoons hot sauce, 1 tablespoon brown sugar, 1 teaspoon cayenne, and ½ teaspoon paprika. Brush this spicy glaze over the chicken during the last 5 minutes of baking, then serve with pickles and white bread for authentic hot chicken experience.
- Create Italian-inspired chicken by adding 2 tablespoons grated Parmesan, 1 teaspoon dried oregano, and ½ teaspoon red pepper flakes to the panko mixture. Serve with marinara sauce and melted mozzarella for a chicken Parmesan effect, or slice over pasta with garlic butter sauce for a quick weeknight dinner that feels fancy.
- Go Asian-fusion by replacing the buttermilk with 1 cup coconut milk mixed with 2 tablespoons soy sauce and 1 tablespoon grated ginger. For the coating, use panko mixed with ¼ cup shredded coconut and 1 teaspoon five-spice powder. Serve with sweet chili sauce or peanut dipping sauce for a tropical twist that’s perfect for summer entertaining.
- For a kid-friendly version, replace the hot sauce with 1 tablespoon Dijon mustard in the buttermilk marinade. Use crushed cornflakes or potato chips instead of panko for extra crunch factor, and serve with honey mustard or barbecue sauce for dipping. This variation often becomes the most requested meal in households with picky eaters.
- Create a herb-crusted version by adding ¼ cup finely chopped fresh herbs (parsley, chives, and dill work beautifully) to the panko mixture. Add the zest of one lemon to the flour mixture for bright flavor, and serve with a yogurt-dill sauce for a refreshing take that’s perfect for spring and summer meals.
Frequently Asked Questions
Can I use chicken thighs instead of breasts?
Absolutely! Chicken thighs work wonderfully in this recipe and actually stay juicier due to their higher fat content. Use boneless, skinless thighs and pound them to an even ½-inch thickness just like the breasts. You may need to adjust cooking time slightly – thighs typically take 20-25 minutes at 400°F to reach 165°F internal temperature. The richer flavor of thighs pairs beautifully with the crispy coating, and many people prefer them for their more robust taste and tenderness. Just be sure to trim any excess fat before marinating to prevent flare-ups in the oven.
Why did my coating fall off during baking?
Coating separation usually happens for three main reasons: insufficient drying before marinating, not pressing firmly enough during the breading process, or moving the chicken too soon after baking. Always pat chicken completely dry with paper towels before the buttermilk marinade – moisture prevents proper adhesion. During the coating process, press firmly at each stage to ensure the layers bond together. After baking, let the chicken rest on the wire rack for at least 5 minutes before moving or cutting – this allows the proteins to set and the coating to adhere properly. Also ensure your oven is fully preheated and your baking sheet is hot when the chicken goes in.
Can I make this recipe gluten-free?
Yes, this recipe adapts beautifully to gluten-free needs! Substitute the all-purpose flour with rice flour, almond flour, or a gluten-free all-purpose blend. For the panko, use gluten-free breadcrumbs or crush gluten-free crackers or cornflakes. The process remains exactly the same, and you’ll still achieve wonderful crispiness. Many gluten-free flours actually create an even crispier coating than regular flour. Just be sure to check that all your ingredients, including spices and baking powder if used, are certified gluten-free if you have celiac disease or severe gluten sensitivity. The results are so good that nobody will guess it’s gluten-free!
How do I store and reheat leftovers?
Store leftover crispy chicken in an airtight container in the refrigerator for up to 3 days. To reheat while maintaining crispiness, avoid the microwave – instead use a 375°F oven for 10-12 minutes or an air fryer at 375°F for 3-4 minutes. The convection setting on your oven works great too. If the chicken seems dry, you can spritz lightly with water or broth before reheating to help rehydrate slightly. For best results, reheat on a wire rack rather than directly on a baking sheet. The chicken also freezes well after baking – freeze on a parchment-lined sheet, then transfer to freezer bags for up to 2 months. Reheat from frozen in a 375°F oven for 15-18 minutes.
Can I prepare this ahead of time?
You can prepare components ahead in several ways. The chicken can marinate in the buttermilk mixture for up to 24 hours in the refrigerator. You can also complete the entire breading process and refrigerate the coated chicken on a wire rack for up to 4 hours before baking – this actually helps the coating set and adhere better. For longer prep, you can freeze the breaded raw chicken on a baking sheet, then transfer to freezer bags for up to 3 months. Bake from frozen, adding 5-7 minutes to the cooking time. The spice mixtures can be pre-mixed and stored in airtight containers for quick assembly. Having components ready makes weeknight dinners incredibly fast and easy.
Summary
This crispy oven-baked chicken delivers fried chicken satisfaction without the grease. Perfectly juicy inside, gloriously crunchy outside, and endlessly adaptable to your favorite flavors. Weeknight dinner hero status achieved!
Crispy Oven Baked Chicken
4
servings20
minutes20
minutesIngredients
Instructions
- 1 Pound chicken to ½-inch thickness, marinate in buttermilk and hot sauce for 4+ hours
- 2 Set up three bowls: flour with spices, beaten eggs, panko with oil and spices
- 3 Coat chicken in flour, then egg, then panko, pressing firmly at each step
- 4 Preheat oven and baking sheet with wire rack to 400°F
- 5 Bake chicken for 18-22 minutes until 165°F internal temperature
- 6 Rest 5 minutes, garnish with parsley and lemon, serve immediately


