
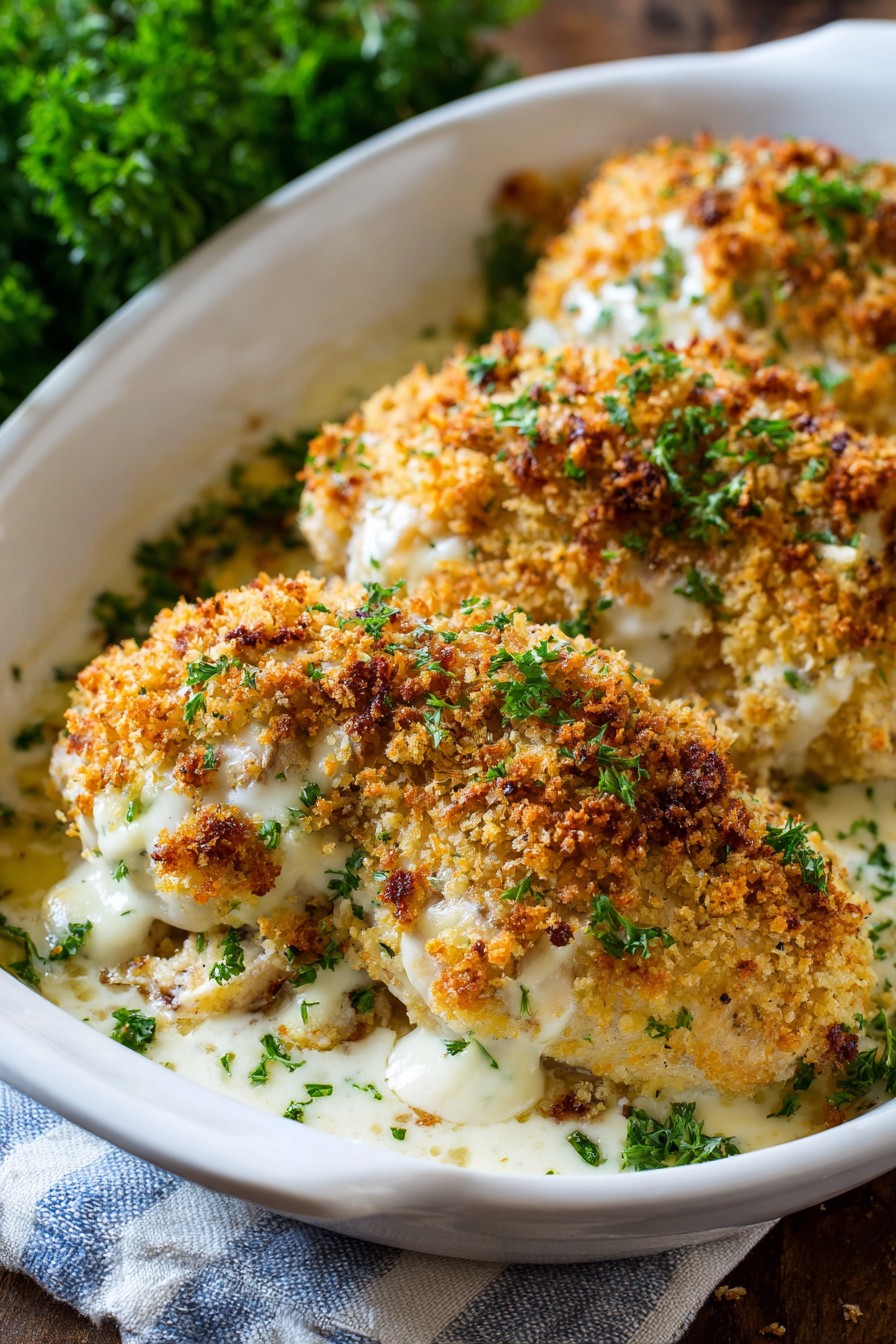
Forget boring baked chicken forever, folks! Finally, a recipe that transforms simple chicken breasts into a creamy, dreamy masterpiece your whole family will beg for on repeat. From the golden-brown crust to the luscious sauce that begs for crusty bread, this dish is weeknight magic at its finest.
Why This Recipe Works
- The cream of chicken soup creates an instant velvety sauce that keeps the chicken incredibly moist while baking, eliminating any risk of dry, bland meat.
- Panko breadcrumbs mixed with Parmesan cheese form a crispy, flavorful topping that adds wonderful texture contrast to the tender chicken beneath.
- Using a combination of fresh herbs and garlic powder layers flavors beautifully, giving you restaurant-quality taste with pantry-staple ingredients.
- The one-pan method means minimal cleanup – everything comes together in your baking dish for maximum convenience and flavor infusion.
- It’s incredibly versatile – serve it over rice, pasta, or mashed potatoes, and it adapts perfectly to whatever ingredients you have on hand.
Ingredients
- 4 boneless, skinless chicken breasts (about 2 pounds total), patted dry with paper towels
- 1 can (10.5 ounces) cream of chicken soup, undiluted
- 1/2 cup sour cream, at room temperature
- 1/4 cup whole milk
- 1 cup panko breadcrumbs
- 1/2 cup grated Parmesan cheese
- 2 tablespoons unsalted butter, melted
- 1 teaspoon garlic powder
- 1 teaspoon dried thyme
- 1/2 teaspoon paprika
- 1/2 teaspoon black pepper, freshly ground
- 1/2 teaspoon salt
- 2 tablespoons fresh parsley, finely chopped (for garnish)
Equipment Needed
- 9×13 inch baking dish
- Mixing bowls (one medium, one small)
- Whisk
- Measuring cups and spoons
- Paper towels
- Aluminum foil
- Instant-read thermometer
Instructions
Prepare Your Chicken and Baking Dish
First things first – let’s get our chicken ready for its creamy transformation! Take your boneless, skinless chicken breasts and pat them completely dry with paper towels. This step is crucial because dry chicken means better browning and prevents the sauce from becoming watery. Now, grab your 9×13 inch baking dish and give it a quick spray with non-stick cooking spray. Arrange the chicken breasts in a single layer, making sure they aren’t overlapping too much. If you have particularly thick chicken breasts, you might want to gently pound them to an even thickness of about 1 inch – this ensures they cook evenly and don’t dry out. Season both sides generously with salt and black pepper, really getting those seasonings into every nook and cranny. Tip: Let the chicken sit at room temperature for 15-20 minutes before baking – this helps it cook more evenly and stay juicier!
Create the Creamy Sauce Base
Now for the magic potion that makes this dish so irresistible! In a medium mixing bowl, combine the undiluted cream of chicken soup, room temperature sour cream, and whole milk. Use a whisk to blend these ingredients until they’re completely smooth and luxurious – no lumps allowed! The sour cream adds tanginess and richness while helping to stabilize the sauce during baking. To this creamy base, add your garlic powder, dried thyme, and paprika. Whisk again until all the spices are fully incorporated and the sauce takes on a beautiful pale golden color. The aroma at this point should already be making your kitchen smell like comfort food heaven. Taste the sauce and adjust seasoning if needed – remember, we’ve already seasoned the chicken, so don’t go too crazy with salt here. This sauce will not only keep our chicken moist but will reduce slightly to create a gorgeous, spoonable consistency perfect for drizzling over everything on your plate.
Make the Crispy Topping
Time to create that irresistible crunchy topping that will have everyone fighting for the crispy bits! In a small mixing bowl, combine the panko breadcrumbs, grated Parmesan cheese, and melted butter. Panko is essential here because it creates a lighter, crispier texture than regular breadcrumbs. Use a fork to mix everything together until the breadcrumbs are evenly coated with butter and the Parmesan is distributed throughout. The mixture should look like damp sand and hold together slightly when pressed. If it seems too dry, you can add another tablespoon of melted butter. This topping will form a beautiful golden crust that protects the chicken underneath while adding fantastic texture contrast. The Parmesan melts into the breadcrumbs during baking, creating little pockets of cheesy goodness throughout the topping. Tip: For extra flavor, you can toast the panko in a dry skillet over medium heat for 2-3 minutes before mixing with the other ingredients!
Assemble and Bake to Perfection
Let’s bring everything together for the grand finale! Pour your prepared creamy sauce evenly over the seasoned chicken breasts, making sure each piece gets a good coating. Use the back of a spoon to spread the sauce into an even layer, covering the chicken completely. Now, sprinkle your panko-Parmesan mixture evenly over the top, covering all the sauce-covered areas. Don’t press it down – let it sit loosely so it can get nice and crispy during baking. Cover the baking dish tightly with aluminum foil – this initial covered baking time allows the chicken to cook through gently without the topping burning. Place it in your preheated 375°F oven and bake covered for 25 minutes. After this time, remove the foil carefully (watch out for steam!) and continue baking uncovered for another 15-20 minutes. You’ll know it’s ready when the topping is deep golden brown, the sauce is bubbling around the edges, and the chicken reaches 165°F on an instant-read thermometer.
Rest and Serve Like a Pro
The hardest part is waiting, but trust me – it’s worth it! Once your baked chicken comes out of the oven, resist the urge to dig in immediately. Let it rest in the baking dish for 5-7 minutes before serving. This resting time allows the juices to redistribute throughout the chicken, ensuring every bite is moist and flavorful. The sauce will also thicken slightly as it cools, reaching the perfect spoonable consistency. While it rests, chop your fresh parsley for garnish. When ready to serve, use a large spoon or spatula to transfer each chicken breast to plates, making sure to get plenty of that delicious sauce and crispy topping. Spoon extra sauce from the baking dish over each portion. The beautiful golden-brown crust should crackle slightly when you cut into it, revealing tender, perfectly cooked chicken underneath. Serve immediately while everything is hot and fabulous! Tip: Letting the dish rest also makes it easier to serve neat portions without the topping sliding off.
Tips and Tricks
If you want to take this recipe from great to absolutely legendary, here are some pro tips that will make all the difference. First, consider searing your chicken breasts before baking – heat a tablespoon of oil in an oven-safe skillet over medium-high heat, sear the chicken for 2-3 minutes per side until golden brown, then add the sauce and topping and transfer the whole skillet to the oven. This extra step adds incredible flavor from the Maillard reaction and gives you even more beautiful color. For the crispiest topping possible, make sure your oven is fully preheated before baking and position your rack in the center of the oven for even heat distribution. If you notice the topping browning too quickly during the uncovered baking time, you can loosely tent it with foil while the chicken finishes cooking through.
When it comes to chicken selection, thicker breasts work better than thin ones because they stay juicier during the longer baking time. If you only have thin breasts, reduce the initial covered baking time by 5-7 minutes. For maximum flavor penetration, you can marinate the chicken in the sauce for up to 4 hours in the refrigerator before baking – just reserve the topping mixture until right before baking. If you’re watching your sodium intake, use low-sodium cream of chicken soup and reduce the added salt by half – the Parmesan and other seasonings will still provide plenty of flavor.
The sauce consistency can be adjusted to your preference – if you like it thicker, mix 1 tablespoon of cornstarch with 2 tablespoons of cold milk and whisk it into the sauce before pouring over the chicken. For a thinner, more gravy-like consistency, add an additional 1/4 cup of milk. Leftovers reheat beautifully – cover with foil and warm in a 325°F oven for 15-20 minutes, or microwave individual portions at 50% power to prevent the topping from getting soggy. If you want to make this ahead, assemble everything except the topping, cover and refrigerate for up to 24 hours, then add the topping right before baking and add 5-10 minutes to the baking time since you’re starting with cold ingredients.
For extra flavor dimensions, try adding a teaspoon of lemon zest to the sauce or a pinch of red pepper flakes for subtle heat. If you’re serving guests, individual ramekins make for beautiful presentation – divide the chicken and sauce among 4 oven-safe dishes, add topping, and bake as directed. Finally, always use an instant-read thermometer to check for doneness – chicken is perfectly cooked at 165°F, and overcooking is the main reason baked chicken turns out dry and tough.
Recipe Variations
- Creamy Mushroom Chicken: Swap the cream of chicken soup for cream of mushroom and add 1 cup of sliced fresh mushrooms sautéed in butter until golden brown. The earthy mushroom flavor pairs beautifully with the crispy topping, and you can use a mix of cremini and shiitake mushrooms for extra depth. Add a tablespoon of fresh thyme leaves instead of dried for a brighter herbal note that complements the mushrooms perfectly.
- Italian Herb Chicken: Use cream of celery soup instead of chicken and add 1 teaspoon of Italian seasoning to the sauce. Mix 1/4 cup of grated mozzarella into the panko topping for extra cheesiness, and garnish with fresh basil instead of parsley. Serve over pasta with extra sauce spooned over the top for a complete meal that tastes like it came from your favorite Italian restaurant.
- Spicy Southwest Chicken: Add 1 teaspoon of chili powder, 1/2 teaspoon of cumin, and a 4-ounce can of diced green chilies to the sauce. Use pepper jack cheese instead of Parmesan in the topping, and garnish with chopped cilantro and a squeeze of lime juice. Serve with Mexican rice and black beans for a fiesta-inspired twist that brings some welcome heat to the creamy base.
- Vegetable-Packed Chicken: Add 2 cups of frozen mixed vegetables (thawed and patted dry) to the baking dish before adding the sauce. Broccoli florets, carrots, and peas work particularly well. You’ll need to increase the sauce by adding an extra 1/4 cup of milk to accommodate the vegetables. This variation turns the dish into a complete one-pan meal that’s perfect for busy weeknights when you want to get extra veggies into your family’s diet.
- French Onion Chicken: Before assembling, caramelize 2 large sliced onions in 2 tablespoons of butter over low heat for 30-40 minutes until deep golden brown. Spread these over the chicken before adding the sauce, and use Gruyère cheese instead of Parmesan in the topping. The sweet, deeply flavored onions transform this into a sophisticated dish that’s perfect for company or date night at home.
Frequently Asked Questions
Can I use cream of mushroom soup instead of cream of chicken?
Absolutely! Cream of mushroom soup works beautifully in this recipe and creates a slightly earthier, richer flavor profile. The mushrooms add depth and umami that complements the chicken wonderfully. If using cream of mushroom, you might want to add an extra 1/4 teaspoon of garlic powder to balance the flavors. The cooking times and method remain exactly the same, so it’s an easy substitution that gives you a different but equally delicious result. Many people actually prefer the mushroom version, especially if they’re serving it over egg noodles or mashed potatoes.
How can I make this recipe gluten-free?
Making this gluten-free is surprisingly easy with a few simple swaps. Use gluten-free cream of chicken soup (several brands like Progresso and Pacific Foods offer gluten-free versions) or make your own with gluten-free flour. For the topping, replace the panko breadcrumbs with gluten-free breadcrumbs or crushed gluten-free crackers. Many stores now carry gluten-free panko-style breadcrumbs that work perfectly. Always check labels to ensure all your ingredients are certified gluten-free if you’re cooking for someone with celiac disease or serious gluten intolerance.
Can I use chicken thighs instead of breasts?
Yes, chicken thighs work wonderfully in this recipe and many people prefer them for their richer flavor and higher fat content that keeps them extra moist. Use boneless, skinless thighs of relatively uniform size. Because thighs have more fat and connective tissue, they can handle slightly longer cooking times without drying out. The baking time might need to be increased by 5-10 minutes depending on the size of your thighs. Always check for an internal temperature of 165°F to ensure they’re fully cooked through.
How should I store and reheat leftovers?
Leftovers can be stored in an airtight container in the refrigerator for up to 3 days. To reheat, the oven method works best to maintain the crispy topping – place in a baking dish, cover with foil, and warm at 325°F for 15-20 minutes until heated through. For quicker reheating, microwave individual portions at 50% power in 30-second intervals, but expect the topping to soften. You can also reheat in an air fryer at 350°F for 5-7 minutes for maximum crispiness revival. The sauce may thicken when refrigerated – just stir in a tablespoon of milk when reheating to restore the creamy consistency.
Can I freeze this baked chicken dish?
You can freeze it, but with some considerations for texture. Assemble the dish without the topping, cover tightly, and freeze for up to 2 months. When ready to cook, thaw in the refrigerator overnight, add the fresh topping, and bake as directed, adding 5-10 minutes to the cooking time. The sauce may separate slightly upon thawing, but a good stir before baking will help. I don’t recommend freezing after baking because the topping becomes soggy and the chicken texture suffers. For best results, enjoy fresh or refrigerate leftovers rather than freezing.
Summary
Creamy, comforting, and impossibly easy, this baked chicken transforms simple ingredients into family dinner magic with minimal effort and maximum flavor in every bite.
Cream of Chicken Baked Chicken
4
servings15
minutes45
minutesIngredients
Instructions
- 1 Preheat oven to 375°F. Pat chicken dry and arrange in greased 9x13 baking dish. Season with salt and pepper.
- 2 Whisk together soup, sour cream, milk, garlic powder, thyme, and paprika until smooth.
- 3 Combine panko, Parmesan, and melted butter for topping mixture.
- 4 Pour sauce over chicken, sprinkle with topping, cover with foil, and bake 25 minutes.
- 5 Remove foil and bake uncovered 15-20 minutes until golden and chicken reaches 165°F.
- 6 Rest 5 minutes, garnish with parsley, and serve immediately.


