Tantalizing, tender, and utterly transformative—these cream cheese mints will redefine your expectations of homemade confections. The moment these delicate morsels hit your tongue, they unleash a creamy avalanche of cool sweetness that melts into pure euphoria. Forget everything you thought you knew about simple mints—this recipe delivers an experience that borders on culinary sorcery.
Why This Recipe Works
- The cream cheese base creates an impossibly smooth, velvety texture that literally melts on your tongue, delivering a cooling sensation that elevates these beyond ordinary candy.
- Using both powdered sugar and granulated sugar creates the perfect balance—powdered sugar for that signature melt-in-your-mouth quality, while granulated sugar provides subtle crystalline texture that crackles gently before dissolving.
- The precise chilling technique ensures these mints hold their shape beautifully while developing an intense cream cheese flavor that deepens and matures over 24 hours.
- Peppermint oil (not extract) delivers an explosive, clean mint flavor that doesn’t fade during storage, creating an aromatic experience that begins the moment you unwrap these gems.
- The simple three-ingredient foundation allows for endless customization while maintaining that perfect creamy-to-crumbly ratio that makes these mints legendary.
Ingredients
- 8 ounces full-fat cream cheese, softened to room temperature
- 4 cups powdered sugar, sifted to remove lumps
- 1/2 cup granulated sugar for coating and texture
- 1 teaspoon pure peppermint oil (not extract)
- 1/4 teaspoon fine sea salt to balance sweetness
- Food coloring gel (optional, for vibrant visual appeal)
Equipment Needed
- Stand mixer with paddle attachment or electric hand mixer
- Large mixing bowl
- Fine-mesh sieve for sifting powdered sugar
- Rubber spatula for scraping
- Baking sheets lined with parchment paper
- Small offset spatula for handling delicate mints
- Airtight containers for storage
- Small candy molds (optional, for shaped mints)
Instructions
Prepare Your Cream Cheese Foundation
Begin by ensuring your cream cheese has reached the perfect room temperature—about 70°F—where it yields gently to pressure but hasn’t become oily or warm. Place the softened cream cheese in your stand mixer bowl and beat on medium speed for exactly two minutes until it transforms into a cloud-like, whipped consistency with no lumps remaining. The cream cheese should appear almost fluffy, with a pale, uniform texture that promises the smooth melt-away quality these mints are famous for. Scrape down the sides thoroughly with a rubber spatula, ensuring every bit incorporates evenly. This initial aeration creates the airy structure that makes these mints dissolve so magically on the tongue rather than sitting heavily in your mouth.
Incorporate the Sugar Symphony
Reduce your mixer speed to low and begin adding the sifted powdered sugar one cup at a time, allowing each addition to fully incorporate before adding the next. The mixture will transform from creamy to crumbly to eventually forming a cohesive dough that pulls away from the sides of the bowl. This process should take about 4-5 minutes total—don’t rush it! The slow incorporation prevents the dreaded powdered sugar cloud while developing the perfect texture. When the dough begins to form a ball around the paddle, add the fine sea salt and peppermint oil. The salt will cut through the sweetness and enhance the cream cheese flavor, while the peppermint oil should be added drop by drop until it reaches your preferred intensity.
Color and Flavor Development
If using food coloring, now is the time to add it. Use gel food coloring rather than liquid to avoid altering the dough’s consistency. Start with a toothpick dipped in coloring and knead it into the dough until you achieve uniform color distribution. The dough should be firm but pliable—if it’s too sticky, add more powdered sugar one tablespoon at a time; if too dry, a few drops of heavy cream can restore the perfect consistency. Divide the dough if creating multiple colors. Work quickly but gently—overworking can make the mints tough. The ideal dough should feel like cold modeling clay and hold its shape when pressed.
Shape and Coat Your Mints
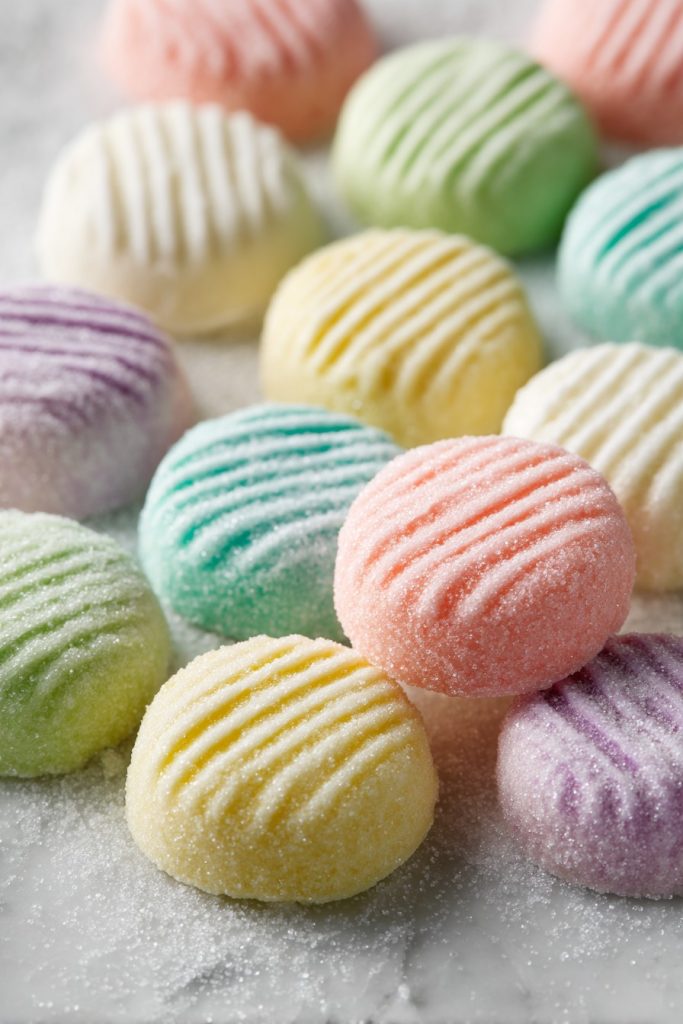
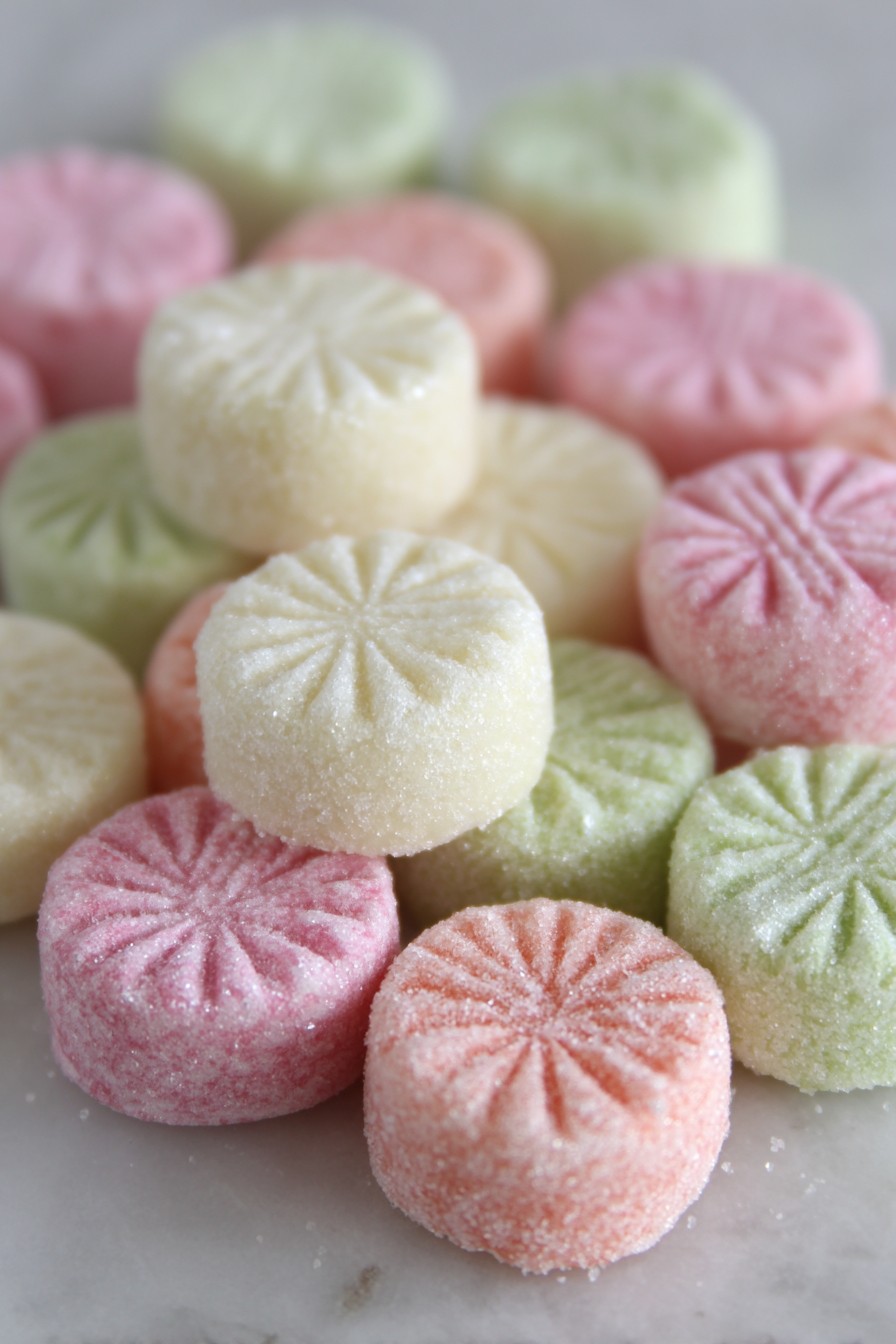
Spread the granulated sugar in a shallow bowl. Pinch off small pieces of dough (about 1 teaspoon each) and roll them into smooth balls between your palms. The key is consistency—each ball should be roughly the same size for even setting and presentation. Roll each ball in the granulated sugar until completely coated, creating that signature crystalline exterior that will glisten like morning frost. The sugar coating isn’t just decorative—it creates a delicate crust that contrasts beautifully with the creamy interior and prevents sticking during storage.
Form and Set the Perfect Shape
Place the sugar-coated balls on parchment-lined baking sheets and use a fork, the bottom of a glass, or specialty candy molds to flatten them to about 1/4-inch thickness. If using a fork, create that classic crisscross pattern by pressing gently but firmly—you want defined lines without squishing the mint too thin. For molded mints, press the dough firmly into the cavities and smooth the surface before unmolding. Arrange the shaped mints with about 1/2 inch between them to allow for air circulation.
The Critical Chilling Phase
Transfer the baking sheets to the refrigerator and chill the mints uncovered for at least 4 hours, though 8 hours is ideal for texture development. The cold temperature firms the cream cheese and allows the flavors to meld and intensify. After the initial chill, you can transfer them to airtight containers, separating layers with parchment paper. For the ultimate flavor experience, let them mature for 24 hours before serving—this resting period allows the peppermint to permeate every molecule and the texture to achieve that perfect melt-away quality.
Storage and Serving Perfection
Store your finished mints in airtight containers in the refrigerator for up to three weeks, or freeze for up to three months. When ready to serve, arrange them on a chilled platter—the cold temperature enhances that refreshing quality. These mints actually improve with age as the flavors continue to develop and meld. For special occasions, consider dusting them with edible glitter or additional colored sugar just before serving to create a sparkling presentation that matches their vibrant flavor.
Tips and Tricks
For professional-level cream cheese mints that will impress even seasoned confectioners, consider these advanced techniques. Temperature control is absolutely crucial—if your kitchen is warmer than 72°F, work in small batches and return the dough to the refrigerator every 10 minutes to prevent softening. The cream cheese must be properly softened but never warm; microwave softening creates hot spots that ruin the texture. When measuring powdered sugar, always sift it first—those tiny lumps can create gritty spots in your otherwise perfectly smooth mints. For the most intense mint flavor, use high-quality peppermint oil rather than extract—the oil contains pure essential oils that don’t evaporate during storage, maintaining that crisp, clean flavor for weeks. If you prefer extract, use three times the amount and be prepared for some flavor loss over time.
When it comes to shaping, consider investing in small silicone candy molds for perfectly uniform mints every time. The molds also allow for intricate designs that elevate these from simple candies to edible art. If rolling by hand, keep a small bowl of ice water nearby to cool your hands periodically—warm hands can melt the delicate fat in the cream cheese. For that classic restaurant-style appearance, the fork method works beautifully, but dip the fork in granulated sugar between presses to prevent sticking. The sugar coating isn’t just decorative—it creates a protective barrier that prevents the mints from absorbing moisture and becoming sticky.
Storage is where many mint makers go wrong. Never stack unprotected mints—they’ll fuse together into one giant mint brick. Always use parchment paper between layers, and consider adding a food-safe silica gel packet to your storage container to absorb excess moisture. For gifting, decorative tins lined with wax paper make beautiful presentations. If your mints develop condensation, simply spread them on a baking sheet and let them air-dry for 30 minutes before returning to storage. Remember that these mints actually improve with 24-48 hours of aging—the flavors meld and intensify, and the texture becomes even more melt-in-your-mouth magical.
Recipe Variations
- Chocolate Orange Bliss: Replace peppermint oil with orange oil and add 1/4 cup sifted cocoa powder to the dough. The rich chocolate pairs spectacularly with bright citrus notes, creating a sophisticated flavor profile that delights the senses. Roll these in a mixture of granulated sugar and orange zest for an aromatic crust that hints at the flavor within.
- Lemon Lavender Elegance: Substitute lemon extract for peppermint and add 1 tablespoon of culinary-grade dried lavender buds. The floral lavender notes dance with the bright lemon in a sophisticated combination that feels both refreshing and calming. These pair beautifully with tea or as a palate cleanser between courses.
- Maple Pecan Comfort: Use maple extract instead of peppermint and fold in 1/2 cup finely chopped toasted pecans. The nutty crunch provides textural contrast to the creamy base, while the maple evokes cozy autumn vibes. Roll these in crushed pecans instead of sugar for a rustic presentation.
- Berry Burst Fusion: Replace the peppermint with raspberry or strawberry extract and add a few drops of corresponding food coloring. The fruit flavors provide a refreshing alternative to traditional mints, perfect for spring and summer gatherings. Consider rolling these in pink or red sparkling sugar for extra visual appeal.
- Spiced Chai Inspiration: Infuse the cream cheese with chai spices by adding 1 teaspoon cinnamon, 1/2 teaspoon cardamom, and 1/4 teaspoon each of ginger and cloves. The warm spices create a complex flavor experience that unfolds gradually on the palate, perfect for holiday entertaining.
Frequently Asked Questions
Can I use low-fat cream cheese for a healthier version?
While technically possible, low-fat cream cheese contains more water and stabilizers that dramatically alter the texture and flavor development. The full-fat version provides the rich, creamy mouthfeel that makes these mints so exceptional, and the fat content helps carry the mint flavor throughout the candy. If you must substitute, consider using neufchâtel cheese, which has slightly less fat but better texture results than truly low-fat options. Be prepared to adjust the powdered sugar quantity as lower-fat versions often require more sugar to achieve the proper dough consistency.
Why do my mints become sticky after a few days?
Stickiness usually indicates either insufficient chilling time or improper storage conditions. These mints need that initial 4-8 hour uncovered chill to properly set and release excess moisture. If stored while still slightly soft, they’ll weep moisture into the container. Always ensure your storage containers are completely airtight, as humidity is the enemy of perfect mints. If stickiness occurs, you can rescue them by spreading on a baking sheet and letting them air-dry for an hour before returning to proper storage with fresh parchment between layers.
Can I freeze cream cheese mints for later use?
Absolutely! Freezing actually preserves the texture and flavor beautifully for up to three months. Arrange the fully set mints in a single layer on a parchment-lined baking sheet and flash-freeze for two hours until firm, then transfer to freezer bags or containers with parchment between layers. Thaw overnight in the refrigerator—never at room temperature, as condensation will ruin the sugar coating. The freezing process doesn’t diminish that magical melt-away quality, making these perfect for making ahead for holidays or special events.
How far in advance can I make these for a party?
These mints actually improve with 24-48 hours of refrigeration, as the flavors meld and intensify. You can confidently make them up to three weeks before your event if stored properly in the refrigerator. For best results, make them at least one day before serving to allow full flavor development. If making more than a week in advance, consider freezing them and thawing gradually in the refrigerator to maintain perfect texture and appearance until your celebration.
Can I use these for wedding favors or large events?
These mints are spectacular for weddings and large events—their elegant appearance and sophisticated flavor profile make them perfect for special occasions. For large batches, work in quantities no larger than double the recipe to maintain control over consistency. Consider custom colors to match your event theme, and package them in individual favor bags or decorative boxes. They travel well and maintain their quality for weeks, making them ideal for advance preparation. Many couples find making these together becomes a cherished pre-wedding activity.
Summary
These cream cheese mints deliver an extraordinary sensory experience—velvety texture, intense flavor, and elegant presentation in one breathtaking bite. The perfect balance of creamy richness and refreshing coolness makes them unforgettable. Master the technique once, and you’ll have a versatile recipe that adapts to any occasion or flavor preference.
Cream Cheese Mints
4
servings30
minutesIngredients
Instructions
- 1 Beat softened cream cheese until fluffy and smooth
- 2 Gradually add sifted powdered sugar until dough forms
- 3 Mix in peppermint oil and salt
- 4 Add food coloring if desired
- 5 Roll into 1-teaspoon balls
- 6 Coat balls in granulated sugar
- 7 Flatten with fork or mold
- 8 Chill 4-8 hours until firm
- 9 Store in airtight container with parchment between layers