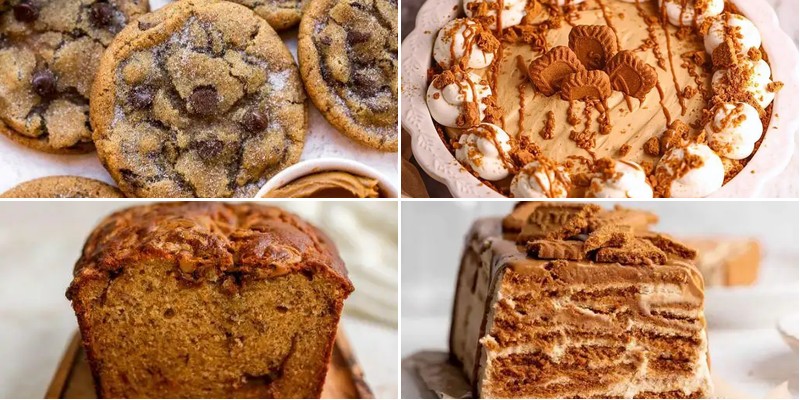
Venture into the delicious world of cookie butter desserts, where creamy, spiced perfection meets irresistible sweetness. Whether you’re craving quick treats or show-stopping creations, these 18 recipes transform that beloved jar into everything from no-bake bites to decadent cakes. Get ready to fall in love with every spoonful—your next favorite dessert is waiting!
Cookie Butter Chocolate Chip Cookies
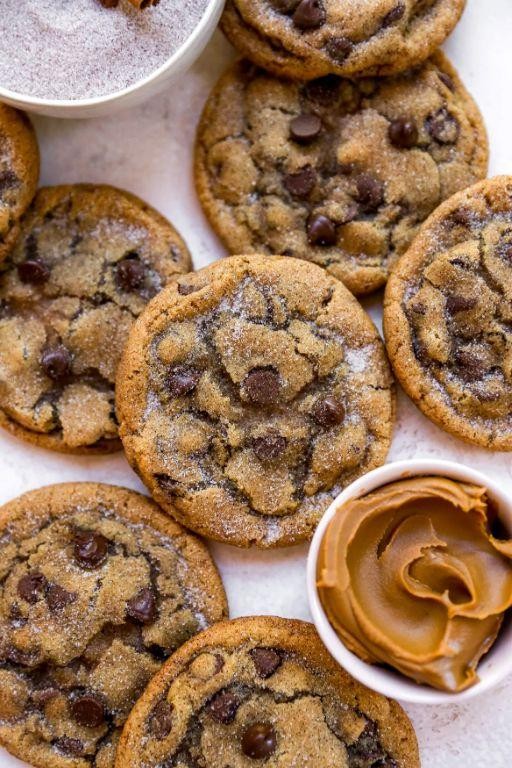
Every time I spot that iconic cookie butter jar at the grocery store, I can’t resist tossing it in my cart—it’s become a bit of a happy habit. These Cookie Butter Chocolate Chip Cookies were born from one of those impulse buys, and they’ve quickly become my go-to when I need a treat that feels both nostalgic and exciting. Trust me, the way the cookie butter swirls into the dough is pure magic.
24
cookies15
minutes11
minutesIngredients
- 1 cup (2 sticks) unsalted butter, softened—I always leave mine on the counter for an hour; it creams so much better than cold!
- ¾ cup creamy cookie butter, straight from the jar (no need to heat it, but give it a good stir if it’s separated)
- 1 cup light brown sugar, packed—I firmly press it into the measuring cup for that rich molasses flavor
- ½ cup granulated sugar
- 2 large eggs, at room temperature—they blend in smoothly and prevent the dough from curdling
- 2 teaspoons pure vanilla extract, my favorite splurge for that warm, aromatic kick
- 2 ¼ cups all-purpose flour, spooned and leveled to avoid dense cookies
- 1 teaspoon baking soda
- ½ teaspoon fine sea salt—I skip table salt here; the finer grains distribute evenly
- 1 ½ cups semi-sweet chocolate chips, because why skimp on chocolate?
Instructions
- Preheat your oven to 375°F (190°C) and line two baking sheets with parchment paper.
- In a large bowl, use an electric mixer on medium speed to cream the softened butter, cookie butter, brown sugar, and granulated sugar for 2–3 minutes, until light and fluffy. Tip: Don’t rush this step—proper creaming gives the cookies lift.
- Add the eggs one at a time, mixing for 30 seconds after each until fully incorporated.
- Mix in the vanilla extract until just combined.
- In a separate bowl, whisk together the flour, baking soda, and sea salt.
- Gradually add the dry ingredients to the wet mixture, mixing on low speed until no flour streaks remain. Tip: Overmixing can make cookies tough, so stop as soon as it’s blended.
- Fold in the chocolate chips with a spatula until evenly distributed.
- Scoop 2-tablespoon portions of dough onto the prepared baking sheets, spacing them 2 inches apart.
- Bake for 9–11 minutes, until the edges are golden brown but the centers still look slightly soft. Tip: For chewier cookies, pull them out when the centers seem underdone—they’ll firm up as they cool.
- Let the cookies cool on the baking sheet for 5 minutes before transferring to a wire rack.
Zesty with warmth from the cookie butter and studded with melty chocolate, these cookies are irresistibly soft in the center with a slight crisp at the edges. I love serving them slightly warm with a cold glass of milk, or crumbling them over vanilla ice cream for an easy dessert upgrade.
Cookie Butter Swirled Brownies
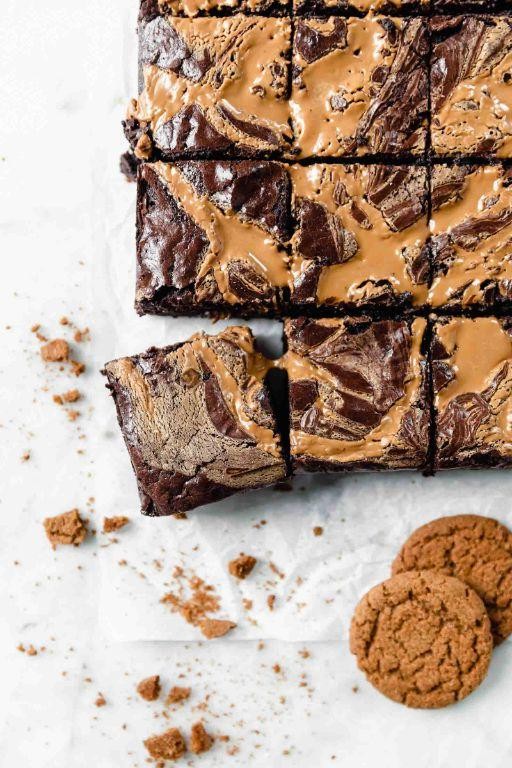
Whenever I’m craving something decadent that combines my love for brownies with the irresistible flavor of cookie butter, this is my go-to recipe. I first tried this combination when I had leftover cookie butter from holiday baking, and now it’s become a regular treat in our house. There’s something magical about how the swirled cookie butter creates pockets of caramelized goodness throughout the fudgy brownie base.
24
squares15
minutes30
minutesIngredients
– 1 cup unsalted butter (I always use European-style for richer flavor)
– 2 cups granulated sugar (I sometimes reduce this to 1¾ cups if I want them less sweet)
– 4 large eggs at room temperature (they incorporate much better when not cold)
– 1 tsp vanilla extract (pure vanilla makes all the difference here)
– ¾ cup cocoa powder (Dutch-processed gives the deepest chocolate flavor)
– 1 cup all-purpose flour
– ½ tsp salt (I prefer fine sea salt for even distribution)
– 1 cup cookie butter (the kind from Trader Joe’s is my absolute favorite)
Instructions
1. Preheat your oven to 350°F and line a 9×13 inch baking pan with parchment paper, leaving some overhang for easy removal.
2. Melt 1 cup of unsalted butter in a medium saucepan over low heat, being careful not to let it brown.
3. Remove the melted butter from heat and immediately whisk in 2 cups of granulated sugar until fully combined.
4. Add 4 room temperature eggs one at a time, whisking thoroughly after each addition until the mixture becomes glossy.
5. Stir in 1 teaspoon of vanilla extract until just incorporated.
6. Sift ¾ cup cocoa powder, 1 cup all-purpose flour, and ½ teaspoon salt directly into the wet ingredients.
7. Use a spatula to fold the dry ingredients into the wet mixture until no flour streaks remain, being careful not to overmix.
8. Pour the brownie batter into your prepared pan and spread it evenly into all corners.
9. Drop spoonfuls of 1 cup cookie butter randomly across the surface of the brownie batter.
10. Use a knife or toothpick to swirl the cookie butter through the batter, creating marbled patterns but not mixing it completely.
11. Bake at 350°F for 25-30 minutes until the edges are set but the center still appears slightly underdone.
12. Remove the pan from the oven and place it on a wire rack to cool completely, about 2 hours.
13. Use the parchment paper overhang to lift the cooled brownies from the pan before cutting into squares.
Decadent doesn’t even begin to describe these brownies – the fudgy chocolate base provides the perfect contrast to the sweet, spiced cookie butter swirls. I love how the cookie butter creates little caramelized pockets that stay slightly chewy even after baking. Serve them slightly warm with a scoop of vanilla ice cream for the ultimate dessert experience.
No-Bake Cookie Butter Cheesecake
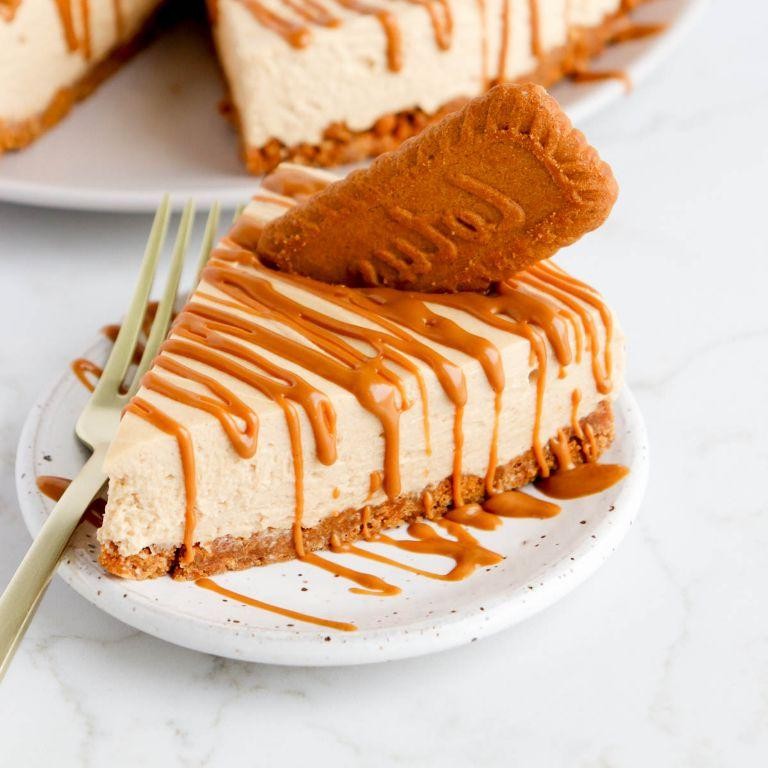
Zesty and utterly irresistible, this no-bake cookie butter cheesecake has become my go-to dessert whenever I need something impressive without turning on the oven. Just last week, my neighbor dropped by unexpectedly, and I whipped this up in 20 minutes flat—she still thinks I spent hours on it! Honestly, it’s the kind of treat that makes you feel like a kitchen wizard with minimal effort.
8
servings20
minutesIngredients
– 2 cups graham cracker crumbs (I always use honey-flavored for that extra warmth)
– 1/2 cup unsalted butter, melted (salted works too, but I find unsalted lets the cookie butter shine)
– 16 oz cream cheese, softened to room temp (this is non-negotiable for a silky filling—I leave mine out for a good 2 hours)
– 1 cup cookie butter spread (I’m loyal to Biscoff, but any brand will do)
– 1/2 cup powdered sugar (sifted to avoid lumps, because nobody wants a gritty bite)
– 1 tsp vanilla extract (pure vanilla is my secret—imitation just doesn’t hit the same)
– 1 cup heavy whipping cream, chilled (straight from the fridge for the fluffiest peaks)
Instructions
1. Combine the graham cracker crumbs and melted butter in a medium bowl until the mixture resembles wet sand.
2. Press the crumb mixture firmly into the bottom of a 9-inch springform pan, using the back of a measuring cup to create an even layer.
3. Chill the crust in the refrigerator for 10 minutes to set while you prepare the filling.
4. In a large mixing bowl, beat the softened cream cheese with an electric mixer on medium speed for 2 minutes until smooth and lump-free. Tip: Scrape down the sides of the bowl halfway through to ensure everything is incorporated evenly.
5. Add the cookie butter, powdered sugar, and vanilla extract to the cream cheese, and beat on medium speed for another 2 minutes until fully combined and creamy.
6. In a separate chilled bowl, whip the heavy whipping cream on high speed for 3–4 minutes until stiff peaks form. Tip: Chill your beaters and bowl beforehand—it helps the cream whip faster and hold its shape.
7. Gently fold the whipped cream into the cookie butter mixture using a spatula until no white streaks remain, being careful not to deflate the airiness.
8. Spread the filling evenly over the chilled crust, smoothing the top with an offset spatula.
9. Cover the pan with plastic wrap and refrigerate the cheesecake for at least 6 hours, or ideally overnight. Tip: For clean slices, dip your knife in hot water and wipe it dry between cuts.
Just imagine slicing into this beauty—the creamy, spiced cookie butter filling melts on your tongue, while the buttery crust adds a satisfying crunch. I love serving it with a drizzle of caramel or a sprinkle of crushed Biscoff cookies for extra texture, and it always disappears faster than I can snap a photo!
Cookie Butter Stuffed French Toast
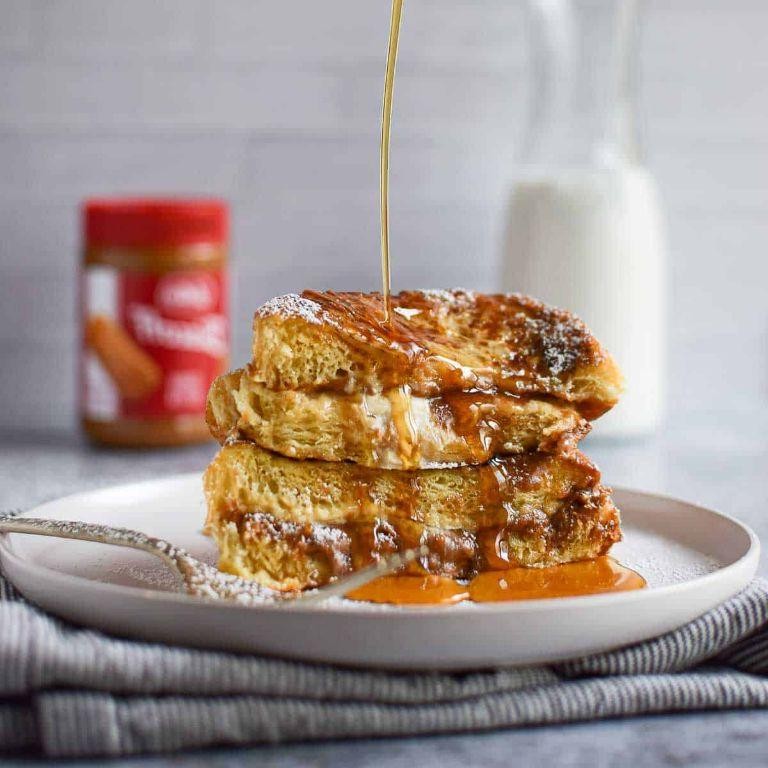
Crisp autumn mornings always have me craving something indulgent for breakfast, and this Cookie Butter Stuffed French Toast is my ultimate comfort food creation—it’s like a hug on a plate, especially when I’m reminiscing about lazy weekends with my family. I stumbled upon this idea after finding a jar of cookie butter hiding in my pantry, and now it’s a staple for cozy brunches.
2
sandwiches10
minutes16
minutesIngredients
– 4 thick slices of brioche bread (I love using day-old brioche for its sturdy texture)
– 1/2 cup cookie butter (smooth, not crunchy—it spreads like a dream)
– 2 large eggs (I prefer room temp eggs here; they blend more smoothly)
– 1/2 cup whole milk (for richness, though almond milk works in a pinch)
– 1 tsp vanilla extract (a splash of the good stuff makes all the difference)
– 1/4 tsp ground cinnamon (my secret for a warm, spiced kick)
– 2 tbsp unsalted butter (for frying; I always have extra on hand)
– Maple syrup and powdered sugar for serving (drizzle generously—it’s a must!)
Instructions
1. Lay the 4 thick slices of brioche bread on a clean cutting board.
2. Spread 2 tablespoons of cookie butter evenly onto two slices of brioche bread, leaving a 1/2-inch border around the edges to prevent leaking.
3. Top each cookie butter-covered slice with the remaining two slices of brioche to form two sandwiches, pressing down gently to seal.
4. Crack the 2 large eggs into a shallow bowl and whisk vigorously for 30 seconds until frothy.
5. Pour in the 1/2 cup whole milk, 1 tsp vanilla extract, and 1/4 tsp ground cinnamon, then whisk for another minute until fully combined.
6. Tip: Dip the brioche sandwiches one at a time to avoid sogginess—I let each side soak for 20 seconds to absorb the custard without falling apart.
7. Heat a large non-stick skillet over medium heat and add 1 tablespoon of unsalted butter, swirling to coat the pan evenly.
8. Place one stuffed sandwich in the skillet and cook for 3–4 minutes until the bottom is golden brown and crisp.
9. Flip the sandwich carefully with a spatula and cook for another 3–4 minutes until the second side is equally golden.
10. Tip: If the bread browns too quickly, reduce the heat to medium-low; this ensures the inside warms through without burning.
11. Transfer the cooked French toast to a plate and repeat steps 7–10 with the remaining 1 tablespoon of butter and second sandwich.
12. Tip: Let the French toast rest for 2 minutes before slicing—this helps the cookie butter set slightly for a neat cut.
13. Slice each sandwich diagonally and dust with powdered sugar, then drizzle with maple syrup to serve.
Warm and gooey from the melted cookie butter, this French toast has a crispy exterior that gives way to a soft, custardy center. I love serving it with fresh berries for a tart contrast, or even a dollop of whipped cream if I’m feeling extra decadent—it’s the kind of breakfast that turns an ordinary morning into something special.
Cookie Butter Banana Bread
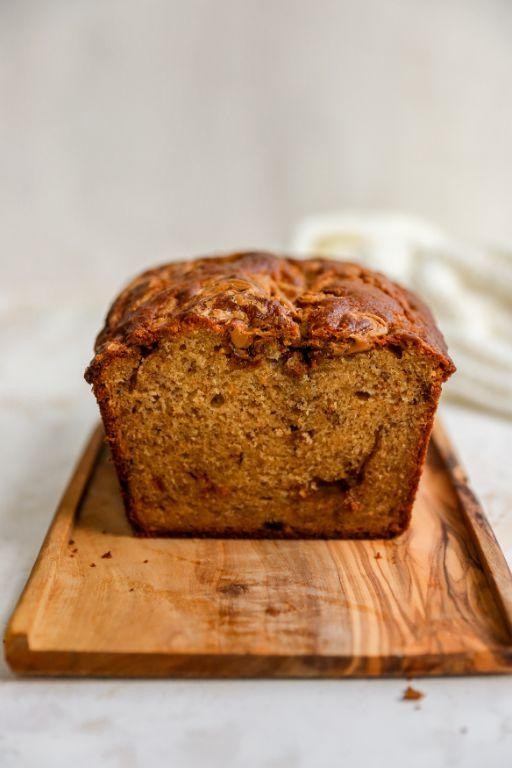
Kind of obsessed with this Cookie Butter Banana Bread—it’s the cozy, slightly indulgent twist on the classic that my family now requests every time our fruit bowl has a few too many spotty bananas. I first whipped it up on a lazy Sunday when I was craving something sweet but not overly complicated, and it’s been a staple ever since.
1
loaf15
minutes55
minutesIngredients
– 3 ripe bananas (the spottier, the sweeter—I always wait until they’re almost black for maximum flavor)
– 1/2 cup cookie butter (I use Biscoff spread because it’s my favorite, but any brand works)
– 1/2 cup unsalted butter, softened (room temp makes creaming so much easier)
– 3/4 cup granulated sugar (I sometimes reduce it to 2/3 cup if the bananas are super ripe)
– 2 large eggs (I prefer room temp eggs here for a smoother batter)
– 1 tsp vanilla extract (the real stuff, never imitation—it makes a difference)
– 1 1/2 cups all-purpose flour (I lightly spoon it into the cup to avoid packing)
– 1 tsp baking soda
– 1/2 tsp salt (I use fine sea salt for even distribution)
Instructions
1. Preheat your oven to 350°F and grease a 9×5-inch loaf pan with butter or non-stick spray.
2. In a large bowl, mash the ripe bananas with a fork until mostly smooth but with a few small lumps for texture.
3. Add the softened unsalted butter and cookie butter to the bananas, and mix with a hand mixer on medium speed until well combined and creamy.
4. Tip: Scrape down the sides of the bowl halfway through to ensure everything is evenly incorporated.
5. Beat in the granulated sugar until the mixture is light and fluffy, about 2 minutes.
6. Add the room temperature eggs one at a time, mixing well after each addition to avoid curdling.
7. Stir in the vanilla extract until just blended.
8. In a separate medium bowl, whisk together the all-purpose flour, baking soda, and salt.
9. Tip: Sifting the dry ingredients helps prevent lumps and ensures a tender crumb.
10. Gradually add the dry ingredients to the wet mixture, folding gently with a spatula until no flour streaks remain—do not overmix.
11. Tip: A few streaks are okay; overmixing can lead to a dense loaf.
12. Pour the batter into the prepared loaf pan and smooth the top with the spatula.
13. Bake in the preheated oven for 50-60 minutes, or until a toothpick inserted into the center comes out clean with a few moist crumbs.
14. Let the bread cool in the pan for 10 minutes, then transfer it to a wire rack to cool completely.
This bread is incredibly moist with a subtle spiced sweetness from the cookie butter—it’s like a hug in loaf form. I love slicing it thick and toasting it lightly for breakfast, or serving it warm with a dollop of whipped cream for dessert.
Cookie Butter Oatmeal Bars
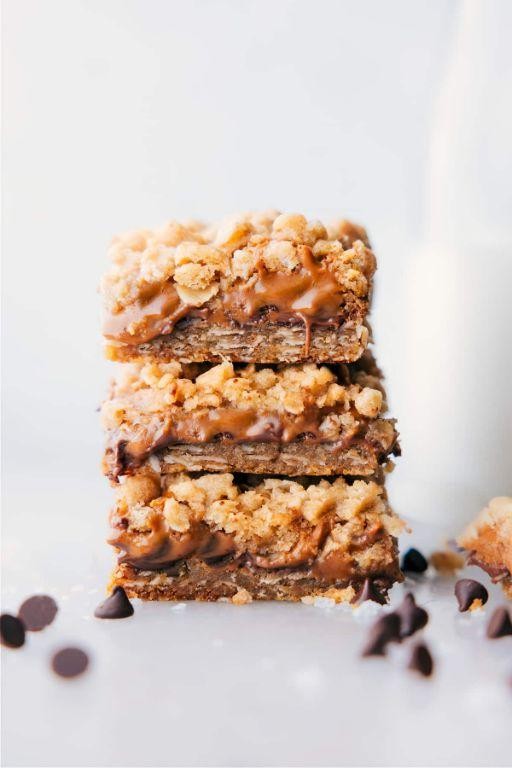
Gosh, I can still remember the first time I tried cookie butter—it was love at first bite! These Cookie Butter Oatmeal Bars have become my go-to treat for cozy fall afternoons, especially when I want something that feels both indulgent and wholesome. They’re the perfect balance of chewy, sweet, and just a little bit nostalgic, like a hug in dessert form.
16
bars15
minutes20
minutesIngredients
– 1 cup old-fashioned rolled oats (I love the texture these give, but quick oats work in a pinch)
– 1/2 cup all-purpose flour (I always spoon and level it to avoid packing too much in)
– 1/2 cup packed light brown sugar (this adds that lovely molasses depth)
– 1/4 cup unsalted butter, melted (I use salted sometimes if that’s all I have—just skip the extra salt)
– 1/4 tsp baking soda
– 1/4 tsp fine sea salt (I prefer this over table salt for even distribution)
– 1/2 cup cookie butter (I usually go for the smooth kind, but crunchy adds fun texture)
– 1 large egg, at room temperature (this helps it blend smoothly with the other ingredients)
– 1 tsp vanilla extract (the real stuff makes all the difference here)
Instructions
1. Preheat your oven to 350°F and line an 8×8-inch baking pan with parchment paper, leaving some overhang for easy removal.
2. In a medium bowl, combine the old-fashioned rolled oats, all-purpose flour, packed light brown sugar, baking soda, and fine sea salt with a whisk until evenly mixed.
3. Pour the melted unsalted butter over the dry ingredients and stir with a spatula until the mixture resembles coarse crumbs.
4. In a separate small bowl, whisk together the cookie butter, large egg, and vanilla extract until smooth and fully incorporated.
5. Tip: If your cookie butter is stiff, microwave it for 10–15 seconds to make mixing easier.
6. Pour the cookie butter mixture into the oat mixture and fold gently until no dry streaks remain and a thick, cohesive dough forms.
7. Transfer the dough to the prepared baking pan and press it into an even layer using lightly damp hands to prevent sticking.
8. Tip: For extra crisp edges, press the dough slightly thinner around the pan’s perimeter.
9. Bake at 350°F for 18–22 minutes, or until the edges are golden brown and the center appears set but still soft.
10. Tip: Don’t overbake—the bars will firm up as they cool, so pull them when the center jiggles just slightly.
11. Let the pan cool completely on a wire rack for at least 1 hour before lifting out the bars and slicing into squares.
What I adore about these bars is their soft, chewy texture with little oat nubs that give a satisfying bite. The cookie butter flavor shines through without being overly sweet, making them ideal with a glass of cold milk or crumbled over vanilla ice cream for a decadent twist.
Cookie Butter Layered Icebox Cake
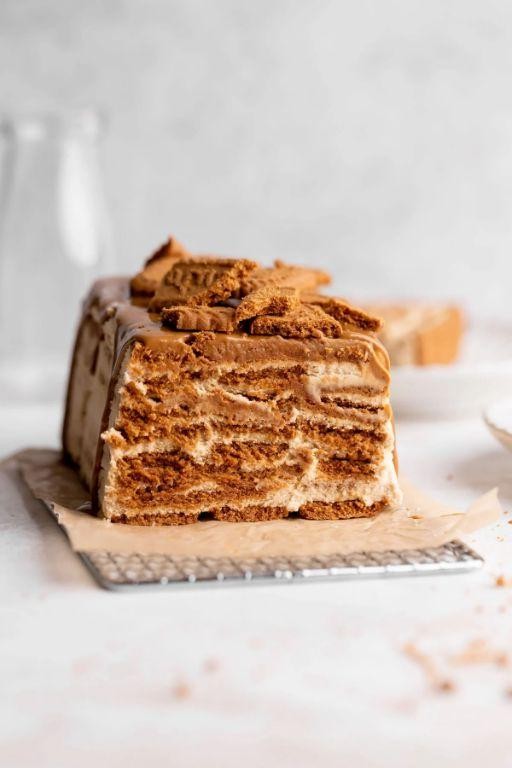
Diving into my freezer always feels like uncovering buried treasure, and this Cookie Butter Layered Icebox Cake is the ultimate prize I discovered during last summer’s heatwave when baking was absolutely out of the question. It’s become my go-to no-bake dessert that never fails to impress guests with its creamy, dreamy layers and that irresistible cookie butter flavor we all adore.
12
servings30
minutesIngredients
– 2 cups heavy whipping cream (I always chill my bowl and beaters first for better peaks)
– 1/4 cup powdered sugar (sifted to avoid lumps, trust me on this)
– 1 teaspoon pure vanilla extract (the good stuff makes all the difference)
– 1 1/2 cups cookie butter spread (I prefer the smooth kind for perfect spreading)
– 48 crisp chocolate wafer cookies (the thin ones that get perfectly soft)
– 1/4 cup crushed Biscoff cookies for topping (saved from my coffee-dunking stash)
Instructions
1. Chill a large metal bowl and electric mixer beaters in the freezer for 15 minutes to help the cream whip faster and hold its shape better.
2. Pour 2 cups heavy whipping cream into the chilled bowl and beat on medium-high speed for 2 minutes until soft peaks form.
3. Add 1/4 cup sifted powdered sugar and 1 teaspoon vanilla extract, then continue beating for 1-2 minutes until stiff peaks form that hold their shape when the beaters are lifted.
4. Gently fold 1 1/2 cups cookie butter spread into the whipped cream mixture using a spatula until just combined, being careful not to deflate the cream.
5. Spread about 1/2 cup of the cookie butter cream mixture evenly across the bottom of a 9×13-inch baking dish to create your base layer.
6. Arrange 16 chocolate wafer cookies in a single layer over the cream, breaking cookies as needed to fill gaps completely.
7. Spread another 1 cup of the cookie butter cream over the cookie layer, making sure to cover all cookies completely to prevent dry spots.
8. Repeat the layering process two more times with remaining cookies and cream, ending with a final layer of cream on top.
9. Sprinkle 1/4 cup crushed Biscoff cookies evenly over the top layer for both decoration and extra crunch.
10. Cover the baking dish tightly with plastic wrap and refrigerate for at least 8 hours or overnight until the cookies have softened completely into cake-like layers.
Really, the magic happens during that overnight chill when the cookies transform into the most tender cake layers while the cream sets up perfectly. That contrast between the creamy filling and the now-soft cookie layers creates something truly special that slices beautifully. I love serving this straight from the fridge with an extra sprinkle of cookie crumbs and maybe even a drizzle of caramel for those extra-indulgent moments.
Cookie Butter Snickerdoodles
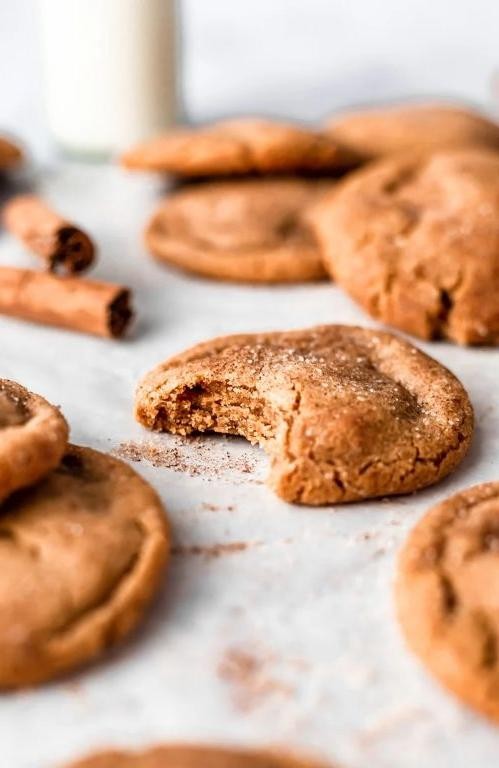
Kind of obsessed is an understatement when it comes to these cookie butter snickerdoodles—I first made them for a last-minute potluck and they disappeared so fast I barely got one myself! Now they’re my go-to when I need something impressively delicious without too much fuss.
24
cookies20
minutes11
minutesIngredients
– 1 cup unsalted butter, softened (I leave mine on the counter for exactly 2 hours before baking)
– 1 ½ cups granulated sugar (I always use cane sugar for that subtle molasses hint)
– ¾ cup cookie butter (the kind with speculoos bits is my favorite for extra texture)
– 2 large eggs, at room temperature (cold eggs can make the dough greasy)
– 2 tsp pure vanilla extract (I splash in a little extra because why not?)
– 3 cups all-purpose flour, spooned and leveled (this prevents dense cookies)
– 2 tsp cream of tartar (don’t skip this—it gives that classic snickerdoodle tang)
– 1 tsp baking soda
– ½ tsp fine sea salt (I prefer this over table salt for even distribution)
– ¼ cup granulated sugar mixed with 1 tbsp cinnamon for rolling
Instructions
1. Preheat your oven to 375°F and line two baking sheets with parchment paper.
2. In a large bowl, beat the softened butter and 1 ½ cups sugar with an electric mixer on medium speed for 2 minutes until light and fluffy.
3. Add the cookie butter and mix for 1 more minute until fully incorporated.
4. Beat in the eggs one at a time, waiting until each is fully combined before adding the next.
5. Mix in the vanilla extract until just blended.
6. In a separate bowl, whisk together the flour, cream of tartar, baking soda, and salt.
7. Gradually add the dry ingredients to the wet mixture, mixing on low speed until no flour streaks remain.
8. Scoop 2-tablespoon portions of dough and roll into smooth balls.
9. Roll each ball in the cinnamon-sugar mixture until evenly coated.
10. Place dough balls 2 inches apart on the prepared baking sheets.
11. Bake for 9-11 minutes until the edges are set but centers still look slightly underdone.
12. Let cookies cool on the baking sheet for 5 minutes before transferring to a wire rack.
Nothing beats pulling these from the oven—they emerge with crackly tops, chewy centers, and that warm spice hug from the cinnamon sugar. Try serving them slightly warm with a scoop of vanilla ice cream for the ultimate cozy dessert, or just enjoy them straight from the cooling rack like I usually do!
Glazed Cookie Butter Donuts
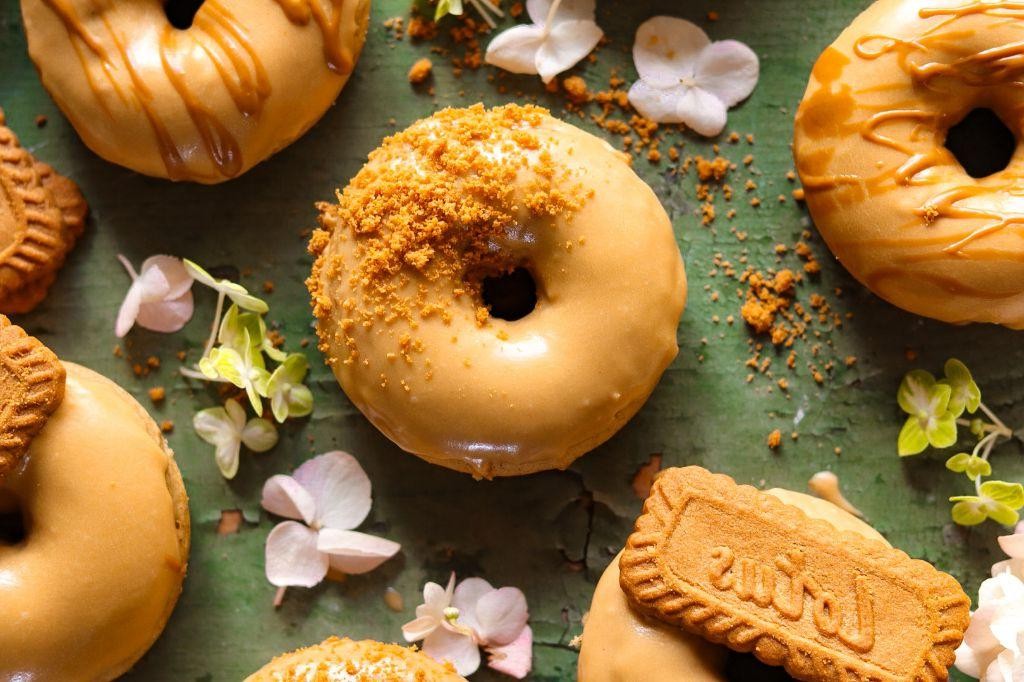
Waking up to the smell of freshly fried donuts takes me right back to my grandma’s kitchen every single time. There’s something magical about that first bite of a warm, glazed donut that just makes the world feel right, especially when it’s infused with the cozy, spiced flavor of cookie butter.
4
servings15
minutes15
minutesIngredients
- 2 cups all-purpose flour (I always spoon and level mine to avoid dense donuts)
- 1/2 cup granulated sugar (this creates that perfect golden crust when frying)
- 2 tsp baking powder (make sure yours is fresh for maximum rise)
- 1/2 tsp salt (I use fine sea salt for even distribution)
- 3/4 cup whole milk (room temperature blends so much smoother)
- 1 large egg (I take mine out about 30 minutes before starting)
- 2 tbsp melted unsalted butter (cooled slightly so it doesn’t cook the egg)
- 1 tsp vanilla extract (the real stuff makes all the difference)
- 1/2 cup cookie butter spread (I microwave mine for 15 seconds to make it pourable)
- 4 cups vegetable oil for frying (I check temperature with a candy thermometer)
- 1 cup powdered sugar for glaze (sifted to eliminate any lumps)
- 2-3 tbsp heavy cream for glaze (add slowly until you reach perfect drizzling consistency)
Instructions
- Whisk together flour, sugar, baking powder, and salt in a large bowl until fully combined.
- In a separate bowl, whisk milk, egg, melted butter, and vanilla extract until smooth and uniform in color.
- Pour wet ingredients into dry ingredients and stir gently until just combined—do not overmix.
- Fold in cookie butter spread until you see beautiful swirls throughout the dough.
- Heat vegetable oil in a heavy-bottomed pot to 350°F, using a candy thermometer for accuracy.
- While oil heats, scoop dough with a tablespoon and roll into smooth balls between your palms.
- Fry donut holes in batches of 4-5 for 2-3 minutes, flipping halfway when golden brown.
- Remove donuts with a slotted spoon and drain on a wire rack set over paper towels.
- Let donuts cool for 5 minutes while you prepare the glaze.
- Whisk powdered sugar and heavy cream together until smooth and pourable.
- Dip slightly warm donuts into glaze, allowing excess to drip back into the bowl.
- Return glazed donuts to wire rack and let set for 10 minutes before serving.
Oh my goodness, these donuts are everything—crispy on the outside with the most tender, cake-like interior that just melts in your mouth. The cookie butter adds this incredible warmth and spice that pairs perfectly with the sweet glaze. I love serving these still slightly warm with a cold glass of milk for the ultimate comfort food moment that feels like a hug in dessert form.
Cookie Butter Filled Cupcakes

Nothing beats the cozy feeling of baking on a crisp fall afternoon like today, and these Cookie Butter Filled Cupcakes are my latest obsession—they’re like a warm hug in dessert form, with a surprise center that always makes my friends ask for the recipe immediately. I first made these for a potluck last year, and now they’re a staple in my kitchen for any occasion, from birthdays to just-because days. Trust me, that gooey cookie butter filling is pure magic, and I’ll walk you through every step to make them perfectly.
12
cupcakes15
minutes20
minutesIngredients
– 1 ½ cups all-purpose flour (I always sift mine first for fluffier cupcakes)
– 1 cup granulated sugar (I use cane sugar for a slight caramel note)
– ½ cup unsalted butter, softened (room temp is key—I leave it out for an hour)
– 2 large eggs, room temperature (they blend better when not cold)
– ½ cup whole milk (I’ve tried skim, but whole gives a richer crumb)
– 1 tsp vanilla extract (pure vanilla is my go-to for that warm flavor)
– 1 ½ tsp baking powder (fresh baking powder makes them rise beautifully)
– ¼ tsp salt (a pinch balances the sweetness)
– ¾ cup cookie butter (I use Biscoff spread—it’s smooth and not too gritty)
– ½ cup powdered sugar (for dusting, and I sift it to avoid lumps)
Instructions
1. Preheat your oven to 350°F and line a 12-cup muffin tin with paper liners; I like to lightly spray the liners with cooking spray to prevent sticking.
2. In a medium bowl, whisk together 1 ½ cups all-purpose flour, 1 ½ tsp baking powder, and ¼ tsp salt until no clumps remain.
3. In a large mixing bowl, cream ½ cup softened unsalted butter and 1 cup granulated sugar with an electric mixer on medium speed for 2–3 minutes, until pale and fluffy.
4. Tip: Scrape down the bowl sides with a spatula halfway through creaming to ensure everything is evenly mixed.
5. Add 2 large eggs, one at a time, beating well after each addition until fully incorporated.
6. Mix in 1 tsp vanilla extract until just combined.
7. Alternate adding the flour mixture and ½ cup whole milk to the butter mixture, starting and ending with flour, and mix on low speed until the batter is smooth.
8. Tip: Do not overmix the batter—stop as soon as no streaks of flour remain to keep the cupcakes tender.
9. Fill each muffin liner about two-thirds full with batter using a spoon or ice cream scoop.
10. Spoon 1 tablespoon of cookie butter into the center of each cupcake batter portion, pressing it down slightly with the back of the spoon.
11. Bake in the preheated oven for 18–20 minutes, or until a toothpick inserted into the cake part (not the filling) comes out clean.
12. Tip: Rotate the pan halfway through baking for even browning, as oven hotspots can cause uneven results.
13. Remove the cupcakes from the oven and let them cool in the pan for 5 minutes before transferring to a wire rack to cool completely.
14. Dust the cooled cupcakes with ½ cup powdered sugar using a fine-mesh sieve for a light, snowy finish.
Finally, these cupcakes are a dream with their moist, vanilla-scented crumb and that molten cookie butter core that oozes out when warm. I love serving them slightly warmed with a dollop of whipped cream or alongside a cold glass of milk for the ultimate comfort treat—they’re so irresistible, I often have to hide one for myself before they disappear!
Cookie Butter Bread Pudding
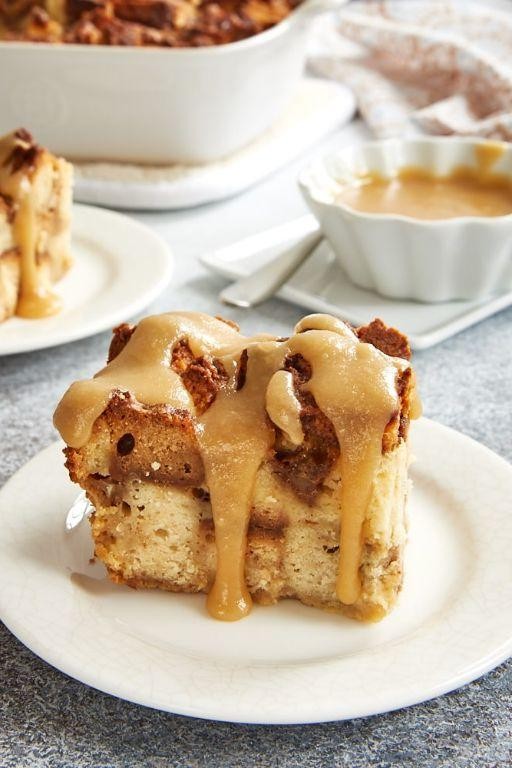
Sometimes the best recipes come from pantry cleanouts, and this Cookie Butter Bread Pudding was born when I discovered a forgotten jar of cookie butter hiding behind the oatmeal. Now it’s my go-to cozy dessert that feels like a warm hug on chilly evenings.
9
portions25
minutes50
minutesIngredients
– 6 cups cubed day-old challah bread (I save the heels from weekend baking for this)
– 1 cup smooth cookie butter (the kind with speculoos cookie bits is my favorite)
– 2 cups whole milk at room temperature (cold milk can make the custard seize)
– 3 large eggs at room temperature (they incorporate better when not chilled)
– 1/2 cup granulated sugar (I sometimes reduce this since cookie butter is already sweet)
– 1 teaspoon vanilla extract (pure vanilla makes all the difference here)
– 1/4 teaspoon salt (just a pinch to balance the sweetness)
– 2 tablespoons melted unsalted butter for greasing (I always use unsalted to control the saltiness)
Instructions
1. Preheat your oven to 350°F and generously grease an 8×8 inch baking dish with the melted butter, making sure to coat the corners well.
2. Arrange the cubed challah bread in a single layer in the prepared baking dish, pressing down lightly to create an even surface.
3. In a medium bowl, whisk together the room temperature eggs until they’re pale and frothy, about 1 minute of vigorous whisking.
4. Add the granulated sugar to the eggs and continue whisking for another 30 seconds until the mixture becomes slightly thickened.
5. Pour in the room temperature whole milk slowly while whisking constantly to prevent the eggs from curdling.
6. Add the vanilla extract and salt, then whisk for another 15 seconds to fully incorporate all the wet ingredients.
7. Microwave the cookie butter in a heat-safe bowl for 20 seconds until it’s pourable but not hot.
8. Slowly drizzle the warmed cookie butter into the milk mixture while whisking continuously to create a smooth, speckled custard.
9. Pour the completed custard mixture evenly over the bread cubes, making sure all pieces are thoroughly soaked.
10. Use the back of a spoon to gently press down any floating bread pieces, ensuring maximum custard absorption.
11. Let the pudding sit for 15 minutes at room temperature so the bread can fully absorb the custard before baking.
12. Bake at 350°F for 45-50 minutes until the top is golden brown and the center springs back when lightly touched.
13. Remove from oven and let cool for at least 20 minutes before serving to allow the custard to set properly. Nothing beats the contrast between the creamy, spiced interior and the crisp, caramelized top crust of this bread pudding. Next time you make it, try serving warm scoops over vanilla ice cream or drizzling with extra melted cookie butter for an indulgent twist.
Cookie Butter Pancakes
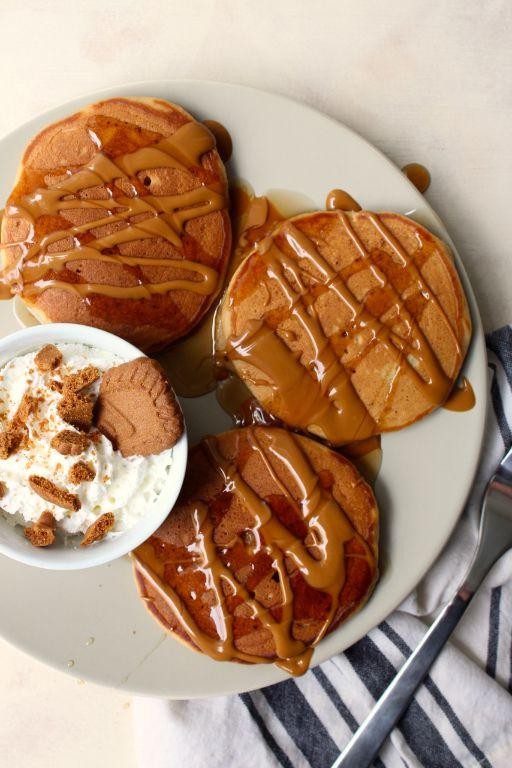
Baking these Cookie Butter Pancakes has become my Sunday morning ritual—there’s something magical about how the warm, spiced aroma fills my kitchen and brings everyone stumbling out of bed. I first tried this twist after discovering a half-empty jar of cookie butter in my pantry, and now it’s our family’s most-requested weekend treat. Honestly, these fluffy stacks taste like dessert for breakfast, but we pretend it’s totally acceptable before noon.
8
pancakes10
minutes20
minutesIngredients
– 1 cup all-purpose flour (I always fluff it with a fork before measuring for lighter pancakes)
– 2 tbsp granulated sugar (this balances the cookie butter’s richness perfectly)
– 1 tsp baking powder (check the date—old baking powder makes sad, flat pancakes)
– ½ tsp salt (I use fine sea salt for even distribution)
– 1 cup whole milk (room temperature blends smoother with other ingredients)
– 1 large egg (I crack mine straight into the wet ingredients—fewer bowls to wash!)
– 3 tbsp smooth cookie butter (slightly warmed for easier mixing)
– 2 tbsp melted unsalted butter (cooled slightly so it doesn’t cook the egg)
– 1 tsp vanilla extract (the real stuff makes all the difference)
Instructions
1. Whisk together flour, sugar, baking powder, and salt in a large bowl until no streaks remain.
2. In a separate bowl, vigorously whisk milk, egg, cookie butter, melted butter, and vanilla for 45 seconds until fully emulsified.
3. Pour wet ingredients into dry ingredients and stir with a spatula until just combined—lumps are okay!
4. Heat a non-stick skillet or griddle over medium heat (325°F if using an electric griddle) for 3 minutes.
5. Test heat by sprinkling a few water droplets—they should sizzle and evaporate immediately.
6. Ladle ¼ cup batter onto the hot surface, spacing pancakes 2 inches apart.
7. Cook for 2-3 minutes until bubbles cover the surface and edges look matte.
8. Flip pancakes with a thin spatula and cook for 1-2 minutes until bottoms are golden brown.
9. Transfer to a wire rack (never stack them—they’ll get soggy!) while repeating with remaining batter.
Golden and speckled with spice, these pancakes have crispy edges giving way to a melt-in-your-mouth center. The cookie butter weaves through every bite with its gingersnap-like warmth, especially glorious when drizzled with maple syrup and topped with sliced bananas. We sometimes sandwich them with whipped cream for an over-the-top weekend indulgence.
Cookie Butter Granola
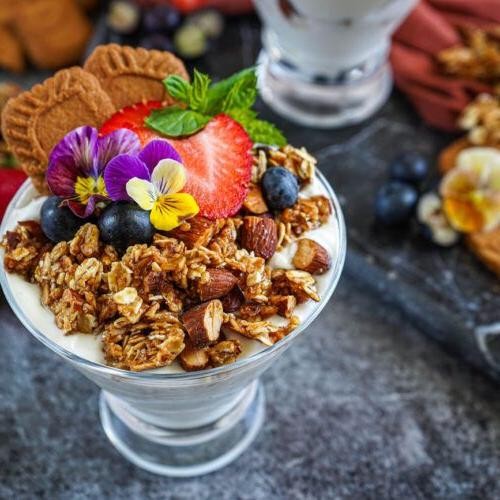
Gosh, I never thought my cookie butter obsession would lead to creating my favorite homemade granola recipe, but here we are! After one too many late-night spoonfuls straight from the jar, I decided to transform that addictive flavor into something I could actually feel good about eating for breakfast. This Cookie Butter Granola has become my go-to weekend project—the kind of simple baking that fills the house with the most incredible warm, spiced aroma while I sip my morning coffee.
8
servings15
minutes35
minutesIngredients
– 3 cups old-fashioned rolled oats (I always use the thick-cut kind for better crunch)
– 1/2 cup creamy cookie butter (I microwave mine for 15 seconds to make it easier to mix)
– 1/4 cup pure maple syrup (the real stuff makes all the difference)
– 2 tablespoons coconut oil (melted but not hot)
– 1 teaspoon vanilla extract (I splash in a little extra because why not?)
– 1/2 teaspoon cinnamon (my secret for that warm cookie flavor)
– 1/4 teaspoon sea salt (I prefer the flaky kind for texture)
Instructions
1. Preheat your oven to 325°F and line a large baking sheet with parchment paper.
2. In a large mixing bowl, combine the old-fashioned rolled oats, cinnamon, and sea salt.
3. In a separate microwave-safe bowl, heat the creamy cookie butter for 15 seconds until slightly softened.
4. Add the pure maple syrup, melted coconut oil, and vanilla extract to the warmed cookie butter.
5. Whisk the wet ingredients vigorously for about 30 seconds until completely smooth and well-combined.
6. Pour the cookie butter mixture over the dry oat mixture.
7. Use a rubber spatula to fold and stir until every oat is thoroughly coated with the cookie butter mixture.
8. Spread the granola mixture evenly onto your prepared baking sheet in a single layer.
9. Bake at 325°F for 20 minutes, then rotate the baking sheet 180 degrees for even cooking.
10. Continue baking for another 10-15 minutes until the granola turns golden brown and smells fragrant.
11. Remove the baking sheet from the oven and let the granola cool completely on the sheet for at least 1 hour—this is crucial for achieving maximum crunch.
12. Break the cooled granola into clusters with your hands or a spoon.
Nothing beats the satisfying crunch of this granola, with its deep caramelized notes from the cookie butter and subtle warmth from cinnamon. I love how the clusters hold their shape beautifully when sprinkled over yogurt, and the flavor somehow manages to taste indulgent while still feeling wholesome. My current favorite way to enjoy it is layered in a parfait with vanilla Greek yogurt and fresh sliced bananas—the creamy, crunchy, fruity combination is absolutely irresistible.
Cookie Butter Milkshake
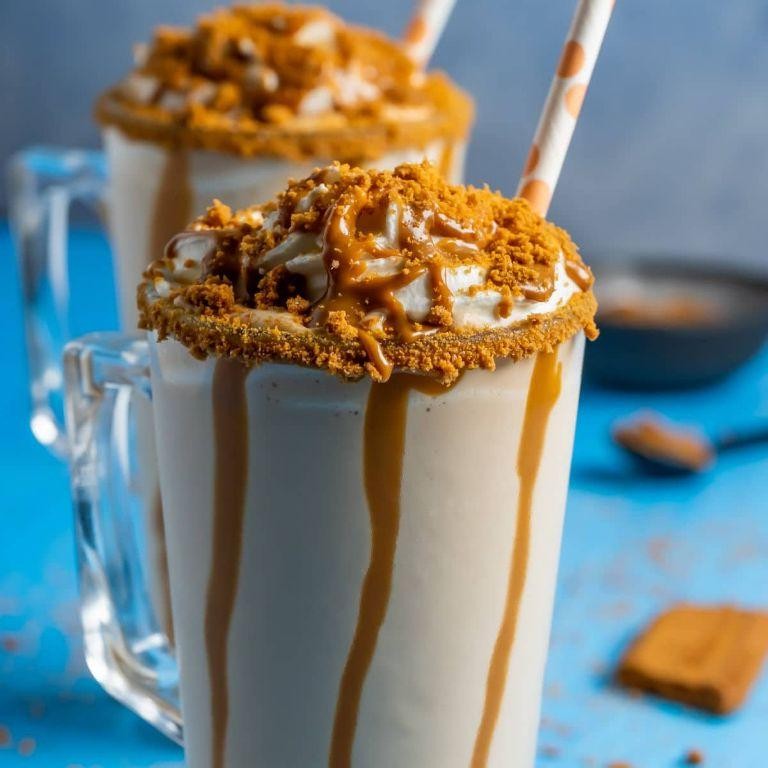
Sometimes you just need that perfect sweet treat to turn a regular Tuesday into something special. I first discovered cookie butter during a late-night grocery run and immediately knew it belonged in a milkshake—this creamy, dreamy creation has been my go-to indulgence ever since.
1
servings5
minutesIngredients
- 2 cups vanilla ice cream (I always use high-quality, creamy vanilla—it makes all the difference)
- 1/2 cup whole milk (for maximum creaminess, though any milk works)
- 1/4 cup cookie butter (the star ingredient—I prefer the smooth kind for perfect blending)
- 1/4 cup crushed Biscoff cookies (for that extra crunch and authentic flavor)
- Whipped cream for topping (because every milkshake deserves a cloud on top)
Instructions
- Measure 2 cups of vanilla ice cream and add it to your blender.
- Pour 1/2 cup of whole milk directly over the ice cream in the blender.
- Scoop 1/4 cup of cookie butter into the blender—tip: if it’s too stiff, microwave it for 10 seconds to make it easier to blend.
- Add 1/4 cup of crushed Biscoff cookies to the blender, reserving about 1 tablespoon for garnish.
- Blend on medium speed for 30 seconds, then scrape down the sides with a spatula to ensure everything incorporates evenly.
- Blend again on high speed for 15-20 seconds until the mixture is completely smooth and no ice cream chunks remain—tip: don’t over-blend or the shake will become too thin.
- Pour the milkshake immediately into a chilled glass to maintain its thick, frosty texture.
- Top generously with whipped cream, creating a tall swirl that reaches the rim.
- Sprinkle the reserved crushed Biscoff cookies evenly over the whipped cream.
Heavenly doesn’t even begin to describe this milkshake—the texture is luxuriously thick with subtle cookie crumbs throughout, while the flavor balances sweet cookie butter with hints of warm spice. For an extra special touch, I love rimming the glass with melted chocolate and extra cookie crumbs before pouring, or serving it with a couple of whole Biscoff cookies on the side for dipping.
Cookie Butter Popcorn
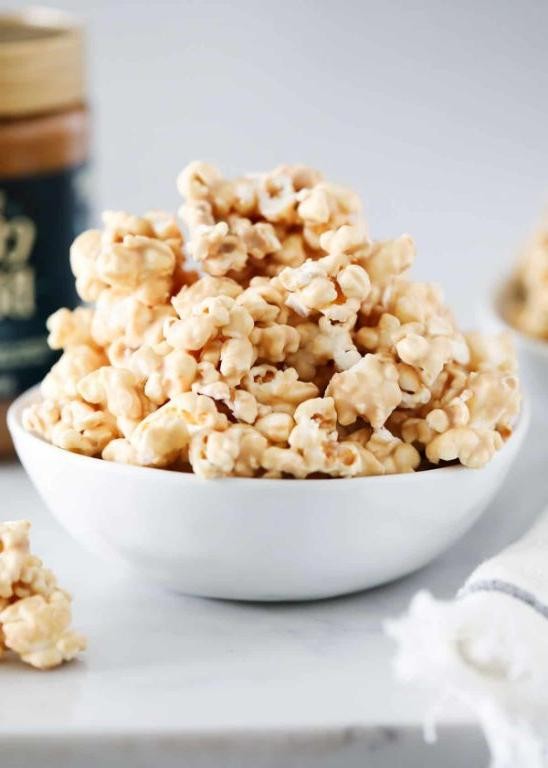
Keeping my kitchen stocked with fun snack ingredients means I’m always ready for impromptu movie nights—this cookie butter popcorn was born during one such evening when I wanted something more exciting than plain buttered popcorn.
10
cups10
minutes15
minutesIngredients
– 10 cups freshly popped popcorn (I always use my air popper for maximum fluffiness)
– 1/2 cup cookie butter (the kind with visible speculoos cookie crumbs is my favorite)
– 2 tablespoons coconut oil (refined works best since it doesn’t add coconut flavor)
– 1/4 teaspoon fine sea salt (I prefer this over table salt for better distribution)
– 1/4 cup white chocolate chips (these add little sweet pockets throughout)
Instructions
1. Preheat your oven to 250°F and line a large baking sheet with parchment paper.
2. Spread 10 cups of freshly popped popcorn evenly across the prepared baking sheet, removing any unpopped kernels.
3. Combine 1/2 cup cookie butter and 2 tablespoons coconut oil in a microwave-safe bowl.
4. Microwave the mixture on high power for 30 seconds, then stir until completely smooth and pourable.
5. Drizzle the warm cookie butter mixture evenly over the popcorn using a spoon or silicone spatula.
6. Sprinkle 1/4 teaspoon fine sea salt over the coated popcorn.
7. Gently toss the popcorn with clean hands or two spatulas until every piece is lightly coated.
8. Bake at 250°F for 15 minutes to help the coating set without burning.
9. Remove the baking sheet from the oven and immediately sprinkle 1/4 cup white chocolate chips over the warm popcorn.
10. Let the popcorn cool completely on the baking sheet for about 20 minutes until the coating crisps up.
11. Break apart any large clusters with your hands before transferring to a serving bowl.
What makes this snack irresistible is the way the crisp popcorn contrasts with the creamy cookie butter coating, while the melted white chocolate chips create delightful sweet surprises. I love serving this in individual paper cones during game nights, and the speculoos flavor somehow makes everything feel more festive.
Cookie Butter Pie
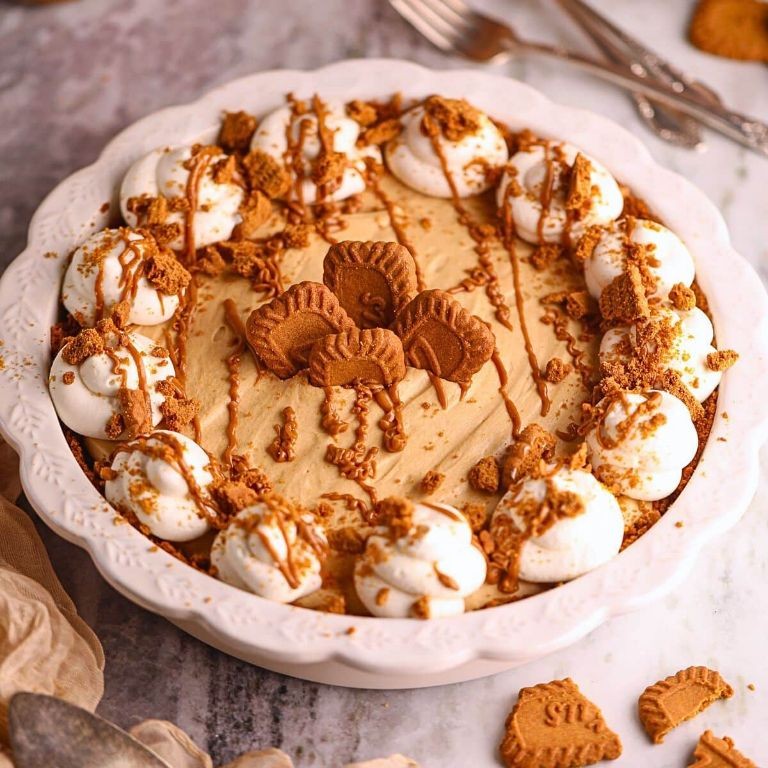
Finally, after discovering a jar of cookie butter hiding in my pantry (leftover from last holiday’s baking frenzy), I decided to create the ultimate no-bake pie that’s become my new obsession. This Cookie Butter Pie is so ridiculously easy that I’ve made it three times this month already, and each time it disappears faster than the last.
8
servings25
minutesIngredients
– 1 ½ cups graham cracker crumbs (I always crush mine fresh for better texture)
– ⅓ cup salted butter, melted (the salted kind gives that perfect sweet-salty balance)
– 8 oz cream cheese, softened to room temperature (this is crucial for smooth blending)
– 1 cup cookie butter spread (I use the smooth variety for that velvety texture)
– 1 cup powdered sugar (sifted to avoid lumps)
– 1 tsp vanilla extract (pure vanilla makes all the difference)
– 1 ½ cups heavy whipping cream, chilled (cold cream whips up so much better)
– ¼ cup chocolate chips for garnish (because everything’s better with chocolate)
Instructions
1. Combine 1 ½ cups graham cracker crumbs with ⅓ cup melted butter in a medium bowl until the mixture resembles wet sand.
2. Press the crumb mixture firmly into a 9-inch pie plate, making sure to create an even layer across the bottom and up the sides.
3. Chill the crust in the refrigerator for exactly 30 minutes to set properly while you prepare the filling.
4. In a large mixing bowl, beat 8 oz softened cream cheese with an electric mixer on medium speed for 2 minutes until completely smooth and lump-free.
5. Add 1 cup cookie butter, 1 cup powdered sugar, and 1 tsp vanilla extract to the cream cheese, then beat on medium-high speed for 3 minutes until fully incorporated and fluffy.
6. In a separate chilled bowl, whip 1 ½ cups cold heavy cream on high speed for 4-5 minutes until stiff peaks form that hold their shape when you lift the beaters.
7. Gently fold the whipped cream into the cookie butter mixture using a rubber spatula, making sure to scrape the bottom and sides to combine thoroughly without deflating the cream.
8. Pour the filling into the chilled crust and spread evenly with an offset spatula, creating decorative swirls on the surface.
9. Sprinkle ¼ cup chocolate chips evenly over the top of the pie for garnish.
10. Cover the pie with plastic wrap and refrigerate for at least 6 hours, or ideally overnight, to allow the filling to set completely.The finished pie has this incredible creamy, mousse-like texture that melts in your mouth, with that distinctive cookie butter flavor shining through in every bite. I love serving thick slices with an extra drizzle of melted cookie butter on top, or sometimes I’ll crumble some actual cookies over individual servings for added crunch.
Conclusion
Ready to transform your cookie butter into something spectacular? These 18 irresistible recipes offer endless inspiration for every skill level and occasion. We hope you’ll try a few, share your favorites in the comments below, and pin this roundup to your Pinterest boards to save for your next baking adventure. Happy baking!