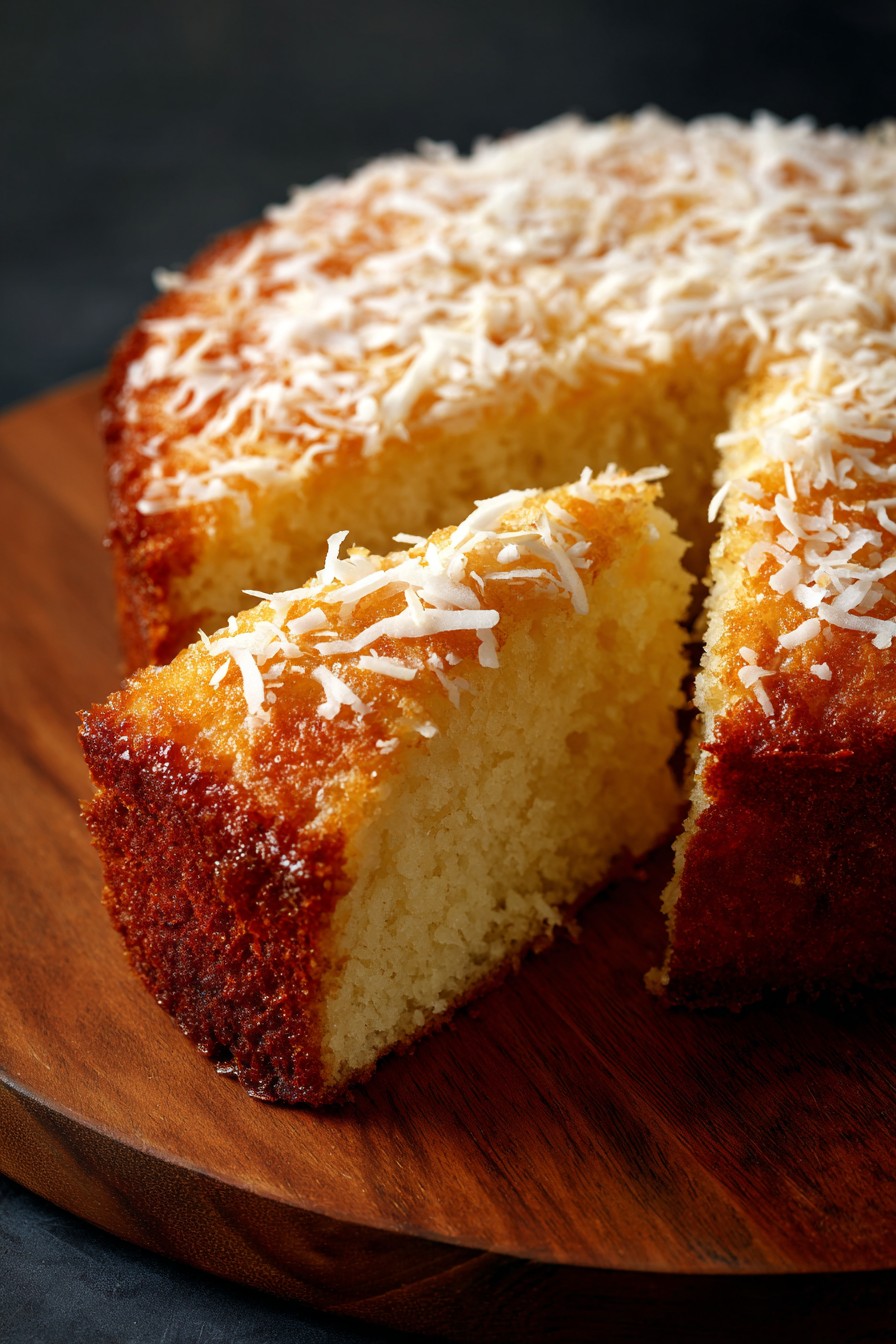
Dive into the most incredible coconut experience you’ll ever have with this show-stopping coconut milk cake! This isn’t just any ordinary cake – we’re talking about a moist, tender, flavor-packed masterpiece that will transport your taste buds straight to a tropical paradise. Get ready to become the superstar baker in your family because this recipe is about to blow everyone away!
Why This Recipe Works
This coconut milk cake recipe delivers absolute perfection for several incredible reasons that will make you want to bake it again and again! First, the combination of full-fat coconut milk and coconut oil creates an unbelievably moist crumb that stays fresh for days – no dry cake disasters here! Second, we use both coconut extract AND shredded coconut for a double coconut punch that will have coconut lovers swooning with delight. Third, the simple reverse creaming method ensures a tender, even texture without any tough gluten development. Fourth, the perfect balance of sweetness allows the natural coconut flavor to shine through without being overwhelming. And finally, this recipe is incredibly versatile – you can dress it up with frostings, serve it plain, or transform it into cupcakes with zero hassle!
Ingredients
- 2 ½ cups all-purpose flour, spooned and leveled
- 1 ½ cups granulated sugar
- 1 tablespoon baking powder
- ½ teaspoon salt
- 1 cup full-fat coconut milk, well shaken
- ½ cup coconut oil, melted and cooled
- 3 large eggs, at room temperature
- 1 teaspoon vanilla extract
- 1 teaspoon coconut extract
- ¾ cup sweetened shredded coconut
- Non-stick cooking spray for greasing
Equipment Needed
- 9-inch round cake pan
- Stand mixer or electric hand mixer
- Medium and large mixing bowls
- Whisk
- Rubber spatula
- Measuring cups and spoons
- Cooling rack
- Toothpick or cake tester
Instructions
Prepare Your Pan and Preheat the Oven
Get ready to create magic by preheating your oven to 350°F – this precise temperature is absolutely crucial for achieving that perfect golden-brown crust and even baking throughout! While that’s heating up, grab your 9-inch round cake pan and give it a thorough coating with non-stick cooking spray, making sure to get every nook and cranny along the sides and bottom. For extra insurance against sticking, you can line the bottom with parchment paper cut to fit perfectly. Now here’s a pro tip that will change your baking game forever: place your prepared pan on a small baking sheet before filling it – this makes transferring to the oven so much easier and prevents any potential spills that could create a mess in your oven! Take this time to measure out all your ingredients using the spoon-and-level method for flour to ensure accuracy, and make sure your eggs and coconut milk are truly at room temperature by letting them sit out for about 30 minutes before starting.
Combine Dry Ingredients Thoroughly
This step is where we build the foundation for our incredible coconut masterpiece! In the bowl of your stand mixer or a large mixing bowl, combine 2 ½ cups of all-purpose flour that you’ve carefully spooned and leveled (never packed!), 1 ½ cups of granulated sugar, 1 tablespoon of baking powder, and ½ teaspoon of salt. Using the paddle attachment on low speed or a whisk by hand, mix these dry ingredients for a full 60 seconds until they’re completely uniform in color and texture – you shouldn’t see any streaks of white flour or clumps of baking powder. This thorough mixing ensures your leavening agents are evenly distributed, which means no weird tunneling or uneven rising in your finished cake! The reverse creaming method we’re using here is a game-changer because coating the flour particles with fat first creates a more tender crumb by limiting gluten development. Make sure to scrape down the sides of the bowl once during mixing to incorporate any stubborn dry ingredients hiding in the corners.
Mix Wet Ingredients Separately
Now let’s create the liquid gold that will transform our dry mixture into coconut heaven! In a separate medium bowl, whisk together 1 cup of well-shaken full-fat coconut milk (make sure to use the creamy part that rises to the top when undisturbed), ½ cup of melted and cooled coconut oil, 3 large room-temperature eggs, 1 teaspoon of vanilla extract, and 1 teaspoon of coconut extract. Whisk vigorously for about 45 seconds until the mixture is completely emulsified and smooth – you shouldn’t see any separation between the oil and other liquids. Here’s an incredible tip that will elevate your baking: if your coconut oil resolidifies when mixed with cold ingredients, gently warm the entire wet mixture over a double boiler while whisking constantly until it becomes fluid again! The room-temperature eggs are non-negotiable here because cold eggs can cause the coconut oil to solidify into little chunks, which would create an uneven texture in your final cake. The combination of both vanilla and coconut extracts gives us that authentic tropical flavor profile that will make this cake absolutely unforgettable!
Combine Wet and Dry Mixtures
This is where the magic really happens – we’re bringing everything together to create our cake batter! With your mixer on low speed, gradually pour the wet ingredient mixture into the dry ingredients over about 60 seconds. Once all the liquid is incorporated, increase the speed to medium and mix for exactly 90 seconds – set a timer because overmixing at this stage can develop too much gluten and make your cake tough! The batter should be smooth, thick, and beautifully creamy with no dry spots remaining. Now, reduce the speed to low and gently fold in ¾ cup of sweetened shredded coconut just until distributed – we want those coconut flakes throughout but not pulverized! Here’s a fantastic tip for perfect texture: if your batter seems too thick, add an additional tablespoon of coconut milk, but if it seems too thin, add a tablespoon of flour until it reaches a scoopable consistency that holds its shape briefly when dropped from a spoon. Scrape the sides and bottom of the bowl thoroughly to ensure every bit of flour gets hydrated properly.
Bake to Perfection
Carefully pour your gorgeous coconut batter into the prepared 9-inch pan and use a spatula to spread it evenly, making sure to get into all the corners and creating a slight dip in the center to help with even rising. Place the pan in the center of your preheated 350°F oven and set your timer for 45 minutes – but start checking at 40 minutes because oven temperatures can vary! Your cake is done when the top is golden brown, the edges are pulling slightly away from the pan, and a toothpick inserted into the center comes out completely clean with no wet batter clinging to it. The internal temperature should register between 200°F and 210°F on an instant-read thermometer for perfect doneness! Here’s a crucial tip for bakery-quality results: resist the temptation to open the oven door during the first 30 minutes of baking, as sudden temperature drops can cause your cake to fall or develop a dense texture. The amazing aroma filling your kitchen will tell you when you’re getting close to coconut paradise!
Cool and Serve Your Masterpiece
Once your coconut milk cake has achieved baking perfection, remove it from the oven and place the pan on a wire cooling rack. Let it cool in the pan for exactly 25 minutes – this allows the structure to set properly so it doesn’t break when you remove it from the pan! After 25 minutes, run a thin knife around the edges to loosen any stuck spots, then carefully invert the cake onto the cooling rack, remove the parchment paper if you used it, and flip it right-side-up to cool completely. The cake must be completely cool to room temperature before slicing or frosting, which typically takes about 2 hours depending on your kitchen temperature. For the most beautiful slices, use a serrated knife and wipe it clean between cuts! This cake is absolutely incredible served plain, but if you want to take it over the top, consider topping it with a simple coconut glaze or serving it with fresh berries and whipped cream for an unforgettable dessert experience that will have everyone begging for the recipe!
Tips and Tricks
Get ready to take your coconut milk cake from great to absolutely extraordinary with these game-changing tips and tricks that will make you feel like a professional pastry chef! First, let’s talk about coconut milk – always use full-fat coconut milk for the richest flavor and creamiest texture, and make sure to shake the can vigorously before measuring because the cream and liquid can separate. If you want an even more intense coconut flavor, toasting your shredded coconut before adding it to the batter will bring out incredible nutty notes – simply spread it on a baking sheet and bake at 325°F for 5-8 minutes, stirring occasionally until golden brown! For the most accurate measurements, especially with flour, always use the spoon-and-level method rather than scooping directly from the bag, which can pack in too much flour and lead to a dense cake. If you’re making this cake for a special occasion and want to ensure perfect slices, consider baking it a day ahead, wrapping it tightly in plastic wrap once cooled, and storing it at room temperature – the flavors actually develop and improve overnight! When testing for doneness, don’t just rely on the toothpick test – also look for the cake pulling away from the sides of the pan and springing back when gently pressed in the center. If you find your cakes often dome in the middle, try using cake strips around your pan – these simple fabric strips soaked in water help distribute heat evenly for a perfectly flat top that’s ideal for stacking and frosting! For an extra moist crumb that stays fresh for days, you can brush the cooled cake with a simple syrup made from equal parts coconut milk and sugar heated until dissolved – this professional baker’s trick keeps commercial cakes moist for days and works wonders at home too! Finally, if you’re transporting this cake or serving it outdoors, consider using a stabilized whipped cream frosting that won’t melt easily, made by adding a tablespoon of instant pudding mix to your heavy cream before whipping – it holds its shape beautifully without affecting the flavor!
Recipe Variations
This incredible coconut milk cake is like the perfect canvas waiting for your creative touches – here are some absolutely amazing variations that will keep this recipe exciting every time you make it! For a tropical paradise explosion, fold in 1 cup of crushed pineapple that’s been well-drained along with the shredded coconut – the pineapple adds natural sweetness and moisture that pairs perfectly with the coconut flavor! If you’re a chocolate lover, reduce the flour by ¼ cup and add ¾ cup of cocoa powder to the dry ingredients, then top with a rich chocolate ganache for the ultimate coconut-chocolate combination that will disappear in minutes! For a stunning layered dessert, bake this recipe in two 8-inch pans for 30-35 minutes and fill with coconut pastry cream or lemon curd between the layers – the contrast between the rich coconut cake and tangy filling is absolutely mind-blowing! If you want individual portions that are perfect for parties, divide the batter among 18 lined muffin cups and bake at 350°F for 20-25 minutes until golden and springy – these coconut cupcakes are fantastic with a simple cream cheese frosting and toasted coconut sprinkles! For a gluten-free version that everyone can enjoy, substitute the all-purpose flour with your favorite 1:1 gluten-free baking blend and add ½ teaspoon of xanthan gum if your blend doesn’t include it – the coconut flavor shines through beautifully and nobody will guess it’s gluten-free! If you’re feeling adventurous, add ½ cup of chopped macadamia nuts or toasted almonds to the batter for wonderful crunch and nutty flavor that complements the coconut perfectly – just toast them first to bring out their maximum flavor potential!
Frequently Asked Questions
Can I use light coconut milk instead of full-fat?
While you technically can use light coconut milk in this recipe, I strongly recommend sticking with full-fat for the absolute best results! Full-fat coconut milk provides the rich, creamy texture and intense coconut flavor that makes this cake so incredibly moist and delicious. Light coconut milk has much of the fat removed, which means your cake won’t be as tender or flavorful, and it might turn out slightly drier in texture. If you must use light coconut milk, consider adding an extra tablespoon of coconut oil to compensate for the missing fat content. The difference is truly noticeable in both the eating experience and how long the cake stays fresh – full-fat versions maintain their moisture for days longer! Trust me, the extra calories are absolutely worth it for that bakery-quality texture and flavor that will have everyone raving about your baking skills!
How should I store this coconut milk cake?
Proper storage is key to keeping your coconut milk cake fresh and delicious for as long as possible! Once completely cooled, store the cake in an airtight container at room temperature for up to 3 days – the coconut oil helps it stay moist without refrigeration. If you’ve frosted the cake with anything containing dairy, you’ll need to refrigerate it, but bring it to room temperature before serving for the best texture and flavor. For longer storage, you can freeze individual slices wrapped tightly in plastic wrap and then aluminum foil for up to 3 months – thaw at room temperature for about 2 hours before serving. Never store coconut cake in the refrigerator uncovered, as it will dry out quickly and absorb other flavors from your fridge. If your kitchen is particularly warm or humid, you might want to refrigerate it after the first day to prevent spoilage, but always let it come to room temperature before serving for that perfect tender crumb!
Can I make this recipe dairy-free?
Fantastic news – this coconut milk cake is naturally dairy-free already, making it perfect for anyone with dairy restrictions or preferences! The recipe uses coconut oil instead of butter and coconut milk instead of regular milk, so there’s no dairy involved at all. Just double-check that your baking powder is aluminum-free and dairy-free, as some brands might contain trace elements, though most standard baking powders are perfectly fine. If you’re serving this to someone with severe dairy allergies, also make sure your extracts don’t contain any dairy-derived ingredients – most pure extracts are safe, but it’s always good to check labels. This makes it an excellent dessert option for parties where you have guests with different dietary needs, and nobody will feel like they’re missing out! The rich, moist texture from the coconut products actually makes this cake even more delicious than many traditional dairy-containing cakes, so it’s a win-win situation for everyone at the table!
Summary
This incredible coconut milk cake delivers tropical paradise in every bite with its ultra-moist texture, intense coconut flavor, and simple preparation that guarantees bakery-quality results right in your own kitchen! Perfect for any occasion from casual family desserts to impressive party centerpieces, this versatile recipe will become your new go-to cake that everyone requests again and again. The combination of coconut milk, coconut oil, and shredded coconut creates an unforgettable experience that transports your taste buds straight to vacation mode!