You’re about to make this Christmas unforgettable. As the heart of your holiday table, the main dish deserves to be spectacular. Whether you’re craving a show-stopping roast, a cozy casserole, or something delightfully unexpected, we’ve gathered 35 festive recipes to inspire your feast. Let’s find your perfect centerpiece and create delicious memories together.
Herb-Crusted Prime Rib Roast

Years of holiday tables and quiet Sunday dinners have taught me that the most memorable meals often come from the simplest, most intentional preparations. There’s a profound comfort in the slow, aromatic promise of a roast filling the kitchen, a ritual that feels both timeless and deeply personal. This herb-crusted prime rib is that kind of dish—a centerpiece built on patience and care, where each step is a quiet meditation leading to a spectacular, shared moment.
Serving: 8 | Pre Time: 30 minutes | Cooking Time: 180 minutes
Ingredients
– 1 (8-pound) bone-in prime rib roast, at room temperature
– 2 tablespoons kosher salt
– 1 tablespoon freshly cracked black pepper
– 3 tablespoons extra-virgin olive oil
– 1/4 cup Dijon mustard
– 1/2 cup finely chopped fresh rosemary
– 1/2 cup finely chopped fresh thyme
– 1/2 cup finely chopped fresh parsley
– 4 cloves garlic, minced into a paste
– 1 cup unsalted butter, softened to room temperature
Instructions
1. Pat the entire surface of the prime rib roast completely dry with paper towels.
2. Rub the kosher salt and freshly cracked black pepper evenly over all sides of the roast.
3. Place the roast, bone-side down, on a rack set inside a large roasting pan and let it rest uncovered at room temperature for 2 hours.
4. Preheat your oven to 450°F (232°C) during the final 30 minutes of the roast’s rest.
5. Combine the extra-virgin olive oil and Dijon mustard in a small bowl, whisking until fully emulsified.
6. Brush this mustard-oil mixture evenly over the entire top and sides of the roast.
7. In a separate bowl, combine the finely chopped fresh rosemary, thyme, parsley, minced garlic paste, and softened unsalted butter.
8. Mix the herb-butter compound with a fork until it forms a cohesive, spreadable paste.
9. Using your hands or a small offset spatula, pack the herb-butter paste thickly and evenly over the mustard-coated top and sides of the roast.
10. Insert an oven-safe meat probe thermometer horizontally into the very center of the roast’s thickest part, avoiding any bone.
11. Place the roasting pan with the rack and prepared roast into the preheated 450°F (232°C) oven.
12. Roast, undisturbed, for 20 minutes to form a deep, flavorful crust.
13. Without opening the oven door, reduce the oven temperature to 325°F (163°C).
14. Continue roasting until the internal temperature of the meat reaches 120°F (49°C) for rare, 125°F (52°C) for medium-rare, or 130°F (54°C) for medium, approximately 2 hours and 40 minutes more for medium-rare.
15. Carefully transfer the entire roasting pan from the oven to a wire cooling rack.
16. Gently tent the roast loosely with aluminum foil, ensuring the foil does not touch the herb crust.
17. Let the roast rest, untouched, for 30 minutes to allow the juices to redistribute fully.
18. Transfer the rested roast to a large cutting board, using the bones as a guide to carve against the grain into 1-inch thick slices.
Each slice reveals a perfect gradient from the crisp, fragrant herb crust to the succulent, rosy interior. The garlic and mustard meld into a savory depth that complements the beef’s natural richness without overpowering it. For a stunning presentation, arrange the slices slightly fanned on a warm platter and drizzle with the resting juices collected from the board.
Maple-Glazed Ham with Spiced Apples
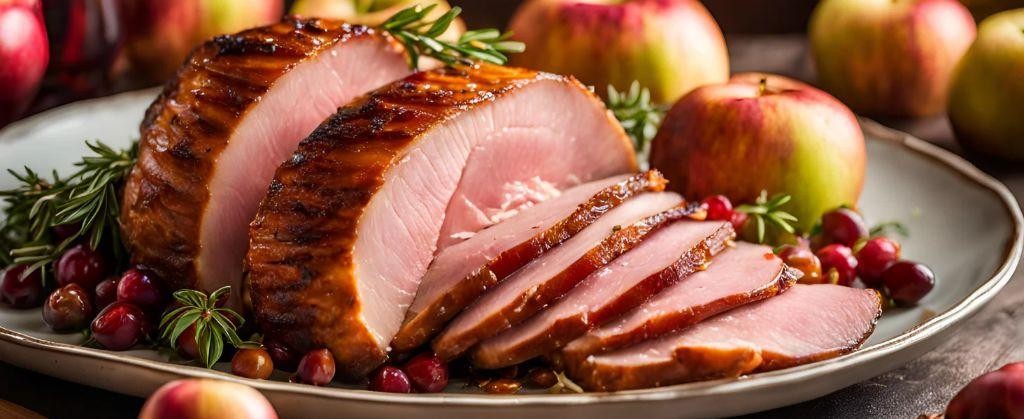
Yesterday, as the afternoon light softened into evening, I found myself drawn to the kitchen with a quiet craving for something that felt both celebratory and comforting. There’s a particular magic in the slow transformation of simple ingredients into a centerpiece that whispers of warmth and gathering, a process that feels more like a gentle ritual than a task. This maple-glazed ham with spiced apples is exactly that—a dish built for savoring, both in its making and its sharing.
Serving: 8 | Pre Time: 25 minutes | Cooking Time: 2 hours 15 minutes
Ingredients
– 1 (8-pound) fully cooked, bone-in smoked ham
– 1 cup pure maple syrup
– 1/4 cup Dijon mustard
– 2 tablespoons unsalted butter
– 4 large Granny Smith apples, peeled, cored, and cut into 1/2-inch wedges
– 1/2 cup light brown sugar, firmly packed
– 1 teaspoon ground cinnamon
– 1/2 teaspoon freshly grated nutmeg
– 1/4 teaspoon ground cloves
– 1/4 teaspoon fine sea salt
– 1/4 cup apple cider
Instructions
1. Preheat your oven to 325°F (163°C) and position a rack in the lower third of the oven.
2. Place the fully cooked, bone-in smoked ham, cut-side down, in a large roasting pan fitted with a rack.
3. Using a sharp knife, score the surface fat of the ham in a 1-inch diamond pattern, cutting about 1/4-inch deep.
4. In a small saucepan over medium-low heat, combine 3/4 cup of the pure maple syrup and the Dijon mustard, whisking constantly until the mixture is smooth and slightly thickened, about 3 minutes.
5. Brush half of the warm maple-mustard glaze evenly over the entire surface of the scored ham.
6. Transfer the glazed ham to the preheated oven and roast, uncovered, for 1 hour and 30 minutes.
7. While the ham roasts, prepare the spiced apples: In a large skillet over medium heat, melt the unsalted butter until it foams and subsides.
8. Add the peeled, cored, and wedged Granny Smith apples to the skillet in a single layer, cooking undisturbed for 4 minutes to allow for light caramelization on one side.
9. Gently turn the apple wedges and sprinkle them evenly with the firmly packed light brown sugar, ground cinnamon, freshly grated nutmeg, ground cloves, and fine sea salt.
10. Pour in the apple cider and the remaining 1/4 cup of pure maple syrup, stirring carefully to coat the apples without breaking them.
11. Reduce the heat to medium-low, cover the skillet, and simmer the apples for 12-15 minutes, or until they are tender but still hold their shape, stirring once halfway through.
12. After the initial 1 hour and 30 minutes of roasting, remove the ham from the oven and brush it with the remaining half of the maple-mustard glaze.
13. Return the ham to the oven and continue roasting for an additional 30-45 minutes, or until the internal temperature reaches 140°F (60°C) and the glaze is deeply caramelized and sticky.
14. Transfer the ham to a cutting board, tent it loosely with aluminum foil, and let it rest for 20 minutes before carving.
15. Gently reheat the spiced apples in their skillet over low heat for 2-3 minutes before serving.
Vividly glazed and aromatic, the ham emerges with a sticky-sweet crust that gives way to succulent, smoky slices. The spiced apples, tender yet retaining a slight bite, offer a warm, fragrant counterpoint with their caramelized edges and spiced syrup. Consider serving thick slices alongside the apples and their syrup, perhaps with a drizzle of the pan juices over creamy mashed potatoes or a simple wild rice pilaf for a complete, deeply satisfying plate.
Stuffed Turkey Roll with Cranberry Sauce

Sometimes, in the quiet of a winter afternoon, the kitchen becomes a sanctuary for slow, deliberate creation. This dish, with its layers of savory and sweet, feels like a warm embrace, a comforting project that rewards patience with every slice.
Serving: 6 | Pre Time: 40 minutes | Cooking Time: 75 minutes
Ingredients
– 1 whole boneless turkey breast, about 3 pounds, butterflied and pounded to ½-inch thickness
– 2 tablespoons extra-virgin olive oil
– 1 large yellow onion, finely diced
– 2 cloves garlic, minced
– 8 ounces cremini mushrooms, finely chopped
– 1 teaspoon fresh thyme leaves
– ½ cup dry white wine
– 4 cups day-old sourdough bread, cut into ½-inch cubes
– ½ cup chicken stock, warmed
– 1 large pasture-raised egg, lightly beaten
– 2 tablespoons clarified butter, melted
– 1 teaspoon kosher salt
– ½ teaspoon freshly ground black pepper
– 12 ounces fresh cranberries
– 1 cup granulated sugar
– ½ cup freshly squeezed orange juice
– 1 cinnamon stick
Instructions
1. Preheat your oven to 375°F (190°C) and position a rack in the center.
2. Heat the extra-virgin olive oil in a large skillet over medium heat until it shimmers, about 2 minutes.
3. Add the finely diced yellow onion and cook, stirring occasionally, until translucent and soft, 6 to 8 minutes.
4. Stir in the minced garlic and cook until fragrant, about 30 seconds.
5. Add the finely chopped cremini mushrooms and fresh thyme leaves, cooking until the mushrooms release their liquid and it evaporates, 8 to 10 minutes.
6. Pour in the dry white wine to deglaze the pan, scraping up any browned bits, and cook until the liquid is reduced by half, about 3 minutes. Remove from heat and let cool slightly.
7. In a large mixing bowl, combine the ½-inch sourdough bread cubes, the warm chicken stock, and the lightly beaten pasture-raised egg, tossing gently to coat evenly.
8. Fold the cooled mushroom mixture into the bread mixture along with the kosher salt and freshly ground black pepper until just combined.
9. Lay the butterflied turkey breast flat on a clean work surface, skin-side down, and spread the stuffing mixture evenly over the surface, leaving a 1-inch border on all sides.
10. Carefully roll the turkey breast lengthwise into a tight cylinder, using kitchen twine to tie it securely at 1½-inch intervals.
11. Place the rolled turkey seam-side down in a roasting pan and brush the entire surface with the melted clarified butter.
12. Roast in the preheated oven until the internal temperature reaches 165°F (74°C) when measured with an instant-read thermometer inserted into the thickest part, about 70 to 75 minutes. Tip: For even cooking, let the stuffed turkey roll rest at room temperature for 20 minutes before roasting.
13. While the turkey roasts, combine the fresh cranberries, granulated sugar, freshly squeezed orange juice, and cinnamon stick in a medium saucepan over medium heat.
14. Bring the mixture to a simmer, stirring occasionally, and cook until the cranberries have burst and the sauce has thickened to a jam-like consistency, 12 to 15 minutes. Remove the cinnamon stick and set aside to cool. Tip: For a smoother sauce, press half of the cooked cranberries through a fine-mesh sieve after cooling.
15. Once the turkey reaches temperature, transfer it to a cutting board, tent loosely with foil, and let it rest for 15 minutes before slicing to allow the juices to redistribute. Tip: Use a sharp, thin-bladed knife for clean slices without compressing the roll.
16. Slice the turkey roll into 1-inch thick rounds and serve warm with the cranberry sauce on the side.
Upon slicing, the tender, juicy turkey gives way to a fragrant, savory stuffing with earthy mushroom notes. The tart-sweet cranberry sauce, with its bright citrus undertones, cuts through the richness beautifully. For a festive presentation, arrange the slices on a platter drizzled with the pan juices and garnish with fresh thyme sprigs.
Bacon-Wrapped Pork Tenderloin
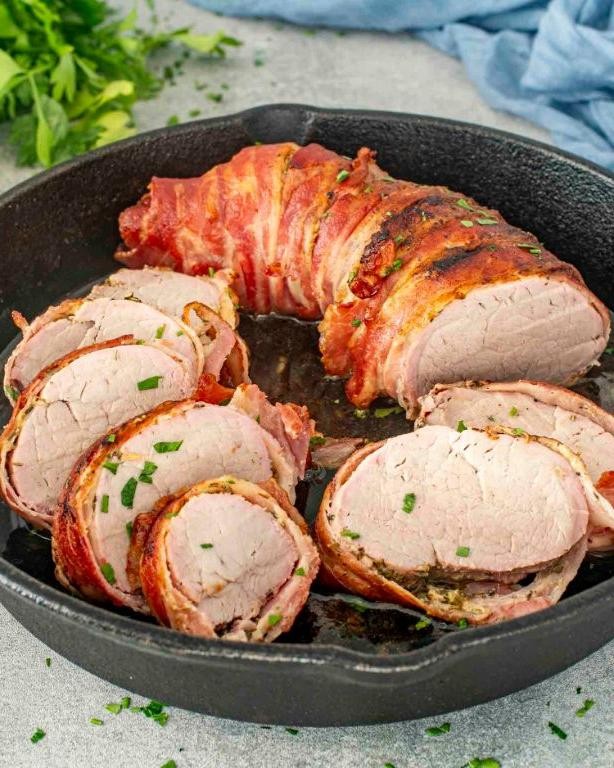
Under the soft glow of the kitchen light, there’s a quiet comfort in preparing something that feels both celebratory and deeply familiar, where the simple act of wrapping transforms a humble cut into a centerpiece worthy of a slow, thoughtful meal.
Serving: 4 | Pre Time: 20 minutes | Cooking Time: 30 minutes
Ingredients
– 1 (1.5-pound) pork tenderloin, trimmed of silver skin
– 8 slices of thick-cut applewood-smoked bacon
– 2 tablespoons pure maple syrup
– 1 tablespoon Dijon mustard
– 1 teaspoon freshly cracked black pepper
– 1/2 teaspoon fine sea salt
– 1 tablespoon clarified butter
– 2 sprigs of fresh rosemary
– 2 cloves of garlic, thinly sliced
Instructions
1. Pat the pork tenderloin completely dry with paper towels to ensure a crisp exterior.
2. In a small bowl, whisk together the maple syrup and Dijon mustard until emulsified.
3. Season the tenderloin evenly on all sides with the fine sea salt and freshly cracked black pepper.
4. Lay the bacon slices side by side on a cutting board, slightly overlapping, to form a lattice that will wrap around the tenderloin.
5. Place the seasoned tenderloin at one end of the bacon lattice and roll it tightly, securing the bacon around the meat with butcher’s twine at 1-inch intervals.
6. Preheat the oven to 400°F (204°C).
7. Heat the clarified butter in a large oven-safe skillet over medium-high heat until it shimmers.
8. Sear the bacon-wrapped tenderloin on all sides until the bacon is golden and lightly crisped, about 2–3 minutes per side.
9. Brush the entire surface of the tenderloin with the maple-mustard glaze using a pastry brush.
10. Tuck the rosemary sprigs and sliced garlic cloves around the tenderloin in the skillet.
11. Transfer the skillet to the preheated oven and roast until an instant-read thermometer inserted into the thickest part of the tenderloin registers 145°F (63°C), approximately 20–25 minutes.
12. Remove the skillet from the oven and let the tenderloin rest, uncovered, for 10 minutes to allow the juices to redistribute.
13. Carefully remove the butcher’s twine and slice the tenderloin into 1-inch medallions.
Draped in its savory, caramelized cloak, the pork emerges tender and juicy, with the bacon’s smoky richness permeating each bite. The subtle sweetness of the glaze balances the peppery crust, creating a harmony that pairs beautifully with roasted root vegetables or a simple arugula salad dressed in a sharp vinaigrette.
Roasted Duck with Orange-Cranberry Glaze
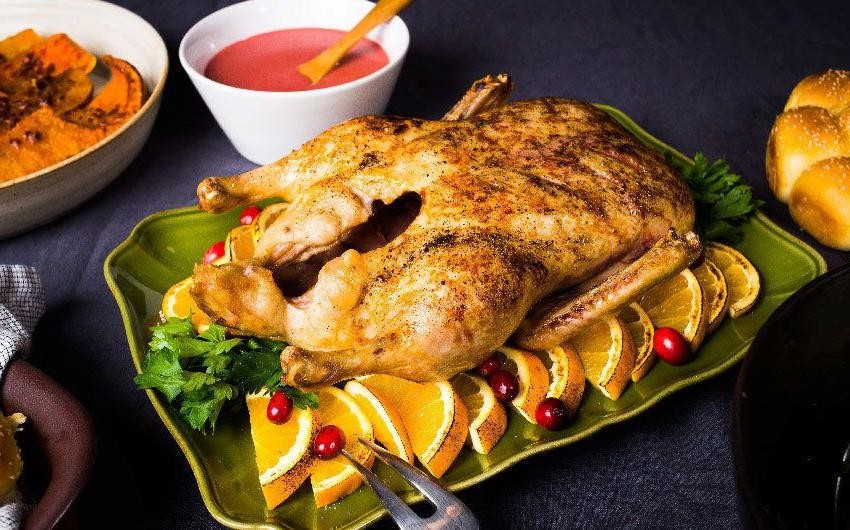
Perhaps there’s something quietly magical about the way a simple roast can anchor a winter evening, its rich aromas filling the kitchen with a sense of warmth and gathering. This particular dish, with its glossy, jewel-toned glaze, feels like a celebration of the season’s bounty, a slow and savory ritual worth savoring.
Serving: 4 | Pre Time: 20 minutes | Cooking Time: 2 hours 30 minutes
Ingredients
– One 5-6 lb whole Pekin duck, patted completely dry
– 2 tbsp kosher salt
– 1 tbsp freshly cracked black pepper
– 2 tbsp extra-virgin olive oil
– 1 large navel orange, zested and juiced
– 1 cup fresh cranberries
– 1/2 cup granulated sugar
– 1/4 cup dry red wine, such as Pinot Noir
– 2 tbsp unsalted butter
– 1 tsp fresh thyme leaves
– 1/2 tsp ground allspice
Instructions
1. Preheat your oven to 325°F and position a rack in the lower third.
2. Using a sharp paring knife, score the duck skin in a crosshatch pattern, being careful not to cut into the meat.
3. Rub the duck thoroughly, inside and out, with the kosher salt and freshly cracked black pepper.
4. Place the duck, breast-side up, on a V-rack set inside a roasting pan.
5. Roast the duck at 325°F for 2 hours, until the skin is golden and crisp and the internal temperature at the thigh reaches 165°F.
6. While the duck roasts, combine the orange zest, orange juice, fresh cranberries, granulated sugar, and dry red wine in a small saucepan.
7. Bring the mixture to a simmer over medium heat, then reduce to low and cook for 15 minutes, until the cranberries have burst and the liquid has thickened slightly.
8. Remove the saucepan from the heat and whisk in the unsalted butter, fresh thyme leaves, and ground allspice until fully incorporated and glossy.
9. After the initial 2-hour roast, carefully remove the duck from the oven and increase the oven temperature to 425°F.
10. Brush the duck generously all over with the prepared orange-cranberry glaze.
11. Return the duck to the oven and roast at 425°F for 10-15 minutes, until the glaze is set and caramelized.
12. Transfer the duck to a carving board, tent loosely with foil, and let it rest for 20 minutes before carving.
13. While the duck rests, skim the fat from the pan juices and reheat the remaining glaze in the saucepan for 2 minutes to serve alongside.
Zesty and deeply savory, the final dish presents a beautiful contrast: the skin crackles with a lacquered crispness, giving way to succulent, flavorful meat beneath. The glaze offers a vibrant counterpoint of tart cranberry and bright citrus that cuts through the richness beautifully. Consider serving the carved duck over a bed of wild rice pilaf or alongside roasted root vegetables to soak up every last bit of the glossy sauce.
Garlic and Herb Roasted Lamb

Wandering through the crisp December air today, I found myself craving something deeply comforting and aromatic, a dish that fills the kitchen with warmth and promise. Garlic and herb roasted lamb is just that—a tender, fragrant centerpiece that feels like a quiet celebration, perfect for gathering loved ones or savoring a moment of solitude. It’s a simple yet profoundly satisfying ritual, transforming humble ingredients into a meal that nourishes both body and soul.
Serving: 6 | Pre Time: 20 minutes | Cooking Time: 90 minutes
Ingredients
– 1 (4-pound) bone-in leg of lamb, trimmed of excess fat
– ¼ cup extra-virgin olive oil
– 8 garlic cloves, minced
– 2 tablespoons fresh rosemary leaves, finely chopped
– 2 tablespoons fresh thyme leaves, stripped from stems
– 1 tablespoon kosher salt
– 1 teaspoon freshly cracked black pepper
– 1 cup low-sodium chicken stock
Instructions
1. Preheat your oven to 425°F and position a rack in the lower third of the oven.
2. Pat the bone-in leg of lamb completely dry with paper towels to ensure a crisp exterior.
3. In a small bowl, whisk together the extra-virgin olive oil, minced garlic cloves, finely chopped fresh rosemary leaves, stripped fresh thyme leaves, kosher salt, and freshly cracked black pepper to form a fragrant paste.
4. Rub the herb paste evenly over the entire surface of the lamb, massaging it into any crevices for maximum flavor penetration.
5. Place the lamb on a wire rack set inside a roasting pan, which allows heat to circulate for even cooking.
6. Roast the lamb at 425°F for 20 minutes to develop a golden-brown crust.
7. Reduce the oven temperature to 325°F and continue roasting for 70 minutes, or until an instant-read thermometer inserted into the thickest part registers 135°F for medium-rare.
8. Transfer the lamb to a cutting board, tent it loosely with aluminum foil, and let it rest for 15 minutes to allow the juices to redistribute.
9. While the lamb rests, place the roasting pan over medium heat on the stovetop, add the low-sodium chicken stock, and scrape up any browned bits to create a simple pan sauce.
10. Slice the lamb against the grain into ¼-inch thick pieces and serve immediately with the pan sauce drizzled over the top.
Aromatic and tender, the lamb yields to the knife with ease, its edges crisped to perfection while the interior remains rosy and juicy. The garlic and herbs meld into a savory crust that crackles with each bite, complemented by the rich, umami-laden sauce. For a creative twist, serve it atop a bed of creamy polenta or alongside roasted root vegetables to soak up every last drop of flavor.
Gingerbread-Spiced Chicken with Almond Butter Sauce
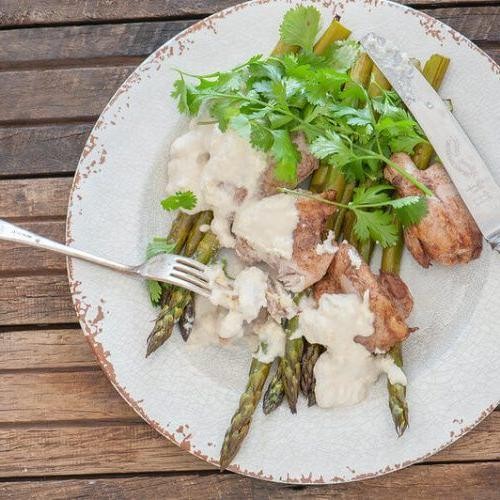
Yesterday, as the afternoon light faded, I found myself craving something that felt both comforting and quietly celebratory, a dish that could bridge the gap between the season’s warmth and its subtle spice. It’s a meal that unfolds slowly, inviting you to be present with each step, from the gentle sizzle in the pan to the final, fragrant drizzle.
Serving: 4 | Pre Time: 15 minutes | Cooking Time: 25 minutes
Ingredients
– 4 boneless, skinless chicken breasts (about 6 oz each), patted dry
– 1 tbsp clarified butter
– 2 tsp ground ginger
– 1 tsp ground cinnamon
– 1/2 tsp ground cloves
– 1/4 tsp freshly grated nutmeg
– 1/4 cup raw honey
– 2 tbsp apple cider vinegar
– 1/2 cup creamy almond butter, unsalted
– 3/4 cup unsalted chicken stock, warmed
– 1 tbsp extra-virgin olive oil
– Kosher salt, for seasoning
– Freshly cracked black pepper, for seasoning
– 1/4 cup sliced almonds, for garnish
– 2 tbsp fresh flat-leaf parsley, finely chopped, for garnish
Instructions
1. In a small bowl, whisk together the ground ginger, cinnamon, cloves, and nutmeg to create the gingerbread spice blend.
2. Season both sides of the chicken breasts generously with kosher salt and freshly cracked black pepper.
3. Evenly coat each chicken breast with the prepared spice blend, pressing gently to adhere.
4. Heat the clarified butter in a large skillet over medium heat until it shimmers, about 2 minutes.
5. Add the chicken breasts to the skillet and cook for 6-7 minutes per side, or until the internal temperature reaches 165°F and the exterior is deeply golden brown. Tip: Avoid moving the chicken for the first few minutes to ensure a proper sear forms.
6. Transfer the cooked chicken to a plate and loosely tent with aluminum foil to rest.
7. In the same skillet over medium-low heat, add the honey and apple cider vinegar, scraping up any browned bits from the pan with a wooden spoon.
8. Whisk in the almond butter until fully incorporated and smooth, about 1 minute.
9. Gradually pour in the warmed chicken stock while whisking constantly to create a velvety sauce. Tip: Warming the stock prevents the sauce from seizing and ensures a silky consistency.
10. Simmer the sauce for 3-4 minutes, stirring occasionally, until it thickens slightly and coats the back of a spoon.
11. Remove the skillet from the heat and stir in the extra-virgin olive oil to finish the sauce. Tip: Adding fat off the heat preserves its flavor and adds a lovely sheen.
12. Slice the rested chicken breasts against the grain into 1/2-inch thick pieces.
13. Arrange the sliced chicken on a serving platter and spoon the warm almond butter sauce over the top.
14. Garnish with the sliced almonds and chopped parsley.
Creating this dish feels like weaving together threads of warmth and earthiness. The chicken emerges incredibly tender and fragrant, its spiced crust giving way to juicy flesh, while the sauce—rich, nutty, and subtly sweet—cloaks everything in a velvety embrace. Consider serving it over a bed of creamy polenta or alongside roasted root vegetables to soak up every last drop of that decadent sauce.
Beef Wellington with Truffle Sauce
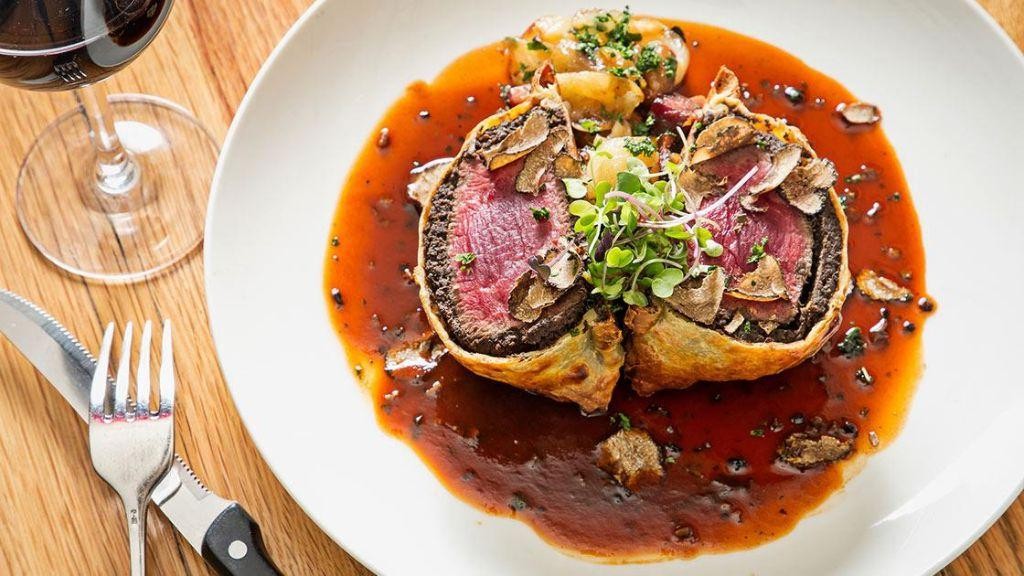
Kneading the memory of a quiet winter evening, I recall the first time I prepared this dish—the rich aroma of seared beef mingling with earthy mushrooms, a moment of culinary meditation that transformed a simple meal into a cherished ritual. It’s a recipe that demands patience and presence, each step a gentle unfolding of flavors, much like the slow turning of pages in a well-loved journal. Here, in the warmth of the kitchen, we craft a Beef Wellington with Truffle Sauce, a dish that feels both indulgent and intimately personal.
Serving: 4 | Pre Time: 45 minutes | Cooking Time: 40 minutes
Ingredients
– 1.5 pounds beef tenderloin, trimmed and tied
– 2 tablespoons clarified butter
– 1 tablespoon extra-virgin olive oil
– 8 ounces cremini mushrooms, finely chopped
– 2 shallots, minced
– 2 cloves garlic, minced
– 1 tablespoon fresh thyme leaves
– 4 ounces foie gras pâté
– 1 sheet puff pastry, thawed
– 1 pasture-raised egg, lightly beaten
– 1 cup heavy cream
– 1 tablespoon black truffle paste
– Kosher salt and freshly ground black pepper
Instructions
1. Season the beef tenderloin generously with kosher salt and freshly ground black pepper on all sides.
2. Heat clarified butter in a large skillet over medium-high heat until it shimmers, about 2 minutes.
3. Sear the beef tenderloin for 2-3 minutes per side until a deep brown crust forms, then transfer to a plate to rest.
4. In the same skillet, add extra-virgin olive oil and sauté minced shallots and garlic over medium heat until translucent, about 3 minutes.
5. Add finely chopped cremini mushrooms and cook until all moisture evaporates and they turn golden brown, approximately 8-10 minutes.
6. Stir in fresh thyme leaves and season the mushroom mixture with kosher salt and freshly ground black pepper, then let it cool completely.
7. Lay a sheet of plastic wrap on a flat surface and spread the cooled mushroom mixture into a rectangle slightly larger than the beef.
8. Spread foie gras pâté evenly over the mushroom layer, creating a smooth surface.
9. Place the seared beef tenderloin in the center of the mushroom-pâté layer and wrap tightly with the plastic wrap, twisting the ends to form a compact cylinder; refrigerate for 20 minutes.
10. Roll out the puff pastry on a lightly floured surface to a thickness of 1/8 inch, large enough to encase the beef bundle.
11. Unwrap the chilled beef bundle and place it in the center of the pastry, then brush the edges with lightly beaten egg.
12. Fold the pastry over the beef, sealing the edges tightly and trimming any excess; brush the entire surface with the remaining egg wash.
13. Score the top of the pastry with a sharp knife in a decorative pattern, being careful not to cut through to the filling.
14. Preheat the oven to 400°F and bake the Wellington on a parchment-lined baking sheet for 25-30 minutes, until the pastry is golden brown and puffed.
15. While baking, heat heavy cream in a small saucepan over medium heat until it just begins to simmer, about 4 minutes.
16. Whisk in black truffle paste until fully incorporated and the sauce thickens slightly, then remove from heat and season with kosher salt.
17. Let the Beef Wellington rest for 10 minutes before slicing into 1-inch thick portions with a sharp serrated knife.
18. Serve each slice drizzled with warm truffle sauce.
After the final slice, the Wellington reveals a tender, rosy center encased in flaky, buttery pastry, while the truffle sauce adds a luxurious, earthy depth that lingers on the palate. For a creative twist, pair it with a simple arugula salad dressed in lemon vinaigrette to cut through the richness, or serve alongside roasted root vegetables for a comforting, seasonal meal. A dish like this invites slow savoring, each bite a reminder of the quiet joy found in mindful cooking.
Holiday Brined Turkey with Apple Cider Gravy
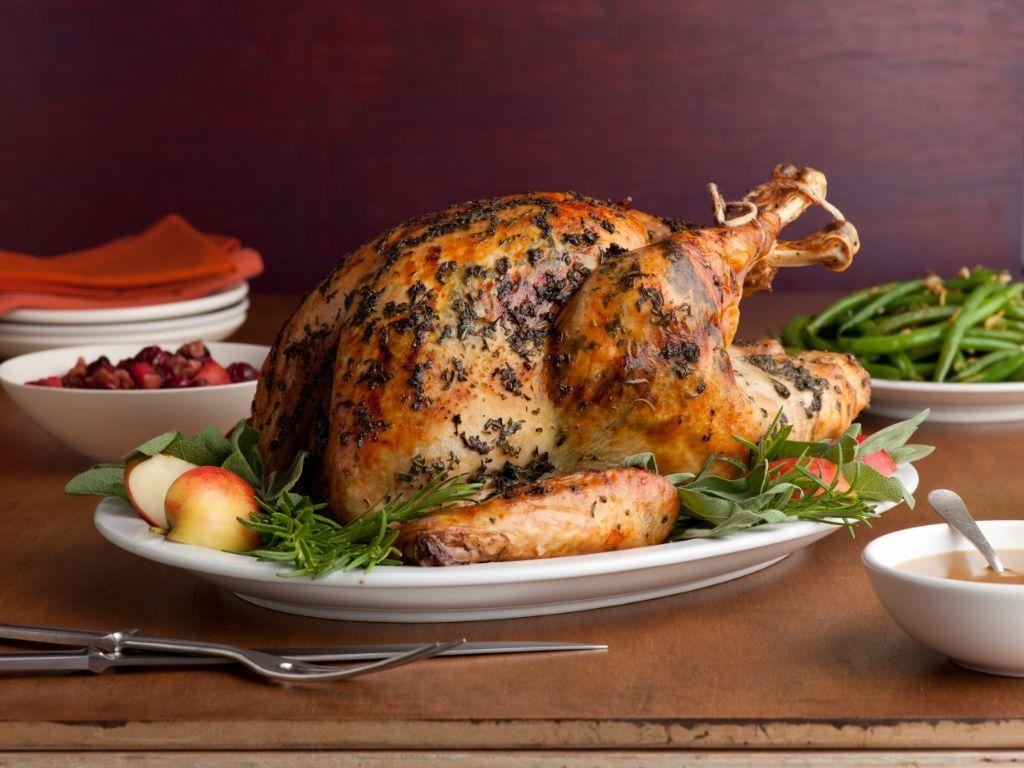
Zestful memories of holiday tables past drift through the kitchen as the scent of brine and cider begins to warm the air. This ritual of preparation, a slow and deliberate dance of salt, sugar, and fruit, transforms the humble turkey into the centerpiece of a gathering, its promise held in the patient hours ahead. The reward is a bird of profound juiciness and flavor, accompanied by a gravy that captures the very essence of the season in a silken pour.
Serving: 8-10 | Pre Time: 1440 minutes | Cooking Time: 240 minutes
Ingredients
– 1 whole turkey (12-14 lbs), patted dry
– 2 gallons cold filtered water
– 1 ½ cups Diamond Crystal kosher salt
– 1 cup light brown sugar, packed
– 2 quarts fresh, unfiltered apple cider
– 1 head of garlic, halved crosswise
– 6 whole black peppercorns
– 4 fresh bay leaves
– 3 sprigs fresh rosemary
– 6 sprigs fresh thyme
– ½ cup unsalted butter, clarified
– ⅓ cup all-purpose flour
– 2 cups rich turkey stock
– 1 tablespoon fresh sage leaves, finely chiffonaded
– Kosher salt and freshly cracked black pepper, for seasoning
Instructions
1. Combine the cold filtered water, Diamond Crystal kosher salt, and packed light brown sugar in a large, food-safe container, stirring vigorously until the solids are fully dissolved.
2. Pour in the fresh, unfiltered apple cider and add the halved head of garlic, whole black peppercorns, fresh bay leaves, rosemary sprigs, and thyme sprigs, stirring gently to incorporate.
3. Submerge the patted-dry whole turkey completely in the brine solution, ensuring no part is exposed to air. Cover the container and refrigerate for precisely 24 hours.
4. Remove the turkey from the brine and rinse it thoroughly under cold running water, both inside and out, to remove excess salt. Pat the skin completely dry with paper towels. Tip: A thoroughly dried skin is crucial for achieving a crisp, golden finish during roasting.
5. Preheat your oven to 325°F (163°C) and position a rack in the lower third of the oven.
6. Place the turkey, breast-side up, on a V-rack set inside a heavy-duty roasting pan. Truss the legs with kitchen twine.
7. Brush the entire surface of the turkey with the clarified unsalted butter, using all of it to coat the skin evenly.
8. Season the turkey liberally, inside the cavity and over the skin, with kosher salt and freshly cracked black pepper.
9. Roast the turkey in the preheated oven until the internal temperature at the thickest part of the thigh registers 165°F (74°C), approximately 3 to 4 hours. Tip: Begin checking the temperature after 3 hours to prevent overcooking; the carryover heat will raise the temperature another 5-10°F as it rests.
10. Transfer the roasted turkey to a carving board, tent loosely with foil, and allow it to rest for 30 minutes before carving.
11. While the turkey rests, prepare the gravy. Pour off all but ⅓ cup of the fat from the roasting pan, leaving the browned fond (crispy bits) intact.
12. Place the pan over medium heat and sprinkle in the all-purpose flour, whisking constantly to form a roux. Cook the roux, whisking, until it turns a light nut-brown color, about 3-4 minutes.
13. Gradually whisk in the rich turkey stock and any accumulated juices from the resting turkey, scraping up all the fond from the bottom of the pan.
14. Bring the mixture to a simmer and cook, stirring frequently, until the gravy thickens enough to coat the back of a spoon, about 5-7 minutes. Tip: For an ultra-smooth gravy, strain it through a fine-mesh sieve into a serving vessel.
15. Stir in the finely chiffonaded fresh sage leaves and season the gravy to your preference with kosher salt and freshly cracked black pepper.
16. Present the carved turkey alongside the gravy.
Perfectly brined, the turkey yields meat that is impossibly moist and seasoned to the bone, with skin that shatters delicately. The apple cider gravy is a glossy, aromatic sauce where the sweetness of the fruit softens into a profound savory depth, punctuated by the piney note of sage. Consider serving slices over a bed of creamy celery root purée or alongside roasted Brussels sprouts with lardons to complement its rich, autumnal character.
Slow-Cooked Venison Stew
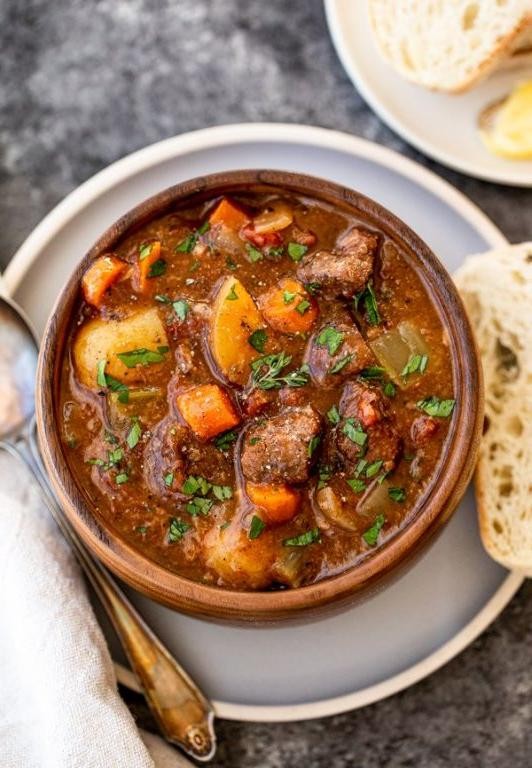
Kneading the memory of a winter’s hunt into something warm and nourishing, this slow-cooked venison stew transforms a rustic cut into a tender, deeply flavored meal. It’s a patient process, where time and low heat coax out the meat’s rich, gamey essence, mellowing it into a harmonious blend with earthy root vegetables and aromatic herbs. Let the quiet simmer fill your kitchen with a comforting, savory promise.
Serving: 6 | Pre Time: 25 minutes | Cooking Time: 180 minutes
Ingredients
– 2 lbs venison shoulder, cut into 1-inch cubes
– 3 tbsp clarified butter
– 1 large yellow onion, finely diced
– 3 cloves garlic, minced
– 2 tbsp all-purpose flour
– 4 cups beef stock
– 1 cup dry red wine
– 3 medium carrots, peeled and cut into 1-inch pieces
– 2 medium parsnips, peeled and cut into 1-inch pieces
– 1 lb baby potatoes, halved
– 2 sprigs fresh rosemary
– 3 sprigs fresh thyme
– 2 bay leaves
– 1 tsp fine sea salt
– ½ tsp freshly cracked black pepper
Instructions
1. Pat the venison cubes completely dry with paper towels to ensure a proper sear.
2. Heat the clarified butter in a large Dutch oven over medium-high heat until it shimmers, about 2 minutes.
3. Working in batches to avoid overcrowding, sear the venison cubes for 2-3 minutes per side until a deep brown crust forms, then transfer to a plate.
4. Reduce the heat to medium and add the diced onion to the pot, sautéing for 5-7 minutes until translucent and lightly golden.
5. Add the minced garlic and cook for 1 minute until fragrant.
6. Sprinkle the all-purpose flour over the onions and garlic, stirring constantly for 2 minutes to cook out the raw flour taste and create a roux.
7. Slowly whisk in the beef stock and dry red wine, scraping up any browned bits from the bottom of the pot.
8. Return the seared venison and any accumulated juices to the pot.
9. Add the carrot pieces, parsnip pieces, halved baby potatoes, rosemary sprigs, thyme sprigs, bay leaves, fine sea salt, and freshly cracked black pepper.
10. Bring the stew to a gentle simmer, then immediately reduce the heat to low.
11. Cover the pot with a tight-fitting lid and cook for 3 hours, checking once at the 90-minute mark to ensure it maintains a bare simmer with only occasional bubbles breaking the surface.
12. After 3 hours, remove the lid and use a spoon to skim off any excess fat from the surface.
13. Discard the rosemary sprigs, thyme sprigs, and bay leaves.
14. Taste the stew broth and adjust seasoning with additional salt only if necessary.
15. Ladle the stew into deep bowls for serving.
Hearty and soul-warming, the finished stew yields venison so tender it falls apart at the touch of a fork, nestled in a velvety, wine-kissed gravy. The root vegetables soften into sweet, creamy bites that contrast beautifully with the rich, gamey depth of the broth. For a delightful textural contrast, serve it over a bed of creamy stone-ground polenta or with a thick slice of crusty, buttered sourdough to soak up every last drop.
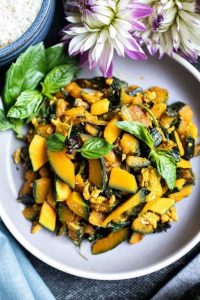
Stuffed Acorn Squash with Rice and Sausage
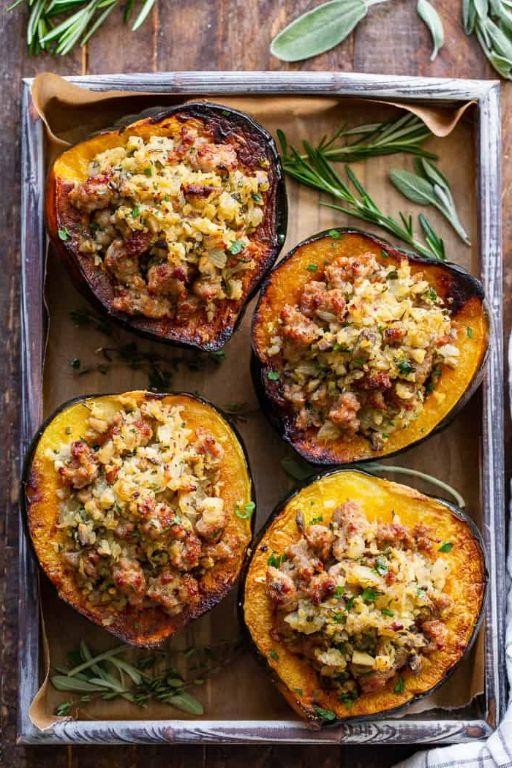
Zigzagging through the farmers’ market this morning, I found myself drawn to the humble acorn squash, its deep green ridges promising a sweet, nutty canvas for a comforting autumn meal. Nestling it in my basket, I imagined it cradling a savory filling of rice and sausage, a simple yet deeply satisfying dish to warm the kitchen on a crisp afternoon. Sometimes, the most profound meals begin with a single, quiet inspiration at a market stall.
Serving: 4 | Pre Time: 20 minutes | Cooking Time: 65 minutes
Ingredients
– 2 medium acorn squashes, halved and seeded
– 1 tablespoon extra-virgin olive oil
– 1/2 teaspoon fine sea salt
– 1/4 teaspoon freshly cracked black pepper
– 8 ounces sweet Italian sausage, casings removed
– 1/2 cup yellow onion, finely diced
– 2 cloves garlic, minced
– 1 cup long-grain white rice, rinsed until water runs clear
– 2 cups low-sodium chicken stock, warmed
– 1/4 cup freshly grated Parmigiano-Reggiano cheese
– 2 tablespoons unsalted butter, cut into small pieces
– 1 tablespoon fresh sage leaves, thinly sliced
Instructions
1. Preheat your oven to 400°F (204°C) and line a rimmed baking sheet with parchment paper.
2. Brush the cut sides of the acorn squash halves evenly with the extra-virgin olive oil, then season the cavities with the fine sea salt and freshly cracked black pepper.
3. Place the squash halves cut-side down on the prepared baking sheet and roast for 35 minutes, or until the flesh yields easily to the tip of a paring knife.
4. While the squash roasts, heat a large skillet over medium heat and add the sweet Italian sausage, using a wooden spoon to break it into small crumbles.
5. Cook the sausage for 6-8 minutes, stirring occasionally, until it is browned and no longer pink, then transfer it to a bowl using a slotted spoon, leaving the rendered fat in the skillet.
6. Add the finely diced yellow onion to the skillet and sauté in the sausage fat for 4-5 minutes until translucent and softened.
7. Stir in the minced garlic and cook for 1 additional minute until fragrant, being careful not to let it burn.
8. Add the rinsed long-grain white rice to the skillet and toast it for 2 minutes, stirring constantly, to lightly coat the grains in the fat and enhance their nutty flavor.
9. Pour in the warmed low-sodium chicken stock, bring the mixture to a simmer, then reduce the heat to low, cover the skillet, and cook for 18 minutes, or until the rice is tender and has absorbed all the liquid.
10. Remove the skillet from the heat and fluff the rice with a fork, then gently fold in the cooked sausage, freshly grated Parmigiano-Reggiano cheese, unsalted butter pieces, and thinly sliced fresh sage leaves until evenly combined.
11. Once the roasted squash halves are cool enough to handle, flip them cut-side up and divide the rice and sausage filling evenly among the four cavities, mounding it slightly.
12. Return the stuffed squash to the oven and bake for an additional 10-12 minutes, just until the filling is heated through and the cheese is melted.
Now, the squash emerges tender and caramelized at the edges, its sweetness perfectly balancing the savory, herbaceous filling. Notice how the grains of rice remain distinct, offering a pleasing texture against the soft squash, while the melted butter and cheese create a rich, glossy finish. For a delightful presentation, serve each half on a warm plate garnished with an extra sage leaf and a final dusting of cheese.
Salmon en Croûte with Dill Cream Sauce

Perhaps there’s something quietly luxurious about wrapping a delicate fillet in a buttery pastry, a small act of care that transforms a simple piece of fish into a celebration. The process itself, with its gentle folds and the warm, herbal scent of dill, feels like a slow, deliberate ritual, a pause in the day’s rush to create something truly special.
Serving: 4 | Pre Time: 25 minutes | Cooking Time: 30 minutes
Ingredients
- 1 ½ lbs skinless, boneless center-cut salmon fillet
- 1 sheet (about 9 oz) frozen puff pastry, thawed
- 2 tbsp Dijon mustard
- 4 oz fresh spinach leaves, wilted and squeezed dry
- 2 tbsp unsalted butter, melted
- 1 large pasture-raised egg, lightly beaten
- 1 cup heavy cream
- ¼ cup dry white wine
- 2 tbsp fresh dill, finely chopped
- 1 tbsp fresh lemon juice
- 1 small shallot, minced
- 1 tbsp clarified butter
- Kosher salt and freshly ground black pepper
Instructions
- Pat the salmon fillet completely dry with paper towels and season all sides generously with kosher salt and freshly ground black pepper.
- Unfold the thawed puff pastry sheet on a lightly floured surface and roll it gently into a 12-inch by 14-inch rectangle.
- Spread the Dijon mustard evenly over the center third of the pastry, leaving a 2-inch border on all sides.
- Arrange the wilted, dry spinach in an even layer over the mustard.
- Place the seasoned salmon fillet directly on top of the spinach layer.
- Brush the exposed pastry borders lightly with the beaten egg wash.
- Carefully fold the long sides of the pastry over the salmon, then fold the ends up to fully enclose it, pressing the seams to seal. Tip: Ensure the pastry is not stretched too tightly over the fish to allow for slight expansion during baking.
- Transfer the wrapped parcel, seam-side down, to a parchment-lined baking sheet.
- Brush the entire exterior of the pastry with the remaining beaten egg wash for a golden finish.
- Using a sharp paring knife, score the top of the pastry with three shallow, diagonal slashes for steam vents.
- Refrigerate the assembled parcel, uncovered, for 15 minutes to firm the pastry.
- Preheat your oven to 400°F (200°C) during the final 5 minutes of chilling.
- Bake the salmon en croûte on the center rack for 25-30 minutes, until the pastry is deeply golden brown and puffed. Tip: An instant-read thermometer inserted into the thickest part of the fish should read 125°F for medium-rare doneness.
- While the parcel bakes, prepare the sauce: Melt the clarified butter in a small saucepan over medium heat.
- Sauté the minced shallot in the butter for 2-3 minutes until translucent and fragrant.
- Deglaze the pan with the dry white wine, scraping up any browned bits, and simmer until reduced by half, about 2 minutes.
- Pour in the heavy cream, bring to a gentle simmer, and cook for 4-5 minutes until the sauce thickens enough to coat the back of a spoon.
- Remove the saucepan from the heat and stir in the fresh dill, lemon juice, and a pinch of salt and pepper.
- Let the salmon en croûte rest on the baking sheet for 5 minutes before slicing. Tip: This resting period allows the juices to redistribute, ensuring a moist fillet.
Zestfully, the final dish presents a beautiful contrast: the shatteringly crisp, golden pastry gives way to the tender, just-opaque salmon and the subtle, earthy spinach. The dill cream sauce, with its bright acidity and herbal notes, cuts through the richness perfectly. For a striking presentation, serve each portion atop a pool of the pale green sauce, garnished with a single frond of fresh dill and a whisper of lemon zest.
Festive Nut Roast with Caramelized Onions
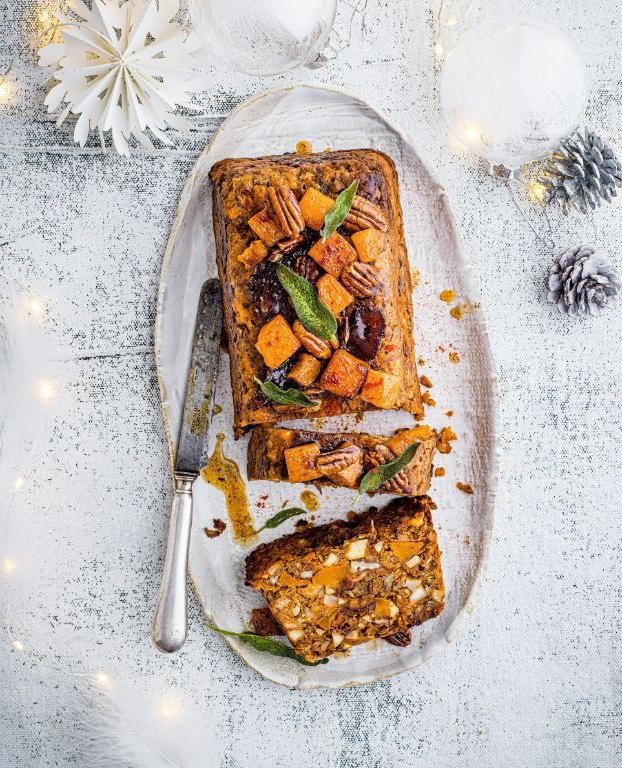
Lingering in the quiet kitchen, I find myself drawn to the warmth of a dish that feels like a gentle embrace, a nut roast that whispers of cozy gatherings and the soft glow of holiday lights. Its layers of caramelized onions and toasted nuts promise a comforting depth, a savory centerpiece that welcomes both celebration and quiet reflection. This recipe unfolds slowly, inviting patience and presence with each step.
Serving: 6 | Pre Time: 25 minutes | Cooking Time: 70 minutes
Ingredients
– 2 large yellow onions, thinly sliced
– 3 tablespoons clarified butter
– 1 cup raw walnuts, coarsely chopped
– 1 cup raw pecans, coarsely chopped
– 1 cup cooked brown rice, cooled
– 2 pasture-raised eggs, lightly beaten
– 1/4 cup whole milk
– 2 tablespoons fresh thyme leaves, finely chopped
– 1 teaspoon fine sea salt
– 1/2 teaspoon freshly ground black pepper
– 1/4 teaspoon freshly grated nutmeg
Instructions
1. Preheat the oven to 375°F and lightly grease a 9×5-inch loaf pan with clarified butter.
2. In a large skillet over medium-low heat, melt 2 tablespoons of clarified butter and add the sliced onions, cooking for 25–30 minutes until deeply golden and caramelized, stirring occasionally to prevent burning.
3. Tip: For richer flavor, deglaze the skillet with a splash of water if onions stick, scraping up the browned bits.
4. Transfer the caramelized onions to a large mixing bowl and set aside to cool slightly.
5. In the same skillet over medium heat, toast the walnuts and pecans for 5–7 minutes until fragrant and lightly browned, stirring constantly to avoid scorching.
6. Add the toasted nuts to the bowl with the onions, along with the brown rice, beaten eggs, milk, thyme, sea salt, pepper, and nutmeg.
7. Mix all ingredients thoroughly until well combined, using a folding motion to preserve texture.
8. Tip: Let the mixture rest for 10 minutes to allow the rice to absorb moisture, ensuring a cohesive roast.
9. Press the mixture firmly into the prepared loaf pan, smoothing the top with a spatula.
10. Bake in the preheated oven for 40–45 minutes, until the top is golden brown and the center feels firm to the touch.
11. Tip: Check for doneness by inserting a knife into the center; it should come out clean with no wet residue.
12. Remove from the oven and let the roast rest in the pan for 15 minutes before carefully turning it out onto a serving plate.
This roast emerges with a tender, moist crumb that holds together beautifully, each slice revealing a mosaic of nuts and sweet onions. The subtle warmth of nutmeg and thyme lingers on the palate, making it perfect alongside a crisp winter salad or draped in a rich mushroom gravy for a heartier meal.
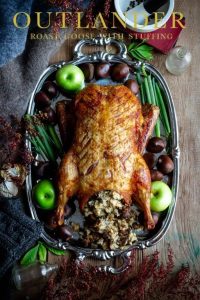
Chestnut and Mushroom Stuffed Goose

Yesterday, as the first snow dusted the windowpane, I found myself drawn to the kitchen, to the quiet ritual of preparing a centerpiece that feels like a warm embrace. This chestnut and mushroom stuffed goose is a slow, deliberate celebration of winter’s bounty, a dish that fills the house with an aroma of earth and hearth long before it graces the table.
Serving: 6 | Pre Time: 40 minutes | Cooking Time: 3 hours 30 minutes
Ingredients
– 1 whole goose (12-14 lbs), giblets removed
– 2 tbsp kosher salt
– 1 tbsp freshly cracked black pepper
– 2 tbsp clarified butter
– 1 lb wild mushrooms (such as chanterelles and porcini), cleaned and roughly chopped
– 1 large yellow onion, finely diced
– 3 cloves garlic, minced
– 2 cups roasted chestnuts, roughly chopped
– 1/2 cup dry sherry
– 4 cups rustic sourdough bread, cut into 1/2-inch cubes and lightly toasted
– 2 tbsp fresh sage, finely chopped
– 1 tbsp fresh thyme leaves
– 1 1/2 cups rich chicken stock
– 2 pasture-raised eggs, lightly beaten
– Kitchen twine
Instructions
1. Pat the entire surface of the goose completely dry with paper towels, including the cavity.
2. Rub the kosher salt and cracked black pepper evenly over the skin and inside the cavity. Let it rest at room temperature for 30 minutes to allow the skin to dry further, which is crucial for achieving crispness.
3. While the goose rests, prepare the stuffing. Heat the clarified butter in a large skillet over medium heat until it shimmers.
4. Add the diced onion and cook, stirring occasionally, for 6-8 minutes until translucent and just beginning to caramelize at the edges.
5. Add the minced garlic and chopped wild mushrooms. Cook for 8-10 minutes, stirring frequently, until the mushrooms have released their liquid and it has evaporated, leaving them deeply browned.
6. Deglaze the skillet with the dry sherry, scraping up any browned bits from the bottom, and cook until the liquid is nearly evaporated, about 2 minutes.
7. Transfer the mushroom mixture to a large bowl. Add the chopped roasted chestnuts, toasted sourdough cubes, chopped sage, and thyme leaves. Toss gently to combine.
8. Pour in the rich chicken stock and add the lightly beaten pasture-raised eggs. Fold the mixture together until the bread is evenly moistened but not soggy.
9. Preheat your oven to 325°F (163°C).
10. Loosely pack the prepared stuffing mixture into the main cavity of the goose. Do not overpack, as the stuffing will expand during cooking.
11. Truss the goose securely with kitchen twine, tying the legs together and tucking the wingtips under the body to promote even cooking.
12. Place the goose, breast-side up, on a V-rack set inside a large roasting pan.
13. Roast in the preheated oven for approximately 3 hours and 15 minutes, or until a meat thermometer inserted into the thickest part of the thigh registers 165°F (74°C) and the skin is a deep, golden brown and very crisp.
14. Tip: For the crispiest skin, carefully pour off the rendered fat from the roasting pan every 45 minutes during cooking.
15. Once cooked, transfer the goose to a carving board, tent loosely with foil, and let it rest for 25-30 minutes before carving to allow the juices to redistribute.
16. Carefully remove the stuffing from the cavity and transfer it to a serving bowl.
17. Carve the goose, slicing the breast meat against the grain for maximum tenderness.
What emerges is a masterpiece of contrasts: the skin shatters like autumn leaves, giving way to impossibly succulent, rich meat. The stuffing is a savory mosaic where the sweet, nutty chestnuts play against the earthy depth of the mushrooms and the fragrant herbs. Serve it sliced on a large platter, the stuffing mounded beside it, perhaps with a drizzle of the reserved, defatted pan juices and a side of braised bitter greens to cut through the richness.
Conclusion
Our collection of 35 festive Christmas main dishes offers something special for every holiday table, from classic roasts to creative new favorites. We hope these recipes help you create a truly memorable feast with your loved ones. Don’t forget to leave a comment telling us which dish you’re most excited to try, and feel free to share this roundup on Pinterest to spread the holiday cheer!