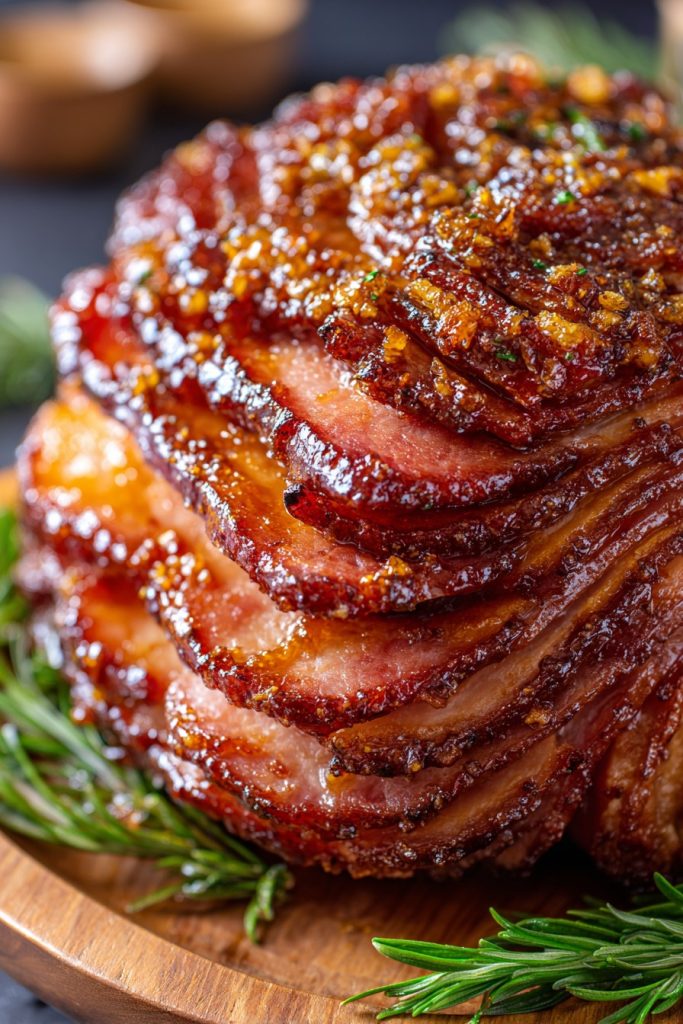
Venerated as the quintessential centerpiece of holiday feasts, a perfectly executed Christmas ham embodies both tradition and culinary excellence. This recipe transforms a quality bone-in ham into a masterpiece through precise temperature control, a complex glaze development, and proper resting techniques that ensure optimal texture and flavor distribution throughout the meat.
Why This Recipe Works
- The dual-stage baking method—starting at low temperature to gently warm the ham through without drying, then finishing at high heat to caramelize the glaze—ensures moist, tender meat with a beautifully lacquered exterior.
- Scoring the fat cap in a diamond pattern not only creates an attractive presentation but also allows the glaze to penetrate deeper into the meat while rendering the fat more effectively during the final high-heat phase.
- Building the glaze in stages—reducing the bourbon first to cook off the alcohol while concentrating flavor, then incorporating the sugars and spices—creates a complex, layered sweetness that balances the ham’s natural salinity without becoming cloying.
- Using a meat thermometer to monitor internal temperature prevents overcooking, as ham is already fully cooked and only requires heating to serving temperature while developing the glaze’s caramelization.
- The extended resting period after baking allows the proteins to reabsorb moisture and the internal temperature to equalize, resulting in cleaner slicing and more succulent meat texture.
Ingredients
- 1 (8-10 pound) fully cooked, bone-in spiral-cut ham
- 2 cups bourbon whiskey
- 1 cup dark brown sugar, packed
- 1/2 cup pure maple syrup
- 1/4 cup Dijon mustard
- 2 tablespoons whole grain mustard
- 1 tablespoon apple cider vinegar
- 2 teaspoons ground cinnamon
- 1 teaspoon ground allspice
- 1/2 teaspoon ground cloves
- 1/4 teaspoon cayenne pepper
- 1 orange, zested and juiced
- 1/2 teaspoon freshly grated nutmeg
- 1/4 cup unsalted butter, cubed
- 1 teaspoon kosher salt
- 1/2 teaspoon freshly ground black pepper
Equipment Needed
- Large roasting pan with rack
- Digital instant-read thermometer
- Medium saucepan
- Pastry brush
- Sharp chef’s knife
- Cutting board
- Measuring cups and spoons
- Whisk
- Aluminum foil
Instructions

Prepare the Ham and Scoring
Position your oven rack in the lower third of the oven and preheat to 325°F. Remove the ham from its packaging and place it cut-side down on a cutting board. Using a sharp chef’s knife, score the fat cap in a 1-inch diamond pattern, cutting through the fat but being careful not to cut into the meat beneath. This scoring technique serves multiple purposes: it creates more surface area for glaze absorption, allows fat to render more efficiently during cooking, and provides visual appeal when the glaze caramelizes in the pattern. Pat the ham completely dry with paper towels, as moisture on the surface will steam rather than brown. Place the ham cut-side down on the rack in your roasting pan, which will help the spiral slices maintain their structure during cooking. If your ham came with a plastic disc covering the bone, remove and discard it before proceeding.
Create the Spiced Bourbon Glaze Base
In a medium saucepan over medium-high heat, combine the bourbon, orange juice, and apple cider vinegar. Bring to a vigorous boil and maintain this boil for 5-7 minutes until the liquid reduces by approximately one-third and the sharp alcohol aroma dissipates, leaving behind the oak and vanilla notes of the bourbon. Reduction at this stage is crucial for concentrating flavors while removing the harsh alcohol taste that could overwhelm the glaze’s balance. Add the dark brown sugar, maple syrup, Dijon mustard, whole grain mustard, orange zest, cinnamon, allspice, cloves, cayenne, nutmeg, salt, and black pepper. Whisk continuously until the sugar completely dissolves and the mixture becomes homogeneous, about 3-4 minutes. Reduce heat to medium-low and simmer for 8-10 minutes, stirring occasionally, until the glaze thickens enough to coat the back of a spoon.
Initial Baking and Glaze Application
Place the prepared ham in the preheated 325°F oven and bake uncovered for 1 hour and 15 minutes. This initial low-temperature phase gently warms the ham throughout without causing excessive moisture loss or fat rendering. Meanwhile, finish the glaze by removing it from heat and whisking in the cubed butter until fully incorporated and emulsified. The butter addition creates a richer mouthfeel and helps the glaze adhere better to the ham’s surface. After the initial baking period, remove the ham from the oven and increase the oven temperature to 425°F. Using a pastry brush, apply a generous layer of the warm glaze over the entire surface of the ham, making sure to work it into the scored diamond patterns and between the spiral slices. Reserve approximately one-third of the glaze for final application.
Final Glazing and Caramelization Phase
Return the glazed ham to the now 425°F oven and bake for 20-25 minutes, watching closely as the sugar content in the glaze can burn quickly at this high temperature. The elevated heat serves to rapidly caramelize the sugars in the glaze while creating a lacquered, slightly crisp exterior. After 15 minutes, check the ham’s internal temperature with an instant-read thermometer inserted into the thickest part without touching bone—it should register between 130-135°F for serving temperature. Remove the ham from the oven and immediately apply the reserved glaze, which will create a glossy finish as it sets on the hot surface. The caramelization should appear deep amber with some darker edges but not blackened—if any areas appear to be burning, tent those specific spots with small pieces of aluminum foil.
Resting and Final Preparation
Transfer the ham from the roasting pan to a clean cutting board and tent loosely with aluminum foil. Allow the ham to rest for a minimum of 30 minutes before carving—this critical resting period allows the muscle fibers to relax and reabsorb juices that have been driven toward the center during cooking. While resting, the internal temperature will continue to rise another 5-10 degrees, reaching the ideal serving temperature of 140°F. To carve, turn the ham so it rests on its flat side and use a sharp carving knife to follow the natural seams between muscle groups, slicing perpendicular to the bone for attractive, even portions. Serve the carved slices with any accumulated juices from the cutting board drizzled over the top.
Tips and Tricks
For optimal results, consider these advanced techniques that elevate the ham beyond the basic recipe. When selecting your ham, look for a bone-in spiral-cut variety that weighs between 8-10 pounds—this size provides the ideal meat-to-bone ratio and ensures even heating throughout. Spiral-cut hams offer the convenience of pre-slicing while maintaining structural integrity, though you’ll need to work the glaze between the slices during application. If using a non-spiral ham, you’ll achieve slightly better moisture retention but will need to carve at the table.
Temperature management proves crucial throughout the process. Always bring your ham to room temperature for approximately 90 minutes before baking—this reduces the thermal shock and promotes more even heating. When monitoring internal temperature, insert your thermometer in multiple locations, avoiding contact with the bone which conducts heat differently than the meat. For food safety, remember that fully cooked hams only need to reach 140°F internal temperature for serving, though the USDA recommends reheating to 165°F if the ham was repackaged after original processing.
Glaze application technique significantly impacts the final product. Apply the initial glaze layer when the ham surface reaches approximately 120°F—this temperature allows the glaze to set without immediately burning when returned to the high-heat oven. Use a silicone pastry brush for the best application, as natural bristles can shed and synthetic brushes might melt at high temperatures. For exceptionally crisp glaze, consider using a kitchen torch for final touch-ups after baking, focusing on areas that didn’t achieve perfect caramelization.
Storage and repurposing deserve consideration. To store leftovers, remove all meat from the bone within two hours of serving and refrigerate in airtight containers for up to five days. The ham bone itself makes an exceptional base for soups—simmer with aromatics and beans for a classic ham and bean soup. For freezing, portion the meat into usable quantities, wrap tightly in plastic wrap followed by aluminum foil, and freeze for up to three months. Thaw overnight in the refrigerator before reheating gently in a 300°F oven with a splash of broth to maintain moisture.
Recipe Variations
- Honey-Orange Clove Glaze: Replace the bourbon with fresh orange juice and the maple syrup with honey. Increase the ground cloves to 1 teaspoon and add 1 tablespoon of finely grated fresh ginger. The honey creates a thicker, more viscous glaze that develops a beautiful crackly texture when caramelized, while the ginger adds a warming note that complements the traditional clove flavor profile. This variation works particularly well with smoked hams where you want the smoke flavor to remain prominent.
- Brown Sugar-Pineapple Mustard Glaze: Substitute the bourbon with pineapple juice and add 1/2 cup of crushed pineapple to the glaze mixture. Replace the maple syrup with additional brown sugar and increase the Dijon mustard to 1/2 cup while omitting the whole grain mustard. The pineapple’s natural enzymes help tenderize the ham’s surface while contributing tropical sweetness that balances the mustard’s sharpness. For presentation, you can secure pineapple rings to the ham with cloves before the final baking stage.
- Apple Cider and Maple Glaze: Use reduced apple cider instead of bourbon and increase the maple syrup to 3/4 cup. Add 1 teaspoon of ground ginger and 1/2 teaspoon of ground cardamom while omitting the allspice and cayenne. This autumnal variation pairs exceptionally well with pork, as the apple and maple create a classic flavor combination that highlights the ham’s natural sweetness. Reduce 2 cups of fresh apple cider to 1/2 cup before incorporating into the glaze for maximum flavor concentration.
- Spicy Cherry Port Glaze: Substitute bourbon with ruby port and add 1/2 cup of cherry preserves. Increase the cayenne to 1 teaspoon and add 1/2 teaspoon of black pepper for a sweet-heat profile that cuts through the ham’s richness. The port reduction creates a sophisticated, wine-forward glaze with deep fruit notes, while the cherry preserves provide body and visible fruit pieces in the finished glaze. This variation works beautifully with heritage breed hams that have more pronounced pork flavor.
Frequently Asked Questions
Can I prepare this ham in advance for Christmas dinner?
Yes, with proper technique you can prepare components in advance while maintaining quality. The glaze can be made up to three days ahead and refrigerated in an airtight container—gently reheat before application. The ham itself can be scored the day before and refrigerated uncovered, which actually helps dry the surface for better browning. For same-day efficiency, have the ham at room temperature and glaze prepared before you begin baking. While you can fully cook the ham several hours ahead, the texture suffers slightly upon reheating, so I recommend timing your preparation to serve within 30-90 minutes of removing from the oven for optimal quality.
What’s the difference between spiral-cut and traditional whole hams for this recipe?
Spiral-cut hams offer convenience and ensure even glaze distribution between slices, but they tend to dry out slightly more during cooking due to increased surface area. Traditional whole hams retain moisture better but require carving skill and don’t allow glaze penetration between slices. For spiral-cut versions, pay particular attention to working glaze between the slices and consider covering with foil during the initial baking phase if your oven runs hot. Whole hams develop a more impressive crust on the exterior but require longer resting before carving to redistribute juices properly. Both produce excellent results when their particular characteristics are accommodated in the cooking process.
How do I prevent the glaze from burning during the high-heat phase?
Glaze burning typically occurs due to sugar concentration, oven hot spots, or insufficient initial baking. Ensure your oven temperature is accurate using an independent thermometer—many home ovens run 25-50 degrees hot. Position the ham in the lower third of the oven where heat is less intense than the top. Watch closely during the final 10 minutes and rotate the pan if you notice uneven browning. If specific areas darken too quickly, create small foil shields to cover just those spots while the rest continues to caramelize. The butter in the glaze also helps moderate burning by raising the smoke point slightly.
Can I use this method for a fully cooked boneless ham?
Absolutely, though timing adjustments are necessary. Boneless hams typically heat more quickly due to the absence of the bone’s insulating effect—reduce the initial baking time by approximately 15-20 minutes per pound. Since boneless hams often contain added moisture and binders, they may not develop quite the same texture or crust, but the flavor profile remains excellent. Pay extra attention to internal temperature monitoring, as boneless hams can transition from perfectly heated to dry more rapidly. The resting period becomes even more critical with boneless varieties to allow the added processing ingredients to stabilize.
What should I do with the leftover ham bone?
The ham bone represents tremendous flavor potential that shouldn’t be wasted. For classic ham and bean soup, simmer the bone with soaked navy beans, chopped onions, carrots, celery, and bay leaves for 2-3 hours until the beans are tender. Alternatively, use it as a base for split pea soup by combining with dried split peas, mirepoix, and thyme. For something different, use the ham bone to flavor collard greens or cabbage—the saltiness permeates the vegetables beautifully. If immediate use isn’t possible, wrap the bone tightly in plastic and foil and freeze for up to three months for future soup-making sessions.
Summary
This Christmas ham recipe achieves perfection through precise temperature staging, a complex spiced bourbon glaze, and proper resting techniques. The method ensures moist, flavorful meat with a beautifully caramelized exterior that will become the celebrated centerpiece of your holiday table.
Christmas Ham with Spiced Bourbon Glaze
4
servings25
minutes1
minutesIngredients
Instructions
- 1 Preheat oven to 325°F. Score ham fat in diamond pattern and place cut-side down in roasting pan.
- 2 Boil bourbon, orange juice, and vinegar until reduced by one-third. Add remaining ingredients except butter and simmer until thickened.
- 3 Bake ham for 1 hour 15 minutes. Whisk butter into glaze.
- 4 Increase oven to 425°F. Brush ham with glaze and bake 20-25 minutes until caramelized and internal temperature reaches 130-135°F.
- 5 Rest ham 30 minutes before carving. Internal temperature will rise to 140°F.


