Ready to elevate your pie game? Whether you’re craving a classic graham cracker crust or something adventurous like chocolate-covered pretzel, these 32 chocolate pie crust recipes will transform your desserts from ordinary to extraordinary. From no-bake options to decadent double-chocolate creations, we’ve gathered the most irresistible bases for your favorite fillings. Get ready to find your new go-to crust that will have everyone asking for seconds!
Classic Chocolate Oreo Pie Crust
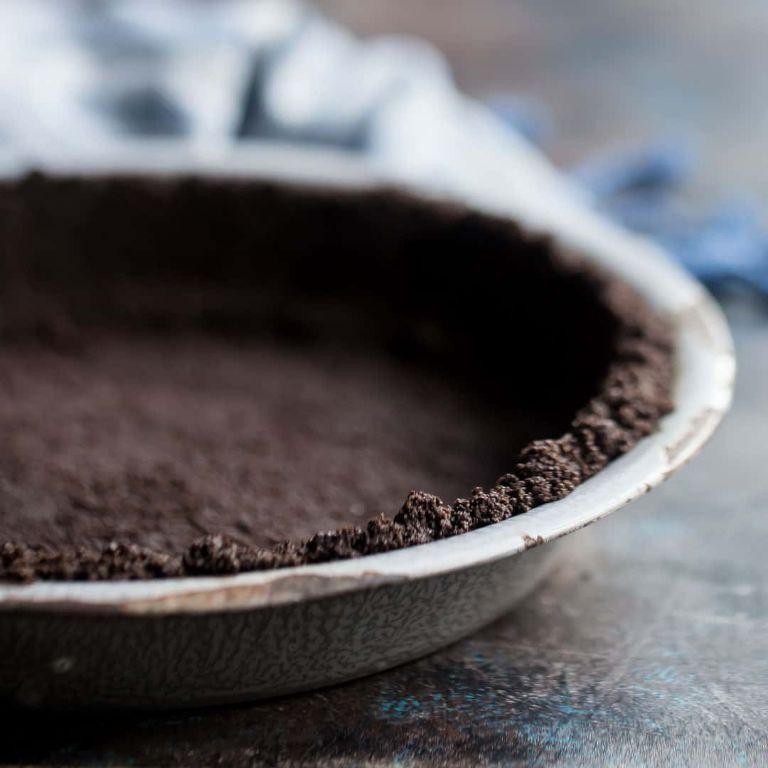
There’s something quietly comforting about the ritual of making a chocolate crust, the way the dark crumbs yield beneath your fingers, promising sweetness yet to come. This Oreo version feels like a secret indulgence, the kind you might sneak a spoonful of before the filling even arrives. Today, I’m taking my time with it, letting the process unfold without hurry.
1
pie15
minutesIngredients
– 24 Oreo cookies (I always use the classic ones for that nostalgic flavor)
– 5 tablespoons unsalted butter, melted (I find European-style butter gives it a richer taste)
– A pinch of fine sea salt (just a whisper to balance the sweetness)
Instructions
1. Place all 24 Oreo cookies in a large zip-top bag, ensuring no air remains before sealing.
2. Use a rolling pin to crush the cookies into fine, even crumbs—you should have about 2 cups when finished.
3. Transfer the Oreo crumbs to a medium mixing bowl, taking care not to spill any.
4. Pour the 5 tablespoons of melted unsalted butter over the crumbs.
5. Add a pinch of fine sea salt to the mixture.
6. Stir continuously with a fork for 45-60 seconds until the crumbs are uniformly moistened and hold together when pressed.
7. Tip: For the best texture, make sure every crumb is coated with butter—this prevents a dry crust.
8. Press the crumb mixture firmly into a 9-inch pie plate, starting from the center and working outward.
9. Use the bottom of a measuring cup to compact the crumbs evenly across the bottom.
10. Build up the sides by pressing the crumbs 1½ inches up the plate walls.
11. Tip: Chill your hands in cold water for 30 seconds before pressing to prevent sticking.
12. Place the crust in the refrigerator for 25 minutes to set completely before filling.
13. Tip: If not using immediately, wrap tightly in plastic—it keeps well for 2 days.
Sometimes I run my finger along the cooled edge just to feel that satisfying crunch. The crust holds a deep chocolate intensity that pairs beautifully with airy fillings, or you could crumble it over ice cream for an impromptu dessert.
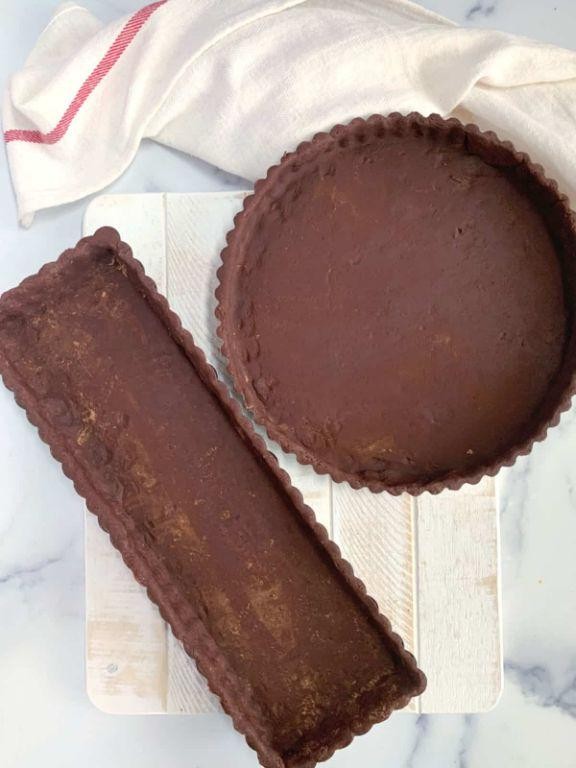
Rich Cocoa Almond Pie Crust
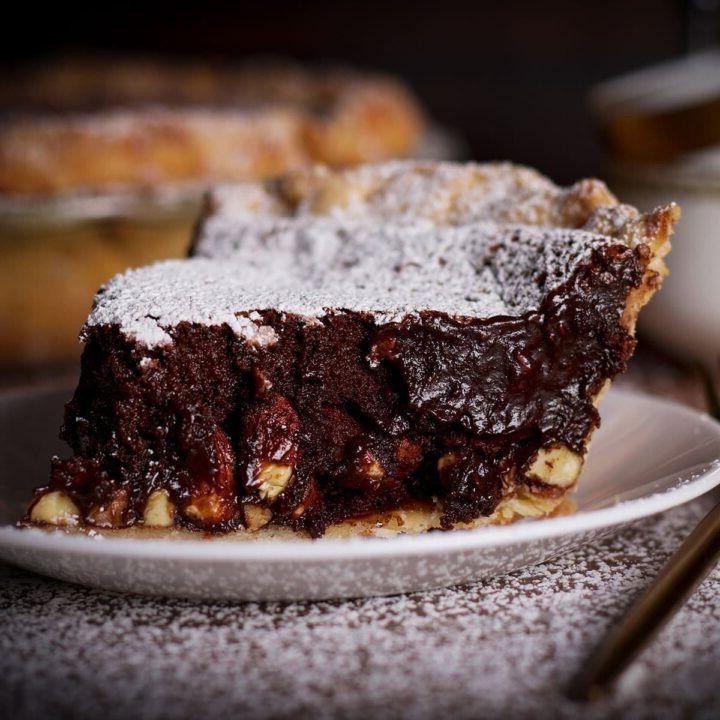
Now, as the afternoon light slants across my kitchen counter, I find myself returning to this cocoa almond crust—a recipe born from rainy Sundays and the quiet comfort of measuring cups. There’s something deeply grounding about pressing this fragrant mixture into a pie plate, knowing it will cradle sweet fillings with its earthy grace.
1
pie15
minutes13
minutesIngredients
– 1 ½ cups almond flour (I always keep a bag in the freezer for freshness)
– ¼ cup unsweetened cocoa powder (the darker, the better—it gives such depth)
– ¼ cup coconut oil, melted but not hot (this creates the most delicate crumb)
– 3 tablespoons maple syrup (grade B has that lovely caramel note)
– 1 teaspoon vanilla extract (pure, never imitation—it makes all the difference)
– ¼ teaspoon fine sea salt (just enough to make the chocolate sing)
Instructions
1. Preheat your oven to 350°F and lightly grease a 9-inch pie plate with coconut oil.
2. Whisk together the almond flour, cocoa powder, and sea salt in a medium bowl until no streaks remain.
3. Pour in the melted coconut oil, maple syrup, and vanilla extract all at once.
4. Stir with a fork until the mixture forms moist crumbs that hold together when pressed—this should take about 45 seconds of mixing.
5. Tip: If the dough feels too dry, add another teaspoon of maple syrup; if too wet, sprinkle in extra almond flour.
6. Transfer the mixture to your prepared pie plate and press it evenly across the bottom and up the sides using your fingertips.
7. Use the flat bottom of a measuring cup to smooth the surface, applying firm, even pressure.
8. Tip: For a decorative edge, press the tines of a fork around the rim before baking.
9. Bake for 12-14 minutes until the crust appears matte and smells richly of toasted almonds.
10. Tip: Place the pie plate on a baking sheet if your oven tends to have hot spots for more even cooking.
11. Cool completely on a wire rack for at least 45 minutes before filling.
Yes, this crust emerges with the subtle crunch of almonds and the sophisticated bitterness of dark cocoa—a perfect partner for airy chocolate mousse or tart lemon curd. I love how it holds its structure without becoming tough, crumbling delicately with each forkful like a well-kept secret.
Gluten-Free Chocolate Hazelnut Crust
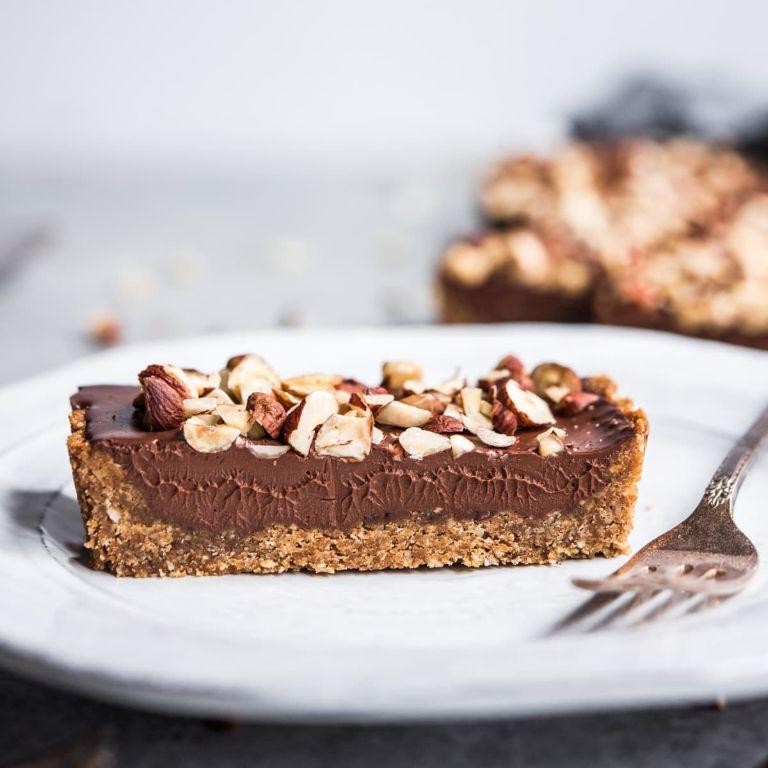
Folding the hazelnut meal between my fingers, I remember how this crust came to be—a happy accident during a rainy afternoon when I needed something both sturdy and tender, something that could cradle fillings without demanding gluten’s embrace. It’s become my favorite base for everything from fruit tarts to creamy cheesecakes, a little project that feels like building edible architecture with chocolate-dusted hands.
1
pie15
minutes15
minutesIngredients
– 1 ½ cups hazelnut meal (toasted lightly first for deeper flavor, I always keep a bag in the freezer)
– ¼ cup unsweetened cocoa powder (I use Dutch-process for its smooth richness)
– 3 tablespoons coconut oil, melted but not hot (this helps it blend evenly)
– 3 tablespoons pure maple syrup (grade A amber has the right consistency)
– 1 large egg, at room temperature (it binds everything without making it tough)
– ½ teaspoon fine sea salt (a pinch to balance the sweetness)
Instructions
1. Preheat your oven to 350°F and lightly grease a 9-inch pie pan with coconut oil.
2. In a medium bowl, combine the hazelnut meal, cocoa powder, and sea salt, whisking until no clumps remain.
3. Pour in the melted coconut oil and maple syrup, stirring with a spatula until the mixture looks like wet sand.
4. Crack the egg into the bowl and mix vigorously for about 1 minute until the dough holds together when pressed.
5. Tip: If the dough feels too dry, add 1 teaspoon of water; if too sticky, chill it for 10 minutes to firm up.
6. Press the dough evenly into the prepared pan, starting from the center and working outward to form a ¼-inch thick layer.
7. Use the bottom of a measuring cup to smooth the surface, ensuring it’s compacted to prevent cracking.
8. Tip: For a neat edge, press the dough slightly up the sides—it should be about ½ inch high.
9. Bake for 12–15 minutes, until the edges are firm and the center no longer looks glossy.
10. Tip: Let it cool completely in the pan on a wire rack; this helps it set without becoming brittle.
11. Once cooled, gently run a knife around the edge before removing if needed. Perhaps what I love most is how the crust crumbles just enough to feel rustic, with toasted hazelnut notes weaving through the dark chocolate, making it perfect for a no-bake filling or simply topped with whipped cream and berries for a humble, satisfying treat.
Vegan Dark Chocolate Coconut Crust
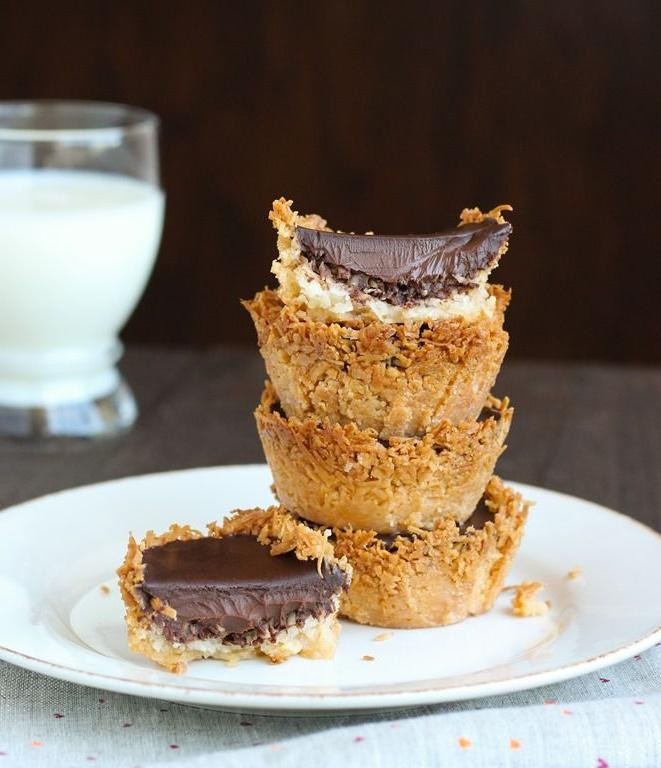
Gently, as autumn leaves begin their slow descent, I find myself drawn to the kitchen, where the rich aroma of dark chocolate and coconut promises comfort. There’s something deeply soothing about creating this vegan crust—the way simple ingredients transform into something sturdy yet tender, ready to cradle whatever sweet filling the heart desires. It’s a quiet ritual that feels both grounding and indulgent, perfect for these cooler days when baking becomes a form of meditation.
1
pie crust20
minutes22
minutesIngredients
– 1 ½ cups shredded unsweetened coconut (toasted lightly first for deeper flavor)
– ½ cup almond flour (I love how fine Bob’s Red Mill brand is for this)
– ¼ cup melted coconut oil (unrefined gives that lovely tropical hint)
– 3 tablespoons maple syrup (grade A amber is my preference for its mild sweetness)
– ¼ cup cocoa powder (Dutch-processed creates such a rich, dark color)
– ¼ teaspoon fine sea salt (just a pinch to balance the sweetness)
Instructions
1. Preheat your oven to 350°F and lightly grease a 9-inch pie pan with coconut oil.
2. Spread the shredded coconut evenly on a baking sheet and toast for 5-7 minutes until golden brown, stirring halfway through.
3. Combine the toasted coconut, almond flour, cocoa powder, and sea salt in a medium bowl, mixing thoroughly with a fork.
4. Pour the melted coconut oil and maple syrup into the dry ingredients, stirring until the mixture resembles wet sand and no dry patches remain.
5. Tip: Press a small amount between your fingers—if it holds together without crumbling, the moisture balance is perfect.
6. Transfer the mixture to your prepared pie pan, spreading it evenly across the bottom and up the sides.
7. Use the flat bottom of a measuring cup to firmly press the crust into place, applying even pressure to create a compact layer.
8. Tip: Chill the crust for 15 minutes before baking—this helps prevent shrinkage and ensures a crisp texture.
9. Bake the crust at 350°F for 12-15 minutes until the edges appear firm and the surface looks matte rather than glossy.
10. Remove from oven and cool completely on a wire rack before filling.
11. Tip: For extra stability with wet fillings, brush the baked crust with melted dark chocolate and let it set before adding your filling.
This crust emerges with a delightful sandy texture that crumbles just enough to feel rustic, while the dark chocolate notes deepen against the coconut’s subtle sweetness. Try filling it with a creamy cashew mousse for contrast, or layer it with fresh berries for a vibrant, simple dessert that lets the crust truly shine.
Simple Chocolate Graham Cracker Crust
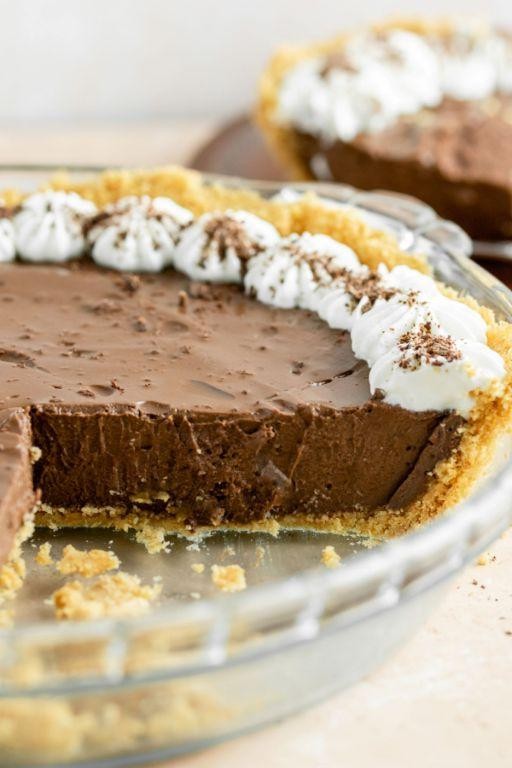
Evenings like this, when the kitchen glows with golden hour light, I find myself reaching for the simplest of comforts—a chocolate graham cracker crust waiting to cradle something sweet. There’s something quietly satisfying about pressing the dark crumbs into a pan, knowing this humble foundation will soon transform into dessert magic. It’s the kind of recipe that feels like a warm hug, no fancy tools required.
1
pie crust15
minutes8
minutesIngredients
– 1 ½ cups finely crushed chocolate graham crackers (I love the deep cocoa flavor these lend, and crushing them myself lets me control the texture)
– 6 tablespoons unsalted butter, melted (using unsalted lets me adjust the salt perfectly, and I always melt it gently to avoid browning)
– 2 tablespoons granulated sugar (just a touch to balance the bitterness of the chocolate crackers)
– ¼ teaspoon fine sea salt (this little pinch makes the chocolate notes pop, I swear by it)
Instructions
1. Preheat your oven to 350°F—this ensures the crust bakes evenly from the moment it goes in.
2. Place chocolate graham crackers in a sealed plastic bag and crush them finely with a rolling pin until they resemble coarse sand; this creates a uniform base that holds together well.
3. Transfer the crushed crackers to a medium mixing bowl.
4. Add the granulated sugar and fine sea salt to the bowl.
5. Stir the dry ingredients with a fork until fully combined, about 30 seconds.
6. Pour the melted unsalted butter over the crumb mixture.
7. Mix thoroughly with the fork until all crumbs are moistened and the mixture holds together when pressed—this usually takes 1-2 minutes.
8. Tip the mixture into a 9-inch pie plate, spreading it evenly across the bottom and up the sides.
9. Use a flat-bottomed measuring cup to firmly press the crumbs into an even layer, about ¼-inch thick; pressing firmly is key to avoiding a crumbly crust later.
10. Bake the crust in the preheated oven for 8 minutes exactly, until it’s fragrant and slightly darkened at the edges.
11. Remove the crust from the oven and place it on a wire rack to cool completely, about 45 minutes—this prevents any filling from melting upon contact.
Perhaps what I love most is how this crust crumbles just enough to feel rustic, its chocolate depth whispering through whatever creamy filling you choose. Try it with a cloud of peanut butter mousse or a layer of salted caramel—it turns simple moments into little celebrations.
Double Chocolate Shortbread Pie Crust
Sometimes, the simplest recipes hold the most comfort—like this double chocolate shortbread pie crust that came to me during a quiet autumn afternoon, when the light was soft and the kitchen felt like a sanctuary. It’s a buttery, crumbly base that cradles fillings beautifully, with just enough cocoa and chocolate chips to make it feel indulgent without being overwhelming. I love how it turns a humble pie into something quietly special, a treat that feels both nostalgic and new.
1
pie20
minutes22
minutesIngredients
– 1 ½ cups all-purpose flour (I always spoon and level it for accuracy, never scoop)
– ½ cup unsweetened cocoa powder (Dutch-processed gives it a deeper, smoother flavor)
– ½ cup granulated sugar (just enough to sweeten without overpowering the chocolate)
– ½ teaspoon fine sea salt (it really makes the chocolate notes pop)
– ¾ cup cold unsalted butter, cut into small cubes (I keep mine chilled right up until mixing)
– ¼ cup mini semi-sweet chocolate chips (these melt into little pockets of joy)
– 1 large egg yolk, at room temperature (it helps bind everything without making it tough)
– 1 teaspoon pure vanilla extract (my secret for warmth and depth)
Instructions
1. Preheat your oven to 350°F and lightly grease a 9-inch pie plate with butter or non-stick spray.
2. In a large bowl, whisk together the all-purpose flour, unsweetened cocoa powder, granulated sugar, and fine sea salt until no streaks remain.
3. Add the cold unsalted butter cubes to the dry ingredients and use a pastry cutter or your fingertips to work them in until the mixture resembles coarse crumbs with some pea-sized bits of butter still visible.
4. Stir in the mini semi-sweet chocolate chips gently to distribute them evenly throughout the mixture.
5. In a small bowl, whisk the room temperature egg yolk and pure vanilla extract together until smooth.
6. Pour the egg yolk mixture into the dry ingredients and mix with a fork just until the dough starts to clump together and no dry spots remain; avoid overmixing to keep the crust tender.
7. Turn the dough out into the prepared pie plate and press it evenly across the bottom and up the sides using your fingers or the flat bottom of a measuring cup.
8. Use a fork to prick the crust all over the bottom and sides, about 15–20 times, to prevent air bubbles during baking.
9. Bake the crust in the preheated oven for 18–22 minutes, or until the edges are firm and the surface looks dry and slightly matte.
10. Remove the crust from the oven and let it cool completely in the pan on a wire rack before filling, which usually takes about 1 hour. Very crumbly and rich with a deep chocolate flavor, this crust pairs wonderfully with a smooth chocolate ganache or a tangy lemon curd filling. I’ve even crumbled leftovers over ice cream for a quick, decadent treat that never fails to delight.
Nutty Chocolate Cashew Crust
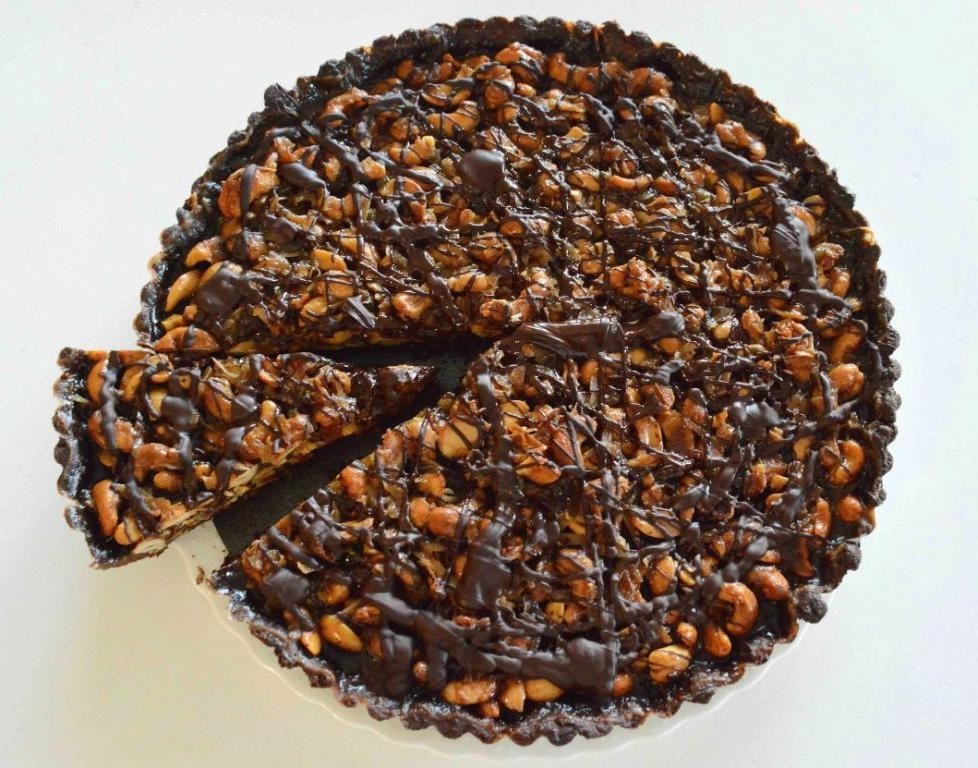
Often, when the afternoon light slants just so through my kitchen window, I find myself craving something that balances earthy richness with just a hint of sweetness. This nutty chocolate cashew crust came to me during one of those quiet moments, a simple base that holds memories of shared desserts and cozy evenings. It’s the kind of recipe that feels both grounding and gently indulgent, like a warm hug in edible form.
1
crust15
minutes10
minutesIngredients
- 1 ½ cups raw cashews – I love their buttery softness when toasted
- ¼ cup cocoa powder – the darker, the better for that deep chocolate flavor
- 3 tablespoons maple syrup – it adds a lovely caramel note that honey just doesn’t quite achieve
- 2 tablespoons coconut oil, melted – this is my secret for that perfect pressable texture
- Pinch of sea salt – a flaky one makes all the difference here
Instructions
- Preheat your oven to 325°F and line a baking sheet with parchment paper.
- Spread the raw cashews evenly across the prepared baking sheet.
- Toast the cashews in the preheated oven for 8-10 minutes, until they’re lightly golden and fragrant – watch closely as they can burn quickly.
- Remove the toasted cashews from the oven and let them cool completely on the baking sheet.
- Transfer the cooled cashews to a food processor.
- Pulse the cashews until they form coarse crumbs, about 10-12 short pulses – you want some texture remaining.
- Add the cocoa powder, maple syrup, melted coconut oil, and sea salt to the food processor.
- Process the mixture on low speed until it comes together into a crumbly dough that holds together when pressed, about 30-45 seconds.
- Transfer the mixture to a 9-inch pie plate or springform pan.
- Press the mixture firmly and evenly across the bottom and up the sides of the pan using the bottom of a measuring cup.
- Chill the pressed crust in the refrigerator for at least 30 minutes to set before filling.
Knowing how this crust turns out always brings me joy – it’s wonderfully crisp yet tender, with the cashews providing a subtle savory balance to the dark chocolate notes. I’ve found it pairs beautifully with a light coconut cream filling or even just some fresh berries scattered over top. Sometimes I’ll press it into individual tartlet pans for elegant single servings that feel particularly special.
No-Bake Chocolate Biscuit Crust
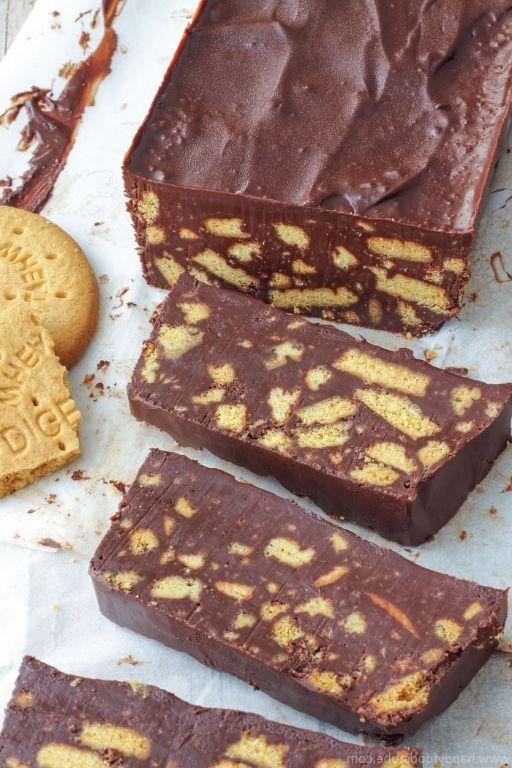
Tracing my finger along the dusty cookbook spine, I remembered how this simple crust became my quiet afternoon companion, the kind of recipe that feels like a whispered secret between friends. There’s something deeply comforting about creating something beautiful without ever turning on the oven, letting ingredients speak for themselves in their raw, honest state.
1
crust15
minutesIngredients
– 1 ½ cups finely crushed chocolate wafer cookies (I always save the end of the bag for this—those extra crumbs add wonderful texture)
– 6 tablespoons unsalted butter, melted (I find European-style butter gives it a richer, more luxurious mouthfeel)
– ¼ cup granulated sugar (just enough to sweeten without overwhelming the chocolate)
– A generous pinch of fine sea salt (this tiny addition makes the chocolate flavor truly sing)
Instructions
1. Place chocolate wafer cookies in a sturdy zip-top bag and seal tightly, removing as much air as possible.
2. Use a rolling pin to crush the cookies against a flat surface until they reach a fine, sandy consistency with no large pieces remaining.
3. Transfer the crushed cookies to a medium mixing bowl, being careful not to lose any crumbs.
4. Add the granulated sugar and fine sea salt to the cookie crumbs, then whisk gently with a fork to distribute evenly throughout the mixture.
5. Pour the melted unsalted butter over the dry ingredients, making sure to scrape every last golden drop from the measuring cup.
6. Use a rubber spatula to fold the mixture together until all the crumbs are evenly coated and the texture resembles wet sand that holds together when pressed.
7. Tip: If the mixture seems too dry, add another tablespoon of melted butter—the crust should hold its shape when pressed but not feel greasy.
8. Transfer the mixture to a 9-inch pie plate or springform pan, spreading it evenly across the bottom with your fingers.
9. Use the flat bottom of a measuring cup or glass to firmly press the crumbs into an even layer across the bottom and slightly up the sides of the pan.
10. Tip: Press especially firmly around the edges where the bottom meets the sides to prevent crumbling when slicing later.
11. Place the crust in the refrigerator to chill for exactly 1 hour, which allows the butter to firm up completely and the flavors to meld together.
12. Tip: For an extra crisp crust, you can chill it for up to 4 hours—the longer it sets, the cleaner your slices will be when serving.
Dense and crumbly with a deep chocolate flavor that lingers pleasantly, this crust provides the perfect sturdy foundation for whatever filling you dream up. I love how the subtle saltiness balances the sweetness, creating layers of flavor that make even the simplest no-bake cheesecake or mousse feel elegantly complex. Sometimes I’ll press crushed toasted almonds along the rim before chilling for an extra textural surprise that guests always notice.
Decadent Chocolate Peanut Butter Crust
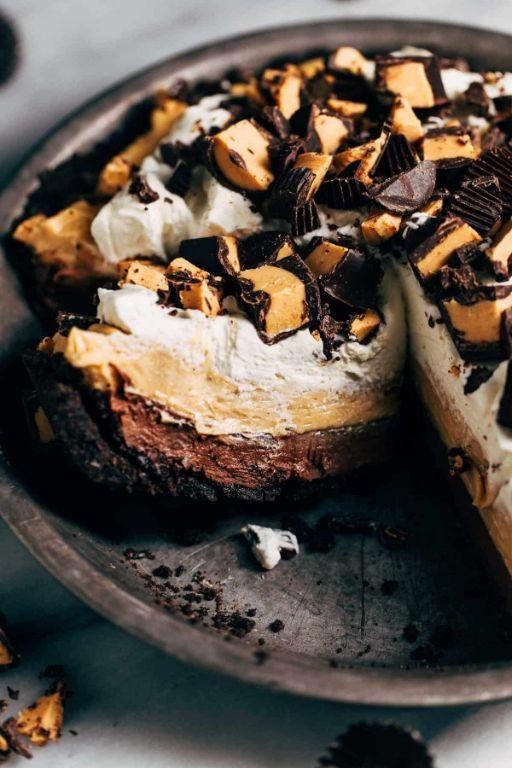
Perhaps it’s the way the afternoon light slants through my kitchen window this time of year that makes me crave something both comforting and celebratory. There’s a particular magic in combining chocolate and peanut butter that feels like wrapping yourself in your favorite blanket while still dressing up for a special occasion.
1
pie15
minutes10
minutesIngredients
- 1 ½ cups chocolate wafer crumbs (I always use Nabisco Famous Wafers for that perfect snap)
- ½ cup creamy peanut butter (the kind that needs stirring gives the best texture)
- ¼ cup unsalted butter, melted (I leave mine on the counter for about 20 minutes first)
- 2 tablespoons granulated sugar (just enough to balance the saltiness)
- ½ teaspoon fine sea salt (I prefer this over table salt for its clean flavor)
Instructions
- Preheat your oven to 350°F and position a rack in the center for even heating.
- Place chocolate wafers in a zip-top bag and crush them with a rolling pin until you achieve fine, even crumbs resembling dark sand.
- Transfer the crumbs to a medium mixing bowl and add the peanut butter, melted butter, sugar, and sea salt all at once.
- Mix with a fork until the mixture resembles wet sand and holds together when pinched between your fingers.
- Tip: If the mixture seems too dry, add another tablespoon of melted butter; if too wet, add more crumbs.
- Press the mixture firmly into a 9-inch pie plate using the bottom of a measuring cup to create an even layer.
- Bake for 8-10 minutes until the edges appear slightly darker and the crust smells fragrant.
- Tip: Place the pie plate on a baking sheet to prevent the bottom from browning too quickly.
- Remove from oven and cool completely on a wire rack for at least 45 minutes.
- Tip: For a crisper crust, let it cool uncovered rather than wrapping it.
Just cooled, this crust has the satisfying snap of a good cookie with the creamy richness that only peanut butter can provide. The salt crystals linger pleasantly against the dark chocolate, making it substantial enough to stand up to any filling you dream up—I’ve been loving it with a simple chocolate mousse or even just piled high with fresh berries.
White Chocolate Macadamia Nut Crust
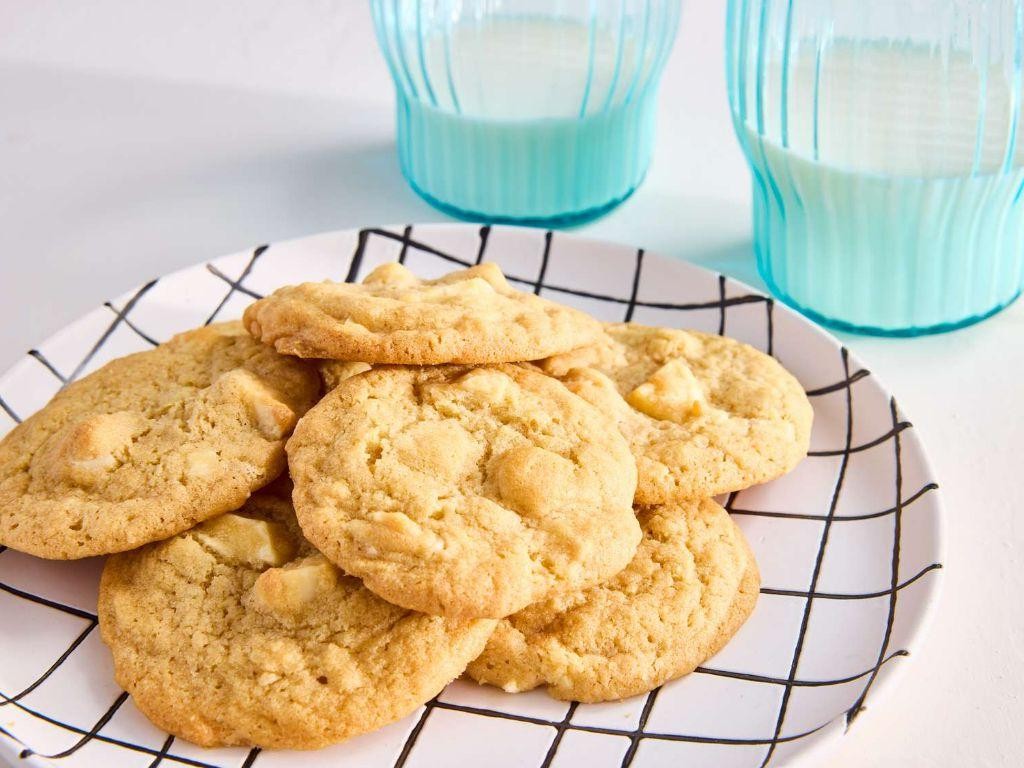
Under the soft glow of morning light, I find myself returning to this recipe like an old friend—there’s something about the gentle sweetness of white chocolate paired with the earthy crunch of macadamias that feels like a quiet comfort. This crust has become my go-to foundation for everything from lemon tarts to no-bake cheesecakes, each time offering that perfect balance between delicate and substantial. It’s a simple pleasure, really, one that invites you to slow down and savor the process as much as the result.
1
pie crust20
minutes20
minutesIngredients
– 1 ½ cups all-purpose flour (I always spoon it into the measuring cup to avoid packing it down)
– ½ cup granulated sugar (just enough to sweeten without overwhelming the nuts)
– ½ cup unsalted butter, cold and cubed (I keep mine in the freezer for about 10 minutes beforehand for the flakiest texture)
– ⅓ cup finely chopped white chocolate (I prefer using a bar over chips—it melts more evenly)
– ¼ cup roasted macadamia nuts, roughly chopped (toasting them first brings out their buttery depth)
– 1 large egg yolk (room temperature helps it blend smoothly into the dough)
– ¼ teaspoon fine sea salt (a pinch to balance the sweetness)
Instructions
1. Preheat your oven to 350°F and lightly grease a 9-inch pie dish with butter or non-stick spray.
2. In a medium bowl, whisk together the all-purpose flour, granulated sugar, and fine sea salt until fully combined.
3. Add the cold, cubed unsalted butter to the dry ingredients, using a pastry cutter or your fingertips to work it in until the mixture resembles coarse crumbs with pea-sized butter pieces.
4. Stir in the finely chopped white chocolate and roughly chopped roasted macadamia nuts, distributing them evenly throughout the mixture.
5. Make a well in the center of the mixture and add the room temperature egg yolk, then mix gently with a fork until the dough just comes together—be careful not to overwork it, as this keeps the crust tender.
6. Turn the dough out onto a lightly floured surface and gently press it into a disc about 1 inch thick.
7. Roll the dough out to a ¼-inch thickness, rotating it occasionally to prevent sticking and ensure an even shape.
8. Carefully transfer the rolled dough to the prepared pie dish, pressing it gently into the bottom and sides without stretching.
9. Trim any excess dough from the edges, then crimp or flute the rim using your fingers or a fork for a decorative finish.
10. Prick the bottom of the crust all over with a fork to prevent air bubbles during baking.
11. Place the pie dish on a baking sheet and bake for 18–20 minutes, or until the edges are lightly golden and the center appears set.
12. Remove the crust from the oven and let it cool completely on a wire rack before filling.
This crust emerges with a delicate crispness that gives way to the creamy pockets of melted white chocolate and the satisfying crunch of macadamias. Try pairing it with a tart fruit filling, like raspberry or passionfruit, to contrast its gentle sweetness—it’s a combination that feels both elegant and effortlessly comforting.
Espresso-Infused Chocolate Cookie Crust
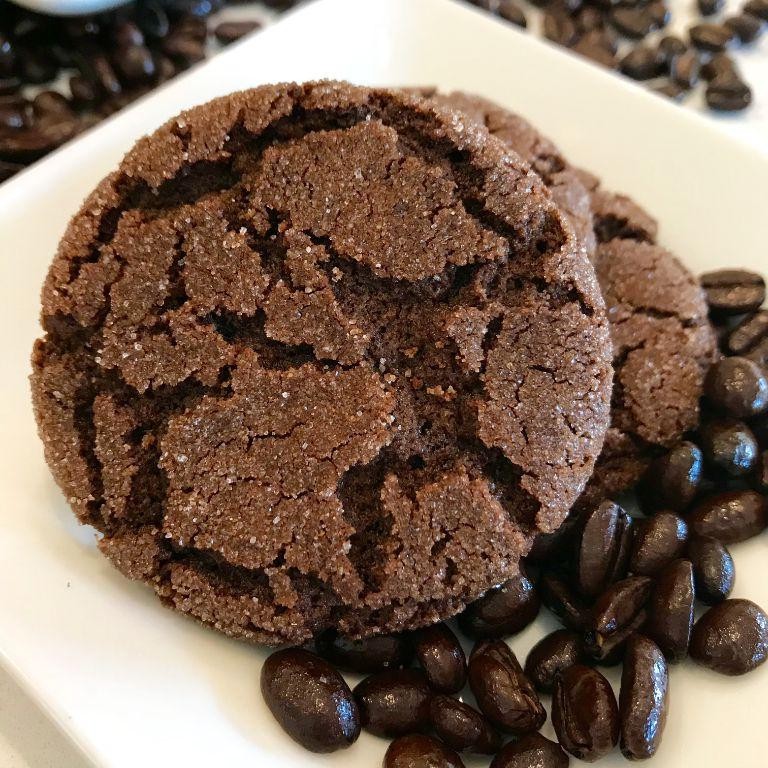
Dipping my fingers into the flour bin this morning, I found myself craving something that would hold both bitterness and sweetness in perfect balance—a crust that whispers of late nights and quiet kitchens, where espresso powder mingles with dark chocolate in a tender, crumbly embrace.
8
portions25
minutes20
minutesIngredients
– 1 ½ cups all-purpose flour (I like to spoon and level it for accuracy)
– ½ cup unsweetened cocoa powder (the really dark kind, with that deep earthy scent)
– 2 tbsp finely ground espresso powder (I use a dark roast for its robust kick)
– ½ cup granulated sugar
– ¼ cup light brown sugar, packed (it adds just a hint of caramel warmth)
– ½ tsp fine sea salt (a pinch to make the chocolate sing)
– ½ cup unsalted butter, cold and cubed (straight from the fridge keeps the crust flaky)
– 1 large egg yolk (room temp helps it blend smoothly)
– 1 tsp pure vanilla extract (my grandmother’s favorite, always)
Instructions
1. Preheat your oven to 350°F and lightly grease a 9-inch pie dish.
2. In a large bowl, whisk together the flour, cocoa powder, espresso powder, granulated sugar, brown sugar, and salt until no streaks remain.
3. Add the cold, cubed butter and use a pastry cutter or your fingertips to work it in until the mixture resembles coarse crumbs with some pea-sized bits. Tip: Keep your hands cool to prevent the butter from melting.
4. In a small bowl, whisk the egg yolk and vanilla extract until just combined.
5. Drizzle the egg mixture over the dry ingredients and stir with a fork until the dough begins to clump together.
6. Press the dough evenly into the bottom and up the sides of the prepared pie dish, using the flat bottom of a measuring cup to smooth it. Tip: Chill the crust for 15 minutes before baking to reduce shrinkage.
7. Bake at 350°F for 18–20 minutes, until the edges are firm and the surface looks dry. Tip: Rotate the dish halfway through for even browning.
8. Let the crust cool completely on a wire rack before filling.
Knowing this crust cradles the memory of quiet mornings, its sandy texture gives way to a deep chocolate warmth, lifted by the espresso’s gentle hum. I love pairing it with a cloud of whipped mascarpone or simply breaking a piece to savor with black tea, letting the bitterness linger like a secret shared between old friends.
Mint Chocolate Chip Pie Crust
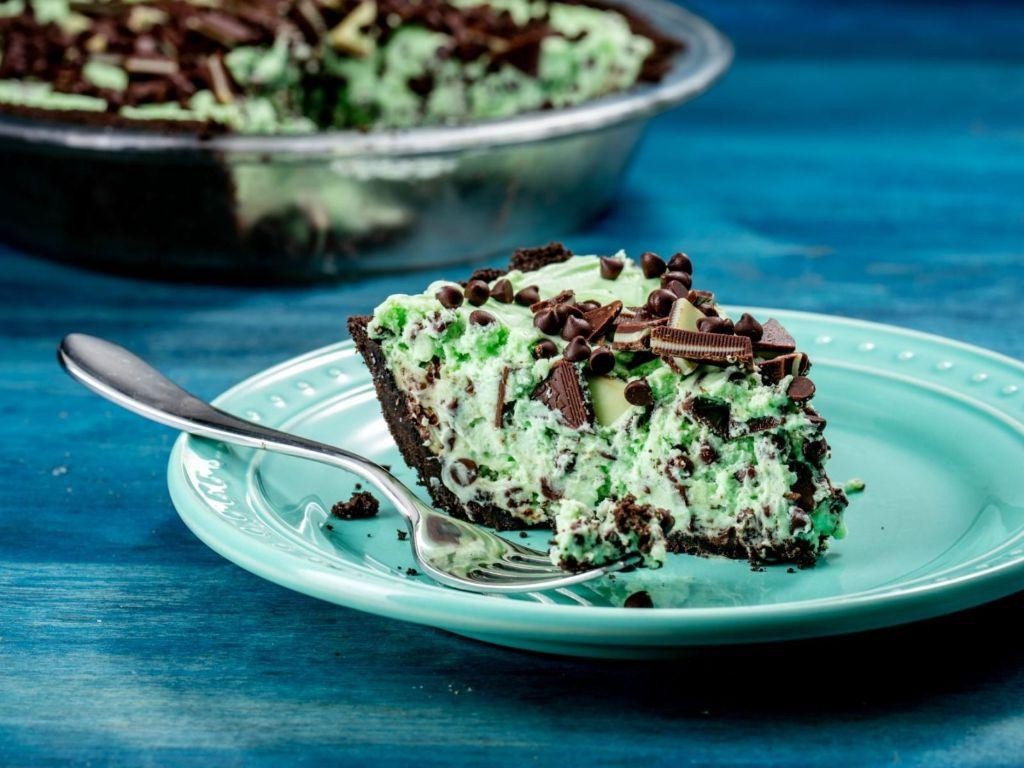
Tracing my finger along the cool edge of the pie plate, I remember how this mint chocolate chip crust came to be—a happy accident during a rainy afternoon when chocolate cravings met leftover mint sprigs. There’s something quietly magical about how these simple ingredients transform into a crisp, fragrant base, holding memories of laughter and quiet kitchen moments. This recipe feels like a gentle whisper of comfort, perfect for days when you need a sweet, grounding ritual.
1
pie crust15
minutes10
minutesIngredients
– 1 ½ cups chocolate wafer crumbs (I always crush them finely for a smoother texture, saving a few chunks for crunch)
– 6 tablespoons unsalted butter, melted (using salted butter works too, but I find unsalted lets the mint shine brighter)
– ¼ cup granulated sugar (a heaping scoop adds just the right sweetness without overpowering)
– 2 teaspoons pure peppermint extract (I prefer this over mint flavoring—it’s cleaner and more refreshing)
– ¼ cup mini chocolate chips (these tiny morsels melt into lovely pockets of richness)
Instructions
1. Preheat your oven to 350°F to ensure it’s perfectly heated for baking.
2. In a medium bowl, combine the chocolate wafer crumbs, melted butter, granulated sugar, and peppermint extract, stirring until the mixture resembles wet sand. Tip: If the crumbs feel too dry, add another tablespoon of melted butter—it should hold together when pressed.
3. Fold in the mini chocolate chips gently, distributing them evenly without overmixing.
4. Press the mixture firmly into a 9-inch pie plate, starting from the center and working outward to create an even layer about ¼-inch thick. Tip: Use the flat bottom of a measuring cup to compact the crust; this prevents crumbling later.
5. Build up the edges to about 1 inch high, smoothing them with your fingers for a neat rim.
6. Bake the crust for 10 minutes at 350°F, or until the edges appear lightly set and fragrant. Tip: Watch closely near the end—overbaking can make it bitter.
7. Remove the crust from the oven and let it cool completely on a wire rack for at least 30 minutes before filling. You’ll know it’s ready when the surface feels firm to the touch.
Yet this crust holds more than just ingredients; its crisp texture gives way to bursts of cool mint and rich chocolate, like a hidden treasure in every slice. Serve it filled with vanilla ice cream for a playful twist, or let it cradle a creamy ganache—each bite feels like a quiet celebration of simplicity.
Spicy Mexican Chocolate Crust
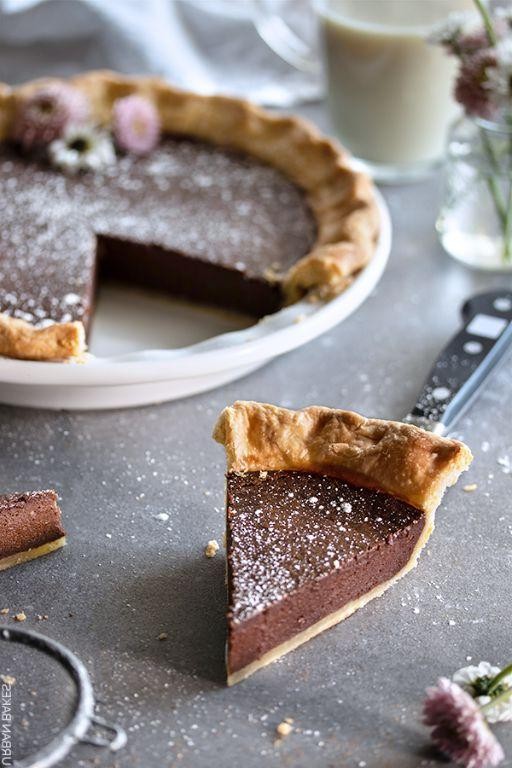
A quiet afternoon finds me in the kitchen, drawn to the warmth of spices and chocolate, creating something that feels like a gentle embrace. This spicy Mexican chocolate crust carries whispers of cinnamon and cayenne, a tender foundation waiting to cradle sweet fillings. It’s a recipe born from cozy moments, where the alchemy of heat and sweetness slows time itself.
1
pie crust40
minutes20
minutesIngredients
– 1 ½ cups all-purpose flour (I always spoon it into the cup to avoid packing)
– ½ cup unsweetened cocoa powder (the deep, dark kind for richness)
– ¾ cup granulated sugar (I prefer cane sugar for its subtle molasses notes)
– 1 tsp ground cinnamon (freshly ground if you have it)
– ¼ tsp cayenne pepper (just enough to tingle, not overwhelm)
– ½ tsp salt (fine sea salt balances the sweetness)
– ½ cup unsalted butter, cold and cubed (straight from the fridge for flakiness)
– 1 large egg, lightly beaten (room temp helps it incorporate smoothly)
– 2 tbsp ice water (chilled to keep the butter firm)
Instructions
1. Preheat your oven to 350°F and lightly grease a 9-inch pie pan.
2. Whisk the flour, cocoa powder, sugar, cinnamon, cayenne, and salt in a large bowl until no streaks remain.
3. Add the cold, cubed butter and use a pastry cutter to work it in until the mixture resembles coarse crumbs with pea-sized butter pieces.
4. Pour in the lightly beaten egg and mix gently with a fork until just combined.
5. Sprinkle the ice water over the dough and stir until it begins to clump together.
6. Tip: If the dough feels dry, add another tablespoon of ice water, but avoid overmixing to prevent toughness.
7. Gather the dough into a ball, flatten it into a disk, and wrap it in plastic wrap.
8. Chill the dough in the refrigerator for 30 minutes to relax the gluten and firm the butter.
9. Tip: Rolling the dough between two sheets of parchment paper prevents sticking without extra flour.
10. Roll the chilled dough into a 12-inch circle, about ¼-inch thick.
11. Carefully transfer the dough to the prepared pie pan, pressing it gently into the edges.
12. Trim any excess dough, leaving a ½-inch overhang, and crimp the edges with your fingers or a fork.
13. Prick the bottom and sides of the crust all over with a fork to prevent bubbling.
14. Tip: For a crispier crust, freeze it for 10 minutes before baking to set the butter.
15. Bake at 350°F for 18–20 minutes, until the crust is firm and fragrant.
16. Let the crust cool completely on a wire rack before filling.
Layers of dark cocoa and warmth unfold with each bite, the crust crisp yet tender, like a secret shared in hushed tones. Serve it filled with cinnamon-spiced custard or topped with fresh berries, letting the gentle heat of cayenne linger on the palate like a soft, fading echo.
Conclusion
From classic graham cracker to inventive gluten-free options, these 32 chocolate pie crust recipes offer endless delicious possibilities for your next dessert creation. We hope you found some new favorites to try in your kitchen! Don’t forget to leave a comment sharing which crust you loved most and pin this article to your Pinterest boards to save these tasty ideas for later.