Many of my fondest childhood memories involve coming inside after hours of playing in the fields, my cheeks flushed from the crisp autumn air, and finding my grandmother waiting with a tall, frosty glass of homemade chocolate milk. She’d always say it was the simple pleasures that warmed the soul best, and this recipe is exactly that—a humble, heartwarming tradition passed down through our family, perfect for cozy afternoons or sharing stories by the fire. It’s more than just a drink; it’s a little sip of comfort and connection.
Why This Recipe Works
- Using high-quality cocoa powder ensures a rich, deep chocolate flavor that’s far superior to store-bought mixes, giving you that authentic, from-scratch taste that reminds you of homemade goodness.
- Whisking the cocoa with a small amount of hot milk first helps dissolve any lumps completely, creating a smooth, velvety base that blends seamlessly into the rest of the milk without any gritty texture.
- A touch of vanilla extract enhances the chocolate notes and adds a warm, aromatic depth that makes this drink feel extra special, like something crafted with love in a farmhouse kitchen.
- Chilling the mixture thoroughly before serving allows the flavors to meld together beautifully, resulting in a perfectly balanced, refreshing treat that’s ideal for sipping slowly on a lazy day.
- This method is incredibly flexible—you can easily adjust the sweetness or chocolate intensity to suit your taste, making it a versatile staple that everyone in the family will adore.
Ingredients
- 4 cups whole milk, cold
- 1/4 cup unsweetened cocoa powder
- 1/3 cup granulated sugar
- 1 teaspoon vanilla extract
- 1/8 teaspoon fine sea salt
Equipment Needed
- Medium saucepan
- Whisk
- Measuring cups and spoons
- Large pitcher or jar with lid
- Spoon for stirring
Instructions
Combine Cocoa and Sugar
Start by pouring 1/2 cup of the cold milk into your medium saucepan, then add the 1/4 cup of unsweetened cocoa powder and 1/3 cup of granulated sugar. Place the saucepan over low heat on the stove, and use your whisk to stir everything together gently. You’ll want to keep the heat low to avoid scorching the milk—just warm enough to help the cocoa and sugar dissolve smoothly. As you whisk, you’ll notice the mixture transforming from a dusty powder into a thick, glossy paste. This step is crucial because it ensures no lumps remain, giving you that silky texture we all love. Keep stirring for about 2 to 3 minutes, until the sugar has fully melted and the paste is uniform. A little tip here: if you see any stubborn bits of cocoa, press them against the side of the pan with the back of your spoon to break them up. This method guarantees a perfectly smooth base for your chocolate milk, just like my grandma taught me to do on chilly mornings.
Heat and Dissolve the Mixture
Once your cocoa paste is smooth, slowly pour in another 1/2 cup of cold milk while continuing to whisk. Increase the heat to medium-low, and let the mixture warm up gradually, stirring constantly to prevent any sticking or burning. You’re aiming for a temperature of around 160°F, which is warm enough to dissolve everything but not so hot that it scalds the milk. If you don’t have a thermometer, watch for tiny bubbles forming around the edges of the pan—that’s your cue that it’s ready. This should take about 4 to 5 minutes of gentle heating. As you stir, you’ll see the mixture thin out and become a rich, dark liquid, almost like a homemade chocolate syrup. The key here is patience; rushing this step can lead to a grainy texture. I always think of this as the heart of the recipe, where the magic happens, turning simple ingredients into something comforting and rich.
Incorporate Remaining Milk and Flavorings
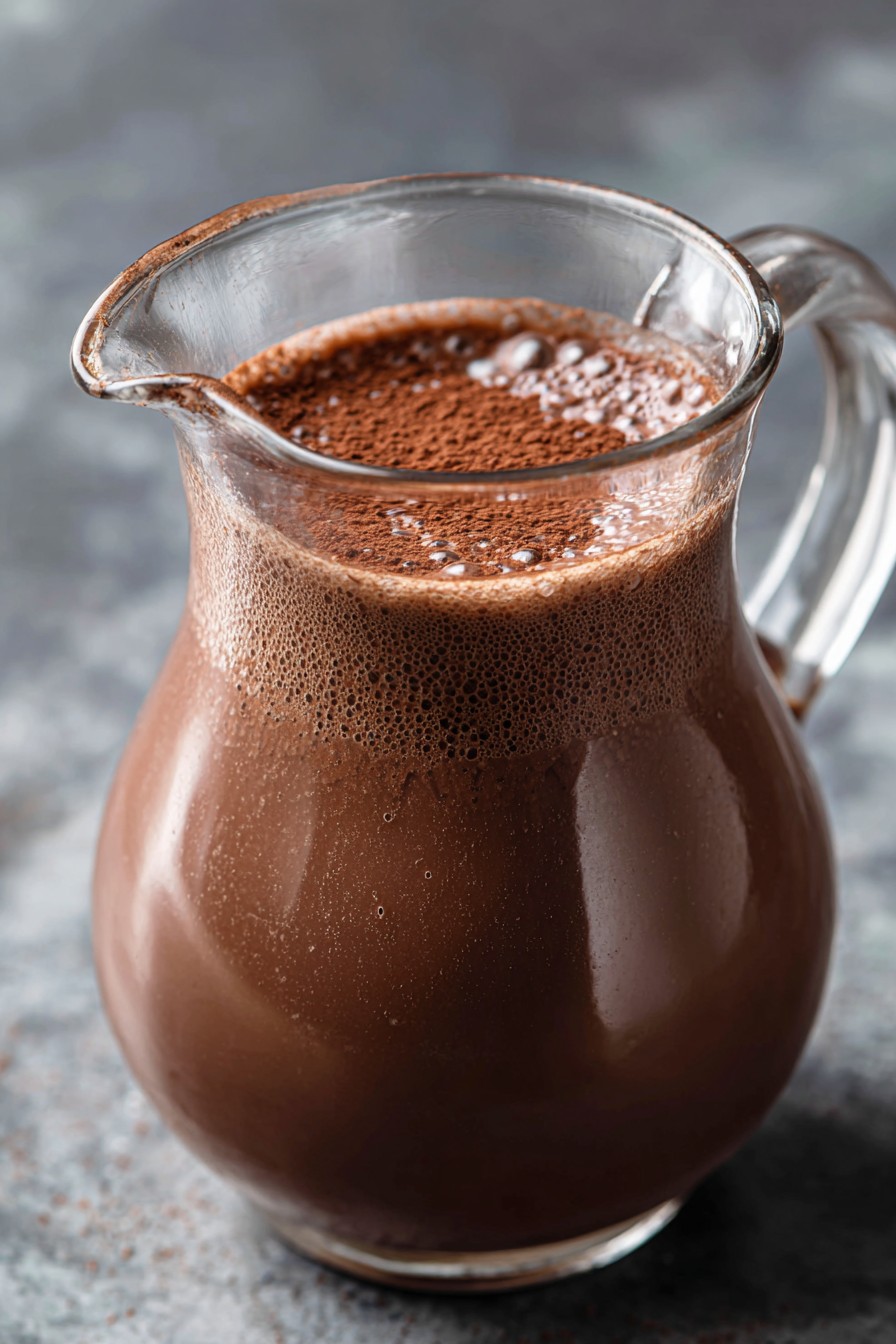
Now, turn off the heat and carefully pour the warm chocolate mixture into your large pitcher or jar. Add the remaining 3 cups of cold milk, along with 1 teaspoon of vanilla extract and 1/8 teaspoon of fine sea salt. The salt might seem odd, but trust me—it enhances the chocolate flavor without making it salty, giving it that balanced, crave-worthy taste. Use a spoon or whisk to stir everything together thoroughly for about a minute, making sure the vanilla and salt are evenly distributed. You’ll see the color lighten to a creamy brown as the milk blends in, and the aroma of vanilla will fill the air, reminding me of baking days in my grandmother’s kitchen. This step is all about bringing it all together, so take your time to mix well. If you’re using a jar with a lid, you can secure it and give it a good shake—it’s a fun way to get the kids involved and makes the process feel like a cherished family ritual.
Chill to Perfection
Once everything is mixed, cover the pitcher or jar tightly and place it in the refrigerator to chill. This isn’t just about cooling it down; it’s about letting the flavors meld and deepen. Aim for at least 2 hours of chilling time, though if you can wait overnight, it’ll taste even better. The cold temperature helps the chocolate and sugar fully integrate into the milk, resulting in a smoother, more harmonious drink. When it’s ready, you’ll notice it has a consistent, inviting color and a thick, creamy consistency. Before serving, give it another gentle stir or shake to make sure nothing has settled at the bottom. I like to pour it into tall glasses, maybe with a few ice cubes if it’s a warm day, and savor it slowly. This waiting period always reminds me of how good things come to those who are patient, just like the best memories from the farm.
Serve and Enjoy
When it’s time to serve, give the chocolate milk one final stir in the pitcher to ensure it’s well blended. Pour it into glasses—I prefer using old-fashioned mason jars for that rustic touch—and enjoy it straight away. If you’d like, you can add a sprinkle of cocoa powder on top for a little extra flair, but honestly, it’s perfect as is. Sip it slowly and let the rich, chocolatey flavor wash over you; it’s the kind of simple pleasure that feels like a warm hug. This drink is best enjoyed within 2-3 days, stored in the fridge, so you can revisit that cozy feeling whenever the mood strikes. Sharing it with loved ones makes it even more special, just like those afternoons when my family would gather on the porch and laugh over glasses of this very treat.
Tips and Tricks
If you want to take your chocolate milk to the next level, here are a few extra ideas that I’ve picked up over the years. First, consider using different types of milk for varied results—whole milk gives it that classic creamy richness, but if you prefer something lighter, 2% milk works well too. For a dairy-free version, almond or oat milk can be substituted; just note that they might alter the texture slightly, so whisk a bit more vigorously to blend everything smoothly. Another tip is to experiment with sweeteners; instead of granulated sugar, try maple syrup or honey for a more nuanced flavor. If using liquid sweeteners, add them in the first step with the cocoa to ensure they dissolve properly. For an extra indulgent treat, a splash of heavy cream stirred in at the end will make it even richer, almost like a dessert in a glass. If you’re making this for kids, you can reduce the sugar slightly and add a pinch of cinnamon for a warm, spicy twist that they’ll love. Storage is key too—always keep it in a sealed container in the fridge, and if you notice any separation, just give it a good shake before serving. For those who enjoy a frothy top, you can blend it briefly with an immersion blender before pouring. Lastly, if you’re doubling the recipe for a crowd, make sure to use a large enough pitcher and chill it for an extra hour to ensure it’s perfectly cold. These little adjustments can make this simple recipe feel new and exciting every time you make it, while still holding onto that nostalgic charm we all cherish.
Recipe Variations
- For a minty fresh twist, add 1/4 teaspoon of peppermint extract along with the vanilla. It gives the chocolate milk a cool, refreshing flavor that’s perfect for holiday gatherings or summer days, reminding me of candy canes and winter festivities by the fireplace.
- To make it a spiced delight, stir in 1/2 teaspoon of ground cinnamon and a pinch of nutmeg when you add the cocoa. This warms it up beautifully, evoking memories of autumn harvests and cozy evenings spent wrapped in blankets.
- For a richer, adult-friendly version, replace 1/2 cup of milk with strong brewed coffee or espresso. It creates a mocha-inspired drink that’s perfect for lazy weekend brunches, adding a subtle caffeine kick to that familiar comfort.
- If you’re craving something extra indulgent, melt 2 ounces of chopped dark chocolate into the warm cocoa mixture before adding the rest of the milk. This makes it intensely chocolatey and decadent, like a liquid dessert that feels special enough for celebrations.
- For a fun, kid-approved option, blend in 1/2 cup of mashed ripe bananas along with the milk. It adds natural sweetness and a creamy texture, turning it into a chocolate-banana treat that’s both nutritious and delicious.
Frequently Asked Questions
Can I use a different type of milk, like almond or oat milk?
Absolutely, you can substitute whole milk with almond, oat, or any other plant-based milk. The process remains the same, but keep in mind that these milks might have a thinner consistency and slightly different flavor profiles. For best results, choose unsweetened varieties to control the sweetness yourself, and whisk a bit longer when combining to ensure everything blends smoothly. Almond milk will give it a nutty undertone, while oat milk tends to be creamier, making it a great alternative if you’re avoiding dairy. Just note that the final texture might be a touch lighter, but it’ll still be delicious and comforting.
How long does homemade chocolate milk last in the refrigerator?
When stored in a sealed container in the fridge, homemade chocolate milk will stay fresh for about 2 to 3 days. Over time, the ingredients may start to separate slightly, so always give it a good stir or shake before serving. If you notice any off smells or changes in texture, it’s best to discard it. For the best flavor, I recommend making it fresh if possible, but it’s handy to have on hand for a quick treat. Chilling it overnight often enhances the taste, so planning ahead can make it even more enjoyable.
Can I make this recipe without heating the milk?
Yes, you can skip the heating step by using a blender to combine the ingredients. Add the cocoa powder, sugar, vanilla, salt, and about 1 cup of cold milk to the blender, then blend on high for 30-60 seconds until smooth. Pour this mixture into your pitcher and stir in the remaining milk. This method is quicker and avoids any risk of scorching, but the flavor might not meld quite as deeply as with gentle heating. It’s a great option for hot days when you want a cold drink fast, though I still prefer the stovetop method for that traditional, slow-cooked feel.
Is it possible to reduce the sugar in this recipe?
Definitely, you can adjust the sugar to suit your taste or dietary needs. Start by reducing it to 1/4 cup, and if you prefer it even less sweet, go down to 3 tablespoons. The cocoa will still shine through, but the drink might taste slightly more bitter, which some people enjoy. You can also use alternative sweeteners like stevia or monk fruit; just follow the conversion guidelines on the package since they’re often sweeter than sugar. Experiment slowly until you find the balance that feels right for you, keeping in mind that the vanilla helps round out the flavors even with less sweetness.
Why add salt to chocolate milk?
Adding a small amount of salt, like the 1/8 teaspoon in this recipe, might seem unusual, but it’s a trick that enhances the overall flavor without making it salty. Salt acts as a flavor amplifier, helping to balance the sweetness and deepen the chocolate notes, giving the drink a more complex and satisfying taste. It’s similar to how a pinch of salt improves baked goods or savory dishes. In this case, it brings out the richness of the cocoa, making each sip feel more indulgent and well-rounded. If you’re sensitive to salt, you can reduce it slightly, but I’ve found it really makes a difference in creating that nostalgic, homemade quality.
Summary
This homemade chocolate milk recipe is a simple, heartwarming tradition that brings comfort and joy to any day. With rich cocoa, a hint of vanilla, and a touch of salt, it’s easy to make and perfect for sharing with family. Sip it slowly and savor the cozy memories it inspires.
Homemade Chocolate Milk
4
servings5
minutes10
minutesIngredients
Instructions
- 1 In a medium saucepan, combine 1/2 cup milk, cocoa powder, and sugar over low heat. Whisk for 2-3 minutes until smooth.
- 2 Add another 1/2 cup milk, increase heat to medium-low, and warm to 160°F (about 4-5 minutes), stirring constantly.
- 3 Remove from heat, pour into a pitcher, and add remaining milk, vanilla, and salt. Stir well to combine.
- 4 Cover and refrigerate for at least 2 hours until chilled.
- 5 Stir before serving and enjoy cold.