There’s something truly magical about how versatile eggs can be in Chinese cooking, transforming simple ingredients into quick dinners, comforting classics, and celebratory feasts with ease. Whether you’re craving a speedy weeknight meal or planning a special weekend treat, these delightful dishes promise to bring authentic flavors right to your kitchen. Ready to discover your new favorite? Let’s dive into these 31 irresistible Chinese egg creations!
Classic Chinese Steamed Egg
Cooking this delicate Classic Chinese Steamed Egg always takes me back to my grandmother’s kitchen, where she’d serve it as the ultimate comfort food—silky, soothing, and surprisingly simple to master. I love making this when I need something gentle on the stomach or want to impress guests with a dish that feels both elegant and homey.
2
portions10
minutes14
minutesIngredients
– 3 large eggs
– 1 ½ cups warm water (about 110°F for smoother mixing)
– ½ tsp salt (adjust if using salted broth)
– 1 tsp light soy sauce (or tamari for gluten-free)
– 1 tsp toasted sesame oil
– 1 green onion, thinly sliced (for garnish)
Instructions
1. Crack 3 large eggs into a medium mixing bowl.
2. Whisk the eggs vigorously for 45 seconds until fully blended and slightly frothy.
3. Pour 1 ½ cups warm water into the eggs while whisking continuously to combine.
4. Add ½ tsp salt and whisk for another 20 seconds until the salt is fully dissolved.
5. Strain the egg mixture through a fine-mesh sieve into a heatproof bowl to remove air bubbles and ensure a silky texture.
6. Cover the bowl tightly with aluminum foil to prevent steam droplets from falling onto the surface.
7. Place the covered bowl in a steamer basket set over a pot of boiling water.
8. Steam over medium heat (maintaining a steady boil) for 12 minutes.
9. Turn off the heat and let the bowl sit in the steamer for 2 more minutes to finish cooking gently.
10. Carefully remove the bowl from the steamer and uncover it.
11. Drizzle 1 tsp light soy sauce and 1 tsp toasted sesame oil evenly over the surface.
12. Garnish with thinly sliced green onion.
Just out of the steamer, this egg custard has a jiggly, pudding-like texture that melts on your tongue with a subtle savory richness. I sometimes top it with sautéed mushrooms or a sprinkle of chili crisp for extra depth, but it’s perfect exactly as is—a humble bowl of comfort that never fails to satisfy.
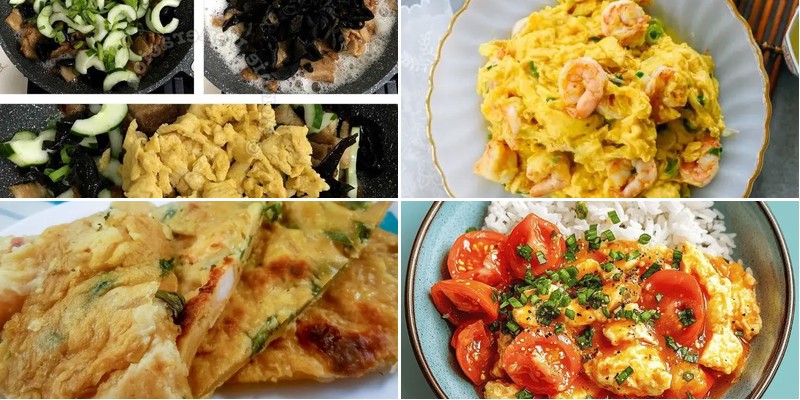
Chinese Tomato and Egg Stir-Fry
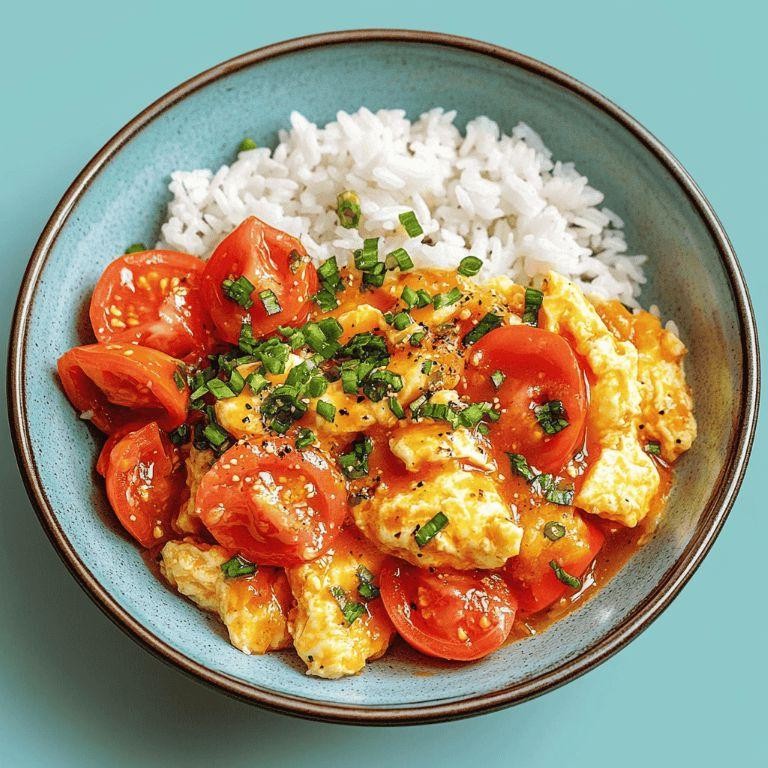
Every time I crave something comforting yet ridiculously easy to whip up, my mind goes straight to this Chinese tomato and egg stir-fry. It’s the dish my roommate taught me during our broke college days, and it’s been a weekly staple ever since—nothing beats its vibrant colors and homely feel after a long day. Honestly, it’s the kind of meal that turns a hectic evening into a cozy one in under 15 minutes.
2
servings5
minutes9
minutesIngredients
– 4 large eggs (room temperature for fluffier scrambling)
– 3 medium tomatoes, chopped into 1-inch wedges (ripe ones add sweetness)
– 2 tablespoons vegetable oil (or any neutral oil like canola)
– 1/4 cup chopped scallions, green parts only (for a fresh garnish)
– 1 tablespoon soy sauce (use light soy sauce for less saltiness)
– 1 teaspoon sugar (balances the tomatoes’ acidity)
– 1/4 teaspoon salt (adjust if using salted soy sauce)
– 1/4 cup water (helps create a saucy texture)
Instructions
1. Crack the eggs into a bowl and whisk vigorously for 30 seconds until frothy and uniform in color. Tip: Whisking well prevents rubbery eggs.
2. Heat 1 tablespoon of vegetable oil in a large non-stick skillet over medium-high heat until it shimmers, about 1 minute.
3. Pour the whisked eggs into the skillet and let them set for 10 seconds without stirring.
4. Gently push the eggs from the edges toward the center with a spatula every 15 seconds until softly scrambled, about 2 minutes total. Tip: Stop cooking while slightly wet for tenderness.
5. Transfer the eggs to a clean plate immediately to avoid overcooking.
6. Add the remaining 1 tablespoon of oil to the same skillet and heat over medium-high until hot.
7. Add the tomato wedges and stir-fry for 2 minutes until they start to soften and release juices.
8. Sprinkle in the sugar and salt, then pour in the water and soy sauce, stirring to combine.
9. Cook the tomato mixture for 3–4 minutes, stirring occasionally, until the tomatoes break down into a chunky sauce. Tip: Mash a few tomatoes with your spatula for thicker consistency.
10. Return the scrambled eggs to the skillet, gently folding them into the tomatoes until evenly coated, about 1 minute.
11. Turn off the heat and stir in the chopped scallions just before serving. Soft, silky eggs meld with the tangy tomato sauce for a dish that’s both light and satisfying. I love scooping it over steamed rice or pairing it with crusty bread to soak up every bit of that savory-sweet juice—it’s a humble masterpiece that never fails to hit the spot.
Egg Drop Soup
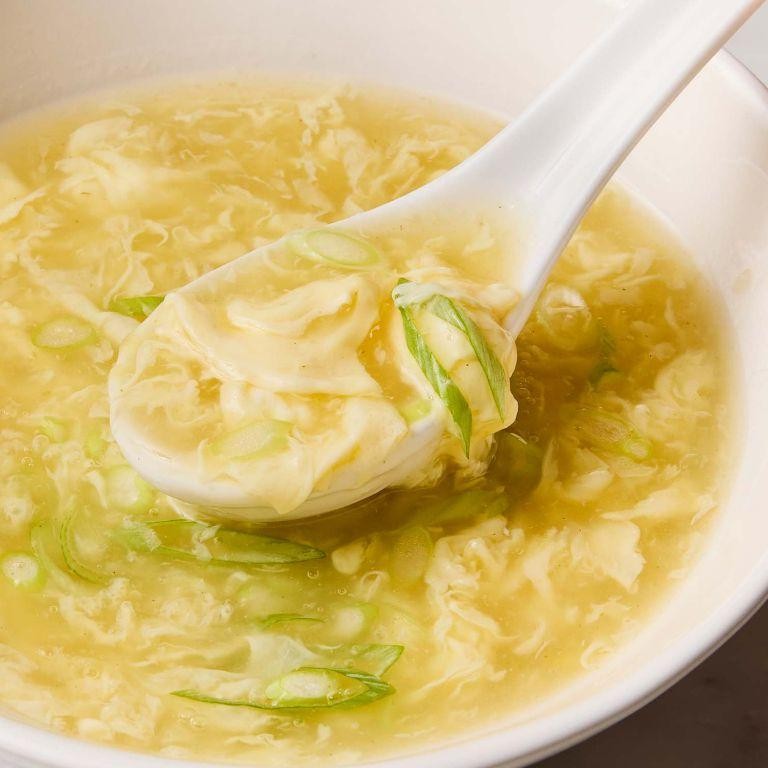
Finally, after a long day of recipe testing, I always find myself craving something simple yet soul-warming—and that’s when I turn to this classic Egg Drop Soup. It reminds me of chilly evenings when my grandma would whip it up in minutes, proving that comfort doesn’t need to be complicated. Today, I’m sharing my go-to version that’s as easy as it is delicious.
5
servings5
minutes5
minutesIngredients
– 4 cups chicken broth (low-sodium for better control)
– 2 large eggs (lightly beaten for delicate ribbons)
– 1 tbsp cornstarch (mixed with 2 tbsp water to thicken)
– 1 tsp soy sauce (or tamari for gluten-free)
– 1/2 tsp sesame oil (toasted for deeper flavor)
– 1 green onion (thinly sliced for garnish)
– 1/4 tsp ground white pepper (adjust for mild heat)
Instructions
1. Pour 4 cups of chicken broth into a medium saucepan and bring it to a boil over high heat.
2. Reduce the heat to medium-low and let the broth simmer gently for 3 minutes to develop flavor.
3. In a small bowl, whisk 1 tbsp cornstarch with 2 tbsp water until smooth to create a slurry.
4. Slowly stir the cornstarch slurry into the simmering broth to thicken it evenly, avoiding lumps.
5. Add 1 tsp soy sauce and 1/4 tsp white pepper, stirring for 30 seconds to incorporate.
6. Hold a fork over the saucepan and slowly drizzle 2 beaten eggs in a thin, steady stream.
7. Let the eggs cook undisturbed for 20 seconds to form silky ribbons before stirring gently.
8. Turn off the heat and stir in 1/2 tsp sesame oil for a fragrant finish.
9. Ladle the soup into bowls and top with sliced green onions for freshness.
10. Serve immediately while hot to enjoy the best texture. My favorite part is how the eggs create delicate, cloud-like strands that melt in your mouth, with the broth offering a savory depth from the soy and sesame. For a fun twist, I sometimes add a handful of spinach at the end or serve it over steamed rice to make it heartier.
Chive and Egg Dumplings
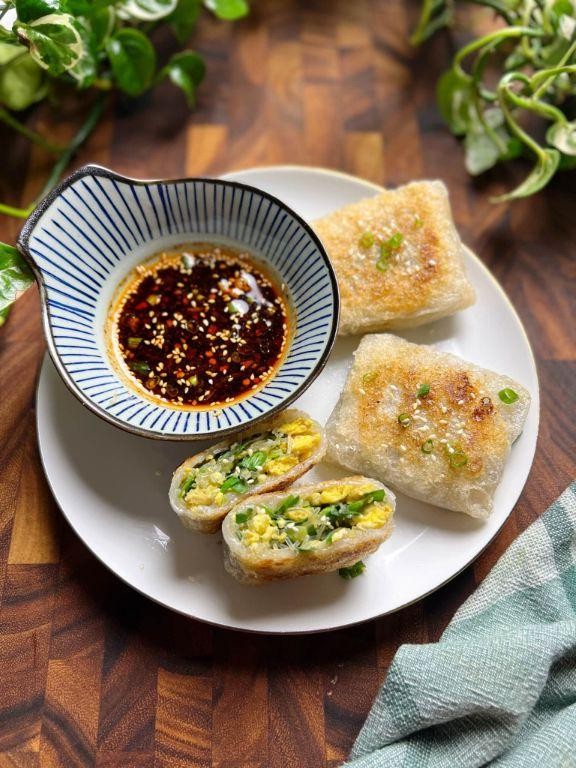
Tuesdays always feel like dumpling day in our house—there’s something about midweek that calls for the comforting ritual of folding these little pockets of joy. My grandmother first taught me to make chive and egg dumplings when I was barely tall enough to see over the counter, and I’ve been tweaking her recipe ever since to get that perfect balance of savory and fresh. These days, I love whipping up a batch while listening to my favorite podcast—it makes the folding process feel more like meditation than work.
48
dumplings50
minutes6
minutesIngredients
- 2 cups all-purpose flour (plus extra for dusting)
- 3/4 cup warm water (about 110°F—test on your wrist like checking a baby’s bottle)
- 4 large eggs
- 2 cups chopped fresh chives (pack them lightly when measuring)
- 2 tbsp vegetable oil (or any neutral oil)
- 1 tsp salt
- 1/2 tsp white pepper (black pepper works too but will show as specks)
- 1 tbsp soy sauce
- 2 tbsp sesame oil (for that nutty finish)
Instructions
- Combine 2 cups flour and 3/4 cup warm water in a large bowl, mixing until shaggy dough forms.
- Knead dough on floured surface for 8 minutes until smooth and elastic—it should spring back when poked.
- Cover dough with damp kitchen towel and rest for 30 minutes at room temperature.
- Whisk 4 eggs in bowl until uniform in color with no visible streaks.
- Heat 2 tbsp vegetable oil in skillet over medium heat until shimmering, about 2 minutes.
- Pour eggs into hot skillet and scramble for 3 minutes, breaking into small curds with spatula.
- Transfer scrambled eggs to cutting board and chop finely into pea-sized pieces.
- Combine chopped eggs, 2 cups chives, 1 tsp salt, 1/2 tsp white pepper, and 1 tbsp soy sauce in mixing bowl.
- Divide rested dough into 4 equal portions, keeping unused portions covered.
- Roll one portion into 1-inch thick rope on floured surface, then cut into 12 equal pieces.
- Flatten each piece with palm, then roll into 3-inch circles using rolling pin, dusting with flour as needed.
- Place 1 heaping tablespoon filling in center of each wrapper, keeping edges clean.
- Fold wrapper in half and pinch center, then pleat edges together with 5-6 folds per side.
- Arrange finished dumplings on parchment-lined baking sheet, not touching.
- Bring large pot of water to rolling boil over high heat—bubbles should cover entire surface.
- Carefully drop 12 dumplings into boiling water and cook for 6 minutes until they float.
- Remove dumplings with slotted spoon and toss with 2 tbsp sesame oil in serving bowl.
Right out of the pot, these dumplings have the most wonderful contrast—the wrappers turn translucent and slightly chewy while the filling stays bright and fluffy. I love how the chives keep their fresh, oniony punch against the rich eggs, especially when you get that burst of sesame oil aroma. Sometimes I’ll pan-fry the leftovers for breakfast, creating a crispy bottom that makes them taste completely new the next day.
Century Egg Congee
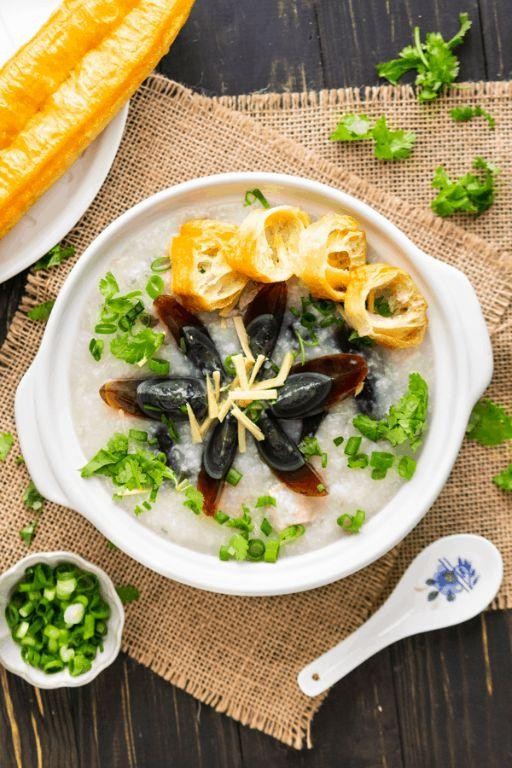
Facing a chilly autumn morning like today, I found myself craving the ultimate comfort food from my childhood – century egg congee. There’s something magical about how this simple rice porridge transforms humble ingredients into a silky, savory bowl that warms you from the inside out. I learned this recipe from my grandmother, who always said the secret was in the patience of slow cooking.
4
servings10
minutes45
minutesIngredients
– 1 cup jasmine rice (rinsed until water runs clear)
– 8 cups water (or chicken broth for richer flavor)
– 2 century eggs (peeled and quartered)
– 1 tablespoon grated ginger (fresh gives the best aroma)
– 2 green onions (thinly sliced, whites and greens separated)
– 1 teaspoon sesame oil (toasted variety preferred)
– 1/2 teaspoon white pepper (adjust to your spice preference)
– 1/2 teaspoon salt (add more at the end if needed)
Instructions
1. Rinse 1 cup jasmine rice under cold running water until the water runs completely clear, about 2-3 minutes of rinsing.
2. Combine the rinsed rice and 8 cups water in a large heavy-bottomed pot over medium-high heat.
3. Bring the mixture to a rolling boil, then immediately reduce heat to low and partially cover with a lid.
4. Simmer for 45 minutes, stirring every 10 minutes with a wooden spoon to prevent sticking to the bottom.
5. Add 1 tablespoon grated ginger and the white parts of 2 sliced green onions during the last 15 minutes of cooking.
6. Peel 2 century eggs and cut each into quarters using a sharp knife wiped with oil to prevent sticking.
7. Gently stir the century egg pieces into the congee during the final 5 minutes of cooking.
8. Season with 1/2 teaspoon salt and 1/2 teaspoon white pepper, stirring thoroughly to distribute evenly.
9. Remove from heat and drizzle 1 teaspoon sesame oil over the top before serving.
10. Garnish with the green parts of the sliced green onions.
Resulting in the most comforting breakfast or light meal, this congee achieves a perfect balance between the creamy rice base and the distinctive richness of century eggs. The texture should be luxuriously smooth with just enough body to coat your spoon. I love serving mine with extra white pepper and a soft-boiled egg for added creaminess.
Egg Foo Young
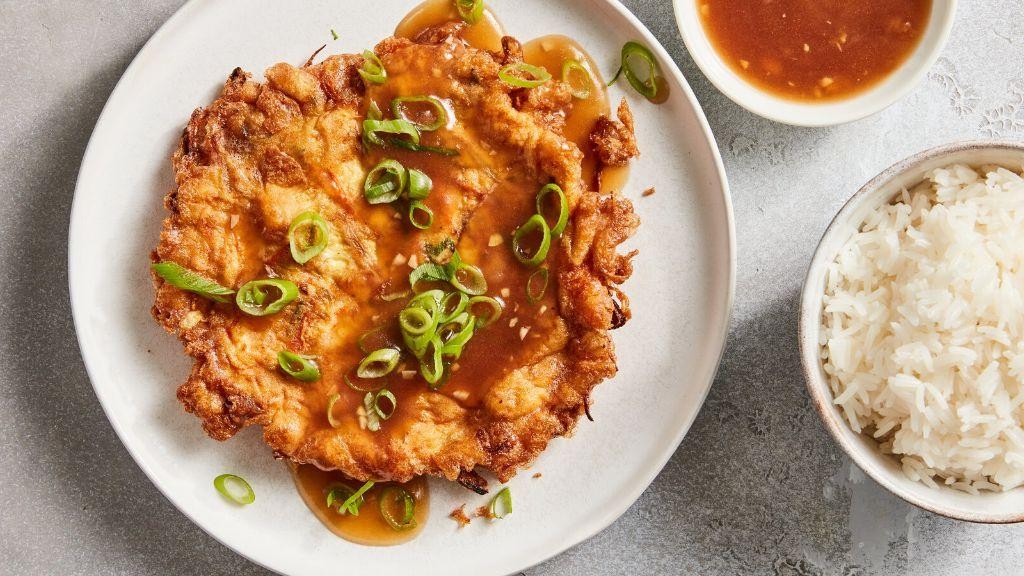
Unbelievably versatile and satisfying, Egg Foo Young has been my go-to quick dinner for years—it’s the perfect way to use up leftover veggies from the fridge. I first fell in love with this Chinese-American classic during my college days when my roommate’s grandmother would make it for us after late study sessions. Now I make it at least twice a month, usually on those busy weeknights when I want something comforting but don’t have hours to spend in the kitchen.
5
patties10
minutes16
minutesIngredients
– 4 large eggs
– 1/2 cup cooked chicken, shredded (or substitute with shrimp or keep it vegetarian)
– 1/4 cup bean sprouts
– 2 tablespoons chopped green onions
– 1/4 cup chopped mushrooms
– 1 tablespoon soy sauce
– 1/4 teaspoon white pepper
– 2 tablespoons vegetable oil (or any neutral oil with high smoke point)
– 1 cup chicken broth
– 1 tablespoon cornstarch
– 1 teaspoon sugar
– 1 teaspoon rice vinegar
Instructions
1. Crack 4 large eggs into a medium mixing bowl and whisk vigorously for 30 seconds until frothy and well-combined.
2. Add 1/2 cup shredded cooked chicken, 1/4 cup bean sprouts, 2 tablespoons chopped green onions, and 1/4 cup chopped mushrooms to the egg mixture.
3. Pour 1 tablespoon soy sauce and sprinkle 1/4 teaspoon white pepper over the egg and vegetable mixture.
4. Gently fold all ingredients together with a spatula until evenly distributed, being careful not to overmix.
5. Heat 2 tablespoons vegetable oil in a 10-inch non-stick skillet over medium-high heat until it shimmers, about 2 minutes.
6. Ladle approximately 1/3 cup of the egg mixture into the hot oil, forming a 4-inch round patty.
7. Cook the patty for 2-3 minutes until the edges appear set and the bottom develops a golden-brown crust.
8. Carefully flip the patty using a spatula and cook for another 2 minutes until the second side is golden brown and the center is fully cooked.
9. Transfer the cooked patty to a paper towel-lined plate and repeat steps 6-8 with remaining batter.
10. In a small saucepan, whisk together 1 cup chicken broth, 1 tablespoon cornstarch, 1 teaspoon sugar, and 1 teaspoon rice vinegar until no lumps remain.
11. Bring the sauce mixture to a boil over medium heat, stirring constantly with a whisk for 1-2 minutes until thickened to a gravy consistency.
12. Remove the sauce from heat once it coats the back of a spoon.
What I love most about this dish is the delightful contrast between the fluffy, slightly crisp exterior and the tender, vegetable-studded interior. The savory gravy adds that perfect umami punch that makes this feel like restaurant-quality comfort food. Sometimes I’ll serve it over steamed jasmine rice, but it’s equally fantastic wrapped in lettuce leaves for a lighter take.
Chinese Tea Egg
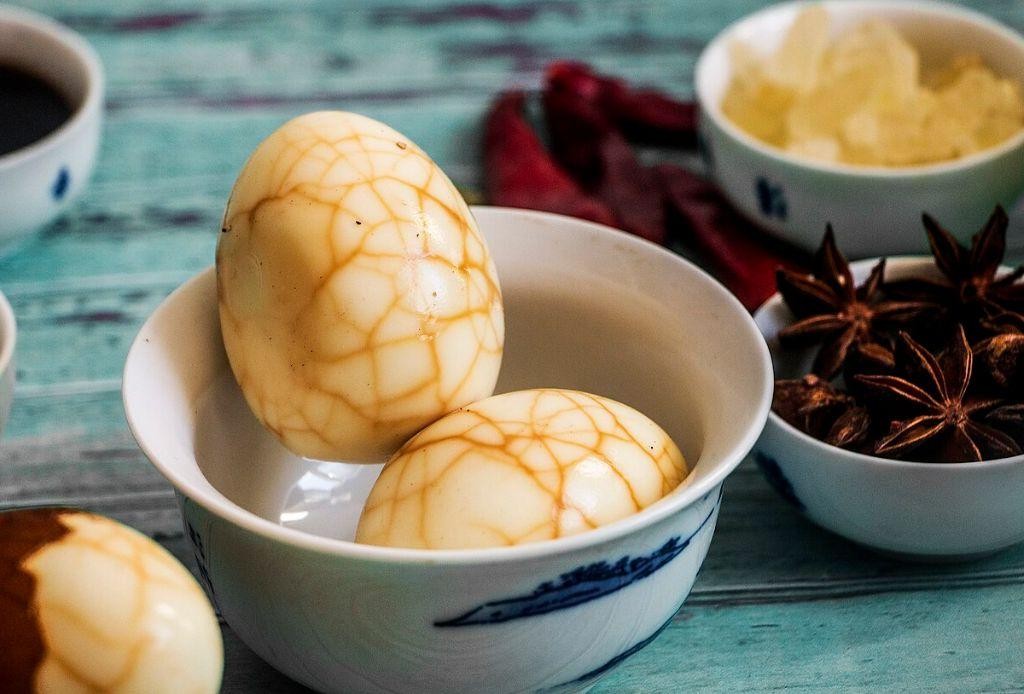
Just last week, I found myself craving that incredible marbled snack I first tried at a Chinatown market years ago – Chinese tea eggs have this magical way of transporting you with every savory, spiced bite. I love how these humble eggs transform into something truly special with just a few pantry staples, and they’ve become my go-to for impressing guests without spending hours in the kitchen.
6
servings15
minutes68
minutesIngredients
– 6 large eggs (room temperature cracks less during boiling)
– 2 tablespoons black tea leaves (or 4 tea bags for easier cleanup)
– 1/4 cup soy sauce (light soy sauce preferred for better color)
– 1 tablespoon dark soy sauce (for that rich mahogany hue)
– 1 star anise pod (whole)
– 1 cinnamon stick (about 3 inches)
– 1 teaspoon sugar (balances the saltiness)
– 4 cups water (enough to fully submerge eggs)
Instructions
1. Place 6 large eggs in a single layer at the bottom of a medium saucepan.
2. Add enough cold water to cover the eggs by 1 inch.
3. Bring the water to a rolling boil over high heat.
4. Once boiling, reduce heat to medium and set a timer for 8 minutes.
5. While eggs boil, prepare an ice bath by filling a large bowl with cold water and ice cubes.
6. Transfer the boiled eggs immediately to the ice bath using a slotted spoon.
7. Let eggs cool in the ice bath for exactly 5 minutes until completely cool to touch.
8. Gently tap each egg all over with the back of a spoon to create a web of fine cracks.
9. Return the cracked eggs to the same saucepan.
10. Add 2 tablespoons black tea leaves, 1/4 cup soy sauce, 1 tablespoon dark soy sauce, 1 star anise pod, 1 cinnamon stick, and 1 teaspoon sugar to the pan.
11. Pour 4 cups of fresh water over the eggs and spices.
12. Bring the mixture to a boil over high heat.
13. Reduce heat to low, cover the pan, and simmer for 1 hour.
14. Turn off the heat and let the eggs steep in the cooking liquid for at least 2 hours or overnight in the refrigerator.
15. Peel the eggs carefully, revealing the beautiful marbled pattern.
During that long simmer, the spiced tea mixture works its magic, seeping through the cracks to create those stunning marble patterns while infusing every bite with complex, savory flavor. These tea eggs make fantastic picnic additions or elegant appetizers when halved to show off their beautiful interiors – I love serving them slightly chilled with a sprinkle of flaky sea salt.
Moo Shu Pork with Scrambled Eggs
Finally, after years of experimenting with different takeout favorites at home, I’ve perfected my version of Moo Shu Pork with Scrambled Eggs—the kind of dish that makes my family actually cheer when they smell it cooking. There’s something magical about how the tender pork, fluffy eggs, and crisp vegetables come together in those warm tortillas that just feels like a cozy restaurant experience right in our kitchen.
8
servings15
minutes10
minutesIngredients
- 1 lb pork tenderloin, thinly sliced (freeze for 15 minutes first for easier slicing)
- 4 large eggs, beaten (room temperature eggs scramble fluffier)
- 2 tbsp vegetable oil (or any neutral oil with high smoke point)
- 1 cup shredded cabbage (green cabbage works best for crunch)
- 1/2 cup shredded carrots (pre-shredded saves time)
- 1/4 cup sliced shiitake mushrooms (dried work too—just rehydrate first)
- 2 tbsp hoisin sauce (plus extra for serving)
- 1 tbsp soy sauce (low-sodium if preferred)
- 1 tsp sesame oil (for that authentic finish)
- 2 cloves garlic, minced (fresh makes all the difference)
- 1 tsp grated ginger (frozen ginger works in a pinch)
- 8 small flour tortillas (warmed according to package directions)
Instructions
- Heat a large skillet or wok over medium-high heat until a drop of water sizzles immediately.
- Add 1 tablespoon vegetable oil and swirl to coat the entire cooking surface evenly.
- Add sliced pork and cook for 3-4 minutes, stirring constantly, until no pink remains and edges are lightly browned.
- Transfer cooked pork to a clean plate, leaving any drippings in the skillet.
- Reduce heat to medium and add remaining 1 tablespoon oil to the same skillet.
- Pour beaten eggs into the skillet and let them set for 30 seconds without stirring.
- Gently push cooked edges toward the center with a spatula, tilting the skillet to let uncooked egg flow to the edges.
- Continue cooking eggs for 1-2 minutes total until softly set but still slightly moist, then transfer to the plate with pork.
- Increase heat back to medium-high and add garlic and ginger to the skillet, cooking for exactly 30 seconds until fragrant but not browned.
- Add shredded cabbage, carrots, and mushrooms, stirring constantly for 2-3 minutes until vegetables are tender-crisp.
- Return pork and eggs to the skillet, breaking up the eggs into bite-sized pieces with your spatula.
- Add hoisin sauce and soy sauce, stirring to combine everything thoroughly for 1 minute until heated through.
- Drizzle with sesame oil and give one final stir before removing from heat.
- Warm tortillas according to package directions—I prefer heating them directly over a gas flame for 10-15 seconds per side for light charring.
Oh, the contrast between the soft scrambled eggs and the crisp-tender vegetables wrapped in warm tortillas creates such satisfying textures. That savory hoisin flavor melds beautifully with the subtle sesame finish, making each bite better than the last—we sometimes even use lettuce cups instead of tortillas for a lighter version that’s equally delicious.
Chinese Egg Fried Rice
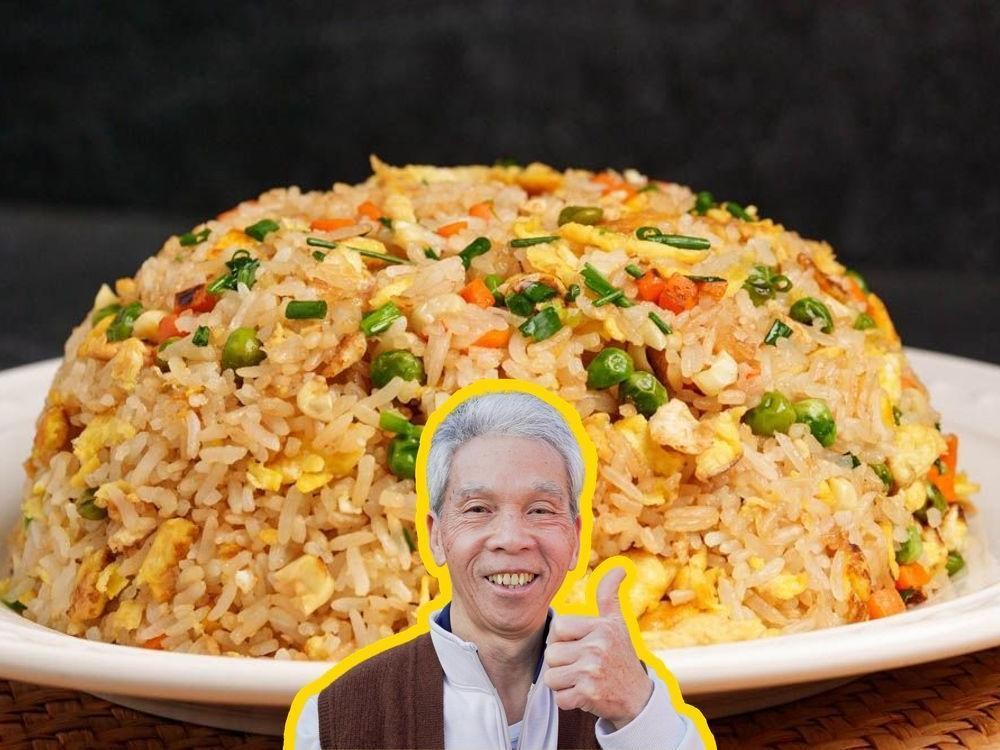
Whenever I find myself with leftover rice and a craving for something comforting yet exciting, Chinese egg fried rice is my absolute go-to. I remember my college roommate teaching me her family’s method—starting with cold rice was the game-changer that transformed my soggy attempts into perfect, separate grains. Now it’s my favorite quick dinner that feels both nostalgic and fresh every single time.
2
servings5
minutes5
minutesIngredients
– 3 cups cold cooked white rice (day-old works best for texture)
– 3 large eggs (room temperature for better scrambling)
– 2 tablespoons vegetable oil (or any neutral oil with high smoke point)
– 1/2 cup frozen peas and carrots mix (no need to thaw)
– 2 tablespoons soy sauce (light soy preferred for color)
– 1 teaspoon sesame oil (adds authentic finishing flavor)
– 2 green onions, sliced (reserve some greens for garnish)
– 1/4 teaspoon white pepper (black pepper works too)
Instructions
1. Break 3 large eggs into a small bowl and whisk vigorously with a fork until completely uniform and frothy, about 30 seconds.
2. Heat a large wok or skillet over medium-high heat until a drop of water sizzles and evaporates immediately upon contact.
3. Add 2 tablespoons vegetable oil and swirl to coat the entire cooking surface evenly.
4. Pour the whisked eggs into the hot oil and let them set for 10 seconds without stirring.
5. Use a spatula to scramble the eggs by pushing them from the edges toward the center, creating large curds, for about 45 seconds until just cooked through but still moist.
6. Transfer the scrambled eggs to a clean plate immediately to prevent overcooking.
7. Add the 3 cups cold cooked rice to the same wok, breaking up any clumps with your spatula against the hot surface.
8. Stir-fry the rice for 2 minutes until heated through and individual grains separate easily.
9. Add 1/2 cup frozen peas and carrots mix and continue stir-frying for 1 minute until vegetables are heated but still crisp.
10. Return the scrambled eggs to the wok, breaking them into smaller pieces as you mix them with the rice and vegetables.
11. Drizzle 2 tablespoons soy sauce around the edges of the wok so it sizzles and caramelizes slightly before mixing in.
12. Add 1/4 teaspoon white pepper and most of the sliced green onions, reserving about 1 tablespoon for garnish.
13. Stir everything together continuously for 30 seconds until well combined and heated through.
14. Remove the wok from heat and drizzle 1 teaspoon sesame oil over the fried rice, tossing gently to distribute the aroma.
Nothing beats that perfect combination of fluffy rice with tender egg curds and the subtle crunch of vegetables. I love serving this topped with extra green onions and sometimes a fried egg for what my friends call “egg-ception”—it makes for a stunning presentation that always impresses dinner guests.
Shrimp and Scallion Egg Pancake

Last week, I found myself with some leftover shrimp and a bunch of scallions that needed using up—this savory pancake was the delicious result! It’s become my new favorite quick dinner that feels fancy but comes together in under 20 minutes. Honestly, I love how versatile this dish is—perfect for breakfast, lunch, or a light dinner with a simple salad.
1
pancake8
minutes9
minutesIngredients
– 8 oz raw shrimp, peeled and deveined (thawed if frozen)
– 4 large eggs
– 1/2 cup thinly sliced scallions (both green and white parts)
– 2 tbsp vegetable oil (or any neutral oil with high smoke point)
– 1/4 tsp salt
– 1/8 tsp black pepper
– 1 tbsp soy sauce (or tamari for gluten-free)
Instructions
1. Pat the shrimp completely dry with paper towels to ensure they sear properly instead of steaming.
2. Chop the shrimp into 1/2-inch pieces and place in a medium bowl.
3. Crack the eggs into the same bowl with the shrimp.
4. Add the sliced scallions, salt, pepper, and soy sauce to the bowl.
5. Whisk the mixture vigorously for 30 seconds until well combined and slightly frothy.
6. Heat a 10-inch non-stick skillet over medium heat for 2 minutes until hot.
7. Pour the vegetable oil into the hot skillet and swirl to coat the bottom evenly.
8. Pour the egg and shrimp mixture into the skillet, spreading it into an even layer.
9. Cook undisturbed for 3-4 minutes until the edges are set and golden brown.
10. Carefully flip the pancake using a large spatula—this takes practice, so don’t worry if it breaks a little.
11. Cook the second side for 2-3 minutes until golden brown and the shrimp pieces are pink and opaque.
12. Transfer the pancake to a cutting board and let rest for 1 minute before slicing.
Finally, this pancake has the most wonderful contrast of textures—crispy edges with tender shrimp throughout. For a fun twist, I sometimes serve it with a spicy mayo dipping sauce or tuck slices into warm tortillas for breakfast tacos. The scallions add just enough freshness to balance the rich eggs and sweet shrimp beautifully.
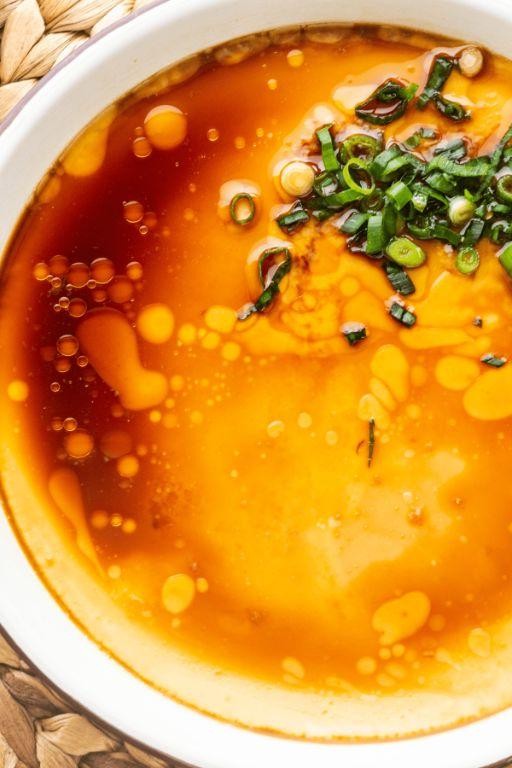
Hot and Sour Soup with Eggs
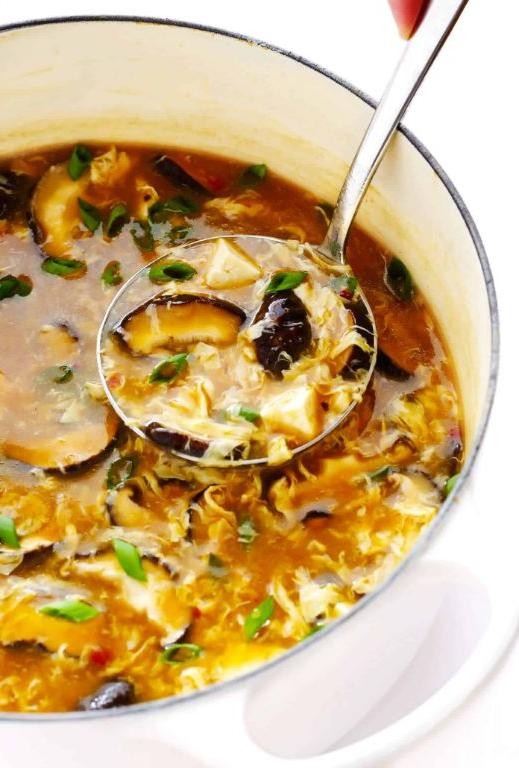
Finally, there’s something magical about how a simple bowl of hot and sour soup can transport me right back to my grandma’s kitchen on a chilly autumn day—it’s the ultimate comfort food that never fails to hit the spot. I love making this version with eggs because it adds a silky richness that balances the tangy, spicy broth perfectly, and it’s become my go-to for quick weeknight dinners when I’m craving something warm and satisfying. Trust me, once you try this, you’ll wonder why you ever ordered takeout!
2
servings10
minutes15
minutesIngredients
– 4 cups chicken broth (or vegetable broth for a vegetarian option)
– 2 tbsp soy sauce (use tamari for gluten-free)
– 1 tbsp rice vinegar (adjust for more tang)
– 1 tsp sesame oil (toasted for deeper flavor)
– 1/2 tsp white pepper (freshly ground works best)
– 2 eggs, lightly beaten
– 1/2 cup sliced shiitake mushrooms (rehydrated if using dried)
– 1/4 cup bamboo shoots, sliced (canned is fine, just drain well)
– 1 tbsp cornstarch mixed with 2 tbsp water (for thickening)
– 2 green onions, thinly sliced (for garnish)
Instructions
1. Pour 4 cups of chicken broth into a medium saucepan and heat over medium-high heat until it reaches a gentle simmer, which should take about 5–7 minutes.
2. Add 1/2 cup sliced shiitake mushrooms and 1/4 cup bamboo shoots to the simmering broth, stirring to combine, and cook for 4 minutes until the mushrooms soften slightly.
3. Stir in 2 tbsp soy sauce, 1 tbsp rice vinegar, 1 tsp sesame oil, and 1/2 tsp white pepper, mixing well to incorporate all flavors evenly.
4. In a small bowl, whisk 1 tbsp cornstarch with 2 tbsp water until smooth to create a slurry, then slowly pour it into the soup while stirring continuously to prevent lumps.
5. Cook the soup for 2–3 minutes, stirring occasionally, until it thickens slightly and coats the back of a spoon.
6. Slowly drizzle 2 lightly beaten eggs into the soup in a thin stream, using a fork to gently swirl the broth as you pour to create delicate egg ribbons.
7. Let the soup cook for 1 minute without stirring to allow the eggs to set fully, then remove from heat immediately to avoid overcooking.
8. Ladle the hot and sour soup into bowls and garnish with 2 thinly sliced green onions for a fresh, colorful finish.
Just imagine that first spoonful—the broth is velvety and rich from the eggs, with a bold kick of heat and tang that lingers on your tongue. I love serving this with a side of crispy wonton strips for extra crunch, or even tossing in some leftover shredded chicken to make it heartier. It’s the kind of dish that feels like a warm hug, perfect for cozying up on a lazy evening.
Chinese Egg Tarts
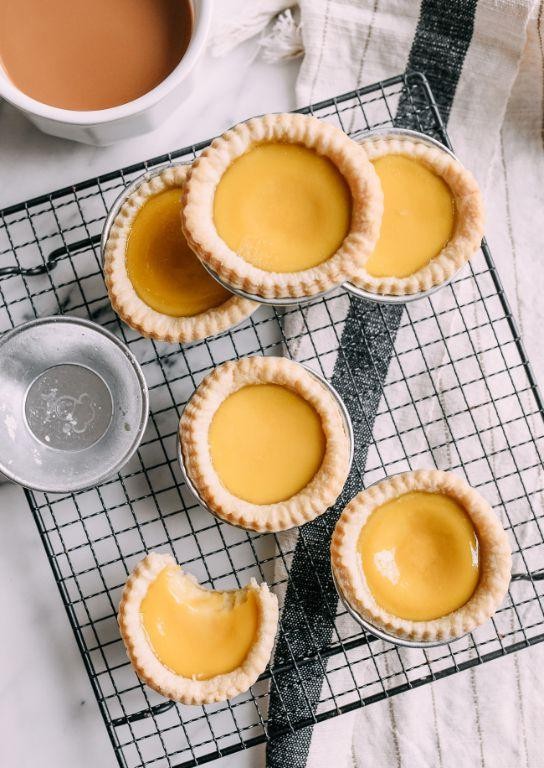
Finally, after years of trying to recreate that perfect bakery-style Chinese egg tart from my favorite Chinatown spot, I’ve landed on this foolproof recipe that delivers that signature flaky crust and silky custard every single time. There’s something magical about pulling these golden beauties from the oven—the way the kitchen fills with the sweet scent of butter and warm eggs always takes me right back to those Saturday morning bakery runs with my dad. Trust me, once you master these, you’ll be the star of every potluck.
12
tarts30
minutes20
minutesIngredients
– 1 ½ cups all-purpose flour (plus extra for dusting)
– ½ cup unsalted butter, chilled and cubed (cold butter makes flakier crust)
– 2 tbsp granulated sugar
– ¼ tsp salt
– 3-4 tbsp ice water (add gradually until dough comes together)
– 3 large eggs
– ½ cup granulated sugar
– ¾ cup whole milk (for richest custard texture)
– ½ cup heavy cream
– 1 tsp vanilla extract
– ¼ tsp nutmeg, freshly grated (optional, but adds warmth)
Instructions
1. Combine 1 ½ cups flour, ½ cup chilled butter cubes, 2 tbsp sugar, and ¼ tsp salt in a food processor.
2. Pulse the mixture for 15 seconds until it resembles coarse crumbs with pea-sized butter pieces.
3. Add 3 tbsp ice water through the feed tube while pulsing for 10 more seconds.
4. Check dough consistency—it should hold together when pressed between fingers; add remaining 1 tbsp water if too dry.
5. Turn dough onto floured surface and gently shape into a disk about 1-inch thick.
6. Wrap the dough tightly in plastic wrap and refrigerate for exactly 30 minutes to relax gluten.
7. Preheat your oven to 375°F and position rack in center position.
8. Lightly grease 12 standard muffin tin cups with butter or cooking spray.
9. Roll chilled dough to ⅛-inch thickness on floured surface, rotating dough to prevent sticking.
10. Cut dough into 12 circles using a 3 ½-inch round cutter, re-rolling scraps as needed.
11. Press each dough circle into prepared muffin cups, ensuring even coverage up the sides.
12. Prick bottom of each tart shell 4-5 times with a fork to prevent puffing during baking.
13. Whisk 3 eggs and ½ cup sugar in medium bowl until sugar dissolves completely, about 2 minutes.
14. Heat ¾ cup milk and ½ cup heavy cream in saucepan over medium heat until steaming (150°F).
15. Slowly pour warm milk mixture into egg mixture while whisking constantly to temper eggs.
16. Stir in 1 tsp vanilla extract and ¼ tsp nutmeg until fully incorporated.
17. Strain custard through fine-mesh sieve into pouring jug to remove any egg strands.
18. Fill each tart shell with custard to ¼-inch below the rim, avoiding overfilling.
19. Bake at 375°F for 18-20 minutes until edges are golden and centers jiggle slightly.
20. Cool tarts in pan for 5 minutes before transferring to wire rack. Perfectly creamy custard should set fully as they cool—that slight jiggle is your cue to pull them out. Personally, I love serving these warm with a dusting of cinnamon or alongside strong coffee for that classic dim sum experience. The contrast between the shatteringly crisp pastry and that velvety, just-sweet-enough filling never fails to impress, and they’re even better the next day if you can resist eating them all at once!
Bitter Melon and Eggs Stir-Fry

Wandering through my local Asian market last weekend, I spotted those bumpy green bitter melons and remembered how my grandmother would make this dish to “cleanse the system” after holiday indulgences. While the bitterness might intimidate some, I’ve learned that proper preparation transforms it into something wonderfully complex and satisfying.
3
servings20
minutes7
minutesIngredients
– 2 medium bitter melons (about 1 pound total), sliced thin
– 4 large eggs, beaten
– 2 tablespoons vegetable oil (or any neutral oil)
– 1 tablespoon soy sauce
– 1 teaspoon sugar (balances the bitterness)
– 2 cloves garlic, minced
– 1/4 teaspoon salt
– 1/4 cup water
Instructions
1. Cut bitter melons in half lengthwise and scoop out the white pith and seeds with a spoon.
2. Slice the bitter melons into 1/4-inch thick half-moons using a sharp knife.
3. Place sliced bitter melons in a bowl and sprinkle with 1/4 teaspoon salt, then toss to coat evenly.
4. Let the salted bitter melons sit for 15 minutes to draw out excess moisture and reduce bitterness.
5. Rinse the bitter melons thoroughly under cold running water and squeeze out as much liquid as possible with your hands.
6. Heat 2 tablespoons vegetable oil in a large skillet over medium-high heat until shimmering, about 350°F.
7. Add minced garlic to the hot oil and cook for 30 seconds until fragrant but not browned.
8. Add the prepared bitter melon slices to the skillet and stir-fry for 3-4 minutes until they turn bright green and slightly softened.
9. Pour 1/4 cup water into the skillet and cover with a lid, then steam for 2 minutes until the melon is tender-crisp.
10. Push the bitter melon to one side of the skillet and pour the beaten eggs into the empty space.
11. Let the eggs set for 30 seconds before scrambling them gently with your spatula.
12. Combine the eggs with the bitter melon and stir everything together.
13. Add 1 tablespoon soy sauce and 1 teaspoon sugar to the skillet, then stir-fry for 1 more minute until everything is well combined.
14. Remove from heat and transfer to a serving plate immediately.
The finished dish has this wonderful contrast between the pleasantly bitter melon and the creamy, rich eggs that just works together beautifully. I love serving it over steaming jasmine rice to soak up all the savory juices, or sometimes I’ll wrap it in lettuce leaves for a low-carb option that still feels satisfying.
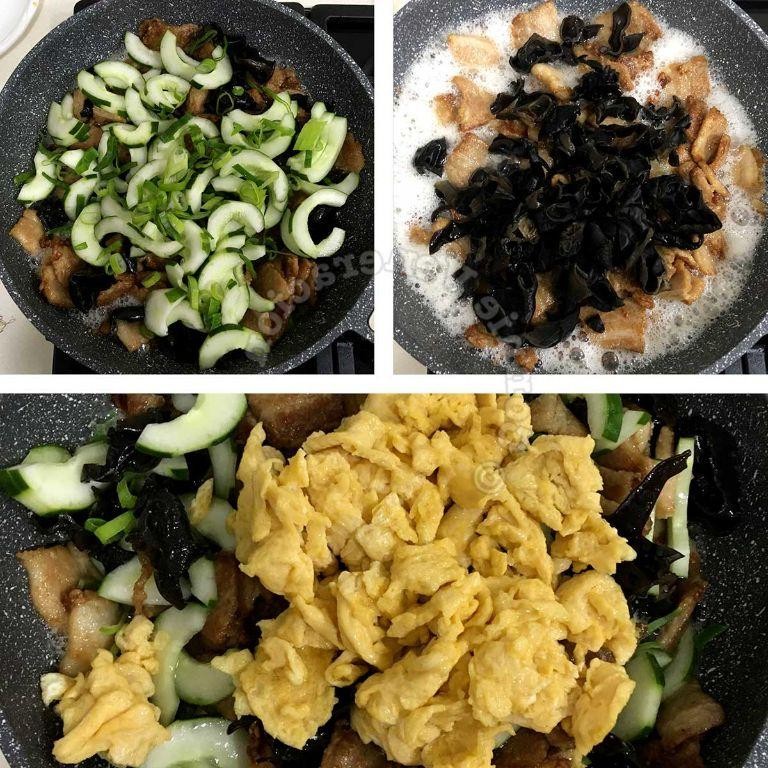
Cantonese Scrambled Eggs with Shrimp
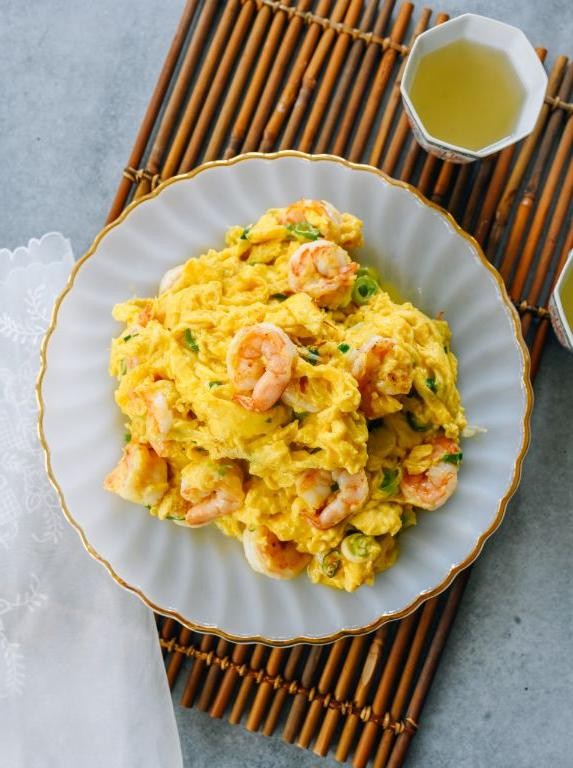
Having just returned from a food crawl in San Francisco’s Chinatown, I was determined to recreate that silky, delicate scrambled egg dish I fell in love with at a tiny family-run restaurant. Here’s my take on Cantonese scrambled eggs with shrimp—it’s become my go-to weeknight dinner when I want something comforting yet impressive.
3
servings10
minutes5
minutesIngredients
- 6 large eggs (room temperature for fluffier texture)
- 8 oz raw medium shrimp, peeled and deveined (thawed if frozen)
- 2 tbsp vegetable oil (or any neutral oil with high smoke point)
- 1/4 cup chopped scallions, green parts only
- 1/2 tsp salt (adjust to taste)
- 1/4 tsp white pepper (black pepper works too)
- 1 tsp cornstarch (for tender shrimp)
- 1 tbsp water (for egg mixture)
Instructions
- Pat shrimp completely dry with paper towels, then toss with cornstarch until lightly coated.
- Heat 1 tablespoon vegetable oil in a non-stick skillet over medium-high heat until shimmering (about 350°F).
- Add shrimp in a single layer and cook for 1 minute per side until pink but not fully cooked through.
- Transfer shrimp to a clean plate using tongs or a slotted spoon.
- Whisk eggs vigorously with salt, white pepper, and 1 tablespoon water until frothy and uniform in color.
- Reduce skillet heat to medium-low and add remaining 1 tablespoon oil.
- Pour egg mixture into skillet and let set for 15 seconds without stirring.
- Gently push cooked edges toward center with a spatula, tilting pan to let raw egg fill empty spaces.
- When eggs are 70% set (still glossy and wet), scatter cooked shrimp evenly over surface.
- Continue folding gently for 30 more seconds until eggs are softly set but not dry.
- Remove from heat immediately and fold in chopped scallions.
Resulting in clouds of tender egg cradling sweet, juicy shrimp, this dish sings when served over steamed jasmine rice to catch every last bit of its delicate richness. Try topping with a drizzle of chili crisp for a spicy contrast that’ll make you forget takeout ever existed.
Conclusion
This treasure trove of Chinese egg dishes proves how versatile and delicious eggs can be in every meal. We hope these recipes inspire your next kitchen adventure! Try a few, leave a comment with your favorites, and don’t forget to share this article on Pinterest to spread the egg-cellent ideas.