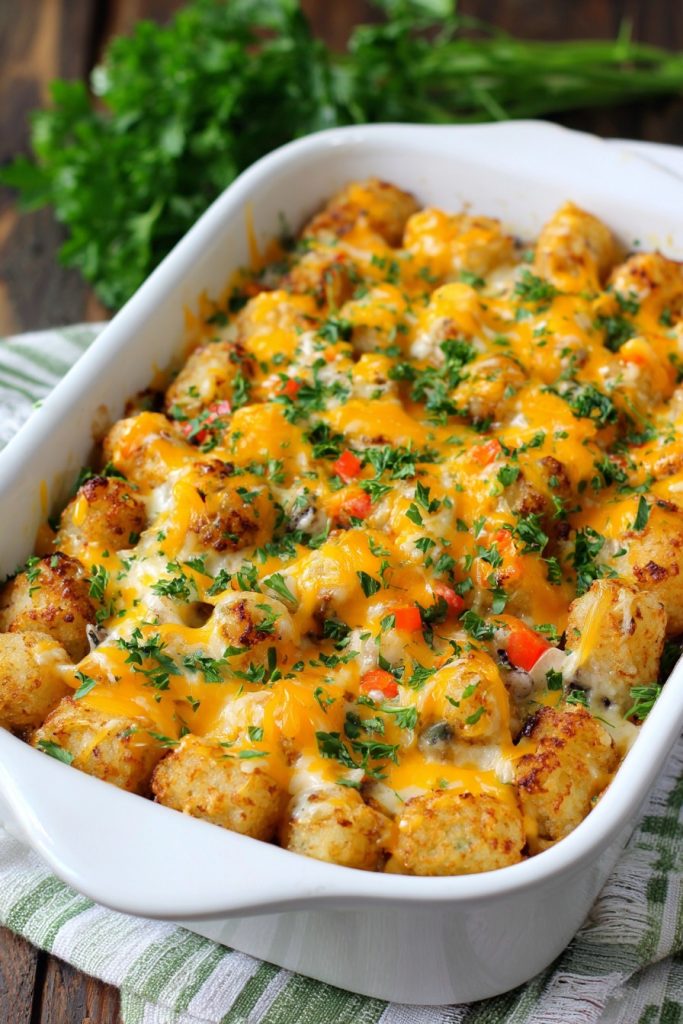
Hang onto your aprons, comfort food lovers! This chicken tater tot casserole is about to become your new weeknight hero. How can you possibly resist that golden, crispy tater tot topping hiding a creamy, cheesy chicken filling underneath? Honestly, it’s like all your favorite childhood foods decided to throw a party in one glorious baking dish.
Why This Recipe Works
- The genius layering of crispy tater tots over a creamy chicken and vegetable mixture creates the perfect textural contrast that will have everyone coming back for seconds
- Using condensed cream of chicken soup as the base ensures a rich, velvety sauce that coats every ingredient beautifully without requiring complicated roux-making skills
- Frozen mixed vegetables add color, nutrition, and convenience while maintaining their perfect texture through the baking process
- The combination of sharp cheddar and creamy mozzarella cheeses creates a complex flavor profile that melts into gooey perfection
- Pre-baking the tater tots for 10 minutes before assembling guarantees that ultimate crispy-on-top, tender-underneath texture we all crave
Ingredients
- 2 pounds frozen tater tots
- 1.5 pounds boneless, skinless chicken breasts, diced into 1-inch pieces
- 1 tablespoon olive oil
- 1 medium yellow onion, finely diced
- 2 cloves garlic, minced
- 1 (10.5 ounce) can condensed cream of chicken soup
- 1 cup sour cream
- 1 cup whole milk
- 2 cups frozen mixed vegetables (peas, carrots, corn, green beans)
- 1.5 cups shredded sharp cheddar cheese, divided
- 1 cup shredded mozzarella cheese
- 1 teaspoon paprika
- 1/2 teaspoon black pepper
- 1/2 teaspoon salt
- 1/4 teaspoon cayenne pepper (optional)
- 2 tablespoons fresh parsley, chopped (for garnish)
Equipment Needed
- 9×13 inch baking dish
- Large skillet
- Mixing bowls
- Wooden spoon or spatula
- Measuring cups and spoons
- Cutting board and chef’s knife
- Aluminum foil
Instructions

Preheat and Prep Your Tater Tots
Preheat your oven to 425°F and grab that 9×13 inch baking dish. Spread all 2 pounds of frozen tater tots in a single layer across the bottom of the dish—this might feel like you’re building a delicious potato mosaic, and you absolutely are! Pop those beauties into the preheated oven for exactly 10 minutes. This initial bake is crucial because it starts the crisping process and prevents the bottom layer from getting soggy later. While they’re baking, you’ll have just enough time to prepare the creamy chicken filling. Set your timer because we want golden, not burned, potato nuggets of joy!
Cook the Chicken and Aromatics
Heat 1 tablespoon of olive oil in a large skillet over medium-high heat until it shimmers—you should see little waves forming in the oil when it’s ready. Add your 1-inch diced chicken pieces in a single layer, working in batches if needed to avoid overcrowding. Cook for 5-7 minutes, turning occasionally, until the chicken develops golden brown spots and reaches an internal temperature of 165°F. Remove the chicken and set aside. In the same skillet, add your finely diced onion and cook for 3-4 minutes until translucent, then add the minced garlic and cook for 30 seconds until fragrant. The key here is building layers of flavor using the delicious browned bits left from the chicken!
Create the Creamy Sauce Base
Layer and Cheese Like a Pro
Your pre-baked tater tots should be out of the oven now—they’ll be lightly golden but not fully cooked. Carefully pour the chicken and vegetable mixture evenly over the tater tots, spreading it with a spatula to cover every last potato nugget. Now for the cheesy magic: sprinkle 1 cup of shredded sharp cheddar cheese followed by 1 cup of shredded mozzarella cheese evenly over the entire surface. The combination of these two cheeses creates the perfect meltability and flavor balance. Reserve that remaining 1/2 cup of cheddar for the final topping later. Cover the dish tightly with aluminum foil—this will help the casserole heat through without over-browning the cheese too quickly.
The Main Bake to Perfection
Place your covered casserole back into the 425°F oven and bake for 25 minutes. After this time, remove the foil—you should see bubbly edges and melted cheese that’s begging to get golden. Sprinkle the remaining 1/2 cup of cheddar cheese over the top and return to the oven, uncovered, for another 10-15 minutes. Watch carefully during these final minutes: you’re looking for deeply golden tater tot peaks, bubbly sauce around the edges, and cheese that’s spotted with beautiful brown bits. The internal temperature should reach at least 165°F in the center when tested with an instant-read thermometer.
Rest and Serve with Flair
Remove the casserole from the oven and let it rest on a wire rack for exactly 10 minutes—this is non-negotiable for perfect slicing! The resting time allows the sauce to thicken slightly and the layers to set, making serving much cleaner. While waiting, chop 2 tablespoons of fresh parsley for garnish. After 10 minutes, sprinkle the parsley over the top for a pop of color and freshness that cuts through the richness. Serve directly from the baking dish using a large spoon or spatula, making sure to get through all those glorious layers in each portion. The contrast between the crispy top and creamy interior will have everyone making happy food noises!
Tips and Tricks
If you want to take this casserole from great to legendary, consider these pro tips. For the crispiest possible tater tot topping, arrange them in a single layer with a little space between each tot—they’ll crisp up better than if they’re crowded together. You can also spray them lightly with cooking spray before that initial bake for extra crunch. When dicing your chicken, make sure all pieces are uniform in size (about 1-inch cubes) so they cook evenly and nobody ends up with overdone or undercooked chicken in their portion.
For the creamiest sauce possible, take your condensed soup, sour cream, and milk out of the refrigerator about 20 minutes before using them—room temperature ingredients incorporate much more smoothly and prevent the sauce from breaking or becoming grainy. If you’re concerned about sodium, you can use low-sodium condensed soup and reduce the added salt by half, then taste and adjust at the end. The frozen vegetables should go in straight from the freezer—don’t thaw them first or they’ll become mushy in the sauce.
Cheese selection matters more than you might think! Pre-shredded cheeses contain anti-caking agents that can affect meltability, so for the creamiest results, buy block cheese and shred it yourself. The combination of cheddar for flavor and mozzarella for stretch is perfect, but you could also try Monterey Jack, Colby, or even a pepper Jack for some spice. If you notice your cheese browning too quickly during the final bake, you can tent the dish loosely with foil while continuing to bake until heated through.
Make-ahead options abound with this recipe! You can prepare the entire casserole up through the layering step, cover tightly, and refrigerate for up to 24 hours before baking. When ready, you may need to add 5-10 minutes to the baking time since it’s starting cold from the refrigerator. Leftovers reheat beautifully in the oven at 350°F for 15-20 minutes, or in the air fryer for 5-7 minutes at 375°F to restore that crispy top. For freezing, assemble without baking, wrap tightly in multiple layers, and freeze for up to 3 months—bake from frozen, adding 20-30 minutes to the covered baking time.
Recipe Variations
- Buffalo Chicken Twist: Replace the cream of chicken soup with cream of celery, add 1/2 cup of buffalo sauce to the filling, and use blue cheese crumbles instead of mozzarella. Top with extra buffalo sauce and chopped celery for serving—this variation brings game-day energy to your dinner table with that perfect spicy kick balanced by cool, creamy elements.
- Mexican Fiesta Version: Swap the cream of chicken for cream of mushroom, add 1 packet of taco seasoning to the filling, use a Mexican cheese blend, and top with crushed tortilla chips instead of extra cheese. Serve with salsa, guacamole, and sour cream on the side—this transformation takes your casserole south of the border with vibrant flavors and textures that everyone will love.
- Breakfor-Dinner Style: Use breakfast sausage instead of chicken, add diced bell peppers, and mix in some thawed hash browns with the tater tots. Top with a fried egg per serving—who says you can’t have breakfast for dinner? This variation is particularly great for brunch gatherings or when you need ultimate comfort food.
- Vegetarian Delight: Omit the chicken and use two cans of drained and rinsed black beans or chickpeas, add extra vegetables like mushrooms and spinach, and use cream of mushroom soup. You’ll still get plenty of protein and fiber while making it plant-based—even meat-lovers won’t miss the chicken in this hearty, satisfying version.
- Italian Inspired: Use Italian seasoning blend instead of paprika, add sun-dried tomatoes and spinach, use Italian cheese blend, and top with garlic bread crumbs mixed with Parmesan. This Mediterranean twist brings herbal notes and tangy tomato flavor that pairs beautifully with the creamy base and crispy potato topping.
Frequently Asked Questions
Can I use fresh potatoes instead of frozen tater tots?
While you certainly can use homemade potato pieces, frozen tater tots are specifically engineered to maintain their structure and crispiness through the baking process. If you substitute with fresh potatoes, I’d recommend parboiling 1/2-inch potato cubes for 5 minutes, draining thoroughly, then tossing with 1 tablespoon of oil and your favorite seasonings before arranging in the dish. The texture will be different—more like a potato bake than the distinct tater tot experience—but still delicious. The convenience factor of frozen tots is hard to beat for weeknight meals!
How can I make this recipe gluten-free?
Great news—this recipe adapts beautifully to gluten-free needs! Simply ensure your condensed cream of chicken soup is gluten-free (several brands offer GF versions), and double-check that your tater tots are made without wheat-based ingredients (many frozen potato products are naturally GF but always verify). The remaining ingredients are typically gluten-free, but watch for hidden gluten in spice blends or pre-shredded cheeses. I’ve made this with gluten-free alternatives many times, and nobody could tell the difference in taste or texture!
What’s the best way to store and reheat leftovers?
Store cooled leftovers in an airtight container in the refrigerator for up to 4 days. For reheating, the oven method is best: place portions in an oven-safe dish, cover with foil, and bake at 350°F for 15-20 minutes until heated through. For single servings, the air fryer works miracles—375°F for 5-7 minutes restores that crispy top beautifully. Microwave reheating will work in a pinch but will sacrifice the textural contrast that makes this casserole special. I don’t recommend freezing after baking as the dairy sauce can separate upon thawing.
Can I prepare this casserole ahead of time?
Absolutely! This is one of those magical make-ahead meals. You can assemble the entire casserole up through the cheese layer, cover tightly with plastic wrap and then foil, and refrigerate for up to 24 hours before baking. When ready to bake, remove the plastic wrap, recover with foil, and add 10-15 minutes to the covered baking time since it’s starting cold. You can also freeze the unbaked casserole for up to 3 months—thaw overnight in the refrigerator before baking as directed. The make-ahead option makes this perfect for potlucks, new parents, or busy weeknights!
What can I serve alongside this casserole?
This casserole is quite substantial on its own, but if you want to round out the meal, a simple green salad with vinaigrette provides fresh contrast to the rich, creamy casserole. Garlic bread or dinner rolls are perfect for soaking up any extra sauce, and roasted vegetables like broccoli or green beans complement without competing. For a lighter option, a fruit salad or cucumber tomato salad adds brightness. Honestly, this dish stands proudly on its own—it’s basically a complete meal in one baking dish!
Summary
This chicken tater tot casserole combines crispy, golden potatoes with creamy chicken and vegetables for the ultimate comfort food experience. With make-ahead options and endless variations, it’s sure to become a family favorite that delivers both convenience and incredible flavor in every bite.
Chicken Tater Tot Casserole
4
servings20
minutes45
minutesIngredients
Instructions
- 1 Preheat oven to 425°F. Arrange tater tots in single layer in 9x13 inch baking dish. Bake for 10 minutes.
- 2 Heat oil in large skillet over medium-high heat. Cook chicken until golden and reaches 165°F internally. Remove and set aside.
- 3 In same skillet, cook onion until translucent, add garlic for 30 seconds. Reduce heat to medium.
- 4 Add soup, sour cream, and milk. Whisk until smooth. Add spices, vegetables, and return chicken to skillet. Cook 3-4 minutes.
- 5 Pour mixture over pre-baked tater tots. Top with 1 cup cheddar and all mozzarella cheese.
- 6 Cover with foil and bake 25 minutes. Uncover, add remaining 1/2 cup cheddar, bake 10-15 minutes until golden and bubbly.
- 7 Rest 10 minutes before serving. Garnish with fresh parsley.


