Ditch the dough and dive into a pizza revolution that’ll make your taste buds do a happy dance! Did you ever imagine that your favorite Friday night treat could get a protein-packed makeover that’s actually good for you? Deliciously crispy, surprisingly easy, and packed with flavor, this chicken pizza crust is about to become your new go-to for guilt-free indulgence.
Why This Recipe Works
- This recipe transforms simple ground chicken into a sturdy, crispy crust that holds up to all your favorite toppings without getting soggy, thanks to the perfect balance of protein and binding agents.
- By using almond flour and Parmesan cheese instead of traditional bread crumbs, we achieve a golden-brown, flavorful base that’s naturally low-carb and gluten-free while maintaining that satisfying crunch you crave.
- The combination of Italian seasoning and garlic powder baked right into the crust means every bite is bursting with flavor before you even add your sauce and toppings, elevating your pizza experience from ordinary to extraordinary.
- Unlike many alternative crusts that can be finicky or fall apart, this version is remarkably forgiving and easy to handle, making it perfect for both weeknight dinners and impressing guests at your next pizza party.
- You get all the joy of pizza night while packing in serious protein power, keeping you full and satisfied without the carb coma that usually follows traditional pizza indulgence.
Ingredients
- 1 pound ground chicken (preferably 93% lean)
- 1/2 cup finely grated Parmesan cheese
- 1/4 cup almond flour
- 1 large egg, lightly beaten
- 2 teaspoons Italian seasoning
- 1 teaspoon garlic powder
- 1/2 teaspoon salt
- 1/4 teaspoon black pepper
- 1 tablespoon olive oil for brushing
- 1/2 cup your favorite pizza sauce
- 1 1/2 cups shredded mozzarella cheese
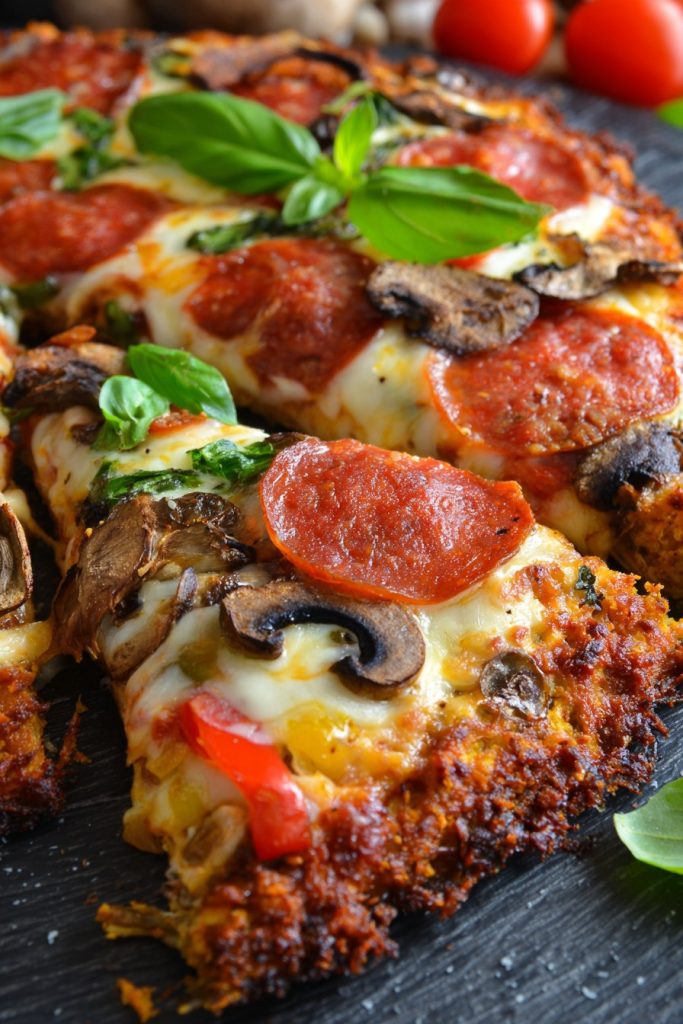
- Your favorite pizza toppings (pepperoni, mushrooms, bell peppers, etc.)
- Fresh basil leaves for garnish (optional)
Equipment Needed
- Large mixing bowl
- Parchment paper
- Baking sheet
- Rolling pin or your hands for pressing
- Measuring cups and spoons
- Oven
- Spatula
Instructions

Prepare Your Chicken Mixture
In a large mixing bowl, combine the ground chicken, grated Parmesan cheese, almond flour, beaten egg, Italian seasoning, garlic powder, salt, and black pepper. Use your hands to mix everything together thoroughly—yes, get in there and get messy! You want all ingredients evenly distributed throughout the chicken mixture. The almond flour and Parmesan will help absorb excess moisture while providing structure, and the egg acts as your binding agent to hold everything together. Mix for about 2-3 minutes until the mixture becomes slightly sticky and homogeneous. Pro tip: If the mixture feels too wet, you can add another tablespoon of almond flour, but be careful not to make it too dry either.
Shape Your Crust
Place a large piece of parchment paper on your work surface and lightly oil it or use a non-stick spray. Transfer the chicken mixture onto the parchment and form it into a ball. Using your hands or a rolling pin, press the mixture into a circle about 1/4-inch thick, aiming for a 12-inch diameter. Try to make the edges slightly thicker than the center to create a natural crust ridge. If the mixture sticks to your hands, lightly wet them with water. Take your time here—an evenly pressed crust will cook uniformly. Once shaped, use your fingers to create a slight rim around the edge to contain your toppings later.
Pre-Bake the Crust
Preheat your oven to 400°F. Carefully slide the parchment paper with your shaped crust onto a baking sheet. Lightly brush the entire surface with olive oil—this will help it develop a beautiful golden color and crispy texture. Bake for 15-18 minutes until the edges are starting to turn golden brown and the center feels firm to the touch. You should see some juices released around the edges—this is normal! The crust needs to be fully cooked through at this stage since we’ll be adding toppings and baking again briefly. Insider tip: If you notice any large bubbles forming during baking, gently press them down with a spatula.
Add Toppings and Final Bake
Remove the crust from the oven—it should be firm and lightly golden. Spread pizza sauce evenly over the surface, leaving about a 1/2-inch border around the edges. Sprinkle with shredded mozzarella cheese, then add your desired toppings. Return the pizza to the oven and bake for an additional 8-12 minutes at 400°F, until the cheese is fully melted and bubbly with some golden spots. Keep a close eye during these final minutes since the crust is already cooked and we just want to melt the cheese and warm the toppings.
Rest and Serve
Carefully remove the pizza from the oven and let it rest on the baking sheet for 5-7 minutes before slicing. This resting period is crucial—it allows the crust to firm up further and makes slicing much cleaner. Use a pizza cutter or sharp knife to slice into wedges. If using, garnish with fresh basil leaves for a pop of color and freshness. Serve immediately while hot and crispy. The crust will be sturdy enough to hold like traditional pizza but with a satisfying crunch that makes every bite absolutely delightful.
Tips and Tricks
For the crispiest possible crust, consider placing a pizza stone in your oven while it preheats and baking your crust directly on the hot stone—just make sure to use parchment paper between the crust and stone. If you’re watching your sodium intake, you can reduce the salt in the crust mixture and use low-sodium Parmesan cheese. For extra flavor infusion, try adding 1/2 teaspoon of onion powder or a pinch of red pepper flakes to the chicken mixture before baking. If your crust seems to be releasing too much liquid during baking, you can carefully blot the surface with paper towels halfway through the initial bake time—just be gentle to avoid breaking the crust. For meal prep enthusiasts, you can pre-bake multiple crusts, let them cool completely, then freeze between layers of parchment paper for up to 3 months—just add toppings and bake from frozen, adding a few extra minutes to the final bake time. If you prefer a thinner, crispier crust, press your mixture to 1/8-inch thickness and reduce the initial bake time by 2-3 minutes, watching carefully for doneness. For those who don’t eat pork, turkey pepperoni makes an excellent substitution that still gives you that classic pizza flavor. If you’re dairy-free, you can substitute nutritional yeast for the Parmesan and use your favorite dairy-free mozzarella alternative—just note that the crust may be slightly less crispy. Always use a digital meat thermometer to ensure your chicken reaches 165°F at the center during the initial bake for food safety. For extra crispy edges, you can brush the crust rim with a little more olive oil before the final bake with toppings. If you’re making this for kids who might be skeptical about chicken crust, try cutting it into fun shapes with cookie cutters after baking—sometimes presentation makes all the difference!
Recipe Variations
- Buffalo Chicken Style: Mix 2 tablespoons of hot sauce into the chicken mixture before shaping, then top with blue cheese crumbles, diced celery, and a drizzle of ranch dressing after baking for a pizza that tastes like your favorite wings.
- Mediterranean Twist: Add 1/4 cup of chopped sun-dried tomatoes and 2 tablespoons of chopped fresh basil to the chicken mixture, then top with artichoke hearts, kalamata olives, and feta cheese for a Greek-inspired flavor explosion.
- BBQ Chicken Pizza: Skip the pizza sauce and use your favorite barbecue sauce instead, topping with cooked shredded chicken, red onion slices, and Monterey Jack cheese for a sweet and smoky variation.
- Breakfast Pizza: Shape your crust as usual but top with scrambled eggs, cooked bacon or sausage crumbles, and cheddar cheese for the ultimate morning meal that’ll keep you full until lunch.
- Pesto Paradise: Replace the pizza sauce with basil pesto, then add sliced cherry tomatoes, fresh mozzarella pearls, and a sprinkle of pine nuts for a fresh, herbaceous take on pizza night.
Frequently Asked Questions
Can I use ground turkey instead of chicken?
Absolutely! Ground turkey works beautifully as a substitute for chicken in this recipe. You’ll want to use 93% lean ground turkey for the best results—anything too lean might make the crust dry, while higher fat content could make it greasy. The cooking times and temperatures remain exactly the same, and you might even find that turkey gives you a slightly milder flavor that lets your toppings shine even more. Just be sure to check that the internal temperature reaches 165°F during the initial bake to ensure it’s fully cooked and safe to eat.
How do I prevent the crust from sticking to the parchment?
The key to easy release is using enough oil or non-stick spray on your parchment paper before shaping the crust. I recommend brushing the parchment with about a teaspoon of olive oil or using a good quality non-stick cooking spray. Also, make sure you’re not trying to move the crust too soon after baking—let it rest for at least 5 minutes on the baking sheet before attempting to lift it. If you do encounter sticking, gently slide a thin spatula underneath while the crust is still warm rather than pulling it off forcefully.
Can I make this crust ahead of time?
You absolutely can! The crust actually holds up wonderfully when made in advance. After the initial bake, let the crust cool completely on the baking sheet, then transfer it to an airtight container or wrap it well in plastic wrap. It will keep in the refrigerator for up to 3 days. When ready to serve, add your toppings and bake at 400°F for 10-12 minutes until heated through and cheese is melted. You can also freeze the pre-baked crust for up to 3 months—just thaw in the refrigerator before topping and baking.
Why is my crust releasing so much liquid?
Some liquid release is normal since we’re working with ground chicken, but excessive liquid usually means your oven temperature might be too low or you’re using chicken with higher water content. Make sure your oven is fully preheated to 400°F before baking, and consider patting your ground chicken dry with paper towels before mixing if it seems particularly wet. Also, using the recommended 93% lean chicken helps—higher fat content can lead to more grease, while super lean chicken might be injected with water or broth.
How do I get my crust extra crispy?
For maximum crispiness, make sure you press your crust evenly to about 1/4-inch thickness—too thick and it might stay soft in the center. Brushing with olive oil before baking creates a beautiful golden crust, and baking on a preheated pizza stone or baking steel can make a significant difference. Also, don’t skip the initial bake without toppings—this crucial step allows the crust to firm up and develop structure before the moisture from sauce and toppings is added. Letting it rest after baking allows steam to escape, preventing sogginess.
Summary
This chicken pizza crust delivers all the satisfaction of pizza night with a protein-packed, low-carb twist that’s surprisingly easy to make and absolutely delicious. Crispy, flavorful, and endlessly customizable, it’s a game-changer for healthy eating without sacrifice.
Chicken Pizza Crust Recipe
4
servings15
minutes25
minutesIngredients
Instructions
- 1 Preheat oven to 400°F. In a large bowl, mix ground chicken, Parmesan, almond flour, egg, Italian seasoning, garlic powder, salt, and pepper until well combined.
- 2 Place mixture on parchment-lined baking sheet and press into a 12-inch circle, 1/4-inch thick, with slightly raised edges.
- 3 Brush with olive oil and bake for 15-18 minutes until golden and firm.
- 4 Remove from oven, add sauce, cheese, and toppings. Return to oven for 8-12 minutes until cheese is melted and bubbly.
- 5 Let rest for 5-7 minutes before slicing and serving.


