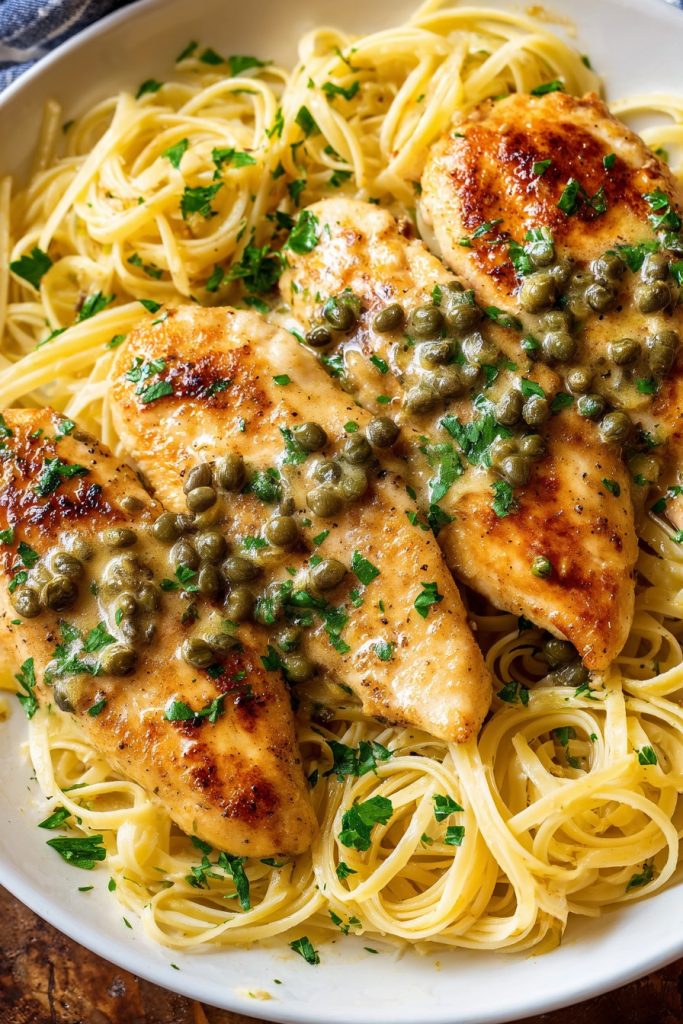
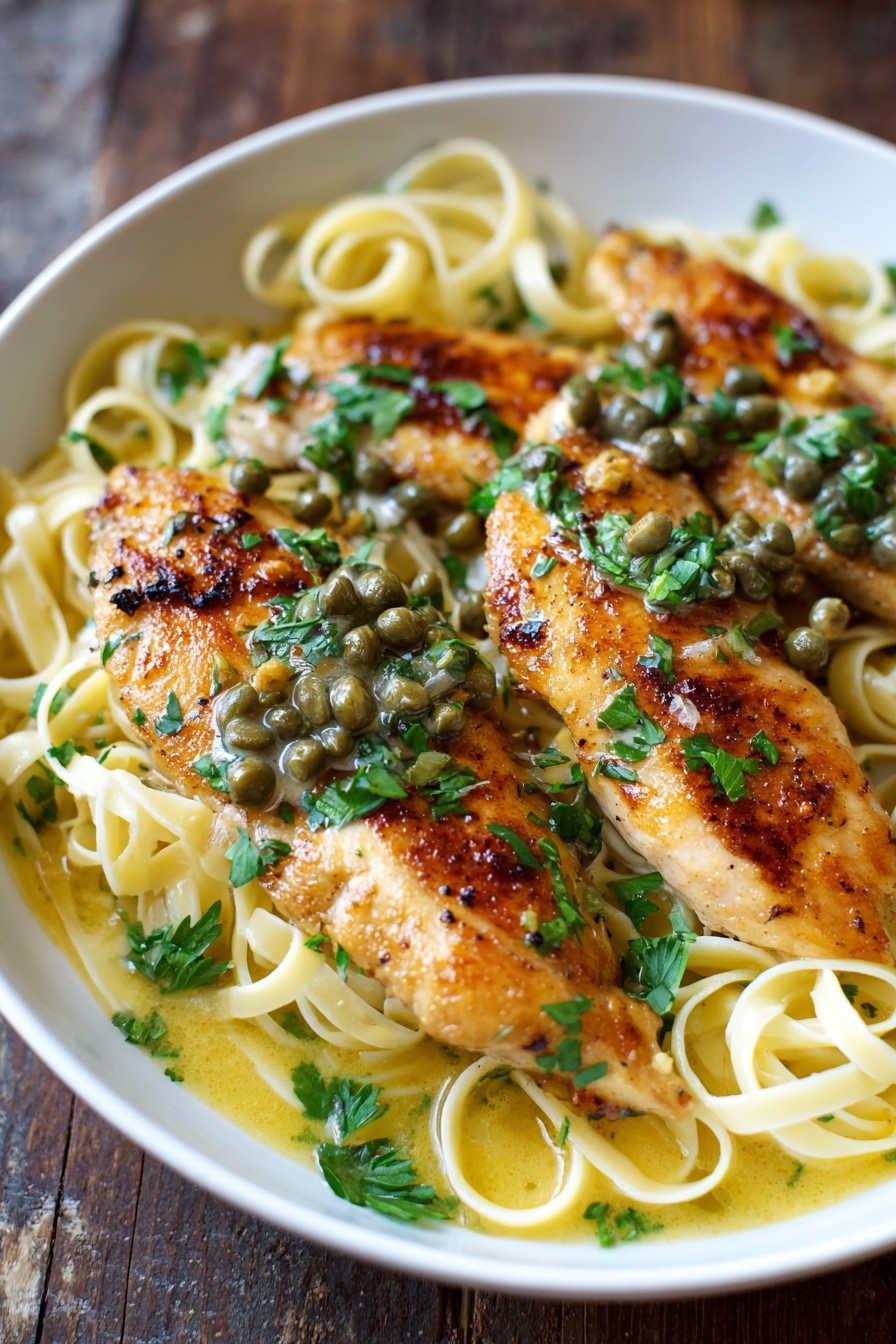
Zany as it sounds, sometimes the most spectacular dinners come together in under 30 minutes, and this chicken piccata with pasta is living proof! Zero excuses needed when you can whip up restaurant-quality elegance right in your own kitchen with minimal fuss and maximum flavor impact.
Why This Recipe Works
- The combination of pan-seared chicken cutlets and al dente pasta creates a perfect textural contrast that makes each bite exciting and satisfying.
- Using fresh lemon juice and capers provides a bright, tangy flavor profile that cuts through the richness of the butter and olive oil, creating a well-balanced sauce.
- The quick pan sauce technique ensures all the delicious browned bits from cooking the chicken are incorporated, maximizing flavor without extra effort.
- This recipe maintains authentic Italian-American flavors while being accessible enough for weeknight dinners, striking the perfect balance between sophistication and practicality.
- The entire dish comes together in one pan (plus the pasta pot), making cleanup a breeze and allowing the flavors to meld together beautifully.
Ingredients
- 4 boneless, skinless chicken breasts (pounded to 1/2-inch thickness)
- 1/2 cup all-purpose flour
- 1 teaspoon kosher salt
- 1/2 teaspoon black pepper
- 4 tablespoons olive oil (divided)
- 3 tablespoons unsalted butter (divided)
- 3 cloves garlic (minced)
- 1/2 cup dry white wine
- 1 cup chicken broth
- 1/4 cup fresh lemon juice (about 2 lemons)
- 3 tablespoons capers (drained)
- 1/4 cup fresh parsley (chopped)
- 12 ounces linguine or spaghetti
- Lemon slices for garnish
Equipment Needed
- Large skillet (12-inch preferred)
- Meat mallet or rolling pin
- Plastic wrap or zip-top bag
- Large pot for pasta
- Colander
- Tongs
- Whisk
- Measuring cups and spoons
- Cutting board and chef’s knife
Instructions
Prepare the Chicken and Pasta
Place each chicken breast between two pieces of plastic wrap or inside a zip-top bag and pound with a meat mallet or rolling pin until they’re uniformly 1/2-inch thick. This ensures even cooking and tender results. In a shallow dish, combine the flour, salt, and pepper. Dredge each chicken breast in the flour mixture, shaking off any excess. Meanwhile, bring a large pot of salted water to a rolling boil for your pasta. The water should taste like the sea – this is your only chance to season the pasta itself! Add the linguine and cook according to package directions until al dente, usually about 9-11 minutes. Reserve 1/2 cup of pasta water before draining.
Pan-Sear the Chicken to Perfection
Heat 2 tablespoons of olive oil in your large skillet over medium-high heat until shimmering but not smoking, about 2-3 minutes. Carefully add the chicken breasts, making sure not to overcrowd the pan – you may need to work in batches. Cook for 4-5 minutes per side until golden brown and the internal temperature reaches 165°F when checked with an instant-read thermometer. The chicken should release easily from the pan when properly seared. Transfer to a plate and tent with foil to keep warm. Pro tip: Don’t move the chicken for the first few minutes to develop that beautiful golden crust!
Create the Flavorful Pan Sauce
Reduce the heat to medium and add the remaining 2 tablespoons of olive oil and 1 tablespoon of butter to the same skillet. Add the minced garlic and cook for just 30-45 seconds until fragrant – be careful not to burn it! Pour in the white wine, scraping up all those delicious browned bits from the bottom of the pan with a wooden spoon. Let the wine reduce by half, which should take about 2-3 minutes. This step is crucial for concentrating flavors and removing the alcohol taste while keeping the fruity notes.
Build the Piccata Sauce
Add the chicken broth, lemon juice, and capers to the skillet. Bring the mixture to a simmer and let it reduce by about one-third, which will take approximately 4-5 minutes. You’ll notice the sauce thickening slightly and becoming more concentrated. Swirl in the remaining 2 tablespoons of butter until melted and incorporated, which will create a lovely silky texture and rich flavor. Taste and adjust seasoning if needed – remember the capers add saltiness, so be cautious with additional salt. The sauce should coat the back of a spoon nicely at this stage.
Combine and Finish the Dish
Return the cooked chicken to the skillet, along with any accumulated juices, and simmer for 2-3 minutes to heat through and allow the flavors to meld. Add the drained pasta directly to the skillet along with a splash of the reserved pasta water – the starch in the water helps the sauce cling to the pasta beautifully. Toss everything together until the pasta is well coated and the chicken is nestled into the sauce. Sprinkle with fresh parsley and give one final toss. Serve immediately garnished with lemon slices and extra parsley if desired.
Tips and Tricks
For the most tender chicken possible, consider brining the breasts for 30 minutes in a solution of 4 cups water and 1/4 cup salt before pounding and dredging. This extra step makes a noticeable difference in moisture retention and texture. When selecting lemons, choose ones that feel heavy for their size with smooth, bright yellow skin – these tend to be juicier. Roll them on the countertop with pressure before juicing to maximize yield. If you don’t have a meat mallet, you can use a heavy-bottomed pan or even a wine bottle to pound the chicken to the proper thickness.
For an even more flavorful sauce, consider using homemade chicken stock instead of broth. The gelatin in homemade stock creates a richer, more luxurious mouthfeel. If using canned broth, try the low-sodium variety to better control the salt level. When cooking the pasta, make sure your water is at a vigorous boil before adding the noodles, and stir immediately after adding to prevent sticking. The reserved pasta water is liquid gold – don’t skip saving it! The starchy water helps emulsify the sauce and helps it cling to every strand of pasta.
If you need to make this dish ahead of time, prepare the components separately and combine just before serving. The chicken can be cooked and refrigerated for up to 2 days, while the sauce can be made and stored separately. Reheat gently to avoid overcooking the chicken. For a thicker sauce, you can create a quick slurry with 1 teaspoon of cornstarch and 1 tablespoon of cold water, then whisk it into the simmering sauce. For wine selection, choose a dry white that you would actually drink – Sauvignon Blanc, Pinot Grigio, or unoaked Chardonnay work beautifully.
Recipe Variations
- For a creamier version, stir in 1/4 cup of heavy cream or half-and-half during the last minute of cooking the sauce. This creates a richer, more decadent dish that’s perfect for special occasions. You can also add a tablespoon of cream cheese for extra tang and creaminess.
- Make it gluten-free by using gluten-free flour for dredging and your favorite gluten-free pasta. Many brands now offer excellent gluten-free options that hold up well in sauces. For the flour, rice flour or a gluten-free blend works particularly well for achieving that crispy coating.
- Add vegetables like sliced mushrooms, sun-dried tomatoes, or artichoke hearts for extra flavor and nutrition. Sauté mushrooms with the garlic, or add sun-dried tomatoes and artichokes when building the sauce. Spinach stirred in at the end also works beautifully and wilts quickly.
- Try different proteins such as turkey cutlets, veal, or even firm tofu for a vegetarian option. The cooking times may vary slightly depending on the protein chosen. For shrimp, cook them quickly in the pan before making the sauce and add back at the end.
- Experiment with different citrus like blood oranges or Meyer lemons for a unique twist on the classic flavor profile. Meyer lemons are sweeter and less acidic, while blood oranges add a beautiful color and slightly berry-like flavor note.
Frequently Asked Questions
Can I make this recipe without wine?
Absolutely! If you prefer not to use wine, you can substitute with additional chicken broth mixed with 1 tablespoon of white wine vinegar or lemon juice. The acidity is important for balancing the sauce, so don’t skip it entirely. You could also use verjus (juice from unripe grapes) for a similar flavor profile without alcohol. The sauce might be slightly less complex, but still delicious.
How do I prevent the chicken from becoming tough?
The key to tender chicken is proper pounding to even thickness and not overcooking. Use an instant-read thermometer to ensure you remove the chicken from heat exactly at 165°F, as it will continue to cook slightly while resting. Also, make sure your skillet is properly preheated before adding the chicken to create a good sear that seals in juices. Letting the chicken rest for 5 minutes before slicing also helps redistribute juices.
What can I use instead of capers?
If you don’t have capers or don’t enjoy their flavor, you can substitute with chopped green olives or even chopped dill pickles for a similar briny note. The measurement would be about the same – 3 tablespoons chopped. Alternatively, you could omit them entirely and add extra lemon zest for brightness. Some people also enjoy using chopped pepperoncini for a slightly spicy twist.
Can I freeze chicken piccata?
While you can freeze the cooked chicken, I don’t recommend freezing the complete dish with pasta as the texture will suffer significantly. The sauce may separate upon thawing, and the pasta will become mushy. If you want to meal prep, freeze the cooked chicken and sauce separately, then cook fresh pasta when ready to serve. Thaw in the refrigerator overnight and reheat gently on the stove.
How long will leftovers keep?
Leftovers will keep in an airtight container in the refrigerator for 3-4 days. The pasta may absorb some of the sauce, so when reheating, add a splash of chicken broth or water to loosen it up. Reheat gently on the stove or in the microwave, stirring occasionally. I don’t recommend freezing the complete dish as the texture of the pasta and sauce will change considerably.
Summary
This chicken piccata with pasta combines tender pan-seared chicken with a bright, lemony caper sauce tossed with al dente pasta. Ready in about 30 minutes, it’s elegant enough for company but easy enough for weeknights. The perfect balance of tangy, savory, and rich flavors that will become a family favorite.
Chicken Piccata with Pasta
5
servings15
minutes20
minutesIngredients
Instructions
- 1 Pound chicken to 1/2-inch thickness. Dredge in flour mixed with salt and pepper.
- 2 Cook pasta according to package directions. Reserve 1/2 cup pasta water.
- 3 Heat 2 tablespoons oil in skillet. Cook chicken 4-5 minutes per side until 165°F.
- 4 Make sauce with remaining oil, butter, garlic, wine, broth, lemon juice, and capers.
- 5 Return chicken to skillet, add pasta and reserved water, toss with parsley.


