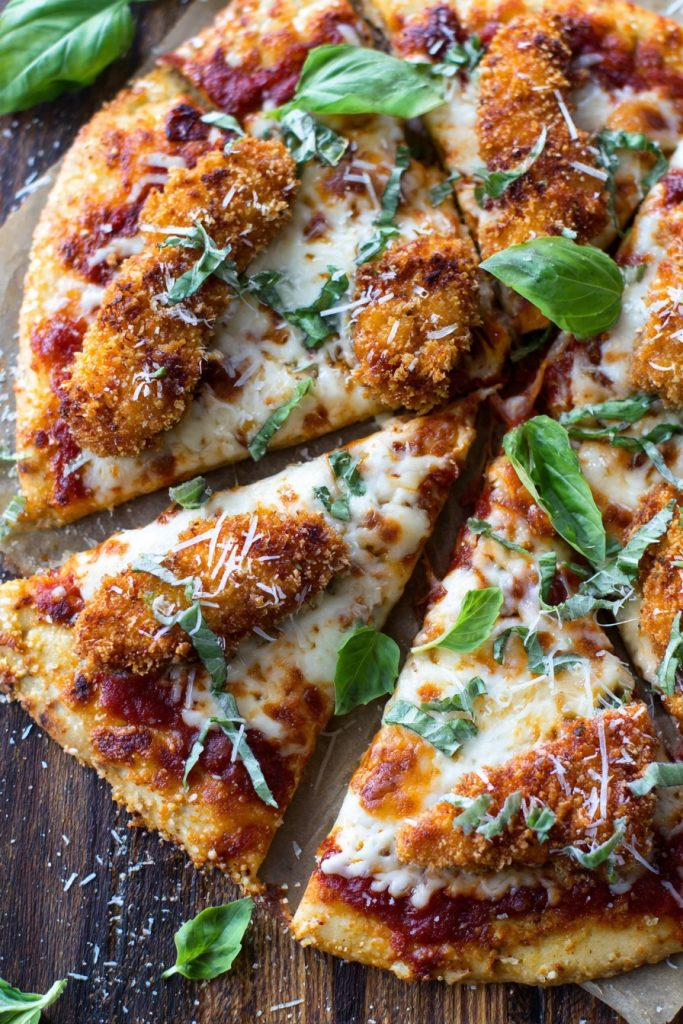
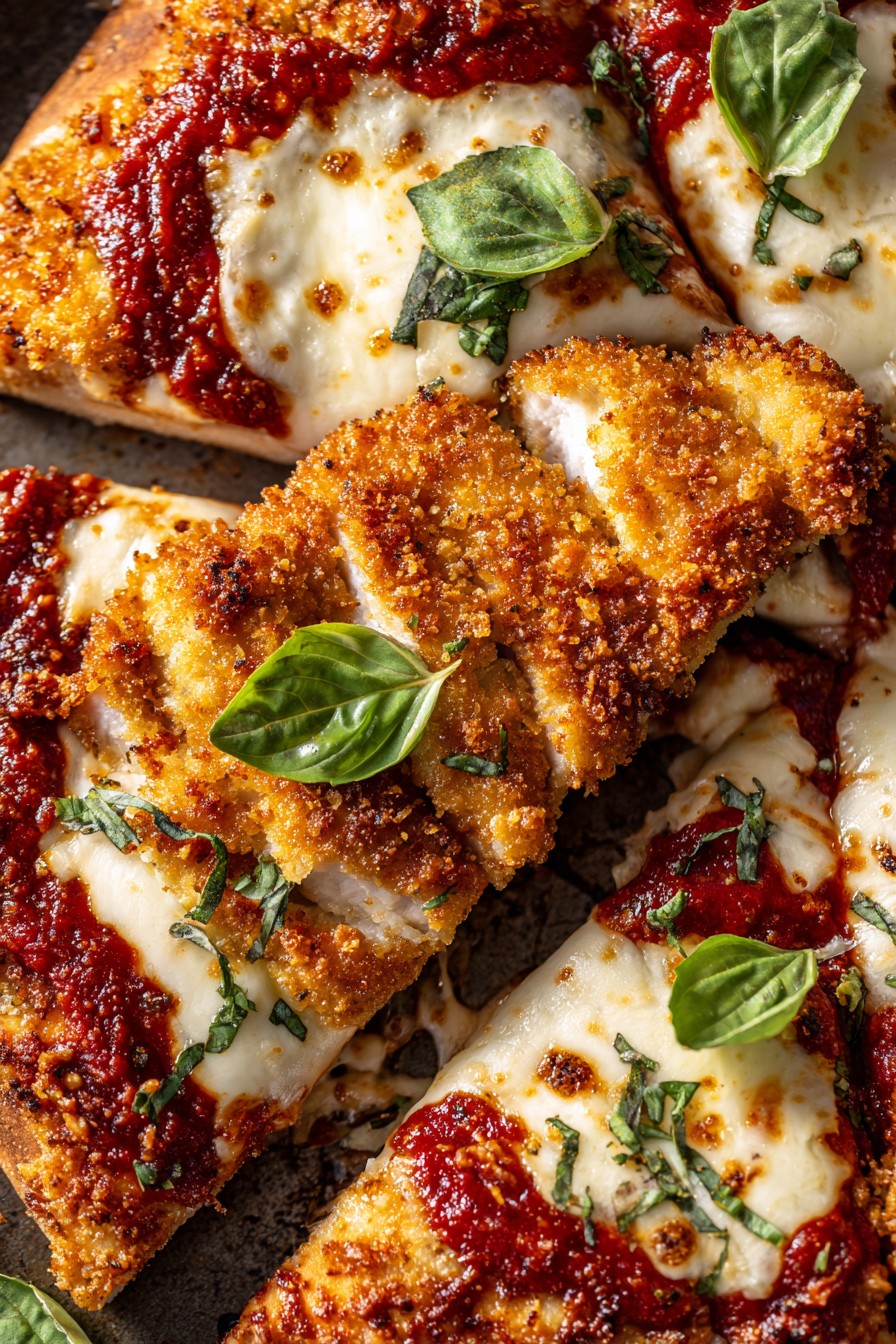
Great news for everyone who can’t decide between Italian classics! Get ready to experience the glorious marriage of crispy chicken parmesan and cheesy pizza in one incredible dish that will have your taste buds doing the happy dance. This fusion creation combines everything we love about both comfort foods into a single, mouthwatering masterpiece.
Why This Recipe Works
- The double-layer cheese approach creates that signature stretchy, gooey texture that makes both pizza and chicken parm so irresistible, with mozzarella providing meltiness and parmesan adding sharp, salty depth.
- Pre-cooking the chicken ensures it stays juicy and tender while developing a perfect golden crust that won’t get soggy under the pizza toppings, maintaining that essential crispy texture contrast.
- Using store-bought pizza dough saves significant time without sacrificing quality, allowing you to focus on perfecting the chicken and sauce components for maximum flavor impact.
- The marinara sauce gets infused with garlic and herbs before baking, creating a rich, aromatic base that permeates every bite with authentic Italian flavor notes.
- Baking at high heat mimics professional pizza oven conditions, giving you that perfect crispy-yet-chewy crust texture that makes this dish feel truly restaurant-quality.
Ingredients
- 1 pound store-bought pizza dough, brought to room temperature
- 1 pound boneless, skinless chicken breasts, pounded to ½-inch thickness
- 1 cup Italian-seasoned breadcrumbs
- ½ cup grated parmesan cheese, divided
- 2 large eggs, beaten
- ½ cup all-purpose flour
- 2 cups shredded mozzarella cheese
- 1½ cups marinara sauce
- 3 cloves garlic, minced
- 2 tablespoons olive oil, plus more for brushing
- 1 teaspoon dried oregano
- ½ teaspoon red pepper flakes (optional)
- Fresh basil leaves for garnish
- Salt and black pepper to taste
Equipment Needed
- Large baking sheet or pizza stone
- Parchment paper
- Meat mallet or rolling pin
- Three shallow bowls for breading station
- Large skillet
- Mixing bowls
- Measuring cups and spoons
- Cheese grater
- Oven thermometer (recommended)
Instructions
Prepare the Chicken Cutlets
Begin by placing your chicken breasts between two pieces of plastic wrap and gently pounding them to an even ½-inch thickness using a meat mallet or rolling pin. This ensures even cooking and creates the perfect texture for your pizza topping. Set up your breading station with three shallow bowls: one with flour seasoned with salt and pepper, one with beaten eggs, and one with breadcrumbs mixed with ¼ cup of parmesan cheese. Dredge each chicken piece in flour, shaking off excess, then dip in egg, and finally coat thoroughly in the breadcrumb mixture, pressing gently to adhere. Heat 2 tablespoons of olive oil in a large skillet over medium-high heat until shimmering but not smoking. Cook the chicken for 3-4 minutes per side until golden brown and cooked through, reaching an internal temperature of 165°F. Transfer to a wire rack to cool slightly before slicing into bite-sized pieces.
Prepare the Pizza Base and Sauce
Preheat your oven to 475°F and place a baking sheet or pizza stone inside to heat up—this creates that crispy bottom crust we all crave. While the oven heats, stretch your room-temperature pizza dough on a piece of parchment paper into a 12-inch circle, creating a slightly thicker edge for the crust. In a small bowl, mix the marinara sauce with minced garlic, dried oregano, and red pepper flakes if using. This infuses the sauce with extra flavor that will bloom during baking. Lightly brush the dough edges with olive oil to promote browning and prevent sogginess. Spread the seasoned marinara sauce evenly over the dough, leaving about a 1-inch border around the edges for the crust. The sauce layer should be thin enough that you can still see some dough through it—too much sauce makes a soggy pizza.
Assemble the Pizza Layers
Now for the fun part—building your masterpiece! Sprinkle half of the shredded mozzarella cheese evenly over the sauced dough, creating a protective layer that prevents the crust from getting soggy. Arrange your sliced chicken parmesan pieces evenly across the cheese layer, making sure each slice gets some chicken goodness. Top with the remaining mozzarella cheese and the rest of the parmesan cheese, ensuring even coverage but leaving the crust edges clear. The cheese acts as glue holding everything together while creating that beautiful golden-brown surface when baked. If you love extra crispiness, you can sprinkle a light dusting of breadcrumbs over the top before the final cheese layer. This assembly order ensures every component cooks perfectly and maintains its textural integrity.
Bake to Perfection
Carefully transfer the parchment paper with the assembled pizza onto the preheated baking sheet or pizza stone in the oven. Bake for 12-15 minutes, but start checking at 10 minutes—you’re looking for the crust to be golden brown and the cheese to be completely melted with some lightly browned spots. Rotate the pizza halfway through baking if your oven has hot spots to ensure even cooking. The pizza is done when the crust edges are deeply golden and firm to the touch, and the cheese is bubbling vigorously. For an extra crispy finish, you can switch to broil for the final 1-2 minutes, but watch carefully as it can burn quickly. Remove from oven when the internal temperature of the cheese layer reaches about 160°F.
Rest and Serve
This might be the hardest step—let the pizza rest for 5 minutes before slicing! This allows the cheese to set slightly so it doesn’t all slide off when you cut into it, and lets the crust finish crisping up. While waiting, chop some fresh basil leaves for garnish. Use a pizza cutter or sharp knife to slice into 8 pieces, wiping the blade between cuts for clean slices. Serve immediately while still hot and crispy. The resting time also allows the flavors to meld together perfectly. If you have any leftovers (unlikely!), they reheat surprisingly well in a 375°F oven for 8-10 minutes to restore crispiness.
Tips and Tricks
For the absolute best chicken parmesan pizza experience, consider these pro tips that take your game to the next level. First, if you have time, make your pizza dough from scratch—it only takes about 10 minutes of active time and the flavor difference is remarkable. A simple dough of bread flour, yeast, water, salt, and a touch of olive oil will give you that authentic chewiness that store-bought often lacks. Second, don’t skip pounding the chicken—uneven thickness leads to some pieces drying out while others remain undercooked, and the uniform thinness ensures perfect breading-to-chicken ratio in every bite.
When breading your chicken, use one hand for dry ingredients and the other for wet to avoid ending up with breadcrumb-coated fingers. Let the breaded chicken rest for 10 minutes before cooking—this helps the coating adhere better and prevents it from falling off during cooking or baking. For extra crispy chicken, you can double-dredge by going through the egg and breadcrumb process twice, though this works best if you let the first layer set in the refrigerator for 15 minutes before the second coating.
If you’re using a pizza stone, make sure it preheats for at least 45 minutes to reach proper temperature—this gives you that blistered, professional-style crust. No pizza stone? A heavy-duty baking sheet turned upside down works surprisingly well as it allows better heat circulation. For cheese lovers, consider mixing in some provolone with your mozzarella for extra flavor complexity, or add a sprinkle of asiago over the top before baking for a more robust cheese profile.
If your chicken is cooking too quickly in the skillet, don’t be afraid to finish it in a 375°F oven for 5-7 minutes—this ensures doneness without burning the breading. Always use an instant-read thermometer to check chicken doneness (165°F) rather than guessing. For sauce, if you have time, simmer your marinara with extra garlic and a pinch of sugar for 15 minutes to deepen the flavors before assembling the pizza.
Recipe Variations
- For a spicy kick, add sliced jalapeños or banana peppers between the chicken and cheese layers, or mix crushed red pepper flakes into your breadcrumb coating for the chicken. You could also use a spicy arrabbiata sauce instead of marinara and top with pepper jack cheese instead of mozzarella for maximum heat that still complements the Italian flavors beautifully.
- Create a white pizza version by replacing the marinara sauce with a garlic cream sauce made from melted butter, minced garlic, heavy cream, and parmesan cheese. Top with chicken, mozzarella, and add spinach or artichoke hearts for extra flavor dimensions. Finish with a drizzle of olive oil and fresh lemon zest after baking for a brighter, creamier alternative to the classic red sauce base.
- Make it vegetarian by substituting the chicken with breaded and fried eggplant or zucchini slices prepared exactly like the chicken—dredged in flour, egg, and seasoned breadcrumbs then pan-fried until golden. The vegetables provide a similar texture contrast while keeping the Italian flavors intact. You could also add roasted bell peppers or mushrooms for extra heartiness and flavor complexity.
- For a gluten-free option, use gluten-free pizza dough and replace the regular breadcrumbs with gluten-free alternatives, ensuring all other ingredients are certified gluten-free. You can also use crushed gluten-free crackers or almond flour mixed with parmesan for the chicken coating. Check that your marinara sauce doesn’t contain hidden gluten ingredients, as some brands use wheat as a thickener.
- Turn it into a deep dish style by pressing the dough into a well-oiled cast iron skillet, building higher edges, and baking for 5-7 minutes longer to account for the thicker crust. Layer the ingredients in reverse order—cheese first, then chicken, then sauce on top—to prevent sogginess. This variation gives you those iconic crispy, buttery edges that deep dish pizza is famous for while maintaining all the chicken parm flavors.
Frequently Asked Questions
Can I use pre-cooked or leftover chicken for this recipe?
Absolutely! Using pre-cooked chicken can save time, but the texture will be different. If using leftover chicken, chop it into bite-sized pieces and add it directly without additional cooking—just make sure it’s fully cooked first. For store-bought rotisserie chicken, remove the skin and shred the meat, then toss with a tablespoon of olive oil and some breadcrumbs before adding to the pizza to approximate the crispy texture. The baking time may need reduction by 2-3 minutes since the chicken doesn’t need to cook through. However, for the best results, I still recommend cooking raw chicken specifically for this recipe to get that perfect crispy coating that makes chicken parmesan so special.
How do I prevent my pizza crust from getting soggy?
Soggy crust is the enemy of good pizza! Several tricks prevent this: First, make sure your pizza stone or baking sheet is fully preheated—this instantly starts crisping the bottom crust. Second, don’t overload with sauce—a thin, even layer is sufficient. Third, put a layer of cheese directly on the dough before adding other toppings—this creates a moisture barrier. Fourth, ensure your chicken is cooked and cooled before adding to avoid releasing juices during baking. Finally, let the baked pizza rest on a wire rack for 5 minutes before slicing to allow steam to escape rather than soaking into the crust. If using vegetables with high water content, sauté them first to remove excess moisture.
Can I make this recipe ahead of time?
You can prepare components ahead but I don’t recommend assembling the entire pizza in advance. The breaded chicken can be cooked up to 2 days ahead and refrigerated—reheat briefly in the oven before using. The sauce can be made 3-4 days ahead and stored refrigerated. The dough can be prepared 1-2 days ahead and kept in the refrigerator—bring to room temperature before stretching. For best results, assemble just before baking as the moisture from the sauce will make the crust soggy if left sitting. If you must assemble ahead, freeze the unbaked pizza on parchment paper, then transfer directly to the hot oven adding 3-5 minutes to baking time.
What’s the best way to reheat leftovers?
Never microwave pizza if you want to maintain texture! The best method is reheating in a 375°F oven for 8-10 minutes directly on the rack or on a preheated pizza stone. This restores the crispy crust and melts the cheese properly. You can also use a skillet on medium-low heat—place the slice in a dry skillet, cover with a lid, and heat for 3-4 minutes until the bottom is crisp and the cheese is melted. For single slices, a toaster oven works surprisingly well at 350°F for 5-6 minutes. If the crust seems dry, spritz very lightly with water before reheating. The chicken may lose some crispiness but will still taste delicious.
Can I freeze chicken parmesan pizza?
Yes, but with some considerations for best results. Freeze the baked pizza whole or in slices on a parchment-lined baking sheet until solid (about 2 hours), then transfer to freezer bags or airtight containers with parchment between layers. It will keep for 2-3 months. To reheat, bake frozen pizza at 400°F for 12-15 minutes directly on the oven rack—no need to thaw. The texture won’t be quite as perfect as fresh but still very good. You can also freeze unbaked assembled pizza—prepare completely except baking, freeze solid on parchment, then wrap tightly. Bake frozen adding 5-7 minutes to the baking time. The chicken may lose some crispiness but the flavors remain excellent.
Summary
Chicken parmesan pizza combines two beloved classics into one spectacular dish featuring crispy breaded chicken, melted cheeses, and herbed marinara sauce on a perfect crust. With pro tips for avoiding sogginess and plenty of variations, this recipe delivers restaurant-quality results at home.
Chicken Parmesan Pizza
6
servings25
minutes20
minutesIngredients
Instructions
- 1 Pound chicken to ½-inch thickness, set up breading station with flour, eggs, and breadcrumbs mixed with ¼ cup parmesan.
- 2 Dredge chicken in flour, egg, then breadcrumbs. Cook in skillet with oil 3-4 minutes per side until 165°F internal temperature.
- 3 Preheat oven to 475°F with baking sheet or stone. Stretch dough on parchment to 12-inch circle.
- 4 Mix marinara with garlic, oregano, and red pepper flakes. Brush dough edges with oil, spread sauce leaving 1-inch border.
- 5 Sprinkle half the mozzarella, add sliced chicken, remaining cheeses. Bake 12-15 minutes until golden and bubbling.
- 6 Rest 5 minutes, garnish with basil, slice and serve immediately.


