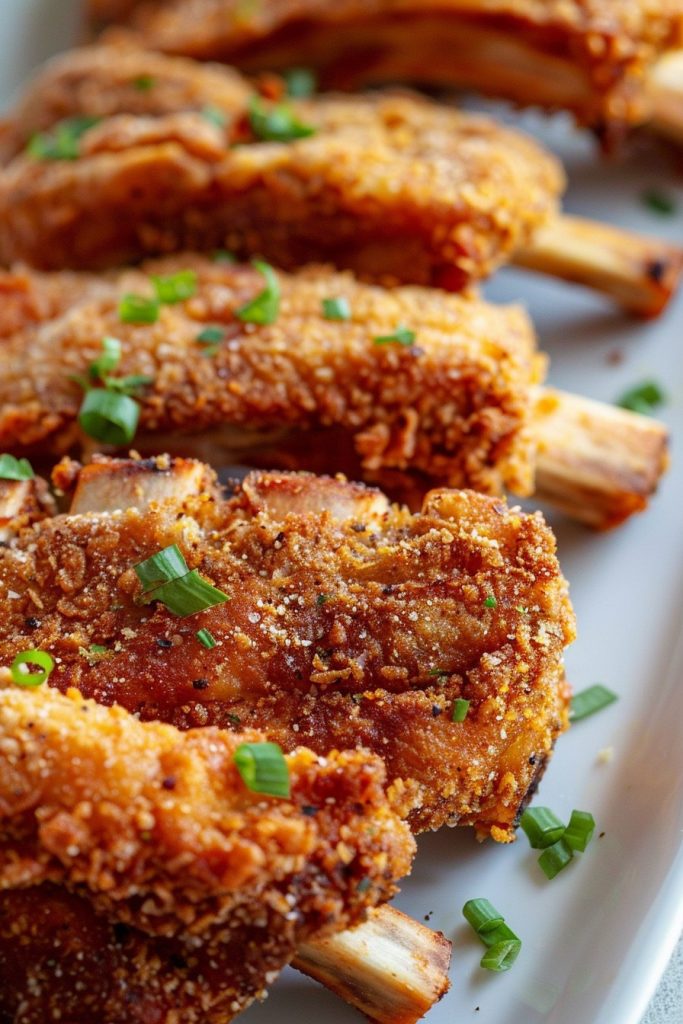
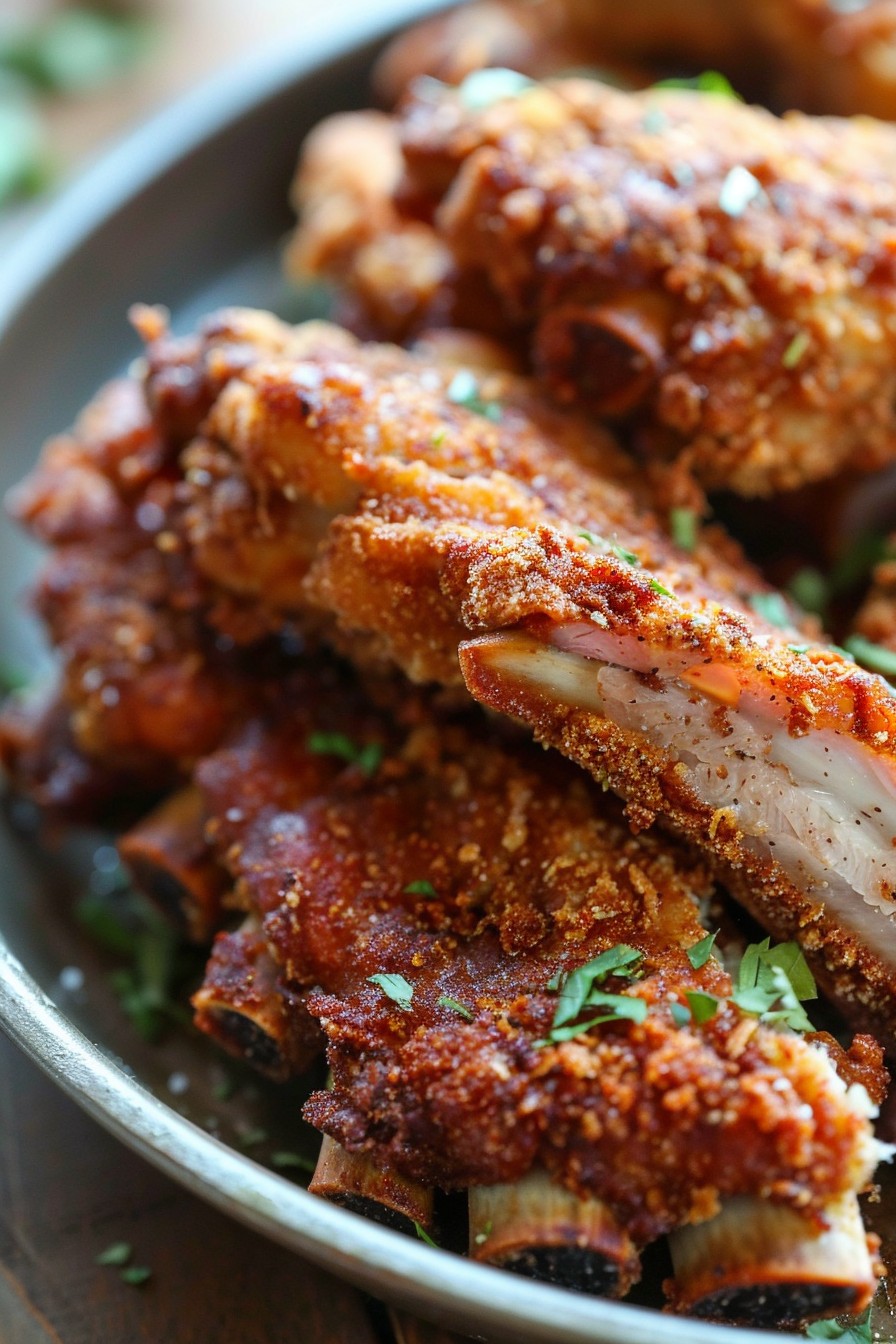
Our chicken fried ribs recipe is a game-changer for any meat lover looking for something out of the ordinary. Combining the tenderness of ribs with the crispy goodness of fried chicken, this dish is sure to impress.
Why This Recipe Works
- The ribs are first slow-cooked to perfection, ensuring they’re fall-off-the-bone tender before they even hit the fryer.
- Double-dipping in the flour mixture gives the ribs an extra crispy coating that’s simply irresistible.
- Using buttermilk in the batter adds a slight tang and ensures the coating sticks perfectly to the ribs.
- Frying at the right temperature guarantees a golden brown exterior without overcooking the meat inside.
- This recipe is versatile, allowing for various seasonings and sauces to suit any taste.
Ingredients
- 2 lbs pork ribs, cut into individual ribs
- 1 cup all-purpose flour
- 1 tbsp garlic powder
- 1 tbsp onion powder
- 1 tsp paprika
- 1 tsp salt
- 1/2 tsp black pepper
- 1 cup buttermilk
- Vegetable oil, for frying
Equipment Needed
- Deep fryer or large deep skillet
- Meat thermometer
- Mixing bowls
- Tongs
- Paper towels
Instructions
Step 1: Prepare the Ribs
Start by seasoning the ribs with salt and pepper. Then, slow-cook them in a preheated oven at 300°F for about 2 hours until they’re tender. This step is crucial for ensuring the ribs are juicy and ready for frying.
Step 2: Mix the Dry Ingredients
In a large bowl, combine the flour, garlic powder, onion powder, paprika, salt, and black pepper. This mixture will give your ribs that flavorful, crispy coating we’re after.
Step 3: Dip in Buttermilk
Dip each rib in buttermilk, ensuring it’s fully coated. The buttermilk not only adds flavor but also helps the flour mixture stick to the ribs better.
Step 4: Coat with Flour Mixture
After the buttermilk dip, roll the ribs in the flour mixture until they’re fully coated. For extra crispiness, dip them back in the buttermilk and flour mixture a second time.
Step 5: Fry to Perfection
Heat the vegetable oil to 375°F in a deep fryer or skillet. Fry the ribs in batches for about 4-5 minutes each, or until golden brown and crispy. Use a meat thermometer to ensure the internal temperature reaches at least 145°F.
Tips and Tricks
For the best results, let the ribs rest after slow-cooking before frying. This helps the meat retain its juices. Always monitor the oil temperature to prevent burning. If you’re short on time, you can use a pressure cooker to tenderize the ribs faster. Experiment with different seasonings in the flour mixture to find your perfect flavor combination. Lastly, serve the ribs immediately after frying for the ultimate crunch.
Recipe Variations
- Spicy Version: Add cayenne pepper or hot sauce to the buttermilk for a kick.
- BBQ Style: After frying, brush the ribs with your favorite BBQ sauce and broil for a few minutes.
- Herb Crusted: Mix dried herbs like rosemary and thyme into the flour mixture for an aromatic twist.
- Gluten-Free: Use almond flour or gluten-free all-purpose flour as a substitute.
- Sweet and Spicy: Incorporate honey and chili flakes into the buttermilk mixture for a balanced flavor.
Frequently Asked Questions
Can I use beef ribs instead of pork?
Absolutely! Beef ribs can be used, but keep in mind they may require a longer cooking time to become tender. Adjust the slow-cooking time accordingly and ensure they’re fully tender before frying.
How do I know when the oil is ready for frying?
The oil is ready when it reaches 375°F. If you don’t have a thermometer, you can test it by dropping a small piece of bread into the oil. If it turns golden brown in about 60 seconds, the oil is ready.
Can I bake these instead of frying?
Yes, for a healthier version, you can bake the coated ribs at 400°F for about 20-25 minutes, flipping halfway through. However, they won’t be as crispy as the fried version.
Summary
This chicken fried ribs recipe offers a delicious twist on traditional ribs, combining tender meat with a crispy, flavorful coating. Perfect for any occasion, it’s sure to become a favorite. With various ways to customize, you can make it your own and enjoy a unique dish every time.
Chicken Fried Ribs
6
servings15
minutes2
minutesIngredients
Instructions
- 1 Slow-cook the ribs at 300°F for 2 hours until tender.
- 2 Mix flour, garlic powder, onion powder, paprika, salt, and pepper in a bowl.
- 3 Dip ribs in buttermilk, then coat with flour mixture.
- 4 Double-dip for extra crispiness.
- 5 Fry in oil at 375°F for 4-5 minutes until golden brown.