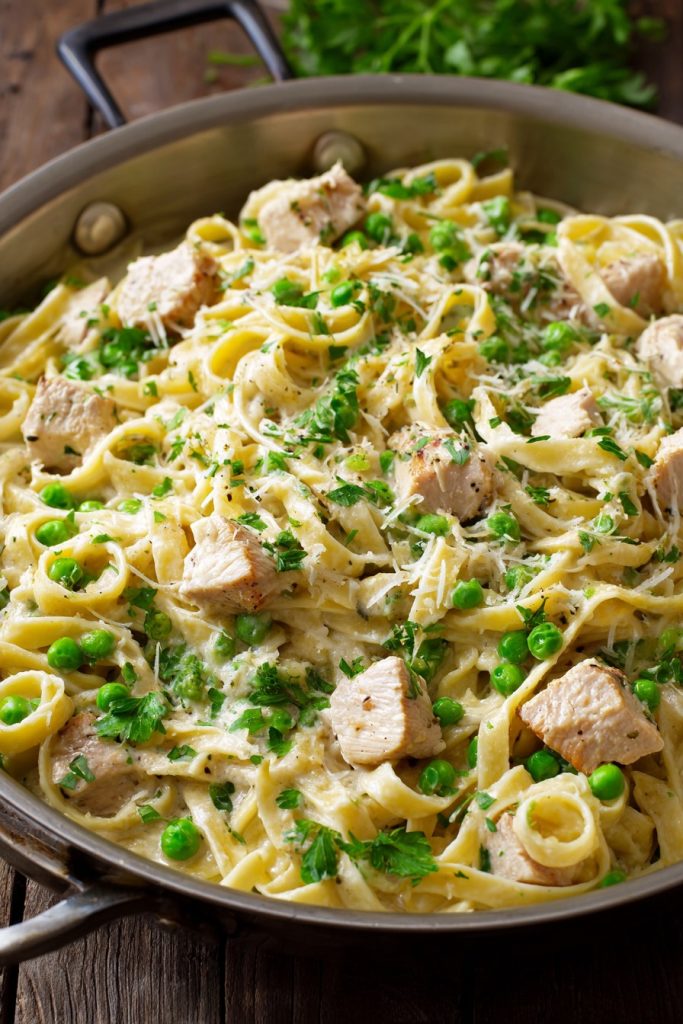
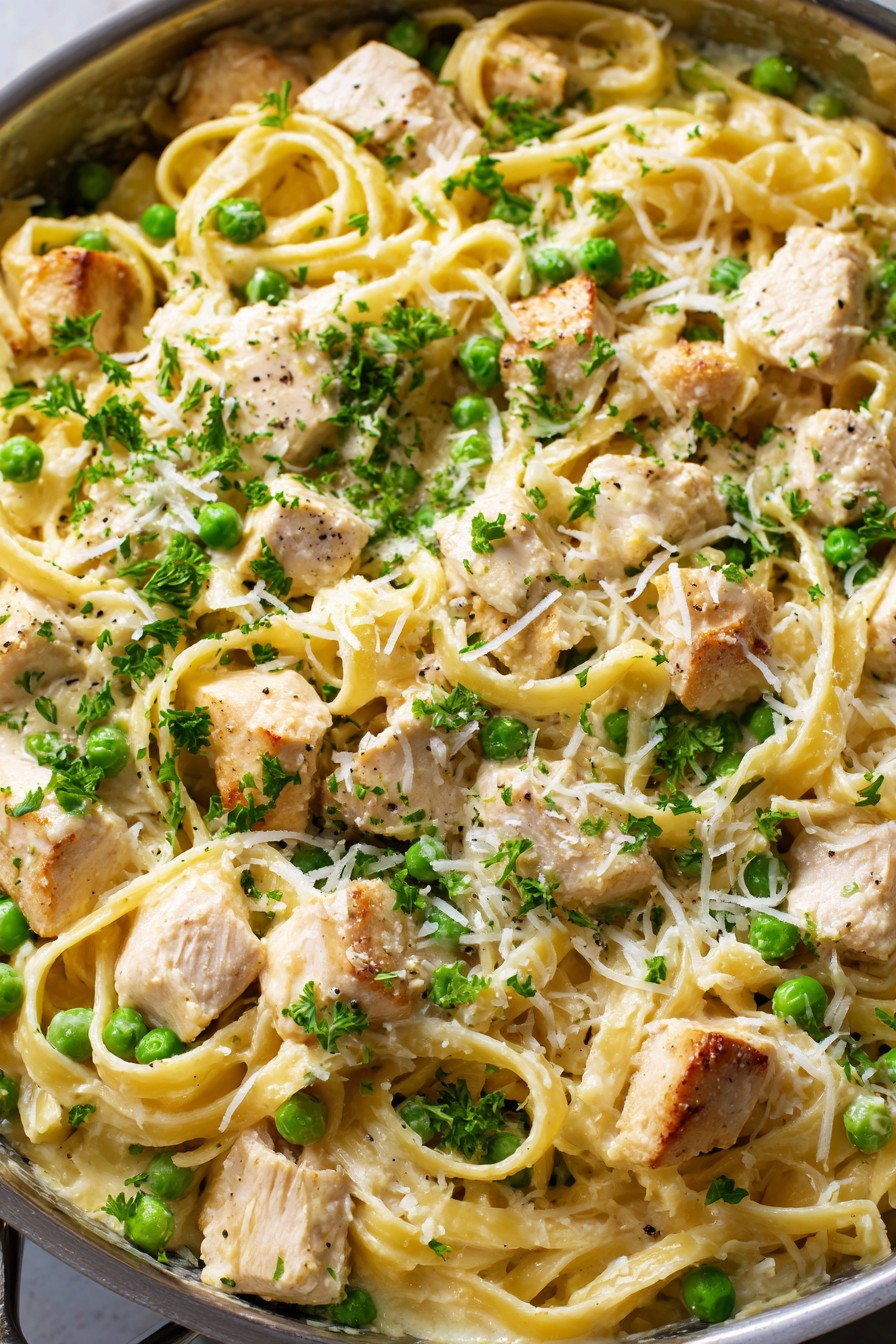
You won’t believe how this simple combination transforms into the most comforting weeknight dinner. Your family will be begging for seconds of this creamy, protein-packed pasta dish that comes together faster than you can say “delicious”!
Why This Recipe Works
- The combination of tender chicken breast and sweet peas creates a perfect protein-vegetable balance that satisfies both nutrition and flavor cravings
- Using pasta water to create the sauce ensures it clings perfectly to every noodle while adding natural starchiness that store-bought cream can’t replicate
- The quick cooking method preserves the bright green color and fresh flavor of the peas while keeping the chicken juicy and tender rather than dry and overcooked
- Simple seasonings like garlic, lemon zest, and Parmesan cheese elevate the dish from basic to restaurant-quality without complicated techniques or hard-to-find ingredients
- This one-pan wonder minimizes cleanup while maximizing flavor, making it ideal for busy weeknights when you want something satisfying without spending hours in the kitchen
Ingredients
- 1 pound boneless, skinless chicken breasts, cut into 1-inch cubes
- 12 ounces fettuccine pasta
- 2 cups frozen peas
- 4 cloves garlic, minced
- 1 medium yellow onion, finely diced
- 1 cup heavy cream
- 1 cup grated Parmesan cheese, plus extra for serving
- 3 tablespoons olive oil
- 2 tablespoons unsalted butter
- 1 tablespoon lemon zest
- 2 teaspoons Italian seasoning
- 1 teaspoon red pepper flakes (optional)
- Salt and freshly ground black pepper to taste
- Fresh parsley, chopped for garnish
Equipment Needed
- Large pot for boiling pasta
- Large skillet or Dutch oven
- Colander
- Cutting board and sharp knife
- Measuring cups and spoons
- Wooden spoon or spatula
- Zester or fine grater
- Tongs for serving
Instructions
Prepare Your Ingredients and Start the Pasta
Before anything else, let’s get organized! Fill your large pot with 4 quarts of water and add 2 tablespoons of salt—this might seem like a lot, but it’s essential for properly seasoning the pasta from the inside out. Bring the water to a rolling boil over high heat, which should take about 8-10 minutes. While waiting, cube your chicken breasts into uniform 1-inch pieces and season generously with salt, pepper, and 1 teaspoon of Italian seasoning. Dice your onion and mince the garlic, keeping them separate since they’ll be added at different times. Once the water reaches a vigorous boil, add the fettuccine and set your timer for 2 minutes less than the package directions suggest—we’ll finish cooking it in the sauce later. Pro tip: Always taste your pasta water—it should taste like the sea! This ensures your pasta will be perfectly seasoned throughout.
Cook the Chicken to Perfection
Heat 2 tablespoons of olive oil in your large skillet over medium-high heat until it shimmers—this takes about 90 seconds. Carefully add the seasoned chicken cubes in a single layer, making sure not to overcrowd the pan (work in batches if needed). Cook without moving for 3-4 minutes until a golden-brown crust forms on the bottom—you should hear a satisfying sizzle! Flip each piece and cook for another 3 minutes until the chicken reaches an internal temperature of 165°F when checked with an instant-read thermometer. The chicken should feel firm but still slightly springy to the touch. Remove the chicken to a clean plate, leaving any rendered fat and browned bits in the pan—these little flavor bombs will make our sauce incredible! Let the chicken rest while we build our sauce; this allows the juices to redistribute throughout the meat.
Build the Flavor Base
Reduce the heat to medium and add the remaining tablespoon of olive oil to the same skillet. Add the diced onion and cook, stirring occasionally, for 4-5 minutes until translucent and slightly softened—they should look glossy but not browned. Add the minced garlic and cook for just 60 seconds until fragrant—be careful not to burn it, as burnt garlic becomes bitter! Now add the butter and let it melt, swirling the pan to combine with the oil. Sprinkle in the remaining Italian seasoning and red pepper flakes if using, toasting them for 30 seconds until you can smell their aromatic oils releasing. This step builds layers of flavor that will infuse throughout the entire dish. The onions should now be tender and the whole kitchen should smell absolutely heavenly!
Create the Creamy Sauce
Pour in the heavy cream and use your wooden spoon to scrape up all those delicious browned bits from the bottom of the pan—this is called deglazing and it’s where magic happens! Bring the cream to a gentle simmer over medium heat, which should take about 2-3 minutes—you’ll see small bubbles forming around the edges. Reduce the heat to low and gradually whisk in the grated Parmesan cheese until completely melted and smooth—this should take about 2 minutes of constant whisking to prevent clumping. The sauce will thicken noticeably as the cheese melts. Stir in the lemon zest—this brightens the rich sauce beautifully. Now add the frozen peas directly to the sauce—they’ll thaw and cook perfectly in the hot liquid. Cook for 3 minutes until the peas are tender but still bright green—overcooking will make them mushy and dull-colored.
Combine Everything and Finish
By now, your pasta should be al dente—drain it reserving 1 cup of the starchy pasta water (this liquid gold is key to our perfect sauce consistency!). Add the drained pasta directly to the skillet with the sauce, along with the cooked chicken and any accumulated juices. Toss everything together thoroughly, adding splashes of the reserved pasta water until the sauce coats every strand of pasta beautifully—you’ll likely need about 1/2 cup. The starch in the water helps emulsify the sauce, making it cling to the pasta rather than pool at the bottom of the bowl. Cook for another 2 minutes over low heat, tossing constantly, until everything is heated through and the sauce has thickened to a creamy consistency that coats the back of a spoon. Taste and adjust seasoning with salt and pepper as needed.
Serve Immediately with Style
Divide the pasta among warm bowls—I like to warm my bowls in a 200°F oven for 5 minutes so the food stays hot longer. Garnish generously with fresh chopped parsley for color and freshness, and offer extra grated Parmesan at the table for those who want it cheesier. Serve immediately while piping hot—this dish doesn’t wait well because the pasta continues to absorb the sauce. The perfect bite should include tender chicken, sweet peas, and creamy pasta all in one forkful. If you want to get fancy, use tongs to twist the pasta into neat nests on each plate—it looks restaurant-worthy! Enjoy within 10 minutes of serving for the best texture experience.
Tips and Tricks
If you want to take this dish to the next level, consider brining your chicken before cooking. Dissolve 1/4 cup of salt and 2 tablespoons of sugar in 4 cups of cold water, submerge the chicken breasts, and refrigerate for 30 minutes to 2 hours. This simple step ensures incredibly juicy chicken that won’t dry out even if you accidentally overcook it slightly. The sugar helps with browning while the salt seasons the meat throughout. Always pat the chicken very dry after brining to ensure proper searing.
For an even creamier sauce without additional cream, try incorporating 2 ounces of cream cheese along with the Parmesan. The cream cheese melts into a velvety smooth consistency and adds tanginess that balances the richness. Add it at the same time as the Parmesan, cubing it first for easier melting. Whisk constantly until completely smooth—this creates a luxurious sauce that clings to every nook and cranny of the pasta.
Don’t underestimate the power of finishing oils! After plating, drizzle each serving with a high-quality extra virgin olive oil—the fruity, peppery notes elevate the entire dish. Similarly, a squeeze of fresh lemon juice right at the end (not the zest cooked into the sauce) brightens everything up. Keep a lemon wedge on each plate for diners to add according to their preference. These final touches make the difference between good and great.
If you’re making this for meal prep, undercook the pasta by an additional minute and store the components separately. The sauce will thicken significantly when refrigerated, so thin it with a little milk or cream when reheating. Assemble and reheat individual portions in a skillet with a splash of water—the microwave will make the pasta mushy. Properly stored, the components keep for 3-4 days, but the peas may lose their vibrant color.
For restaurant-style presentation, use a pair of kitchen tweezers to place individual peas strategically around the plate—it looks beautiful and shows care. Similarly, slice the chicken on the bias for more elegant pieces rather than cubes. Garnish with microgreens instead of parsley for a more sophisticated look. Remember, we eat with our eyes first, so taking an extra minute for presentation makes ordinary meals feel special.
Recipe Variations
- For a lighter version, substitute half the heavy cream with whole milk and thicken with a tablespoon of cornstarch slurry. You can also use Greek yogurt stirred in at the very end off the heat—this adds tanginess and protein while reducing calories. Replace regular pasta with whole wheat or chickpea pasta for added fiber and nutrients. The sauce might be slightly less rich but still deliciously creamy.
- Transform this into a lemon herb extravaganza by doubling the lemon zest and adding fresh herbs like tarragon, dill, and chives. Tarragon particularly loves chicken and cream sauces! Add a tablespoon of each fresh herb at the very end to preserve their bright flavors. For extra citrus punch, add thin slices of lemon that have been sautéed until caramelized—they become edible and delicious!
- Make it decadently indulgent by adding crispy pancetta or bacon—cook 4 ounces diced pancetta until crispy before cooking the chicken, then use the rendered fat instead of olive oil. Stir in the crispy bits at the end for texture. You could also add sautéed mushrooms for earthy depth—sliced cremini mushrooms browned in butter would be heavenly. For luxury, finish with white truffle oil or shaved black truffles.
- Create different cultural twists: for an Alfredo-style version, omit the peas and add sautéed spinach and sun-dried tomatoes. For a French influence, add herbes de Provence and Dijon mustard. For Italian flair, add roasted red peppers and basil. For Greek vibes, use oregano, kalamata olives, and feta cheese instead of Parmesan. The basic recipe is wonderfully adaptable to whatever flavors you’re craving!
- For vegetable-packed versions, add asparagus tips, broccoli florets, or zucchini ribbons—blanch them briefly before adding to preserve color and texture. You could also use edamame instead of peas for different nutrition profile. For color, add roasted red peppers or cherry tomatoes. The recipe welcomes nearly any vegetable that pairs well with cream and chicken—get creative with what’s in season!
Frequently Asked Questions
Can I use chicken thighs instead of breasts?
Absolutely! Chicken thighs will add more flavor and remain juicier since they have higher fat content. Dice them the same way, but cook for 1-2 minutes longer per side since they need to reach 175°F internally for best texture. The rendered fat from thighs will make your sauce even richer. Just be aware that the dish will have a more pronounced chicken flavor, which some prefer while others might find overpowering with the delicate peas.
How do I prevent the sauce from breaking or becoming greasy?
The key is temperature control and emulsification. Keep the heat low when adding cheese and cream—high heat can cause separation. Always add cheese gradually while whisking constantly. If your sauce does break, remove from heat and whisk in a tablespoon of cold butter or a splash of cold cream—this can often bring it back together. Using the starchy pasta water helps stabilize the emulsion. Avoid boiling the sauce after adding dairy components.
Can I make this dish ahead of time?
You can prep components ahead but I don’t recommend fully assembling until serving. Cook the chicken and make the sauce base (without cream and cheese) up to 2 days ahead. Store separately refrigerated. When ready, reheat the sauce base, add dairy components, then combine with freshly cooked pasta. The peas are best added fresh rather than reheated. Fully assembled pasta tends to absorb too much sauce and become mushy upon reheating.
What if I don’t have heavy cream?
You can substitute with half-and-half mixed with 1 tablespoon melted butter per cup, or evaporated milk for similar richness. For dairy-free, canned coconut cream works surprisingly well—it adds slight sweetness that complements the peas. Cashew cream (blended soaked cashews with water) also creates a luxuriously creamy sauce. The sauce might be slightly thinner with substitutions, so simmer a bit longer to reduce or add a cornstarch slurry to thicken.
How can I make this recipe more kid-friendly?
Use smaller pasta shapes like bowties or shells that are easier for little hands. Mash the peas slightly so they’re less recognizable to picky eaters—they’ll still add sweetness and nutrition. You can also blend the sauce smooth before adding the chicken if your kids dislike “chunks.” Reduce or omit the garlic and pepper flakes for sensitive palates. Sometimes calling it “green noodle surprise” makes it more exciting than “pea pasta”!
Summary
This chicken and pea pasta combines tender protein, sweet vegetables, and creamy sauce in one stunning dish. Perfect for busy weeknights yet elegant enough for company, it proves simple ingredients can create extraordinary meals when prepared with care and attention to technique.
Chicken and Pea Pasta
4
servings15
minutes20
minutesIngredients
Instructions
- 1 Bring salted water to boil and cook pasta 2 minutes less than package directions. Reserve 1 cup pasta water before draining.
- 2 Season chicken with salt, pepper, and 1 tsp Italian seasoning. Cook in hot oil until golden brown and reaches 165°F internally, about 6-7 minutes total. Remove from pan.
- 3 In same pan, cook onion until translucent, add garlic for 1 minute until fragrant. Add butter, remaining seasoning, and red pepper flakes if using.
- 4 Pour in cream, scrape browned bits, simmer 2-3 minutes. Whisk in Parmesan until smooth. Add peas and lemon zest, cook 3 minutes until peas are tender.
- 5 Add drained pasta and chicken to sauce, toss with reserved pasta water until desired consistency. Garnish with parsley and extra Parmesan.


