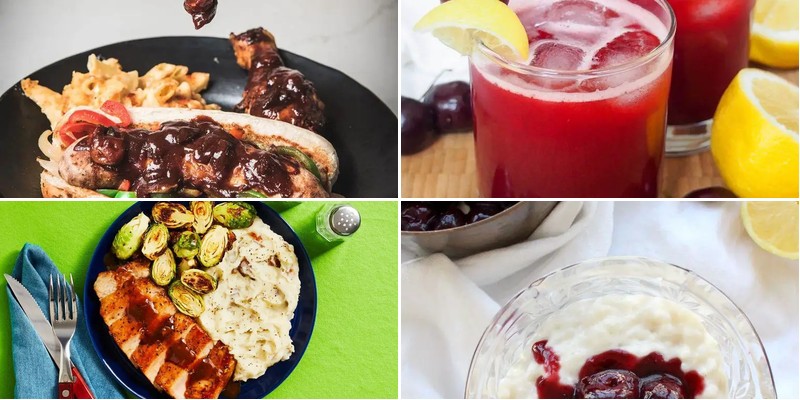
Kick off your summer with the sweet, juicy goodness of cherries! As the season’s favorite fruit takes center stage, we’ve gathered 18 mouthwatering recipes that celebrate everything from quick desserts to refreshing drinks. Whether you’re hosting a barbecue or simply craving a seasonal treat, these cherry delights are sure to impress. Dive in and discover your next favorite summer creation!
Classic Cherry Pie
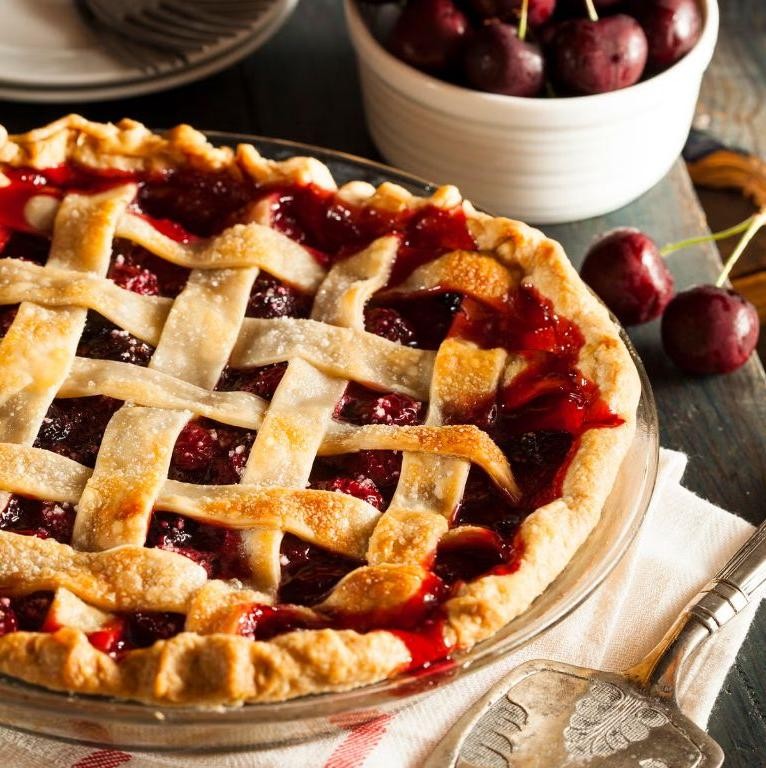
Whether you’re a first-time baker or seasoned pie maker, this classic cherry pie delivers that perfect balance of sweet and tart in every flaky bite. We’ll walk through each step methodically to ensure your crust stays tender while the filling bubbles with fruity goodness.
8
servings40
minutes50
minutesIngredients
– 2 ½ cups all-purpose flour, plus extra for dusting
– 1 cup unsalted butter, chilled and cubed (keep cold until ready)
– 1 tsp salt
– 6-8 tbsp ice water, adding one tablespoon at a time
– 4 cups pitted fresh or frozen cherries (thawed if frozen)
– ¾ cup granulated sugar
– 3 tbsp cornstarch
– 1 tbsp lemon juice
– 1 tsp vanilla extract
– 1 egg, beaten (for egg wash)
– 1 tbsp coarse sugar, for sprinkling
Instructions
1. Combine 2 ½ cups flour and 1 tsp salt in a large bowl.
2. Cut in 1 cup chilled butter cubes using a pastry cutter until mixture resembles coarse crumbs with pea-sized butter pieces.
3. Sprinkle 6 tablespoons ice water over flour mixture, mixing with a fork until dough just comes together.
4. Gather dough into two equal balls, flatten into discs, wrap in plastic, and refrigerate for 30 minutes minimum.
5. Preheat oven to 375°F and place a baking sheet on the middle rack to preheat.
6. Roll one dough disc on a floured surface to a 12-inch circle, then transfer to a 9-inch pie plate.
7. Combine 4 cups cherries, ¾ cup sugar, 3 tbsp cornstarch, 1 tbsp lemon juice, and 1 tsp vanilla in a bowl.
8. Pour cherry filling into the bottom crust, spreading evenly.
9. Roll second dough disc to an 11-inch circle and place over filling.
10. Trim excess dough, leaving a ½-inch overhang, then crimp edges firmly to seal.
11. Cut four 2-inch slits in the top crust for steam vents.
12. Brush entire top crust with beaten egg using a pastry brush.
13. Sprinkle 1 tbsp coarse sugar evenly over the egg-washed crust.
14. Bake on preheated baking sheet for 45-55 minutes until crust is golden brown and filling bubbles thickly through vents.
15. Cool completely on a wire rack for 3-4 hours before slicing.
Let this pie cool fully to allow the cornstarch-thickened filling to set properly, creating clean slices that hold their shape. The flaky, buttery crust contrasts beautifully with the juicy, slightly tart cherry interior. Serve slightly warmed with a scoop of vanilla ice cream for that classic à la mode experience, or enjoy a slice with your morning coffee for a special treat.
Cherry Almond Scones
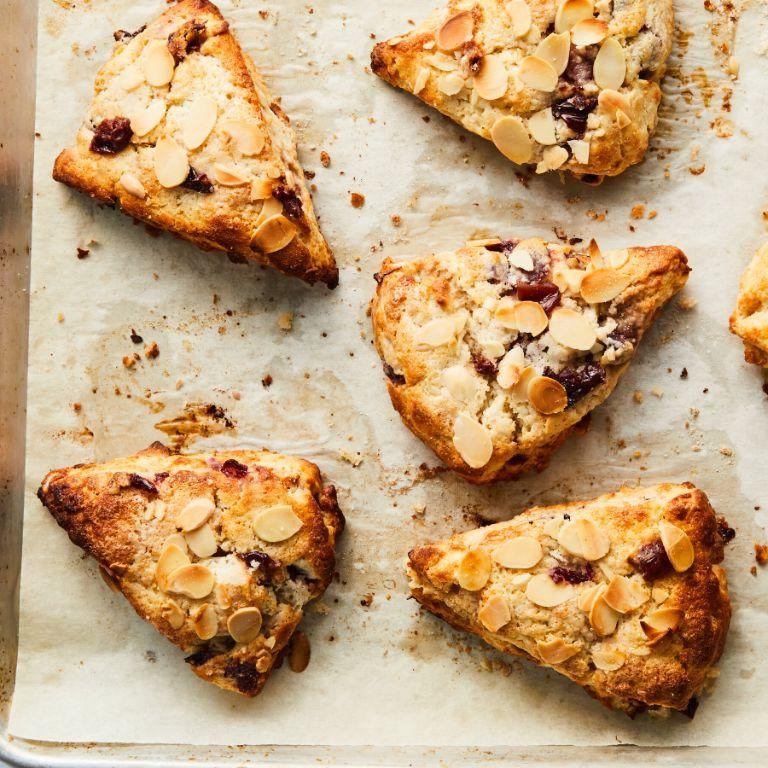
Let’s create these delightful cherry almond scones together, perfect for your morning coffee or afternoon tea break. I’ll walk you through each step methodically so even first-time bakers can achieve bakery-quality results with confidence. These scones combine sweet cherries with nutty almond flavors in a tender, buttery pastry that’s surprisingly simple to make.
8
portions15
minutes18
minutesIngredients
– 2 cups all-purpose flour (spoon and level for accuracy)
– 1/3 cup granulated sugar
– 1 tablespoon baking powder
– 1/2 teaspoon salt
– 1/2 cup cold unsalted butter, cubed (keep refrigerated until use)
– 1/2 cup dried cherries
– 1/4 cup sliced almonds
– 1/2 cup heavy cream, cold
– 1 large egg, cold
– 1 teaspoon almond extract
– 1 tablespoon milk for brushing
– 1 tablespoon coarse sugar for sprinkling
Instructions
1. Preheat your oven to 400°F and line a baking sheet with parchment paper.
2. Whisk together the flour, sugar, baking powder, and salt in a large bowl.
3. Add the cold butter cubes and use a pastry cutter or two forks to cut the butter into the flour mixture until it resembles coarse crumbs with some pea-sized butter pieces remaining.
4. Stir in the dried cherries and sliced almonds until evenly distributed.
5. In a separate small bowl, whisk together the cold heavy cream, cold egg, and almond extract until well combined.
6. Pour the wet ingredients into the dry ingredients and mix gently with a fork until just combined and no dry flour remains.
7. Tip: Don’t overmix – the dough should be shaggy and slightly sticky for tender scones.
8. Turn the dough out onto a lightly floured surface and gently pat it into a 7-inch circle about 1-inch thick.
9. Use a sharp knife to cut the circle into 8 equal wedges.
10. Tip: For cleaner cuts, dip your knife in flour between each cut.
11. Arrange the wedges on the prepared baking sheet, leaving about 2 inches between each scone.
12. Brush the tops of each scone lightly with milk using a pastry brush.
13. Sprinkle the coarse sugar evenly over the tops of all the scones.
14. Bake for 15-18 minutes until the scones are golden brown on top and a toothpick inserted in the center comes out clean.
15. Tip: Rotate the baking sheet halfway through baking for even browning.
16. Transfer the scones to a wire rack and let them cool for at least 10 minutes before serving.
You’ll love how these scones achieve that perfect balance between crisp exterior and tender, flaky interior. The tart cherries provide bright bursts of flavor against the rich almond backdrop, making them wonderful when served warm with clotted cream or simply enjoyed plain with your favorite tea.
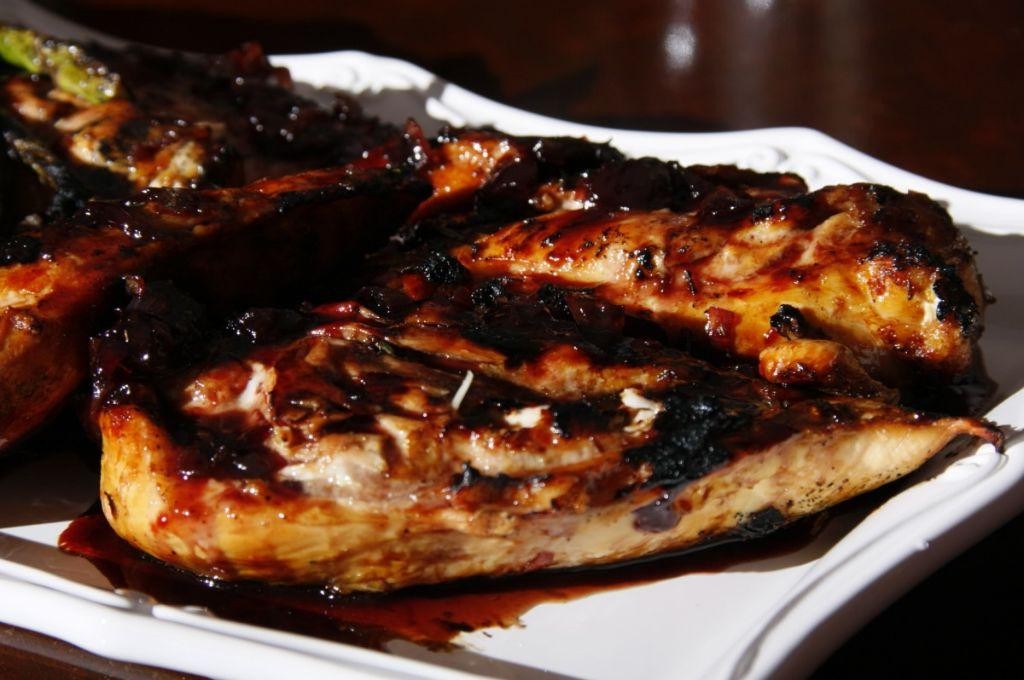
Spicy Cherry Barbecue Sauce
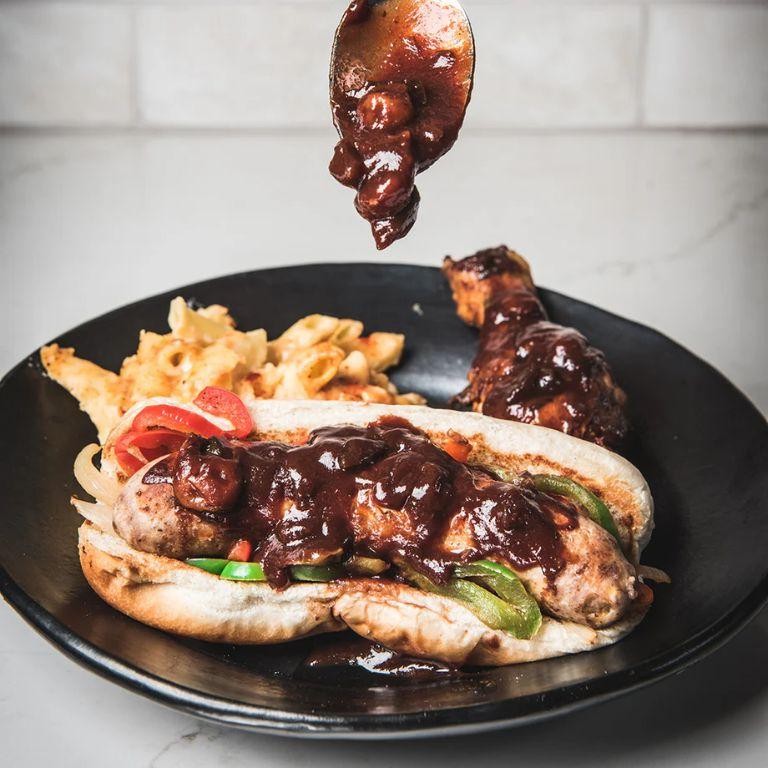
This homemade spicy cherry barbecue sauce transforms ordinary grilled dishes into extraordinary meals with its perfect balance of sweet and heat. Today we’ll walk through each step methodically, ensuring even beginner cooks can achieve that glossy, restaurant-quality sauce right in their own kitchen. Trust me, once you taste this vibrant condiment, you’ll never go back to store-bought versions again.
1
batch10
minutes42
minutesIngredients
– 2 cups fresh cherries, pitted (frozen work too, just thaw first)
– 1 cup ketchup
– 1/2 cup apple cider vinegar
– 1/4 cup brown sugar, packed
– 2 tbsp Worcestershire sauce
– 1 tbsp smoked paprika
– 1 tsp garlic powder
– 1/2 tsp cayenne pepper (reduce to 1/4 tsp for milder heat)
– 1/4 tsp black pepper, freshly ground
– 1 tbsp vegetable oil (or any neutral oil)
Instructions
1. Heat 1 tablespoon vegetable oil in a medium saucepan over medium heat for 2 minutes until shimmering.
2. Add 2 cups pitted cherries and cook for 5 minutes, stirring frequently until they release their juices and soften.
3. Stir in 1 cup ketchup, 1/2 cup apple cider vinegar, and 1/4 cup packed brown sugar until fully combined.
4. Add 2 tablespoons Worcestershire sauce, 1 tablespoon smoked paprika, 1 teaspoon garlic powder, 1/2 teaspoon cayenne pepper, and 1/4 teaspoon black pepper.
5. Bring the mixture to a gentle boil, then immediately reduce heat to low.
6. Simmer uncovered for 25-30 minutes, stirring every 5 minutes to prevent sticking.
7. Remove from heat and let cool for 15 minutes until safe to handle.
8. Transfer the mixture to a blender and blend on high speed for 1 minute until completely smooth.
9. Return the blended sauce to the saucepan and simmer for an additional 5 minutes to thicken further.
10. Remove from heat and let cool completely before transferring to an airtight container. Expect this glossy sauce to coat the back of a spoon thickly, with the cherries’ natural sweetness beautifully balancing the cayenne’s gentle heat. Elevate grilled chicken or pork by brushing it on during the last 10 minutes of cooking, or stir a spoonful into baked beans for an instant flavor upgrade that will have everyone asking for your secret.
Cherry Clafoutis
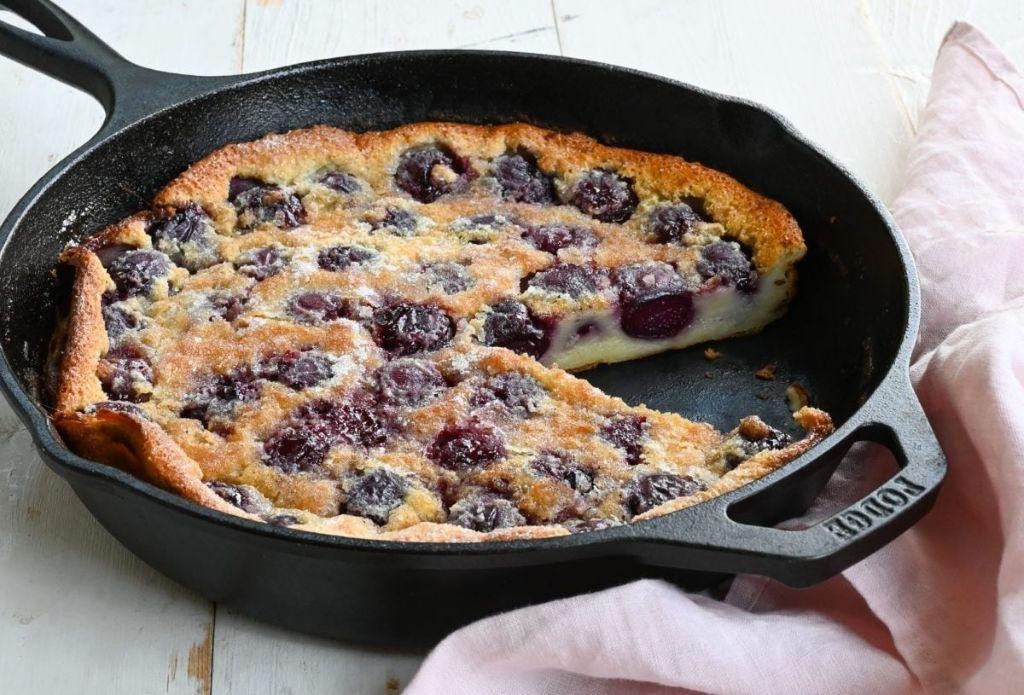
Easy enough for beginners yet impressive enough for guests, cherry clafoutis brings French elegance to your kitchen with minimal effort. Essentially a baked custard studded with fresh fruit, this dessert comes together quickly using pantry staples. Let’s walk through each step methodically to ensure your clafoutis turns out perfectly tender and golden.
6
servings15
minutes40
minutesIngredients
- 1 cup whole milk (or half-and-half for extra richness)
- 3 large eggs, at room temperature
- 1/2 cup granulated sugar
- 1/2 cup all-purpose flour
- 1 tsp vanilla extract
- 1/4 tsp salt
- 1 tbsp unsalted butter, melted (or any neutral oil)
- 2 cups fresh cherries, pitted (or frozen, thawed and drained)
Instructions
- Preheat your oven to 350°F and position a rack in the center.
- Generously butter a 9-inch pie dish or cast-iron skillet.
- Arrange the pitted cherries in a single layer across the bottom of the buttered dish.
- In a medium bowl, whisk the eggs vigorously for 30 seconds until frothy and pale yellow.
- Tip: Room-temperature eggs blend more smoothly, so take them out 30 minutes before baking.
- Gradually whisk in the sugar until the mixture is thick and creamy.
- Add the flour and salt, whisking just until no dry streaks remain to avoid overmixing.
- Pour in the milk, vanilla extract, and melted butter, whisking until the batter is smooth and lump-free.
- Tip: Let the batter rest for 5 minutes to allow the flour to hydrate, which prevents a rubbery texture.
- Carefully pour the batter over the cherries in the prepared dish.
- Bake at 350°F for 35–40 minutes, or until the edges are golden brown and the center jiggles slightly when shaken.
- Tip: Insert a toothpick into the center; it should come out clean or with a few moist crumbs attached.
- Transfer the clafoutis to a wire rack and let it cool for 15–20 minutes before slicing.
Zesty bursts of cherry punctuate the creamy, custard-like interior, while the edges bake up with a delicate, pancake-like firmness. Serve it warm with a dusting of powdered sugar or a scoop of vanilla ice cream to contrast the subtle sweetness. Leftovers (if any!) taste wonderful chilled the next day, making it a versatile treat for any occasion.
Grilled Cherry and Goat Cheese Salad
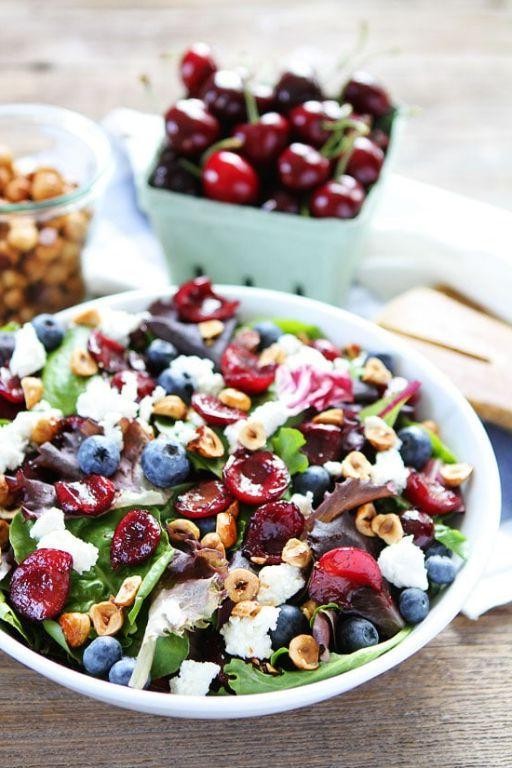
Yielding to the perfect balance of sweet and savory, this grilled cherry and goat cheese salad transforms simple ingredients into an elegant dish that’s surprisingly easy to master. Let’s walk through each step methodically to ensure your salad turns out perfectly every time.
2
servings15
minutes6
minutesIngredients
– 2 cups fresh cherries, pitted (frozen work too if thawed)
– 4 cups mixed greens (arugula adds nice peppery notes)
– 4 oz goat cheese, crumbled (herbed variety works beautifully)
– 1/4 cup walnuts, chopped (pecans make a fine substitute)
– 2 tbsp olive oil (or any neutral oil)
– 1 tbsp balsamic vinegar (aged varieties add depth)
– 1 tsp honey (maple syrup for vegan option)
– 1/4 tsp salt (adjust to preference)
– 1/8 tsp black pepper
Instructions
1. Preheat your grill or grill pan to medium-high heat (approximately 400°F).
2. Pit 2 cups of fresh cherries using a cherry pitter or small knife.
3. Toss the pitted cherries with 1 tablespoon of olive oil until lightly coated.
4. Place cherries in a single layer on the hot grill surface.
5. Grill cherries for 2-3 minutes per side until they develop visible grill marks and begin to soften.
6. Remove cherries from grill and let them cool for 5 minutes to prevent wilting the greens.
7. In a small bowl, whisk together remaining 1 tablespoon olive oil, 1 tablespoon balsamic vinegar, 1 teaspoon honey, 1/4 teaspoon salt, and 1/8 teaspoon black pepper.
8. Place 4 cups of mixed greens in a large salad bowl.
9. Drizzle half of the dressing over the greens and toss gently to coat.
10. Arrange the grilled cherries evenly over the dressed greens.
11. Sprinkle 4 ounces of crumbled goat cheese across the salad.
12. Scatter 1/4 cup of chopped walnuts over the top.
13. Drizzle the remaining dressing over the completed salad.
Layers of warm grilled cherries against cool, crisp greens create a wonderful temperature contrast that makes this salad special. The creamy goat cheese melts slightly from the warm fruit while the walnuts provide essential crunch. For a stunning presentation, serve this salad alongside grilled chicken or as a starter for dinner parties where the dramatic colors always impress.
Cherry Chocolate Chip Cookies
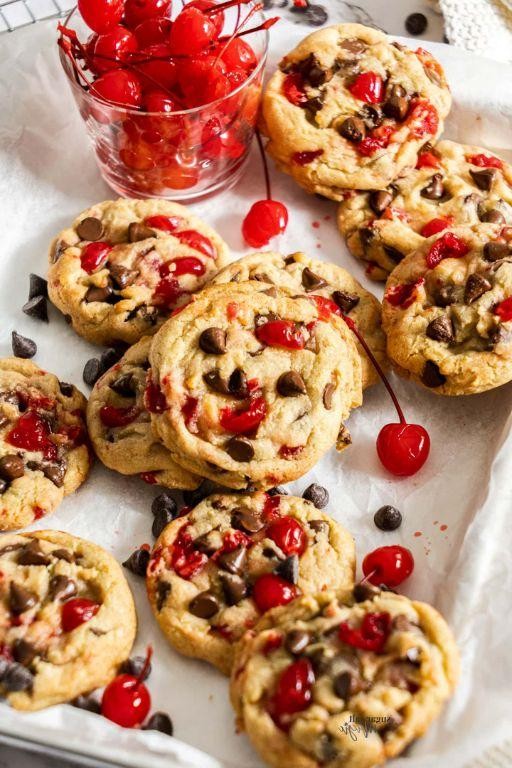
A perfect batch of cherry chocolate chip cookies begins with proper preparation and attention to detail, making this classic treat both approachable and rewarding for home bakers of all skill levels. These cookies combine the sweet-tart flavor of cherries with rich chocolate in a soft, chewy texture that’s sure to become a new favorite.
24
cookies15
minutes11
minutesIngredients
– 2¼ cups all-purpose flour (spoon and level for accuracy)
– 1 tsp baking soda
– 1 tsp salt
– 1 cup unsalted butter, softened at room temperature (about 65-70°F)
– ¾ cup granulated sugar
– ¾ cup packed light brown sugar (pack firmly into measuring cup)
– 2 large eggs at room temperature
– 2 tsp vanilla extract
– 1 cup semi-sweet chocolate chips
– 1 cup dried cherries, chopped if large
Instructions
1. Preheat your oven to 375°F and line two baking sheets with parchment paper.
2. Whisk together the flour, baking soda, and salt in a medium bowl until fully combined.
3. In a separate large bowl, beat the softened butter with both sugars using an electric mixer on medium speed for 2 minutes until light and fluffy.
4. Add the eggs one at a time to the butter mixture, beating for 30 seconds after each addition until fully incorporated.
5. Mix in the vanilla extract until just combined.
6. Gradually add the flour mixture to the wet ingredients, mixing on low speed until no dry streaks remain.
7. Fold in the chocolate chips and dried cherries using a spatula until evenly distributed throughout the dough.
8. Scoop 2-tablespoon portions of dough and place them 2 inches apart on the prepared baking sheets.
9. Bake one sheet at a time in the center rack for 9-11 minutes until the edges are golden brown but centers still appear slightly soft.
10. Remove the cookies from the oven and let them cool on the baking sheet for 5 minutes before transferring to a wire rack.
Just out of the oven, these cookies boast crisp edges with wonderfully soft, chewy centers where the melted chocolate pools alongside juicy cherry pieces. The tartness of the cherries beautifully cuts through the sweetness of the chocolate, creating a balanced flavor profile that’s sophisticated yet comforting. For an extra special treat, try serving them warm with a scoop of vanilla ice cream sandwiched between two cookies.
Cherry Mango Smoothie
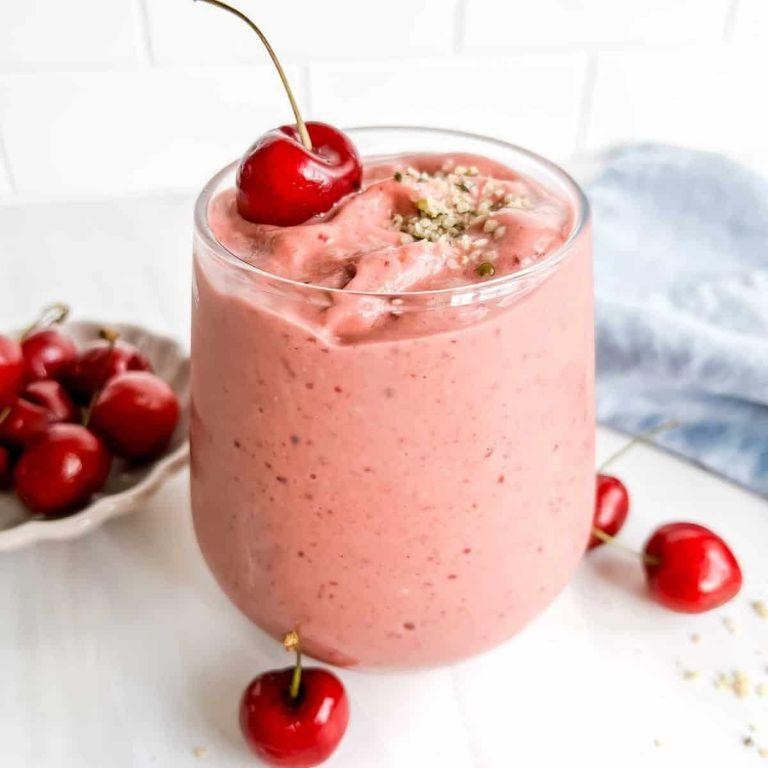
This refreshing cherry mango smoothie combines sweet summer fruits into a vibrant, nutrient-packed drink that comes together in minutes. The deep red cherries and sunny mango create a beautiful gradient effect when layered properly, making it as visually appealing as it is delicious. Follow these simple steps to achieve the perfect creamy texture and balanced flavor every time.
2
servings5
minutesIngredients
– 1 cup frozen dark sweet cherries (pitted, no need to thaw)
– 1 cup frozen mango chunks (ripe mango works best)
– 1 cup plain Greek yogurt (full-fat for creamier texture, or substitute with dairy-free alternative)
– 1/2 cup unsweetened almond milk (add more for thinner consistency)
– 1 tablespoon honey (adjust sweetness to preference)
– 1/2 teaspoon vanilla extract (pure vanilla recommended for best flavor)
Instructions
1. Measure 1 cup of frozen dark sweet cherries and place them in your blender pitcher.
2. Add 1 cup of frozen mango chunks to the blender with the cherries.
3. Pour 1 cup of plain Greek yogurt over the frozen fruit in the blender.
4. Measure 1/2 cup of unsweetened almond milk and add it to the blender ingredients.
5. Drizzle 1 tablespoon of honey into the mixture for natural sweetness.
6. Add 1/2 teaspoon of vanilla extract to enhance the fruit flavors.
7. Secure the blender lid tightly to prevent any leaks during blending.
8. Begin blending on low speed for 15 seconds to break down the larger frozen pieces.
9. Increase to high speed and blend for 45-60 seconds until the mixture becomes completely smooth and creamy.
10. Stop the blender and check the consistency by dipping a spoon into the mixture.
11. If the smoothie is too thick, add 1-2 tablespoons more almond milk and blend for another 15 seconds.
12. Pour the finished smoothie immediately into serving glasses to maintain the cold temperature.
Now you have a beautifully textured smoothie with the perfect balance of tart cherries and sweet mango. The creamy Greek yogurt base provides a rich mouthfeel that contrasts nicely with the bright fruit flavors. Try serving it in chilled glasses with a fresh cherry on the rim for an elegant presentation, or layer it with granola for a parfait-style breakfast.
Cherry Balsamic Glazed Chicken
Many home cooks find chicken dishes repetitive, but this cherry balsamic glazed version transforms simple ingredients into an elegant meal. Mastering this recipe requires just careful attention to timing and temperature for perfectly caramelized results.
5
servings15
minutes35
minutesIngredients
– 4 boneless, skinless chicken breasts (about 1.5 lbs total, pat dry for better browning)
– 1 cup cherry preserves (smooth variety works best for even glazing)
– 1/4 cup balsamic vinegar (aged for deeper flavor)
– 2 tbsp olive oil (or any neutral high-heat oil)
– 2 cloves garlic, minced (fresh preferred over powdered)
– 1 tsp dried thyme (or 1 tbsp fresh if available)
– 1/2 tsp salt (fine sea salt dissolves evenly)
– 1/4 tsp black pepper (freshly cracked for best flavor)
Instructions
1. Preheat your oven to 375°F and position a rack in the center for even heating.
2. Pat chicken breasts completely dry with paper towels to ensure proper browning.
3. Season both sides of chicken evenly with salt, pepper, and dried thyme.
4. Heat olive oil in a large oven-safe skillet over medium-high heat until shimmering, about 2 minutes.
5. Place chicken in the hot skillet and cook undisturbed for 5-6 minutes until golden brown crust forms.
6. Flip chicken using tongs and cook for 3 more minutes on the second side.
7. Transfer skillet to the preheated oven and bake for 12-15 minutes until internal temperature reaches 165°F.
8. While chicken bakes, combine cherry preserves, balsamic vinegar, and minced garlic in a small saucepan.
9. Simmer the glaze over medium-low heat for 8-10 minutes, stirring frequently until thickened slightly.
10. Remove chicken from oven and brush generously with the cherry balsamic glaze.
11. Return glazed chicken to oven for 3-4 minutes until glaze becomes sticky and caramelized.
12. Let chicken rest on a cutting board for 5 minutes before slicing to retain juices.
Creating that perfect sticky-sweet glaze transforms ordinary chicken into something special. Crisp-edged chicken gives way to tender, juicy meat that balances the tart balsamic with sweet cherry notes. Consider serving over creamy polenta or with roasted Brussels sprouts to complement the rich glaze.
Cherry Jam Thumbprint Cookies
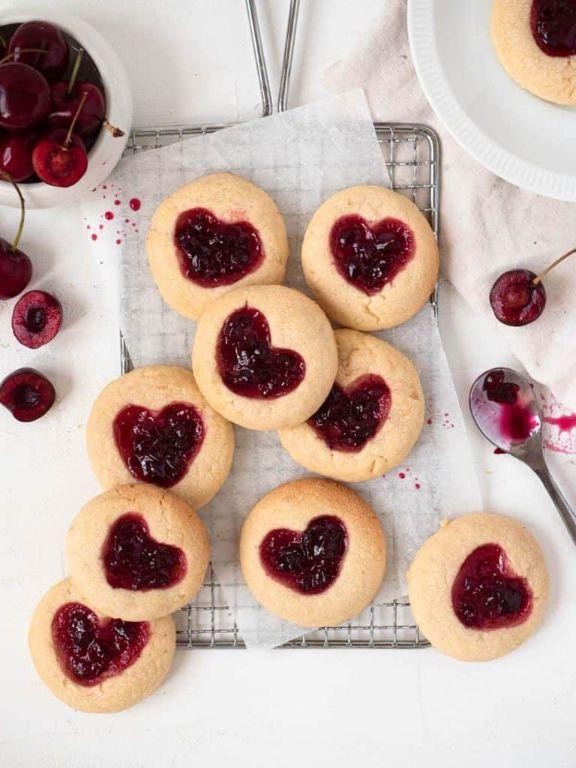
Making these classic cherry jam thumbprint cookies is simpler than you might think, even if you’re new to baking. Many home bakers appreciate how these buttery treats come together with just a few basic ingredients and straightforward techniques. Mastering this recipe will give you a delightful homemade cookie that’s perfect for holiday trays or everyday snacking.
24
cookies20
minutes14
minutesIngredients
– 1 cup unsalted butter, softened (at room temperature for about 30 minutes)
– ⅔ cup granulated sugar
– 2 large eggs, separated (save yolks for another use)
– 2 teaspoons vanilla extract
– 2¼ cups all-purpose flour
– ¼ teaspoon salt
– ½ cup finely chopped walnuts (or pecans if preferred)
– ⅓ cup cherry jam (or any fruit preserves you enjoy)
Instructions
1. Preheat your oven to 350°F and line two baking sheets with parchment paper.
2. Beat the softened butter and granulated sugar together in a large bowl using an electric mixer on medium speed for 2 minutes until light and fluffy.
3. Add the egg whites and vanilla extract to the butter mixture, then beat for 1 additional minute until fully incorporated.
4. Whisk the all-purpose flour and salt together in a separate bowl to ensure even distribution.
5. Gradually mix the flour mixture into the wet ingredients on low speed until a soft dough forms, being careful not to overmix.
6. Place the chopped walnuts in a shallow bowl for easy coating access.
7. Scoop 1 tablespoon of dough and roll it between your palms to form a smooth ball.
8. Roll each dough ball in the chopped walnuts until evenly coated on all surfaces.
9. Arrange the walnut-coated dough balls 2 inches apart on your prepared baking sheets.
10. Use your thumb or the back of a teaspoon to make a deep indentation in the center of each cookie.
11. Fill each indentation with ½ teaspoon of cherry jam, being careful not to overfill.
12. Bake the cookies for 12-14 minutes until the edges are lightly golden and the jam is bubbly.
13. Transfer the baking sheets to a wire rack and let the cookies cool completely for 30 minutes before serving.
Using a light touch when making the thumbprint indentations helps prevent the cookies from cracking during baking. These cookies feature a tender, buttery base that contrasts beautifully with the sweet-tart cherry filling and crunchy walnut coating. Try serving them alongside coffee for breakfast or stacking them with alternating jam colors for a festive cookie platter that will impress your guests.
Cherry Lemonade
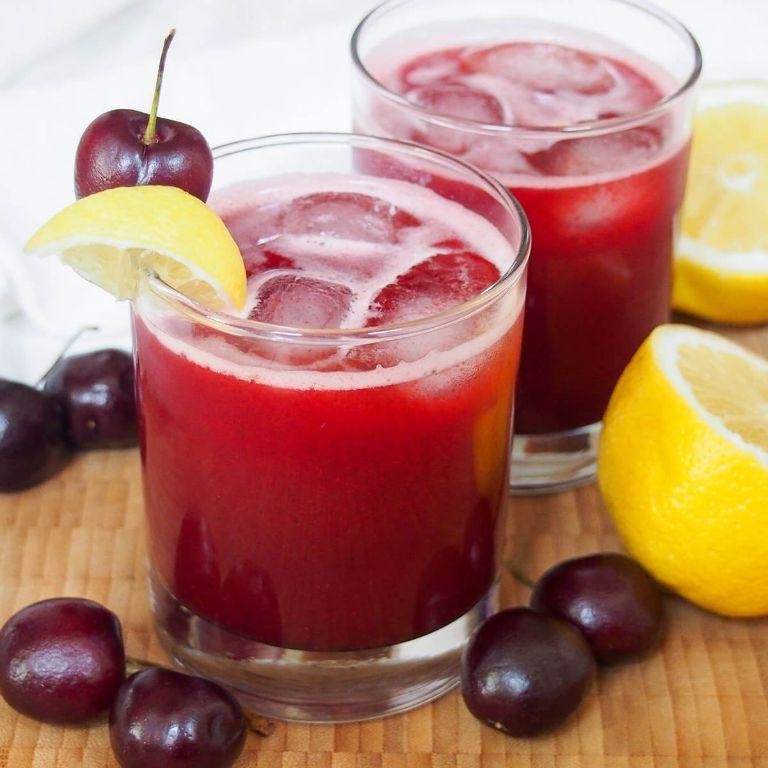
During these warm autumn afternoons, nothing refreshes quite like a homemade cherry lemonade. This vibrant drink combines sweet cherries with tangy lemon for a perfectly balanced beverage that’s surprisingly simple to make from scratch. Let’s walk through each step together to create your new favorite thirst-quencher.
6
servings20
minutes15
minutesIngredients
- 2 cups fresh or frozen pitted cherries (thawed if frozen)
- 1 cup freshly squeezed lemon juice, about 4-6 lemons
- 3/4 cup granulated sugar, adjust for preferred sweetness
- 6 cups cold water, divided
- Ice cubes for serving
- Fresh mint sprigs for garnish (optional)
Instructions
- Combine cherries, 1 cup water, and sugar in a medium saucepan over medium heat.
- Bring the mixture to a gentle simmer, stirring occasionally until sugar completely dissolves, about 3-4 minutes.
- Reduce heat to low and continue cooking until cherries soften and release their juices, about 8-10 minutes.
- Remove saucepan from heat and let the cherry mixture cool for 15 minutes to prevent splattering when blending.
- Transfer the cooled cherry mixture to a blender and blend on high speed until completely smooth, about 1 minute.
- Strain the blended cherry mixture through a fine-mesh sieve into a large pitcher, pressing with a spoon to extract all liquid.
- Add freshly squeezed lemon juice to the pitcher with the cherry syrup.
- Pour remaining 5 cups cold water into the pitcher and stir thoroughly to combine all ingredients.
- Chill the lemonade in refrigerator for at least 1 hour before serving to allow flavors to meld.
- Fill glasses with ice cubes and pour chilled cherry lemonade over ice.
- Garnish each serving with fresh mint sprigs if desired.
What makes this cherry lemonade exceptional is its beautiful ruby color and the perfect balance between sweet cherry notes and bright lemon acidity. The strained pulp creates a smooth, sippable texture that’s neither too thick nor watery. For a festive twist, freeze some lemonade with whole cherries in popsicle molds for a refreshing frozen treat that both kids and adults will love.
Cherry-Glazed Pork Chops
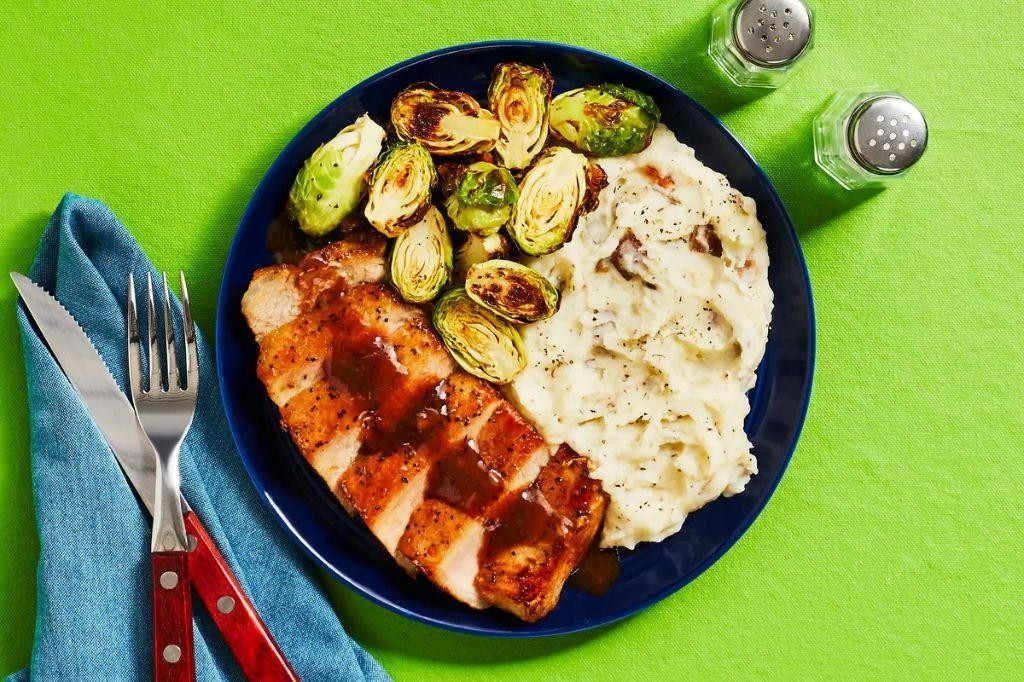
Perfecting pork chops can be challenging for home cooks, but this cherry-glazed version simplifies the process with a sweet-savory sauce that caramelizes beautifully. Preparing these chops requires just a few basic ingredients and straightforward techniques that yield impressive results every time. Follow these steps carefully for tender, juicy pork with a glossy finish that will become a weeknight favorite.
3
servings10
minutes17
minutesIngredients
– 4 bone-in pork chops, 1-inch thick (bring to room temperature for even cooking)
– 1 tablespoon olive oil (or any neutral oil with high smoke point)
– 1/2 teaspoon kosher salt (adjust based on pork chop thickness)
– 1/4 teaspoon black pepper (freshly ground for best flavor)
– 1/2 cup cherry preserves (smooth variety works best for glazing)
– 2 tablespoons balsamic vinegar (adds acidity to balance sweetness)
– 1 tablespoon Dijon mustard (helps emulsify the glaze)
– 2 cloves garlic, minced (fresh provides more aromatic flavor)
– 1/4 teaspoon red pepper flakes (optional, for subtle heat)
Instructions
1. Pat pork chops completely dry with paper towels to ensure proper browning.
2. Season both sides of pork chops evenly with salt and pepper.
3. Heat olive oil in a large skillet over medium-high heat until shimmering, about 2 minutes.
4. Place pork chops in the hot skillet without crowding, cooking for 4-5 minutes until deeply golden brown.
5. Flip pork chops using tongs and cook for another 4-5 minutes on the second side.
6. Reduce heat to medium and insert an instant-read thermometer into the thickest part of a chop, checking for 145°F internal temperature.
7. Transfer pork chops to a clean plate and tent loosely with foil to rest.
8. While pork rests, reduce skillet heat to medium-low and add minced garlic, cooking for 30 seconds until fragrant.
9. Whisk in cherry preserves, balsamic vinegar, Dijon mustard, and red pepper flakes until fully combined.
10. Simmer the glaze for 2-3 minutes, stirring constantly until thickened and bubbling.
11. Return pork chops and any accumulated juices to the skillet, spooning glaze over each chop.
12. Cook for 1 minute, turning chops once to coat both sides in the glossy glaze.
A beautifully caramelized crust gives way to exceptionally juicy pork that pairs wonderfully with the sweet-tart cherry glaze. The slight acidity from the balsamic vinegar cuts through the richness, creating a balanced flavor profile that elevates this simple dish. Consider serving these glazed chops alongside roasted Brussels sprouts or creamy polenta to soak up every bit of the delicious sauce.
Black Forest Cherry Cake
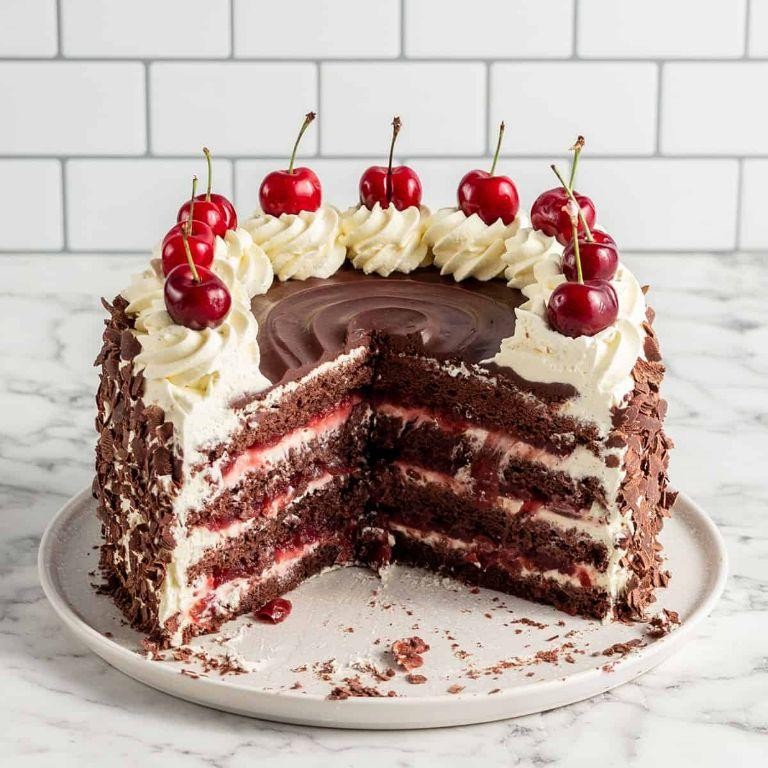
Baking a classic Black Forest Cherry Cake might seem intimidating, but breaking it down into simple, methodical steps makes this impressive dessert completely achievable for any home baker. By carefully following each stage from cake preparation to final assembly, you’ll create a stunning layered masterpiece that balances rich chocolate, sweet cherries, and fluffy whipped cream.
8
servings25
minutes35
minutesIngredients
– 1 ¾ cups all-purpose flour (spooned and leveled for accuracy)
– ¾ cup unsweetened cocoa powder (Dutch-processed preferred for deeper flavor)
– 2 cups granulated sugar
– 1 ½ tsp baking powder
– 1 ½ tsp baking soda
– 1 tsp salt
– 2 large eggs (at room temperature for better incorporation)
– 1 cup whole milk
– ½ cup vegetable oil (or any neutral oil like canola)
– 2 tsp pure vanilla extract
– 1 cup boiling water
– 2 cups heavy whipping cream (chilled)
– ¼ cup powdered sugar
– 1 tsp vanilla extract
– 1 (21 oz) can cherry pie filling
– ½ cup chocolate shavings (from a chocolate bar)
Instructions
1. Preheat your oven to 350°F and grease two 9-inch round cake pans.
2. Whisk together 1 ¾ cups flour, ¾ cup cocoa powder, 2 cups sugar, 1 ½ tsp baking powder, 1 ½ tsp baking soda, and 1 tsp salt in a large bowl.
3. Add 2 eggs, 1 cup milk, ½ cup oil, and 2 tsp vanilla to the dry ingredients.
4. Beat the mixture on medium speed for 2 minutes until fully combined.
5. Carefully stir in 1 cup boiling water until the batter becomes thin and smooth.
6. Divide the batter evenly between the prepared pans using a kitchen scale for precision.
7. Bake for 30-35 minutes until a toothpick inserted in the center comes out clean.
8. Cool the cakes in their pans on a wire rack for 10 minutes.
9. Run a knife around the edges and invert the cakes onto the rack to cool completely.
10. Whip 2 cups cold heavy cream with ¼ cup powdered sugar and 1 tsp vanilla until stiff peaks form.
11. Place one cooled cake layer on a serving plate and spread 1 cup of whipped cream evenly over the top.
12. Spoon half of the cherry pie filling over the whipped cream layer, keeping cherries away from the edges.
13. Carefully place the second cake layer on top, pressing down gently.
14. Frost the top and sides of the cake with the remaining whipped cream using an offset spatula for smooth coverage.
15. Create a decorative border with the remaining cherry pie filling on top of the cake.
16. Sprinkle ½ cup chocolate shavings over the sides and center of the cake.
Heavenly layers of moist chocolate cake, billowy whipped cream, and tart cherries create a textural symphony in every bite. The contrast between rich cocoa and bright fruit makes this dessert perfect for special occasions, though it’s equally wonderful served with coffee for a luxurious afternoon treat. For an elegant presentation, garnish individual slices with fresh mint leaves and extra chocolate curls just before serving.
Cherry Vanilla Ice Cream
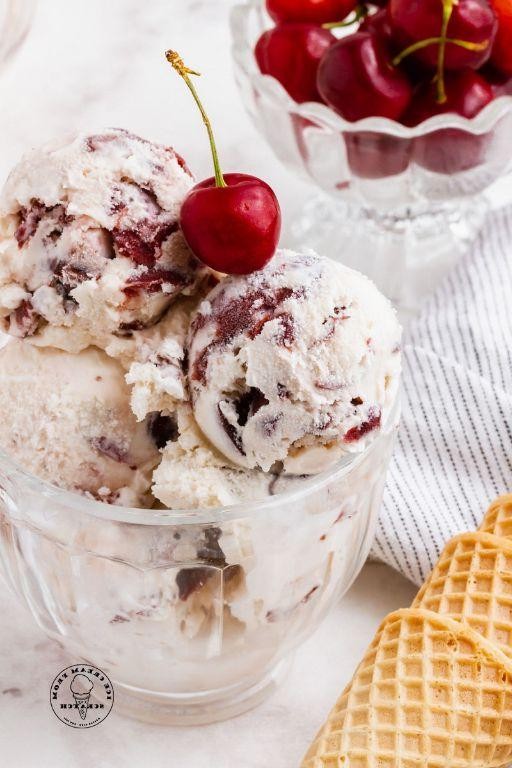
Creating cherry vanilla ice cream at home yields a creamy, fruit-studded treat far superior to store-bought versions. This straightforward method requires no special equipment and walks you through each stage with precision, ensuring perfect results even for first-time ice cream makers. Follow these measured steps carefully for a dessert that balances sweet cherries with smooth vanilla in every scoop.
15
minutesIngredients
– 2 cups heavy cream (chilled for faster whipping)
– 1 cup whole milk (for creamier texture than low-fat)
– 3/4 cup granulated sugar (reduce to 2/3 cup if using sweetened cherries)
– 1 tablespoon pure vanilla extract (not imitation for best flavor)
– 1/4 teaspoon fine sea salt (enhances sweetness)
– 1 1/2 cups pitted fresh cherries, chopped (frozen work if thawed and drained)
Instructions
1. Combine 2 cups heavy cream, 1 cup whole milk, 3/4 cup granulated sugar, and 1/4 teaspoon fine sea salt in a large mixing bowl.
2. Whisk the mixture vigorously for 2 full minutes until the sugar completely dissolves and no granules remain.
3. Stir in 1 tablespoon pure vanilla extract until fully incorporated into the cream base.
4. Pour the mixture into a 9×13-inch metal baking pan for optimal surface area and faster freezing.
5. Cover the pan tightly with plastic wrap, pressing it directly against the surface to prevent ice crystals.
6. Freeze the mixture for 45 minutes until the edges begin firming but the center remains slushy.
7. Transfer the partially frozen base to a chilled mixing bowl, scraping the pan thoroughly with a spatula.
8. Beat the mixture with an electric mixer on medium-high speed for 3 minutes until light and creamy.
9. Fold in 1 1/2 cups chopped pitted cherries gently until evenly distributed throughout the base.
10. Return the mixture to the cleaned 9×13-inch pan, spreading it evenly with a spatula.
11. Cover again with plastic wrap pressed directly on the surface and freeze for 4 hours until firm.
12. Let the ice cream stand at room temperature for 8 minutes before scooping to soften slightly.
Dense yet scoopable, this ice cream features creamy vanilla base punctuated with juicy cherry bursts. The cherries maintain slight firmness against the smooth backdrop, creating delightful textural contrast. Serve it sandwiched between chewy chocolate cookies or layered with crushed amaretto biscuits for an elegant parfait presentation.
Cherry-Infused Rice Pudding
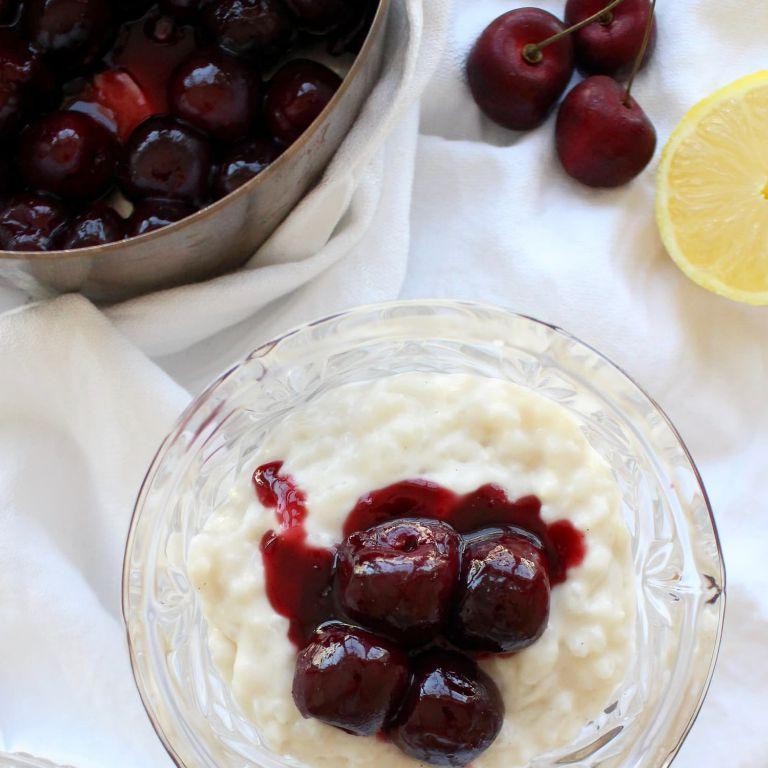
Sometimes the simplest desserts bring the most comfort, and this cherry-infused rice pudding is no exception. Starting with basic pantry staples, we’ll transform ordinary rice into a creamy, fruity delight that’s perfect for cozy evenings or elegant gatherings. Get ready to create a dessert that balances sweet cherries with comforting vanilla in every spoonful.
2
servings10
minutes37
minutesIngredients
– 1 cup short-grain white rice (rinsed well to remove excess starch)
– 4 cups whole milk (for maximum creaminess, or 2% for lighter version)
– 1/2 cup granulated sugar (adjust to your preferred sweetness level)
– 1 cup fresh or frozen cherries (pitted and halved, frozen work perfectly)
– 1 teaspoon vanilla extract (pure vanilla recommended for best flavor)
– 1/4 teaspoon salt (to balance the sweetness)
– 1/2 cup heavy cream (for finishing, or half-and-half for lighter option)
Instructions
1. Rinse 1 cup short-grain white rice under cold running water until water runs clear, about 1 minute of stirring.
2. Combine rinsed rice, 4 cups whole milk, and 1/4 teaspoon salt in a heavy-bottomed saucepan over medium heat.
3. Bring the mixture to a gentle simmer, stirring occasionally to prevent sticking to the bottom.
4. Reduce heat to low and cover the saucepan, cooking for 25 minutes while stirring every 5 minutes to ensure even cooking.
5. Add 1/2 cup granulated sugar and 1 cup pitted cherries, stirring until sugar completely dissolves, about 2 minutes.
6. Continue cooking uncovered for 10 more minutes, stirring frequently as the pudding thickens noticeably.
7. Remove from heat and stir in 1 teaspoon vanilla extract and 1/2 cup heavy cream until fully incorporated.
8. Let the pudding rest for 15 minutes off heat to allow flavors to meld and texture to set properly.
Generously spoon the warm pudding into serving bowls, noticing how the cherries have softened into jammy pockets throughout the creamy rice. The finished texture should be luxuriously thick yet still spoonable, with the vanilla complementing the bright cherry flavor beautifully. For an elegant presentation, top with fresh cherry halves and a drizzle of cold cream right before serving.
Conclusion
Zesty, sweet, and perfect for summer, these cherry recipes are sure to delight! We hope this collection inspires you to make the most of cherry season. Try a recipe or two, and let us know your favorites in the comments below. Don’t forget to share this roundup on Pinterest so others can enjoy these tasty treats too!


