
Now that the summer heat is fading, nothing beats a warm, comforting casserole to welcome the cozy season. This cheesy chicken and rice bake is the perfect weeknight dinner that’ll have your family begging for seconds!
Why This Recipe Works
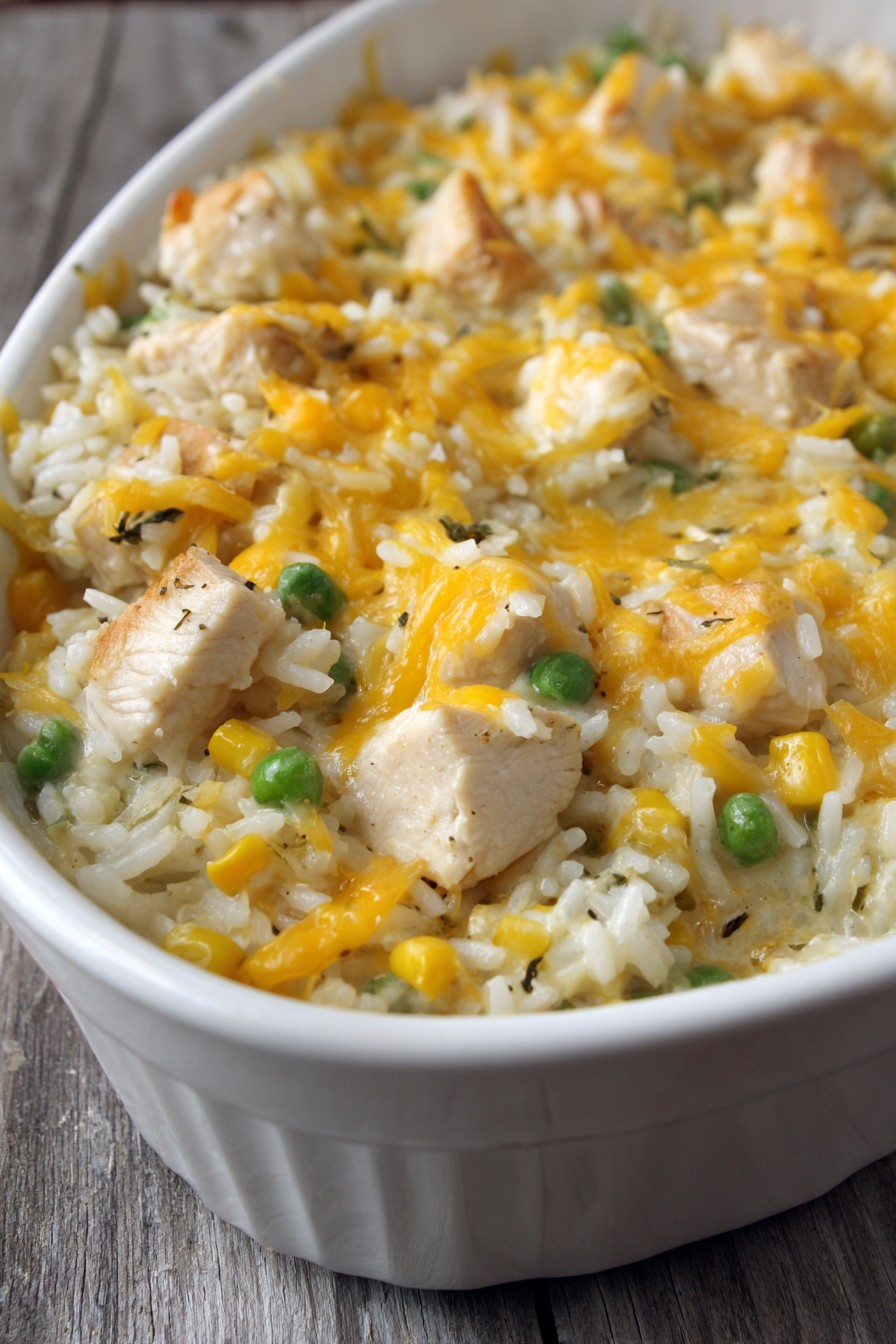
- The combination of tender chicken, fluffy rice, and melty cheese creates the ultimate comfort food experience that satisfies both kids and adults alike
- Using cream of chicken soup as the base ensures a creamy, rich sauce that coats every grain of rice without requiring complicated roux-making skills
- Baking at 375°F for exactly 45 minutes guarantees perfectly cooked rice that’s neither mushy nor crunchy, with a golden-brown cheesy crust on top
- The one-dish preparation means minimal cleanup, making it ideal for busy weeknights when you want something delicious without the kitchen mess
- Customization is incredibly easy – you can add different vegetables, switch up the cheese, or even make it spicy depending on your family’s preferences
Ingredients
- 2 cups uncooked long-grain white rice
- 4 cups chicken broth, divided
- 2 pounds boneless, skinless chicken breasts, cut into 1-inch cubes
- 1 tablespoon olive oil
- 1 large yellow onion, finely diced
- 3 cloves garlic, minced
- 2 cans (10.5 oz each) cream of chicken soup
- 1 cup sour cream
- 1 teaspoon paprika
- 1/2 teaspoon black pepper
- 1 teaspoon salt
- 2 cups shredded cheddar cheese, divided
- 1 cup shredded mozzarella cheese
- 1/2 cup grated Parmesan cheese
- 1 cup frozen peas
- 1 cup frozen corn
- 2 tablespoons fresh parsley, chopped (for garnish)
Equipment Needed
- 9×13 inch baking dish
- Large skillet
- Mixing bowls
- Measuring cups and spoons
- Cutting board and sharp knife
- Wooden spoon or spatula
- Aluminum foil
Instructions
Prepare the Rice Base
Start by preheating your oven to 375°F and greasing your 9×13 inch baking dish with butter or cooking spray. In a medium saucepan, combine 2 cups of uncooked long-grain white rice with 4 cups of chicken broth. Bring to a boil over high heat, then immediately reduce to low, cover, and simmer for exactly 18 minutes until the liquid is absorbed and the rice is tender but still slightly firm. Remove from heat and let it stand covered for 5 minutes – this allows the rice to finish cooking through steam and prevents it from becoming mushy when baked. Fluff with a fork and set aside. This par-cooking method ensures your rice won’t turn into a gloppy mess in the final bake.
Cook the Chicken and Vegetables
Heat 1 tablespoon of olive oil in a large skillet over medium-high heat until shimmering but not smoking. Add your 1-inch cubed chicken pieces in a single layer, making sure not to overcrowd the pan – you might need to work in batches. Cook for 4-5 minutes per side until golden brown and cooked through, reaching an internal temperature of 165°F when checked with an instant-read thermometer. Remove the chicken and set aside. In the same skillet, add your finely diced yellow onion and cook for 3-4 minutes until translucent, then add the minced garlic and cook for another 30 seconds until fragrant. The key here is building flavor layers by using the same pan and those delicious browned bits from the chicken.
Create the Creamy Sauce Mixture
In a large mixing bowl, combine both cans of cream of chicken soup, 1 cup of sour cream, 1 teaspoon paprika, 1/2 teaspoon black pepper, and 1 teaspoon salt. Whisk vigorously until completely smooth and well combined – no one wants lumps in their creamy sauce! Add 1 cup of the cooked rice (reserve the rest), the cooked chicken, sautéed onions and garlic, 1 cup frozen peas, and 1 cup frozen corn. Gently fold everything together until evenly distributed. The frozen vegetables will thaw and cook perfectly during baking, adding both color and nutrition without any extra prep work. This is where the magic starts coming together!
Assemble the Casserole Layers
Spread the remaining cooked rice evenly across the bottom of your prepared baking dish, creating a sturdy base that will absorb excess moisture and prevent sogginess. Pour the chicken and sauce mixture over the rice layer, spreading it into an even layer with a spatula. Now for the cheesy goodness! Sprinkle 1 1/2 cups of shredded cheddar cheese evenly over the top, followed by 1 cup of shredded mozzarella, and finally 1/2 cup of grated Parmesan. The combination of these three cheeses creates incredible flavor depth and that perfect golden crust we all crave. Cover the dish tightly with aluminum foil, making sure it’s sealed well to trap steam.
Bake to Perfection
Place your covered casserole in the preheated 375°F oven and bake for 30 minutes. After this time, carefully remove the foil (watch for steam!) and continue baking uncovered for another 15-20 minutes. You’ll know it’s done when the edges are bubbly, the cheese is completely melted and golden brown in spots, and the internal temperature reaches 165°F when tested in the center. If you want extra browning on the cheese, you can broil for the final 2-3 minutes, but watch closely as cheese can burn quickly! Remove from oven and let it rest for 10 minutes – this crucial step allows the casserole to set up properly for clean slicing.
Serve and Enjoy
After the resting period, sprinkle the top with 2 tablespoons of freshly chopped parsley for a pop of color and freshness. Using a sharp knife or serving spoon, portion out generous servings onto plates. The casserole should hold its shape beautifully while still being creamy and luxurious. Serve immediately while hot and cheesy! This dish pairs wonderfully with a simple green salad or steamed vegetables to balance the richness. Any leftovers can be stored in an airtight container in the refrigerator for up to 4 days, though I doubt you’ll have much left!
Tips and Tricks
For the absolute best results, consider these pro tips that will take your casserole from good to legendary. First, if you have time, brine your chicken cubes for 30 minutes in a solution of 4 cups water and 1/4 cup salt before cooking – this ensures incredibly juicy, flavorful chicken that won’t dry out during baking. When cooking your rice, use chicken broth instead of water for extra flavor infusion throughout the entire dish. If you’re concerned about sodium, opt for low-sodium broth and cream of chicken soup, then adjust seasoning at the end.
For cheese lovers, experiment with different cheese combinations beyond the classic cheddar-mozzarella-Parmesan trio. Pepper jack adds a nice kick, while Gruyère brings sophisticated nutty notes. Always shred your own cheese from blocks rather than using pre-shredded – the anti-caking agents in pre-shredded cheese can affect melting quality and texture. If you want an extra crispy top, mix 1/4 cup of panko breadcrumbs with 2 tablespoons of melted butter and sprinkle over the cheese before the final uncovered baking time.
Vegetable variations are endless – try adding sautéed mushrooms, diced bell peppers, or even chopped spinach (make sure to squeeze out excess moisture first). For a creamier result, substitute 1 cup of the chicken broth with heavy cream when cooking the rice. If you’re making this ahead, assemble everything except the cheese topping, cover tightly, and refrigerate for up to 24 hours. When ready to bake, add the cheese and increase initial covered baking time by 10-15 minutes since you’re starting from cold.
Freezing instructions: This casserole freezes beautifully either before or after baking. For unbaked freezing, assemble completely but wait to add the cheese topping until ready to bake. Wrap tightly in both plastic wrap and foil, freeze for up to 3 months. Thaw overnight in refrigerator before baking as directed. For already-baked freezing, portion into individual servings, wrap tightly, and freeze. Reheat in oven at 350°F for 20-25 minutes or microwave until hot throughout.
Recipe Variations
- Mexican Fiesta Version: Transform this into a south-of-the-border delight by adding 1 tablespoon of taco seasoning to the sauce mixture, using pepper jack cheese instead of mozzarella, and stirring in a 4-ounce can of diced green chilies. Substitute the peas and corn with black beans and diced tomatoes. Top with crushed tortilla chips mixed with the cheese for extra crunch. Serve with avocado slices, sour cream, and fresh cilantro for a complete Mexican-inspired meal that’ll have everyone doing the happy dance.
- Broccoli Cheese Twist: For vegetable lovers, replace the peas and corn with 3 cups of fresh broccoli florets (blanched for 2 minutes first) and add 1/2 cup of diced carrots. Use extra sharp cheddar cheese and stir 1 teaspoon of dry mustard powder into the sauce for extra depth. This variation turns the casserole into a complete meal with built-in veggies, perfect for picky eaters who need their greens disguised in cheesy goodness.
- Buffalo Chicken Style: Spice things up by tossing the cooked chicken cubes in 1/2 cup of buffalo sauce before adding to the mixture. Use a blue cheese and mozzarella blend instead of cheddar, and add 1/2 cup of crumbled blue cheese to the sauce. Omit the peas and corn, and serve with celery sticks and ranch dressing for dipping. This variation brings game-day flavors to your dinner table any night of the week.
- Italian Herb Edition: Give it a Mediterranean makeover by adding 1 tablespoon of Italian seasoning to the sauce, using provolone and fontina cheeses instead of cheddar/mozzarella, and substituting the vegetables with sautéed mushrooms and spinach. Stir in 1/4 cup of sun-dried tomatoes and top with extra Parmesan and a sprinkle of breadcrumbs mixed with dried oregano before baking. Serve with a side of garlic bread for a complete Italian feast.
Frequently Asked Questions
Can I use brown rice instead of white rice?
Absolutely! Brown rice works well but requires adjustments. Since brown rice takes longer to cook and absorbs more liquid, increase the initial rice cooking time to 40-45 minutes using 4 1/2 cups of broth instead of 4 cups. You may also need to add 5-10 minutes to the baking time. The texture will be slightly chewier and nuttier, which many people actually prefer. Just make sure the rice is fully cooked before assembling the casserole, as the baking time alone won’t be enough to cook raw brown rice through properly.
What can I substitute for cream of chicken soup?
If you prefer not to use canned soup, you can make a homemade version by melting 4 tablespoons of butter in a saucepan, whisking in 1/4 cup of flour to make a roux, then gradually adding 2 cups of chicken broth and 1/2 cup of milk or cream. Cook until thickened, then season with 1/2 teaspoon each of garlic powder, onion powder, and poultry seasoning. For a dairy-free option, use olive oil instead of butter, and substitute the milk with unsweetened almond or oat milk. The homemade version often tastes fresher and allows you to control the sodium content.
How do I prevent the casserole from becoming too dry?
Dry casserole usually results from overbaking or insufficient liquid. Make sure to measure your rice and broth accurately during the initial cooking phase. If your oven runs hot, check for doneness 5-10 minutes early. The casserole should be bubbly around the edges but still have some movement in the center when gently shaken. Letting it rest for 10 minutes after baking allows the residual heat to distribute evenly and the rice to absorb any remaining liquid. If you’re consistently having dryness issues, try increasing the chicken broth by 1/2 cup or adding an extra 1/4 cup of sour cream to the sauce mixture.
Can I make this recipe gluten-free?
Yes, this adapts beautifully to gluten-free diets! Use certified gluten-free cream of chicken soup (several brands offer GF versions) or make your own gluten-free white sauce using gluten-free flour blend. Ensure your chicken broth is gluten-free (most are, but check labels), and double-check that any pre-shredded cheeses don’t contain anti-caking agents with gluten. The basic ingredients – chicken, rice, vegetables, and most cheeses – are naturally gluten-free, so with these simple swaps, you can enjoy this comfort food classic without any gluten concerns.
How long do leftovers last, and what’s the best way to reheat them?
Leftovers will keep in an airtight container in the refrigerator for 3-4 days. For freezing, portion into individual servings, wrap tightly, and freeze for up to 3 months. The best reheating method is in the oven at 350°F for 20-25 minutes if refrigerated, or 30-35 minutes if frozen (thaw overnight in fridge first). Cover with foil for the first half of reheating to prevent drying out, then remove foil to crisp up the top. Microwave reheating works in a pinch (2-3 minutes on high), but may result in softer texture. Add a splash of broth or milk before reheating if the casserole seems dry.
Summary
This cheesy chicken and rice casserole delivers ultimate comfort with minimal effort. Creamy, cheesy, and packed with flavor, it’s perfect for busy weeknights or cozy family dinners. Customizable and freezer-friendly, it’s sure to become a household favorite!
Cheesy Chicken and Rice Casserole
4
servings25
minutes45
minutesIngredients
Instructions
- 1 Preheat oven to 375°F and grease a 9x13 inch baking dish
- 2 Cook rice with 4 cups chicken broth for 18 minutes, then let stand 5 minutes
- 3 Brown chicken cubes in olive oil, then sauté onions and garlic
- 4 Mix soup, sour cream, seasonings, then combine with chicken, vegetables, and 1 cup rice
- 5 Layer remaining rice in dish, top with mixture, then cheeses
- 6 Cover and bake 30 minutes, uncover and bake 15-20 minutes more until bubbly and golden
- 7 Rest 10 minutes, garnish with parsley, and serve hot


