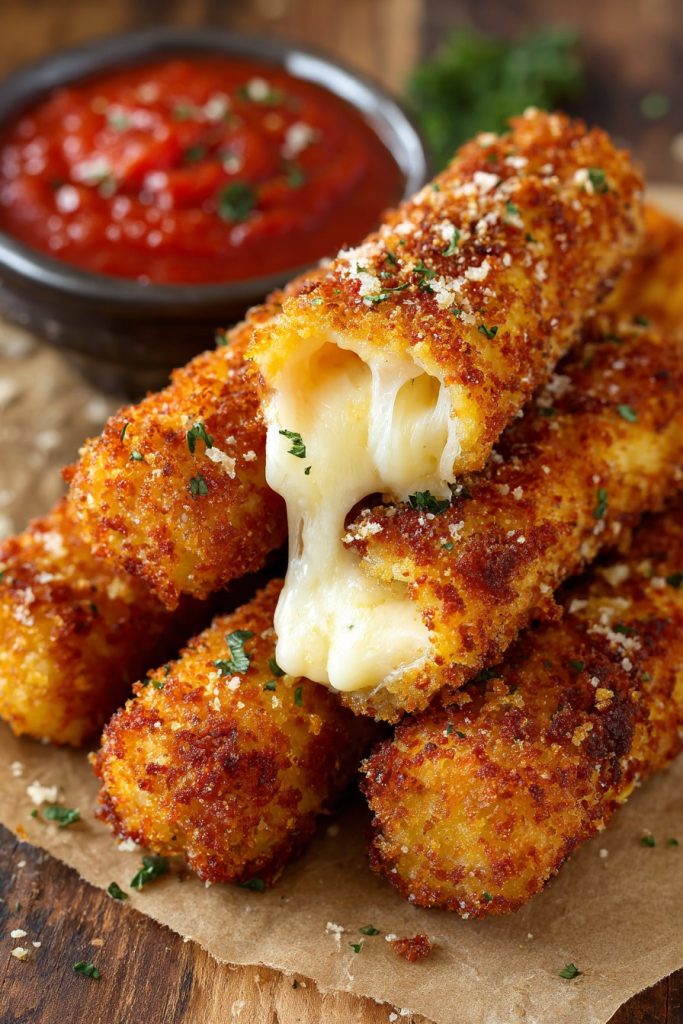
Very few things in this world bring me back to my grandmother’s farmhouse kitchen quite like the smell of cheese sticks baking in the oven. Visions of snowy afternoons spent rolling out dough while she shared stories of her own mother’s cooking come flooding back every time I make this recipe. Venture with me into this simple, soul-satisfying treat that has warmed hearts and filled bellies for generations in our family.
Why This Recipe Works
- The combination of sharp cheddar and creamy mozzarella creates a perfect balance of flavor and meltability that ensures every bite is both tangy and wonderfully stretchy, just like the cheese sticks my grandmother used to pull straight from her cast iron skillet.
- Using both baking powder and a touch of yeast gives these sticks their signature light, airy interior while maintaining that satisfying crispness on the outside, creating that perfect textural contrast we all crave in good comfort food.
- The addition of buttermilk in the dough not only adds a subtle tang that complements the cheese beautifully but also creates an incredibly tender crumb that practically melts in your mouth, making these impossible to resist straight from the oven.
- Double-coating in seasoned breadcrumbs provides an extra-crispy exterior that holds up beautifully to dipping in marinara sauce without becoming soggy, ensuring each cheese stick maintains its structural integrity from first bite to last.
- Resting the dough for a full hour allows the flavors to develop and the gluten to relax, resulting in cheese sticks that are both flavorful and incredibly easy to work with, even for beginner bakers in their own farmhouse kitchens.
Ingredients
- 2 cups all-purpose flour, plus extra for dusting
- 1 tablespoon granulated sugar
- 1 teaspoon baking powder
- 1/2 teaspoon active dry yeast
- 1 teaspoon salt
- 3/4 cup buttermilk, warmed to about 110°F
- 1 large egg, lightly beaten
- 2 tablespoons unsalted butter, melted and cooled slightly
- 1 1/2 cups shredded sharp cheddar cheese
- 1 cup shredded whole milk mozzarella cheese
- 1 cup Italian-seasoned breadcrumbs
- 1/2 cup grated Parmesan cheese
- 1 teaspoon garlic powder
- 1/2 teaspoon paprika
- 1 large egg beaten with 1 tablespoon water (for egg wash)
- Vegetable oil for frying (about 2 cups)
- Marinara sauce for serving
Equipment Needed
- Large mixing bowl
- Stand mixer with dough hook (optional but helpful)
- Rolling pin
- Pizza cutter or sharp knife
- Baking sheets
- Parchment paper
- Deep fry thermometer
- Large heavy-bottomed pot or Dutch oven
- Wire cooling rack
- Slotted spoon or spider strainer
Instructions
Prepare the Dough and Let It Rest
Begin by combining your dry ingredients in that large mixing bowl – measure out 2 cups of all-purpose flour, 1 tablespoon of granulated sugar, 1 teaspoon of baking powder, that half teaspoon of active dry yeast, and 1 teaspoon of salt. Whisk them together until they’re well acquainted, just like introducing old friends at a country gathering. In a separate vessel, warm your 3/4 cup of buttermilk to about 110°F – you want it warm enough to activate the yeast but not so hot that it kills those precious little organisms. Pour the warmed buttermilk into your dry ingredients, then add 1 lightly beaten large egg and 2 tablespoons of melted unsalted butter that’s had a moment to cool. Stir everything together with a wooden spoon until a shaggy dough forms, then turn it out onto a lightly floured surface. Knead for about 5-7 minutes until the dough becomes smooth and elastic, adding just enough additional flour to prevent sticking but not so much that it becomes tough. Place the dough back in your lightly oiled bowl, cover with a clean kitchen towel, and let it rest in a warm, draft-free spot for exactly 1 hour – this resting period is crucial for developing flavor and making the dough easier to work with.
Incorporate the Cheeses and Shape the Sticks
After your dough has rested for that full hour, it’s time to bring in the stars of the show – the cheeses. Punch down the dough gently to release any air bubbles, then transfer it to your work surface. Sprinkle 1 1/2 cups of shredded sharp cheddar and 1 cup of shredded whole milk mozzarella evenly over the dough. Now comes the fun part – knead those cheeses right into the dough until they’re thoroughly incorporated and distributed throughout. You’ll notice the dough becoming beautifully marbled with those cheesy pockets that will melt into glorious pools of goodness. Roll the dough out into a rectangle about 1/2-inch thick using your trusty rolling pin, then use a pizza cutter or sharp knife to slice it into sticks approximately 1-inch wide and 4-inches long. Arrange these raw cheese sticks on a parchment-lined baking sheet, cover them again with that kitchen towel, and let them rest for another 15 minutes while you prepare your coating station – this second rest helps ensure they maintain their shape during frying.
Create the Coating and Bread the Sticks
While your cheese sticks are enjoying their final rest, it’s time to prepare that crispy, flavorful coating that will make these irresistible. In a shallow bowl or pie plate, combine 1 cup of Italian-seasoned breadcrumbs, 1/2 cup of grated Parmesan cheese, 1 teaspoon of garlic powder, and 1/2 teaspoon of paprika. Whisk these dry ingredients together until they’re beautifully blended – the Parmesan will add that extra savory depth while the paprika provides both color and a subtle smokiness. In another shallow bowl, prepare your egg wash by beating 1 large egg with 1 tablespoon of water until it’s completely smooth and uniform. Now take each cheese stick and dip it first in the egg wash, making sure to coat all sides thoroughly, then transfer it to the breadcrumb mixture, pressing gently to ensure an even, substantial coating. Return each breaded stick to your parchment-lined baking sheet – this double-dipping method creates that perfect crispy exterior that won’t fall off during frying.
Heat the Oil and Fry to Golden Perfection
Now we come to the heart of the matter – achieving that perfect golden-brown crispness. Pour about 2 cups of vegetable oil into your large heavy-bottomed pot or Dutch oven, making sure you have at least 2 inches of oil depth. Attach your deep fry thermometer to the side of the pot and heat the oil slowly over medium heat until it reaches 350°F – maintaining this precise temperature is absolutely crucial for cheese sticks that cook through without burning on the outside. Once your oil is perfectly heated, carefully lower 4-5 cheese sticks into the oil using your slotted spoon or spider strainer, being careful not to overcrowd the pot. Fry for 2-3 minutes, turning occasionally, until they achieve a deep golden-brown color and float to the surface. Remove them from the oil and transfer to a wire cooling rack set over a baking sheet – the rack allows excess oil to drip away while keeping the bottoms crisp. Continue frying in batches, allowing the oil to return to 350°F between each batch for consistent results.
Serve Immediately with Your Favorite Dipping Sauce
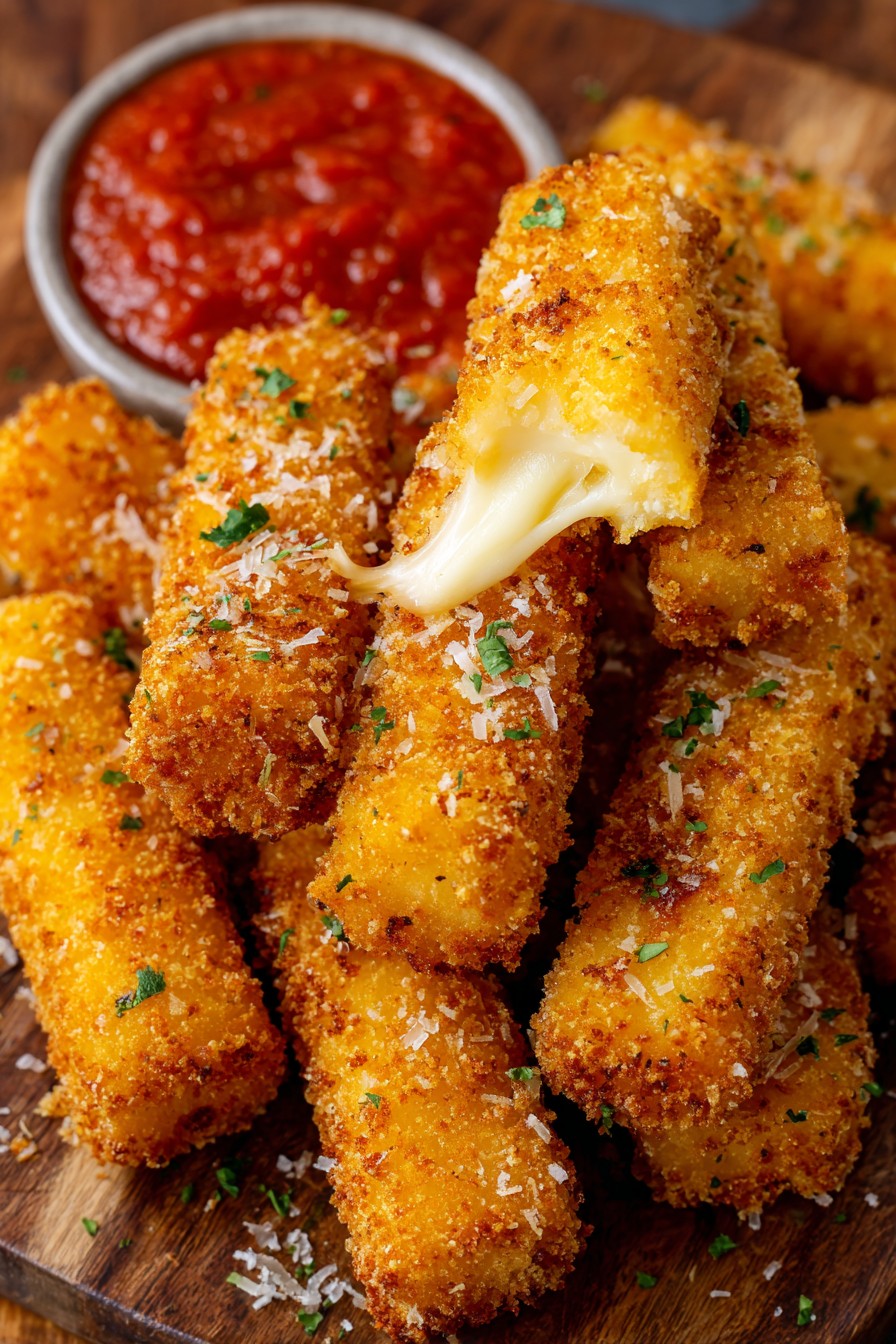
The moment of truth has arrived – serving these golden beauties while they’re at their absolute peak of perfection. Transfer your freshly fried cheese sticks to a serving platter lined with paper towels to catch any remaining oil drips. Heat your favorite marinara sauce until it’s warm and bubbly – about 1 1/2 cups should be plenty for dipping. Arrange the cheese sticks in a rustic basket or on a wooden board, with the warm marinara sauce in a small bowl alongside. Serve immediately while the cheese is still gloriously molten and the exterior maintains its satisfying crunch. These are best enjoyed within 10-15 minutes of frying, though I must confess they rarely last that long in our household. The combination of that crispy seasoned coating giving way to the stretchy, melted cheese interior is pure comfort food magic that never fails to bring smiles around the table.
Tips and Tricks
Over years of making these cheese sticks in my own farmhouse kitchen, I’ve gathered quite a few pearls of wisdom that can elevate your results from good to absolutely extraordinary. First and foremost, cheese selection matters tremendously – always shred your own cheese from blocks rather than using pre-shredded varieties. Those pre-shredded cheeses are coated with anti-caking agents that can prevent proper melting and create a grainy texture. For the cheddar, choose a good sharp variety that’s been aged at least a year – the deeper flavor stands up beautifully to frying. When it comes to frying temperature, don’t trust your eyes alone – that deep fry thermometer is your best friend in the kitchen. If the oil is too cool, your cheese sticks will absorb excess oil and become greasy; if it’s too hot, the outside will burn before the inside is properly cooked. Another game-changing tip involves the resting periods – don’t be tempted to skip them! That initial hour rest allows the yeast to work its magic even in small quantities, creating tiny air pockets that make the dough lighter. The second 15-minute rest after shaping helps the gluten relax so your sticks maintain their shape during frying rather than shrinking or twisting. When breading, use one hand for wet ingredients and the other for dry to avoid creating a messy breading station with clumpy fingers. For extra-crispy results, you can double-dip your sticks – after the first coating, return them to the egg wash and breadcrumbs again for an even thicker, crunchier exterior. If you’re making these for a crowd, you can prepare them up to the breading stage, then freeze them on baking sheets before transferring to freezer bags. They’ll keep for up to 3 months frozen, and you can fry them directly from frozen – just add an extra minute to the frying time. Finally, if you notice your cheese sticks developing small splits during frying, that’s actually a good sign! It means the cheese is melting beautifully and creating those wonderful cheesy pockets we all love. Just be sure to fry at the correct temperature to prevent the cheese from leaking out completely.
Recipe Variations
- For a spicy kick that will warm you from the inside out, add 1 teaspoon of chili powder and 1/2 teaspoon of cayenne pepper to your breadcrumb mixture, and mix 1/2 cup of pepper jack cheese into your cheese blend. The combination of melted pepper jack with that spicy coating creates a wonderful heat that builds gradually with each bite, perfect for those who like their comfort food with a little extra personality. Serve these with a cool ranch dressing or cilantro-lime dipping sauce to balance the heat.
- Create an Italian-inspired version by replacing the cheddar with provolone and adding 1/4 cup of finely chopped sun-dried tomatoes and 2 tablespoons of chopped fresh basil to your dough. Use panko breadcrumbs mixed with Italian seasoning and grated Romano cheese for the coating, then serve with a robust marinara sauce that’s been simmered with garlic and fresh oregano. The sun-dried tomatoes add wonderful chewy texture and concentrated flavor that pairs beautifully with the melted provolone.
- For a breakfast twist that’s perfect for lazy weekend mornings, reduce the salt in the dough and add 6 cooked and crumbled slices of bacon and 2 tablespoons of chopped chives to your cheese mixture. Use a blend of sharp cheddar and Monterey Jack cheeses, and serve these breakfast cheese sticks with maple syrup for dipping or alongside scrambled eggs. The salty-sweet combination is absolutely divine, and they make ordinary mornings feel like special occasions.
- Try a Southwestern variation by using a blend of pepper jack and cotija cheeses, adding 1 tablespoon of taco seasoning to your flour mixture, and using crushed tortilla chips mixed with your breadcrumbs for the coating. Serve these with fresh pico de gallo, guacamole, or a spicy chipotle ranch dressing for dipping. The tortilla chip coating adds wonderful corn flavor and extra crunch that transports these cheese sticks straight to your favorite Mexican restaurant.
- For an elegant appetizer version perfect for holiday gatherings, use a combination of Gruyère and fontina cheeses, add 1 tablespoon of fresh thyme leaves to your dough, and use panko breadcrumbs mixed with herbes de Provence for coating. Serve these sophisticated cheese sticks with a champagne mustard sauce or fig jam for dipping. The nutty Gruyère and creamy fontina create a more complex flavor profile that pairs beautifully with festive beverages and special occasions.
Frequently Asked Questions
Can I bake these cheese sticks instead of frying them?
Absolutely, though the texture will be different from the traditional fried version. To bake your cheese sticks, preheat your oven to 425°F and arrange the breaded sticks on a parchment-lined baking sheet. Lightly spray them with cooking oil to help them brown evenly, then bake for 12-15 minutes, flipping halfway through, until golden brown and cooked through. The baked version will be slightly less crispy than fried ones and may have a more bread-like texture, but they’re still delicious and make a wonderful lighter alternative. Just be sure not to overcrowd the baking sheet to allow for proper air circulation and even browning.
What’s the best way to reheat leftover cheese sticks?
While cheese sticks are always best enjoyed fresh, if you do have leftovers, the oven method works far better than the microwave. Preheat your oven to 375°F and place the cheese sticks on a baking sheet in a single layer. Bake for 8-10 minutes until heated through and crispy again. The microwave will make them soggy and rubbery, but the dry heat of the oven helps restore some of that original texture. For even better results, you can use an air fryer at 375°F for 5-6 minutes, which does an excellent job of crisping them back up while melting the cheese perfectly.
Can I make these cheese sticks ahead of time for a party?
You certainly can, and I often do when expecting company! The best approach is to prepare them through the breading stage, then arrange them in a single layer on baking sheets and freeze until solid. Once frozen, transfer them to freezer bags where they’ll keep beautifully for up to 3 months. When you’re ready to serve, fry them directly from frozen, adding an extra minute to the cooking time. This method ensures they’re freshly cooked for your guests while saving you valuable time on the day of your gathering. Just be sure not to thaw them before frying, as this can make the coating soggy.
Why did my cheese sticks burst open during frying?
This usually happens when the oil temperature is too low or when you’ve overfilled the sticks with cheese. If the oil isn’t hot enough, the outside doesn’t seal quickly enough to contain the melting cheese inside. Make sure your oil maintains a steady 350°F throughout the frying process. Also, be careful not to overstuff your sticks – the cheese should be evenly distributed throughout the dough rather than concentrated in large pockets. A few small splits are normal and actually desirable for that rustic, cheesy appearance, but major bursting indicates temperature issues or overfilling.
What other dipping sauces work well with cheese sticks?
While marinara is the classic choice, there are many wonderful alternatives that can make your cheese sticks feel new again. Ranch dressing is always a crowd-pleaser, especially when homemade with buttermilk and fresh herbs. For something different, try a garlic aioli made with roasted garlic, lemon juice, and good olive oil. Barbecue sauce adds a sweet and smoky dimension that pairs surprisingly well with the cheesy goodness. If you’re feeling adventurous, a spicy buffalo sauce or even a sweet chili sauce can create exciting flavor combinations. For holiday gatherings, cranberry sauce thinned with a little orange juice makes a festive and unexpectedly delicious dip.
Summary
These homemade cheese sticks represent the very heart of comfort food – crispy, golden exteriors giving way to stretchy, melted cheese centers that warm both kitchen and soul. With careful temperature control and quality ingredients, you can create this nostalgic treat that brings generations together around the table, proving that the simplest foods often create the fondest memories.
Homemade Cheese Sticks
6
servings30
minutes15
minutesIngredients
Instructions
- 1 Combine dry ingredients in large bowl, then mix in warmed buttermilk, egg, and melted butter until dough forms
- 2 Knead dough 5-7 minutes until smooth, then rest covered for 1 hour
- 3 Knead cheeses into dough, roll to 1/2-inch thickness, cut into 1x4-inch sticks, rest 15 minutes
- 4 Mix breadcrumbs with Parmesan, garlic powder, and paprika for coating
- 5 Dip sticks in egg wash, then breadcrumb mixture, pressing to coat evenly
- 6 Heat oil to 350°F, fry sticks 2-3 minutes until golden brown, drain on rack
- 7 Serve immediately with warm marinara sauce for dipping