You remember those moments when the world fades away, when all that exists is the soft glow of candlelight and the quiet understanding between two souls. Your hands brushed against mine as we reached for the last cheese ball at that little wine bar downtown, and in that instant, I knew I needed to recreate that magic in our own kitchen, to capture that tender connection in every creamy, dreamy bite.
Why This Recipe Works
- The combination of three distinct cheeses creates a symphony of flavors that dance across your palate, with sharp cheddar providing depth, creamy cream cheese offering luxurious texture, and Parmesan adding that perfect salty finish that makes you close your eyes in pure bliss.
- Using real butter rather than substitutes ensures each cheese ball melts perfectly in your mouth, creating that moment of surrender when flavors bloom and time seems to stand still between you and your beloved.
- The careful chilling process allows the flavors to marry beautifully while creating the perfect firmness for rolling, ensuring each ball holds its shape while promising that delicate collapse when it meets your tongue.
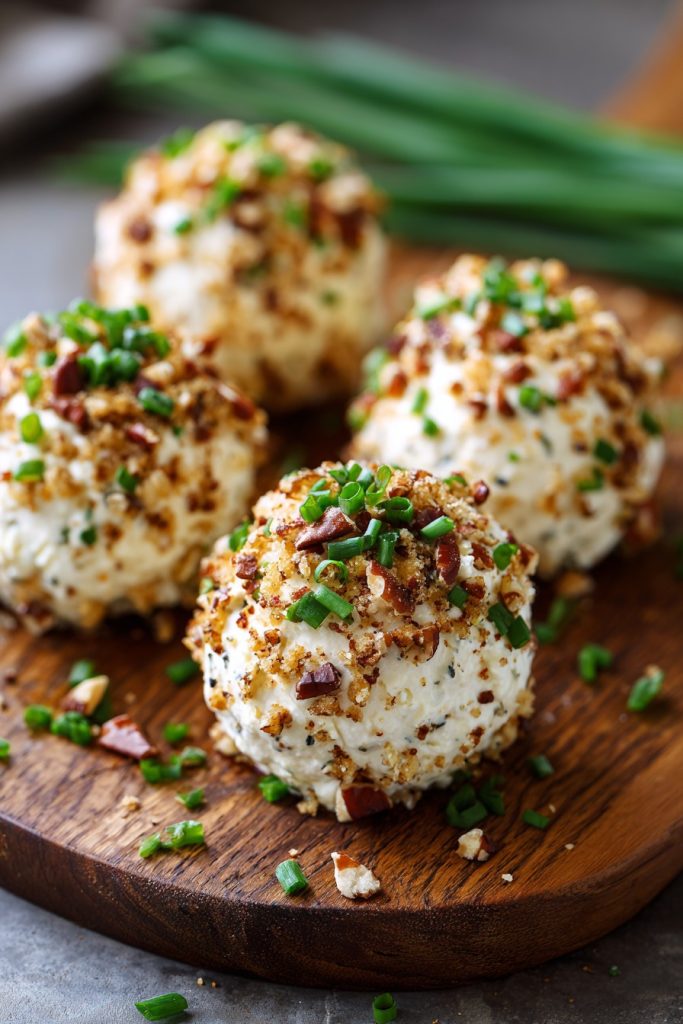
- Finely chopped pecans provide the ideal textural contrast, that gentle crunch that gives way to creamy perfection, much like the way conversation flows between two people discovering each other’s hearts.
- The subtle hint of garlic powder and Worcestershire sauce creates layers of flavor that reveal themselves slowly, like secrets whispered in the dark, each taste building upon the last until you’re completely lost in the experience.
Ingredients
- 16 ounces cream cheese, softened to room temperature
- 2 cups sharp cheddar cheese, freshly grated
- 1/2 cup Parmesan cheese, finely grated
- 1/2 cup unsalted butter, softened
- 1 cup pecans, very finely chopped
- 2 teaspoons Worcestershire sauce
- 1 teaspoon garlic powder
- 1/2 teaspoon smoked paprika
- 1/4 teaspoon cayenne pepper (optional, for gentle heat)
- 1/4 teaspoon freshly ground black pepper
- 1/4 teaspoon sea salt
- 2 tablespoons fresh chives, minced
Equipment Needed
- Stand mixer or large mixing bowl with hand mixer
- Rubber spatula
- Measuring cups and spoons
- Plastic wrap
- Baking sheets
- Parchment paper
- Small bowls for coating ingredients
- Sharp knife and cutting board
Instructions
Prepare Your Cheeses and Ingredients
Begin by taking your cream cheese and butter out of the refrigerator about two hours before you plan to start, allowing them to soften naturally on your countertop. There’s something almost ceremonial about this waiting period, this gentle anticipation that builds as the ingredients reach the perfect temperature for blending. As they soften, grate your cheddar cheese using the small holes of your grater, watching the golden strands pile up like whispered promises. The Parmesan should be grated even finer, almost like snow dusting a winter landscape. Measure your Worcestershire sauce carefully—that dark, mysterious liquid that will add depth and complexity to your creation. Chop your pecans until they’re fine but still retain some texture, and mince your fresh chives until they release their delicate oniony fragrance. This preparation phase is like the quiet before a romantic evening, where every detail matters and contributes to the final magic.
Combine the Creamy Base
Place your softened cream cheese and butter in the bowl of your stand mixer fitted with the paddle attachment, or use a large mixing bowl if you’re using a hand mixer. Turn the mixer to medium speed and watch as the two creamy elements begin their beautiful dance, swirling together in pale yellow waves. After about two minutes, when they’re fully incorporated and fluffy, add your grated cheddar cheese, Parmesan, Worcestershire sauce, garlic powder, smoked paprika, cayenne pepper if using, black pepper, and sea salt. The colors and textures merging together create a mosaic of potential flavors. Mix on medium-low speed for another three minutes, scraping down the sides with your spatula halfway through, until every ingredient is perfectly distributed and the mixture becomes a cohesive, slightly stiff but spreadable consistency that promises delicious things to come.
Chill and Develop Flavors
Transfer your cheese mixture to the center of a large piece of plastic wrap, gathering the edges to form a tight bundle that you’ll gently shape into a rough ball. The warmth of your hands against the cool plastic creates an intimate connection with the food you’re crafting. Place this bundle in your refrigerator and let it chill for at least four hours, though overnight is even better if you have the patience. This waiting period is crucial—it allows the flavors to deepen and marry, much like how time allows relationships to grow richer. The cheese mixture will firm up significantly, making it easier to handle when you form your perfect spheres. As it chills, the Worcestershire sauce works its magic, the garlic powder distributes evenly, and the cheeses settle into their harmonious union.
Form Perfect Little Spheres
Remove your chilled cheese mixture from the refrigerator and unwrap it carefully, noticing how the texture has transformed from soft to firm yet still pliable. Using a tablespoon measure or a small cookie scoop, portion out approximately one tablespoon of the mixture for each cheese ball. Roll each portion between your palms using gentle, circular motions, applying just enough pressure to form smooth, round spheres without squeezing too tightly. There’s something profoundly satisfying about this process—the transformation of a simple mixture into these perfect little orbs of potential joy. As you work, keep a damp cloth nearby to wipe your hands periodically, ensuring each ball maintains its perfect shape. You should end up with about 24 to 28 cheese balls, each one a tiny promise of creamy delight.
Coat with Nutty Goodness
Spread your finely chopped pecans in a shallow bowl or plate, creating an even layer that will coat each cheese ball beautifully. Take your first formed sphere and gently roll it through the pecans, applying light pressure to ensure the nuts adhere to the surface. Rotate the ball as you work, covering every possible surface with that crunchy, nutty coating that will provide the perfect textural contrast to the creamy interior. The sound of the nuts clinging to the cheese mixture is like soft applause for your efforts. As each cheese ball is coated, place it on a parchment-lined baking sheet, leaving about an inch between them to prevent sticking. If you find the nuts aren’t adhering well, you can gently press them into the surface with your fingertips, creating that perfect pecan crust.
Final Chill and Serve with Love
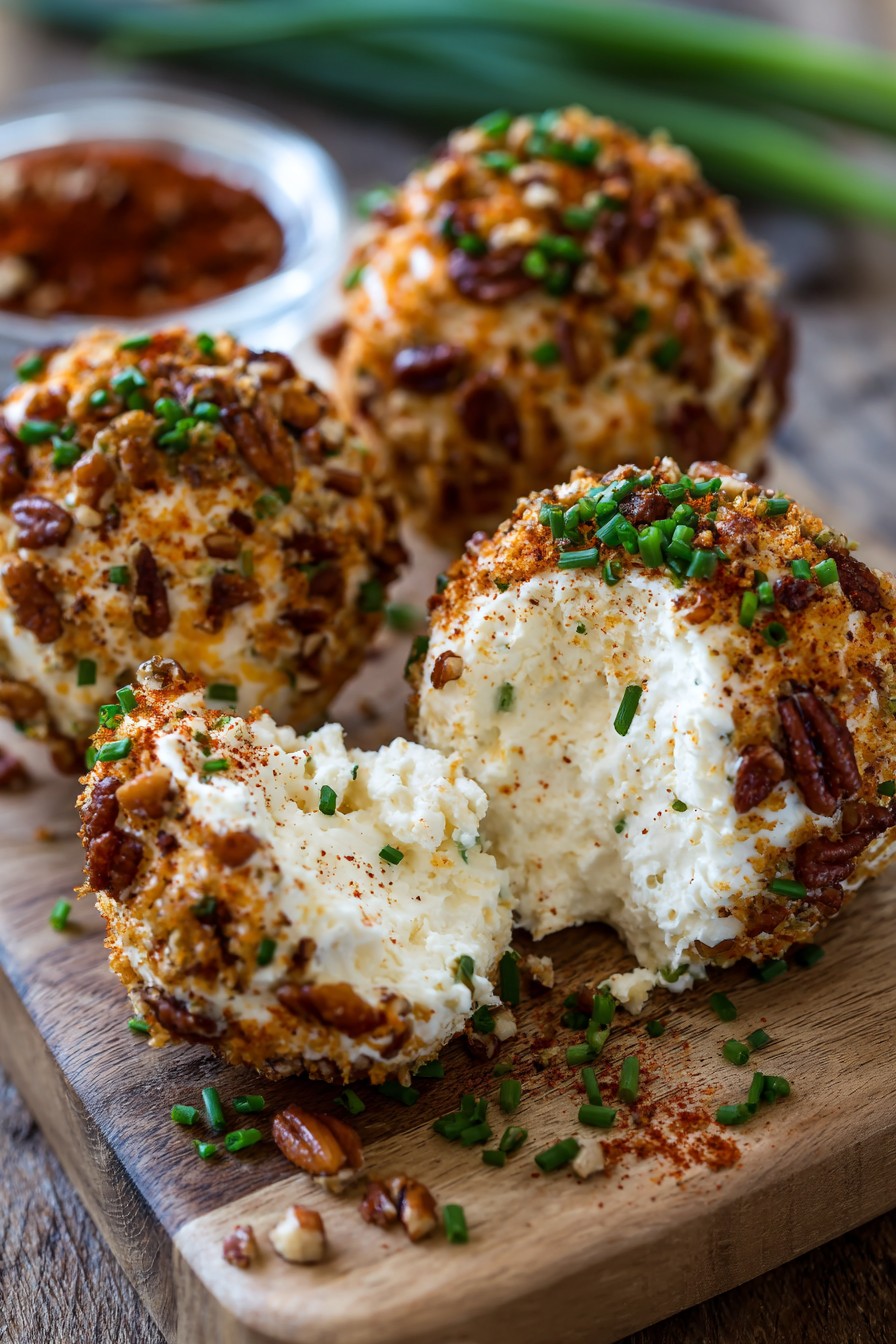
Once all your cheese balls are beautifully coated with pecans and arranged on your baking sheet, cover them loosely with plastic wrap and return them to the refrigerator for at least thirty minutes. This final chill helps the coating set properly and allows the flavors to reach their peak harmony. When you’re ready to serve, arrange your cheese balls on a beautiful platter—perhaps that ceramic dish you saved for special occasions—and garnish with additional minced chives or a light dusting of paprika for color. Serve with crisp crackers, slices of baguette, or fresh vegetable crudités. Watch as your partner’s eyes light up when they taste that first perfect bite, the way the creamy interior gives way to the crunchy coating, creating a moment of pure culinary romance that lingers long after the last ball disappears.
Tips and Tricks
Creating the perfect cheese ball experience requires attention to those subtle details that transform good into unforgettable. When selecting your cheeses, always opt for blocks rather than pre-shredded varieties—the anti-caking agents in pre-shredded cheese can affect the texture and melting quality of your final product. Take the time to grate your own cheddar and Parmesan, noticing how the fresh grating releases more aroma and flavor compounds that will make your cheese balls truly exceptional. If you find your cheese mixture is too soft after combining, don’t hesitate to chill it for an additional thirty minutes before forming your balls—patience in cooking, as in love, often yields the sweetest rewards.
Consider toasting your pecans before chopping them for an even deeper, richer flavor profile. Simply spread them on a baking sheet and toast in a 350°F oven for 5-7 minutes, until they become fragrant and slightly darkened. Watch them carefully, as nuts can burn quickly, and that moment of perfect toasting makes all the difference. When forming your cheese balls, if the mixture begins to stick to your hands, lightly dampen your palms with cold water or wear disposable food-safe gloves—this prevents sticking while maintaining the perfect spherical shape. The size of your cheese balls matters more than you might think; keeping them at about one tablespoon each ensures each bite contains the perfect ratio of creamy interior to crunchy coating.
For serving, consider bringing your cheese balls to room temperature for about fifteen minutes before your guests arrive—this allows the flavors to fully express themselves while maintaining the perfect texture. If you’re planning ahead, these cheese balls freeze beautifully for up to three months. Simply arrange them on a parchment-lined baking sheet, freeze until solid, then transfer to an airtight container with parchment between layers. Thaw in the refrigerator overnight when ready to serve. The beauty of this recipe lies in its flexibility—you can adjust the seasonings to match your personal preferences, add different herbs, or even incorporate cooked, crumbled bacon for a savory twist that will make your cheese balls the star of any intimate gathering.
Recipe Variations
- For an elegant herbal variation, replace the pecans with finely chopped fresh herbs like parsley, dill, and chives, and add a tablespoon of herbes de Provence to the cheese mixture itself. The result is a garden-fresh cheese ball that tastes like a spring morning, with bright, aromatic notes that dance across your palate and complement a crisp white wine perfectly.
- Create a spicy southwest version by mixing in 1/4 cup of finely chopped green chilies, one teaspoon of chili powder, and replacing the pecans with crushed tortilla chips or pepitas. The gentle heat builds slowly, like a flirtation that grows more intense with each moment, creating a cheese ball that’s bold, exciting, and utterly irresistible.
- For a sweeter take perfect for dessert cheese boards, reduce the garlic powder to 1/4 teaspoon, omit the Worcestershire sauce, and add 2 tablespoons of honey and 1/2 cup of dried cranberries to the mixture. Coat with chopped toasted walnuts and serve with apple slices and graham crackers for a cheese ball that blurs the line between savory and sweet.
- Transform your cheese balls into a Mediterranean dream by adding 1/4 cup of chopped sun-dried tomatoes, 2 tablespoons of chopped Kalamata olives, and 1 teaspoon of dried oregano to the mixture. Coat with a combination of finely chopped pistachios and breadcrumbs for a cheese ball that tastes like a romantic evening on the Italian coast.
- For the ultimate indulgence, mix in 1/2 cup of cooked and crumbled bacon and 2 tablespoons of finely chopped scallions, then coat with a mixture of crushed pretzels and brown sugar. The sweet-salty combination creates a complexity that keeps you coming back for just one more bite, much like those conversations that last long into the night.
Frequently Asked Questions
Can I make cheese balls ahead of time, and how far in advance?
Absolutely, and in fact, cheese balls often benefit from being made ahead as the flavors continue to develop and deepen with time. You can prepare the cheese mixture up to three days in advance, keeping it tightly wrapped in plastic wrap in the refrigerator until you’re ready to form and coat your balls. The fully assembled cheese balls will keep beautifully for about 24 hours in the refrigerator before serving, though I recommend letting them come to room temperature for about 15-20 minutes before your guests arrive to ensure the perfect creamy texture. If you need to prepare further ahead, you can freeze the uncoated cheese mixture for up to three months, or freeze the fully assembled cheese balls for one month—just be sure to thaw them gradually in the refrigerator overnight.
What’s the best way to serve cheese balls for a romantic evening?
Creating the perfect presentation for your cheese balls can elevate your romantic evening from lovely to unforgettable. Arrange your cheese balls on a beautiful wooden board or elegant ceramic platter, leaving some space between them for visual appeal. Surround them with an assortment of complementary items—thin slices of baguette toasted with olive oil, crisp water crackers that won’t overpower the delicate cheese flavor, and fresh vegetable crudités like endive leaves, radish slices, and sugar snap peas for refreshing contrast. Add some clusters of grapes, fig preserves, or honey for drizzling to create sweet counterpoints to the savory cheese. The key is creating a landscape of textures and flavors that you and your partner can explore together, each bite leading to the next in a delicious dance of discovery.
My cheese mixture seems too soft—what did I do wrong?
If your cheese mixture feels too soft to form into proper balls, there are several possible causes and simple solutions. The most common issue is that your cream cheese and butter weren’t chilled sufficiently after mixing—remember that the four-hour chill is essential for proper firmness. If you’re in a hurry, you can place the mixture in the freezer for 30-45 minutes, checking every 15 minutes until it reaches the right consistency. Another possibility is that your cheeses had higher moisture content than ideal—in this case, you can add 2-3 tablespoons of additional grated Parmesan, which will absorb excess moisture while adding flavor. Finally, ensure you’re using block cheeses rather than pre-shredded, as the latter often contains more moisture and anti-caking agents that can affect texture.
Can I make these cheese balls without nuts for allergy reasons?
Certainly, and there are numerous beautiful alternatives that will give you that perfect crunchy coating without using nuts. Consider using finely crushed pretzels for a salty crunch that complements the creamy interior beautifully, or try panko breadcrumbs toasted with a bit of butter and herbs for a lighter texture. For a more dramatic presentation, use everything bagel seasoning or crushed bacon bits mixed with breadcrumbs. If you prefer a completely nut-free coating that’s still elegant, try finely chopped fresh herbs mixed with a small amount of breadcrumbs, or even crushed tortilla chips for a southwest flair. The key is ensuring your coating is fine enough to adhere properly while providing that essential textural contrast to the creamy cheese interior.
Summary
These creamy cheese balls capture the essence of intimate connection through food—each perfect sphere holding the promise of shared moments and quiet romance. With their luxurious texture, harmonious flavors, and elegant presentation, they transform simple ingredients into edible poetry that speaks directly to the heart.
Creamy Cheese Balls
6
servings30
minutesIngredients
Instructions
- 1 In a stand mixer, combine softened cream cheese and butter until fluffy, about 2 minutes on medium speed.
- 2 Add cheddar cheese, Parmesan, Worcestershire sauce, garlic powder, smoked paprika, cayenne, black pepper, and salt. Mix until fully combined, about 3 minutes.
- 3 Transfer mixture to plastic wrap, form into a ball, and refrigerate for at least 4 hours or overnight.
- 4 Using a tablespoon measure, portion mixture and roll into 1-inch balls between your palms.
- 5 Roll each ball in finely chopped pecans until fully coated.
- 6 Chill coated cheese balls for 30 minutes before serving with crackers or vegetables.


