Ooh, fellow budget gourmets! Are you tired of sacrificing flavor for affordability? We’ve got you covered with 20 mouthwatering recipes that prove delicious dining doesn’t have to drain your wallet. From cozy comfort foods to quick weeknight dinners, get ready to transform simple ingredients into extraordinary meals. Let’s dive into these wallet-friendly wonders that’ll make your taste buds sing without breaking the bank!
Spicy Chickpea Curry

Perhaps there’s something quietly comforting about a pot simmering on the stove, especially when it’s filled with the warm, earthy promise of chickpeas and spices. On a day like today, when the light fades early, this curry feels less like a meal and more like a gentle, fragrant embrace for the senses.
Serving: 4 | Pre Time: 10 minutes | Cooking Time: 25 minutes
Ingredients
– A couple of tablespoons of olive oil
– One yellow onion, finely chopped
– Three cloves of garlic, minced
– A tablespoon of freshly grated ginger
– A couple of teaspoons of ground cumin
– A teaspoon of ground coriander
– Half a teaspoon of turmeric
– A quarter to a half teaspoon of cayenne pepper, depending on your heat preference
– A 15-ounce can of chickpeas, drained and rinsed
– A 14.5-ounce can of diced tomatoes
– A cup of vegetable broth
– A splash of coconut milk (about a quarter cup)
– A big handful of fresh spinach
– Salt, just a pinch or two
Instructions
1. Warm the olive oil in a large pot or Dutch oven over medium heat for about 1 minute, until it shimmers lightly.
2. Add the chopped onion and cook for 5–7 minutes, stirring occasionally, until it turns soft and translucent.
3. Stir in the minced garlic and grated ginger, cooking for 1 more minute until fragrant—be careful not to let it burn.
4. Sprinkle in the cumin, coriander, turmeric, and cayenne pepper, toasting the spices with the onion mixture for 30 seconds to unlock their flavors.
5. Tip in the drained chickpeas and diced tomatoes, stirring to coat everything evenly in the spiced base.
6. Pour in the vegetable broth and bring the mixture to a gentle boil, then reduce the heat to low.
7. Let the curry simmer uncovered for 15 minutes, stirring every few minutes to prevent sticking and allow the liquid to reduce slightly.
8. Stir in the splash of coconut milk and the handful of spinach, cooking for 2–3 minutes until the spinach wilts into the curry.
9. Season with a pinch or two of salt, then remove the pot from the heat.
Now, this curry settles into a lovely, thick consistency where the chickpeas stay tender but firm, soaking up all those warm spices. The flavor deepens into something rich and slightly smoky, perfect for spooning over fluffy rice or scooping up with warm naan on a quiet evening.
Garlic Butter Pasta
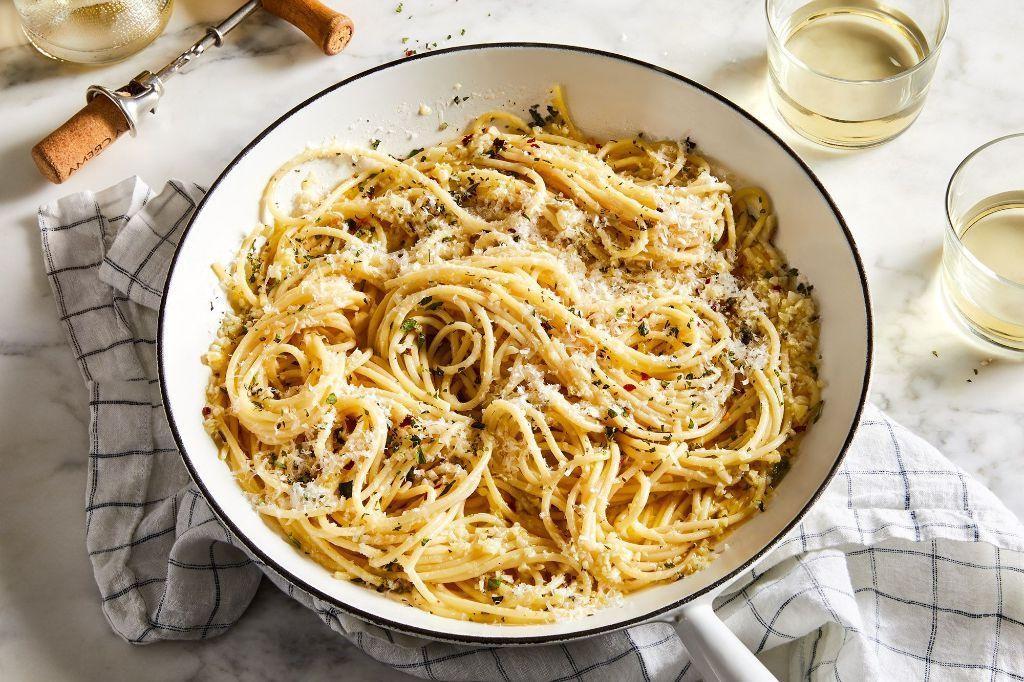
Kind of like a quiet evening, this garlic butter pasta feels like a gentle hug in a bowl—simple, comforting, and just right for when you need something warm and familiar. It’s one of those dishes that comes together with little fuss, letting the rich, savory flavors of garlic and butter meld into the pasta in a way that’s deeply satisfying. I find myself making it often, especially on nights when the world outside feels a bit too loud, and all I crave is a plate of something softly soothing.
Serving: 4 | Pre Time: 10 minutes | Cooking Time: 15 minutes
Ingredients
– 12 ounces of dried spaghetti
– 4 tablespoons of unsalted butter
– 6 cloves of garlic, minced
– a splash of olive oil, about 1 tablespoon
– a couple of tablespoons of grated Parmesan cheese
– a pinch of salt and a pinch of black pepper
– a small handful of fresh parsley, chopped
Instructions
1. Fill a large pot with water, add a generous pinch of salt, and bring it to a rolling boil over high heat.
2. Add the dried spaghetti to the boiling water and cook it for 8–10 minutes, stirring occasionally, until it’s al dente (tender but still firm to the bite).
3. While the pasta cooks, melt the unsalted butter in a large skillet over medium-low heat.
4. Add the minced garlic to the skillet and sauté it for 2–3 minutes, stirring constantly, until it becomes fragrant and lightly golden but not browned.
5. Stir in the splash of olive oil to help prevent the garlic from burning and to add a subtle richness.
6. Drain the cooked spaghetti, reserving about 1/2 cup of the pasta water for later use.
7. Add the drained spaghetti directly to the skillet with the garlic butter mixture, tossing it gently to coat every strand evenly.
8. Pour in a few tablespoons of the reserved pasta water, a little at a time, to create a silky sauce that clings to the pasta.
9. Sprinkle in the grated Parmesan cheese, a pinch of salt, and a pinch of black pepper, stirring until everything is well combined and the cheese melts into the sauce.
10. Remove the skillet from the heat and fold in the chopped fresh parsley for a burst of color and freshness.
That silky texture, with the pasta coated in a glossy, garlic-infused butter, makes each bite feel indulgent yet light. The flavors are rich and savory, with the Parmesan adding a subtle sharpness that balances the sweetness of the garlic. Try serving it with a side of crusty bread to soak up any extra sauce, or top it with a sprinkle of red pepper flakes for a gentle kick on cooler evenings.
Vegetable Fried Rice

Often, the simplest meals are the ones that feel most like home—a quiet, comforting ritual of transforming humble ingredients into something warm and complete. Vegetable fried rice is that kind of dish, a gentle stir of memories and nourishment that comes together in one pan.
Serving: 4 | Pre Time: 15 minutes | Cooking Time: 15 minutes
Ingredients
– 3 cups of day-old, cold cooked white rice
– A couple of large eggs
– A splash of vegetable oil, about 2 tablespoons
– A small yellow onion, finely chopped
– 2 cloves of garlic, minced
– A cup of frozen peas and carrots
– A generous splash of soy sauce, about 3 tablespoons
– A pinch of salt
– A sprinkle of green onions, chopped, for serving
Instructions
1. Crack the eggs into a small bowl, whisk them lightly with a fork until just combined, and set them aside near the stove.
2. Heat a large skillet or wok over medium-high heat for about 2 minutes, until a drop of water sizzles and evaporates immediately.
3. Pour the vegetable oil into the hot skillet, swirling it to coat the bottom evenly.
4. Add the chopped onion to the oil and cook, stirring occasionally, for 3–4 minutes, until it turns soft and translucent.
5. Stir in the minced garlic and cook for 30 seconds, just until fragrant—be careful not to let it burn.
6. Push the onion and garlic to one side of the skillet, creating a clear space in the center.
7. Pour the whisked eggs into the empty space and let them sit undisturbed for 20 seconds to set slightly.
8. Gently scramble the eggs with a spatula, breaking them into small curds, for about 1 minute until fully cooked but still tender.
9. Mix the scrambled eggs with the onion and garlic in the skillet.
10. Add the frozen peas and carrots to the skillet and stir everything together, cooking for 2 minutes to thaw and warm them through.
11. Crumble the cold cooked rice into the skillet with your hands to break up any clumps, then stir to combine with the other ingredients.
12. Drizzle the soy sauce evenly over the rice and stir continuously for 3–4 minutes, until the rice is heated through and has absorbed the sauce.
13. Taste a small spoonful and add a pinch of salt only if needed, as the soy sauce is already salty.
14. Remove the skillet from the heat and sprinkle the chopped green onions over the top.
Most satisfying is the texture—each grain of rice stays distinct, lightly coated and savory, with little bursts of sweetness from the peas and carrots. Serve it straight from the skillet, perhaps with a drizzle of chili oil or a soft-boiled egg on top for extra richness.
Easy Lentil Soup

Maybe it’s the way the light slants through the kitchen window this afternoon, or perhaps it’s the quiet hum of the refrigerator, but something about this gray December day calls for a pot of something simple and steady simmering on the stove. This lentil soup is just that—a gentle, forgiving recipe that feels less like cooking and more like letting something good come together on its own time.
Serving: 4 | Pre Time: 10 minutes | Cooking Time: 40 minutes
Ingredients
– A couple of tablespoons of olive oil
– One medium yellow onion, diced small
– Two carrots, peeled and chopped into little half-moons
– Two celery stalks, sliced thin
– A couple of cloves of garlic, minced
– One cup of brown lentils, rinsed
– Four cups of vegetable broth
– A splash of water, if the pot looks dry
– A pinch of salt and a few cracks of black pepper
Instructions
1. Warm the olive oil in a large pot over medium heat for about 1 minute until it shimmers lightly.
2. Add the diced onion, chopped carrots, and sliced celery to the pot.
3. Cook the vegetables, stirring occasionally, for 8–10 minutes until the onion turns translucent and the carrots soften slightly at the edges.
4. Stir in the minced garlic and cook for 1 more minute until it becomes fragrant—this quick step keeps the garlic from burning and adds depth.
5. Add the rinsed lentils to the pot, stirring to coat them in the oil and vegetable mixture.
6. Pour in the vegetable broth, scraping the bottom of the pot to lift any browned bits for extra flavor.
7. Bring the soup to a boil, then immediately reduce the heat to low.
8. Cover the pot with a lid, leaving it slightly ajar to let steam escape, and simmer for 30 minutes until the lentils are tender but not mushy—check by tasting one; it should yield easily to your teeth.
9. If the soup thickens too much during simmering, add a splash of water and stir.
10. Season with a pinch of salt and a few cracks of black pepper right at the end, stirring gently to distribute.
When you ladle it into bowls, the soup will be thick and hearty, with lentils that hold their shape against the soft, sweet vegetables. The broth soaks up all those earthy, savory notes, making it perfect for dunking a crusty piece of bread or topping with a dollop of yogurt for a creamy contrast.
Quick Stir-Fried Noodles

Gently, as the afternoon light fades outside the kitchen window, I find myself reaching for the familiar comfort of a quick stir-fry—the sizzle of the pan a quiet promise of something warm and satisfying after a long day. It’s one of those forgiving dishes that welcomes whatever you have on hand, turning simple ingredients into a cozy, complete meal with minimal fuss.
Serving: 2 | Pre Time: 10 minutes | Cooking Time: 15 minutes
Ingredients
– 8 ounces of dried rice noodles
– A couple of tablespoons of vegetable oil
– 2 cloves of garlic, minced
– A small knob of fresh ginger, grated (about 1 teaspoon)
– 1 cup of thinly sliced bell peppers (any color you like)
– A handful of snap peas (about ½ cup)
– 2 tablespoons of soy sauce
– A splash of rice vinegar (about 1 tablespoon)
– A drizzle of sesame oil (about 1 teaspoon)
– A pinch of red pepper flakes (optional, for a little heat)
Instructions
1. Place the rice noodles in a large bowl and cover them with hot water from the tap; let them soak for 8–10 minutes until they’re pliable but still firm, then drain well and set aside—this prevents them from getting mushy later.
2. Heat a large skillet or wok over medium-high heat until a drop of water sizzles and evaporates immediately, about 2 minutes.
3. Add the vegetable oil to the hot skillet and swirl it to coat the bottom evenly.
4. Toss in the minced garlic and grated ginger, stirring constantly for 30–45 seconds until fragrant but not browned to avoid bitterness.
5. Add the sliced bell peppers and snap peas to the skillet, cooking for 3–4 minutes while stirring occasionally until they start to soften and brighten in color.
6. Push the vegetables to one side of the skillet to create space, then add the drained noodles to the other side.
7. Pour the soy sauce and rice vinegar over the noodles, tossing everything together gently to combine and coat evenly.
8. Continue cooking for another 2–3 minutes, stirring frequently, until the noodles are heated through and have absorbed some of the sauce.
9. Remove the skillet from the heat and drizzle with sesame oil, sprinkling red pepper flakes if using, then give it one final toss.
10. Serve immediately while hot. Really, the beauty of these noodles lies in their tender yet slightly chewy texture, with the savory soy and tangy vinegar balancing the crisp vegetables—it’s a dish that feels both nourishing and effortless. For a creative twist, top it with a fried egg or sprinkle with chopped green onions to add an extra layer of flavor and color.
Savory Bread Pudding

Just now, as the afternoon light slants through my kitchen window, I find myself thinking about how the simplest things—like day-old bread—can become something quietly extraordinary. This savory bread pudding feels like a gentle embrace on a chilly day, transforming humble ingredients into a cozy, comforting dish that’s both forgiving and deeply satisfying.
Serving: 6 | Pre Time: 20 minutes | Cooking Time: 55 minutes
Ingredients
– About 6 cups of day-old bread, torn into bite-sized pieces—something sturdy like a rustic loaf works beautifully
– A generous splash of olive oil, maybe 2 tablespoons
– A couple of sweet onions, thinly sliced
– A few cloves of garlic, minced
– A handful of fresh thyme leaves
– A cup of shredded sharp cheddar cheese
– 4 large eggs
– 2 cups of whole milk
– A teaspoon of Dijon mustard
– A good pinch of salt and a few cracks of black pepper
Instructions
1. Preheat your oven to 350°F and lightly grease an 8×8-inch baking dish with a bit of the olive oil.
2. Heat the remaining olive oil in a large skillet over medium heat, then add the sliced onions.
3. Cook the onions, stirring occasionally, for about 15 minutes until they turn soft and golden brown—this slow caramelization builds a sweet, deep flavor base.
4. Stir in the minced garlic and thyme leaves, cooking for just 1 minute until fragrant to avoid burning the garlic.
5. In a large bowl, whisk together the eggs, milk, Dijon mustard, salt, and pepper until smooth and well combined.
6. Add the torn bread pieces and the onion mixture to the bowl, gently tossing everything so the bread soaks up the liquid evenly—let it sit for 10 minutes to allow the bread to fully absorb the custard.
7. Fold in half of the shredded cheddar cheese, reserving the rest for the top.
8. Transfer the mixture to the prepared baking dish, pressing it down lightly with a spoon to create an even layer.
9. Sprinkle the remaining cheddar cheese evenly over the top.
10. Bake in the preheated oven for 40–45 minutes, until the pudding is set in the center and the top is golden brown and crisp.
11. Remove from the oven and let it cool for 10 minutes before slicing—this resting time helps the pudding firm up for cleaner cuts.
Gently, this savory bread pudding emerges with a tender, custardy interior and a delightfully crisp top, offering a rich blend of sweet onions and sharp cheddar in every bite. Serve it warm alongside a simple green salad for a comforting meal, or slice it into squares for a cozy brunch—it’s wonderfully versatile and even tastes great reheated the next day.
Cheesy Potato Skillet

Nostalgia has a way of settling in the kitchen, especially on quiet afternoons like this one. I find myself reaching for the simplest of comforts, a dish that feels like a warm hug from the inside out. This cheesy potato skillet is just that—a humble, one-pan wonder that transforms basic ingredients into something deeply satisfying.
Serving: 4 | Pre Time: 15 minutes | Cooking Time: 25 minutes
Ingredients
– A couple of large russet potatoes, peeled and diced into 1/2-inch cubes
– A splash of olive oil, about 2 tablespoons
– One small yellow onion, finely chopped
– Two cloves of garlic, minced
– A generous pinch of salt and a few cracks of black pepper
– A cup of shredded sharp cheddar cheese
– A quarter cup of milk
– A tablespoon of butter
– A sprinkle of fresh chives, chopped (optional, for garnish)
Instructions
1. Preheat a large, oven-safe skillet over medium heat on the stovetop and add the olive oil, swirling to coat the bottom evenly.
2. Add the diced potatoes to the skillet in a single layer, letting them cook undisturbed for 5 minutes to develop a golden crust on one side—this helps prevent sticking and adds texture.
3. Stir in the chopped onion and minced garlic, cooking for another 5 minutes until the onions turn translucent and fragrant, stirring occasionally to avoid burning.
4. Season the mixture with salt and black pepper, then reduce the heat to medium-low and cover the skillet with a lid, letting it simmer for 10 minutes to soften the potatoes fully, checking once to ensure they’re tender when pierced with a fork.
5. Remove the lid and pour in the milk, adding the butter, and stir gently to combine, creating a creamy base that coats the potatoes.
6. Sprinkle the shredded cheddar cheese evenly over the top, then transfer the skillet to a preheated oven at 375°F and bake for 5 minutes, or until the cheese is melted and bubbly.
7. Remove from the oven and let it rest for 2 minutes before garnishing with fresh chives if using.
What emerges is a delightful contrast of creamy, melted cheese clinging to tender potatoes with just a hint of crispness from the initial sear. The sharp cheddar melds beautifully with the savory onions and garlic, creating a rich, comforting flavor that’s perfect for scooping straight from the skillet. Try serving it alongside a crisp green salad or topping it with a fried egg for a hearty brunch twist.
One-Pot Tomato Basil Pasta
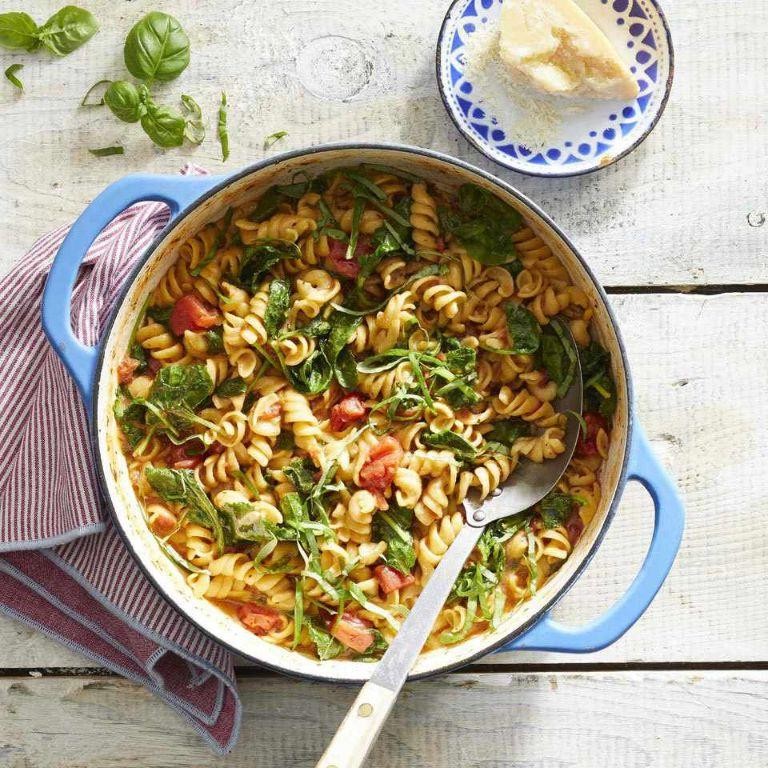
Cooking sometimes feels like a quiet conversation with the kitchen, a slow simmer of thoughts and ingredients coming together. Today, that conversation is about a simple, comforting dish that requires just one pot and a bit of patience, letting the flavors meld into something warm and satisfying.
Serving: 4 | Pre Time: 10 minutes | Cooking Time: 25 minutes
Ingredients
– 12 ounces of dried spaghetti
– 1 large yellow onion, finely diced
– 4 cloves of garlic, minced
– 1 (28-ounce) can of crushed tomatoes
– 4 cups of vegetable broth
– A generous handful of fresh basil leaves, roughly torn
– A good glug of extra-virgin olive oil, about 2 tablespoons
– A pinch of red pepper flakes
– A couple of teaspoons of kosher salt
– A few cracks of black pepper
Instructions
1. In a large pot or Dutch oven, heat the olive oil over medium heat until it shimmers, about 2 minutes.
2. Add the diced onion and cook, stirring occasionally, until it turns soft and translucent, which should take 5-7 minutes.
3. Stir in the minced garlic and red pepper flakes, cooking for just 1 minute until fragrant to avoid burning the garlic.
4. Pour in the crushed tomatoes and vegetable broth, then add the spaghetti, breaking it in half if needed to fit in the pot.
5. Season with the kosher salt and black pepper, bringing the mixture to a boil over high heat.
6. Once boiling, reduce the heat to a gentle simmer, cover the pot, and cook for 10-12 minutes, stirring every few minutes to prevent sticking. Tip: If the pasta seems dry, add a splash of water or broth to keep it saucy.
7. After 10-12 minutes, test the pasta by biting a strand; it should be al dente, tender but with a slight bite. Tip: The sauce will thicken as it cooks, so don’t worry if it looks thin at first.
8. Remove the pot from the heat and stir in the torn basil leaves, letting them wilt into the pasta for about 1 minute. Tip: Adding the basil off the heat preserves its bright flavor and color.
9. Serve immediately while hot.
One bite reveals a silky, clingy sauce that coats each strand of pasta, with the sweet acidity of tomatoes balanced by the peppery kick and herbal freshness. For a creative twist, top it with a dollop of ricotta or a sprinkle of Parmesan, letting the creaminess melt into the warmth.
Crispy Bean Tacos

Perhaps there’s something quietly comforting about a simple taco, especially on a day when the light slants just so through the kitchen window. Crispy bean tacos are my go-to when I crave something warm and textural, a humble meal that feels like a small, edible hug. They come together with a gentle rhythm, transforming pantry staples into a satisfying crunch.
Serving: 4 | Pre Time: 10 minutes | Cooking Time: 15 minutes
Ingredients
- 8 small corn tortillas
- 1 can (15 ounces) of black beans, rinsed and drained
- A couple of tablespoons of olive oil
- A small yellow onion, finely diced
- 2 cloves of garlic, minced
- A teaspoon of ground cumin
- A half teaspoon of smoked paprika
- A splash of lime juice
- A handful of fresh cilantro, chopped
- Salt, just a pinch or two
Instructions
- Heat a large skillet over medium heat and add a tablespoon of olive oil.
- Add the diced onion and cook, stirring occasionally, until it turns soft and translucent, about 5 minutes.
- Stir in the minced garlic and cook for 1 minute until fragrant, being careful not to let it burn.
- Add the rinsed black beans, cumin, smoked paprika, and a pinch of salt to the skillet.
- Mash the beans lightly with a fork or potato masher until about half are broken down, leaving some whole for texture—this helps the filling hold together better in the tacos.
- Cook the bean mixture for 3-4 minutes, stirring often, then remove from heat and stir in the lime juice and chopped cilantro.
- Wipe the skillet clean and return it to medium-high heat, adding the remaining tablespoon of olive oil.
- Warm each corn tortilla in the skillet for about 15 seconds per side to make them pliable, stacking them on a plate as you go to keep them soft.
- Spoon about 2 tablespoons of the bean filling onto one half of each tortilla, then fold them over to create a half-moon shape.
- Place the filled tacos back in the skillet, working in batches if needed to avoid crowding, and cook for 2-3 minutes per side until golden brown and crispy—listen for a gentle sizzle as a cue they’re ready to flip.
- Transfer the cooked tacos to a wire rack instead of a plate to prevent them from getting soggy on the bottom.
- Repeat with the remaining tacos, adding a bit more oil to the skillet if it looks dry.
Gently, these tacos emerge with a satisfying crunch that gives way to the creamy, spiced beans inside. The lime adds a bright zing that cuts through the richness, making each bite feel balanced. For a fun twist, try topping them with a dollop of cool avocado crema or a quick-pickled red onion to add layers of flavor and color.
Simple Vegetable Stir-Fry
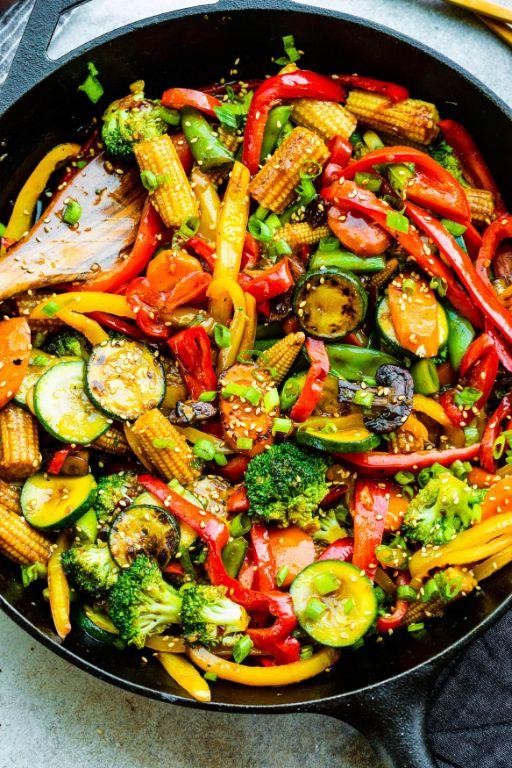
Under the soft glow of the kitchen light, with the quiet hum of the evening settling in, there’s a gentle comfort in returning to the basics—a simple vegetable stir-fry that feels like a warm, familiar embrace after a long day.
Serving: 4 | Pre Time: 15 minutes | Cooking Time: 10 minutes
Ingredients
– A couple of tablespoons of vegetable oil
– 1 large onion, thinly sliced
– 3 cloves of garlic, minced
– A thumb-sized piece of fresh ginger, grated
– 2 bell peppers (any color), cut into thin strips
– 2 medium carrots, julienned
– A big handful of broccoli florets
– 3 tablespoons of soy sauce
– A splash of rice vinegar
– A teaspoon of sesame oil
– A pinch of red pepper flakes (optional, for a little kick)
Instructions
1. Heat 2 tablespoons of vegetable oil in a large wok or skillet over medium-high heat until it shimmers slightly, about 1–2 minutes.
2. Add the thinly sliced onion to the hot oil and stir-fry for 3–4 minutes, until it turns soft and translucent, stirring constantly to prevent burning.
3. Stir in the minced garlic and grated ginger, cooking for just 30 seconds until fragrant—be careful not to let it brown, as this can make it bitter.
4. Toss in the bell pepper strips, julienned carrots, and broccoli florets, and stir-fry for 4–5 minutes until the vegetables are tender-crisp but still vibrant in color.
5. Pour in 3 tablespoons of soy sauce and a splash of rice vinegar, stirring to coat all the vegetables evenly for about 1 minute.
6. Drizzle a teaspoon of sesame oil over the stir-fry and add a pinch of red pepper flakes if using, then give it one final stir to combine everything well.
7. Remove the skillet from the heat immediately to keep the vegetables from overcooking and becoming mushy.
Drizzle the finished stir-fry over a bed of fluffy jasmine rice or toss it with noodles for a heartier meal. The vegetables should still have a slight crunch, mingling with the savory depth of soy sauce and the bright hint of ginger—a humble dish that feels both nourishing and deeply satisfying.
Budget-Friendly Chili

Zigzagging through the grocery aisles on a tight budget, I found myself craving something warm and substantial that wouldn’t strain my wallet. This chili recipe emerged from that quiet, reflective moment, a simple pot of comfort that simmers gently on the stove while the world rushes by outside. It’s the kind of meal that feels like a soft exhale at the end of a long day, forgiving in its simplicity and generous in its flavor.
Serving: 6 | Pre Time: 15 minutes | Cooking Time: 45 minutes
Ingredients
– A couple of tablespoons of olive oil
– One large yellow onion, chopped small
– Four cloves of garlic, minced fine
– One pound of ground beef (the 80/20 kind works great here)
– Two 15-ounce cans of kidney beans, drained and rinsed
– One 28-ounce can of crushed tomatoes
– A couple of tablespoons of chili powder
– A teaspoon of ground cumin
– A good pinch of salt
– A splash of water if things look too thick
Instructions
1. Warm a couple of tablespoons of olive oil in a large, heavy-bottomed pot over medium heat for about 2 minutes, until it shimmers lightly.
2. Add one large chopped yellow onion and cook, stirring occasionally, for 8-10 minutes until it turns soft and translucent, releasing its sweet aroma.
3. Stir in four minced garlic cloves and cook for just 1 minute more, being careful not to let the garlic brown, as it can turn bitter.
4. Crumble in one pound of ground beef, breaking it up with a wooden spoon, and cook for 6-8 minutes until it’s no longer pink, letting it develop a bit of fond on the bottom of the pot.
5. Sprinkle in two tablespoons of chili powder, one teaspoon of ground cumin, and a good pinch of salt, stirring to coat the meat and onions evenly for about 30 seconds to toast the spices.
6. Pour in one 28-ounce can of crushed tomatoes and two drained and rinsed 15-ounce cans of kidney beans, giving everything a gentle stir to combine.
7. Bring the chili to a low simmer, then reduce the heat to low, cover the pot partially, and let it bubble gently for 30 minutes, stirring every 10 minutes to prevent sticking.
8. After 30 minutes, check the consistency; if it seems too thick, add a splash of water and simmer uncovered for 5 more minutes to let the flavors meld.
9. Remove the pot from the heat and let the chili rest for 5 minutes before serving, which allows the flavors to settle and deepen.
Now, ladle it into bowls and notice how the chili has thickened into a rich, hearty stew where the beans hold their shape but melt softly against the tender beef. The flavor is deeply savory with a warm, earthy undertone from the cumin, perfect for spooning over a baked potato or crumbling cornbread into for a cozy, textured meal.
Cabbage Roll Casserole
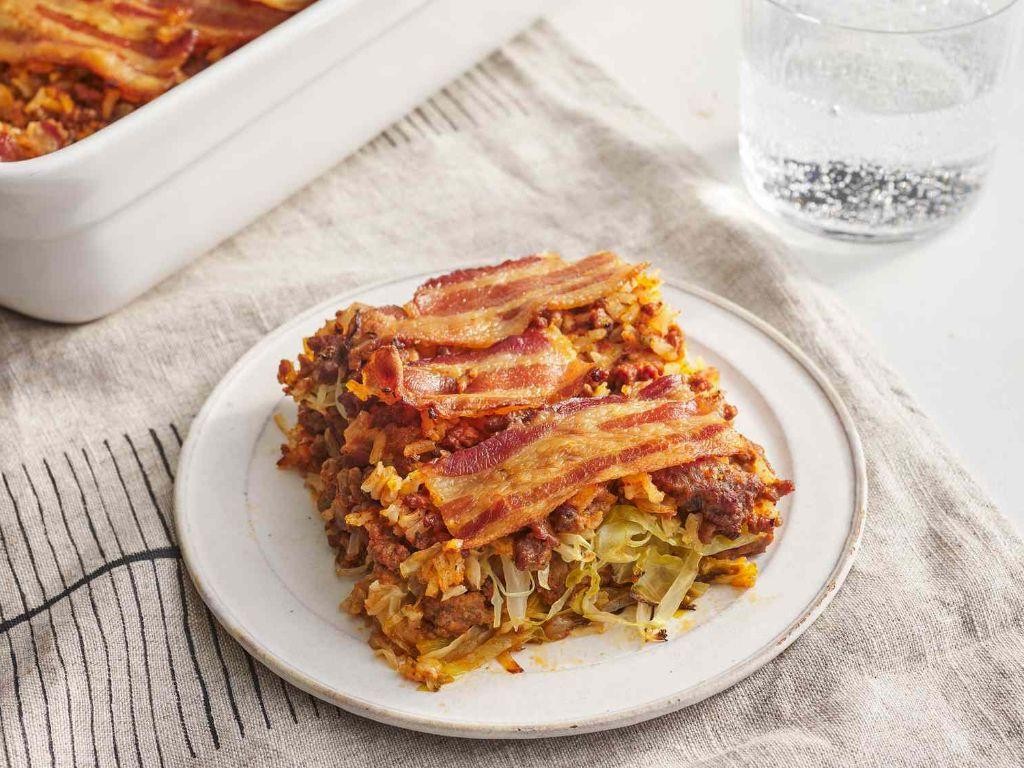
A quiet evening calls for something that feels like a hug from the inside, a dish that simmers patiently while the world outside grows still. This layered casserole captures all the cozy, savory warmth of traditional cabbage rolls but lets you skip the fussy rolling, letting the flavors mingle freely in the baking dish instead.
Serving: 6 | Pre Time: 20 minutes | Cooking Time: 55 minutes
Ingredients
– A good drizzle of olive oil
– One large yellow onion, finely chopped
– A couple of cloves of garlic, minced
– 1 pound of lean ground beef
– A 28-ounce can of crushed tomatoes
– A splash of beef broth, about half a cup
– 1 tablespoon of brown sugar
– 2 teaspoons of dried oregano
– A teaspoon of smoked paprika
– A good pinch of salt and a few cracks of black pepper
– Half a head of green cabbage, roughly chopped into bite-sized pieces
– 1 cup of uncooked long-grain white rice
– 2 cups of shredded mozzarella cheese
Instructions
1. Preheat your oven to 375°F (190°C) to ensure it’s ready for baking.
2. In a large, deep skillet or Dutch oven, heat a good drizzle of olive oil over medium heat until it shimmers, about 1 minute.
3. Add the finely chopped onion and sauté, stirring occasionally, until it turns soft and translucent, which should take about 5 minutes.
4. Stir in the minced garlic and cook for just 30 seconds until fragrant, being careful not to let it burn.
5. Add the lean ground beef to the skillet, breaking it up with a wooden spoon, and cook until it’s fully browned and no pink remains, approximately 7-8 minutes.
6. Tip: If there’s excess grease, drain it off for a lighter dish, but a little adds flavor.
7. Pour in the crushed tomatoes, splash of beef broth, brown sugar, dried oregano, smoked paprika, salt, and black pepper, stirring everything together until well combined.
8. Bring the mixture to a gentle simmer, then reduce the heat to low and let it cook uncovered for 10 minutes to allow the flavors to meld.
9. While the sauce simmers, layer the roughly chopped cabbage evenly in the bottom of a 9×13-inch baking dish.
10. Sprinkle the uncooked long-grain white rice evenly over the cabbage layer.
11. Tip: Rinsing the rice first can help prevent it from becoming too sticky during baking.
12. Carefully pour the simmered meat and tomato sauce over the cabbage and rice, using a spoon to spread it into an even layer.
13. Cover the baking dish tightly with aluminum foil to trap steam, which helps cook the rice thoroughly.
14. Bake in the preheated oven for 40 minutes, until the rice is tender and has absorbed most of the liquid.
15. Remove the dish from the oven and take off the foil, being cautious of the hot steam.
16. Evenly sprinkle the shredded mozzarella cheese over the top of the casserole.
17. Return the dish to the oven, uncovered, and bake for an additional 10-15 minutes, until the cheese is melted, bubbly, and lightly golden in spots.
18. Tip: Let the casserole rest for 5-10 minutes after baking; this allows the layers to set for easier serving.
19. Now, nestle into a cozy corner with a bowl of this casserole. Notice how the cabbage softens into silky tenderness, mingling with the savory beef and sweet-tart tomatoes, while the rice soaks up every bit of flavor, and the melted cheese adds a creamy, stretchy finish. It’s perfect on its own or with a side of crusty bread for dipping into the rich sauce, making any quiet night feel a little more special.
Hearty Minestrone Soup

Huddled in the kitchen on this chilly December afternoon, I find myself craving the kind of meal that feels like a warm embrace, a slow-simmered pot of comfort that fills the whole house with its promise. Hearty minestrone soup is exactly that—a forgiving, adaptable mosaic of vegetables, beans, and pasta that changes with the seasons and the contents of your pantry, always welcoming you home.
Serving: 6 | Pre Time: 20 minutes | Cooking Time: 45 minutes
Ingredients
– A couple of tablespoons of olive oil
– One medium yellow onion, chopped
– Two carrots, peeled and diced
– Two celery stalks, diced
– Three cloves of garlic, minced
– A 28-ounce can of crushed tomatoes
– Six cups of vegetable broth
– One 15-ounce can of cannellini beans, rinsed and drained
– One cup of small pasta, like ditalini or small shells
– A couple of handfuls of fresh spinach
– A generous pinch of salt and a few cracks of black pepper
– A splash of red wine vinegar, for brightness at the end
– A little grated Parmesan cheese for serving, if you like
Instructions
1. In a large Dutch oven or heavy-bottomed pot, heat the olive oil over medium heat until it shimmers.
2. Add the chopped onion, diced carrots, and diced celery, stirring occasionally, and cook for about 8–10 minutes until the vegetables soften and the onion turns translucent.
3. Stir in the minced garlic and cook for 1 more minute, just until fragrant—be careful not to let it burn, as it can turn bitter quickly.
4. Pour in the crushed tomatoes and vegetable broth, then increase the heat to bring the mixture to a gentle boil.
5. Reduce the heat to low, cover the pot partially, and let it simmer for 20 minutes to allow the flavors to meld together beautifully.
6. Add the rinsed cannellini beans and the pasta, stirring to combine, and simmer uncovered for another 10–12 minutes, or until the pasta is al dente—taste a piece to check for doneness, as cooking times can vary by brand.
7. Stir in the fresh spinach until it just wilts, which should take about 2 minutes, then turn off the heat.
8. Finish with a splash of red wine vinegar, a generous pinch of salt, and a few cracks of black pepper, stirring gently to incorporate.
9. Ladle the soup into bowls and top with a sprinkle of grated Parmesan cheese if desired.
On a quiet evening, this soup settles into a rich, brothy harmony where the tender vegetables and beans mingle with the slight chew of pasta. I love serving it with a thick slice of crusty bread for dipping, letting the steam rise and fog the windows, a simple ritual that turns a meal into a moment of quiet comfort.
Loaded Baked Potato Wedges

Holding this warm bowl of loaded baked potato wedges, I’m reminded how the simplest comforts often arrive when we need them most—these wedges, with their crisp edges and pillowy centers, feel like a quiet afternoon wrapped in potato skins.
Serving: 4 | Pre Time: 15 minutes | Cooking Time: 35 minutes
Ingredients
– 4 large russet potatoes, scrubbed clean
– A generous glug of olive oil, about ¼ cup
– A couple of teaspoons of garlic powder
– A sprinkle of smoked paprika, roughly 1 teaspoon
– A pinch of salt and freshly cracked black pepper
– A handful of shredded cheddar cheese, about 1 cup
– A few slices of cooked bacon, crumbled into bits
– A dollop of sour cream, maybe ½ cup
– A scattering of chopped green onions, just a couple of tablespoons
Instructions
1. Preheat your oven to 425°F and line a large baking sheet with parchment paper.
2. Cut each potato lengthwise into 8 wedges, leaving the skins on for extra texture.
3. In a big bowl, toss the potato wedges with olive oil, garlic powder, smoked paprika, salt, and pepper until evenly coated.
4. Arrange the wedges in a single layer on the baking sheet, making sure they don’t touch so they crisp up nicely.
5. Bake for 20 minutes, then flip each wedge carefully with tongs to ensure even browning.
6. Return to the oven and bake for another 15 minutes, or until the wedges are golden and fork-tender.
7. Remove from the oven and immediately sprinkle the shredded cheddar cheese over the hot wedges, letting it melt from the residual heat.
8. Top with crumbled bacon, a dollop of sour cream, and a scattering of chopped green onions.
9. Serve right away while everything is warm and gooey.
As you bite into these, the crunch gives way to a soft, steamy interior, with the smoky bacon and tangy sour cream creating a cozy balance. Try stacking them high on a platter for sharing, or enjoy them straight from the pan with a cold drink on the side.
Conclusion
Looking to eat well without breaking the bank? This roundup proves gourmet flavor is totally achievable on a budget. We hope these 20 delicious recipes inspire your next kitchen adventure. Give them a try, leave a comment with your favorite, and don’t forget to share your cooking wins by pinning this article on Pinterest! Happy cooking!


