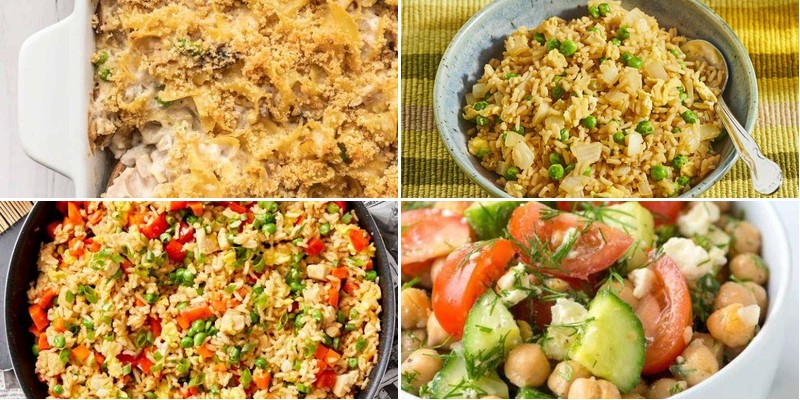
Oh, the struggle of wanting delicious, satisfying meals without breaking the bank or spending hours in the kitchen—we’ve all been there! That’s why we’ve gathered 34 budget-friendly, cheap, and easy recipes perfect for busy weeknights or lazy weekends. From cozy comfort foods to quick dinners, these ideas will save you time and money while keeping your taste buds happy. Dive in and discover your new go-to meals!
One-Pan Garlic Chicken with Potatoes

Whew, who knew your entire dinner could get its act together in one pan without staging a kitchen mutiny? This garlicky chicken and potato situation is basically your weeknight superhero—minimal cleanup, maximum flavor, and zero chance of your potatoes staging a coup. It’s the kind of meal that makes you look like a culinary genius while secretly being easier than deciding what to watch on Netflix.
2
servings15
minutes40
minutesIngredients
– A couple of boneless, skinless chicken breasts
– About 4 medium russet potatoes, chopped into 1-inch chunks
– A hearty glug of olive oil (around 2 tablespoons)
– A whole head of garlic, cloves peeled and roughly chopped
– A generous sprinkle of dried rosemary (1 teaspoon)
– A pinch of salt and black pepper
– A splash of chicken broth (½ cup)
– A squeeze of fresh lemon juice (1 tablespoon)
Instructions
1. Preheat your oven to 400°F—this ensures everything cooks evenly and gets nicely browned.
2. Toss the chopped potatoes with 1 tablespoon of olive oil, half the chopped garlic, ½ teaspoon dried rosemary, and a pinch of salt and pepper in a large mixing bowl.
3. Spread the potato mixture in a single layer on a rimmed baking sheet.
4. Rub the chicken breasts with the remaining 1 tablespoon of olive oil, the rest of the garlic, ½ teaspoon dried rosemary, and another pinch of salt and pepper.
5. Nestle the chicken breasts among the potatoes on the baking sheet.
6. Roast in the preheated oven for 20 minutes.
7. Remove the pan from the oven and carefully pour ½ cup of chicken broth around the chicken and potatoes—this keeps everything moist and adds flavor.
8. Return the pan to the oven and roast for another 15–20 minutes, until the chicken reaches an internal temperature of 165°F and the potatoes are fork-tender.
9. Drizzle 1 tablespoon of fresh lemon juice over the chicken and potatoes right before serving.
That golden, crispy-edged chicken pairs perfectly with the soft, garlic-infused potatoes—it’s a texture dream team. Serve it straight from the pan with a side of steamed green beans or over a bed of arugula for a fresh twist, and watch it disappear faster than your Wi-Fi during a binge-watch.
Easy Spaghetti Alla Puttanesca
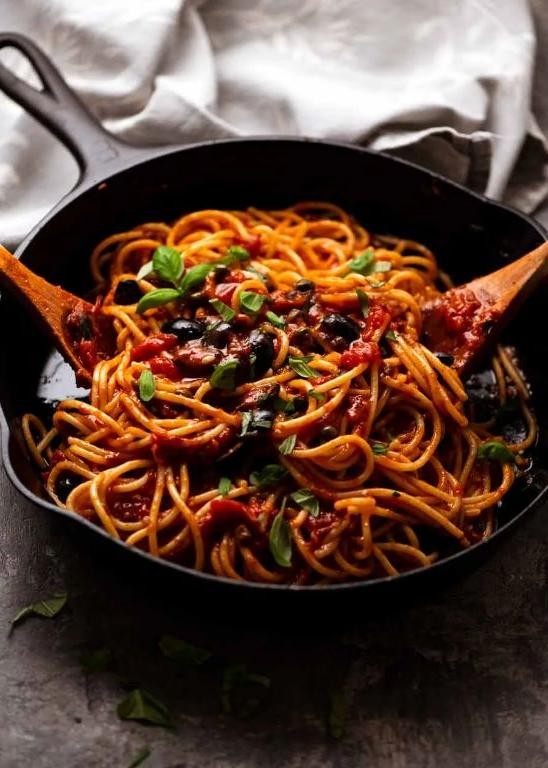
Hangry? This easy spaghetti alla puttanesca is here to rescue your dinner with bold flavors and zero fuss—it’s basically the superhero of pantry meals, swooping in when you’re too busy (or lazy) for anything fancy. Packed with briny olives, salty capers, and a kick of red pepper, it’s the saucy, sassy dish that proves big flavor doesn’t need a big effort. Let’s get cooking before your stomach stages a mutiny!
5
servings10
minutes20
minutesIngredients
– 8 ounces of spaghetti (because who measures pasta with a scale?)
– A couple of glugs of olive oil (about 2 tablespoons)
– 3 cloves of garlic, minced (don’t skimp—it’s the flavor boss)
– A pinch of red pepper flakes (for that spicy wink)
– A 28-ounce can of crushed tomatoes (the saucy foundation)
– A handful of pitted Kalamata olives, roughly chopped (about ½ cup)
– A tablespoon of capers, drained (they’re the salty little rebels)
– A splash of water (to loosen things up)
– A sprinkle of fresh parsley, chopped (for a herby finish)
Instructions
1. Bring a large pot of salted water to a rolling boil over high heat—it should bubble like a hot tub for pasta.
2. Add the spaghetti and cook for 8–10 minutes, stirring occasionally, until it’s al dente (bite into a strand to check; it should have a slight firmness).
3. While the pasta cooks, heat the olive oil in a large skillet over medium heat until it shimmers lightly.
4. Add the minced garlic and red pepper flakes, and sauté for 1–2 minutes until fragrant but not browned (burnt garlic is a culinary crime).
5. Pour in the crushed tomatoes and a splash of water, stirring to combine, and let it simmer for 5–7 minutes until slightly thickened.
6. Stir in the chopped olives and capers, and cook for another 2–3 minutes to let the flavors meld (tip: taste and adjust salt only after adding the briny bits).
7. Drain the cooked spaghetti, reserving ½ cup of pasta water, and add the pasta directly to the skillet.
8. Toss everything together, adding a splash of reserved pasta water if needed to create a silky sauce that clings to the noodles.
9. Sprinkle with fresh parsley and give it one final toss to distribute the herbs evenly.
Bold and briny, this puttanesca coats the spaghetti in a tangy, umami-rich sauce that’s unapologetically flavorful. Serve it with a side of crusty bread to mop up every last drop, or top it with extra red pepper flakes if you’re feeling feisty—it’s a dish that begs to be devoured straight from the pan.
Simple Vegetable Stir-Fry
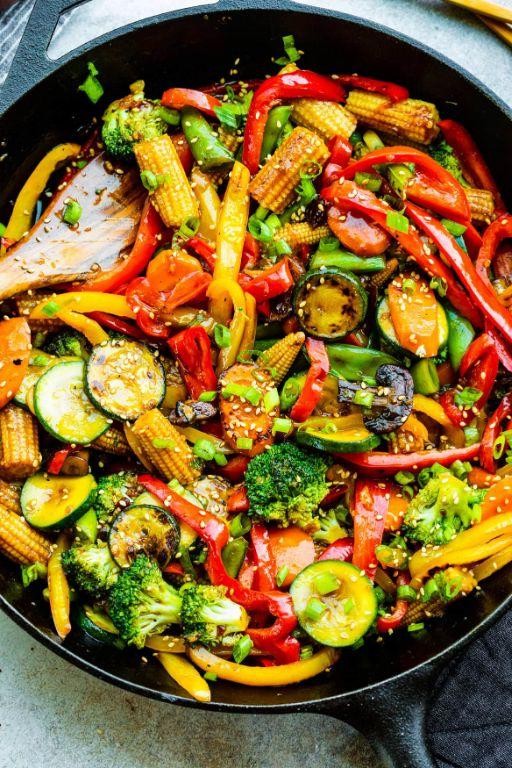
Juggling work, life, and the eternal “what’s for dinner?” question? This lightning-fast veggie stir-fry is your new weeknight superhero—ready faster than you can scroll through takeout apps.
3
servings15
minutes10
minutesIngredients
– A couple of tablespoons of vegetable oil
– 1 large onion, sliced into thin half-moons
– 2 bell peppers (any color you like), sliced into strips
– 2 cups of broccoli florets (the tiny trees!)
– 2 carrots, cut into thin matchsticks
– 3 cloves of garlic, minced (the more, the merrier)
– A generous splash of soy sauce (about 3 tablespoons)
– A tablespoon of sesame oil for that nutty finish
– A pinch of red pepper flakes if you like a little kick
Instructions
1. Pour 2 tablespoons of vegetable oil into a large skillet or wok and heat it over medium-high heat until it shimmers, about 1–2 minutes.
2. Add the sliced onion and cook, stirring constantly, for 2 minutes until it just starts to soften.
3. Toss in the bell pepper strips and cook for another 2 minutes, keeping them moving so they get a slight char without burning.
4. Tip: Don’t overcrowd the pan—if needed, cook veggies in batches to avoid steaming instead of frying.
5. Add the broccoli florets and carrot matchsticks, stirring for 3–4 minutes until the broccoli turns bright green and the carrots are tender-crisp.
6. Sprinkle in the minced garlic and cook for 30 seconds until fragrant—any longer, and it might turn bitter.
7. Tip: Have all your ingredients prepped and within arm’s reach (“mise en place”) so nothing burns while you search.
8. Drizzle in 3 tablespoons of soy sauce and a pinch of red pepper flakes, tossing everything to coat evenly.
9. Cook for 1 more minute, letting the sauce bubble and cling to the veggies.
10. Remove from heat and stir in 1 tablespoon of sesame oil for a rich, toasty flavor.
11. Tip: Serve immediately over rice or noodles—the veggies are best when they’re still crisp and hot.
Mouthwatering and vibrant, this stir-fry delivers a satisfying crunch from the broccoli and carrots, balanced by the savory soy and nutty sesame. Try piling it over quinoa for a protein boost, or wrap it in warm tortillas for a fun, handheld twist—leftovers (if any!) shine cold in salads the next day.
Quick and Hearty Lentil Soup

Naturally, your Tuesday needs this soup more than you need that third cup of coffee—it’s the cozy, no-fuss hero that fights off hangry monsters with a single, glorious ladle. Quick and hearty lentil soup is basically a warm hug in a bowl, ready to save your sanity when your fridge looks sadder than a deflated balloon. Let’s dive in and make magic happen, shall we?
4
servings15
minutes40
minutesIngredients
– A glug of olive oil (about 2 tablespoons)
– One big yellow onion, chopped up
– A couple of carrots, diced
– Two celery stalks, sliced thin
– Three cloves of garlic, minced
– One cup of brown lentils, rinsed
– Six cups of vegetable broth
– One 14.5-ounce can of diced tomatoes
– A splash of red wine vinegar (1 tablespoon)
– A pinch of salt and black pepper
Instructions
1. Heat 2 tablespoons of olive oil in a large pot over medium heat for 1–2 minutes until it shimmers.
2. Add the chopped onion, diced carrots, and sliced celery, and sauté for 6–8 minutes until the onion turns translucent and the veggies soften.
3. Stir in the minced garlic and cook for 1 minute until fragrant—don’t let it brown, or it’ll turn bitter (tip: keep the heat medium to avoid burning).
4. Pour in the rinsed lentils, vegetable broth, and diced tomatoes with their juices, then bring to a boil.
5. Reduce the heat to low, cover the pot, and simmer for 25–30 minutes until the lentils are tender but not mushy (tip: check at 25 minutes by tasting a lentil—it should be soft with a slight bite).
6. Stir in 1 tablespoon of red wine vinegar, a pinch of salt, and black pepper, then simmer uncovered for 5 more minutes to let the flavors meld (tip: the vinegar brightens the soup, so don’t skip it!).
7. Ladle the soup into bowls and serve hot.
Seriously, this soup is a texture dream—creamy lentils swimming with tender veggies in a brothy, tangy base that’ll make you forget takeout exists. Try topping it with a dollop of Greek yogurt or crusty bread for dipping, and watch it become your new weeknight obsession.
Affordable Chicken Fried Rice
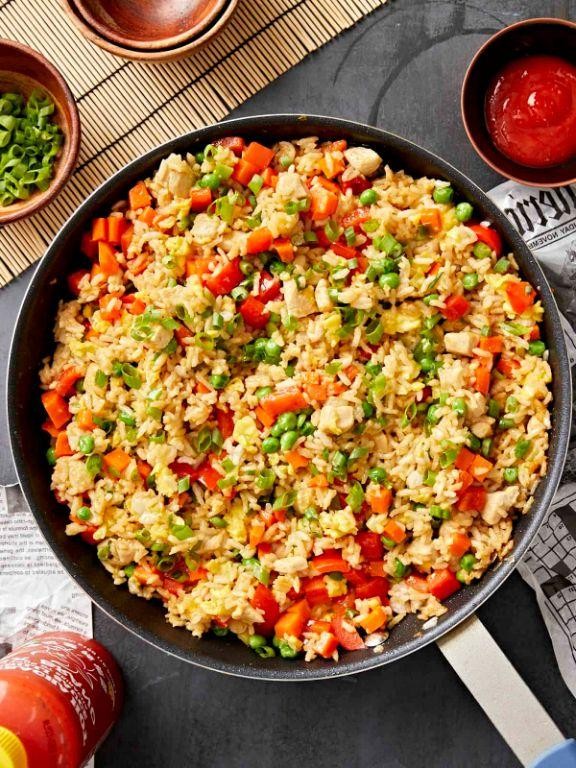
Hooray for the ultimate fridge-clearing hero that somehow tastes like takeout royalty! This affordable chicken fried rice is your golden ticket to transforming leftover rice and that lonely chicken breast into a flavor-packed masterpiece that’ll have your wallet and taste buds doing a happy dance.
4
servings15
minutes15
minutesIngredients
– 2 cups of day-old cooked rice (trust me, fresh rice turns to mush)
– 1 boneless, skinless chicken breast, cut into bite-sized pieces
– 2 large eggs, because everything’s better with eggs
– 1 cup of frozen peas and carrots mix (the colorful confetti)
– 3 cloves of garlic, minced (the more the merrier)
– 3 tablespoons of vegetable oil, divided
– 2 tablespoons of soy sauce
– 1 tablespoon of sesame oil (the flavor bomb)
– A couple of green onions, sliced
– A generous pinch of salt and pepper
Instructions
1. Heat 1 tablespoon of vegetable oil in a large skillet or wok over medium-high heat until it shimmers.
2. Add the chicken pieces and season with salt and pepper, cooking for 5-7 minutes until golden brown and cooked through (no pink inside!).
3. Remove the chicken from the skillet and set aside on a plate.
4. Crack the eggs into the same skillet and scramble them for about 1 minute until just set but still slightly runny.
5. Transfer the eggs to the plate with the chicken.
6. Add the remaining 2 tablespoons of vegetable oil to the skillet and heat for 30 seconds.
7. Toss in the minced garlic and cook for 30 seconds until fragrant (don’t let it burn!).
8. Add the frozen peas and carrots and stir-fry for 2 minutes until they’re no longer frozen.
9. Crumble the day-old rice into the skillet, breaking up any clumps with your spatula.
10. Pour the soy sauce and sesame oil over the rice and stir continuously for 3 minutes until everything is evenly coated.
11. Return the cooked chicken and scrambled eggs to the skillet.
12. Add the sliced green onions and stir everything together for 1 final minute to heat through.
Let’s be real—this fried rice delivers that perfect slightly crispy, chewy texture with savory soy-kissed grains and tender chicken in every bite. Serve it straight from the skillet with extra green onions sprinkled on top, or get fancy by packing it into bowls and topping with a fried egg for the ultimate breakfast-for-dinner situation.
Easy Tomato Basil Pasta
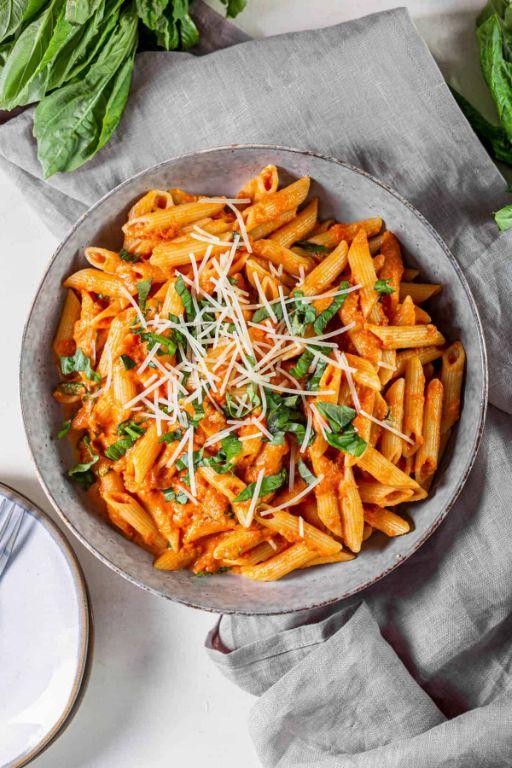
Oh, the eternal struggle of wanting restaurant-worthy pasta without the restaurant-worthy effort! This Easy Tomato Basil Pasta is your deliciously lazy solution—the kind of dish that makes you look like a culinary genius while secretly requiring the skill level of someone who can boil water (mostly).
4
servings10
minutes25
minutesIngredients
– 8 ounces of your favorite pasta (because life’s too short for boring noodles)
– A couple of tablespoons of olive oil
– 3 cloves of garlic, minced (or more—we don’t judge garlic obsession)
– A 28-ounce can of crushed tomatoes (the saucy hero)
– A big handful of fresh basil leaves, roughly chopped
– A generous pinch of salt and a few cracks of black pepper
– A splash of heavy cream for that dreamy finish
– A half-cup of grated Parmesan cheese (the cheesy crown)
Instructions
1. Fill a large pot with water, add a hefty pinch of salt, and bring it to a rolling boil over high heat. 2. Add the pasta to the boiling water and cook for 8–10 minutes, stirring occasionally, until it’s al dente (that’s fancy for “firm to the bite”—check by tasting a piece; it should have a slight resistance). 3. While the pasta cooks, heat the olive oil in a large skillet over medium heat until it shimmers. 4. Add the minced garlic and sauté for 1–2 minutes, stirring constantly, until it’s fragrant and golden (but not brown—burnt garlic is a sad affair). 5. Pour in the crushed tomatoes, stir to combine, and let the sauce simmer for 10–12 minutes, until it thickens slightly and bubbles gently. 6. Stir in the chopped basil, salt, and black pepper, and cook for another 2 minutes to let the flavors meld. 7. Reduce the heat to low, add the heavy cream, and stir until the sauce is smooth and creamy (about 1 minute—this prevents curdling and adds richness). 8. Drain the cooked pasta, reserving a half-cup of the starchy pasta water. 9. Add the drained pasta to the skillet with the sauce, tossing to coat everything evenly; if it’s too thick, splash in a bit of the reserved pasta water to loosen it up. 10. Sprinkle the grated Parmesan over the top, give it one final toss, and remove from the heat. Keep it saucy, friends—the starchy water is your secret weapon for a silky texture that clings to every strand. Kiss goodbye to bland pasta nights! This dish delivers a velvety, tomato-rich sauce with pops of fresh basil, all hugged by tender noodles. Try serving it with a side of garlic bread for dipping, or top it with extra basil and a drizzle of olive oil to impress your inner food critic.
Budget-Friendly Quiche Lorraine

Alright, let’s whip up some magic without breaking the bank! A quiche so wallet-friendly it might just pay you back in deliciousness—this Budget-Friendly Quiche Lorraine is here to save dinner (and your pennies) with creamy, savory goodness that’ll have everyone begging for seconds.
6
servings15
minutes50
minutesIngredients
– A store-bought pie crust (because we’re keeping it easy!)
– 6 large eggs
– 1 cup of heavy cream
– A couple of slices of bacon, chopped
– 1 small onion, finely diced
– 1 cup of shredded Swiss cheese
– A pinch of salt
– A dash of black pepper
– A sprinkle of nutmeg (trust me, it’s a game-changer!)
Instructions
1. Preheat your oven to 375°F and grab that pie crust—no need to thaw if frozen, just pop it right into a 9-inch pie dish.
2. In a skillet over medium heat, cook the chopped bacon until it’s crispy, about 5–7 minutes, then transfer it to a paper towel to drain (tip: save that bacon grease for frying potatoes later!).
3. Toss the diced onion into the same skillet and sauté until it’s soft and translucent, roughly 4–5 minutes, stirring occasionally to avoid burning.
4. In a large bowl, crack the 6 eggs and whisk them until they’re fully blended and frothy.
5. Pour in the heavy cream, then add the salt, black pepper, and nutmeg, whisking everything together until smooth.
6. Stir in the cooked bacon, sautéed onions, and shredded Swiss cheese until evenly distributed in the egg mixture.
7. Carefully pour the mixture into the pie crust, spreading it out gently with a spatula.
8. Bake in the preheated oven for 35–40 minutes, or until the center is set and the top is golden brown (tip: jiggle the pan—if it doesn’t wobble, it’s ready!).
9. Let the quiche cool on a wire rack for at least 10 minutes before slicing (tip: this helps it hold its shape beautifully).
Buttery, rich, and packed with smoky bacon and melty cheese, this quiche delivers a custardy texture that’s pure comfort in every bite. Serve it warm with a simple side salad for a cozy brunch, or slice it cold for a quick grab-and-go lunch that’ll make your coworkers jealous!
Simple Black Bean Tacos

Mmm, let’s talk about the culinary magic that happens when humble black beans decide they’re ready for their taco night debut—no fancy ingredients required, just pure, unapologetic deliciousness that’ll make your taste buds do a happy dance.
8
tacos10
minutes15
minutesIngredients
– A couple of 15-ounce cans of black beans, rinsed and drained
– 1 tablespoon of olive oil
– 1 small onion, diced
– 2 cloves of garlic, minced
– 1 teaspoon of ground cumin
– 1/2 teaspoon of chili powder
– A splash of lime juice (about 1 tablespoon)
– A pinch of salt
– 8 small corn tortillas
– Your favorite taco toppings (like shredded lettuce, diced tomatoes, or avocado slices)
Instructions
1. Heat 1 tablespoon of olive oil in a large skillet over medium heat until it shimmers.
2. Add the diced onion and cook for 4–5 minutes, stirring occasionally, until it turns translucent and soft.
3. Stir in the minced garlic and cook for 1 minute until fragrant—don’t let it brown!
4. Tip in the rinsed black beans, 1 teaspoon of ground cumin, 1/2 teaspoon of chili powder, and a pinch of salt.
5. Cook for 5–7 minutes, mashing some beans with the back of a spoon to create a creamy texture (this helps them hold together in the taco).
6. Remove the skillet from heat and stir in a splash of lime juice for a zesty kick.
7. Warm 8 small corn tortillas in a dry skillet over medium heat for 30–45 seconds per side until pliable and lightly toasted.
8. Spoon the black bean mixture into the warmed tortillas and top with your favorite toppings like shredded lettuce or diced tomatoes.
9. Serve immediately while everything is warm and vibrant.
Buttery soft tortillas cradle that spiced bean filling, which is subtly smoky from cumin and brightened by lime—try stacking them with extra avocado slices for a creamy contrast that’ll have you forgetting all about meat-based tacos.
Cheesy Broccoli Rice Casserole

Ready to transform that sad bag of frozen broccoli in your freezer into a cheesy, comforting masterpiece? This Cheesy Broccoli Rice Casserole is basically a warm hug in a baking dish—the kind of cozy, no-fuss dinner that makes you feel like a domestic genius with minimal effort. Let’s turn those humble ingredients into pure cheesy bliss!
6
servings15
minutes35
minutesIngredients
– 2 cups of cooked white rice (leftover works great!)
– 4 cups of fresh broccoli florets (or a whole bag if you’re using frozen)
– 1 can of creamy condensed mushroom soup
– 1 cup of shredded sharp cheddar cheese (plus extra for that glorious top layer)
– 1/2 cup of whole milk
– 1/4 cup of sour cream
– A couple of tablespoons of butter
– A generous pinch of garlic powder
– A good crack of black pepper
Instructions
1. Preheat your oven to 375°F and grab a 9×13-inch baking dish.
2. Steam the broccoli florets for about 5 minutes until they’re bright green and just tender—don’t let them get mushy! (Tip: If using frozen broccoli, no need to thaw—just pat it dry to avoid a watery casserole.)
3. In a large mixing bowl, combine the cooked rice, steamed broccoli, condensed mushroom soup, milk, sour cream, half of the shredded cheddar, garlic powder, and black pepper.
4. Stir everything together until the broccoli and rice are evenly coated in the creamy mixture.
5. Transfer the mixture to your baking dish and spread it into an even layer.
6. Sprinkle the remaining cheddar cheese evenly over the top—be generous here for that perfect golden crust.
7. Dot the top with small pieces of butter to help the cheese get beautifully browned.
8. Bake uncovered for 25-30 minutes, until the cheese is melted and bubbly with golden spots. (Tip: For extra crispiness, broil for the last 2 minutes, but watch closely—it can go from golden to burnt in seconds!)
9. Let it rest for 5-10 minutes before serving—this helps the casserole set and makes serving much cleaner.
That first spoonful reveals a creamy, comforting texture where the tender broccoli plays perfectly against the rich, cheesy rice. The sharp cheddar adds a tangy punch that cuts through the richness, making it impossible to stop at just one serving. Try scooping it over baked potatoes or alongside grilled chicken for a dinner that feels both nostalgic and totally new!
Quick Chickpea Salad
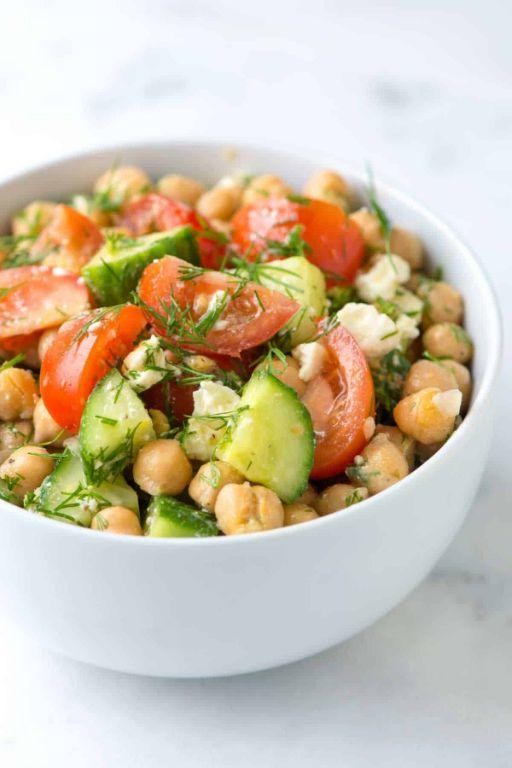
Darlings, if your lunch routine has become a sad desk salad situation, let me introduce you to this vibrant chickpea number that’s about to become your new BFF—it’s so quick, even your microwave will feel neglected. Get ready to toss together a bowl of pure joy that’s packed with protein and personality, no fancy skills required. Trust me, this isn’t just another salad; it’s a flavor party in a bowl, and you’re the VIP guest.
2
servings15
minutesIngredients
– A couple of 15-ounce cans of chickpeas, rinsed and drained
– One big handful of fresh parsley, roughly chopped
– A quarter of a red onion, finely diced
– A generous glug of extra-virgin olive oil (about 3 tablespoons)
– A big squeeze of fresh lemon juice (about 2 tablespoons)
– A heaping teaspoon of Dijon mustard
– A pinch of salt and a few cracks of black pepper
Instructions
1. Rinse and drain both cans of chickpeas thoroughly in a colander to remove any excess liquid.
2. Transfer the chickpeas to a large mixing bowl and use a potato masher to gently crush them until about half are broken down—this creates a chunkier texture that holds the dressing beautifully.
3. Add the chopped parsley and finely diced red onion to the bowl with the chickpeas.
4. In a small separate bowl, whisk together the olive oil, lemon juice, Dijon mustard, salt, and pepper until the mixture is fully emulsified and smooth.
5. Pour the dressing over the chickpea mixture and use a spatula to fold everything together until evenly coated.
6. Let the salad sit at room temperature for at least 10 minutes to allow the flavors to meld and the chickpeas to absorb the dressing.
7. Taste and adjust seasoning with an extra pinch of salt or squeeze of lemon if needed, then serve immediately.
Gloriously chunky and zesty, this salad boasts a satisfying texture that’s neither mushy nor boring—each bite delivers a bright pop from the lemon and a subtle kick from the Dijon. Pile it high on toasted sourdough for an epic open-faced sandwich, or scoop it into lettuce cups for a low-carb crunch fest. However you serve it, this little number is guaranteed to banish lunchtime blues for good.
Easy Baked Ziti
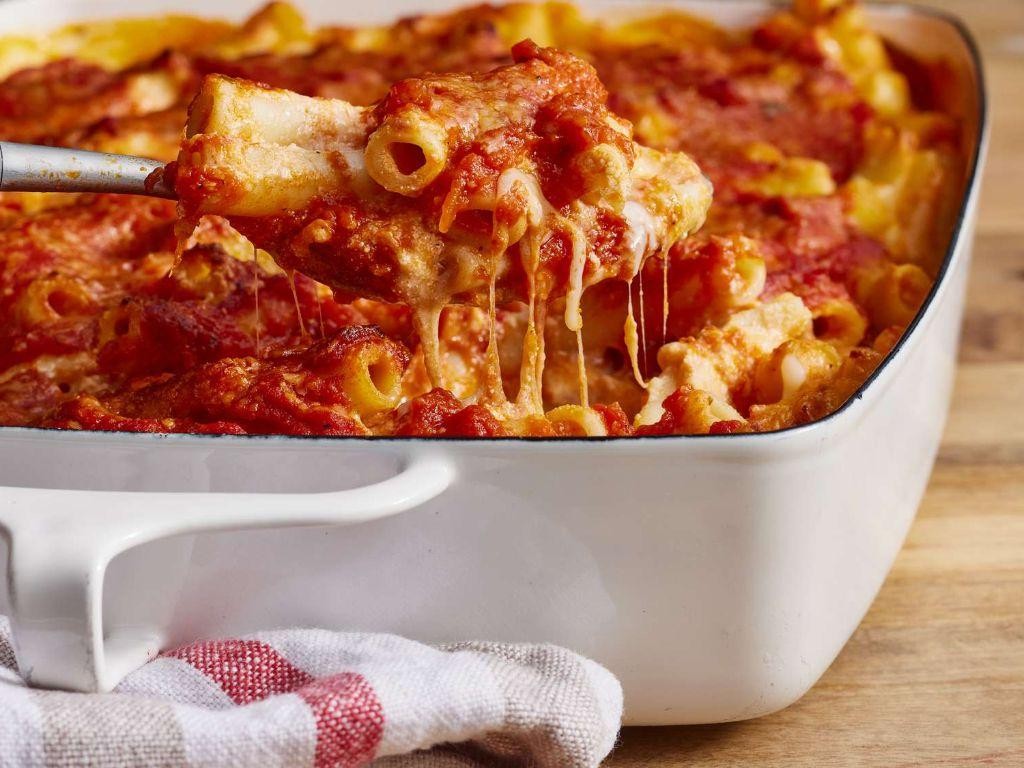
Aren’t we all just one bad day away from needing a giant, cheesy, carb-loaded hug in casserole form? This baked ziti is basically a warm, bubbly security blanket that just happens to be delicious. It’s the ultimate ‘fake it ’til you make it’ dinner that will have everyone thinking you slaved for hours.
8
servings20
minutes55
minutesIngredients
– A one-pound box of ziti pasta
– A 24-ounce jar of your favorite marinara sauce
– A 15-ounce container of ricotta cheese
– A couple of cups of shredded mozzarella cheese
– A good handful of grated Parmesan cheese
– One large egg
– A teaspoon of dried oregano
– A pinch of salt and a few cracks of black pepper
Instructions
1. Preheat your oven to 375°F (190°C).
2. Bring a large pot of salted water to a rolling boil.
3. Cook the entire box of ziti pasta according to the package directions for ‘al dente,’ which usually takes about 9-11 minutes.
4. While the pasta cooks, grab a large bowl and combine the entire container of ricotta cheese, the large egg, the teaspoon of dried oregano, the pinch of salt, and the few cracks of black pepper. Mix it all together until it’s smooth. (Tip: The egg helps bind the ricotta so your final bake isn’t watery!)
5. Drain the cooked ziti pasta thoroughly and immediately return it to the warm pot.
6. Pour the entire jar of marinara sauce over the hot pasta and stir until every piece is coated.
7. Add the ricotta mixture to the saucy pasta and gently fold it in, creating lovely cheesy swirls rather than mixing it completely uniformly.
8. Transfer half of the pasta mixture into a 9×13 inch baking dish, spreading it into an even layer.
9. Sprinkle one cup of the shredded mozzarella cheese evenly over this first layer.
10. Spoon the remaining pasta mixture on top, spreading it out carefully.
11. Top with the final cup of mozzarella and the good handful of grated Parmesan cheese, covering the surface completely. (Tip: This double layer of cheese creates the ultimate gooey, stretchy, golden-brown top!)
12. Cover the baking dish tightly with aluminum foil and bake for 20 minutes.
13. Remove the foil and continue baking for another 15-20 minutes, or until the cheese on top is completely melted, bubbly, and has those perfect golden-brown spots. (Tip: Let it rest for 5-10 minutes after baking; this allows the sauce to set so you get clean slices instead of a cheesy lava flow.)
Heavenly is the only word for that first bite through the crisp, cheesy crust into the tender, saucy pasta below. The ricotta pockets provide little creamy surprises that balance the tangy marinara perfectly. For a next-level experience, serve it with a simple green salad dressed sharply with vinaigrette to cut through all that glorious richness.
Budget Tuna Noodle Casserole

C’mon, let’s be real—sometimes your wallet needs dinner more than your Instagram feed does. This tuna noodle casserole is here to save the day (and your grocery budget) with zero apologies for being deliciously basic. It’s the cozy hug your Tuesday night desperately needs.
6
servings15
minutes32
minutesIngredients
– A couple of cups of egg noodles
– A can of chunk light tuna, drained
– A can of cream of mushroom soup
– A cup of frozen peas
– Half a cup of milk
– A quarter cup of grated Parmesan cheese
– A handful of crushed potato chips
– A tablespoon of butter
– A pinch of salt and black pepper
Instructions
1. Preheat your oven to 375°F.
2. Boil the egg noodles in salted water for 7 minutes until al dente, then drain thoroughly. (Tip: Don’t overcook the noodles—they’ll soften more in the oven!)
3. In a large bowl, combine the drained noodles, tuna, cream of mushroom soup, frozen peas, milk, Parmesan, salt, and pepper.
4. Stir everything together until the sauce coats every noodle evenly.
5. Transfer the mixture to a greased 9×13-inch baking dish.
6. Sprinkle the crushed potato chips evenly over the top.
7. Dot the surface with small pieces of butter.
8. Bake for 25 minutes until the edges are bubbly and the topping is golden brown. (Tip: For extra crunch, broil for the last 2 minutes—watch closely to avoid burning!)
9. Let it rest for 5 minutes before serving. (Tip: Resting helps the sauce thicken so it doesn’t run all over your plate.)
Out of the oven, this casserole emerges creamy and comforting, with the potato chips adding a salty crunch that plays perfectly against the tender noodles. Serve it straight from the dish with a side of steamed green beans, or get fancy and scoop it into individual ramekins for a “I meant to do that” dinner party vibe.
Simple Egg Fried Rice

Golly, who knew that the most satisfying meal in your culinary arsenal could be whipped up faster than you can decide what to watch on Netflix? This simple egg fried rice is the kitchen equivalent of a superhero cape—ready to rescue you from hangry meltdowns with minimal effort and maximum flavor. Let’s turn those leftover rice grains into a dish that’ll have you doing a happy dance right there by the stove.
2
servings5
minutes8
minutesIngredients
– 2 cups of day-old cooked rice (trust me, fresh rice turns to mush)
– 2 large eggs, because everything’s better with eggs
– 2 tablespoons of vegetable oil (the non-stick hero)
– 1/2 cup of frozen peas and carrots mix (the colorful confetti)
– 2 tablespoons of soy sauce (that salty, umami magic)
– 1 teaspoon of sesame oil (the flavor bomb finish)
– A couple of green onions, sliced (for that fresh crunch)
– 1 clove of garlic, minced (the aromatic whisper)
Instructions
1. Crack 2 eggs into a small bowl and whisk them until completely uniform and pale yellow.
2. Heat a large skillet or wok over medium-high heat for 1 minute until a drop of water sizzles immediately.
3. Pour 1 tablespoon of vegetable oil into the hot skillet, swirling to coat the entire surface.
4. Add the whisked eggs and cook for 45 seconds, scrambling with a spatula until soft curds form but eggs are still slightly wet.
5. Transfer the eggs to a clean plate immediately to prevent overcooking.
6. Add the remaining 1 tablespoon of vegetable oil to the same skillet.
7. Toss in the minced garlic and frozen peas and carrots, stir-frying for 2 minutes until vegetables are heated through and garlic is fragrant.
8. Add the 2 cups of day-old rice, breaking up any clumps with your spatula until grains are separated.
9. Cook the rice mixture for 3 minutes, stirring constantly until rice is heated through and slightly toasted.
10. Return the scrambled eggs to the skillet, distributing them evenly throughout the rice.
11. Drizzle 2 tablespoons of soy sauce evenly over the rice mixture, stirring vigorously to coat every grain.
12. Cook for 1 more minute, allowing the soy sauce to caramelize slightly on the hot rice.
13. Remove the skillet from heat and stir in 1 teaspoon of sesame oil and the sliced green onions.
14. Serve immediately while hot and sizzling. Remarkably, this humble fried rice achieves that perfect textural symphony—fluffy separate grains with little bursts of sweet peas, tender carrot bits, and rich egg ribbons woven throughout. The savory soy sauce and aromatic sesame oil create layers of flavor that make this taste anything but simple. Try piling it next to some crispy orange chicken or scooping it into lettuce cups for a fun handheld meal that’ll make Tuesday night feel like takeout Friday.
Conclusion
Budget-friendly cooking has never been easier! These 34 recipes prove delicious meals don’t need to break the bank. I’d love to hear which recipes become your new favorites—drop a comment below and share this roundup on Pinterest to help other home cooks discover these wallet-friendly ideas. Happy cooking!