
Welcome, budget-savvy food lovers! If you’re tired of sacrificing flavor for affordability, you’ve come to the right place. We’ve gathered 34 mouthwatering recipes that prove delicious meals don’t need to break the bank. From quick weeknight dinners to comforting classics, get ready to transform simple ingredients into extraordinary dishes. Let’s dive into these wallet-friendly culinary gems that will have everyone asking for seconds!
Spaghetti Aglio e Olio
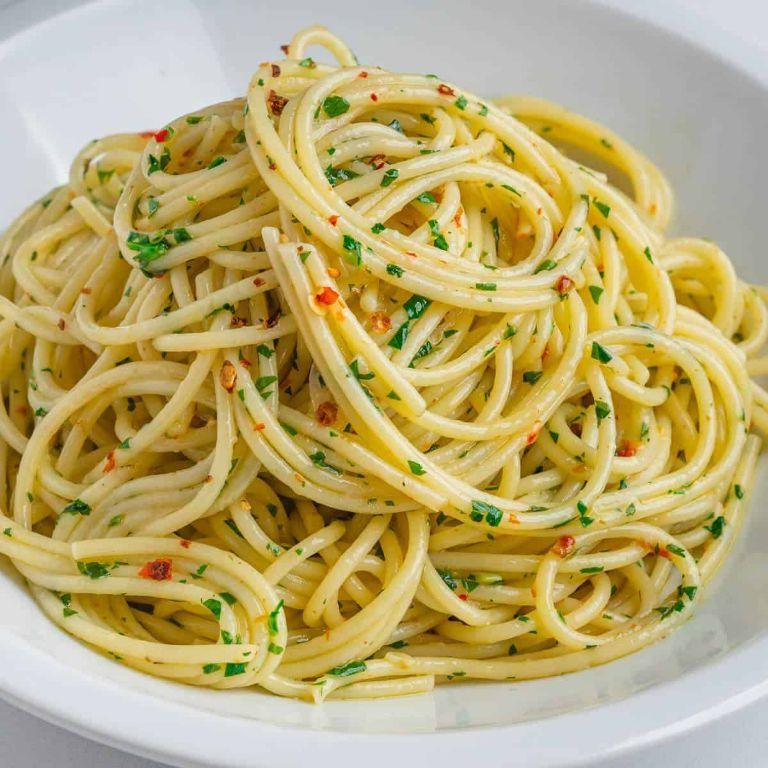
Haven’t we all had those nights where we want something delicious but don’t want to spend hours in the kitchen? Spaghetti aglio e olio is your answer—it’s simple, fast, and packed with flavor. You’ll be amazed at how a few basic ingredients can create such a satisfying meal.
3
servings10
minutes12
minutesIngredients
Spaghetti – 8 oz
Extra virgin olive oil – ¼ cup
Garlic cloves – 4
Red pepper flakes – ½ tsp
Parsley – 2 tbsp
Salt – 1 tsp
Instructions
1. Bring 4 quarts of water to a rolling boil in a large pot.
2. Add 1 teaspoon of salt to the boiling water.
3. Add 8 ounces of spaghetti and cook for 9 minutes, stirring occasionally to prevent sticking.
4. While pasta cooks, thinly slice 4 garlic cloves.
5. Heat ¼ cup of extra virgin olive oil in a large skillet over medium-low heat.
6. Add sliced garlic to the oil and cook for 2 minutes, until fragrant but not browned.
7. Stir in ½ teaspoon of red pepper flakes and cook for 30 seconds more.
8. Reserve ½ cup of pasta water before draining the spaghetti.
9. Add drained spaghetti directly to the skillet with the oil mixture.
10. Toss the spaghetti continuously for 1 minute to coat evenly with the oil.
11. Add 2 tablespoons of the reserved pasta water and toss for another 30 seconds to create a light sauce.
12. Chop 2 tablespoons of fresh parsley.
13. Remove skillet from heat and stir in the chopped parsley.
14. Serve immediately in warm bowls.
Enjoy how the al dente spaghetti perfectly carries the garlic-infused oil. The subtle heat from the pepper flakes balances the rich olive oil beautifully. Try topping it with toasted breadcrumbs for extra crunch, or serve alongside a simple green salad for a complete meal.
Lentil Soup with Vegetables

Warm up your kitchen with this simple lentil soup that’s perfect for chilly evenings. You’ll love how the vegetables soften into the broth, creating a cozy meal that comes together with minimal effort. It’s the kind of comforting dish that makes you feel nourished from the inside out.
5
servings15
minutes46
minutesIngredients
Olive oil – 2 tbsp
Onion – 1, chopped
Carrots – 2, diced
Celery – 2 stalks, diced
Garlic – 3 cloves, minced
Brown lentils – 1 cup
Vegetable broth – 6 cups
Bay leaf – 1
Salt – 1 tsp
Black pepper – ½ tsp
Instructions
1. Heat olive oil in a large pot over medium heat until it shimmers.
2. Add chopped onion and cook for 5 minutes, stirring occasionally, until translucent.
3. Stir in diced carrots and celery, cooking for another 5 minutes until slightly softened.
4. Add minced garlic and cook for 1 minute until fragrant.
5. Pour in brown lentils and stir to coat with the vegetables.
6. Add vegetable broth, bay leaf, salt, and black pepper.
7. Bring the soup to a boil, then reduce heat to low and cover the pot.
8. Simmer for 35 minutes until lentils are tender but not mushy.
9. Remove the bay leaf before serving.
Rich and hearty, this soup develops a wonderful creamy texture as the lentils break down slightly. The vegetables add natural sweetness that balances perfectly with the earthy lentils. Try topping it with a drizzle of olive oil and crusty bread for dipping to make it a complete meal.
Chickpea and Spinach Curry

You know those nights when you want something comforting but don’t want to spend hours in the kitchen? This chickpea and spinach curry is your answer. It’s hearty, flavorful, and comes together in no time.
2
servings10
minutes24
minutesIngredients
Olive oil – 2 tbsp
Onion – 1, diced
Garlic – 3 cloves, minced
Curry powder – 2 tbsp
Canned chickpeas – 2 (15 oz) cans, drained and rinsed
Canned diced tomatoes – 1 (14.5 oz) can
Coconut milk – 1 cup
Fresh spinach – 4 cups
Salt – 1 tsp
Instructions
1. Heat 2 tbsp olive oil in a large pot over medium heat for 1 minute.
2. Add 1 diced onion and cook for 5 minutes, stirring occasionally, until translucent.
3. Add 3 minced garlic cloves and cook for 1 minute until fragrant.
4. Stir in 2 tbsp curry powder and cook for 30 seconds to toast the spices.
5. Add 2 cans of drained chickpeas and 1 can of diced tomatoes with their juices.
6. Pour in 1 cup coconut milk and bring to a simmer.
7. Reduce heat to low, cover, and cook for 15 minutes to let flavors meld.
8. Stir in 4 cups fresh spinach and cook for 2 minutes until wilted.
9. Season with 1 tsp salt and stir to combine.
My favorite thing about this curry is how the creamy coconut milk balances the earthy spices. The chickpeas stay firm while the spinach melts into the sauce. Try serving it over quinoa or with naan bread for scooping up every last bit.
Vegetarian Tacos with Roasted Veggies

Busy weeknights call for simple, satisfying meals that don’t skimp on flavor. These vegetarian tacos with roasted veggies are exactly that—a colorful, customizable dinner that comes together with minimal effort. You’ll love how the roasted vegetables become sweet and tender, creating the perfect filling for warm tortillas.
8
tacos15
minutes25
minutesIngredients
Small flour tortillas – 8
Bell peppers – 2, sliced
Zucchini – 1, sliced
Red onion – 1, sliced
Olive oil – 2 tbsp
Chili powder – 1 tsp
Cumin – 1 tsp
Salt – ½ tsp
Black beans – 1 can, drained and rinsed
Lime – 1, cut into wedges
Cilantro – ¼ cup, chopped
Avocado – 1, sliced
Instructions
1. Preheat your oven to 425°F.
2. Place the sliced bell peppers, zucchini, and red onion on a large baking sheet.
3. Drizzle the vegetables with 2 tablespoons of olive oil.
4. Sprinkle the vegetables with 1 teaspoon chili powder, 1 teaspoon cumin, and ½ teaspoon salt.
5. Toss the vegetables until they are evenly coated with the oil and spices.
6. Spread the vegetables in a single layer on the baking sheet.
7. Roast the vegetables in the preheated oven for 20 minutes.
8. Remove the baking sheet from the oven after 20 minutes.
9. Add 1 can of drained and rinsed black beans to the baking sheet with the roasted vegetables.
10. Return the baking sheet to the oven and roast for 5 more minutes.
11. Warm 8 small flour tortillas in a dry skillet over medium heat for 30 seconds per side.
12. Divide the roasted vegetable and black bean mixture evenly among the warm tortillas.
13. Top each taco with sliced avocado and chopped cilantro.
14. Squeeze fresh lime juice from the wedges over the tacos before serving. Here’s the best part: the roasted veggies get slightly caramelized and smoky from the spices, while the creamy avocado and zesty lime brighten everything up. Try serving them with a side of hot sauce or a dollop of Greek yogurt for an extra kick.
Bean and Cheese Quesadillas

Aren’t you craving something cheesy, satisfying, and ready in minutes? Bean and cheese quesadillas are your answer for a quick, no-fuss meal that hits the spot every time. You just need a few basic ingredients and a hot skillet to get that perfect golden crunch.
2
quesadillas5
minutes20
minutesIngredients
– Flour tortillas – 4
– Canned refried beans – 1 cup
– Shredded cheddar cheese – 1 cup
– Vegetable oil – 1 tbsp
Instructions
1. Heat a large non-stick skillet over medium heat for 2 minutes.
2. Spread ¼ cup of refried beans evenly over one half of a flour tortilla.
3. Sprinkle ¼ cup of shredded cheddar cheese over the beans.
4. Fold the other half of the tortilla over the filling to create a half-moon shape.
5. Add ¼ tablespoon of vegetable oil to the hot skillet and swirl to coat.
6. Place the folded quesadilla in the skillet and cook for 2–3 minutes until the bottom is golden brown with visible toast marks.
7. Carefully flip the quesadilla using a spatula.
8. Cook for another 2–3 minutes until the second side is golden brown and the cheese is fully melted.
9. Transfer the cooked quesadilla to a cutting board and repeat steps 2–8 with the remaining ingredients.
10. Let each quesadilla rest for 1 minute before slicing into wedges. My best tip: letting it rest helps the cheese set so it doesn’t ooze out when you cut it.
11. Serve immediately while warm and crispy. Make sure your skillet is properly preheated—this prevents soggy tortillas and gives you that ideal crisp exterior. For extra flavor, you can lightly toast the tortilla for 30 seconds on each side before adding fillings, which adds another layer of texture.
Melted cheddar and creamy beans create a wonderfully gooey center that contrasts with the crispy, toasted tortilla. Try serving these with a side of cool salsa or guacamole for dipping, or slice them into small wedges for a perfect party appetizer that everyone will love.
Potato and Leek Frittata

Now, picture this: you’ve got some potatoes and leeks hanging out in your fridge, and you’re craving something hearty but easy. This potato and leek frittata is your answer—it’s cozy, filling, and perfect for any meal of the day. You’ll love how simple it comes together with just a few ingredients.
4
servings15
minutes35
minutesIngredients
– Olive oil – 2 tbsp
– Potatoes – 2 medium, peeled and diced
– Leek – 1 large, white and light green parts only, thinly sliced
– Eggs – 6 large
– Milk – ¼ cup
– Salt – 1 tsp
– Black pepper – ½ tsp
Instructions
1. Preheat your oven to 375°F.
2. Heat 2 tbsp olive oil in a 10-inch oven-safe skillet over medium heat.
3. Add the diced potatoes to the skillet and cook for 10 minutes, stirring occasionally, until they start to soften.
4. Stir in the sliced leek and cook for another 5 minutes until the leek is tender and fragrant.
5. Tip: If the potatoes stick, add a splash more oil—this ensures even cooking without burning.
6. In a medium bowl, whisk together 6 eggs, ¼ cup milk, 1 tsp salt, and ½ tsp black pepper until well combined.
7. Pour the egg mixture evenly over the potatoes and leek in the skillet.
8. Cook on the stovetop for 3–4 minutes without stirring until the edges set.
9. Transfer the skillet to the preheated oven and bake for 12–15 minutes until the center is fully set and no longer jiggly.
10. Tip: Use an oven mitt to handle the hot skillet—the handle gets very hot in the oven.
11. Remove the frittata from the oven and let it cool in the skillet for 5 minutes.
12. Tip: Letting it rest makes slicing easier and helps the flavors meld.
13. Slice the frittata into wedges and serve warm. Perfectly fluffy and savory, this frittata has a tender texture from the potatoes and a mild sweetness from the leeks. Pair it with a simple salad for a light dinner, or enjoy a slice cold for a quick breakfast on the go—it’s versatile and always satisfying.
Homemade Margherita Pizza

Feeling that pizza craving but want something fresher than delivery? You can whip up this classic Margherita pizza right in your own kitchen. It’s simpler than you think and so much more satisfying when you make it yourself.
5
servings15
minutes15
minutesIngredients
Pizza dough – 1 lb
Tomato sauce – ½ cup
Fresh mozzarella cheese – 8 oz
Fresh basil leaves – ¼ cup
Olive oil – 1 tbsp
Salt – ½ tsp
Instructions
1. Preheat your oven to 475°F and place a pizza stone or baking sheet inside to heat for 30 minutes.
2. Stretch the pizza dough into a 12-inch circle on a floured surface. Tip: Let the dough rest at room temperature for 30 minutes first—it will stretch more easily without snapping back.
3. Spread the tomato sauce evenly over the dough, leaving a 1-inch border around the edges.
4. Tear the fresh mozzarella cheese into small pieces and distribute them evenly over the sauce.
5. Drizzle the olive oil over the pizza and sprinkle with salt.
6. Carefully transfer the pizza to the preheated stone or baking sheet. Tip: Use a pizza peel dusted with cornmeal or semolina flour to prevent sticking.
7. Bake for 12-15 minutes until the crust is golden brown and the cheese is bubbly with some browned spots.
8. Remove the pizza from the oven and immediately scatter the fresh basil leaves over the top. Tip: Adding basil after baking keeps it vibrant and prevents it from wilting into the cheese.
Just out of the oven, the crust is crisp with a satisfying chew, while the melted mozzarella creates perfect cheesy pulls. The bright tomato sauce and fresh basil give it that classic Italian flavor balance. Try serving it with a drizzle of balsamic glaze or alongside a simple arugula salad for a complete meal.
Crispy Baked Chicken Wings

Wondering how to get that perfect crunch without deep frying? You’re in the right place. These crispy baked chicken wings deliver all the satisfying texture with way less mess and guilt.
4
servings10
minutes60
minutesIngredients
Chicken wings – 2 lbs
Baking powder – 2 tbsp
Salt – 1 tsp
Black pepper – ½ tsp
Garlic powder – 1 tsp
Instructions
1. Preheat your oven to 425°F and line a baking sheet with aluminum foil.
2. Place a wire rack on top of the prepared baking sheet.
3. Pat the chicken wings completely dry with paper towels.
4. Place the dried wings in a large mixing bowl.
5. Add the baking powder, salt, black pepper, and garlic powder to the bowl.
6. Toss the wings until they’re evenly coated with the seasoning mixture.
7. Arrange the coated wings in a single layer on the wire rack.
8. Bake the wings for 30 minutes at 425°F.
9. Flip each wing over using tongs.
10. Continue baking for another 30 minutes at 425°F.
11. Check for doneness – the wings should be golden brown and crispy.
12. Remove the wings from the oven when the internal temperature reaches 165°F.
13. Let the wings rest for 5 minutes before serving.
Don’t be surprised when you hear that satisfying crunch with every bite. The baking powder creates tiny bubbles that crisp up beautifully in the hot oven, giving you restaurant-quality texture at home. Try serving them with your favorite dipping sauce or tossing them in buffalo sauce right after baking for that classic wing experience.
Egg Fried Rice with Mixed Vegetables

Kind of craving that perfect takeout-style fried rice but want to make it at home? You’ve come to the right place. This egg fried rice with mixed vegetables comes together in minutes and tastes way better than delivery.
4
servings5
minutes12
minutesIngredients
Rice – 3 cups cooked and cooled
Eggs – 2 large
Vegetable oil – 2 tbsp
Frozen mixed vegetables – 1 cup
Soy sauce – 2 tbsp
Green onions – 2 stalks
Instructions
1. Heat a large skillet or wok over medium-high heat for 2 minutes until hot.
2. Add 1 tablespoon of vegetable oil and swirl to coat the pan.
3. Crack 2 eggs directly into the hot oil and immediately scramble with a spatula for 45-60 seconds until fluffy and fully cooked.
4. Remove the cooked eggs to a clean plate and set aside.
5. Add the remaining 1 tablespoon of vegetable oil to the same pan.
6. Add 1 cup of frozen mixed vegetables and stir-fry for 3 minutes until heated through and any ice crystals have evaporated.
7. Add 3 cups of cooked, cooled rice to the pan, breaking up any clumps with your spatula.
8. Stir-fry the rice and vegetables together for 4 minutes until the rice grains are separated and slightly toasted.
9. Pour 2 tablespoons of soy sauce evenly over the rice mixture and stir to combine completely.
10. Return the cooked eggs to the pan and gently fold them into the rice.
11. Chop 2 stalks of green onions and sprinkle them over the fried rice.
12. Stir everything together for 1 final minute to combine and heat through.
Crispy rice grains mingle with tender vegetables and fluffy scrambled eggs in every bite. The soy sauce adds that classic savory depth that makes this dish so addictive. Try topping it with a fried egg for extra richness or serving it alongside some simple grilled chicken.
Peanut Butter and Banana Sandwich

Remember those days when you need something quick, comforting, and downright delicious? This peanut butter and banana sandwich hits all the right notes—it’s creamy, sweet, and ready in minutes.
1
sandwich5
minutes6
minutesIngredients
– Bread – 2 slices
– Peanut butter – 2 tbsp
– Banana – 1 medium
– Butter – 1 tbsp
Instructions
1. Place a non-stick skillet on the stove over medium heat.
2. Spread 1 tablespoon of peanut butter evenly on one side of each bread slice.
3. Peel the banana and slice it into ¼-inch thick rounds.
4. Arrange the banana slices in a single layer over the peanut butter on one bread slice.
5. Place the second bread slice on top, peanut butter side down, to form a sandwich.
6. Spread ½ tablespoon of butter on the top outer side of the sandwich.
7. Carefully place the sandwich, buttered side down, into the preheated skillet.
8. Cook for 2–3 minutes, or until the bottom is golden brown and crisp.
9. Spread the remaining ½ tablespoon of butter on the top side of the sandwich.
10. Flip the sandwich using a spatula.
11. Cook for another 2–3 minutes, or until the second side is golden brown and crisp.
12. Remove the sandwich from the skillet and let it rest for 1 minute before slicing.
Very few snacks deliver this perfect combo of textures—crispy, buttery bread gives way to warm, melty peanut butter and soft banana. For a fun twist, try drizzling it with honey or sprinkling cinnamon on the bananas before assembling.
Garlic Butter Shrimp Pasta
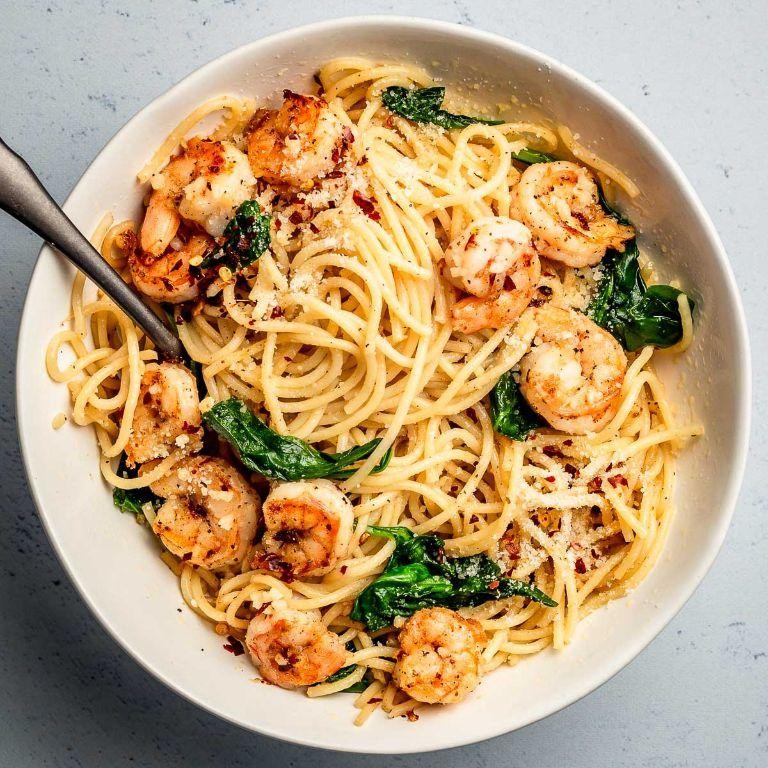
Dinner just got a whole lot easier with this garlic butter shrimp pasta. You’re going to love how quickly it comes together on busy weeknights. Seriously, it’s restaurant-quality food made in your own kitchen.
4
servings15
minutes20
minutesIngredients
- Linguine – 8 oz
- Large shrimp – 1 lb, peeled and deveined
- Unsalted butter – 4 tbsp
- Garlic – 4 cloves, minced
- Heavy cream – ½ cup
- Parmesan cheese – ½ cup, grated
- Fresh parsley – 2 tbsp, chopped
- Salt – 1 tsp
- Black pepper – ½ tsp
- Red pepper flakes – ¼ tsp
Instructions
- Bring a large pot of salted water to a rolling boil over high heat.
- Add linguine to the boiling water and cook for 9-11 minutes until al dente, stirring occasionally to prevent sticking.
- While pasta cooks, pat shrimp completely dry with paper towels to ensure proper searing.
- Melt 2 tablespoons of butter in a large skillet over medium-high heat.
- Add shrimp in a single layer and cook for 2 minutes per side until pink and opaque.
- Remove shrimp from skillet and set aside on a plate.
- Reduce heat to medium and add remaining 2 tablespoons of butter to the same skillet.
- Add minced garlic and cook for 1 minute until fragrant but not browned.
- Pour in heavy cream and bring to a gentle simmer, stirring constantly.
- Whisk in grated Parmesan cheese until the sauce is smooth and slightly thickened.
- Season sauce with salt, black pepper, and red pepper flakes.
- Drain cooked linguine, reserving ¼ cup of pasta water.
- Add drained linguine directly to the sauce in the skillet.
- Toss pasta with sauce, adding reserved pasta water 1 tablespoon at a time if the sauce seems too thick.
- Return cooked shrimp to the skillet and gently toss to combine everything.
- Stir in chopped fresh parsley just before serving.
You’ll notice the creamy sauce clings perfectly to every strand of pasta. That garlic butter flavor really shines through with just a hint of heat from the pepper flakes. Try serving it with crusty bread to soak up every last bit of that delicious sauce.
Classic Tomato Basil Bruschetta

Zesty and fresh, this classic bruschetta is perfect for when you want something impressive but easy. You’ll love how the sweet tomatoes mingle with fragrant basil on crisp toast. It’s the ideal appetizer for gatherings or a quick snack when tomatoes are at their peak.
1
loaf15
minutes10
minutesIngredients
Baguette – 1 loaf
Roma tomatoes – 4
Fresh basil – ¼ cup
Garlic – 2 cloves
Extra virgin olive oil – 3 tbsp
Balsamic vinegar – 1 tbsp
Salt – ½ tsp
Black pepper – ¼ tsp
Instructions
1. Preheat your oven to 375°F.
2. Slice the baguette into ½-inch thick pieces.
3. Arrange the bread slices in a single layer on a baking sheet.
4. Toast the bread in the oven for 8–10 minutes until golden and crisp.
5. While the bread toasts, dice the Roma tomatoes into ¼-inch pieces.
6. Chop the fresh basil leaves finely.
7. Mince the garlic cloves.
8. In a medium bowl, combine the diced tomatoes, chopped basil, and minced garlic.
9. Drizzle in the extra virgin olive oil and balsamic vinegar.
10. Sprinkle with salt and black pepper.
11. Gently toss the mixture until everything is evenly coated.
12. Let the tomato mixture sit for 5 minutes to allow the flavors to meld.
13. Remove the toasted bread from the oven and let it cool for 2 minutes.
14. Spoon the tomato basil mixture generously onto each toast slice.
15. Serve immediately. Really, the contrast between the crunchy bread and juicy tomatoes is what makes this dish sing. Try topping it with a sprinkle of Parmesan or serving alongside a charcuterie board for a fuller spread.
Savory Mushroom Risotto

Venturing into homemade risotto might seem intimidating, but you’ve got this. This creamy mushroom version comes together with just a few ingredients and some patient stirring. It’s the ultimate comfort food that feels fancy but is totally approachable.
5
servings15
minutes45
minutesIngredients
Arborio rice – 1 ½ cups
Chicken broth – 4 cups
White mushrooms – 8 oz
Yellow onion – 1 medium
Garlic – 2 cloves
Dry white wine – ½ cup
Butter – 3 tbsp
Parmesan cheese – ½ cup grated
Olive oil – 2 tbsp
Salt – 1 tsp
Black pepper – ½ tsp
Instructions
1. Pour chicken broth into a saucepan and heat over medium heat until it reaches a gentle simmer.
2. Heat 1 tablespoon olive oil in a large, heavy-bottomed pot over medium heat.
3. Add chopped onion and cook for 5 minutes until translucent and soft.
4. Stir in minced garlic and cook for 1 minute until fragrant.
5. Add sliced mushrooms and cook for 8 minutes until they release their liquid and turn golden brown.
6. Pour in Arborio rice and stir constantly for 2 minutes until grains are lightly toasted and opaque around the edges.
7. Add white wine and stir continuously until the liquid is fully absorbed, about 3 minutes.
8. Add 1 cup of warm broth to the rice and stir frequently until the liquid is almost completely absorbed.
9. Continue adding broth ½ cup at a time, stirring constantly and waiting for each addition to be absorbed before adding the next.
10. Cook the risotto for 25-30 minutes total, until the rice is creamy but still has a slight bite to it.
11. Remove the pot from heat and stir in butter and grated Parmesan cheese.
12. Season with salt and black pepper, stirring to combine thoroughly.
Now that your risotto is ready, notice how the grains are perfectly al dente while swimming in that luxurious, creamy sauce. The earthy mushrooms and sharp Parmesan create a beautiful balance that feels both comforting and sophisticated. Try topping it with fresh herbs or serving alongside roasted chicken for a complete meal that will impress anyone at your table.
Conclusion
Budget-friendly cooking has never been more exciting! These 34 delicious recipes prove that tasty meals don’t need to break the bank. We hope you’ll try a few favorites from this collection and share your cooking adventures in the comments below. Don’t forget to pin this article on Pinterest to save these wallet-friendly recipes for your next kitchen adventure!