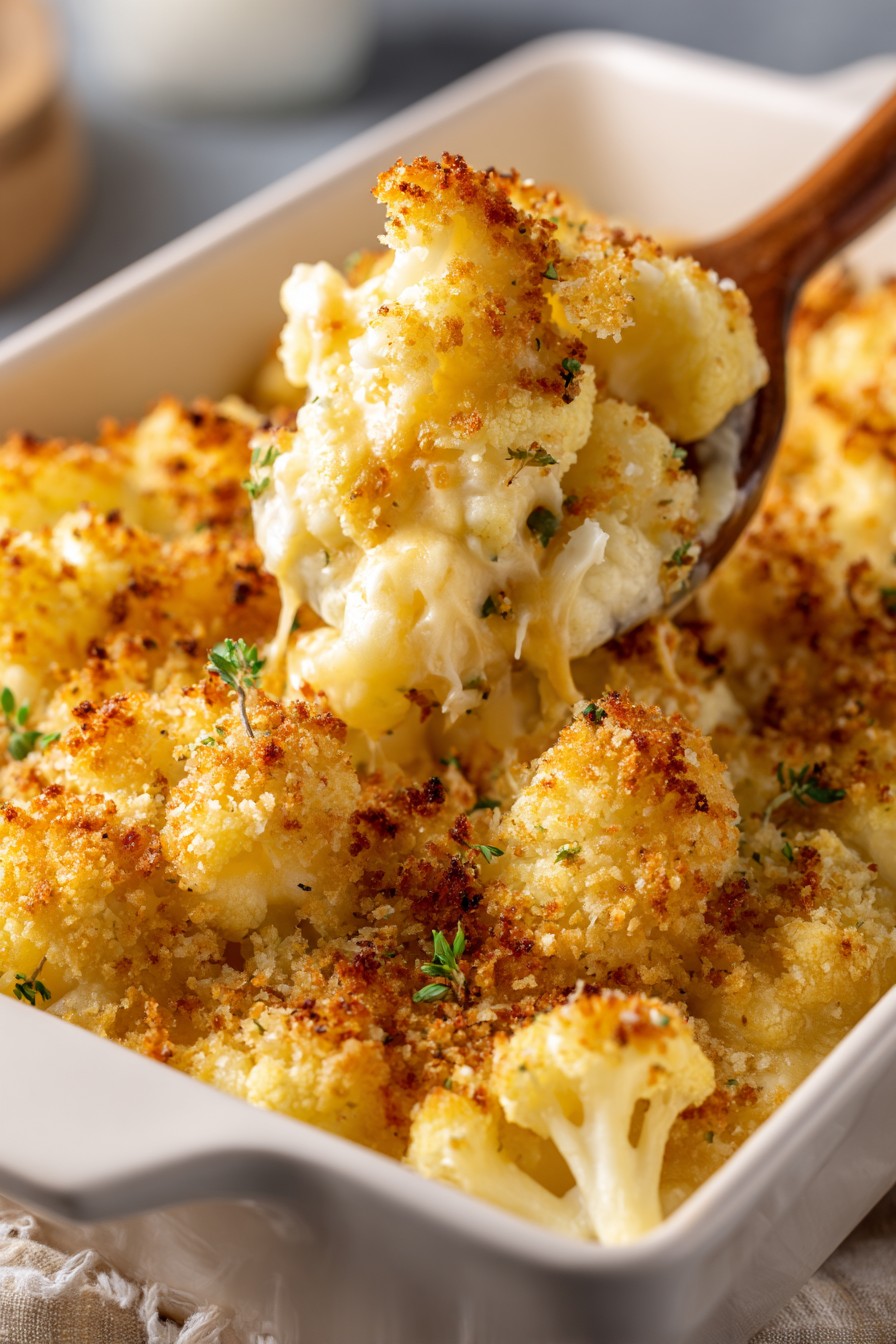
Versatile cauliflower transforms into a satisfying mac and cheese alternative. This recipe delivers creamy comfort while keeping things light and nutritious. You get all the cheesy goodness without the heavy pasta.
Why This Recipe Works
- Cauliflower provides a neutral base that absorbs cheese sauce beautifully while adding fiber and nutrients missing from traditional pasta
- The combination of sharp cheddar and Parmesan creates complex flavor with the cheddar providing creaminess and the Parmesan adding salty, umami notes
- Baking creates a golden, crispy topping that contrasts with the tender cauliflower underneath for perfect textural balance
- Heavy cream and butter ensure the sauce remains rich and velvety without becoming grainy or separating during baking
- Simple seasonings like garlic powder and mustard powder enhance the cheese flavor without overwhelming the dish’s delicate balance
Ingredients
- 1 large head cauliflower, cut into 1-inch florets
- 2 tablespoons unsalted butter
- 2 tablespoons all-purpose flour
- 1 cup heavy cream
- 1 cup whole milk
- 2 cups shredded sharp cheddar cheese
- 1/2 cup grated Parmesan cheese
- 1 teaspoon garlic powder
- 1/2 teaspoon mustard powder
- 1/2 teaspoon smoked paprika
- 1/4 teaspoon black pepper
- 1/2 teaspoon salt
- 1/4 cup panko breadcrumbs
- 1 tablespoon olive oil
Equipment Needed
- Large pot
- Medium saucepan
- Whisk
- Colander
- 9×13 inch baking dish
- Mixing bowls
- Measuring cups and spoons
- Cheese grater
Instructions
Prepare the Cauliflower
Fill a large pot with water and bring to a rolling boil over high heat. Add 1 tablespoon of salt to the water. Carefully add the 1 large head of cauliflower cut into 1-inch florets to the boiling water. Cook for 5-7 minutes until the cauliflower is tender but still firm. You should be able to pierce it easily with a fork but it should not fall apart. Drain the cauliflower thoroughly in a colander and let it sit for 2-3 minutes to release excess moisture. This step is crucial because watery cauliflower will make your sauce thin. Spread the drained cauliflower in a single layer on a baking sheet to cool slightly while you prepare the cheese sauce. Proper draining ensures your final dish won’t be watery.
Make the Cheese Sauce Base
Melt 2 tablespoons of unsalted butter in a medium saucepan over medium heat. Once melted and bubbling slightly, add 2 tablespoons of all-purpose flour. Whisk continuously for 1-2 minutes until the mixture turns light golden and smells nutty. This creates a roux that will thicken your sauce. Slowly pour in 1 cup of heavy cream while whisking constantly to prevent lumps. Then add 1 cup of whole milk, continuing to whisk until smooth. Cook the mixture for 3-4 minutes, stirring frequently, until it thickens enough to coat the back of a spoon. The sauce should bubble gently but not boil vigorously. This base provides the foundation for your creamy cheese sauce.
Combine Cheeses and Seasonings
Assemble the Casserole
Preheat your oven to 375°F. Transfer the cooked and drained cauliflower to a 9×13 inch baking dish, spreading it in an even layer. Pour the prepared cheese sauce over the cauliflower, using a spatula to gently mix and ensure all florets are coated. Make sure the sauce distributes evenly throughout the dish. In a small bowl, combine 1/4 cup panko breadcrumbs with 1 tablespoon olive oil and mix until the breadcrumbs are lightly coated. Sprinkle this mixture evenly over the top of the cauliflower and cheese sauce. The breadcrumbs will create a crispy, golden topping during baking.
Bake to Perfection
Place the baking dish in the preheated 375°F oven on the middle rack. Bake for 20-25 minutes until the sauce is bubbling around the edges and the breadcrumb topping is golden brown. For extra browning, switch to broil for the final 1-2 minutes, watching carefully to prevent burning. Remove from oven when the top is crisp and the interior reaches 165°F on an instant-read thermometer. Let the dish rest for 5-7 minutes before serving. This resting time allows the sauce to thicken slightly and makes serving easier. The finished dish should have a crisp top and creamy interior.
Tips and Tricks
For the creamiest results, shred your own cheese from blocks rather than using pre-shredded cheese. Pre-shredded cheese contains anti-caking agents that can prevent smooth melting and create a grainy texture. Block cheese melts more evenly and creates a superior sauce consistency. When choosing cauliflower, look for tight, compact heads with bright white florets and no brown spots. Larger heads work better than small ones because they provide more substantial florets that hold their shape during cooking.
If your sauce becomes too thick, thin it with additional milk one tablespoon at a time until it reaches the desired consistency. Conversely, if the sauce seems too thin after adding the cheese, continue cooking over low heat for a few more minutes to allow further reduction. The sauce should coat the back of a spoon thickly but still be pourable. For extra flavor depth, consider roasting the cauliflower instead of boiling it. Toss raw cauliflower florets with olive oil, salt, and pepper, then roast at 425°F for 20-25 minutes until tender and lightly browned before proceeding with the cheese sauce.
Make ahead options include preparing the entire dish up to the baking step, covering tightly, and refrigerating for up to 24 hours. When ready to serve, add 5-10 minutes to the baking time since you’re starting from cold. You can also freeze the assembled but unbaked casserole for up to 3 months. Thaw overnight in the refrigerator before baking. Leftovers reheat well in a 350°F oven for 15-20 minutes or in the microwave in 30-second intervals, though the topping will lose some crispiness with microwave reheating.
For dietary modifications, gluten-free flour blends work well as a 1:1 substitute for all-purpose flour in the roux. Similarly, gluten-free breadcrumbs can replace panko for the topping. To reduce calories, substitute half-and-half for heavy cream and use reduced-fat cheese, though the sauce may be less creamy. For dairy-free versions, use plant-based butter, unsweetened almond or oat milk, and dairy-free cheese alternatives, though melting characteristics will vary by brand.
Recipe Variations
- Add protein by mixing in 2 cups of cooked, shredded chicken or 1 pound of cooked ground beef during the assembly stage. For vegetarian protein, include 1 can of drained and rinsed white beans or 2 cups of cooked lentils. These additions make the dish more substantial as a main course while maintaining the creamy texture. Adjust baking time by 5 minutes if adding cold ingredients straight from refrigeration.
- Incorporate vegetables like 1 cup of thawed frozen peas, 1/2 cup of finely chopped steamed broccoli, or 1/4 cup of sun-dried tomatoes. Sautéed mushrooms or spinach also work well—squeeze excess moisture from spinach before adding. These additions provide color, nutrition, and flavor variation. For spicy versions, add 1/4 teaspoon of cayenne pepper to the cheese sauce or mix in 1/4 cup of chopped pickled jalapeños.
- Experiment with different cheeses such as Gruyère for nutty flavor, pepper jack for spice, or Gouda for smokiness. Replace up to 1 cup of the cheddar with your preferred alternatives while keeping the Parmesan for its salty kick. Blue cheese crumbles added during assembly provide bold flavor for those who enjoy stronger cheeses. Always taste the sauce after cheese additions to adjust seasoning accordingly.
- Create a crunchy topping variation by combining 1/2 cup crushed butter crackers with 2 tablespoons melted butter instead of panko. For extra flavor, add 2 tablespoons of grated Parmesan to the topping mixture. Another option uses 1/4 cup crushed pork rinds for a keto-friendly version that provides excellent crunch without carbohydrates. These alternatives create different texture profiles while maintaining the dish’s essential character.
Frequently Asked Questions
Can I make this recipe ahead of time?
Yes, you can prepare the entire dish up to the baking step and refrigerate it covered for up to 24 hours. The cauliflower may release some liquid during storage, so you might need to drain any excess before baking. When ready to serve, bake at 375°F for 30-35 minutes since you’re starting with a cold dish. The extended baking time ensures the center heats thoroughly. You can also freeze the unbaked casserole for up to 3 months—thaw completely in the refrigerator before baking as directed.
How do I prevent a watery sauce?
Thoroughly drain the cooked cauliflower and let it sit in the colander for several minutes to release excess moisture. Some cooks even pat the florets dry with paper towels for extra insurance. When making the cheese sauce, ensure it’s thick enough to coat the back of a spoon before combining with the cauliflower. If your sauce still seems thin, add an extra tablespoon of flour to the roux or increase the cheese by 1/4 cup. Baking uncovered helps evaporate excess liquid during cooking.
Can I use frozen cauliflower instead of fresh?
Frozen cauliflower works but requires different preparation. Thaw completely and press between paper towels to remove excess moisture—frozen cauliflower contains more water than fresh. You may need to reduce the milk in the sauce by 1/4 cup to compensate. Cook according to package directions before using, but avoid overcooking since frozen cauliflower tends to be softer. The texture will be slightly different but still acceptable. For best results, use fresh cauliflower when possible.
What’s the best way to reheat leftovers?
For optimal texture, reheat in a 350°F oven for 15-20 minutes until warmed through. This method preserves the crispy topping better than microwave reheating. If using a microwave, cover with a paper towel and heat in 30-second intervals, stirring between each, until hot. The sauce may separate slightly with microwave reheating—stirring helps recombine it. Add a splash of milk if the sauce seems too thick after refrigeration. Leftovers keep for 3-4 days in the refrigerator.
Can I make this recipe dairy-free?
Yes, use plant-based butter and unsweetened, unflavored almond, oat, or cashew milk. For the cheese, select melting-friendly dairy-free alternatives—some brands work better than others. Nutritional yeast can enhance cheesy flavor—add 2 tablespoons to the sauce. Be aware that dairy-free cheeses have different melting properties and may not achieve the same creaminess. The sauce might require additional thickeners like 1 extra tablespoon of flour. Test your preferred dairy-free products before making a full batch.
Summary
This cauliflower mac and cheese delivers creamy comfort with fewer carbs than traditional versions. The method ensures proper texture and flavor balance while allowing for customization. It works as both a side dish and vegetarian main course.