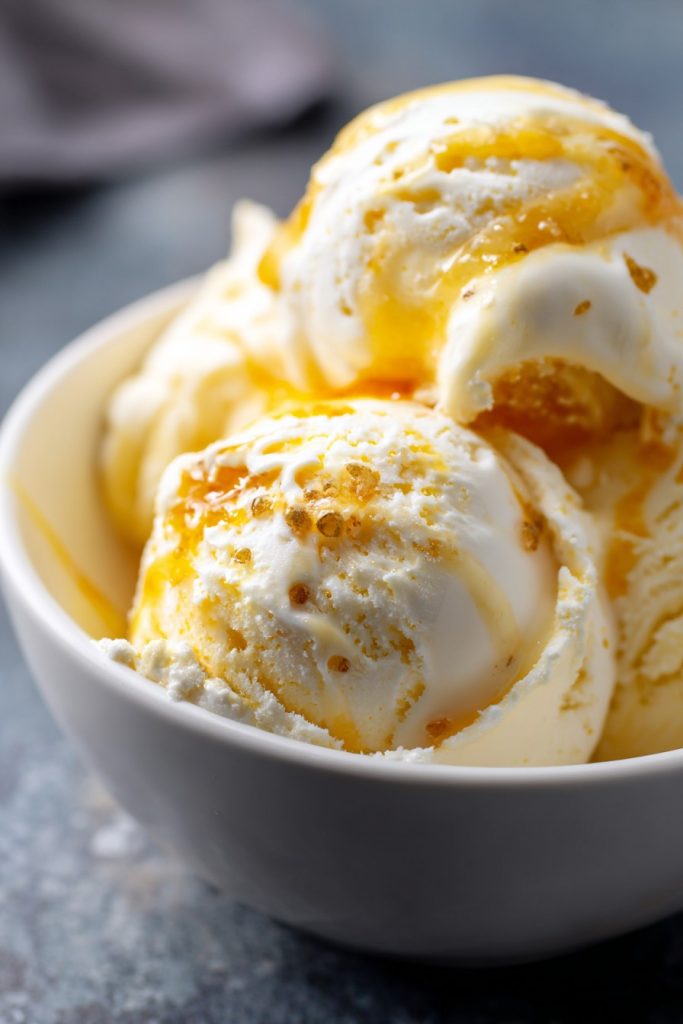
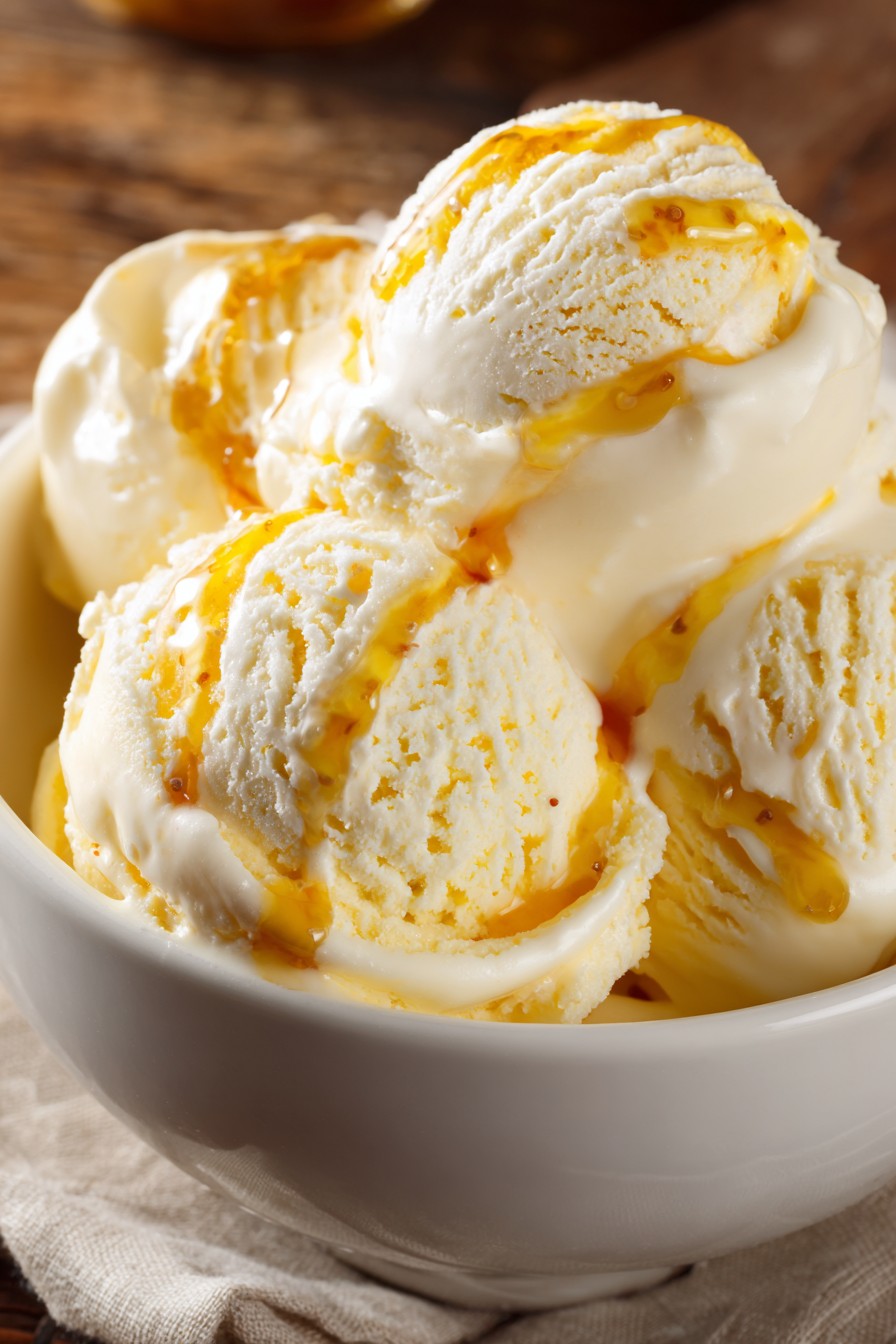
Just when you thought the carnivore diet couldn’t get more satisfying, this revolutionary ice cream recipe proves otherwise. Journey with me into the world of pure animal-based indulgence where we transform simple ingredients into a frozen masterpiece that aligns perfectly with your health goals while satisfying those persistent sweet cravings without any plant-based compromises.
Why This Recipe Works
- The combination of heavy cream and egg yolks creates an exceptionally rich, creamy base that mimics traditional ice cream texture while providing substantial fat-soluble vitamins A, D, E, and K, essential for hormone production and cellular function.
- Using raw honey as the sole sweetener provides natural antimicrobial properties and enzymes while keeping the recipe free from refined sugars and artificial sweeteners that can disrupt gut health and insulin sensitivity.
- The strategic addition of collagen peptides not only boosts protein content but enhances the smooth mouthfeel while supporting joint health, skin elasticity, and connective tissue repair throughout your body.
- Vanilla bean powder delivers authentic flavor complexity without the alcohol or additives found in extracts, making this suitable for those avoiding even trace amounts of non-animal ingredients in their dietary protocol.
- The slow churning process at precise temperatures ensures small ice crystal formation, resulting in that professional-quality creamy texture that melts perfectly on the tongue without icy graininess.
Ingredients
- 2 cups heavy cream, preferably grass-fed and organic
- 4 large egg yolks, from pasture-raised chickens
- 1/4 cup raw honey, gently warmed to liquid state
- 1/4 cup collagen peptides, unflavored
- 1 teaspoon vanilla bean powder
- 1/4 teaspoon sea salt, finely ground
Equipment Needed
- Ice cream maker with frozen bowl
- Medium saucepan
- Whisk
- Mixing bowls
- Fine mesh strainer
- Instant-read thermometer
- Spatula
- Airtight container for freezing
Instructions
Prepare Your Base Mixture
Begin by pouring 2 cups of heavy cream into your medium saucepan, then gently warm it over medium-low heat until small bubbles form around the edges, reaching approximately 160°F on your instant-read thermometer. This temperature carefully pasteurizes the cream while preserving its beneficial enzymes and fat structure. Meanwhile, in a separate bowl, whisk together 4 large egg yolks with 1/4 cup of raw honey that you’ve gently warmed to liquid consistency—this ensures proper emulsification. The honey not only sweetens but provides natural preservative qualities and digestive enzymes. Slowly temper the egg mixture by gradually adding about 1/2 cup of the warmed cream while continuously whisking to prevent curdling, then combine everything back into the saucepan. Pro tip: Always temper eggs slowly to avoid scrambling—this technique ensures your base remains perfectly smooth and velvety rather than developing unpleasant graininess from cooked egg proteins.
Cook to Perfect Consistency
Return the combined mixture to the stove over low heat, stirring constantly with a wooden spoon or spatula until the temperature reaches 170°F—this creates a safe custard base while developing rich flavor compounds. The mixture should thicken enough to coat the back of your spoon, leaving a clear trail when you run your finger through it, which typically takes 8-10 minutes of attentive stirring. During this process, you’ll notice the transformation from thin liquid to luxurious custard as the egg proteins unfold and bond with the cream’s fat molecules. Remove from heat immediately once reaching temperature to prevent overcooking, then whisk in 1/4 cup collagen peptides, 1 teaspoon vanilla bean powder, and 1/4 teaspoon sea salt until fully dissolved. The collagen not only boosts protein content but acts as a natural stabilizer, while the sea salt enhances flavor perception and mineral content.
Strain and Chill Thoroughly
Pour your cooked custard through a fine mesh strainer into a clean bowl to catch any potential egg curds or undissolved ingredients, ensuring absolute smoothness in your final product. This crucial step guarantees the velvety texture that defines premium ice cream, removing any imperfections that could create ice crystals during freezing. Place the strained mixture into an ice bath or refrigerate for at least 4 hours, preferably overnight, until it reaches 40°F or lower—this extended chilling allows flavors to meld while ensuring proper churning consistency. Cover the surface directly with plastic wrap to prevent skin formation, which can introduce unwanted texture variations. Pro tip: Patience during chilling is non-negotiable—properly chilled base freezes more evenly in your ice cream maker, creating smaller ice crystals and creamier results that rival professional quality.
Churn to Frozen Perfection
Pour your thoroughly chilled base into your pre-frozen ice cream maker bowl, then churn according to manufacturer’s instructions, typically 20-25 minutes, until it reaches soft-serve consistency. Watch for the magical transformation as the mixture thickens and increases in volume, aerating properly while freezing gradually. The optimal churning temperature should maintain around 21-23°F throughout the process, creating the perfect environment for small, uniform ice crystal formation. You’ll know it’s ready when the ice cream holds its shape when scooped but remains pliable—this stage represents the ideal balance between frozen structure and creamy texture. Avoid over-churning, which can cause butterfat separation and grainy results, stopping immediately once you achieve the desired consistency.
Final Freeze and Serve
Transfer your freshly churned ice cream to an airtight container, pressing plastic wrap directly onto the surface before sealing to prevent ice crystal formation during hardening. Freeze for at least 4-6 hours until firm enough to scoop, ideally at 0°F, which allows proper setting without becoming rock-hard. When serving, let the container sit at room temperature for 5-7 minutes to slightly soften for perfect scoopability—this preserves the delicate texture you worked so hard to create. Pro tip: For professional-looking scoops, dip your ice cream scoop in warm water between servings—this creates smooth, round portions that showcase your homemade creation beautifully while maintaining the optimal eating temperature of 6-10°F for maximum flavor release.
Tips and Tricks
For those seeking to elevate their carnivore ice cream mastery, several advanced techniques can transform your results from good to exceptional. First, consider sourcing your ingredients with intentionality—grass-fed heavy cream contains higher levels of conjugated linoleic acid (CLA) and omega-3 fatty acids compared to conventional options, while pasture-raised egg yolks offer deeper color and richer flavor from the diverse diet of the hens. If you’re avoiding even raw honey, you can create an egg yolk-only sweetened version by increasing yolks to 6 and omitting honey entirely—the natural sweetness of high-quality yolks can be surprisingly satisfying when combined with the vanilla. For those dealing with texture challenges, understand that ice cream structure relies on the balance between fat content, air incorporation, and ice crystal size—if your results seem too hard, try increasing cream to 2 1/4 cups; if too soft, decrease to 1 3/4 cups while maintaining other ingredients. The quality of your collagen peptides significantly impacts both nutrition and texture—look for hydrolyzed collagen from grass-fed sources, which dissolves more completely and provides superior bioavailability. When freezing your final product, position your container in the coldest part of your freezer, typically the back bottom section, where temperature fluctuations are minimal—this prevents the formation of large ice crystals that compromise smoothness. For serving perfection, invest in a proper ice cream scoop with a heated handle or keep a glass of hot water nearby for dipping—this professional technique ensures beautiful presentation without struggling with rock-hard ice cream. Remember that carnivore ice cream tends to freeze harder than traditional versions due to the absence of stabilizers and added sugars, so planning your serving time accordingly ensures the best eating experience. If you notice separation during storage, simply let the container thaw slightly, stir vigorously, and refreeze—this re-emulsifies the fats and recreates the creamy texture. Finally, keep detailed notes of your modifications and results—carnivore baking and dessert making is still an evolving art, and your personal observations will guide you toward your perfect version over time.
Recipe Variations
- For a deeper savory-sweet profile, incorporate 1/4 cup of rendered bacon fat instead of 1/4 cup of the heavy cream—this adds incredible richness and a subtle smoky flavor that complements the sweetness beautifully while increasing the satiating quality of your dessert. The bacon fat should be carefully strained and cooled before incorporating to ensure smooth texture.
- Create a cheese-infused version by adding 1/2 cup of finely grated high-quality Parmesan or aged cheddar during the final minutes of churning—the umami notes from well-aged cheese provide sophisticated complexity that balances the cream’s sweetness while adding beneficial calcium and protein.
- For a tropical twist, replace the vanilla bean powder with 1 tablespoon of finely grated lime zest and 1 teaspoon of lemon zest—the citrus oils provide bright, refreshing notes that cut through the richness while remaining within carnivore parameters since you’re using only the zest, not the juice.
- Experiment with different animal-based fats by substituting 1/2 cup of the heavy cream with an equal amount of rendered duck fat or tallow—these traditional fats offer unique flavor profiles and different fatty acid compositions that can enhance both nutrition and taste experience.
- For those following strict carnivore protocols without honey, create a savory ice cream by omitting sweeteners entirely and adding 1 tablespoon of bone broth powder and 1 teaspoon of nutritional yeast—this creates a unique frozen treat that serves as a refreshing palate cleanser or unusual side dish.
Frequently Asked Questions
Can I make this ice cream without an ice cream maker?
While an ice cream maker provides the optimal texture through constant aeration and controlled freezing, you can achieve reasonable results without one by using the freezer method. Pour your chilled base into a shallow metal baking pan and freeze for 45 minutes until the edges begin to set, then remove and vigorously whisk to break up ice crystals. Repeat this process every 30 minutes for 3-4 cycles until the mixture becomes too thick to whisk, then transfer to your final container for complete freezing. This manual method requires more attention but can produce acceptable texture, though it will be denser than machine-churned versions due to less incorporated air.
How long does carnivore ice cream stay fresh in the freezer?
Properly stored in an airtight container with plastic wrap pressed directly on the surface, your carnivore ice cream maintains optimal quality for 2-3 weeks. Beyond this timeframe, texture degradation occurs as ice crystals slowly enlarge and fat molecules can begin to separate. The absence of commercial stabilizers means homemade versions have shorter shelf life, but the high fat content and natural preservatives in raw honey help extend freshness. For best quality, consume within the first week when flavor and texture peak, and always ensure your freezer maintains consistent 0°F temperature to preserve integrity.
Is raw honey truly carnivore diet compliant?
This question sparks ongoing debate within carnivore communities, as strict interpretations exclude all plant-sourced foods including honey. However, many practitioners adopt a more flexible approach that includes raw honey due to its unique composition—it’s technically an animal product created through bee digestion and enzyme activity rather than direct plant material. From a nutritional perspective, raw honey provides beneficial enzymes, antioxidants, and prebiotics that may support gut health without the antinutrients found in true plant foods. Ultimately, individual tolerance and dietary goals should guide this decision—if avoiding all carbohydrates, omit honey and rely on the natural sweetness from high-quality dairy and egg yolks.
Can I use pasteurized cream instead of raw?
Absolutely—pasteurized heavy cream works perfectly in this recipe and is actually recommended for food safety considerations, particularly when serving individuals with compromised immune systems. The gentle heating during the custard-making process further ensures safety while developing flavor complexity. Ultra-pasteurized cream can be used but may result in slightly less robust flavor due to the higher heat treatment during processing. Nutritionally, both options provide excellent fat-soluble vitamins and fatty acids, though some enthusiasts prefer pasteurized (not ultra-pasteurized) for its balance of safety and flavor preservation.
What if my ice cream becomes too hard to scoop?
This common issue typically results from either insufficient fat content or freezer temperature that’s too low. First, allow the container to rest at room temperature for 8-10 minutes before attempting to scoop—carnivore ice cream benefits from slightly longer softening time due to its different composition. If hardness persists, consider increasing the heavy cream to 2 1/4 cups in your next batch or adding an extra egg yolk for additional emulsification. Also verify your freezer temperature isn’t set below 0°F, as excessive cold creates impenetrable texture. For immediate rescue of too-hard ice cream, transfer to the refrigerator for 20 minutes before returning to freezer at proper temperature.
Summary
This carnivore ice cream delivers luxurious satisfaction while aligning with animal-based nutritional principles, proving that dietary restrictions needn’t mean sacrificing indulgent treats. Through careful ingredient selection and precise technique, we’ve created a frozen dessert that nourishes as it delights.
Carnivore Ice Cream
5
servings25
minutes15
minutesIngredients
Instructions
- 1 Warm cream to 160°F, then temper with egg yolk and honey mixture
- 2 Cook custard to 170°F until thickened, then add remaining ingredients
- 3 Strain mixture and chill thoroughly to 40°F
- 4 Churn in ice cream maker until soft-serve consistency
- 5 Freeze in airtight container for 4-6 hours until firm


