
Sometimes the most magical kitchen discoveries are hiding right in your pantry! Carnation Evaporated Milk is that secret ingredient that transforms ordinary recipes into creamy, dreamy comfort food masterpieces. From cozy soups to decadent desserts, we’ve gathered 18 irresistible recipes that will make you fall in love with this versatile staple all over again. Get ready to be inspired—your next family favorite is waiting!
Creamy Macaroni and Cheese

Every home cook needs a reliable macaroni and cheese recipe in their repertoire, and this creamy version delivers comfort in every bite. Essentially foolproof, this method walks you through creating the silkiest cheese sauce that clings perfectly to tender pasta. Expect to master the classic roux-based technique that guarantees smooth, lump-free results every single time.
2
servings10
minutes17
minutesIngredients
– 8 ounces dried elbow macaroni
– 4 tablespoons unsalted butter
– ¼ cup all-purpose flour
– 2 cups whole milk, warmed to room temperature
– 2 cups freshly shredded sharp cheddar cheese
– ½ cup freshly grated Parmesan cheese
– ½ teaspoon garlic powder
– ½ teaspoon smoked paprika
– ¼ teaspoon freshly ground black pepper
– ½ teaspoon fine sea salt
Instructions
1. Bring a large pot of salted water to a rolling boil over high heat.
2. Add 8 ounces dried elbow macaroni to the boiling water and cook for exactly 7 minutes, stirring occasionally to prevent sticking.
3. Drain the pasta in a colander but do not rinse, as the starch helps the sauce adhere better.
4. Melt 4 tablespoons unsalted butter in the same pot over medium heat until foamy and fragrant.
5. Whisk in ¼ cup all-purpose flour and cook for exactly 2 minutes until the mixture turns pale golden, creating a smooth roux.
6. Gradually pour in 2 cups warmed whole milk while whisking constantly to prevent lumps from forming.
7. Continue cooking and whisking until the sauce thickens enough to coat the back of a spoon, about 3-4 minutes.
8. Remove the pot from heat and immediately stir in 2 cups shredded sharp cheddar cheese until completely melted and smooth.
9. Add ½ cup grated Parmesan cheese, ½ teaspoon garlic powder, ½ teaspoon smoked paprika, ¼ teaspoon black pepper, and ½ teaspoon sea salt, stirring until fully incorporated.
10. Fold the drained macaroni into the cheese sauce until every piece is evenly coated.
11. Serve immediately while hot and creamy.
Nothing beats the stretchy, gooey texture of freshly made macaroni and cheese as the sharp cheddar and nutty Parmesan create a sophisticated flavor profile. For a delightful twist, top with buttery breadcrumbs and bake at 375°F for 15 minutes until golden and bubbly.
Velvety Potato Soup
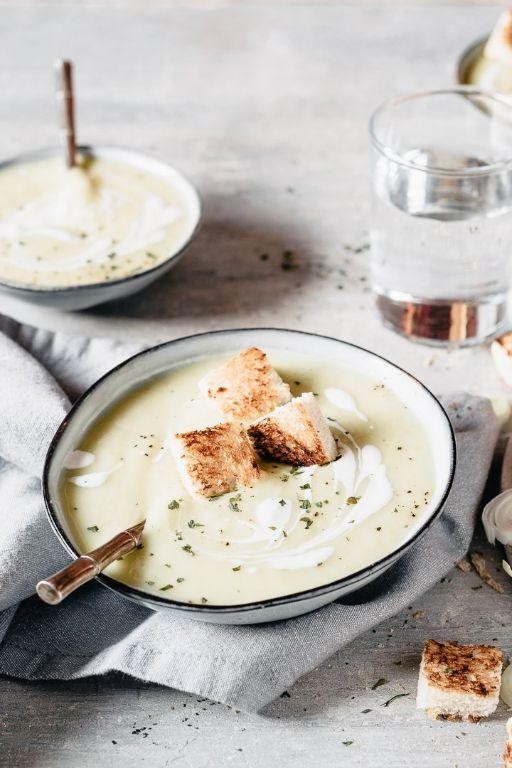
Creating this velvety potato soup requires just a few simple techniques to achieve that perfect creamy texture. Carefully follow each step to transform humble ingredients into a comforting bowl of warmth that will become your new cold-weather favorite.
5
servings15
minutes35
minutesIngredients
– 2 tablespoons rich unsalted butter
– 1 large yellow onion, finely diced
– 3 cloves fresh garlic, minced
– 2 pounds russet potatoes, peeled and cubed
– 4 cups rich chicken broth
– 1 cup heavy cream
– 1 teaspoon kosher salt
– ½ teaspoon freshly ground black pepper
– 2 tablespoons fresh chives, finely chopped
Instructions
1. Melt 2 tablespoons of rich unsalted butter in a large Dutch oven over medium heat until fully liquid and bubbling slightly.
2. Add 1 large finely diced yellow onion and cook for 5-7 minutes, stirring occasionally, until the onions become translucent and fragrant.
3. Stir in 3 cloves of minced fresh garlic and cook for exactly 1 minute until aromatic but not browned.
4. Add 2 pounds of peeled and cubed russet potatoes to the pot, stirring to coat them with the butter and onion mixture.
5. Pour in 4 cups of rich chicken broth, ensuring all potato pieces are submerged in the liquid.
6. Bring the mixture to a boil over high heat, then reduce to a gentle simmer and cook for 20-25 minutes until the potatoes are fork-tender.
7. Carefully transfer the hot soup in batches to a blender, filling only halfway to prevent splattering, and blend until completely smooth.
8. Return the blended soup to the pot over low heat and stir in 1 cup of heavy cream until fully incorporated.
9. Season with 1 teaspoon of kosher salt and ½ teaspoon of freshly ground black pepper, stirring thoroughly to distribute evenly.
10. Ladle the hot soup into bowls and garnish with 2 tablespoons of finely chopped fresh chives.
Velvety smooth and luxuriously creamy, this potato soup delivers deep earthy flavors balanced by the richness of cream. The russet potatoes break down perfectly to create that signature silky texture that coats your spoon. Try topping with crispy bacon bits or serving alongside crusty artisan bread for dipping into this comforting bowl.
Rich Chocolate Fudge
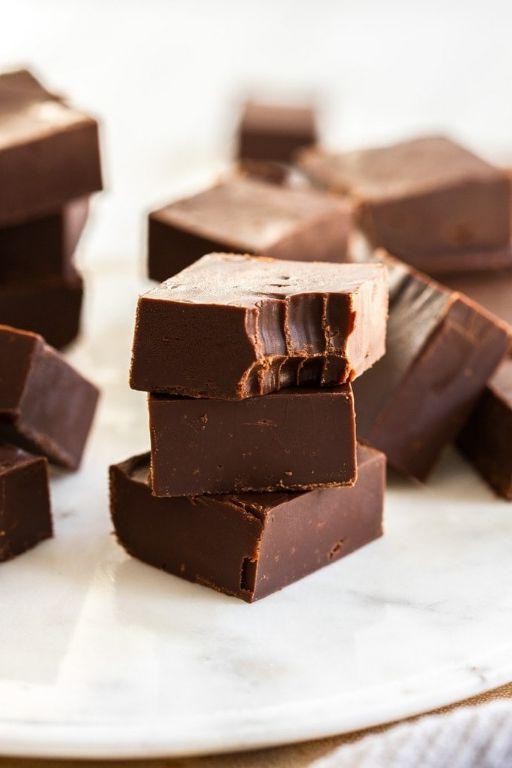
Now, let’s create the ultimate rich chocolate fudge that will become your go-to dessert for any occasion. This methodical approach ensures perfect results every time, even if you’re new to candy-making. Follow each step precisely for fudge that’s smooth, decadent, and utterly irresistible.
16
servings15
minutes12
minutesIngredients
– 3 cups granulated white sugar
– 3/4 cup rich European-style butter
– 2/3 cup fresh, creamy evaporated milk
– 12 ounces premium semi-sweet chocolate chips
– 1 jar (7 ounces) velvety marshmallow creme
– 1 teaspoon pure vanilla extract
– 1 cup chopped toasted walnuts
Instructions
1. Line an 8×8-inch baking pan with parchment paper, ensuring the paper extends up all four sides for easy removal.
2. Combine 3 cups granulated white sugar, 3/4 cup rich European-style butter, and 2/3 cup fresh, creamy evaporated milk in a heavy-bottomed saucepan.
3. Clip a candy thermometer to the side of the saucepan, making sure it doesn’t touch the bottom.
4. Cook the mixture over medium heat, stirring constantly with a wooden spoon until the butter melts completely.
5. Continue cooking without stirring until the candy thermometer reaches 234°F (soft-ball stage), which typically takes 8-10 minutes.
6. Remove the saucepan from heat immediately and add 12 ounces premium semi-sweet chocolate chips, stirring until completely melted and smooth.
7. Add 1 jar (7 ounces) velvety marshmallow creme and 1 teaspoon pure vanilla extract, beating vigorously with a wooden spoon for exactly 2 minutes until the mixture loses its gloss.
8. Fold in 1 cup chopped toasted walnuts until evenly distributed throughout the fudge.
9. Pour the fudge mixture into the prepared pan, spreading it evenly into all corners with a spatula.
10. Let the fudge cool at room temperature for 2 hours until completely set before cutting.
When properly cooled, this fudge develops a firm yet creamy texture that melts luxuriously on the tongue. The deep chocolate flavor is beautifully balanced by the crunchy walnuts, creating layers of texture in every bite. For an elegant presentation, cut into small squares and serve alongside strong coffee or crumble over vanilla ice cream for an indulgent sundae topping.
Smooth Flan Dessert
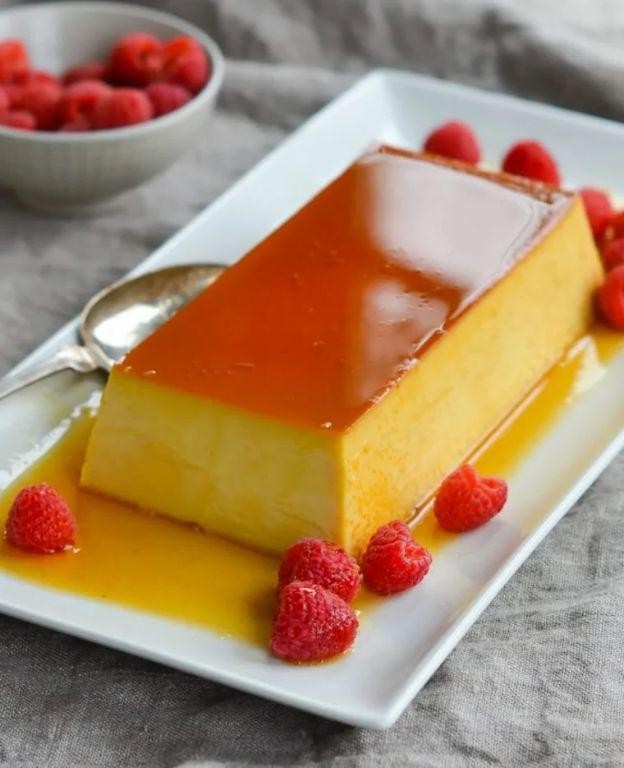
Remember those silky, jiggly desserts that melt in your mouth? Rich, creamy flan is easier to make than you might think, and today I’ll walk you through creating this elegant treat step by step.
6
portions25
minutes50
minutesIngredients
– 1 cup granulated white sugar
– 4 large farm-fresh eggs
– 1 can (14 ounces) sweetened condensed milk
– 1 can (12 ounces) evaporated milk
– 1 teaspoon pure vanilla extract
– ¼ cup warm water
Instructions
1. Preheat your oven to 350°F and gather six 6-ounce ramekins.
2. Place 1 cup granulated white sugar in a heavy-bottomed saucepan over medium heat.
3. Stir the sugar continuously with a wooden spoon until it completely melts into a deep amber liquid, about 8–10 minutes. Tip: Avoid stirring once it starts melting to prevent crystallization.
4. Immediately pour the caramel evenly into the bottom of each ramekin, swirling to coat the bases.
5. In a large mixing bowl, whisk 4 large farm-fresh eggs until just combined—don’t overbeat to avoid bubbles.
6. Add 1 can sweetened condensed milk, 1 can evaporated milk, 1 teaspoon pure vanilla extract, and ¼ cup warm water to the eggs.
7. Gently whisk the mixture until smooth and uniform in color. Tip: Strain through a fine-mesh sieve for an ultra-silky texture.
8. Divide the custard evenly among the caramel-lined ramekins.
9. Place the ramekins in a large baking dish and fill the dish with hot water until it reaches halfway up the sides of the ramekins.
10. Carefully transfer the baking dish to the preheated oven and bake for 45–50 minutes, or until the centers jiggle slightly when shaken. Tip: A toothpick inserted near the edge should come out clean.
11. Remove the ramekins from the water bath and let them cool to room temperature on a wire rack.
12. Cover each ramekin with plastic wrap and refrigerate for at least 4 hours, or overnight.
13. To serve, run a thin knife around the edges of each ramekin and invert onto a plate. The silky custard and golden caramel sauce create a luxurious contrast. This flan’s creamy texture pairs beautifully with fresh berries or a sprinkle of sea salt for a sophisticated twist.
Buttermilk Pancakes

A perfect stack of buttermilk pancakes starts with understanding the simple chemistry between ingredients. As your cooking guide, I’ll walk you through each precise step to achieve fluffy, golden-brown pancakes every single time.
12
pancakes15
minutes30
minutesIngredients
– 2 cups all-purpose flour
– 2 tablespoons granulated sugar
– 2 teaspoons baking powder
– 1 teaspoon baking soda
– 1 teaspoon fine sea salt
– 2 large farm-fresh eggs
– 2 cups cultured buttermilk
– 1/4 cup melted unsalted butter
– 1 teaspoon pure vanilla extract
– 2 tablespoons vegetable oil for cooking
Instructions
1. Whisk together 2 cups all-purpose flour, 2 tablespoons granulated sugar, 2 teaspoons baking powder, 1 teaspoon baking soda, and 1 teaspoon fine sea salt in a large mixing bowl until fully combined.
2. Crack 2 large farm-fresh eggs into a separate medium bowl and whisk until pale yellow and frothy.
3. Pour 2 cups cultured buttermilk into the egg mixture while continuously whisking.
4. Stream in 1/4 cup melted unsalted butter while whisking to incorporate.
5. Stir in 1 teaspoon pure vanilla extract until the wet ingredients are fully blended.
6. Pour the wet mixture into the dry ingredients and gently fold with a spatula until just combined, leaving some small lumps.
7. Let the batter rest undisturbed for 10 minutes to allow the baking powder to activate.
8. Heat a non-stick skillet or griddle over medium heat until a drop of water sizzles and evaporates immediately.
9. Brush the hot surface with 1 tablespoon vegetable oil using a pastry brush.
10. Pour 1/4 cup portions of batter onto the hot surface, spacing them 2 inches apart.
11. Cook for 2-3 minutes until bubbles form across the entire surface and edges look set.
12. Flip each pancake using a thin spatula when the bottoms are golden brown.
13. Cook for another 1-2 minutes until the second side is equally golden brown.
14. Transfer cooked pancakes to a wire rack in a single layer to prevent steaming.
15. Repeat steps 9-14 with remaining batter, brushing the surface with additional vegetable oil between batches.
Stack these golden pancakes high and notice how the tender crumb practically melts in your mouth. Serve them with maple syrup cascading between layers, or get creative with fresh berries and whipped cream for a stunning breakfast presentation that’s as beautiful as it is delicious.
Sweet Corn Chowder

Savoring a warm bowl of sweet corn chowder feels like wrapping yourself in a cozy blanket on a crisp autumn day. This comforting soup celebrates the natural sweetness of fresh corn balanced with savory bacon and creamy potatoes. Follow these methodical steps to create a perfectly textured chowder that will become your new cold-weather staple.
6
servings25
minutes40
minutesIngredients
– 6 slices thick-cut applewood smoked bacon, chopped
– 1 large yellow onion, finely diced
– 3 cloves fresh garlic, minced
– 4 cups fresh sweet corn kernels (from about 6 ears)
– 2 medium Yukon Gold potatoes, peeled and diced into ½-inch cubes
– 4 cups rich chicken broth
– 1 cup heavy cream
– 2 tablespoons unsalted butter
– 1 teaspoon smoked paprika
– ½ teaspoon freshly ground black pepper
– ¼ cup fresh chives, finely chopped
Instructions
1. Place the chopped bacon in a large Dutch oven over medium heat and cook for 8-10 minutes until crispy and browned, stirring occasionally.
2. Remove the bacon with a slotted spoon and drain on paper towels, leaving 2 tablespoons of bacon fat in the pot.
3. Add the diced onion to the bacon fat and cook for 5-7 minutes until translucent and softened, stirring frequently.
4. Stir in the minced garlic and cook for 1 minute until fragrant but not browned. Tip: Don’t let the garlic burn or it will turn bitter.
5. Add the fresh corn kernels and diced potatoes to the pot, stirring to coat them in the onion mixture.
6. Pour in the chicken broth and bring to a boil over high heat, then reduce to a simmer.
7. Cover and simmer for 15-18 minutes until the potatoes are fork-tender but not falling apart.
8. Use an immersion blender to partially puree about one-third of the soup, creating a creamy base while maintaining texture. Tip: For chunkier chowder, simply mash some potatoes against the pot side with a spoon.
9. Stir in the heavy cream, butter, smoked paprika, and black pepper.
10. Simmer uncovered for 5 more minutes to allow the flavors to meld and the soup to thicken slightly.
11. Remove from heat and stir in the reserved crispy bacon and fresh chives. Tip: Reserve some bacon and chives for garnish to add visual appeal.
Just ladle this golden chowder into deep bowls and watch how the creamy base cradles the sweet corn kernels and tender potato cubes. The smoky bacon provides satisfying crunch against the velvety texture, while the fresh chives brighten each spoonful. For a creative twist, serve it in hollowed-out bread bowls or top with a dollop of zesty lime crema.
Heavenly Rice Pudding
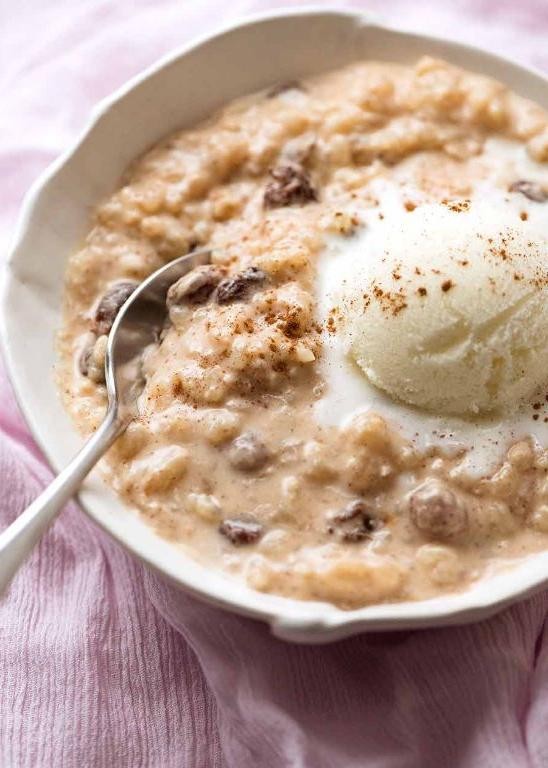
Just imagine coming home to the comforting aroma of warm spices and creamy rice filling your kitchen. This heavenly rice pudding transforms simple pantry staples into a dessert that feels both nostalgic and sophisticated. Let’s walk through each step together to create this classic comfort food.
2
servings10
minutes28
minutesIngredients
- 1 cup high-quality Arborio rice
- 4 cups creamy whole milk
- 1/2 cup granulated white sugar
- 1 teaspoon pure vanilla extract
- 1/2 teaspoon fragrant ground cinnamon
- 1/4 teaspoon freshly grated nutmeg
- 1/4 teaspoon fine sea salt
- 2 large farm-fresh eggs
- 1/2 cup plump golden raisins
Instructions
- Rinse 1 cup of high-quality Arborio rice under cool running water until the water runs clear to remove excess starch.
- Combine the rinsed rice with 4 cups of creamy whole milk in a heavy-bottomed saucepan.
- Bring the mixture to a gentle simmer over medium heat, stirring frequently to prevent scorching.
- Reduce heat to low and cover the saucepan, cooking for 25 minutes until the rice is tender but still has a slight bite.
- Stir in 1/2 cup granulated white sugar, 1 teaspoon pure vanilla extract, 1/2 teaspoon fragrant ground cinnamon, 1/4 teaspoon freshly grated nutmeg, and 1/4 teaspoon fine sea salt until fully incorporated.
- In a separate bowl, lightly beat 2 large farm-fresh eggs until uniform in color.
- Temper the eggs by slowly adding 1/2 cup of the hot rice mixture while whisking constantly to prevent curdling.
- Pour the tempered egg mixture back into the saucepan, stirring continuously for 2 minutes until the pudding thickens noticeably.
- Fold in 1/2 cup plump golden raisins and cook for 1 additional minute to soften them slightly.
- Remove from heat and let the pudding rest for 10 minutes to allow flavors to meld before serving.
Your finished pudding will have a luxuriously creamy texture with individual rice grains suspended throughout. The warm cinnamon and nutmeg create a comforting spice profile that pairs beautifully with the sweet plump raisins. You might try serving it warm with a drizzle of caramel sauce or chilled with fresh berry compote for contrasting temperatures and flavors.
Silky Caramel Sauce

Here’s how to master a foolproof caramel sauce that transforms simple desserts into showstoppers. Homemade caramel might seem intimidating, but with careful attention to temperature and timing, you’ll achieve a silky, luxurious sauce every time.
1
batch5
minutes15
minutesIngredients
– 1 cup granulated white sugar
– 6 tablespoons unsalted high-quality butter, cut into cubes
– ½ cup heavy whipping cream, at room temperature
– 1 teaspoon pure vanilla extract
– ¼ teaspoon flaky sea salt
Instructions
1. Place the granulated white sugar in a heavy-bottomed saucepan over medium heat.
2. Stir continuously with a heat-resistant spatula until the sugar melts completely into a smooth, amber-colored liquid, about 5–7 minutes. Tip: Avoid scraping the sides of the pan to prevent crystallization.
3. Immediately add the unsalted high-quality butter cubes and whisk vigorously until fully incorporated and the mixture is bubbling uniformly.
4. Carefully pour in the heavy whipping cream while whisking constantly; the mixture will bubble vigorously.
5. Continue cooking and whisking for exactly 2 minutes at a steady simmer to thicken the sauce slightly.
6. Remove the saucepan from the heat and stir in the pure vanilla extract and flaky sea salt until evenly distributed. Tip: Let the sauce cool for 10 minutes before transferring to a jar—it will thicken as it cools.
7. Pour the warm caramel sauce through a fine-mesh sieve into a heatproof glass jar to remove any potential sugar crystals. Tip: Store the sauce in the refrigerator for up to two weeks; gently reheat in a warm water bath before serving. Creating this caramel sauce rewards patience with its glossy sheen and deep, buttery sweetness. Consider it drizzled over vanilla ice cream, swirled into coffee, or as a dip for crisp apple slices—its versatility is as impressive as its flavor.
Luscious Pumpkin Pie

Keeping the tradition of autumn baking alive, this luscious pumpkin pie brings warmth to any gathering with its perfectly spiced filling and flaky crust. Knowing each step ensures your pie turns out beautifully every time, let’s walk through the process together.
8
servings15
minutes65
minutesIngredients
- 1 9-inch unbaked pie crust
- 1 15-ounce can of velvety smooth pumpkin puree
- 3 large farm-fresh eggs
- 1 cup of rich heavy cream
- 3/4 cup of fine granulated sugar
- 1 teaspoon of fragrant ground cinnamon
- 1/2 teaspoon of aromatic ground ginger
- 1/4 teaspoon of freshly grated nutmeg
- 1/4 teaspoon of pungent ground cloves
- 1/2 teaspoon of pure vanilla extract
- 1/2 teaspoon of fine sea salt
Instructions
- Preheat your oven to 425°F and position a rack in the center.
- Place your 9-inch unbaked pie crust in a pie dish, gently pressing it into the corners without stretching.
- In a large mixing bowl, combine the velvety smooth pumpkin puree, farm-fresh eggs, and rich heavy cream, whisking until completely smooth.
- Add the fine granulated sugar, fragrant ground cinnamon, aromatic ground ginger, freshly grated nutmeg, pungent ground cloves, pure vanilla extract, and fine sea salt to the pumpkin mixture.
- Whisk all ingredients together for exactly 2 minutes until the filling is perfectly homogeneous and slightly aerated.
- Carefully pour the pumpkin filling into the unbaked pie crust, stopping when it reaches 1/4 inch from the top edge.
- Place the pie on a baking sheet to catch any potential spills and transfer it to the preheated oven.
- Bake at 425°F for 15 minutes to set the crust edges, then reduce the oven temperature to 350°F without opening the door.
- Continue baking for 45-50 minutes at 350°F until the filling is set around the edges but still slightly jiggly in the center when gently shaken.
- Remove the pie from the oven and place it on a wire cooling rack for at least 4 hours until completely cooled to room temperature.
Here, the pie achieves its signature silky texture that melts on your tongue while the warm spices create a comforting aroma throughout your kitchen. For an elegant presentation, serve each slice with a dollop of freshly whipped cream and a sprinkle of cinnamon, or try drizzling with caramel sauce for extra decadence during holiday gatherings.
Decadent Alfredo Sauce
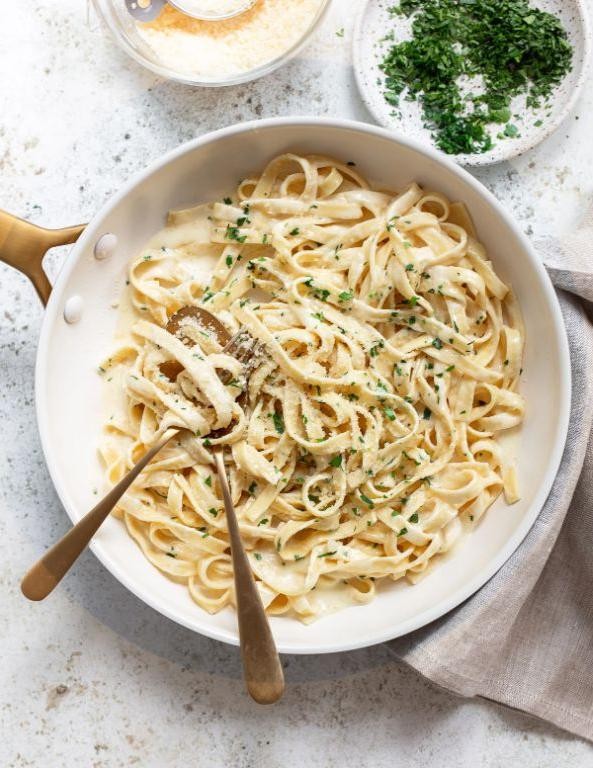
Of all the creamy pasta sauces that grace our dinner tables, this homemade Alfredo stands apart with its luxurious texture and rich flavor profile. Once you master this foundational recipe, you’ll understand why restaurant versions pale in comparison to what you can create in your own kitchen. Let’s walk through each step methodically to ensure perfect results every time.
3
servings10
minutes10
minutesIngredients
– 1/2 cup high-quality unsalted butter
– 2 cups heavy cream with high butterfat content
– 4 cloves fresh garlic, minced finely
– 2 cups freshly grated Parmesan cheese
– 1/4 teaspoon freshly grated nutmeg
– 1/2 teaspoon fine sea salt
– 1/4 teaspoon freshly cracked black pepper
– 2 tablespoons fresh Italian parsley, chopped finely
Instructions
1. Melt 1/2 cup high-quality unsalted butter in a heavy-bottomed saucepan over medium-low heat for 2-3 minutes until fully liquid.
2. Add 4 cloves fresh garlic, minced finely to the melted butter and cook for exactly 1 minute until fragrant but not browned.
3. Pour in 2 cups heavy cream with high butterfat content and whisk continuously to combine with the butter-garlic mixture.
4. Heat the cream mixture until small bubbles form around the edges of the pan, about 4-5 minutes, stirring constantly.
5. Reduce heat to low and gradually whisk in 2 cups freshly grated Parmesan cheese in four additions, ensuring each addition melts completely before adding the next.
6. Stir in 1/4 teaspoon freshly grated nutmeg, 1/2 teaspoon fine sea salt, and 1/4 teaspoon freshly cracked black pepper until fully incorporated.
7. Continue cooking the sauce on low heat for 3-4 minutes until it thickens enough to coat the back of a spoon.
8. Remove the saucepan from heat and stir in 2 tablespoons fresh Italian parsley, chopped finely until evenly distributed.
9. Serve immediately over freshly cooked pasta, tossing to coat each strand thoroughly. Embrace the velvety texture that clings perfectly to pasta without being overly heavy. The nutmeg provides a subtle warmth that complements the sharp Parmesan, while the fresh parsley adds both color and a clean finish. For an elegant twist, try serving it over roasted vegetables or as a dipping sauce for artisan bread.
Custardy Bread Pudding
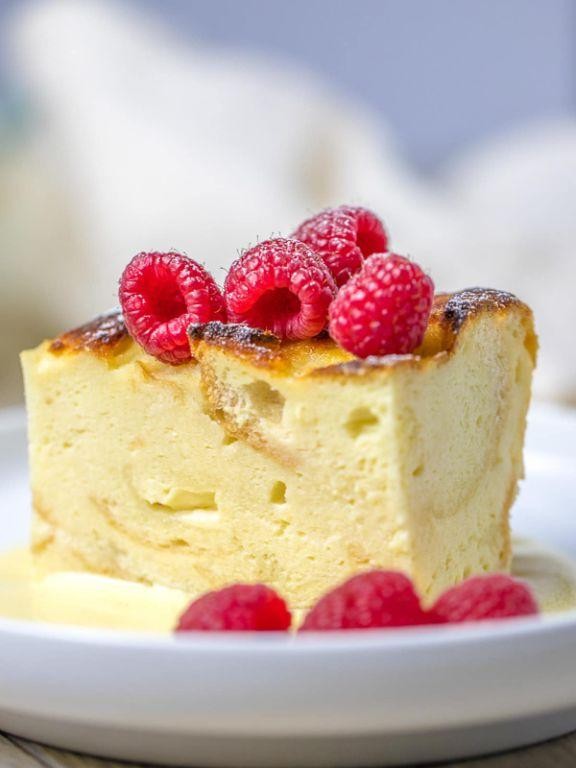
Custardy bread pudding transforms humble ingredients into a luxurious dessert that feels both nostalgic and sophisticated. Carefully following these steps will yield a perfectly textured pudding with a golden-brown top and rich, creamy interior that melts in your mouth.
8
portions25
minutes50
minutesIngredients
– 6 cups of day-old, sturdy white bread cubes
– 2 cups of rich whole milk
– 1 cup of heavy cream with high butterfat content
– 4 large farm-fresh eggs at room temperature
– 3/4 cup of granulated white sugar
– 2 teaspoons of pure vanilla extract
– 1/2 teaspoon of fine sea salt
– 1/4 teaspoon of freshly grated nutmeg
– 2 tablespoons of unsalted butter, softened
– 1/4 cup of dark brown sugar for sprinkling
Instructions
1. Preheat your oven to 350°F and position the rack in the center.
2. Generously grease a 9×13-inch baking dish with the softened unsalted butter, ensuring complete coverage.
3. Arrange the day-old, sturdy white bread cubes evenly in the prepared baking dish.
4. In a large mixing bowl, whisk together the 4 large farm-fresh eggs until thoroughly combined and slightly frothy.
5. Gradually add the 3/4 cup of granulated white sugar to the eggs while continuously whisking to prevent graininess.
6. Pour in the 2 cups of rich whole milk and 1 cup of heavy cream, whisking until the mixture becomes smooth and homogeneous.
7. Stir in the 2 teaspoons of pure vanilla extract, 1/2 teaspoon of fine sea salt, and 1/4 teaspoon of freshly grated nutmeg until fully incorporated.
8. Slowly pour the custard mixture over the bread cubes in the baking dish, ensuring all bread pieces are thoroughly saturated.
9. Use the back of a spoon to gently press down any floating bread cubes, submerging them completely in the custard.
10. Let the mixture rest for 20 minutes to allow the bread to fully absorb the custard, which prevents a soggy texture.
11. Evenly sprinkle the 1/4 cup of dark brown sugar across the top to create a caramelized crust.
12. Place the baking dish in the preheated oven and bake for 45-50 minutes until the top is golden brown and the center barely jiggles when shaken.
13. Remove from oven and let cool on a wire rack for at least 30 minutes before serving to allow the custard to set properly.
Velvety and rich, this bread pudding achieves the perfect balance between a crisp, caramelized top and a soft, custardy interior that practically melts on your tongue. The subtle warmth of nutmeg complements the sweet vanilla notes, creating a dessert that feels both comforting and elegant. For an extra indulgence, serve warm with a drizzle of bourbon caramel sauce or a scoop of vanilla bean ice cream to contrast the warm pudding with cool creaminess.
Mouthwatering Tres Leches Cake
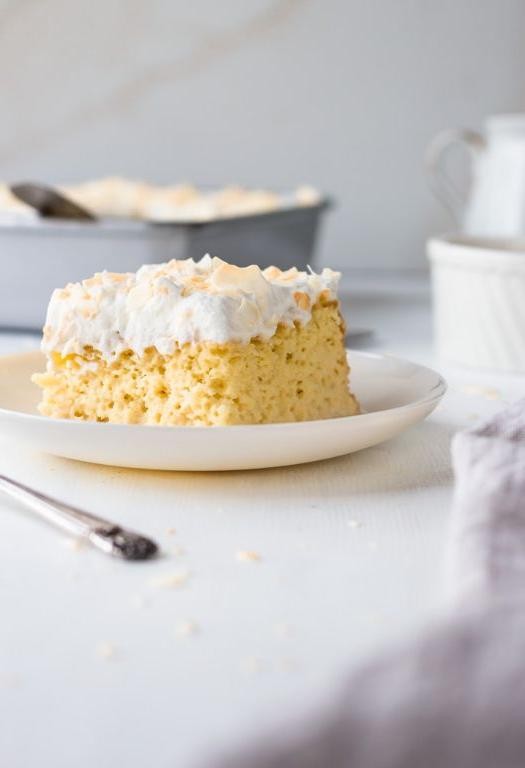
Whether you’re new to baking or looking for a showstopping dessert, this classic Latin American cake soaked in three milks is surprisingly approachable. With its cloud-like texture and sweet, creamy saturation, it’s the perfect make-ahead treat for any celebration.
12
servings25
minutes30
minutesIngredients
– 1 cup all-purpose flour
– 1 ½ teaspoons baking powder
– ¼ teaspoon fine sea salt
– 5 large farm-fresh eggs, separated
– 1 cup granulated sugar
– ⅓ cup whole milk
– 1 teaspoon pure vanilla extract
– 12-ounce can evaporated milk
– 14-ounce can sweetened condensed milk
– ½ cup heavy whipping cream
– 1 cup heavy whipping cream for topping
– 2 tablespoons powdered sugar
– 1 teaspoon pure vanilla extract
Instructions
1. Preheat your oven to 350°F and generously grease a 9×13-inch baking pan.
2. In a medium bowl, whisk together 1 cup all-purpose flour, 1 ½ teaspoons baking powder, and ¼ teaspoon fine sea salt until fully combined.
3. In a large bowl, beat 5 egg yolks with ¾ cup granulated sugar using an electric mixer on medium-high speed for 3 minutes until pale yellow and thickened.
4. Mix in ⅓ cup whole milk and 1 teaspoon vanilla extract until just incorporated.
5. Gently fold the dry flour mixture into the yolk mixture using a spatula until no white streaks remain.
6. In a separate clean bowl, beat the 5 egg whites on high speed until soft peaks form.
7. Gradually add the remaining ¼ cup granulated sugar while continuing to beat until stiff, glossy peaks form.
8. Carefully fold the egg whites into the batter in three additions, being careful not to deflate the mixture.
9. Pour the batter into your prepared pan and bake for 25-30 minutes until golden brown and a toothpick inserted in the center comes out clean.
10. While the cake bakes, whisk together the 12-ounce can evaporated milk, 14-ounce can sweetened condensed milk, and ½ cup heavy whipping cream in a large measuring cup.
11. As soon as the cake comes out of the oven, use a skewer to poke holes all over the surface, spacing them about ½ inch apart.
12. Slowly pour the three-milk mixture over the warm cake, ensuring it soaks in evenly.
13. Cover the cake with plastic wrap and refrigerate for at least 4 hours or overnight.
14. Before serving, beat 1 cup heavy whipping cream with 2 tablespoons powdered sugar and 1 teaspoon vanilla extract until stiff peaks form.
15. Spread the whipped cream evenly over the chilled cake.
This cake achieves an incredibly moist, tender crumb that practically melts in your mouth while maintaining enough structure to hold its shape. The sweet, milky soaking liquid permeates every bite without making the cake soggy. Try serving it with fresh berries or a sprinkle of cinnamon for an extra layer of flavor that complements the creamy richness beautifully.
Savory Quiche Lorraine

Perfect for brunch or a light dinner, this classic Savory Quiche Lorraine combines rich, creamy custard with smoky bacon and sharp cheese in a buttery crust. Preparing it from scratch might seem intimidating, but by following these clear, methodical steps, you’ll achieve a golden, flaky masterpiece that’s sure to impress. Let’s begin by gathering our ingredients and preheating the oven.
6
servings20
minutes50
minutesIngredients
– 1 pre-made refrigerated pie crust
– 6 slices thick-cut smoky bacon
– 1 cup shredded sharp Gruyère cheese
– 4 large farm-fresh eggs
– 1 cup heavy cream
– 1/4 cup whole milk
– 1/2 teaspoon finely ground black pepper
– 1/4 teaspoon freshly grated nutmeg
Instructions
1. Preheat your oven to 375°F (190°C).
2. Unroll the pre-made refrigerated pie crust and gently press it into a 9-inch pie dish, crimping the edges decoratively.
3. Place the thick-cut smoky bacon in a single layer in a cold skillet, then cook over medium heat for 8-10 minutes until crisp and browned.
4. Transfer the cooked bacon to a paper towel-lined plate to drain excess grease, then crumble it into small pieces.
5. Evenly sprinkle the shredded sharp Gruyère cheese over the bottom of the pie crust.
6. Scatter the crumbled bacon pieces over the cheese layer.
7. In a medium mixing bowl, whisk together the 4 large farm-fresh eggs until frothy and pale yellow.
8. Pour in the heavy cream and whole milk, whisking continuously until fully combined.
9. Stir in the finely ground black pepper and freshly grated nutmeg until evenly distributed throughout the custard mixture. Tip: For the flakiest crust, keep all ingredients cold and handle the dough as little as possible.
10. Carefully pour the custard mixture over the bacon and cheese in the pie crust.
11. Place the quiche on the center rack of the preheated oven and bake for 35-40 minutes. Tip: The quiche is done when the center jiggles slightly but the edges are firm and the top is golden brown.
12. Remove the quiche from the oven and let it cool on a wire rack for at least 15 minutes before slicing. Tip: Allowing the quiche to rest ensures clean slices and helps the custard set completely.
Creamy and rich, this quiche features a silky custard that contrasts beautifully with the crisp, salty bacon and flaky crust. Consider serving warm slices alongside a simple arugula salad dressed with lemon vinaigrette to cut through the richness. The subtle nutmeg aroma enhances the savory notes, making each bite a comforting delight.
Homemade Dulce de Leche
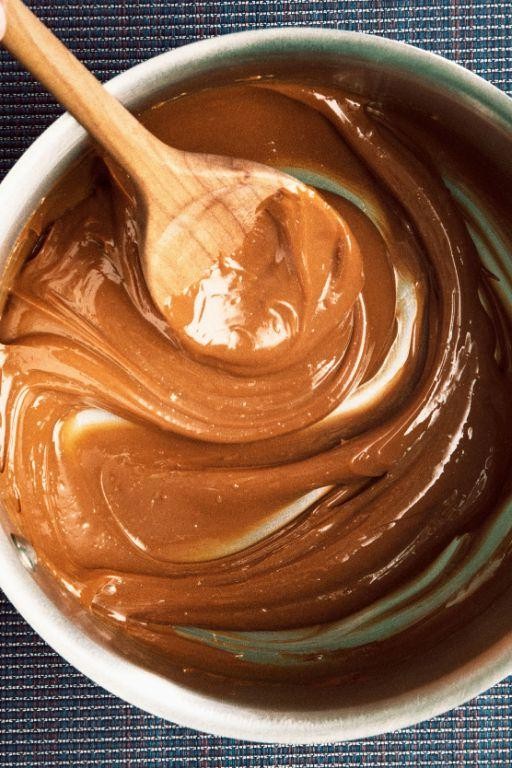
For those seeking a luscious caramel alternative, homemade dulce de leche transforms simple pantry staples into a velvety, deeply flavored spread through patient, gentle cooking. Following this methodical approach ensures perfect results every time, turning basic ingredients into something truly magical with careful temperature control and timing.
1
can5
minutes180
minutesIngredients
– 1 can (14 ounces) of sweetened condensed milk with its characteristic thick, pale gold appearance
– 1/4 cup of cool, clear water for creating the essential water bath
Instructions
1. Remove the paper label completely from your can of sweetened condensed milk using warm water and gentle scrubbing to prevent paper residue from contaminating your cooking water.
2. Place the unopened can horizontally in the center of a medium-sized heavy-bottomed saucepan to ensure even heat distribution during the lengthy cooking process.
3. Pour cool, clear water into the saucepan until it covers the can by at least 2 full inches, as maintaining complete submersion throughout cooking is crucial for safety and even heating.
4. Set your stove burner to medium-high heat and bring the water to a vigorous rolling boil, watching for large bubbles breaking rapidly across the surface.
5. Immediately reduce the heat to maintain a steady, gentle simmer where small bubbles occasionally break the surface, maintaining this temperature for exactly 3 hours.
6. Check the water level every 30 minutes, adding additional boiling water as needed to keep the can fully submerged, since allowing the water level to drop below the can could cause dangerous pressure buildup.
7. After 3 hours of uninterrupted simmering, use kitchen tongs to carefully transfer the hot can to a wire cooling rack, avoiding any sudden movements that might cause the hot contents to splash if opened prematurely.
8. Let the can cool completely to room temperature for at least 4 hours before attempting to open it, as the contents remain under pressure while hot and could erupt dangerously if opened warm.
9. Once completely cooled, use a can opener to carefully puncture the lid, then slowly open the can to reveal your transformed dulce de leche.
10. Transfer the thick, caramel-colored dulce de leche to an airtight container using a rubber spatula, scraping every bit of the rich sauce from the can.
Creating this homemade dulce de leche yields an incredibly smooth, spoonable caramel with deep butterscotch notes and a luxurious viscosity that holds its shape when swirled. Consider layering it between cake layers, swirling it into cheesecake batter, or simply enjoying it straight from the spoon for an instant caramel treat that far surpasses store-bought versions.
Creamy Mashed Potatoes
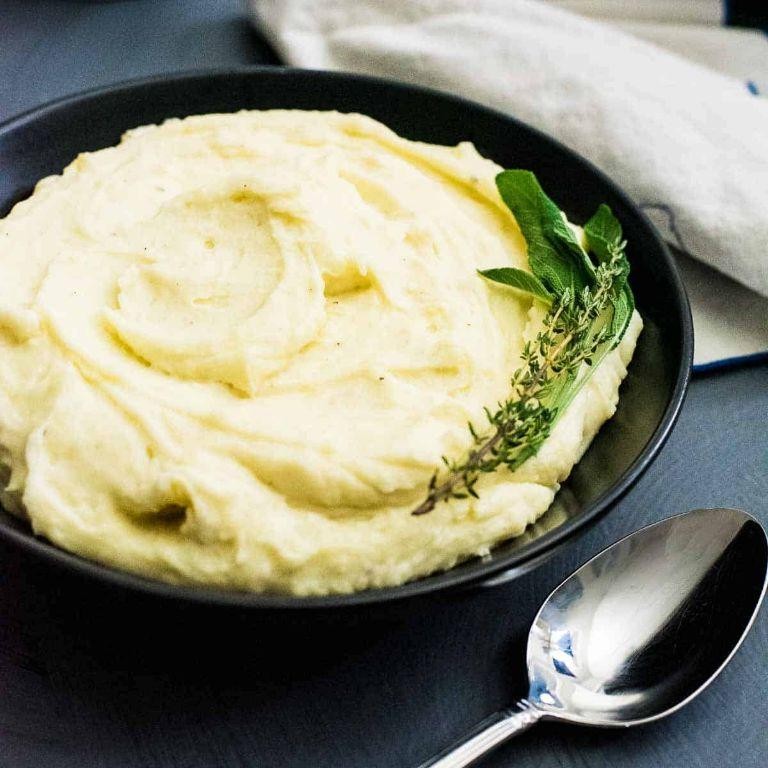
There’s something deeply comforting about a bowl of perfectly creamy mashed potatoes, a classic side dish that feels like a warm hug on a plate. This methodical approach will guide you through creating the smoothest, most flavorful version you’ve ever made, ensuring success even if you’re new to the kitchen.
4
servings15
minutes25
minutesIngredients
– 2 pounds of starchy russet potatoes, peeled and quartered
– 1 cup of heavy cream, gently warmed
– ½ cup of unsalted European-style butter, cut into small cubes
– 1 ½ teaspoons of fine sea salt
– ½ teaspoon of freshly ground white pepper
– ¼ teaspoon of freshly grated nutmeg
Instructions
1. Place the peeled and quartered russet potatoes in a large pot and cover them with cold water by 2 inches.
2. Add 1 teaspoon of fine sea salt to the water and bring it to a rolling boil over high heat.
3. Reduce the heat to maintain a gentle boil and cook the potatoes for 15-20 minutes, or until they are fork-tender and easily slide off when pierced.
4. Tip: Start with cold water to ensure the potatoes cook evenly from the outside in.
5. Carefully drain the potatoes in a colander and return them to the warm, dry pot.
6. Let the potatoes steam in the pot for 2 minutes to evaporate any excess surface moisture.
7. Pass the hot potatoes through a ricer or food mill into a large bowl for the smoothest texture.
8. Tip: Avoid using a food processor, as it can release too much starch and make the potatoes gluey.
9. In a small saucepan, gently warm the heavy cream over medium-low heat until it reaches 150°F and small bubbles form around the edges.
10. Gradually fold the warmed heavy cream into the riced potatoes using a rubber spatula until just combined.
11. Add the cubed European-style butter, remaining ½ teaspoon of fine sea salt, freshly ground white pepper, and freshly grated nutmeg to the potato mixture.
12. Gently fold everything together until the butter is fully melted and incorporated, being careful not to overmix.
13. Tip: For extra fluffiness, fold the ingredients instead of stirring vigorously.
Just imagine serving these cloud-like potatoes with their rich, buttery flavor and subtle hint of nutmeg. They make the perfect bed for gravy or can be elegantly piped into swirls for a special occasion presentation.
Decadent Chocolate Mousse

This elegant dessert transforms simple ingredients into an airy, luxurious treat that’s surprisingly straightforward to master. Today we’ll walk through creating a silky chocolate mousse that’s perfect for special occasions or when you simply crave something indulgent. The methodical approach ensures even beginners can achieve professional results.
6
servings25
minutes7
minutesIngredients
– 8 ounces high-quality semisweet chocolate, finely chopped
– 3 large fresh eggs, separated
– 1/4 cup granulated sugar
– 1 cup heavy whipping cream, chilled
– 1 teaspoon pure vanilla extract
– Pinch of fine sea salt
Instructions
1. Place the finely chopped semisweet chocolate in a heatproof bowl set over a saucepan of barely simmering water, ensuring the bowl doesn’t touch the water.
2. Melt the chocolate slowly, stirring occasionally with a rubber spatula until completely smooth and glossy, about 5-7 minutes.
3. Remove the chocolate from heat and let it cool slightly while you prepare the other components.
4. In a clean, dry mixing bowl, whip the chilled heavy cream with an electric mixer on medium-high speed until soft peaks form, about 2-3 minutes.
5. In a separate bowl, beat the 3 egg yolks with 2 tablespoons of granulated sugar using a whisk until pale and thickened, approximately 2 minutes.
6. Gently fold the slightly cooled melted chocolate into the egg yolk mixture until fully incorporated.
7. Add the pure vanilla extract to the chocolate mixture and stir to combine.
8. In another clean, dry bowl, beat the 3 egg whites with a pinch of fine sea salt using an electric mixer on medium speed until foamy, about 1 minute.
9. Gradually add the remaining 2 tablespoons of granular sugar while continuing to beat the egg whites until stiff, glossy peaks form, about 3-4 minutes.
10. Carefully fold one-third of the whipped egg whites into the chocolate mixture to lighten it.
11. Gently fold in the remaining whipped egg whites until no white streaks remain.
12. Finally, fold in the whipped cream in two additions, being careful not to deflate the mixture.
13. Divide the mousse among 6 serving glasses or ramekins.
14. Cover the containers with plastic wrap and refrigerate for at least 4 hours, or until firmly set.
Each spoonful delivers an incredibly light texture that melts on the tongue, releasing deep chocolate flavor with just the right balance of sweetness. For an elegant presentation, top with fresh raspberries and shaved chocolate, or serve alongside crisp biscotti for contrasting textures.
Conclusion
From creamy desserts to savory dishes, these 18 Carnation Evaporated Milk recipes showcase incredible versatility for everyday cooking. We hope you find new family favorites to enjoy! Try these recipes, leave a comment sharing which ones you loved, and don’t forget to pin this article on Pinterest to save for later. Happy cooking!


