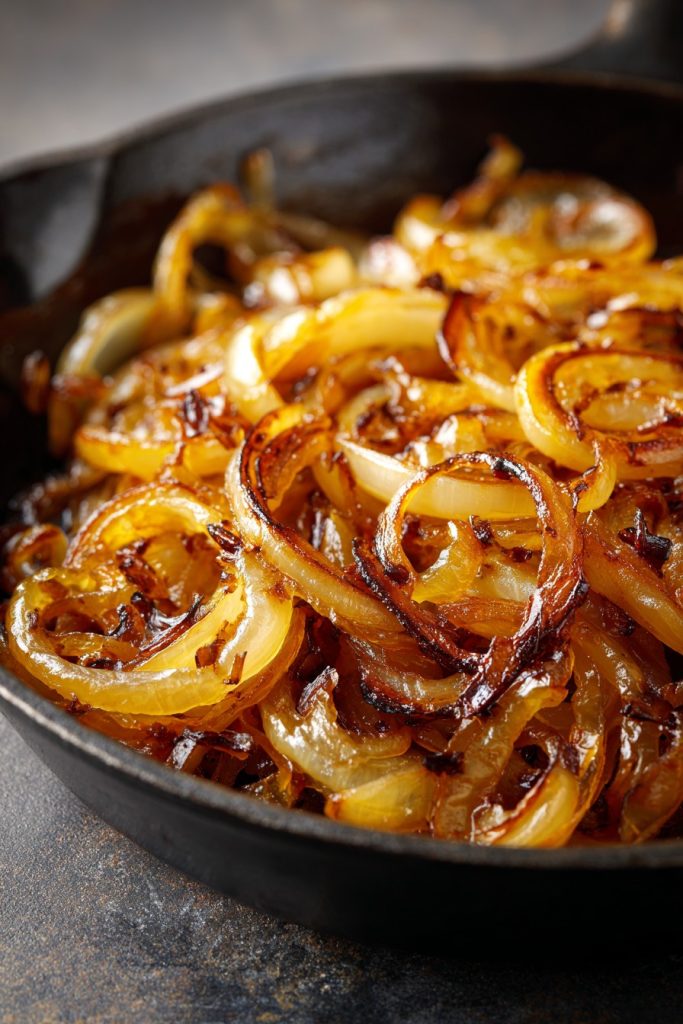
Transform your kitchen into an aromatic sanctuary with these deeply caramelized onions that deliver an explosive symphony of sweet, savory, and umami flavors. This isn’t just cooking—it’s alchemy, where humble onions metamorphose into golden-brown silk that will elevate every dish they grace.
Why This Recipe Works
- The slow, patient cooking method coaxes out the onions’ natural sugars, creating an intense sweetness that balances beautifully with savory undertones
- Strategic salt addition at the beginning draws out moisture efficiently, speeding up the caramelization process while developing complex flavor layers
- Using both butter and olive oil provides the perfect fat combination—butter for rich flavor and olive oil for higher smoke point during extended cooking
- The final splash of balsamic vinegar adds a tangy counterpoint that cuts through the sweetness and enhances the overall depth of flavor
- Proper heat management ensures even caramelization without burning, resulting in uniformly golden, melt-in-your-mouth texture
Ingredients
- 4 large yellow onions, thinly sliced (about 8 cups)
- 3 tablespoons unsalted butter
- 2 tablespoons extra virgin olive oil
- 1 teaspoon kosher salt
- 1/2 teaspoon freshly ground black pepper
- 1 tablespoon balsamic vinegar
- 1/4 cup water or beef broth (if needed)
Equipment Needed
- Large, heavy-bottomed skillet or Dutch oven
- Sharp chef’s knife
- Wooden spoon or spatula
- Cutting board
- Measuring spoons
Instructions
Prepare and Season the Onions
Begin by peeling your yellow onions and slicing them uniformly into thin half-moons, about 1/8-inch thick. This consistent thickness is absolutely crucial—it ensures every single strand caramelizes at the same rate, preventing some pieces from burning while others remain undercooked. As you slice, notice the sharp, pungent aroma that fills your kitchen; this aggressive scent will transform dramatically through the cooking process. Place your large, heavy-bottomed skillet over medium heat and add both the unsalted butter and extra virgin olive oil. The combination creates a perfect cooking medium—the butter delivers rich, nutty flavor while the olive oil prevents burning during the extended cooking time. Once the fats are shimmering and fragrant, add all your sliced onions in one glorious heap. They’ll sizzle aggressively as they hit the hot surface. Immediately sprinkle with kosher salt, which works double duty: seasoning the onions while drawing out their natural moisture to kickstart the caramelization process. Use your wooden spoon to toss everything until every strand glistens with fat and salt.
Initial Sweating Phase
Reduce the heat to medium-low and begin the transformation. For the first 15-20 minutes, you’re not caramelizing yet—you’re sweating the onions, encouraging them to release their liquid content. Stir every 3-4 minutes, ensuring even heat distribution and preventing any sticking. Watch as the mountain of crisp onions gradually collapses into a softer, more manageable mass. The color will shift from bright white to translucent, and the sharp raw onion scent will mellow into something sweeter, more inviting. This phase is about patience—don’t rush it by turning up the heat, as that will cause the onions to fry rather than sweat, resulting in bitter notes instead of sweet development. The onions should soften completely but not take on any significant color during this stage. If you notice any pieces sticking to the bottom of the pan, deglaze with a tablespoon of water, scraping up those flavorful browned bits and incorporating them back into the mixture.
Develop Golden Color
Now the magic truly begins. As the onions’ liquid evaporates, the natural sugars concentrate and begin to caramelize. You’ll notice the first hints of golden color appearing at the edges—this is your signal to become more attentive. Stir frequently now, every 2-3 minutes, scraping the bottom of the pan thoroughly. The onions will reduce significantly in volume, becoming silkier in texture. After about 30-40 minutes total cooking time, they should achieve a uniform pale golden hue. The aroma will have transformed completely—where once stood sharp pungency now wafts deep, sweet, almost nutty fragrances that make your stomach growl in anticipation. This is where many cooks make the critical mistake of stopping too early; pale golden is beautiful, but we’re marching toward deep amber perfection. Tip: If the onions seem to be coloring too quickly in spots, reduce the heat slightly and stir more vigorously.
Achieve Deep Caramelization
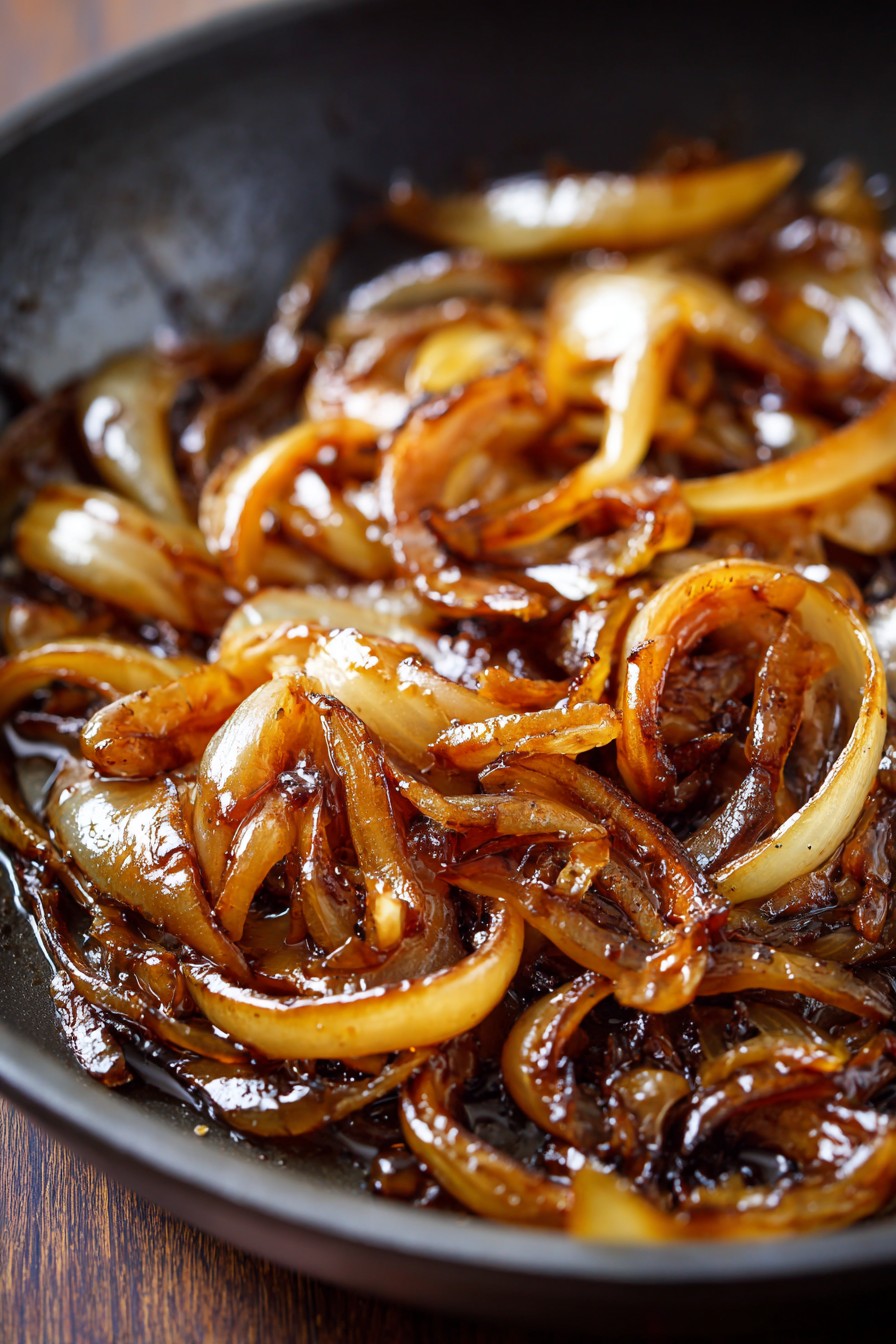
The final stage requires your full attention and patience. Over the next 20-30 minutes, the onions will transition from golden to deep amber, developing complex flavors that range from sweet to savory to slightly bitter in the most delightful way. Stir constantly now—every minute—to prevent burning while encouraging even color development. You’ll notice the onions becoming jam-like in consistency, clinging to your spoon rather than sliding off easily. When they reach a rich mahogany brown color and your kitchen smells like the most incredible French onion soup imaginable, they’re nearly done. This deep caramelization creates Maillard reaction compounds that deliver unbelievable umami depth. The texture should be meltingly soft, with individual strands barely distinguishable as they’ve broken down into a cohesive, spreadable mass.
Finish with Acidity and Seasoning
The final flourish elevates these caramelized onions from excellent to extraordinary. Remove the skillet from heat and immediately add the balsamic vinegar—it will sizzle and steam dramatically, releasing its complex fruity acidity that cuts through the richness. The vinegar not only adds brightness but also deepens the color to an even more lustrous dark amber. Stir vigorously to incorporate, then taste carefully—the onions will be hot! Adjust seasoning with additional kosher salt if needed and a generous grinding of fresh black pepper, which adds subtle heat and aromatic complexity. If the onions seem too dry or sticky, stir in a tablespoon or two of water or beef broth to loosen them to your desired consistency. They should be supple, glossy, and spreadable—perfect for immediate use or storage.
Tips and Tricks
For truly exceptional caramelized onions that will make your guests wonder what culinary sorcery you’ve performed, consider these advanced techniques. First, the onion variety matters more than you might think—while yellow onions are standard for their balanced sweetness and sharpness, experimenting with different types can yield fascinating results. Sweet onions like Vidalia or Walla Walla will caramelize faster and yield a more pronounced sweetness, while red onions add beautiful color and slightly more assertive flavor that stands up well to strong cheeses and meats. If you’re making large batches, use your largest widest pan rather than crowding multiple smaller pans—the increased surface area allows for better evaporation and more consistent caramelization.
Timing and temperature control represent the heart of caramelization mastery. Many home cooks fail by using heat that’s too high, resulting in burned bitter onions rather than sweet silkiness. If your onions seem to be coloring too quickly but still retain crunch, your heat is definitely too high—reduce immediately and add a tablespoon of water to slow things down. Conversely, if after 45 minutes your onions are still pale and swimming in liquid, increase the heat slightly to encourage evaporation. The perfect caramelization temperature maintains a steady gentle sizzle without aggressive frying sounds. For those who want to deepen the savory notes dramatically, consider adding a teaspoon of tomato paste during the last 15 minutes of cooking—it adds incredible umami complexity that pairs beautifully with meat dishes.
Storage and usage represent the final frontier of caramelized onion excellence. These beauties freeze magnificently—portion them into ice cube trays for convenient small amounts, or freeze flat in zip-top bags for easy breaking off of larger pieces. When reheating, always do so gently over low heat with a splash of water or broth to restore their creamy texture. For culinary applications beyond the obvious burger and sandwich topping, consider blending caramelized onions into dips and spreads, stirring into mashed potatoes for incredible depth, mixing into meatloaf or meatballs for moisture and flavor, or creating stunning pasta sauces by combining with cream and Parmesan. The versatility of properly caramelized onions cannot be overstated—they’re quite literally flavor gold in your culinary arsenal.
Recipe Variations
- Herb-Infused Caramelized Onions: During the last 10 minutes of cooking, stir in 2 tablespoons of fresh thyme leaves and 1 teaspoon of chopped rosemary. The herbal notes cut through the richness beautifully and make these onions perfect for topping roasted meats or incorporating into stuffings. The earthy pine-like quality of rosemary complements the sweetness spectacularly, while thyme adds its distinctive minty-lemon undertones that brighten the entire mixture.
- Balsamic-Glazed Caramelized Onions: Increase the balsamic vinegar to 3 tablespoons and add 1 tablespoon of brown sugar during the last 15 minutes of cooking. This creates a thicker, glossier result that’s absolutely divine on pizzas, crostini, or as a condiment for cheese plates. The increased acidity and sweetness create a more complex flavor profile that stands up beautifully to strong blue cheeses and hearty whole-grain breads.
- Spicy Caramelized Onions: Add 1 teaspoon of crushed red pepper flakes with the initial seasoning, and finish with 2 tablespoons of chopped pickled jalapeños for a sweet-heat combination that will wake up your taste buds. These are phenomenal on burgers, hot dogs, or stirred into cream cheese for an incredible spread. The gradual heat build from the pepper flakes combined with the bright acidity of the pickled jalapeños creates dimension that keeps you coming back for more.
- Bacon-Fat Caramelized Onions: Replace the butter and olive oil with 4 tablespoons of rendered bacon fat for an incredibly rich, smoky version that’s practically a meal on its own. The rendered fat carries incredible pork flavor that infuses every strand of onion, creating something that borders on meaty candy. Perfect for topping steaks, baked potatoes, or incorporating into breakfast hash.
- Beer-Caramelized Onions: Deglaze the pan with 1/2 cup of dark beer (like stout or porter) during the last 20 minutes of cooking instead of using water. The malty, slightly bitter notes of the beer complement the onions’ sweetness while adding incredible complexity. These are particularly excellent on bratwurst or incorporated into beer cheese soup for layered flavor development.
Frequently Asked Questions
Why do my caramelized onions keep burning instead of turning golden brown?
Burnt onions typically result from heat that’s too high or insufficient stirring. Caramelization requires patience—it’s a chemical process that happens gradually as sugars break down between 320-360°F. If your heat exceeds this range, the sugars carbonize instead of caramelizing, creating bitter, acrid flavors. The solution is simple: maintain low to medium-low heat throughout the process and stir frequently, especially during the final stages when moisture content is low and burning risk increases. Using a heavy-bottomed pan also helps distribute heat evenly, preventing hot spots that cause localized burning. If you notice any sticking or darkening too quickly, don’t hesitate to reduce the heat slightly and add a tablespoon of liquid to slow the process.
Can I speed up the caramelization process without sacrificing quality?
While true caramelization can’t be rushed without compromising flavor development, several techniques can slightly accelerate the process. Adding a pinch of baking soda (about 1/8 teaspoon) raises the pH, encouraging faster browning through increased Maillard reactions—but use sparingly as too much can create mushy texture and soapy flavors. More effectively, ensure your onions are uniformly sliced and don’t overcrowd the pan, which allows for better moisture evaporation. Starting with a wider pan increases surface area, while salting immediately draws out liquid faster. However, remember that the slow transformation is part of what creates the complex flavor profile—rushing typically yields simpler, less developed results.
How long do caramelized onions last in the refrigerator or freezer?
Properly stored caramelized onions maintain excellent quality for about 5-7 days in the refrigerator when kept in an airtight container. For longer storage, freezing is your best option—they’ll maintain good texture and flavor for up to 3 months. For freezing, portion them into usable amounts in ice cube trays or small containers, which prevents having to thaw and refreeze large batches. When reheating, always do so gently over low heat with a splash of water or broth to restore their creamy consistency. The flavor actually improves after a day in the refrigerator as the various elements continue to meld and develop complexity.
What’s the difference between caramelized onions and simply sautéed onions?
The distinction lies in cooking time, technique, and resulting flavor profile. Sautéed onions are cooked quickly over medium-high heat until tender and translucent, typically taking 5-10 minutes—they retain much of their sharp, pungent onion character with minimal sweetness. Caramelized onions undergo a lengthy transformation over 45-90 minutes where natural sugars break down and brown, creating deep, complex sweetness with rich umami notes and significantly reduced sharpness. The texture differs dramatically too—sautéed onions maintain distinct strands with slight crunch, while caramelized onions break down into a jam-like, spreadable consistency. They’re essentially different ingredients despite starting from the same raw component.
Can I make caramelized onions in a slow cooker or Instant Pot?
While both appliances can produce caramelized onions, the results differ from traditional stovetop method. Slow cookers require 8-10 hours on low with the lid slightly ajar to allow moisture evaporation, yielding very soft onions with good flavor but less developed browning due to the lack of direct heat contact. Instant Pots can accelerate the process using the sauté function followed by pressure cooking, but the texture becomes extremely soft—almost puréed—and the flavor lacks the complexity of slowly developed stovetop caramelization. For the deepest, most complex flavor and ideal texture, traditional stovetop method remains superior, though appliance methods work adequately when time or attention is limited.
Summary
Mastering caramelized onions transforms ordinary dishes into extraordinary experiences through patient technique that coaxes incredible sweetness and depth from humble ingredients. The slow alchemy creates versatile gold that elevates everything from burgers to pasta with its complex sweet-savory balance.
Caramelized Onions
5
servings15
minutes60
minutesIngredients
Instructions
- 1 Slice onions uniformly into 1/8-inch thick half-moons
- 2 Heat butter and olive oil in large skillet over medium heat until shimmering
- 3 Add onions and salt, toss to coat, then reduce heat to medium-low
- 4 Cook for 15-20 minutes, stirring occasionally, until onions soften and release liquid
- 5 Continue cooking 30-40 minutes, stirring frequently, until golden brown
- 6 Cook additional 20-30 minutes, stirring constantly, until deep amber color develops
- 7 Remove from heat, stir in balsamic vinegar and black pepper, adjust consistency with water if needed


