Canadian Thanksgiving is all about gathering with loved ones over a spectacular feast. From classic roast turkey with all the trimmings to uniquely Canadian twists on seasonal favorites, we’ve gathered 20 delicious recipes that will make your celebration unforgettable. Whether you’re hosting a big crowd or keeping it cozy, get ready to discover mouthwatering dishes that capture the warm, hearty spirit of this beloved holiday!
Maple-Glazed Turkey with Herb Stuffing
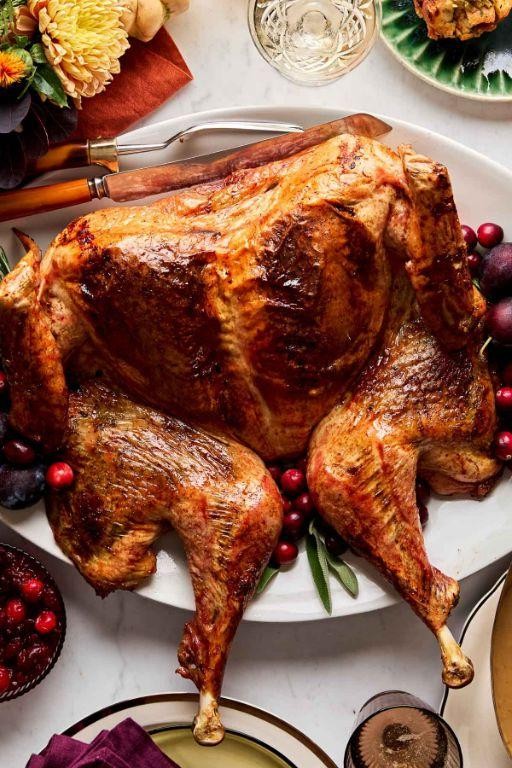
Elevating the classic holiday centerpiece, this maple-glazed turkey with herb stuffing transforms tradition into an unforgettable culinary experience. The rich maple syrup caramelizes into a glossy, golden-brown crust while the aromatic herb stuffing infuses every bite with comforting, savory notes. Perfect for festive gatherings, this dish promises to become the star of your table with its harmonious blend of sweet and savory flavors.
8
servings30
minutes225
minutesIngredients
– 12 lb whole turkey
– 1 cup maple syrup
– 1/2 cup unsalted butter
– 2 tbsp olive oil
– 1 tbsp salt
– 2 tsp black pepper
– 8 cups cubed bread
– 1 cup chopped celery
– 1 cup chopped onion
– 2 cloves minced garlic
– 1/4 cup chopped parsley
– 2 tbsp chopped sage
– 1 tbsp chopped thyme
– 1 cup chicken broth
– 1 egg
Instructions
1. Preheat your oven to 325°F and position the rack in the lower third of the oven.
2. Pat the 12 lb whole turkey completely dry with paper towels inside and out.
3. Season the turkey cavity and exterior evenly with 1 tbsp salt and 2 tsp black pepper.
4. Heat 2 tbsp olive oil in a large skillet over medium heat until shimmering.
5. Sauté 1 cup chopped onion and 1 cup chopped celery for 5 minutes until translucent.
6. Add 2 cloves minced garlic and cook for 1 minute until fragrant.
7. Transfer the vegetable mixture to a large bowl with 8 cups cubed bread, 1/4 cup chopped parsley, 2 tbsp chopped sage, and 1 tbsp chopped thyme.
8. Whisk together 1 cup chicken broth and 1 egg, then pour over the bread mixture.
9. Toss the stuffing gently until all ingredients are evenly moistened.
10. Loosely fill the turkey cavity with the prepared herb stuffing.
11. Truss the turkey legs together with kitchen twine to maintain shape during roasting.
12. Place the turkey breast-side up on a rack in a roasting pan.
13. Melt 1/2 cup unsalted butter and brush it evenly over the entire turkey surface.
14. Roast the turkey at 325°F for 3 hours, basting with pan juices every 45 minutes.
15. Brush the turkey with 1 cup maple syrup, ensuring complete coverage of the skin.
16. Continue roasting for 30-45 minutes until the internal temperature reaches 165°F in the thickest part of the thigh.
17. Transfer the turkey to a cutting board and let rest for 30 minutes before carving.
18. Remove the stuffing from the turkey cavity and serve alongside the carved meat.
Juicy and tender beneath its crackling maple glaze, the turkey yields to the fork with perfect moisture retention. The herb stuffing emerges fragrant and golden, having absorbed the turkey’s savory drippings during roasting. For an elegant presentation, arrange carved slices over a bed of the warm stuffing and drizzle with additional reduced pan juices.
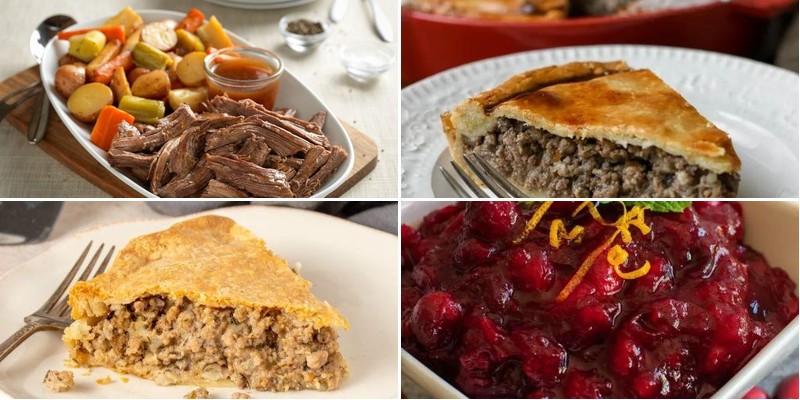
Savory Tourtière with a Flaky Crust
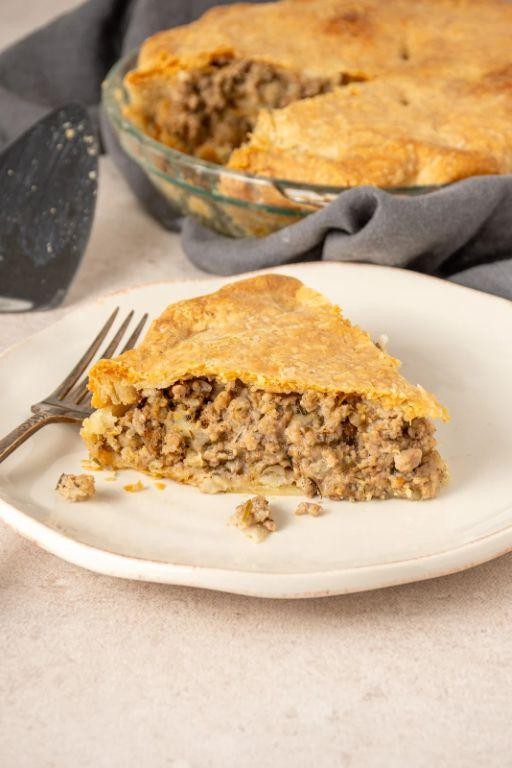
A quintessential celebration of French-Canadian heritage, this savory tourtière envelops spiced ground meats in a buttery, golden crust that shatters delicately with each forkful. An aromatic blend of cloves, allspice, and thyme perfumes the kitchen as this traditional pie bakes to perfection. Assembling this dish feels like wrapping comfort in pastry—a timeless centerpiece for holiday tables or cozy winter evenings.
8
servings45
minutes64
minutesIngredients
– 2 cups all-purpose flour
– 1 cup unsalted butter
– 6 tbsp ice water
– 1 lb ground pork
– 1 lb ground beef
– 1 cup diced onion
– 2 cloves minced garlic
– 1 tsp ground cloves
– 1 tsp ground allspice
– 1 tsp dried thyme
– 1 cup mashed potatoes
– 1/2 cup beef broth
– 1 egg
– 1 tbsp water
Instructions
1. Combine 2 cups all-purpose flour and 1 cup cold, cubed unsalted butter in a food processor, pulsing until mixture resembles coarse crumbs.
2. Gradually add 6 tablespoons ice water while pulsing, stopping just when dough begins to form cohesive clumps.
3. Divide dough into two discs, wrap tightly in plastic, and refrigerate for 30 minutes to prevent shrinkage during baking.
4. Sauté 1 cup diced onion and 2 cloves minced garlic in a large skillet over medium heat until translucent, about 5 minutes.
5. Add 1 pound ground pork and 1 pound ground beef, breaking meat into small crumbles with a wooden spoon as it browns for 8 minutes.
6. Stir in 1 teaspoon ground cloves, 1 teaspoon ground allspice, and 1 teaspoon dried thyme, toasting spices for 1 minute until fragrant.
7. Mix in 1 cup mashed potatoes and 1/2 cup beef broth, simmering for 10 minutes until liquid is absorbed and filling thickens.
8. Roll one chilled dough disc to 1/8-inch thickness on a floured surface, carefully transferring to a 9-inch pie dish.
9. Spoon cooled filling into crust, spreading evenly and pressing gently to eliminate air pockets.
10. Roll remaining dough disc to 1/8-inch thickness, draping over filling and crimping edges decoratively with a fork to seal.
11. Whisk 1 egg with 1 tablespoon water, brushing entire top crust lightly for a glossy, golden finish.
12. Cut four 1-inch steam vents in the center of the top crust to prevent splitting during baking.
13. Bake at 375°F for 45 minutes, rotating halfway, until crust is deeply golden and filling bubbles visibly through vents.
14. Rest pie on a wire rack for 20 minutes before slicing—this allows juices to redistribute for cleaner cuts.
Hearty and aromatic, this tourtière delivers a satisfying contrast between the shatteringly flaky crust and richly spiced meat filling. For a festive presentation, accompany slices with a sharp cranberry relish or a simple green salad dressed in tangy vinaigrette. Leftovers reheat beautifully, their flavors deepening overnight for an even more compelling meal the next day.
Roasted Butternut Squash and Sage Soup

Just as autumn’s crisp air settles in, this velvety roasted butternut squash and sage soup emerges as the ultimate comfort. Jewel-toned and aromatic, it transforms humble ingredients into an elegant bowl of warmth that celebrates the season’s finest flavors.
4
servings20
minutes70
minutesIngredients
– 1 large butternut squash (about 3 pounds)
– 2 tablespoons olive oil
– 1 medium yellow onion, diced
– 3 cloves garlic, minced
– 8 fresh sage leaves
– 4 cups vegetable broth
– 1/2 cup heavy cream
– 1 teaspoon salt
– 1/2 teaspoon black pepper
– 1/4 teaspoon nutmeg
Instructions
1. Preheat your oven to 400°F and line a baking sheet with parchment paper.
2. Cut the butternut squash in half lengthwise and scoop out the seeds with a spoon.
3. Brush the cut sides of the squash with 1 tablespoon of olive oil and place them cut-side down on the prepared baking sheet.
4. Roast the squash for 45-50 minutes until the flesh is completely tender when pierced with a fork.
5. While the squash roasts, heat the remaining 1 tablespoon of olive oil in a large pot over medium heat.
6. Add the diced onion and cook for 6-8 minutes until translucent and fragrant.
7. Add the minced garlic and cook for 1 minute until aromatic but not browned.
8. Carefully add the fresh sage leaves and cook for 30 seconds until crisp and fragrant.
9. Once the squash is roasted, scoop the flesh from the skin using a large spoon.
10. Add the squash flesh to the pot with the onion mixture.
11. Pour in the vegetable broth and bring the mixture to a gentle simmer.
12. Cook for 10 minutes to allow the flavors to meld together.
13. Carefully transfer the soup to a blender in batches and blend until completely smooth.
14. Return the blended soup to the pot and stir in the heavy cream.
15. Season with salt, black pepper, and nutmeg, stirring to combine thoroughly.
16. Heat the soup over low heat for 5 minutes until warmed through.
The resulting texture is luxuriously smooth with a subtle sweetness from the caramelized squash, balanced by earthy sage notes. For an elegant presentation, garnish with crispy fried sage leaves and a drizzle of sage-infused oil, or serve alongside crusty artisanal bread for dipping into this golden-hued masterpiece.
Alberta Beef Pot Roast with Root Vegetables
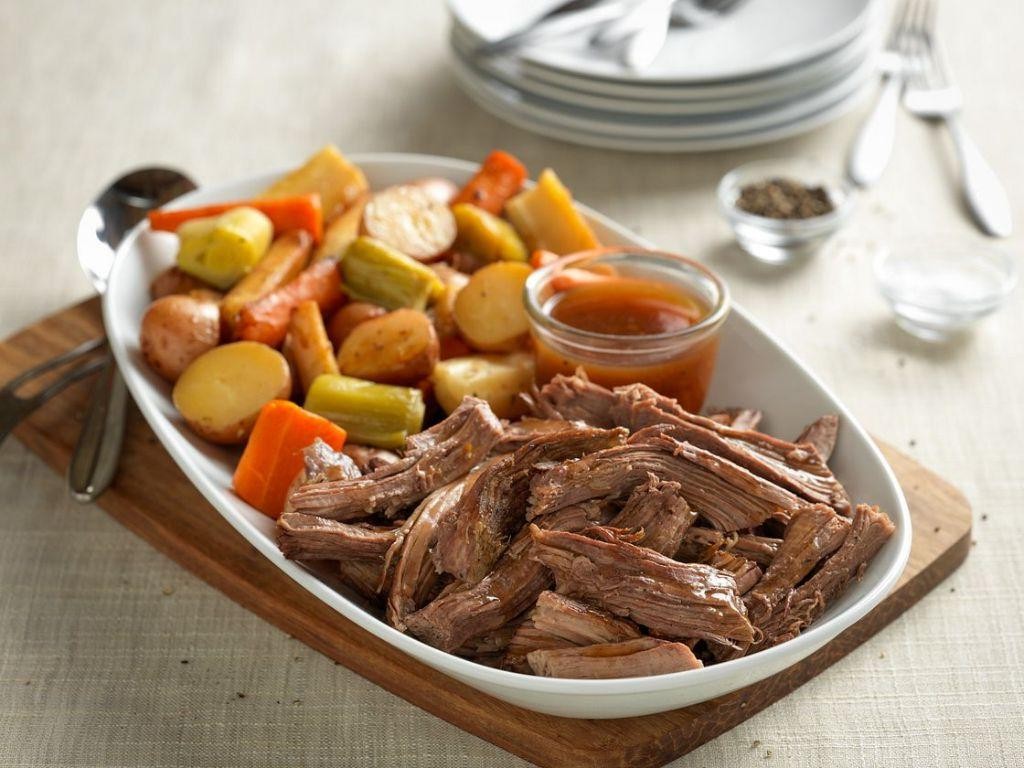
Nestled in the heart of autumn’s embrace, this Alberta beef pot roast celebrates the deep, soulful flavors that emerge when quality ingredients meet patient cooking. Rich marbled beef slowly braises alongside earthy root vegetables until fork-tender, creating a comforting centerpiece worthy of any gathering. The aromatic herbs and slow-cooked broth develop into a luxurious sauce that elevates this classic dish to new heights.
6
servings20
minutes200
minutesIngredients
– 3 pounds beef chuck roast
– 2 tablespoons olive oil
– 1 teaspoon kosher salt
– 1/2 teaspoon black pepper
– 1 large yellow onion
– 4 cloves garlic
– 4 large carrots
– 3 parsnips
– 1 pound baby potatoes
– 2 cups beef broth
– 1 cup red wine
– 2 sprigs fresh rosemary
– 3 sprigs fresh thyme
Instructions
1. Preheat your oven to 325°F.
2. Pat the beef chuck roast completely dry with paper towels.
3. Season all sides of the roast evenly with kosher salt and black pepper.
4. Heat olive oil in a large Dutch oven over medium-high heat until shimmering.
5. Sear the roast for 4-5 minutes per side until deeply browned.
6. Transfer the seared roast to a clean plate.
7. Add chopped yellow onion to the Dutch oven and cook for 3 minutes until translucent.
8. Add minced garlic and cook for 30 seconds until fragrant.
9. Pour in red wine to deglaze, scraping all browned bits from the bottom.
10. Simmer the wine for 2 minutes until reduced by half.
11. Return the seared roast to the Dutch oven.
12. Arrange peeled and chopped carrots, parsnips, and baby potatoes around the roast.
13. Pour beef broth over the vegetables until they’re partially submerged.
14. Place fresh rosemary and thyme sprigs on top of the roast.
15. Cover the Dutch oven tightly with its lid.
16. Transfer to the preheated oven and braise for 3 hours.
17. Check for doneness by inserting a fork into the beef—it should pull apart easily.
18. Remove the Dutch oven from the oven and let rest for 15 minutes before serving. Perfectly braised, the beef yields to gentle pressure while the vegetables maintain their structural integrity beneath a glossy, herb-infused sauce. Present this magnificent roast family-style, allowing guests to admire the caramelized exterior before diving into the tender, flavor-packed interior.
Classic Nanaimo Bars
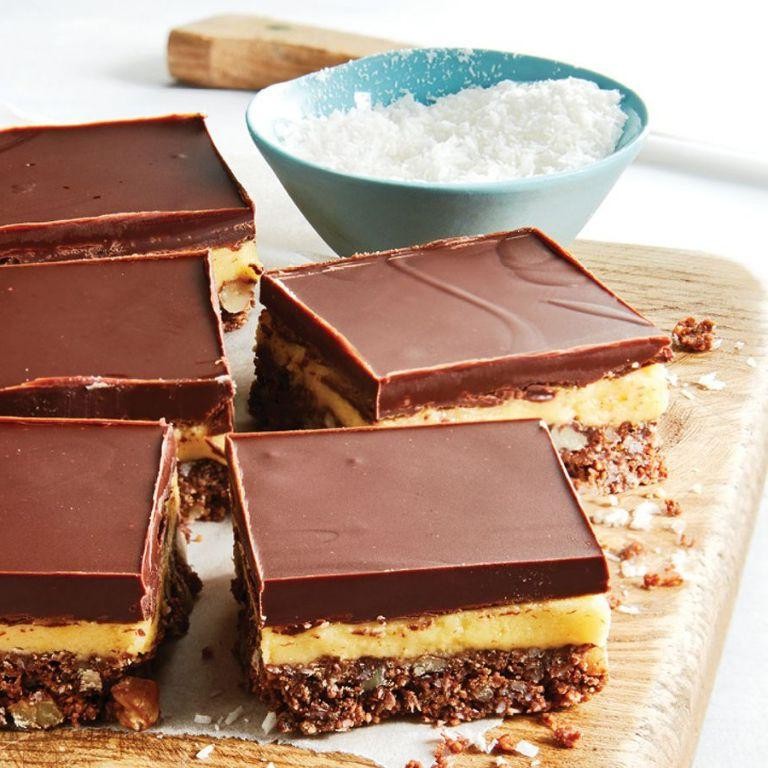
Virtually every dessert enthusiast has encountered that moment when only a truly decadent, no-bake treat will suffice. Classic Nanaimo Bars deliver precisely that satisfaction with their three distinct layers of texture and flavor, creating a confection that feels both nostalgic and sophisticated. This Canadian classic has earned its place in American dessert culture through its perfect balance of crunchy base, creamy filling, and glossy chocolate topping.
16
squares45
minutes3
minutesIngredients
– 1 cup graham cracker crumbs
– 1/2 cup unsalted butter
– 1/4 cup granulated sugar
– 5 tbsp cocoa powder
– 1 egg
– 1 1/2 cups shredded coconut
– 1/2 cup chopped walnuts
– 1/4 cup unsalted butter
– 2 tbsp heavy cream
– 2 tbsp vanilla custard powder
– 2 cups powdered sugar
– 4 oz semi-sweet chocolate
– 1 tbsp unsalted butter
Instructions
1. Melt 1/2 cup unsalted butter in a saucepan over medium heat until completely liquid.
2. Add 1/4 cup granulated sugar and 5 tbsp cocoa powder to the melted butter, whisking continuously for 1 minute until fully incorporated.
3. Beat 1 egg in a small bowl, then gradually temper it into the chocolate mixture by adding 1 tablespoon of the warm mixture to the egg while whisking vigorously.
4. Pour the tempered egg mixture back into the saucepan and cook over low heat for 2 minutes, stirring constantly until thickened.
5. Remove the saucepan from heat and stir in 1 cup graham cracker crumbs, 1 1/2 cups shredded coconut, and 1/2 cup chopped walnuts until evenly combined.
6. Press the mixture firmly into an 8×8 inch baking pan using the bottom of a measuring cup to create an even, compact base layer.
7. Refrigerate the base for 30 minutes until completely firm to the touch.
8. Cream together 1/4 cup unsalted butter, 2 tbsp heavy cream, and 2 tbsp vanilla custard powder in a mixing bowl using an electric mixer on medium speed for 2 minutes until light and fluffy.
9. Gradually add 2 cups powdered sugar to the butter mixture, beating on low speed for 3 minutes until smooth and spreadable.
10. Spread the custard filling evenly over the chilled base using an offset spatula, ensuring it reaches all corners.
11. Return the pan to the refrigerator and chill for 1 hour until the filling layer is firm.
12. Melt 4 oz semi-sweet chocolate and 1 tbsp unsalted butter together in a double boiler over simmering water, stirring until completely smooth and glossy.
13. Pour the melted chocolate over the chilled filling layer and tilt the pan to spread it evenly across the surface.
14. Refrigerate the completed Nanaimo Bars for 2 hours until the chocolate topping is completely set.
15. Remove the bars from the refrigerator and let stand at room temperature for 10 minutes before cutting into 16 squares using a sharp knife wiped clean between cuts.
Layers of contrasting textures make these bars particularly memorable—the crisp coconut-walnut base gives way to a smooth vanilla custard center before meeting the rich chocolate shell. For an elegant presentation, dust the finished squares with edible gold powder or serve alongside freshly brewed coffee to complement the chocolate notes. The harmonious balance of sweet and bitter elements ensures each bite reveals new dimensions of flavor.
Canadian Meat Pie with Mushrooms and Onions
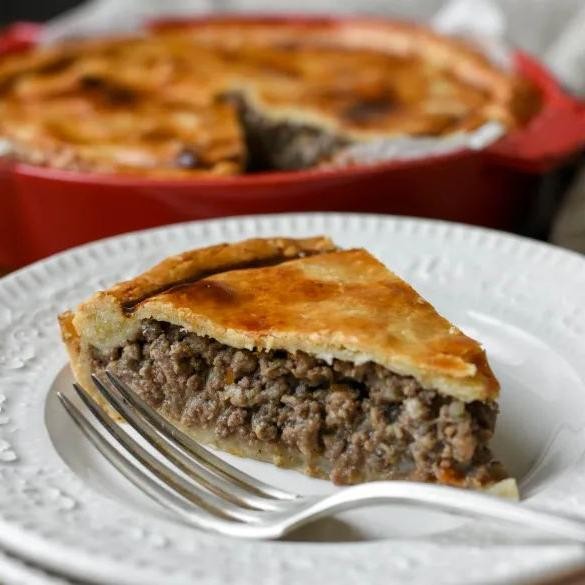
Delightfully rustic yet refined, this Canadian meat pie with mushrooms and onions offers a comforting embrace of savory flavors encased in a golden, flaky crust. Deeply aromatic with earthy mushrooms and sweet caramelized onions, this dish transforms humble ingredients into an elegant centerpiece worthy of any autumn gathering. Each forkful delivers the perfect balance of tender filling and buttery pastry that will transport you straight to a cozy Canadian kitchen.
8
servings25
minutes68
minutesIngredients
– 1 lb ground beef
– 2 cups sliced cremini mushrooms
– 1 large yellow onion, diced
– 2 tbsp olive oil
– 1 tsp dried thyme
– 1/2 tsp black pepper
– 1/2 tsp salt
– 1/4 cup beef broth
– 1 tbsp all-purpose flour
– 2 prepared pie crusts (9-inch)
– 1 egg, beaten
Instructions
1. Preheat your oven to 375°F.
2. Heat olive oil in a large skillet over medium heat until shimmering.
3. Add diced onion and cook for 5 minutes until translucent.
4. Add sliced mushrooms and cook for 8 minutes until browned and moisture has evaporated.
5. Add ground beef, breaking it apart with a wooden spoon, and cook for 6 minutes until no pink remains.
6. Sprinkle flour over the mixture and stir continuously for 1 minute to cook out the raw flour taste.
7. Pour in beef broth, scraping any browned bits from the bottom of the pan.
8. Add dried thyme, salt, and black pepper, stirring to combine thoroughly.
9. Simmer the mixture for 3 minutes until slightly thickened, then remove from heat.
10. Line a 9-inch pie dish with one pie crust, pressing it gently against the sides.
11. Spoon the meat mixture into the crust, spreading it evenly.
12. Place the second pie crust over the filling, crimping the edges together with your fingers or a fork.
13. Brush the entire top crust with beaten egg using a pastry brush.
14. Cut 4 small slits in the center of the top crust to allow steam to escape.
15. Bake for 35 minutes until the crust is golden brown and flaky.
16. Let the pie rest for 15 minutes before slicing to allow the filling to set properly. What makes this pie truly exceptional is the way the flaky, buttery crust gives way to the rich, savory filling where mushrooms provide an earthy depth that complements the sweet caramelized onions. Serve warm slices alongside a crisp green salad for contrast, or elevate it further by drizzling with a red wine reduction for an extra layer of sophistication.
Traditional Butter Tarts with a Hint of Maple

A quintessential Canadian treat finds its elegant American expression in these butter tarts, where flaky pastry cradles a rich, caramel-like filling subtly enhanced with the warm, woodsy notes of pure maple syrup. As autumn leaves begin their fiery descent, these individual pastries offer the perfect balance of nostalgic comfort and sophisticated flavor that will transport you to a cozy fireside gathering with their irresistible aroma and delicate sweetness.
12
tarts20
minutes18
minutesIngredients
– 1 package refrigerated pie crust
– 1/2 cup unsalted butter
– 1 cup brown sugar
– 1/2 cup maple syrup
– 2 large eggs
– 1 tsp vanilla extract
– 1/4 tsp salt
– 1/2 cup raisins
Instructions
1. Preheat your oven to 375°F and lightly grease a 12-cup muffin tin.
2. Roll out the refrigerated pie crust on a lightly floured surface to 1/8-inch thickness.
3. Using a 4-inch round cutter, cut 12 circles from the pie crust, gathering and rerolling scraps as needed.
4. Gently press each pastry circle into the prepared muffin tin cups, ensuring the crust reaches halfway up the sides.
5. In a medium saucepan over medium heat, melt the unsalted butter completely.
6. Remove the saucepan from heat and whisk in the brown sugar until fully dissolved and the mixture appears smooth.
7. Add the maple syrup to the butter-sugar mixture, whisking continuously until thoroughly combined.
8. In a separate bowl, lightly beat the 2 large eggs until uniform in color.
9. Slowly pour the warm butter mixture into the beaten eggs while whisking constantly to prevent curdling.
10. Stir in the vanilla extract and salt until the filling is completely homogeneous.
11. Evenly distribute the raisins among the 12 pastry-lined muffin cups.
12. Carefully pour the filling mixture over the raisins in each cup, filling each three-quarters full.
13. Place the muffin tin on the center rack of the preheated 375°F oven.
14. Bake for 15-18 minutes until the pastry edges are golden brown and the filling appears set but still slightly jiggly in the center.
15. Remove the tarts from the oven and let them cool in the tin for 10 minutes to allow the filling to set properly.
16. Using a small offset spatula, gently transfer the tarts to a wire rack to cool completely.
Upon cooling, these butter tarts develop a delightful textural contrast between the crisp, buttery pastry and the soft, slightly chewy filling that yields a gentle pull when bitten. The maple syrup imparts a sophisticated depth that complements the caramelized brown sugar without overwhelming the delicate balance, while the plump raisins provide occasional bursts of fruity sweetness. Unconventionally elegant when served alongside artisanal coffee or as the star of an afternoon tea spread, these tarts also make stunning individual desserts when garnished with a drizzle of extra maple syrup and a sprinkle of flaky sea salt.
Sweet Potato Casserole with Pecan Topping
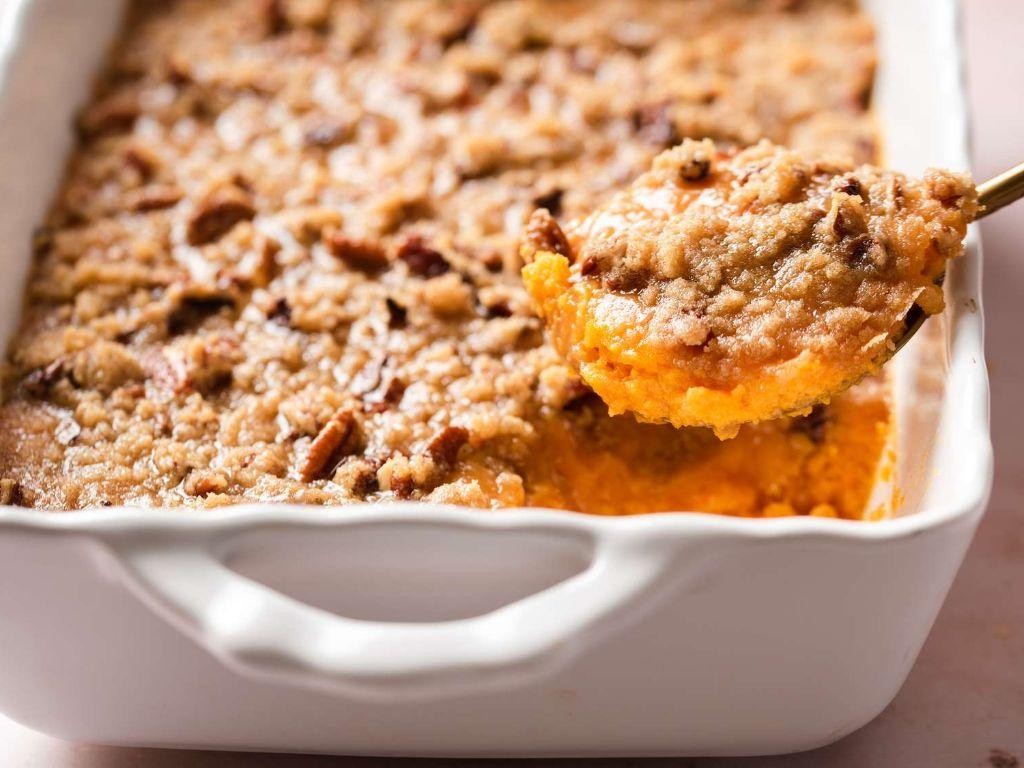
Delightfully bridging the gap between side dish and dessert, this sweet potato casserole features a golden-brown pecan topping that crackles with texture. Deeply comforting and sophisticated enough for holiday tables, it transforms humble ingredients into an unforgettable centerpiece. The contrast of creamy sweet potato base and crunchy nut topping creates a symphony of autumnal flavors.
8
servings30
minutes105
minutesIngredients
- 3 pounds sweet potatoes
- 1/2 cup unsalted butter, melted
- 1/2 cup whole milk
- 1/4 cup brown sugar
- 2 large eggs
- 1 teaspoon vanilla extract
- 1/2 teaspoon ground cinnamon
- 1/4 teaspoon ground nutmeg
- 1 cup chopped pecans
- 1/2 cup all-purpose flour
- 1/2 cup granulated sugar
- 4 tablespoons cold butter, cubed
Instructions
- Preheat your oven to 400°F and line a baking sheet with parchment paper.
- Pierce each sweet potato several times with a fork to allow steam to escape.
- Roast sweet potatoes for 45-60 minutes until flesh yields easily when pressed.
- Let sweet potatoes cool until comfortable to handle, about 15 minutes.
- Scoop flesh from skins into a large mixing bowl, discarding the skins.
- Add melted butter, milk, brown sugar, eggs, vanilla extract, cinnamon, and nutmeg to the bowl.
- Beat mixture with an electric mixer on medium speed until completely smooth, about 2 minutes.
- Transfer sweet potato mixture to a greased 9×13-inch baking dish, spreading evenly.
- Combine pecans, flour, and granulated sugar in a medium bowl.
- Cut cold butter into the pecan mixture using a pastry cutter until crumbly.
- Sprinkle pecan topping evenly over the sweet potato base.
- Bake at 350°F for 30-35 minutes until topping is golden brown and filling bubbles at edges.
- Let casserole rest for 15 minutes before serving to allow flavors to meld.
Luxuriously creamy beneath its crisp pecan blanket, this casserole offers contrasting textures that elevate every bite. The subtle warmth of cinnamon and nutmeg complements the natural sweetness of the potatoes without overwhelming them. For an elegant presentation, serve individual portions in ramekins garnished with candied pecans and a dusting of powdered sugar.
Cranberry Sauce with Orange Zest and Cloves
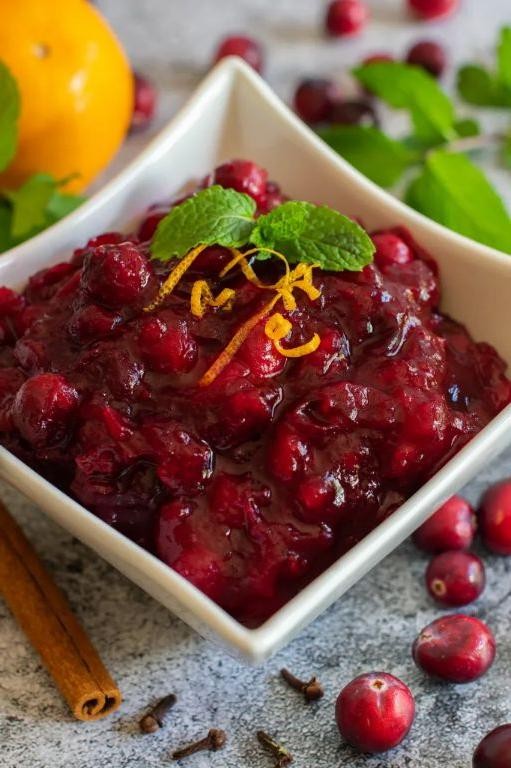
Unveiling the quintessential autumn condiment, this cranberry sauce elevates the traditional holiday staple with vibrant citrus notes and warming spice. The brilliant ruby hue and aromatic complexity will transform your holiday table into a sophisticated culinary experience. Perfectly balanced between tart and sweet, this sauce promises to become an instant family favorite.
8
servings10
minutes20
minutesIngredients
– 12 ounces fresh cranberries
– 1 cup granulated sugar
– 1 cup water
– 1 tablespoon orange zest
– 1/2 teaspoon ground cloves
Instructions
1. Rinse 12 ounces of fresh cranberries under cold water and discard any soft or discolored berries.
2. Combine 1 cup granulated sugar and 1 cup water in a medium saucepan over medium heat.
3. Stir the mixture continuously until the sugar completely dissolves, about 3-4 minutes.
4. Add the rinsed cranberries to the saucepan and bring to a gentle boil.
5. Reduce heat to medium-low and simmer for 10-12 minutes, stirring occasionally until most berries have burst open.
6. Stir in 1 tablespoon orange zest and 1/2 teaspoon ground cloves until fully incorporated.
7. Continue cooking for 2-3 additional minutes to allow the flavors to meld together.
8. Remove the saucepan from heat and let the sauce cool to room temperature, about 45-60 minutes.
9. Transfer the cooled cranberry sauce to an airtight container and refrigerate for at least 4 hours before serving.
What makes this cranberry sauce exceptional is its jewel-like texture with whole berries suspended in a glossy, thickened syrup. The bright citrus undertones from the orange zest beautifully complement the warm, aromatic cloves, creating a sophisticated flavor profile that enhances both sweet and savory dishes. Consider serving it alongside roasted turkey, spreading it on brie crostini, or even as an unexpected topping for vanilla ice cream.
Whipped Yukon Gold Potatoes with Garlic and Thyme
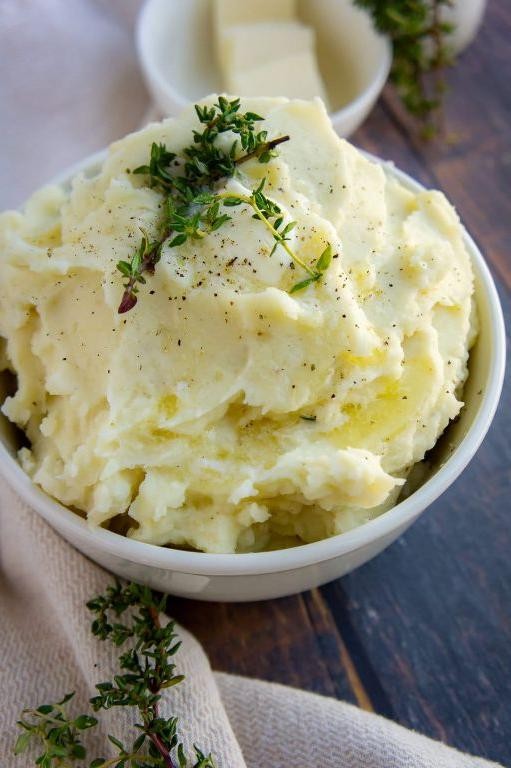
Luxuriously smooth and fragrant, these whipped Yukon Gold potatoes elevate the humble spud to new heights of culinary sophistication. Their delicate texture and aromatic infusion of garlic and fresh thyme create a side dish worthy of any special occasion. Perfectly balanced between creamy richness and herbal brightness, they transform ordinary meals into memorable dining experiences.
2
servings15
minutes18
minutesIngredients
- 2 pounds Yukon Gold potatoes
- 4 cloves garlic
- 2 tablespoons fresh thyme leaves
- 1 cup heavy cream
- 1/2 cup unsalted butter
- 1 teaspoon kosher salt
- 1/2 teaspoon black pepper
Instructions
- Peel 2 pounds Yukon Gold potatoes and cut into 1-inch cubes.
- Place potato cubes in a large pot and cover with cold water by 2 inches.
- Bring water to a boil over high heat, then reduce to a simmer and cook for 15-18 minutes until potatoes are fork-tender.
- While potatoes cook, peel and thinly slice 4 cloves garlic.
- Strip fresh thyme leaves from stems to yield 2 tablespoons.
- In a small saucepan, combine 1 cup heavy cream, 1/2 cup unsalted butter, sliced garlic, and thyme leaves.
- Heat cream mixture over medium-low heat until butter melts and mixture is warm to the touch (about 120°F), being careful not to boil.
- Drain cooked potatoes thoroughly in a colander, then return them to the warm pot for 1 minute to evaporate excess moisture.
- Pass hot potatoes through a ricer or food mill into a large bowl for the fluffiest texture.
- Gradually pour warm cream mixture into riced potatoes while whisking constantly.
- Continue whisking vigorously for 2-3 minutes until potatoes become light, airy, and completely smooth.
- Season whipped potatoes with 1 teaspoon kosher salt and 1/2 teaspoon black pepper, whisking to incorporate evenly.
Gliding across the palate with cloud-like lightness, these potatoes offer a subtle garlic essence that complements rather than overwhelms. The fresh thyme provides earthy undertones that balance the rich creaminess beautifully. Consider serving them as an elegant bed for roasted meats or topped with sautéed wild mushrooms for added texture and depth.
Honey-Dijon Brussels Sprouts with Bacon
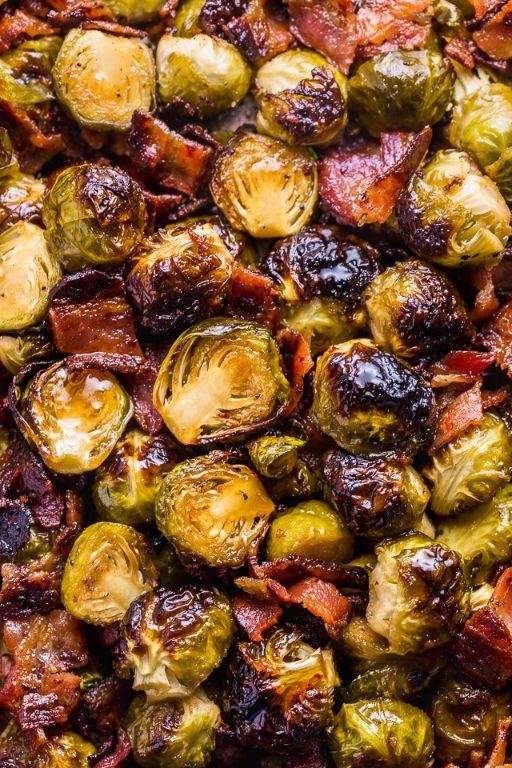
Perfectly balancing sweet and savory notes, these honey-Dijon Brussels sprouts transform the humble vegetable into an elegant side dish worthy of any holiday table. Crispy bacon adds smoky depth while a glossy glaze creates irresistible caramelization that will convert even the most skeptical sprout critics.
2
servings15
minutes47
minutesIngredients
- 1 ½ pounds Brussels sprouts
- 6 slices thick-cut bacon
- 3 tablespoons olive oil
- ½ teaspoon kosher salt
- ¼ teaspoon black pepper
- 3 tablespoons Dijon mustard
- 2 tablespoons honey
- 2 cloves garlic
- 1 tablespoon apple cider vinegar
Instructions
- Preheat your oven to 400°F and line a large baking sheet with parchment paper.
- Trim the stem ends from Brussels sprouts and cut any large sprouts in half lengthwise for even cooking.
- Arrange bacon slices in a single layer on the prepared baking sheet and bake for 12-15 minutes until crisp.
- Transfer cooked bacon to a paper towel-lined plate, reserving 2 tablespoons of bacon drippings on the baking sheet.
- In a large bowl, toss Brussels sprouts with olive oil, reserved bacon drippings, salt, and pepper until thoroughly coated.
- Spread sprouts in a single layer on the baking sheet and roast for 20 minutes at 400°F.
- Meanwhile, mince garlic and combine with Dijon mustard, honey, and apple cider vinegar in a small bowl.
- After 20 minutes, remove baking sheet and drizzle the honey-Dijon mixture over the partially roasted sprouts.
- Toss sprouts gently with the glaze using tongs, ensuring each piece gets coated evenly.
- Return to oven and roast for an additional 10-12 minutes until sprouts are tender with crispy, caramelized edges.
- While sprouts finish roasting, crumble the cooled bacon into small pieces.
- Remove sprouts from oven and immediately top with crumbled bacon before serving.
Vibrant with contrasting textures, these sprouts offer crisp-tender interiors beneath their sticky-sweet glaze, while the bacon provides salty crunch in every bite. Consider serving them alongside roasted chicken or as part of a holiday spread where their glossy appearance and complex flavor profile will shine. The caramelized edges and balanced acidity make them equally suited for elegant dinners or casual weeknight meals.
Pumpkin Cheesecake with Gingersnap Crust
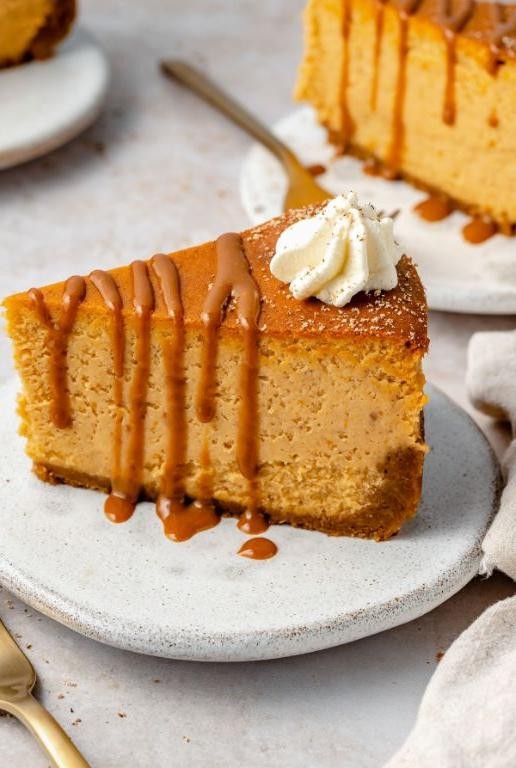
When autumn’s crisp air settles in and golden leaves begin their descent, there’s no dessert more emblematic of the season than this sophisticated pumpkin cheesecake. With its spicy gingersnap crust and velvety spiced filling, this creation masterfully balances rich creaminess with warm autumnal flavors, making it the perfect centerpiece for any harvest gathering.
8
servings25
minutes85
minutesIngredients
- 1 1/2 cups gingersnap cookie crumbs
- 1/4 cup granulated sugar
- 6 tablespoons unsalted butter, melted
- 24 ounces cream cheese, room temperature
- 1 cup granulated sugar
- 1/4 cup light brown sugar
- 15 ounces pumpkin puree
- 3 large eggs, room temperature
- 1 cup sour cream
- 1 teaspoon vanilla extract
- 1 teaspoon ground cinnamon
- 1/2 teaspoon ground ginger
- 1/4 teaspoon ground nutmeg
- 1/4 teaspoon ground cloves
- 1/4 teaspoon salt
Instructions
- Preheat your oven to 325°F and position the rack in the center of the oven.
- Combine 1 1/2 cups gingersnap cookie crumbs with 1/4 cup granulated sugar in a medium bowl.
- Pour 6 tablespoons melted unsalted butter over the crumb mixture and stir until the texture resembles wet sand.
- Press the crust mixture firmly into the bottom of a 9-inch springform pan, using the bottom of a measuring cup to create an even layer.
- Bake the crust for 10 minutes at 325°F until lightly fragrant and slightly darkened around the edges.
- Remove the crust from the oven and let it cool completely on a wire rack while you prepare the filling.
- Beat 24 ounces room temperature cream cheese with 1 cup granulated sugar and 1/4 cup light brown sugar in a stand mixer fitted with the paddle attachment on medium speed for 3 minutes until completely smooth and free of lumps.
- Add 15 ounces pumpkin puree and mix on low speed until fully incorporated, scraping down the sides of the bowl with a spatula.
- Mix in 3 room temperature eggs one at a time, waiting until each egg is fully incorporated before adding the next.
- Add 1 cup sour cream, 1 teaspoon vanilla extract, 1 teaspoon ground cinnamon, 1/2 teaspoon ground ginger, 1/4 teaspoon ground nutmeg, 1/4 teaspoon ground cloves, and 1/4 teaspoon salt, mixing on low speed just until combined.
- Pour the filling over the cooled crust and smooth the top with an offset spatula.
- Place the springform pan in a larger baking dish and create a water bath by pouring hot water into the larger dish until it reaches halfway up the sides of the springform pan.
- Bake at 325°F for 60-75 minutes until the edges are set but the center still jiggles slightly when gently shaken.
- Turn off the oven, crack the door open slightly, and let the cheesecake cool in the oven for 1 hour to prevent cracking.
- Remove the cheesecake from the water bath and run a thin knife around the edges to release it from the pan.
- Refrigerate the cheesecake for at least 8 hours or overnight before serving.
Meticulously crafted through gentle baking and patient chilling, this cheesecake achieves an impossibly smooth texture that melts luxuriously on the tongue. The spicy gingersnap crust provides a delightful crunch that contrasts beautifully with the silken pumpkin filling, while the complex spice profile deepens overnight. For an elegant presentation, garnish each slice with candied ginger and a drizzle of caramel sauce, or serve alongside a dollop of freshly whipped cream to complement the rich autumnal flavors.
Apple Crisp with Oatmeal Streusel Topping
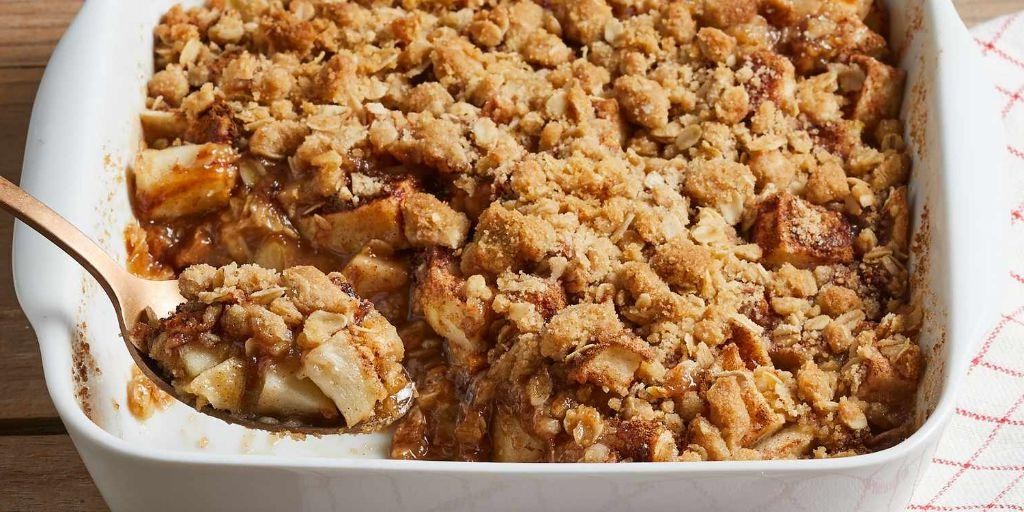
There’s something profoundly comforting about the marriage of tender, spiced apples and a crunchy oat topping that makes apple crisp the quintessential fall dessert. This version elevates the classic with an oatmeal streusel that bakes up golden and crisp, creating perfect textural contrast. Warm from the oven, it fills your kitchen with the irresistible aroma of cinnamon and baked fruit that promises pure autumnal bliss.
8
servings20
minutes40
minutesIngredients
– 6 cups sliced apples
– 1/2 cup granulated sugar
– 1 tbsp lemon juice
– 1 tsp ground cinnamon
– 1/4 tsp ground nutmeg
– 1 cup all-purpose flour
– 1 cup old-fashioned oats
– 3/4 cup brown sugar
– 1/2 cup cold unsalted butter
– 1/2 tsp salt
Instructions
1. Preheat your oven to 375°F and lightly grease a 9×13-inch baking dish.
2. In a large bowl, combine 6 cups sliced apples, 1/2 cup granulated sugar, 1 tablespoon lemon juice, 1 teaspoon ground cinnamon, and 1/4 teaspoon ground nutmeg until evenly coated.
3. Transfer the apple mixture to the prepared baking dish, spreading it into an even layer.
4. In a separate bowl, whisk together 1 cup all-purpose flour, 1 cup old-fashioned oats, 3/4 cup brown sugar, and 1/2 teaspoon salt.
5. Cut 1/2 cup cold unsalted butter into small cubes and add to the dry ingredients.
6. Using your fingertips or a pastry cutter, work the butter into the dry mixture until it resembles coarse crumbs with some pea-sized pieces remaining.
7. Sprinkle the streusel topping evenly over the apple mixture, covering it completely.
8. Place the baking dish in the preheated oven and bake for 35-45 minutes, until the topping is golden brown and the filling is bubbly around the edges.
9. Remove from the oven and let cool on a wire rack for at least 20 minutes before serving.
Buttery, crisp, and warmly spiced, this dessert achieves perfect harmony between the soft, jammy apples and the crunchy oat topping. For an extra indulgence, serve it warm with a scoop of vanilla bean ice cream melting into the crevices, or enjoy it cold the next day when the flavors have deepened and melded beautifully.
Conclusion
Here’s a collection of 20 delicious Canadian Thanksgiving recipes to make your feast truly special. From classic mains to festive sides and desserts, there’s something for everyone to enjoy. We’d love to hear which recipes become your favorites—leave a comment below and don’t forget to share this roundup on Pinterest to spread the holiday inspiration!


