Kickstart your journey to healthier eating with these 29 delicious, calorie-conscious recipes perfect for a balanced meal plan! Whether you’re craving quick dinners, seasonal favorites, or satisfying comfort food, we’ve got you covered with options that don’t skimp on flavor. Dive in to discover mouthwatering dishes that make eating well easy and enjoyable—your next favorite meal is just a scroll away!
Low-Calorie Lemon Herb Grilled Chicken
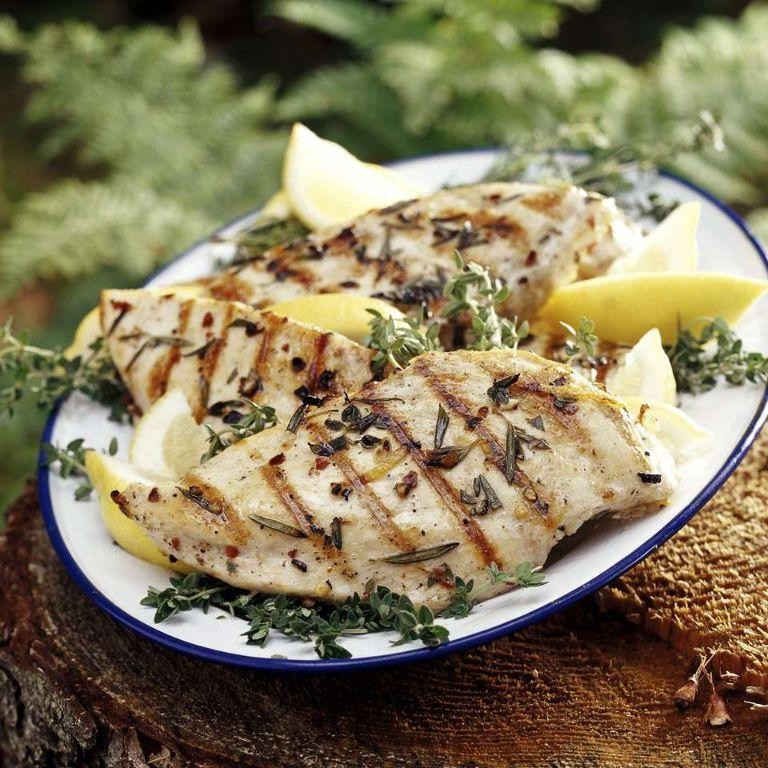
Craving something that won’t make your scale weep but still delivers on flavor? This low-calorie lemon herb grilled chicken is here to save your dinner—and your waistline—with zesty vibes and juicy results that’ll make you forget you’re eating healthy.
2
servings35
minutes12
minutesIngredients
– 4 boneless, skinless chicken breasts
– 1/4 cup fresh lemon juice
– 2 tbsp olive oil
– 2 cloves garlic, minced
– 1 tbsp fresh rosemary, chopped
– 1 tsp dried oregano
– 1/2 tsp salt
– 1/4 tsp black pepper
Instructions
1. Place chicken breasts between two sheets of plastic wrap and pound to an even 1/2-inch thickness using a meat mallet or rolling pin.
2. Whisk together lemon juice, olive oil, minced garlic, chopped rosemary, dried oregano, salt, and black pepper in a medium bowl.
3. Add chicken breasts to the marinade, turning to coat completely.
4. Cover the bowl with plastic wrap and refrigerate for at least 30 minutes or up to 2 hours.
5. Preheat your grill to medium-high heat (400-450°F) and lightly oil the grates.
6. Remove chicken from marinade, letting excess drip off, and discard remaining marinade.
7. Place chicken on the preheated grill and cook for 5-6 minutes.
8. Flip chicken using tongs and cook for another 5-6 minutes.
9. Check for doneness by inserting an instant-read thermometer into the thickest part—it should read 165°F.
10. Transfer grilled chicken to a clean plate and let rest for 5 minutes before slicing or serving.
Get ready for chicken that’s tender with a perfect char and bursting with bright lemon and earthy herbs. Serve it sliced over a crisp salad, tucked into warm tortillas, or alongside grilled veggies for a meal that’s as versatile as it is delicious.
Skinny Spaghetti Squash Primavera
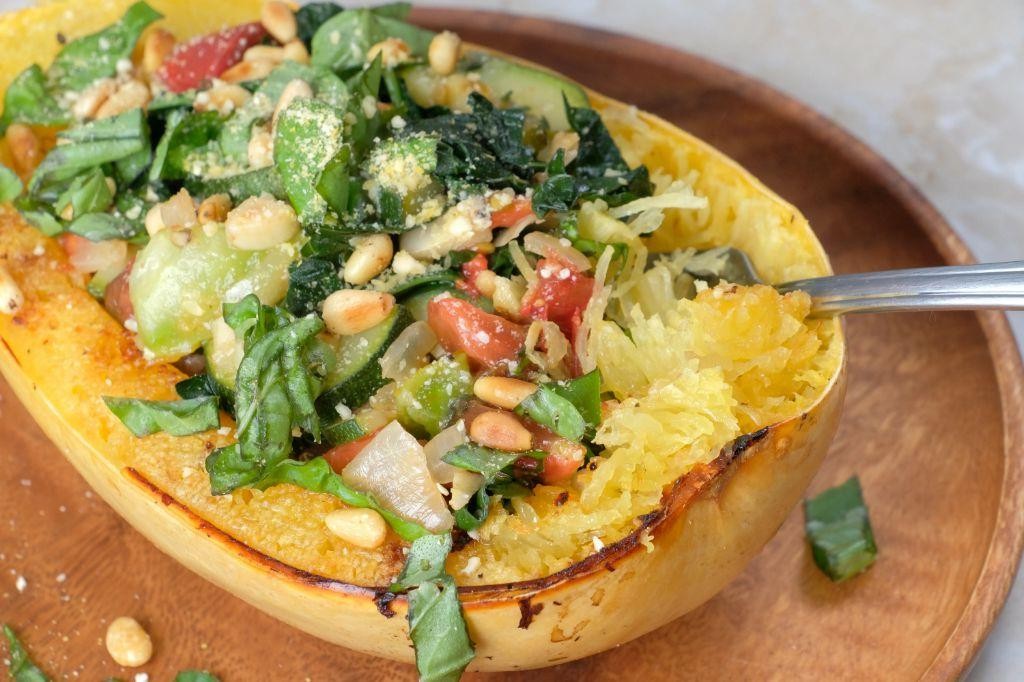
Eager to ditch the pasta guilt but keep all the flavor? Meet your new best friend: skinny spaghetti squash primavera, where vibrant spring veggies mingle with nature’s noodle imposter in a dish so satisfying, you’ll forget it’s actually good for you. This colorful creation proves that healthy eating doesn’t have to be boring—it just needs better PR and a seriously delicious sauce.
3
servings20
minutes50
minutesIngredients
– 1 large spaghetti squash
– 2 tablespoons olive oil
– 1 teaspoon salt
– 1/2 teaspoon black pepper
– 1 yellow onion, diced
– 2 cloves garlic, minced
– 1 red bell pepper, sliced
– 1 cup cherry tomatoes, halved
– 1 zucchini, sliced
– 1/2 cup vegetable broth
– 1/4 cup grated Parmesan cheese
– 2 tablespoons fresh basil, chopped
Instructions
1. Preheat your oven to 400°F and line a baking sheet with parchment paper.
2. Carefully slice the spaghetti squash in half lengthwise using a sharp chef’s knife—pro tip: microwave the whole squash for 2 minutes first to soften the skin and make cutting safer.
3. Scoop out all the seeds and stringy pulp from both squash halves with a spoon.
4. Brush the cut sides of the squash with 1 tablespoon of olive oil and sprinkle with 1/2 teaspoon of salt and 1/4 teaspoon of black pepper.
5. Place the squash halves cut-side down on the prepared baking sheet and roast for 35-40 minutes until the flesh easily shreds with a fork.
6. While the squash roasts, heat the remaining 1 tablespoon of olive oil in a large skillet over medium heat.
7. Add the diced yellow onion and cook for 4-5 minutes until translucent and fragrant.
8. Stir in the minced garlic and cook for 1 minute until golden but not browned—watch carefully as burnt garlic turns bitter.
9. Add the sliced red bell pepper and cook for 3 minutes until slightly softened.
10. Add the halved cherry tomatoes and sliced zucchini, cooking for 4-5 minutes until the tomatoes begin to burst and release their juices.
11. Pour in the vegetable broth and bring to a simmer, scraping any browned bits from the bottom of the pan for extra flavor.
12. Season the vegetable mixture with the remaining 1/2 teaspoon of salt and 1/4 teaspoon of black pepper.
13. Once the squash is roasted, use a fork to scrape the flesh into spaghetti-like strands into the skillet with the vegetables.
14. Toss everything together gently to combine and heat through for 2 minutes.
15. Remove from heat and stir in the grated Parmesan cheese and chopped fresh basil.
16. Serve immediately while warm.
But here’s the beautiful part: the squash strands maintain just enough bite to feel satisfyingly noodle-like, while the medley of fresh vegetables creates a symphony of sweet, savory, and slightly tangy notes. Try serving it in the roasted squash shells for a stunning presentation that’ll make your dinner guests think you graduated from culinary school, or top with extra Parmesan and red pepper flakes for those who like a little heat with their healthy.
Guilt-Free Zucchini Noodles with Pesto
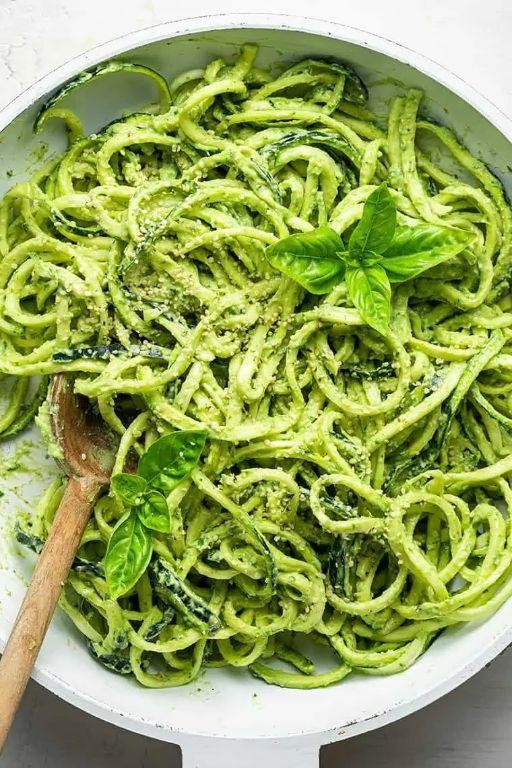
Aren’t you tired of pretending to enjoy those sad, watery zucchini noodles that taste like disappointment? Let’s transform those green spirals into a pesto-packed party that’ll make you forget pasta ever existed—no willpower required, just pure deliciousness.
5
servings25
minutes4
minutesIngredients
– 4 medium zucchinis
– 2 cups fresh basil leaves
– 1/2 cup grated Parmesan cheese
– 1/3 cup pine nuts
– 2 garlic cloves
– 1/2 cup extra virgin olive oil
– 1 tbsp lemon juice
– 1/2 tsp salt
– 1/4 tsp black pepper
Instructions
1. Wash and trim ends from 4 medium zucchinis.
2. Spiralize zucchinis using a spiralizer fitted with the medium blade.
3. Place zucchini noodles in a colander and sprinkle with 1/2 tsp salt.
4. Let zucchini noodles drain for 15 minutes to remove excess moisture.
5. Toast 1/3 cup pine nuts in a dry skillet over medium heat for 3-4 minutes until golden brown, shaking pan frequently.
6. Combine 2 cups fresh basil leaves, toasted pine nuts, 2 garlic cloves, and 1/2 cup grated Parmesan cheese in a food processor.
7. Pulse mixture 5-6 times until coarsely chopped.
8. With food processor running, slowly drizzle in 1/2 cup extra virgin olive oil until pesto becomes smooth and emulsified.
9. Add 1 tbsp lemon juice and 1/4 tsp black pepper to pesto, then pulse 2 more times to combine.
10. Pat zucchini noodles dry with paper towels to remove remaining moisture.
11. Toss zucchini noodles with pesto sauce in a large bowl until evenly coated.
12. Serve immediately or refrigerate for up to 2 hours before serving.
Unbelievably fresh and vibrant, these zucchini noodles offer a satisfying crunch that plays perfectly against the creamy, garlicky pesto. The lemon juice cuts through the richness beautifully, making this dish feel both indulgent and light—try topping it with grilled shrimp or cherry tomatoes for an extra pop of color and flavor that’ll make your taste buds do a happy dance.
Healthy Turkey and Quinoa Stuffed Peppers
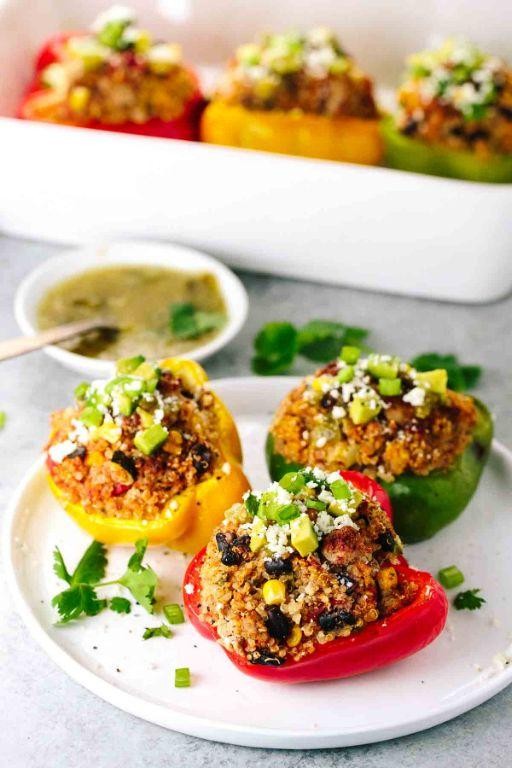
Vibrantly colored bell peppers get a seriously delicious glow-up in this recipe, transforming from simple salad bar staples into edible bowls packed with protein-packed goodness that’ll make your taste buds do a happy dance. Forget boring diet food—these stuffed peppers are here to prove that healthy eating can be downright delightful and full of flavor. Let’s get stuffing!
3
servings20
minutes50
minutesIngredients
- 4 large bell peppers
- 1 lb ground turkey
- 1 cup uncooked quinoa
- 2 cups low-sodium chicken broth
- 1 medium yellow onion, diced
- 3 cloves garlic, minced
- 1 tbsp olive oil
- 1 tsp dried oregano
- 1/2 tsp paprika
- 1/2 cup shredded mozzarella cheese
- 1/4 cup chopped fresh parsley
- Salt and black pepper to taste
Instructions
- Preheat your oven to 375°F and line a baking sheet with parchment paper.
- Slice the tops off all 4 bell peppers and remove the seeds and membranes.
- Place the hollowed peppers cut-side up on the prepared baking sheet.
- Rinse 1 cup of quinoa thoroughly in a fine-mesh strainer to remove the natural bitter coating.
- Heat 1 tablespoon of olive oil in a large skillet over medium-high heat.
- Add the diced onion and cook for 4-5 minutes until translucent and fragrant.
- Add the minced garlic and cook for 30 seconds until aromatic but not browned.
- Add the ground turkey, breaking it up with a spatula, and cook for 6-7 minutes until no pink remains.
- Season the turkey mixture with 1 teaspoon dried oregano, 1/2 teaspoon paprika, salt, and black pepper.
- Stir in the rinsed quinoa and 2 cups of chicken broth, bringing everything to a boil.
- Reduce heat to low, cover the skillet, and simmer for 15 minutes until quinoa is tender and liquid is absorbed.
- Remove the skillet from heat and stir in 1/4 cup chopped fresh parsley.
- Spoon the turkey-quinoa mixture evenly into the prepared bell pepper shells.
- Sprinkle 1/2 cup shredded mozzarella cheese evenly over the tops of all stuffed peppers.
- Bake at 375°F for 25-30 minutes until peppers are tender and cheese is golden and bubbly.
- Remove from oven and let rest for 5 minutes before serving to allow filling to set.
Getting these peppers to the table is worth the wait—the quinoa stays wonderfully fluffy while the turkey keeps everything satisfyingly hearty. That melty mozzarella creates the perfect golden crust against the sweet, tender pepper walls. Try serving them alongside a crisp green salad or, for extra fun, slice them into colorful rings that reveal the beautiful layered filling inside!
Baked Salmon with Citrus and Dill
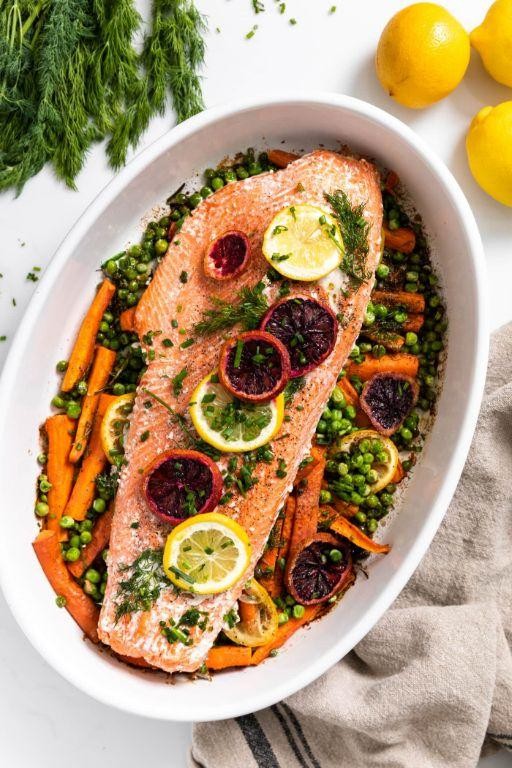
Nailed that fancy restaurant flavor without the fancy restaurant price? You bet! This baked salmon with citrus and dill is about to become your weeknight hero, delivering restaurant-quality vibes with minimal effort and maximum deliciousness. Get ready to impress your taste buds (and maybe even your mother-in-law) with this zesty, herbaceous wonder.
5
servings15
minutes15
minutesIngredients
– 1.5 lbs salmon fillet
– 2 tbsp olive oil
– 1 lemon
– 1 orange
– 2 tbsp fresh dill
– 1 tsp salt
– 1/2 tsp black pepper
– 2 cloves garlic
Instructions
1. Preheat your oven to 400°F and line a baking sheet with parchment paper.
2. Pat the 1.5 lbs salmon fillet completely dry with paper towels to ensure crispy skin.
3. Drizzle 2 tbsp olive oil evenly over both sides of the salmon.
4. Squeeze the juice from half the lemon and half the orange directly onto the salmon.
5. Mince 2 cloves garlic and sprinkle evenly over the fish.
6. Chop 2 tbsp fresh dill and distribute across the salmon surface.
7. Season with 1 tsp salt and 1/2 tsp black pepper, rubbing gently into the flesh.
8. Slice the remaining lemon and orange halves into thin rounds.
9. Arrange the citrus slices in a single layer on the prepared baking sheet.
10. Place the seasoned salmon skin-side down on top of the citrus bed.
11. Bake at 400°F for 12-15 minutes until the internal temperature reaches 145°F.
12. Let rest for 5 minutes before serving to allow juices to redistribute.
Perfectly flaky with a bright citrus kick that cuts through the richness, this salmon practically begs to be paired with roasted asparagus or served over a bed of quinoa. The dill adds that fresh garden note that makes you feel fancy while eating in your pajamas – now that’s what we call winning at dinner!
Light and Flavorful Vegetable Stir-Fry
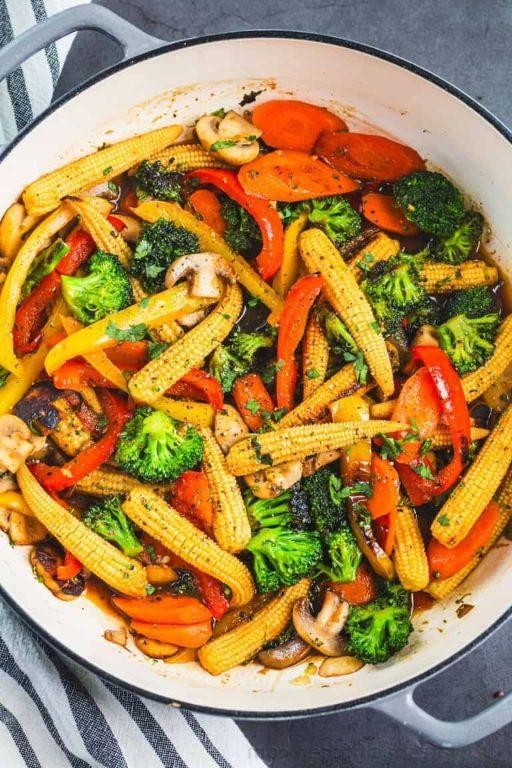
Mmm, are your taste buds ready to do the happy dance? This isn’t your average, sad-looking veggie pile—it’s a vibrant, sizzling celebration in a pan that’ll make you forget all about those takeout menus. Get ready to whip up something truly spectacular in minutes!
2
servings15
minutes12
minutesIngredients
– 2 tbsp vegetable oil
– 1 medium yellow onion, thinly sliced
– 2 cloves garlic, minced
– 1 red bell pepper, sliced into strips
– 1 cup broccoli florets
– 1 medium carrot, julienned
– 1 cup snap peas
– 3 tbsp soy sauce
– 1 tbsp rice vinegar
– 1 tsp sesame oil
– 1 tsp grated fresh ginger
– 1/4 tsp red pepper flakes
Instructions
1. Heat 2 tbsp vegetable oil in a large wok or skillet over medium-high heat until it shimmers, about 1 minute.
2. Add 1 medium yellow onion, thinly sliced, and cook while stirring constantly until translucent, about 3-4 minutes.
3. Stir in 2 cloves garlic, minced, and cook until fragrant, about 30 seconds (tip: don’t let the garlic brown or it will turn bitter).
4. Add 1 red bell pepper, sliced into strips, 1 cup broccoli florets, and 1 medium carrot, julienned, then stir-fry for 4 minutes until vegetables are crisp-tender.
5. Incorporate 1 cup snap peas and continue cooking for 2 more minutes.
6. In a small bowl, whisk together 3 tbsp soy sauce, 1 tbsp rice vinegar, 1 tsp sesame oil, 1 tsp grated fresh ginger, and 1/4 tsp red pepper flakes.
7. Pour the sauce mixture over the vegetables (tip: pour it around the edges of the pan so it sizzles and caramelizes instantly).
8. Toss everything together vigorously for 1-2 minutes until the sauce evenly coats all vegetables (tip: use tongs for the best tossing action and even distribution).
9. Remove from heat immediately when vegetables are brightly colored and still slightly crisp.
Vividly colorful and bursting with fresh energy, this stir-fry delivers a satisfying crunch in every bite alongside that perfect salty-sweet-tangy sauce harmony. Try serving it over quinoa for a protein boost, or stuff it into warm tortillas for unexpected veggie wraps that’ll make your lunchbox the envy of the office!
Cauliflower Rice with Garlic and Ginger
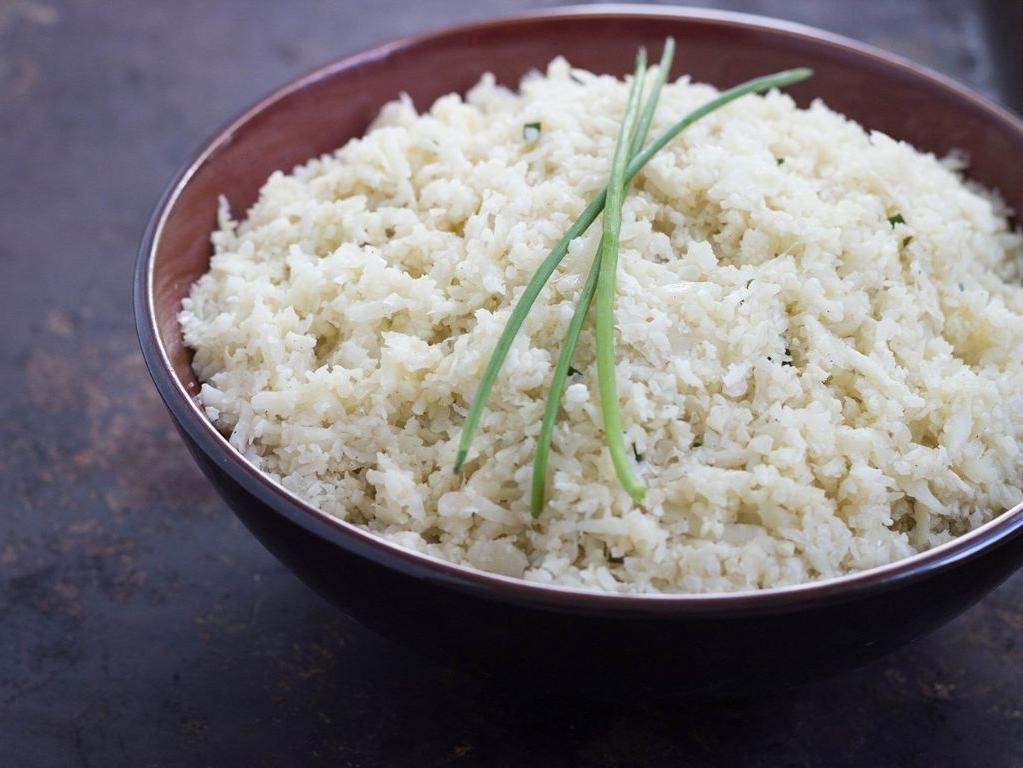
Gather ’round, cauliflower skeptics and rice revolutionaries! This isn’t your average bland veggie impersonation—we’re about to transform humble cauliflower into a fragrant, flavor-packed side dish that’ll make you forget traditional rice ever existed. Get ready for a garlicky, gingery revelation that’s so delicious, you might just start planning your next meal before you’ve finished this one.
3
servings15
minutes7
minutesIngredients
– 1 large head cauliflower
– 2 tbsp olive oil
– 3 cloves garlic
– 1 tbsp fresh ginger
– 1/4 tsp salt
– 1/8 tsp black pepper
– 2 tbsp chopped green onions
– 1 tbsp soy sauce
– 1 tsp sesame oil
Instructions
1. Cut the cauliflower head into florets, removing the tough core and leaves.
2. Working in batches, pulse cauliflower florets in a food processor until they reach a rice-like texture with no large chunks remaining.
3. Mince 3 cloves of garlic finely to ensure even distribution throughout the dish.
4. Peel and grate 1 tablespoon of fresh ginger using the fine side of a box grater.
5. Heat 2 tablespoons of olive oil in a large skillet over medium-high heat until shimmering.
6. Add minced garlic and grated ginger to the hot oil, sautéing for exactly 30 seconds until fragrant but not browned.
7. Add the cauliflower rice to the skillet, spreading it in an even layer.
8. Cook undisturbed for 2 minutes to allow the bottom layer to develop light browning.
9. Stir the cauliflower rice thoroughly, then continue cooking for 4-5 minutes until tender but still slightly crisp.
10. Season with 1/4 teaspoon salt and 1/8 teaspoon black pepper, stirring to combine evenly.
11. Drizzle 1 tablespoon of soy sauce over the cauliflower rice, tossing to coat completely.
12. Remove skillet from heat and stir in 1 teaspoon of sesame oil for nutty aroma.
13. Garnish with 2 tablespoons of chopped green onions just before serving.
Vibrant and satisfying, this cauliflower rice delivers a delightful crunch that plays beautifully against the punchy garlic and warming ginger notes. The sesame oil adds a subtle nuttiness that makes this dish feel surprisingly luxurious—perfect as a base for stir-fries, alongside grilled proteins, or even stuffed into lettuce cups for a low-carb taco night twist that’ll have everyone asking for seconds.
Spicy Black Bean and Sweet Potato Tacos
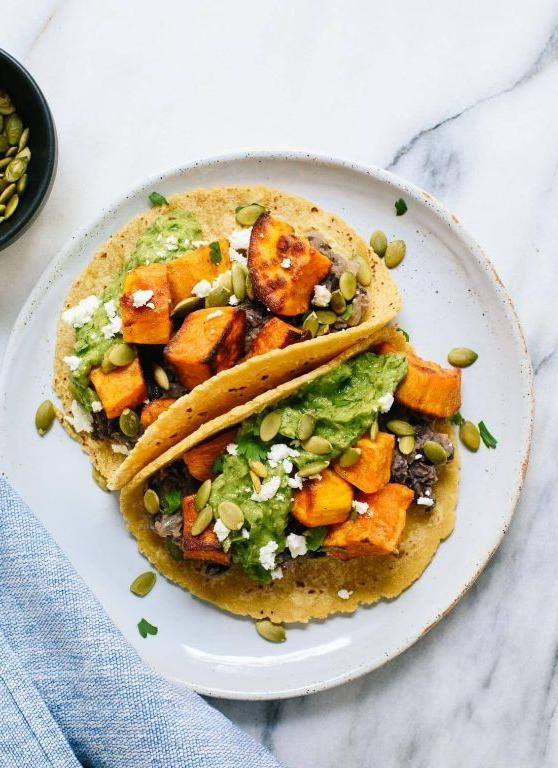
Brace yourselves, taco enthusiasts, because we’re about to upgrade Taco Tuesday from a humble tradition to a full-blown fiesta that’ll make your taste buds do the salsa. These aren’t your average ground beef affairs; we’re talking a glorious mash-up of smoky sweet potatoes and zesty black beans that pack a punch. Get ready to ditch the boring and embrace the brilliantly spicy.
8
tacos15
minutes25
minutesIngredients
– 2 large sweet potatoes, peeled and diced into 1/2-inch cubes
– 1 tbsp olive oil
– 1 tsp chili powder
– 1/2 tsp smoked paprika
– 1/4 tsp cayenne pepper
– 1 (15 oz) can black beans, rinsed and drained
– 1/2 cup red onion, finely diced
– 1 jalapeño, seeds removed and minced
– 2 tbsp fresh lime juice
– 1/4 cup fresh cilantro, chopped
– 8 small corn tortillas
– 1/2 cup crumbled cotija cheese
– 1/2 cup sour cream
Instructions
1. Preheat your oven to 400°F (200°C) and line a baking sheet with parchment paper.
2. In a large bowl, toss the diced sweet potatoes with 1 tablespoon of olive oil, 1 teaspoon of chili powder, 1/2 teaspoon of smoked paprika, and 1/4 teaspoon of cayenne pepper until evenly coated.
3. Spread the seasoned sweet potatoes in a single layer on the prepared baking sheet.
4. Roast the sweet potatoes for 20-25 minutes, or until they are tender and slightly caramelized at the edges, flipping them halfway through for even cooking. (Tip: Don’t overcrowd the pan, or they’ll steam instead of roast.)
5. While the sweet potatoes roast, combine the rinsed black beans, diced red onion, minced jalapeño, 2 tablespoons of fresh lime juice, and chopped cilantro in a medium bowl.
6. Warm the corn tortillas one at a time in a dry skillet over medium heat for about 30 seconds per side, until pliable and lightly toasted. (Tip: Keep them warm by wrapping them in a clean kitchen towel.)
7. To assemble each taco, place a warm tortilla on a plate and top it with a scoop of the roasted sweet potatoes.
8. Spoon the black bean mixture over the sweet potatoes.
9. Garnish each taco with a sprinkle of crumbled cotija cheese and a dollop of sour cream. (Tip: For extra kick, add a dash of hot sauce before serving.)
Now, let’s talk about that first glorious bite: the soft, warm tortilla gives way to creamy sweet potatoes with a smoky kick, while the zesty black bean salsa adds a fresh, crunchy contrast. Nothing beats the melty, salty cotija cheese mingling with the cool sour cream—it’s a texture party in your mouth. For a next-level move, serve these with a side of tangy mango salsa or pile them high for a seriously impressive (and delicious) dinner centerpiece.
Herbed Grilled Shrimp Skewers
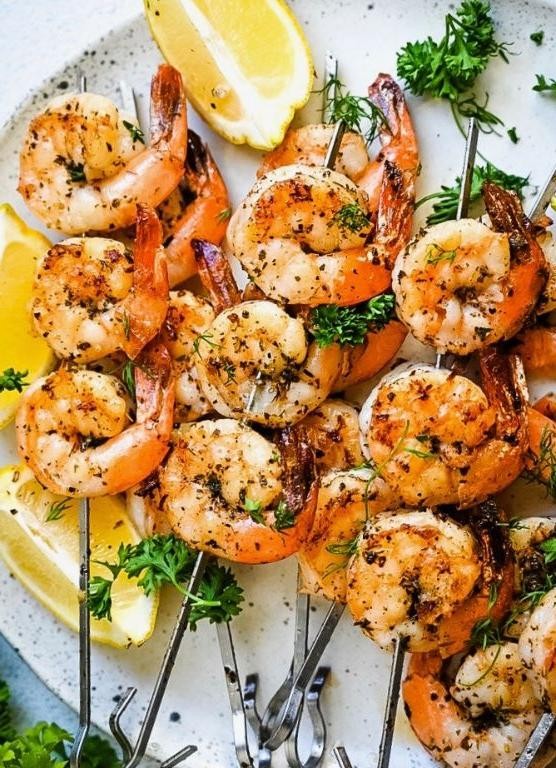
Mmm, get ready to make your taste buds do a happy dance! These herbed grilled shrimp skewers are the ultimate summer flex—they’re so quick, so flavorful, and so ridiculously easy that you’ll wonder why you ever bothered with complicated mains. Seriously, if you can thread a needle (or, you know, a shrimp), you’re already halfway to grilling glory.
8
skewers15
minutes4
minutesIngredients
– 1 lb large shrimp, peeled and deveined
– 2 tbsp olive oil
– 2 cloves garlic, minced
– 1 tbsp fresh lemon juice
– 1 tsp dried oregano
– 1 tsp dried thyme
– 1/2 tsp salt
– 1/4 tsp black pepper
– 8 wooden skewers, soaked in water for 30 minutes
Instructions
1. Soak 8 wooden skewers in water for 30 minutes to prevent burning on the grill.
2. Pat 1 lb of large shrimp completely dry with paper towels to ensure a good sear.
3. In a medium bowl, whisk together 2 tbsp olive oil, 2 cloves minced garlic, 1 tbsp fresh lemon juice, 1 tsp dried oregano, 1 tsp dried thyme, 1/2 tsp salt, and 1/4 tsp black pepper.
4. Add the dried shrimp to the bowl and toss until evenly coated with the marinade.
5. Thread 3-4 shrimp onto each soaked skewer, leaving small gaps between them for even cooking.
6. Preheat your grill to medium-high heat (400°F) and lightly oil the grates.
7. Place the shrimp skewers on the grill and cook for 2 minutes without moving them to develop grill marks.
8. Flip the skewers and cook for another 2 minutes until the shrimp are opaque and firm to the touch.
9. Remove the skewers from the grill immediately to prevent overcooking.
Yes, these skewers are a total win—they’re juicy with a subtle smokiness from the grill, and the herby garlic-lemon marinade makes them pop with bright, fresh flavor. Serve them piled high on a platter with a squeeze of extra lemon, or tuck them into warm tortillas with a crunchy slaw for the ultimate shrimp taco night.
Creamy Avocado and Tomato Salad
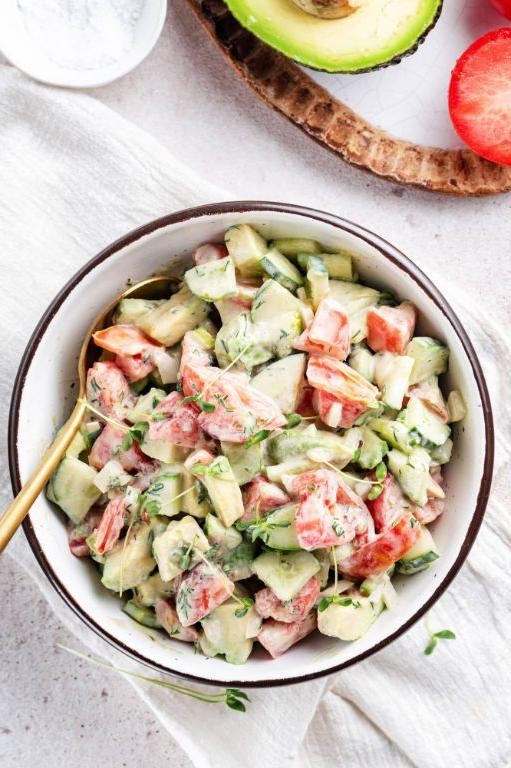
Dare we say there’s a salad that actually makes you excited about eating your greens? This creamy avocado and tomato situation is basically summer in a bowl—so fresh, so vibrant, it might just convince you that healthy eating is actually fun (and delicious). Forget boring salads; this one’s got personality, creaminess, and a color palette that would make a rainbow jealous.
4
servings15
minutesIngredients
– 2 large ripe avocados
– 1 pint cherry tomatoes
– 1/4 cup red onion
– 1/4 cup fresh cilantro
– 2 tbsp lime juice
– 2 tbsp olive oil
– 1/2 tsp salt
– 1/4 tsp black pepper
Instructions
1. Cut the cherry tomatoes in half lengthwise using a sharp knife.
2. Dice the red onion into 1/4-inch pieces for even distribution.
3. Chop the fresh cilantro leaves, discarding the tough stems.
4. Halve the avocados lengthwise, remove the pits, and scoop the flesh into a medium bowl.
5. Mash the avocado with a fork until it reaches a chunky, spreadable consistency.
6. Add the halved cherry tomatoes, diced red onion, and chopped cilantro to the bowl with the mashed avocado.
7. Pour 2 tablespoons of lime juice and 2 tablespoons of olive oil over the mixture.
8. Sprinkle 1/2 teaspoon of salt and 1/4 teaspoon of black pepper evenly across the ingredients.
9. Gently fold all ingredients together with a spatula until just combined, being careful not to overmix and turn the avocado mushy.
10. Let the salad sit at room temperature for 5 minutes to allow the flavors to meld.
11. Serve immediately on a plate or in a bowl.
Let’s be real—the velvety avocado mash clings to every juicy tomato half, while the sharp red onion and zesty lime keep things from getting too rich. Try scooping it onto crunchy tortilla chips for a next-level dip, or pile it high on grilled chicken for a main dish that doesn’t skimp on flavor.
Low-Calorie Eggplant Parmesan
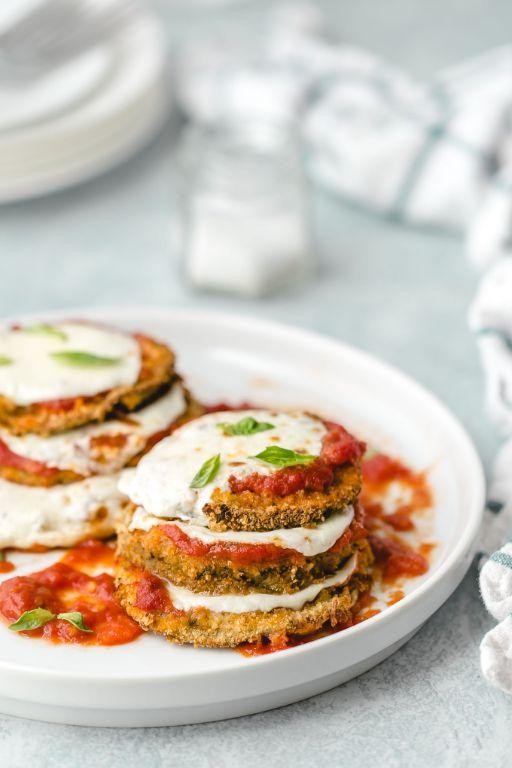
Zesty, guilt-free Italian comfort is calling your name! This low-calorie eggplant parmesan swaps the usual deep-fry for a crispy baked situation that’ll have you doing a happy dance without the post-pasta bloat. Who said healthy eating couldn’t be deliciously dramatic?
2
servings30
minutes60
minutesIngredients
– 2 medium eggplants
– 1 cup all-purpose flour
– 2 large eggs
– 2 cups panko breadcrumbs
– 1/2 cup grated parmesan cheese
– 2 cups marinara sauce
– 1 cup part-skim mozzarella cheese
– 2 tbsp olive oil
– 1 tsp salt
– 1/2 tsp black pepper
– 1/2 tsp garlic powder
Instructions
1. Preheat your oven to 425°F and line two baking sheets with parchment paper.
2. Slice the eggplants into 1/4-inch thick rounds using a sharp knife.
3. Sprinkle the eggplant slices with salt and let them sit for 15 minutes to draw out excess moisture.
4. Pat the eggplant slices completely dry with paper towels to ensure maximum crispiness.
5. Set up three shallow bowls: one with flour, one with beaten eggs, and one with panko breadcrumbs mixed with parmesan cheese, garlic powder, and black pepper.
6. Dredge each eggplant slice first in flour, shaking off any excess.
7. Dip the floured slice into the beaten eggs, coating both sides.
8. Press the egg-coated slice into the panko mixture, ensuring an even coating on both sides.
9. Arrange the breaded eggplant slices in a single layer on the prepared baking sheets.
10. Lightly spray or brush the tops with olive oil using a pastry brush for even browning.
11. Bake for 20 minutes, then flip each slice and bake for another 15 minutes until golden brown and crispy.
12. Spread 1/2 cup of marinara sauce in the bottom of a 9×13 inch baking dish.
13. Arrange half of the baked eggplant slices in a single layer over the sauce.
14. Top with 3/4 cup of marinara sauce and 1/2 cup of shredded mozzarella cheese.
15. Repeat with remaining eggplant slices, sauce, and cheese.
16. Bake at 375°F for 25 minutes until the cheese is bubbly and lightly browned.
17. Let the dish rest for 10 minutes before serving to allow the layers to set properly.
Buttery crisp eggplant layers meld beautifully with tangy marinara and gooey cheese in this lighter take on comfort food. Serve it over zucchini noodles for a complete low-carb meal, or pair with a simple arugula salad to balance the richness. The texture stays miraculously firm despite skipping the traditional frying, proving that healthy swaps can be just as satisfying as the original!
Hearty Lentil and Vegetable Soup
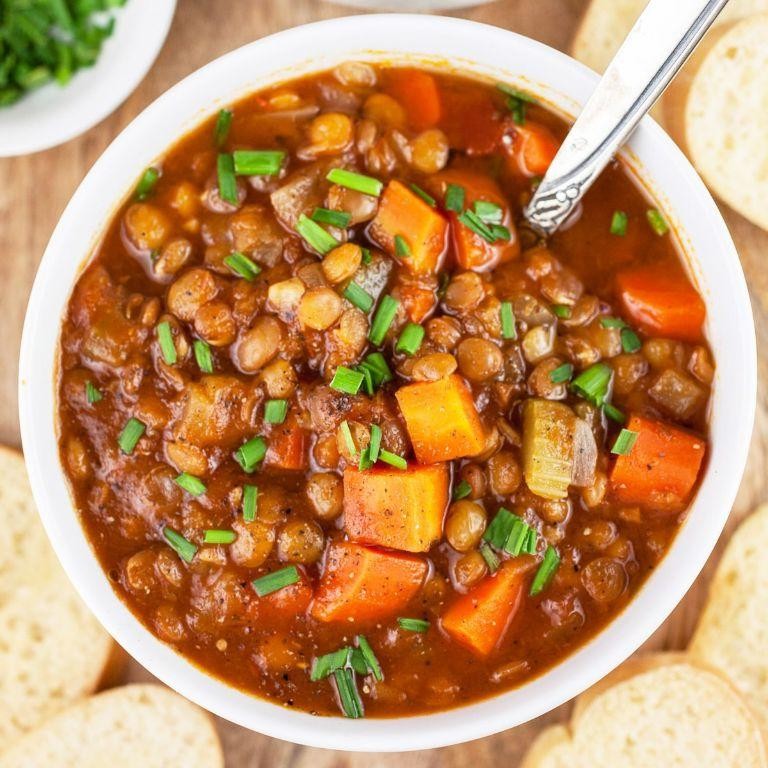
Eager for a soup that hugs your soul tighter than your favorite sweater? This hearty lentil and vegetable soup is the cozy, one-pot wonder your chilly evenings have been dreaming of—packed with earthy lentils, vibrant veggies, and a broth so flavorful, it’ll make your taste buds do a happy dance.
5
servings15
minutes40
minutesIngredients
– 1 tbsp olive oil
– 1 medium onion, diced
– 2 carrots, chopped
– 2 celery stalks, chopped
– 3 cloves garlic, minced
– 1 cup brown lentils, rinsed
– 6 cups vegetable broth
– 1 (14.5 oz) can diced tomatoes
– 1 tsp dried thyme
– 1 bay leaf
– 1/2 tsp salt
– 1/4 tsp black pepper
– 2 cups fresh spinach
– 1 tbsp lemon juice
Instructions
1. Heat 1 tbsp olive oil in a large pot over medium heat for 2 minutes until shimmering.
2. Add 1 medium diced onion, 2 chopped carrots, and 2 chopped celery stalks; sauté for 7 minutes until softened.
3. Stir in 3 minced garlic cloves and cook for 1 minute until fragrant.
4. Pour in 1 cup rinsed brown lentils, 6 cups vegetable broth, 1 can diced tomatoes, 1 tsp dried thyme, 1 bay leaf, 1/2 tsp salt, and 1/4 tsp black pepper.
5. Bring the mixture to a boil, then reduce heat to low, cover, and simmer for 30 minutes until lentils are tender.
6. Stir in 2 cups fresh spinach and cook for 2 minutes until wilted.
7. Remove the pot from heat, discard the bay leaf, and stir in 1 tbsp lemon juice. Now, nothing beats the velvety texture of tender lentils mingling with vibrant veggies in a broth that’s both rich and bright—serve it with crusty bread for dipping or top with a sprinkle of Parmesan to make it extra indulgent.
Zesty Lime and Cilantro Grilled Chicken
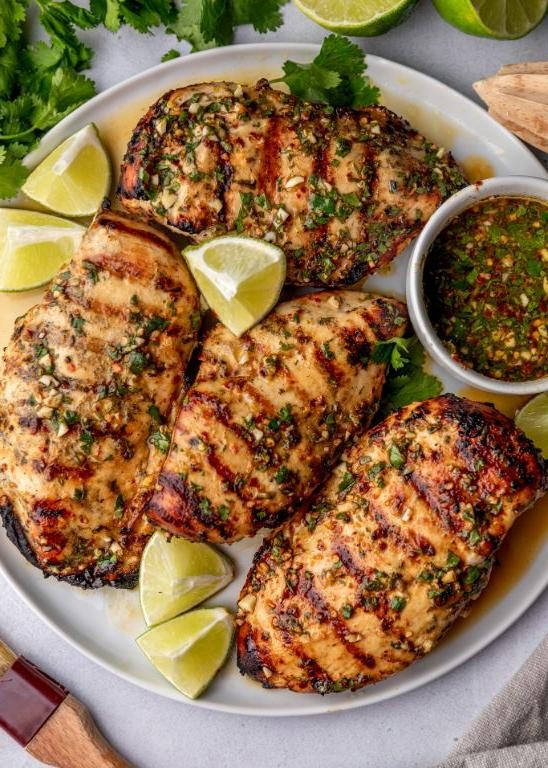
Jazzed up and ready to transform your basic chicken game? This zesty lime and cilantro grilled chicken is about to become your grill’s new BFF, bringing a fiesta of flavor that’ll make your taste buds do a happy dance while saving you from another boring poultry predicament.
2
servings10
minutes14
minutesIngredients
– 4 boneless, skinless chicken breasts
– 1/4 cup fresh lime juice
– 2 tbsp olive oil
– 1/4 cup chopped fresh cilantro
– 2 cloves garlic, minced
– 1 tsp ground cumin
– 1/2 tsp chili powder
– 1/2 tsp salt
– 1/4 tsp black pepper
Instructions
1. Combine 1/4 cup fresh lime juice, 2 tbsp olive oil, 1/4 cup chopped fresh cilantro, 2 cloves minced garlic, 1 tsp ground cumin, 1/2 tsp chili powder, 1/2 tsp salt, and 1/4 tsp black pepper in a medium bowl.
2. Place 4 boneless, skinless chicken breasts in a large resealable plastic bag.
3. Pour the marinade over the chicken in the bag, ensuring all pieces are coated evenly.
4. Press out excess air from the bag and seal it completely.
5. Refrigerate the marinating chicken for at least 30 minutes and up to 4 hours for maximum flavor absorption.
6. Preheat your outdoor grill to medium-high heat (400°F) while the chicken marinates.
7. Remove chicken from the marinade, letting excess liquid drip off back into the bag.
8. Discard the used marinade completely to avoid cross-contamination.
9. Place chicken breasts directly on the preheated grill grates.
10. Grill for 6-7 minutes until the bottom develops clear grill marks and releases easily from the grates.
11. Flip chicken using tongs and grill for another 6-7 minutes on the second side.
12. Check for doneness by inserting a meat thermometer into the thickest part of the chicken – it should read 165°F.
13. Transfer grilled chicken to a clean plate and let it rest for 5 minutes before slicing or serving.
Heavenly tender with a perfect char-kissed exterior, this chicken boasts bright citrus notes that mingle beautifully with the earthy cilantro and warm spices. Serve it sliced over a crisp salad, stuffed into warm tortillas with avocado, or alongside grilled corn for a complete summer feast that’ll have everyone asking for your secret.
Quinoa and Kale Power Bowl
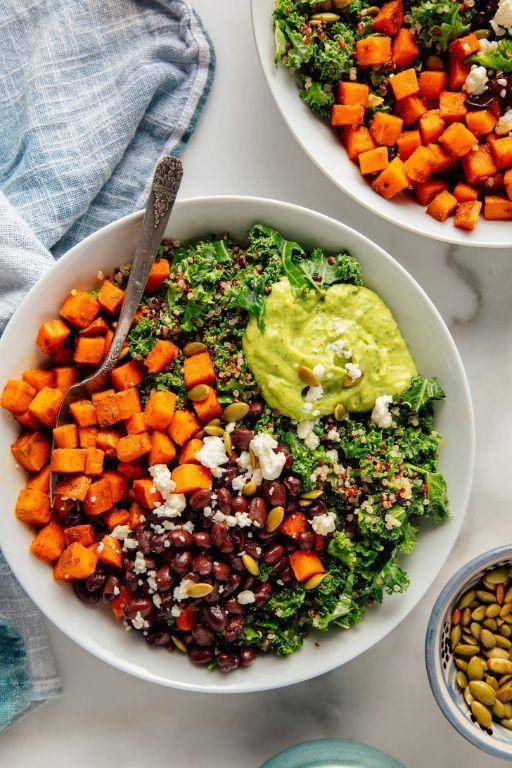
Dreading another boring lunch that leaves you counting down to snack time? This quinoa and kale power bowl is about to become your midday superhero—packed with vibrant flavors and enough energy to power through even the most tedious Tuesday. It’s the kind of meal that makes you feel like you’ve got your life together, even if your inbox says otherwise.
2
portions10
minutes18
minutesIngredients
– 1 cup quinoa
– 2 cups water
– 1 bunch kale
– 1 tbsp olive oil
– 1 lemon
– 1 avocado
– 1/4 cup pumpkin seeds
– 1/2 tsp salt
Instructions
1. Rinse 1 cup quinoa under cold water in a fine-mesh strainer for 1 minute to remove bitterness.
2. Combine rinsed quinoa and 2 cups water in a saucepan, bring to a boil over high heat, then reduce to low, cover, and simmer for 15 minutes until water is fully absorbed.
3. Remove quinoa from heat, fluff with a fork, and let it rest covered for 5 minutes to steam—this prevents clumping.
4. While quinoa cooks, remove stems from 1 bunch kale and tear leaves into bite-sized pieces.
5. Massage kale with 1 tbsp olive oil and 1/2 tsp salt for 2 minutes until leaves darken and soften, reducing toughness.
6. Toast 1/4 cup pumpkin seeds in a dry skillet over medium heat for 3 minutes, shaking pan until seeds are golden and fragrant.
7. Halve 1 lemon and squeeze juice evenly over massaged kale, tossing to coat.
8. Dice 1 avocado into 1/2-inch cubes, gently folding into kale mixture to prevent mashing.
9. Combine quinoa, kale mixture, and toasted pumpkin seeds in a large bowl, tossing lightly to distribute ingredients evenly.
Unbelievably satisfying, this bowl delivers a confetti-like crunch from the seeds against the creamy avocado and fluffy quinoa. Serve it piled high in a colorful bowl for maximum Instagram appeal, or pack it cold for a lunch that stays perky all day—no sad desk salads here!
Spaghetti Squash Pad Thai
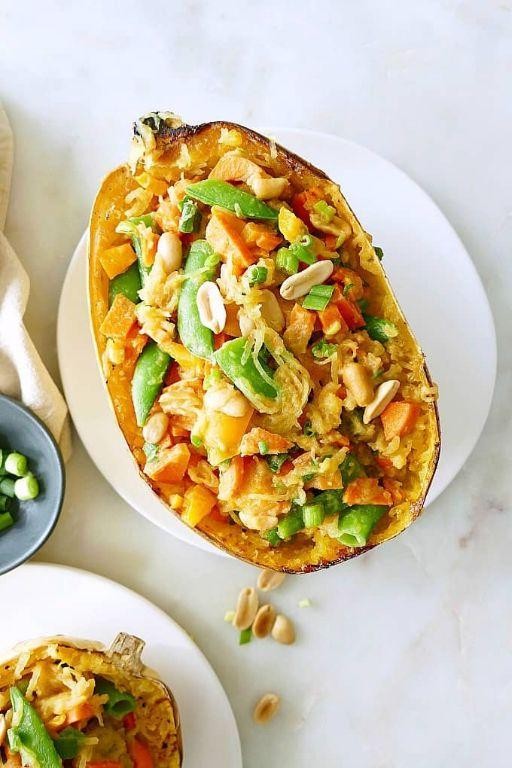
Gather ’round, fellow food adventurers, because we’re about to transform that humble spaghetti squash into the most unexpectedly glorious Pad Thai you’ve ever twirled around your fork. This isn’t just a “healthy swap”—it’s a full-blown noodle intervention that’s so delicious, you might just forget the original ever existed. Get ready to have your mind (and your taste buds) completely blown.
5
servings20
minutes50
minutesIngredients
– 1 large spaghetti squash
– 2 tbsp avocado oil
– 2 large eggs
– 1 cup shredded carrots
– 1/2 cup chopped green onions
– 1/4 cup chopped peanuts
– 1/4 cup fresh cilantro
– 3 tbsp tamari
– 2 tbsp lime juice
– 1 tbsp maple syrup
– 1 tsp chili garlic sauce
– 1/2 tsp garlic powder
Instructions
1. Preheat your oven to 400°F.
2. Carefully slice the spaghetti squash in half lengthwise using a sharp chef’s knife.
3. Scoop out all the seeds and stringy pulp from both halves with a spoon.
4. Brush the cut sides of the squash with 1 tablespoon of avocado oil.
5. Place the squash halves cut-side down on a baking sheet lined with parchment paper.
6. Roast in the preheated oven for 35-40 minutes, until the flesh is easily pierced with a fork.
7. Let the squash cool for 10 minutes until safe to handle.
8. Use a fork to scrape the squash flesh into long, spaghetti-like strands into a large bowl.
9. Heat the remaining 1 tablespoon of avocado oil in a large skillet or wok over medium-high heat.
10. Whisk the eggs in a small bowl and pour them into the hot skillet.
11. Scramble the eggs for 2-3 minutes until fully cooked, then transfer to a plate.
12. Add the shredded carrots to the same skillet and cook for 3 minutes until slightly softened.
13. Add the spaghetti squash strands to the skillet with the carrots.
14. In a small bowl, whisk together the tamari, lime juice, maple syrup, chili garlic sauce, and garlic powder.
15. Pour the sauce mixture over the squash and carrots in the skillet.
16. Cook everything together for 4-5 minutes, stirring frequently, until heated through and well combined.
17. Add the scrambled eggs back to the skillet along with the chopped green onions.
18. Toss everything together gently and cook for 1 more minute.
19. Remove from heat and stir in the chopped peanuts and fresh cilantro.
20. Serve immediately while hot.
Finally, behold your masterpiece! The spaghetti squash provides a wonderfully al dente texture that holds the tangy-sweet sauce beautifully, while the crunchy peanuts and fresh cilantro add pops of flavor and texture. For an extra fun twist, serve it in the roasted squash shells themselves—it makes for an impressive presentation that’s totally Instagram-worthy.
Refreshing Berry Chia Seed Pudding
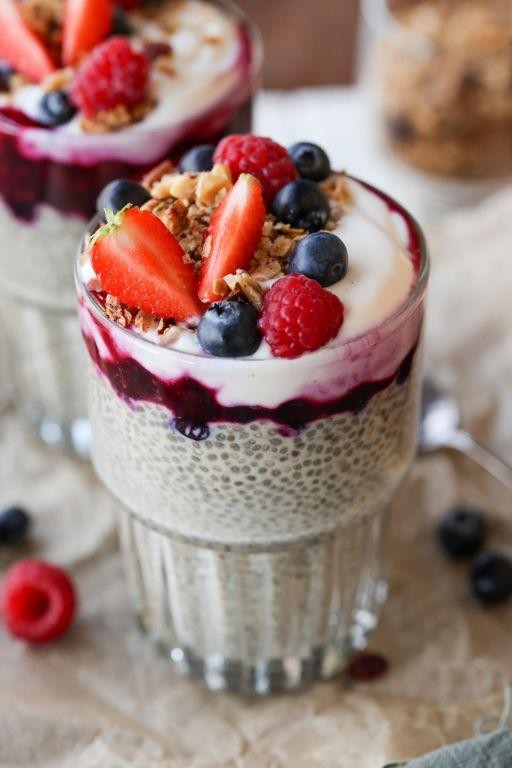
Brace yourselves, berry lovers—this chia seed pudding is about to become your new breakfast obsession that’s so simple, it practically makes itself while you sleep. Imagine waking up to a creamy, dreamy jar of fruity goodness that requires zero morning effort and delivers maximum deliciousness. It’s the culinary equivalent of hitting the snooze button and still winning breakfast.
2
servings15
minutesIngredients
– 1/4 cup chia seeds
– 1 cup unsweetened almond milk
– 1 tbsp maple syrup
– 1/2 cup mixed fresh berries
– 1/2 tsp vanilla extract
Instructions
1. Combine 1/4 cup chia seeds and 1 cup unsweetened almond milk in a medium-sized jar or bowl.
2. Add 1 tbsp maple syrup and 1/2 tsp vanilla extract to the chia seed mixture.
3. Whisk vigorously for 30 seconds to prevent clumping and ensure even distribution.
4. Let the mixture sit undisturbed for 5 minutes, then whisk again to break up any seed clusters that may have formed.
5. Cover the container tightly with a lid or plastic wrap.
6. Refrigerate the pudding for at least 4 hours or overnight until it reaches a thick, spoonable consistency.
7. Wash 1/2 cup mixed fresh berries and pat them dry with a paper towel.
8. Slice larger berries like strawberries into bite-sized pieces while leaving smaller berries whole.
9. Layer the chilled chia pudding and prepared berries in serving glasses, starting with pudding and alternating with berries.
10. Serve immediately or refrigerate for up to 3 days in airtight containers.
Just wait until you dig your spoon into that velvety texture that somehow manages to be both light and satisfyingly substantial. The berries burst with juicy brightness against the subtle sweetness, creating a symphony of flavors that’ll make you feel like you’re eating dessert for breakfast. Try serving it in clear mason jars to show off those beautiful layers, or mix in some granola for added crunch that takes this pudding from fabulous to absolutely legendary.
Broccoli and Cheddar Stuffed Chicken Breasts
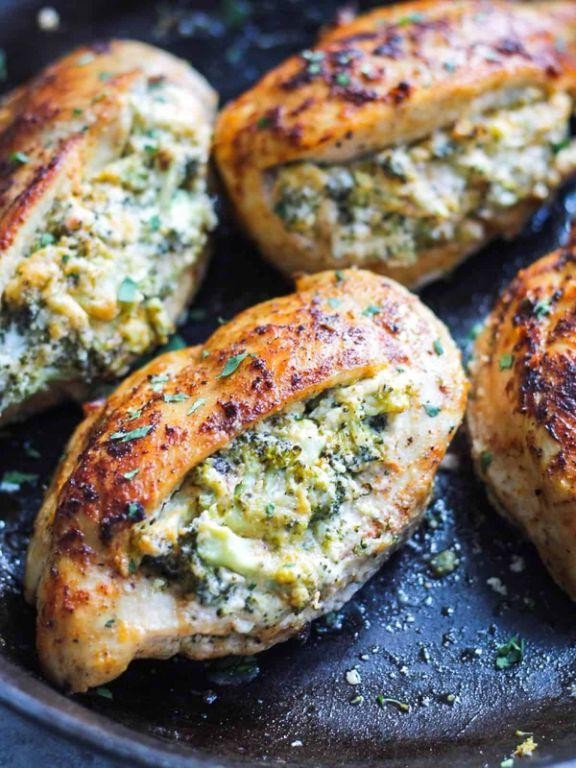
Yikes, are you tired of the same old chicken dinner routine? Let’s stuff some excitement right into those breasts—literally! This broccoli and cheddar stuffed chicken is here to rescue your weeknight meals from monotony with cheesy, veggie-packed goodness that’s as fun to make as it is to devour.
3
servings20
minutes30
minutesIngredients
- 4 boneless, skinless chicken breasts
- 2 cups broccoli florets, finely chopped
- 1 cup shredded sharp cheddar cheese
- 1/4 cup cream cheese, softened
- 1/2 tsp garlic powder
- 1/2 tsp onion powder
- 1/2 tsp paprika
- 1/2 tsp salt
- 1/4 tsp black pepper
- 1 tbsp olive oil
Instructions
- Preheat your oven to 375°F and lightly grease a baking dish with olive oil.
- Place one chicken breast on a cutting board and use a sharp knife to slice a horizontal pocket through the thickest part, being careful not to cut all the way through. Tip: Chill the chicken for 15 minutes beforehand for easier, cleaner slicing.
- In a medium bowl, combine the broccoli florets, shredded cheddar cheese, cream cheese, garlic powder, onion powder, paprika, salt, and black pepper until well mixed.
- Spoon about 1/4 cup of the broccoli-cheddar mixture into each chicken breast pocket.
- Secure the openings with toothpicks to prevent filling from leaking during baking.
- Brush the outside of each stuffed chicken breast with the remaining olive oil and sprinkle with extra paprika for color.
- Arrange the chicken breasts in the prepared baking dish and bake for 25–30 minutes, or until the internal temperature reaches 165°F. Tip: Use a meat thermometer inserted into the thickest part of the chicken (avoiding the filling) for accuracy.
- Remove from the oven and let rest for 5 minutes before serving. Tip: Resting allows juices to redistribute, keeping the chicken moist and flavorful.
Now, behold your masterpiece! The chicken emerges juicy and tender, while the filling oozes with melted cheddar and tender broccoli bits. Serve it sliced over a bed of garlic mashed potatoes or alongside a crisp salad—either way, it’s a guaranteed crowd-pleaser that’ll have everyone asking for seconds.
Conclusion
An incredible collection of 29 calorie-conscious recipes that make healthy eating delicious and achievable! We hope these dishes inspire your meal planning journey. Try your favorites, leave a comment sharing which recipes you loved most, and don’t forget to pin this article on Pinterest to save for later. Happy cooking!
