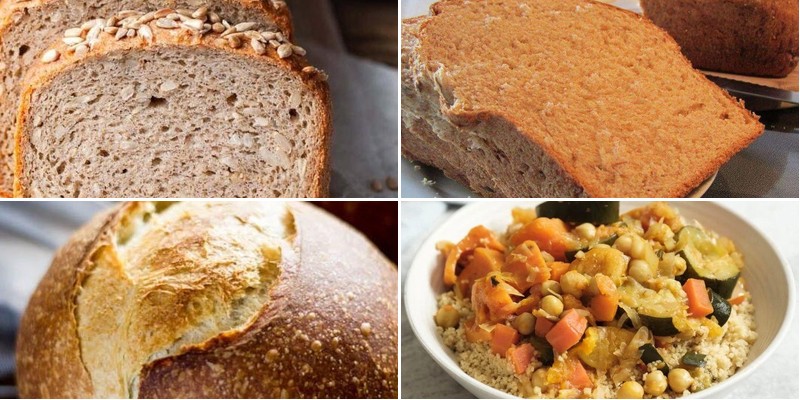
From cozy weeknight dinners to festive holiday gatherings, breads and grains are the comforting foundation of countless memorable meals. Whether you’re craving fluffy dinner rolls, hearty whole grains, or aromatic artisan loaves, this collection has something for every occasion and skill level. Get ready to fill your kitchen with wonderful aromas and your table with delicious creations—let’s explore these 26 irresistible recipes!
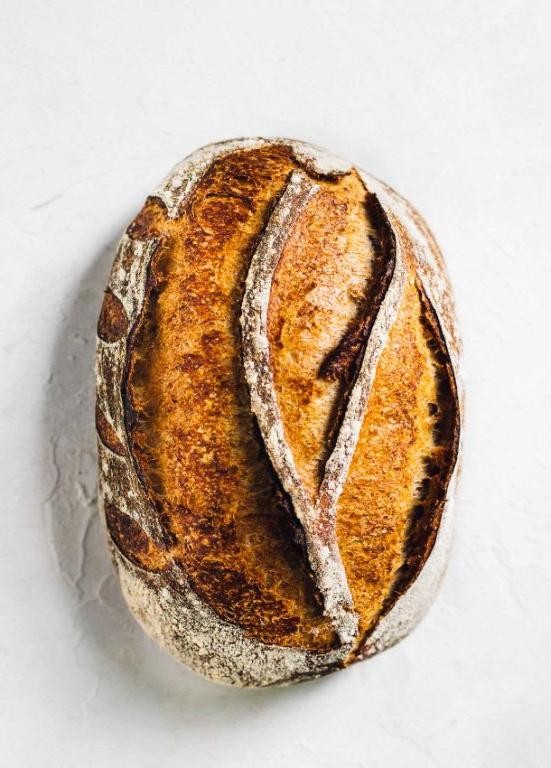
Homemade Sourdough Bread
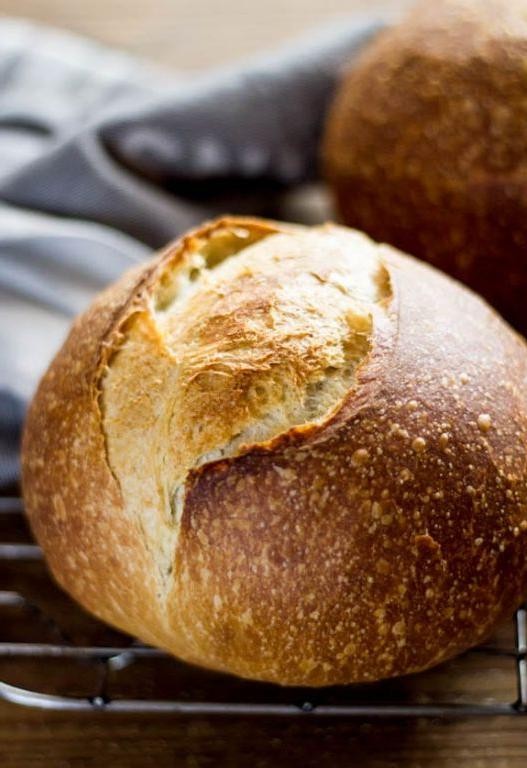
Years of trial and error in my tiny apartment kitchen have taught me that nothing beats the satisfaction of pulling a perfectly crusty, tangy loaf of homemade sourdough from the oven. I still remember my first dense, sad brick—but these days, my starter “Sour Doug” and I have found our rhythm. Let me walk you through my foolproof method that fills my home with that incredible yeasty aroma every weekend.
1
loaf60
minutes45
minutesIngredients
– 1 cup active sourdough starter (I keep mine on the counter for daily baking)
– 1 ½ cups warm water at 85°F (test it on your wrist like baby formula)
– 4 cups bread flour (I swear by King Arthur for consistent results)
– 1 ½ tsp fine sea salt (I prefer this over table salt for better flavor distribution)
– Rice flour for dusting (prevents sticking without burning like regular flour)
Instructions
1. Combine 1 cup active sourdough starter and 1 ½ cups warm water in a large mixing bowl, whisking until milky.
2. Add 4 cups bread flour gradually while stirring with a wooden spoon until a shaggy dough forms.
3. Cover the bowl with a damp kitchen towel and let rest for 30 minutes—this autolyse helps gluten development.
4. Sprinkle 1 ½ tsp fine sea salt over the dough and knead for 8 minutes until smooth and elastic.
5. Transfer dough to a lightly oiled bowl, cover with plastic wrap, and bulk ferment at room temperature for 4 hours.
6. Perform a series of stretch-and-folds every 30 minutes during the first 2 hours of bulk fermentation.
7. Tip: Wet your hands before handling to prevent sticking without adding extra flour.
8. Shape the dough into a tight round on a floured surface, creating surface tension.
9. Generously dust a proofing basket with rice flour and place dough seam-side up inside.
10. Cover with plastic and refrigerate for 12-14 hours for maximum flavor development.
11. Preheat a Dutch oven in your oven at 475°F for 45 minutes before baking.
12. Tip: The preheated Dutch oven creates steam for that perfect crust.
13. Carefully transfer chilled dough into the hot Dutch oven and score the top with a sharp blade.
14. Bake covered at 475°F for 25 minutes to trap steam and develop oven spring.
15. Remove the lid and continue baking at 450°F for 20 minutes until deeply golden brown.
16. Tip: Listen for the hollow sound when tapping the bottom to confirm doneness.
17. Cool completely on a wire rack for at least 2 hours before slicing.
Let that final loaf cool completely—I know it’s tempting to cut warm bread, but patience rewards you with better texture. The crust should crackle when squeezed, revealing a chewy, hole-studded crumb with that distinctive tang. Last Sunday, I served thick slices toasted with avocado and everything bagel seasoning, and my neighbors texted asking if I’d opened a bakery.
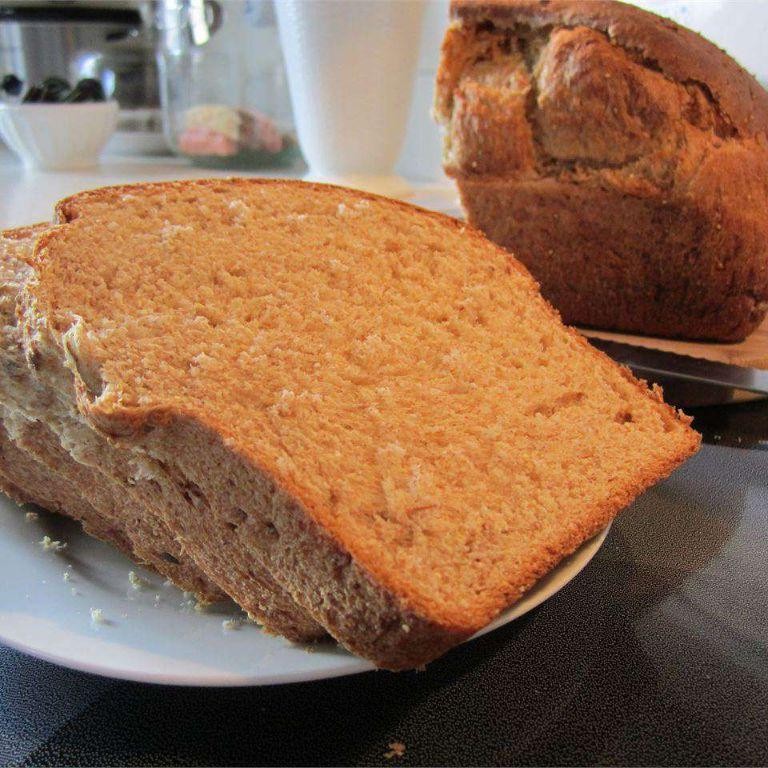
Easy Whole Wheat Bread
Diving into bread baking used to intimidate me until I discovered this foolproof whole wheat recipe that never fails—it’s become my weekly ritual, filling the house with that irresistible warm, yeasty aroma. Even on busy mornings, I sneak in a quick knead while my coffee brews, and the payoff is a loaf so wholesome and satisfying, it’s become our family’s staple for everything from avocado toast to hearty sandwiches. Trust me, if I can master this, so can you!
1
loaf25
minutes35
minutesIngredients
– 3 cups whole wheat flour (I always use King Arthur for its consistent texture)
– 1 cup warm water at 110°F (test it on your wrist—it should feel like a cozy bath, not hot)
– 2 tbsp honey (local raw honey is my favorite for a subtle sweetness)
– 1 packet active dry yeast (check the expiration date—I learned the hard way after a flat loaf once!)
– 1 tsp salt (I prefer fine sea salt for even distribution)
– 2 tbsp olive oil (extra virgin is my go-to for a hint of fruitiness)
Instructions
1. In a large bowl, combine the warm water, honey, and yeast, then let it sit for 5 minutes until frothy.
2. Tip: If the mixture doesn’t bubble, your yeast might be inactive—start over to avoid dense bread.
3. Stir in the whole wheat flour and salt until a shaggy dough forms.
4. Drizzle in the olive oil and mix until incorporated.
5. Turn the dough onto a lightly floured surface and knead for 8–10 minutes until smooth and elastic.
6. Tip: Use the windowpane test—stretch a small piece; if it thin without tearing, it’s ready.
7. Place the dough in a greased bowl, cover with a damp towel, and let rise in a warm spot for 1 hour or until doubled in size.
8. Punch down the dough to release air bubbles, then shape it into a loaf.
9. Transfer to a greased 9×5-inch loaf pan, cover, and let rise again for 30 minutes.
10. Preheat oven to 375°F while the dough rises.
11. Bake for 30–35 minutes until the top is golden brown and the loaf sounds hollow when tapped.
12. Tip: For a crisp crust, spritz the oven with water before baking.
13. Remove from the oven and cool on a wire rack for at least 1 hour before slicing.
Every slice of this bread boasts a tender crumb with a nutty, slightly sweet flavor that pairs perfectly with soups or as toast. I love slathering thick slices with almond butter for a quick breakfast, or toasting them to scoop up the last bits of chili—it’s hearty enough to stand up to any meal.
Savory Herb Focaccia

Keeping my kitchen warm and fragrant is one of my favorite fall rituals, and this savory herb focaccia has become my go-to comfort bread. I first discovered this recipe during a rainy weekend when I needed something to brighten the mood, and now the smell of rosemary and garlic baking never fails to lift my spirits.
8
portions105
minutes25
minutesIngredients
– 4 cups all-purpose flour (I always use King Arthur for consistent results)
– 1 ½ cups warm water (around 110°F – test it on your wrist like I do)
– 2 tbsp extra virgin olive oil plus more for drizzling (the good stuff from my last Italy trip)
– 2 tsp active dry yeast (check the expiration date – I learned this the hard way!)
– 2 tsp kosher salt
– 1 tbsp fresh rosemary leaves (from my windowsill herb garden)
– 2 cloves garlic, thinly sliced (fresh only – no jarred garlic here)
– 1 tsp flaky sea salt for topping
Instructions
1. Combine warm water, yeast, and 1 teaspoon of sugar in a large bowl and let sit for 5 minutes until foamy.
2. Tip: If your yeast doesn’t bubble, it’s inactive – start over with fresh yeast.
3. Add flour, kosher salt, and 2 tablespoons olive oil to the yeast mixture.
4. Mix with a wooden spoon until a shaggy dough forms.
5. Turn dough onto a floured surface and knead for 8 minutes until smooth and elastic.
6. Place dough in an oiled bowl, cover with a damp kitchen towel, and let rise in a warm spot for 1 hour until doubled in size.
7. Punch down the dough and transfer to a 9×13 inch baking pan greased with olive oil.
8. Stretch dough to fit the pan, then use your fingertips to create deep dimples across the surface.
9. Drizzle generously with olive oil, making sure it pools in the dimples.
10. Sprinkle rosemary leaves and garlic slices evenly over the dough.
11. Cover and let rise for 30 minutes until puffy.
12. Tip: For extra flavor, I like to infuse the olive oil with garlic before drizzling.
13. Preheat oven to 425°F while the dough completes its second rise.
14. Sprinkle flaky sea salt over the risen dough.
15. Bake for 20-25 minutes until golden brown and crisp around the edges.
16. Tip: Place a pan of water in the bottom rack to create steam for a crispier crust.
17. Transfer to a wire rack and let cool for 10 minutes before slicing.
Unbelievably aromatic and satisfyingly chewy, this focaccia develops the most wonderful crispy bottom when baked properly. I love tearing off warm pieces to dip in herbed olive oil or using thick slices for the most incredible sandwiches – try it with roasted vegetables and fresh mozzarella for a real treat.
Classic French Baguette
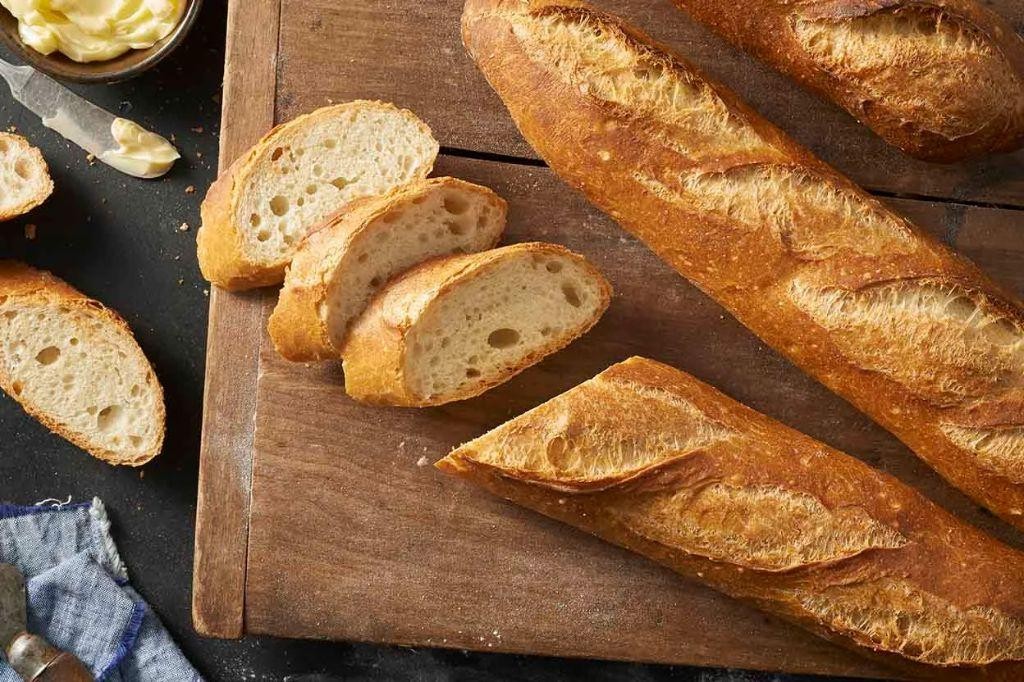
Oh, the smell of freshly baked baguette takes me right back to my first trip to Paris, where I’d wake up early just to get one still warm from the bakery. There’s something magical about that crisp crust giving way to a soft, airy interior that makes even simple butter taste extraordinary. I’ve been perfecting this recipe for years, and today I’m sharing my foolproof version that fills my kitchen with that authentic French bakery aroma every single time.
2
baguettes140
minutes25
minutesIngredients
– 4 cups bread flour (I always use King Arthur for its consistent protein content)
– 1½ cups warm water at 110°F (test it on your wrist like testing baby formula)
– 2 teaspoons active dry yeast (check the expiration date—old yeast is the enemy of good bread)
– 2 teaspoons fine sea salt (I prefer the clean taste over iodized table salt)
– 1 tablespoon olive oil (extra virgin adds a lovely fruity note)
– Cornmeal for dusting (this prevents sticking and gives that authentic bakery texture)
Instructions
1. Combine warm water and yeast in a large mixing bowl, letting it sit for 5 minutes until foamy.
2. Add bread flour, sea salt, and olive oil to the yeast mixture.
3. Mix with a wooden spoon until a shaggy dough forms, about 2 minutes.
4. Turn dough onto a lightly floured surface and knead for 8-10 minutes until smooth and elastic.
5. Place dough in a lightly oiled bowl, cover with a damp kitchen towel, and let rise in a warm spot for 1½ hours until doubled in size.
6. Punch down the dough and divide into two equal portions.
7. Shape each portion into a 16-inch long baguette on a floured surface.
8. Place shaped baguettes on a baking sheet dusted with cornmeal.
9. Score each baguette diagonally 4-5 times with a sharp razor blade, making ¼-inch deep cuts.
10. Cover with the damp towel and let rise for 45 minutes until puffy.
11. Preheat oven to 475°F with a baking stone or inverted baking sheet inside.
12. Place a shallow pan of boiling water on the oven’s bottom rack to create steam.
13. Transfer baguettes to the preheated baking stone and bake for 20-25 minutes until deeply golden brown.
14. Tap the bottom of a baguette—it should sound hollow when fully baked.
15. Cool completely on a wire rack for at least 30 minutes before slicing.
Getting that perfect crackle as you break into the crust is pure joy. The interior should be chewy with those signature irregular holes, while the exterior shatters beautifully with each bite. I love serving these slightly warm with cultured butter and flaky sea salt, or using day-old baguettes for the most incredible garlic bread that’ll have everyone asking for seconds.
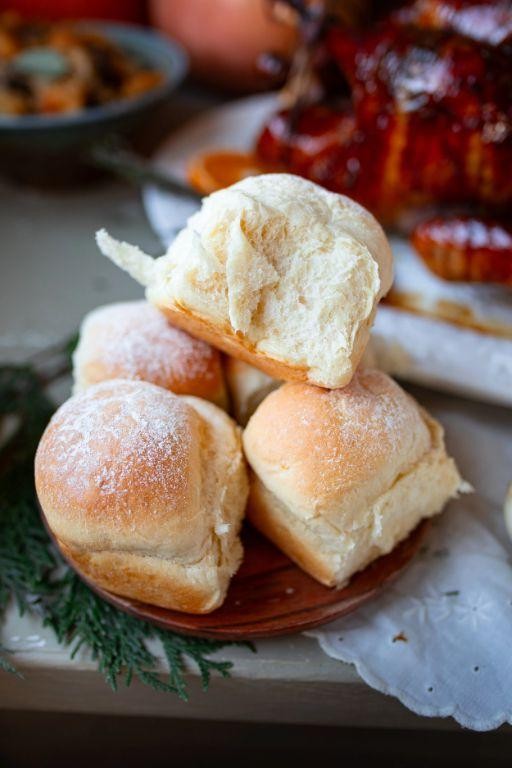
Fluffy Dinner Rolls
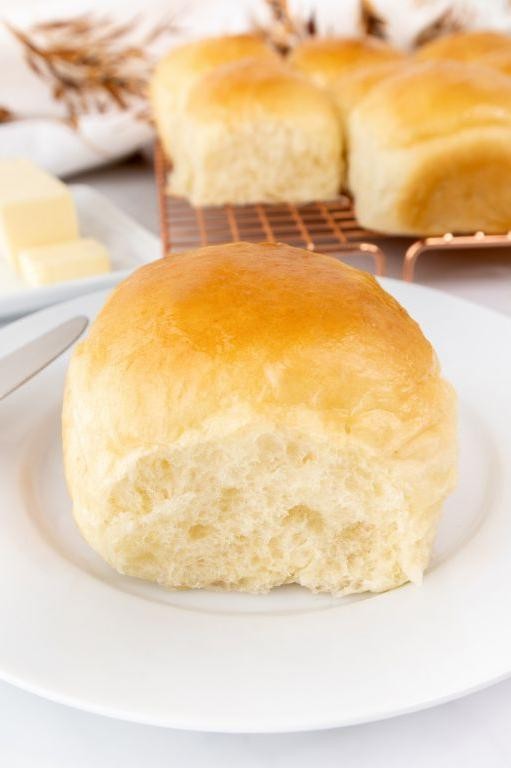
Gosh, there’s something so comforting about pulling a batch of warm, fluffy dinner rolls from the oven—it reminds me of Sunday dinners at my grandma’s house where the rolls were always the first thing to disappear from the table. I’ve tweaked her recipe over the years to get that perfect pillow-soft texture every time, and now it’s my go-to for holiday gatherings or just a cozy weeknight meal. Trust me, once you try these, you’ll never go back to store-bought.
12
rolls25
minutes22
minutesIngredients
– 4 cups all-purpose flour (I always use King Arthur for its consistent quality)
– 1 cup whole milk, warmed to about 110°F (this temperature is key for activating the yeast without killing it)
– ¼ cup granulated sugar (a little extra sweetness makes them irresistible)
– ¼ cup unsalted butter, melted and slightly cooled (I prefer unsalted to control the salt level)
– 2 large eggs, at room temperature (they blend into the dough more smoothly this way)
– 2 ¼ tsp active dry yeast (check the expiration date—old yeast won’t rise properly)
– 1 tsp fine sea salt (I find it dissolves better than coarse salt)
– Non-stick cooking spray for greasing the bowl and pan (a quick spritz prevents sticking every time)
Instructions
1. In a small bowl, combine the warmed whole milk (110°F), granulated sugar, and active dry yeast, then let it sit for 5–10 minutes until foamy and bubbly.
2. In a large mixing bowl, whisk together the all-purpose flour and fine sea salt until evenly distributed.
3. Pour the yeast mixture into the flour bowl, then add the melted unsalted butter and room-temperature eggs.
4. Stir the ingredients with a wooden spoon until a shaggy dough forms and no dry flour remains.
5. Turn the dough onto a lightly floured surface and knead by hand for 8–10 minutes until it becomes smooth and elastic (tip: if it sticks to your hands, add a tablespoon of flour at a time).
6. Lightly grease a large bowl with non-stick cooking spray, place the dough inside, and turn it to coat all sides.
7. Cover the bowl with a damp kitchen towel and let the dough rise in a warm, draft-free spot for 1–1.5 hours until doubled in size (tip: I often place it in an oven that’s turned off but warmed by the pilot light).
8. Punch down the risen dough to release air bubbles, then divide it into 12 equal pieces on a floured surface.
9. Shape each piece into a smooth ball by pulling the edges underneath and pinching them together at the bottom.
10. Arrange the dough balls in a greased 9×13-inch baking pan, spacing them about 1 inch apart.
11. Cover the pan with the damp towel again and let the rolls rise for 30–45 minutes until puffy and nearly doubled.
12. Preheat your oven to 375°F while the rolls are rising to ensure it’s ready for baking.
13. Bake the rolls for 18–22 minutes until golden brown on top and sound hollow when tapped (tip: use an instant-read thermometer—they’re done at 190–200°F internally).
14. Remove the pan from the oven and let the rolls cool in the pan for 5 minutes before transferring to a wire rack. These rolls come out with a tender, airy crumb and a buttery richness that pairs beautifully with soups or holiday feasts. I love tearing them apart while they’re still warm and slathering them with honey butter for an extra indulgent treat—they never last long in my house!
Rustic Rye Bread
Unbelievably, my love for rustic rye bread began during a rainy afternoon visit to my grandmother’s farmhouse kitchen, where the earthy aroma of freshly baked loaves filled every corner and created memories I’ve been chasing ever since. There’s something magical about how this dense, tangy bread transforms simple ingredients into pure comfort, perfect for everything from morning toast to hearty sandwiches. I still make it weekly, often while listening to old jazz records and sipping coffee—it’s become my little ritual that makes the house smell like home.
1
loaf30
minutes40
minutesIngredients
– 2 cups rye flour (I love Bob’s Red Mill for its consistent texture)
– 1 ½ cups bread flour (King Arthur is my trusty go-to)
– 1 ¼ cups warm water (around 110°F—test it on your wrist like you would for a baby’s bottle)
– 2 tbsp molasses (the robust flavor makes all the difference)
– 1 tbsp active dry yeast (I always check the expiration date to avoid flat loaves)
– 1 tsp salt (fine sea salt dissolves evenly)
– 1 tbsp caraway seeds (toasted lightly for extra nuttiness)
– 2 tbsp olive oil (extra virgin adds fruity notes)
Instructions
1. Combine 1 ¼ cups warm water (110°F), 2 tbsp molasses, and 1 tbsp active dry yeast in a large bowl, then let it sit for 5–7 minutes until foamy.
2. Tip: If the mixture doesn’t bubble, your yeast may be old—start fresh to ensure a good rise.
3. Stir in 2 cups rye flour, 1 ½ cups bread flour, 1 tsp salt, and 1 tbsp caraway seeds until a shaggy dough forms.
4. Knead the dough on a floured surface for 8–10 minutes until smooth and elastic.
5. Tip: Add a sprinkle of bread flour if the dough sticks, but avoid over-flouring to keep it tender.
6. Place the dough in a greased bowl, cover with a damp cloth, and let it rise in a warm spot for 1–1.5 hours until doubled in size.
7. Punch down the dough, shape it into a round loaf, and place it on a parchment-lined baking sheet.
8. Score the top with a sharp knife in a crisscross pattern, then brush with 2 tbsp olive oil.
9. Let it rise again for 30–45 minutes until puffy.
10. Preheat the oven to 375°F and bake the loaf for 35–40 minutes until the crust is dark brown and sounds hollow when tapped.
11. Tip: For a crispier crust, spritz the oven with water before baking.
12. Cool the bread on a wire rack for at least 1 hour before slicing.
Now, nothing beats that first slice—the crust crackles, revealing a moist, tangy crumb with hints of molasses and caraway. I love it thickly sliced for avocado toast or paired with sharp cheddar and apple slices for a cozy snack.
Quick and Easy Flatbread

My family’s weeknight dinners often call for something fast yet satisfying, and this quick and easy flatbread has become our go-to. I first whipped it up during a hectic Tuesday when takeout wasn’t an option, and now it’s a staple I customize with whatever’s in the fridge. Nothing beats warm, homemade bread in under 30 minutes—it’s a lifesaver!
2
portions15
minutes12
minutesIngredients
– 2 cups all-purpose flour (I always use unbleached for a softer texture)
– 1 cup warm water (around 110°F—test it on your wrist like I do to avoid killing the yeast)
– 1 tbsp extra virgin olive oil (my pantry staple for a hint of fruitiness)
– 1 tsp active dry yeast (I keep mine in the freezer to extend its life)
– 1 tsp salt (I prefer fine sea salt for even distribution)
Instructions
1. In a large bowl, combine the warm water and active dry yeast, then let it sit for 5 minutes until frothy.
2. Tip: If the yeast doesn’t bubble, it might be old—start over for best results.
3. Add the all-purpose flour, extra virgin olive oil, and salt to the yeast mixture.
4. Stir with a wooden spoon until a shaggy dough forms, about 1–2 minutes.
5. Turn the dough onto a floured surface and knead for 3–4 minutes until smooth and elastic.
6. Tip: If the dough sticks, dust with a little more flour, but don’t overdo it—too much makes it tough.
7. Divide the dough into 4 equal pieces and roll each into a ball.
8. Cover the balls with a damp cloth and let them rest for 10 minutes to relax the gluten.
9. Heat a skillet over medium-high heat (around 400°F) for 2–3 minutes until hot.
10. Roll one dough ball into a ¼-inch thick circle using a rolling pin.
11. Place the flatbread in the dry skillet and cook for 2 minutes until bubbles form and the bottom has golden spots.
12. Flip the flatbread and cook for another 1–2 minutes until both sides are lightly charred.
13. Tip: Press down gently with a spatula to ensure even cooking and those lovely air pockets.
14. Repeat with the remaining dough balls, stacking the cooked flatbreads under a towel to keep them soft.
Perfectly chewy with a slight crispness, this flatbread pairs wonderfully with hummus or as a base for personal pizzas. I love tearing it warm and dipping it into herbed olive oil—it’s so versatile, you’ll find excuses to make it weekly!
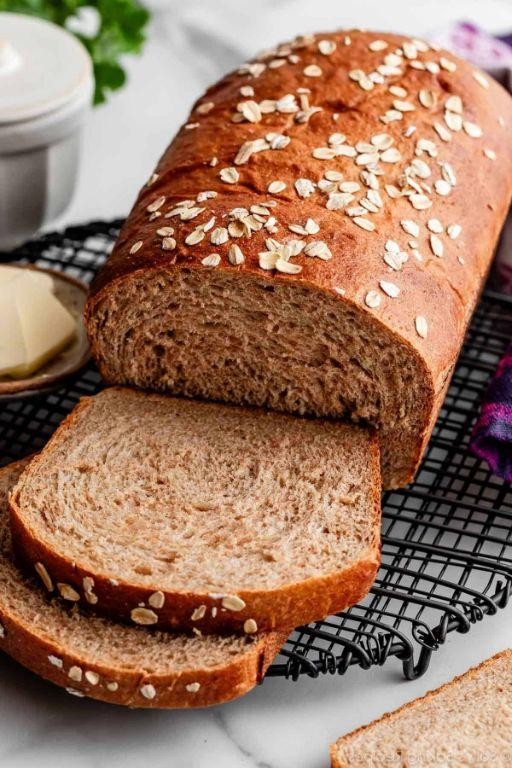
Hearty Multigrain Loaf
Remember that chilly morning last week when I was craving something substantial for breakfast? That’s exactly when this multigrain loaf came to life in my kitchen—it’s become my go-to for weekend baking ever since. There’s something so satisfying about the nutty aroma filling the house while it bakes, and it makes the perfect foundation for everything from avocado toast to hearty sandwiches.
1
loaf25
minutes40
minutesIngredients
– 2 cups bread flour (I always keep King Arthur in my pantry for consistent results)
– 1 cup whole wheat flour (the heartier the better, in my opinion)
– 1/2 cup rolled oats (the old-fashioned kind gives the best texture)
– 1/4 cup sunflower seeds (I toast mine first for extra crunch)
– 2 tbsp honey (local raw honey is my preference for that floral note)
– 1 1/4 cups warm water (around 110°F—test it on your wrist like testing baby formula)
– 2 1/4 tsp active dry yeast (I always check the expiration date first)
– 1 tsp salt (fine sea salt dissolves more evenly)
– 2 tbsp olive oil (extra virgin is my kitchen staple)
Instructions
1. Combine warm water, honey, and yeast in a large mixing bowl and let sit for 5 minutes until foamy.
2. Tip: If your yeast doesn’t bubble, it might be expired—start over with fresh yeast.
3. Add both flours, oats, sunflower seeds, salt, and olive oil to the yeast mixture.
4. Mix with a wooden spoon until a shaggy dough forms, about 2 minutes.
5. Turn dough onto a lightly floured surface and knead for 8-10 minutes until smooth and elastic.
6. Tip: Use the windowpane test—stretch a small piece thin enough to see light through without tearing.
7. Place dough in a greased bowl, cover with a damp kitchen towel, and let rise in a warm spot for 1 hour until doubled.
8. Punch down the risen dough to release air bubbles.
9. Shape dough into a loaf and place in a greased 9×5 inch loaf pan.
10. Cover and let rise again for 45 minutes until cresting the pan rim.
11. Preheat oven to 375°F during the last 15 minutes of rising.
12. Bake for 35-40 minutes until golden brown and internal temperature reaches 190°F.
13. Tip: Tap the bottom—it should sound hollow when fully baked.
14. Cool completely on a wire rack before slicing.
But this loaf truly shines when you experience its texture—the crisp crust gives way to a moist, chewy crumb studded with nutty seeds. Beyond basic toast, try thick slices for French toast or cube it for the most incredible bread pudding that’ll make you question store-bought bread forever.
Classic Italian Ciabatta

Often when I’m craving that perfect chewy, hole-filled bread for sandwiches, my mind goes straight to ciabatta. Over the years, I’ve perfected this recipe through many trial and error batches in my cozy kitchen. There’s something magical about transforming simple ingredients into this Italian classic.
2
loaves30
minutes25
minutesIngredients
- 4 cups bread flour – I always use King Arthur for its consistent protein content
- 1 ½ cups warm water (around 110°F) – test it on your wrist like testing baby formula
- 2 teaspoons active dry yeast – I keep mine in the freezer to extend its life
- 1 ½ teaspoons fine sea salt – my preference over table salt for better flavor distribution
- 2 tablespoons extra virgin olive oil – the good stuff from my last trip to Little Italy
Instructions
- Combine warm water and yeast in your stand mixer bowl, letting it bloom for exactly 5 minutes until foamy.
- Add bread flour, sea salt, and olive oil to the yeast mixture all at once.
- Mix on low speed with dough hook for 3 minutes until ingredients are just combined.
- Increase speed to medium and knead for 8 minutes until dough becomes smooth and elastic.
- Transfer dough to a lightly oiled bowl, turning once to coat all surfaces.
- Cover bowl tightly with plastic wrap and let rise in a warm spot for 1.5 hours until doubled in size.
- Punch down the dough gently to release large air bubbles.
- Turn dough onto a floured surface and divide into two equal portions with a bench scraper.
- Shape each portion into a rough oval about 10 inches long, handling minimally to preserve air pockets.
- Place shaped loaves on a parchment-lined baking sheet dusted with semolina or cornmeal.
- Cover loaves loosely with a clean kitchen towel and proof for 45 minutes until puffy.
- Preheat your oven to 450°F with a baking stone or inverted baking sheet inside during the last 20 minutes of proofing.
- Using a sharp lame or knife, make three diagonal slashes about ¼ inch deep across the top of each loaf.
- Spritz loaves generously with water from a spray bottle just before loading into the oven.
- Bake for 22-25 minutes until crust is deep golden brown and internal temperature reaches 210°F.
- Transfer baked loaves to a wire rack and cool completely for at least 1 hour before slicing.
Seriously, that crackly crust gives way to the most wonderful chewy interior with those signature irregular holes. I love tearing into a still-warm slice and watching the steam escape from those beautiful pockets. This bread makes incredible panini or simply dipped in herbed olive oil – it’s the star of any meal.
Soft Potato Bread
Crafting the perfect loaf of soft potato bread has become my weekend ritual—there’s something magical about how mashed potatoes transform ordinary bread into something incredibly tender and moist. I first discovered this recipe when my garden produced a ridiculous surplus of russet potatoes, and now it’s my go-to for sandwiches, toast, and just tearing off warm chunks straight from the oven.
2
loaves90
minutes35
minutesIngredients
– 1 cup mashed russet potatoes (I always make extra during dinner for this purpose)
– 1 cup warm whole milk (about 110°F—test it on your wrist like baby formula)
– 2 ¼ teaspoons active dry yeast (that’s one standard packet)
– ¼ cup granulated sugar (I sometimes reduce this slightly if my potatoes are extra starchy)
– 3 tablespoons unsalted butter, melted (plus extra for brushing—salted works in a pinch)
– 1 large egg, at room temperature (I leave mine on the counter while prepping other ingredients)
– 1 ½ teaspoons fine sea salt (I prefer this over table salt for better distribution)
– 4 ½ cups all-purpose flour, divided (plus more for dusting—I keep mine in the freezer)
Instructions
1. Combine warm milk, yeast, and sugar in your stand mixer bowl and let sit for 5 minutes until foamy.
2. Add mashed potatoes, melted butter, egg, and salt to the yeast mixture.
3. Mix on low speed with dough hook attachment until ingredients are fully combined, about 1 minute.
4. Gradually add 4 cups of flour while mixing on medium-low speed, scraping bowl sides as needed.
5. Continue kneading with dough hook for 8 minutes until dough becomes smooth and elastic.
6. Sprinkle remaining ½ cup flour on clean counter surface and turn dough out onto it.
7. Knead by hand for 2 minutes, incorporating just enough flour until dough no longer sticks to your hands.
8. Place dough in large greased bowl, turning once to coat all surfaces.
9. Cover bowl with damp kitchen towel and let rise in warm spot for 1 hour until doubled in size.
10. Punch down risen dough to release air bubbles and divide into two equal portions.
11. Shape each portion into smooth round loaf and place in greased 9-inch loaf pans.
12. Cover pans with same damp towel and let rise again for 45 minutes until dough crowns pan rims.
13. Preheat oven to 375°F during final 15 minutes of second rise.
14. Bake loaves on center oven rack for 30-35 minutes until golden brown and internal temperature reaches 190°F.
15. Remove bread from pans immediately and brush tops with melted butter.
16. Cool completely on wire rack before slicing, about 2 hours.
Remarkably soft with a subtle sweetness that makes incredible French toast, this bread stays moist for days thanks to the potato. I love using thick slices for grilled cheese sandwiches—the tender crumb soaks up butter beautifully without becoming soggy. When I’m feeling fancy, I’ll sprinkle everything bagel seasoning on the buttered crust before baking for an extra flavor dimension.
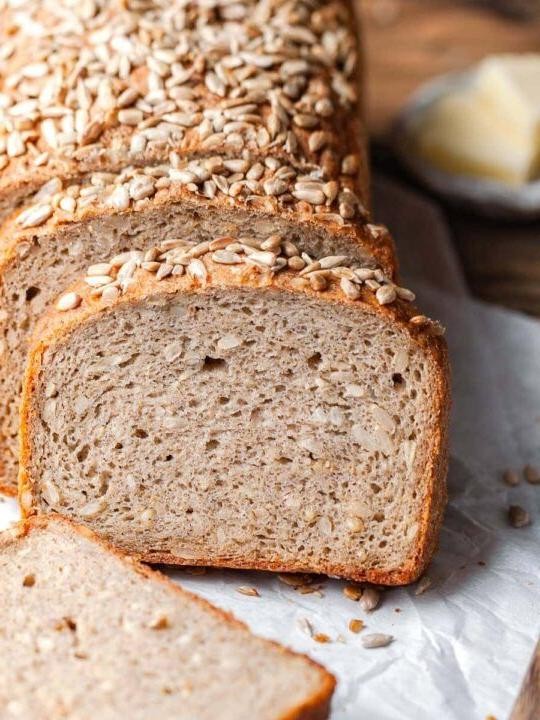
Seedy Sunflower Bread
Keeping my kitchen stocked with homemade bread has become my ultimate comfort ritual, especially during these crisp fall mornings. There’s something magical about the smell of freshly baked bread wafting through the house that makes even the rainiest days feel cozy. This seedy sunflower bread has become my absolute favorite – it’s nutty, hearty, and makes the most incredible toast.
1
loaf90
minutes35
minutesIngredients
– 3 cups bread flour (I always keep King Arthur in my pantry for consistent results)
– 1 cup warm water at 110°F (test it on your wrist like you would for a baby’s bottle)
– 2 tablespoons honey (local if you can get it – it adds such lovely floral notes)
– 2 teaspoons active dry yeast (I proof mine every time to avoid disappointment)
– 1 teaspoon salt (I’m partial to sea salt for its clean flavor)
– ¼ cup raw sunflower seeds (toasted first for maximum nuttiness)
– 2 tablespoons olive oil (extra virgin is my go-to for its fruity notes)
– 1 egg beaten with 1 tablespoon water for egg wash
– Additional sunflower seeds for topping
Instructions
1. Combine warm water, honey, and yeast in a large bowl and let sit for 5 minutes until foamy.
2. Tip: Always proof your yeast – if it doesn’t bubble, your bread won’t rise properly.
3. Add bread flour, salt, and ¼ cup toasted sunflower seeds to the yeast mixture.
4. Pour in olive oil and mix until a shaggy dough forms.
5. Knead the dough on a floured surface for 8-10 minutes until smooth and elastic.
6. Place dough in a greased bowl, cover with a damp kitchen towel, and let rise in a warm spot for 1 hour until doubled in size.
7. Punch down the risen dough and shape into a loaf.
8. Place in a greased 9×5 inch loaf pan and let rise for 45 minutes until cresting the pan edges.
9. Tip: For extra rise, place the pan in a turned-off oven with a bowl of hot water underneath.
10. Preheat oven to 375°F while the loaf completes its second rise.
11. Brush the loaf with egg wash and sprinkle generously with additional sunflower seeds.
12. Tip: The egg wash gives that beautiful golden crust – don’t skip it!
13. Bake for 30-35 minutes until deeply golden brown and sounds hollow when tapped.
14. Cool completely on a wire rack before slicing.
Finally, this bread develops the most wonderful chewy crumb with a crisp, seed-studded crust that crackles when you slice it. The toasted sunflower seeds release their nutty flavor throughout every bite, making it perfect for avocado toast or simply slathered with good butter. I love how the seeds add little pops of texture that make each slice feel special and substantial.
Cheesy Garlic Breadsticks

Oh my goodness, these cheesy garlic breadsticks are the ultimate comfort food that I find myself making at least once a week. I first discovered this recipe during a cozy movie night with friends, and now it’s become my go-to appetizer whenever we have people over. There’s just something magical about that combination of warm, melted cheese and fragrant garlic that brings everyone together.
12
breadsticks25
minutes18
minutesIngredients
- 1 cup warm water (around 110°F – I always test it with my wrist like my grandma taught me)
- 2 ¼ teaspoons active dry yeast (this little packet makes all the difference)
- 1 tablespoon granulated sugar (just enough to get the yeast excited)
- 3 cups all-purpose flour (I prefer King Arthur brand for consistent results)
- 1 teaspoon salt (I use fine sea salt for even distribution)
- 2 tablespoons olive oil (extra virgin is my kitchen staple)
- 4 tablespoons unsalted butter (melted and slightly cooled)
- 3 cloves garlic (freshly minced – the pre-minced jarred stuff just doesn’t compare)
- 1 ½ cups shredded mozzarella cheese (I like to shred my own for better melting)
- 2 tablespoons grated Parmesan cheese (the good stuff from the refrigerated section)
- 1 teaspoon dried parsley (for that classic breadstick look)
Instructions
- Combine warm water, yeast, and sugar in a large mixing bowl and let sit for 5 minutes until foamy.
- Add flour and salt to the yeast mixture, stirring with a wooden spoon until a shaggy dough forms.
- Knead the dough on a floured surface for 8 minutes until smooth and elastic. Tip: The dough should spring back when poked gently with your finger.
- Place the dough in a greased bowl, cover with a clean kitchen towel, and let rise in a warm place for 1 hour until doubled in size.
- Punch down the risen dough and transfer to a lightly floured surface.
- Roll the dough into a 12×8-inch rectangle about ½-inch thick.
- Transfer the dough rectangle to a parchment-lined baking sheet.
- Combine melted butter and minced garlic in a small bowl.
- Brush the garlic butter mixture evenly over the entire surface of the dough.
- Sprinkle mozzarella cheese evenly over the buttered dough, leaving a ½-inch border around the edges.
- Top with Parmesan cheese and dried parsley.
- Bake at 400°F for 15-18 minutes until the cheese is bubbly and the edges are golden brown. Tip: Rotate the baking sheet halfway through for even browning.
- Remove from oven and let cool for 2 minutes before slicing. Tip: Use a pizza cutter for clean, straight cuts into breadsticks.
- Slice into 1-inch wide strips while still warm.
These breadsticks come out perfectly crisp on the bottom with a wonderfully soft, cheesy interior that pulls apart in the most satisfying way. The garlic flavor really shines through without being overpowering, making them irresistible straight from the oven. Try serving them alongside a big bowl of marinara sauce for dipping, or crumble them over salads for an extra special crunch.
Nutty Quinoa Salad

Wandering through the farmers market last weekend, I spotted the most beautiful rainbow of vegetables that immediately inspired this wholesome salad. I’ve been making variations of this nutty quinoa salad for years, but this particular combination with toasted almonds and fresh herbs has become my absolute favorite lunch staple.
5
servings20
minutes19
minutesIngredients
– 1 cup quinoa (I always rinse mine thoroughly to remove that bitter coating)
– 2 cups water (cold from the tap works perfectly)
– ½ cup sliced almonds (toasting them brings out such amazing flavor)
– 1 medium cucumber, diced (I leave the skin on for extra crunch and nutrients)
– 1 cup cherry tomatoes, halved (the sweeter, the better in my opinion)
– ¼ cup fresh parsley, chopped (flat-leaf is my preference for its robust flavor)
– 3 tablespoons extra virgin olive oil (this is where quality really matters)
– 2 tablespoons lemon juice (freshly squeezed makes all the difference)
– ½ teaspoon salt (I use fine sea salt for even distribution)
Instructions
1. Rinse 1 cup quinoa under cold running water for 30 seconds using a fine-mesh strainer.
2. Combine rinsed quinoa and 2 cups water in a medium saucepan over high heat.
3. Bring the mixture to a rolling boil, then immediately reduce heat to low and cover the pan.
4. Simmer quinoa for 15 minutes exactly—resist peeking to keep the steam trapped inside.
5. Remove saucepan from heat and let quinoa stand covered for 5 minutes to finish absorbing moisture.
6. Fluff quinoa with a fork and spread it on a baking sheet to cool completely to room temperature.
7. While quinoa cools, place ½ cup sliced almonds in a dry skillet over medium heat.
8. Toast almonds for 3-4 minutes, stirring constantly until they turn golden brown and become fragrant.
9. Transfer toasted almonds to a plate to prevent them from burning in the hot pan.
10. Dice 1 medium cucumber into ¼-inch pieces and place in a large mixing bowl.
11. Cut 1 cup cherry tomatoes in half and add them to the bowl with cucumber.
12. Chop ¼ cup fresh parsley leaves and add to the vegetable mixture.
13. Whisk together 3 tablespoons extra virgin olive oil, 2 tablespoons lemon juice, and ½ teaspoon salt in a small bowl.
14. Add cooled quinoa and toasted almonds to the vegetable mixture in the large bowl.
15. Pour the dressing over the salad and toss everything together until evenly coated.
You’ll love how the fluffy quinoa contrasts with the crisp cucumber and juicy tomatoes, while the toasted almonds add that satisfying crunch. This salad tastes even better after chilling for an hour, making it perfect for meal prep or picnics where the flavors have time to meld together beautifully.
Spiced Couscous with Vegetables

Keeping my pantry stocked with versatile grains has saved many a busy weeknight, and this spiced couscous with vegetables has become my go-to when I need something satisfying but don’t want to spend hours in the kitchen. I actually first threw this together during a hectic move when most of my cooking tools were still packed in boxes—sometimes necessity really does spark the best creations!
3
servings15
minutes15
minutesIngredients
– 1 cup couscous (I always keep the pearled variety on hand for its fluffy texture)
– 1 ¼ cups vegetable broth (homemade if I have it, but boxed works perfectly)
– 2 tablespoons extra virgin olive oil (my everyday cooking oil of choice)
– 1 medium yellow onion, diced (I prefer the sweetness of yellow over white onions here)
– 2 cloves garlic, minced (freshly minced makes all the difference)
– 1 medium zucchini, chopped into ½-inch pieces
– 1 red bell pepper, diced
– 1 teaspoon ground cumin (toasting whole seeds and grinding them elevates the flavor)
– ½ teaspoon smoked paprika
– ¼ teaspoon cayenne pepper (adjust based on your heat preference)
– Salt to taste (I use about ¾ teaspoon kosher salt)
– 2 tablespoons fresh parsley, chopped
– 1 tablespoon lemon juice (freshly squeezed brightens everything up)
Instructions
1. Heat 1 tablespoon olive oil in a medium saucepan over medium heat for 90 seconds until shimmering.
2. Add diced onion and cook for 4-5 minutes, stirring occasionally, until translucent and fragrant.
3. Stir in minced garlic and cook for 45 seconds until fragrant but not browned.
4. Add chopped zucchini and diced red bell pepper to the pan.
5. Cook vegetables for 6-7 minutes, stirring every 90 seconds, until slightly softened but still crisp.
6. Sprinkle ground cumin, smoked paprika, and cayenne pepper over the vegetables.
7. Toast spices with vegetables for 60 seconds while stirring constantly to prevent burning.
8. Pour vegetable broth into the saucepan and bring to a rolling boil over high heat.
9. Immediately remove pan from heat and stir in couscous until fully incorporated.
10. Cover saucepan tightly with a lid and let stand for 7 minutes undisturbed.
11. Uncover pan and fluff couscous with a fork to separate grains.
12. Drizzle remaining 1 tablespoon olive oil over the couscous mixture.
13. Add chopped fresh parsley and lemon juice to the pan.
14. Gently fold all ingredients together until evenly distributed.
15. Season with salt and serve immediately. What makes this dish truly special is how the fluffy couscous absorbs all those warm spices while the vegetables retain just enough crunch. I love serving it alongside grilled chicken or stuffing it into pita pockets for a quick lunch—the lemon juice really makes the flavors pop in the most delightful way.
Traditional Irish Soda Bread
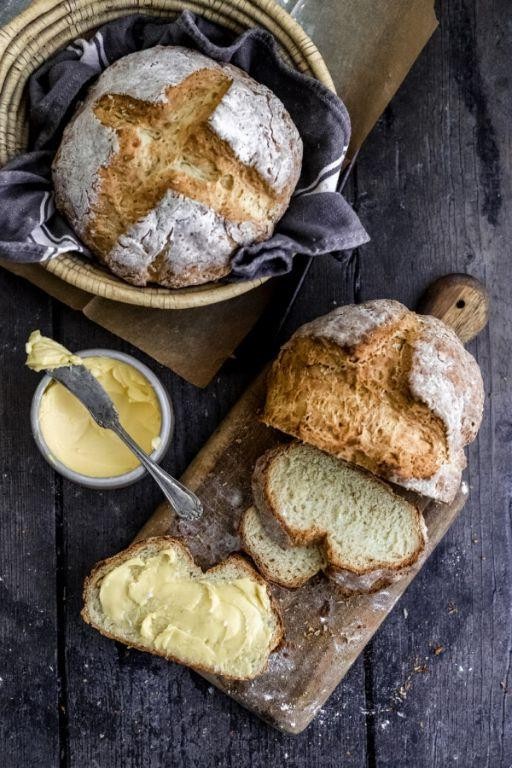
Craving something simple yet soul-satisfying? I first tried Traditional Irish Soda Bread during a rainy afternoon at my Irish friend’s kitchen—the warm, rustic loaf with a cup of tea felt like a hug from the inside. Now, I bake it whenever I need a no-fuss, comforting bread that comes together in minutes.
1
loaf10
minutes40
minutesIngredients
– 4 cups all-purpose flour (I always use unbleached for a softer crumb)
– 1 teaspoon baking soda (make sure it’s fresh for a good rise!)
– 1 teaspoon salt (I love fine sea salt for even distribution)
– 1 and 3/4 cups buttermilk (room temp works best; I shake the carton well before using)
Instructions
1. Preheat your oven to 425°F and lightly dust a baking sheet with flour.
2. In a large bowl, whisk together 4 cups all-purpose flour, 1 teaspoon baking soda, and 1 teaspoon salt until fully combined.
3. Make a well in the center of the dry ingredients and pour in 1 and 3/4 cups buttermilk all at once.
4. Use a fork to gently mix until a shaggy dough forms—don’t overmix, or the bread will be tough.
5. Turn the dough onto a lightly floured surface and knead it gently for about 10 seconds, just until it holds together.
6. Shape the dough into a round loaf about 1.5 inches thick and place it on the prepared baking sheet.
7. Use a sharp knife to score a deep “X” across the top of the loaf, which helps it expand evenly as it bakes.
8. Bake at 425°F for 35–40 minutes, until the crust is golden brown and the bottom sounds hollow when tapped.
9. Transfer the loaf to a wire rack and let it cool completely before slicing—this prevents a gummy texture. On a chilly morning, nothing beats thick slices of this bread slathered with salted butter; the craggy interior stays moist for days, while the crisp crust adds the perfect contrast. I love serving it alongside a hearty stew or simply toasted with jam for a cozy treat.
Conclusion
Ready to transform your meals? This collection offers versatile bread and grain recipes perfect for any occasion—from cozy weeknights to festive gatherings. We hope you find new favorites to bake and share! Don’t forget to leave a comment with your top picks and pin this article on Pinterest to save these delicious ideas for later.