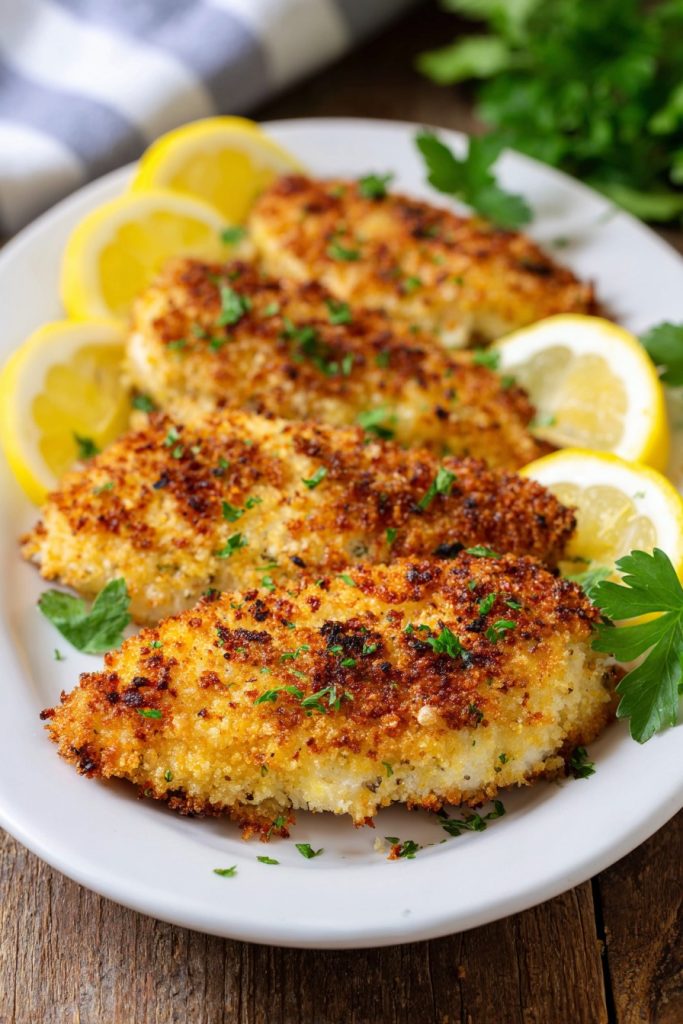
Zesty and absolutely irresistible, this air fryer breaded chicken recipe is about to become your new weeknight hero! Zero excuses needed when you can achieve that golden, crunchy exterior and juicy interior without all the oil and mess of traditional frying. Get ready to fall in love with your air fryer all over again!
Why This Recipe Works
- The air fryer circulates hot air perfectly around each piece, creating an incredibly crispy crust without submerging in oil, cutting calories while maximizing crunch.
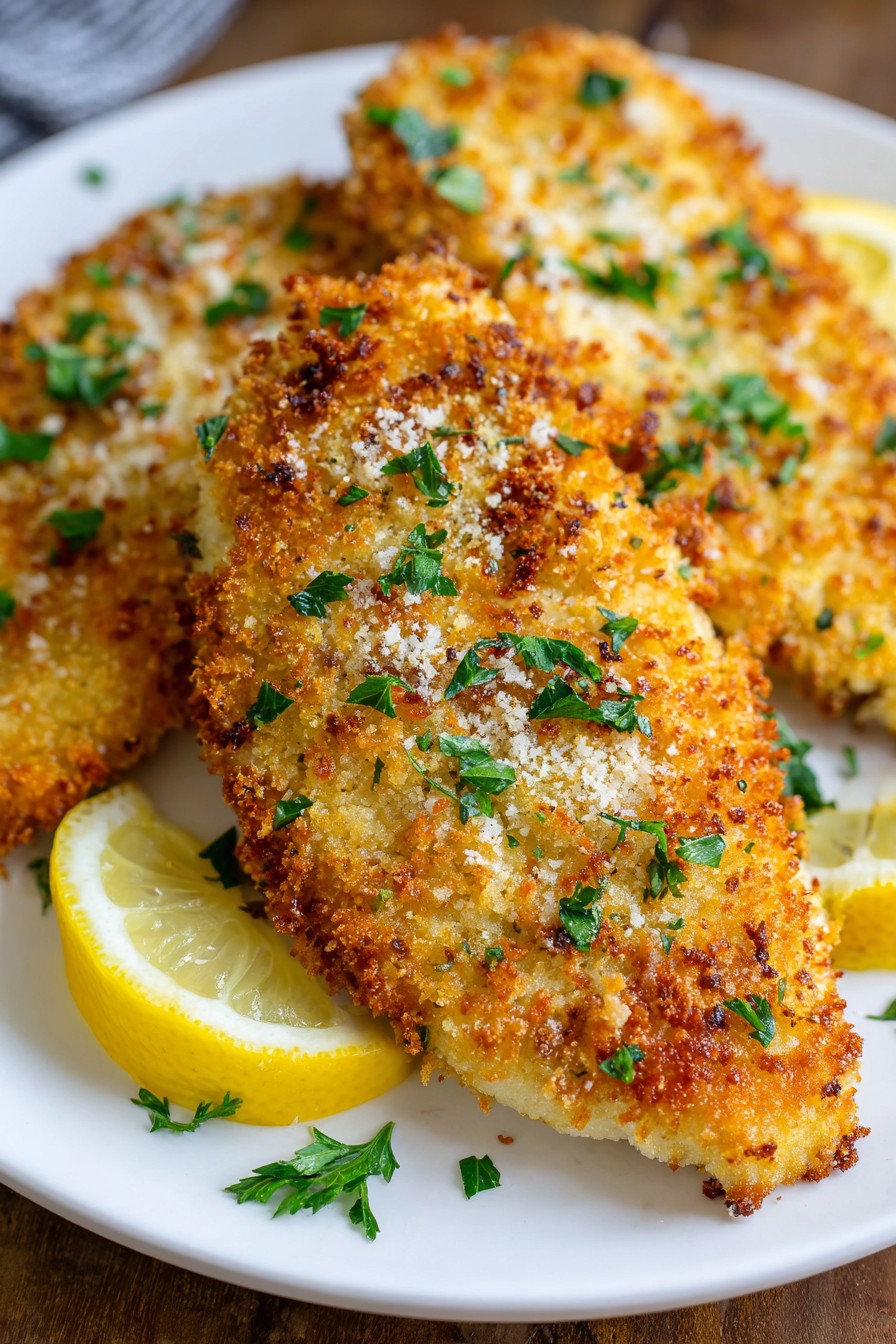
- Using panko breadcrumbs mixed with grated Parmesan cheese gives you that ideal texture combination—light yet substantial, with a savory cheesy flavor that enhances every bite.
- A double-dredging technique in seasoned flour and buttermilk ensures the coating adheres beautifully, preventing any dreaded breading fallout during cooking.
- Cooking at 400°F for exactly 12-14 minutes guarantees juicy, fully cooked chicken inside while achieving that deep golden brown exterior we all crave.
- This method is incredibly versatile; you can easily adapt the seasonings or swap proteins, making it perfect for meal prepping or pleasing picky eaters.
Ingredients
- 1.5 pounds boneless, skinless chicken breasts, pounded to ½-inch thickness
- 1 cup all-purpose flour
- 2 teaspoons garlic powder
- 1 teaspoon paprika
- 1 teaspoon onion powder
- 1 teaspoon salt
- ½ teaspoon black pepper
- 2 large eggs
- ¼ cup buttermilk
- 1.5 cups panko breadcrumbs
- ½ cup grated Parmesan cheese
- 1 teaspoon dried Italian seasoning
- Cooking spray (avocado or olive oil preferred)
- Fresh parsley, chopped (for garnish)
- Lemon wedges (for serving)
Equipment Needed
- Air fryer (basket-style recommended)
- Three shallow bowls or plates
- Meat mallet or rolling pin
- Measuring cups and spoons
- Whisk
- Tongs
- Instant-read thermometer
Instructions
Prepare Your Chicken and Setup
Place your chicken breasts between two pieces of plastic wrap or in a large zip-top bag. Using a meat mallet or heavy rolling pin, gently pound them to an even ½-inch thickness—this is crucial for ensuring they cook evenly without drying out. While you’re at it, set up your breading station with three shallow dishes: one for the flour mixture (combine flour, garlic powder, paprika, onion powder, salt, and pepper), one for the egg wash (whisk eggs and buttermilk until frothy), and one for the panko mixture (mix panko, Parmesan, and Italian seasoning). This organization will make the coating process smooth and mess-free. Pro tip: Line a baking sheet with parchment paper to place your breaded chicken before air frying—this prevents crowding and helps maintain that perfect crust.
Coat the Chicken Thoroughly
Take each pounded chicken piece and first dredge it in the seasoned flour mixture, making sure to shake off any excess—you want a light, even coating that will help the egg wash adhere. Next, dip it into the egg mixture, allowing any extra to drip off so you don’t end up with gloopy spots. Finally, press it firmly into the panko-Parmesan mixture, ensuring every nook and cranny is covered for maximum crunch. Place each finished piece on your prepared baking sheet. Don’t rush this step; taking your time here means no bare spots and that gorgeous, uniform golden brown finish we’re after. Lightly spray both sides with cooking spray—this helps achieve that beautiful color and crisp texture.
Preheat and Arrange in Air Fryer
Preheat your air fryer to 400°F for about 3 minutes—this ensures immediate crisping when the chicken hits the basket. Arrange the breaded chicken pieces in a single layer without overlapping; you’ll likely need to cook in batches depending on your air fryer size. Give each piece a little space so the hot air can circulate freely around them, creating that perfectly even cook. Cook for 6 minutes, then carefully flip each piece using tongs. Continue cooking for another 6-8 minutes until the internal temperature reaches 165°F and the exterior is deeply golden brown. If you’re cooking multiple batches, keep finished chicken warm in a 200°F oven while you finish the rest.
Check for Doneness and Rest
Use an instant-read thermometer to check that the thickest part of each chicken piece has reached 165°F—this is non-negotiable for food safety and juiciness. If needed, add 1-2 minutes more cooking time, but avoid overcooking as it can lead to dryness. Once perfectly cooked, transfer the chicken to a clean plate or cutting board and let it rest for 5 minutes before slicing or serving. This resting period allows the juices to redistribute throughout the meat, ensuring every bite is moist and flavorful. While it rests, the crust will firm up slightly, achieving that ideal texture contrast between the crispy exterior and tender interior.
Serve and Enjoy Immediately
Slice your beautifully golden breaded chicken against the grain into strips or leave whole for serving. Garnish with freshly chopped parsley and serve with lemon wedges for a bright, zesty finish that cuts through the richness perfectly. This chicken shines as the main event alongside mashed potatoes and green beans, sliced over a crisp salad, or tucked into a bun for an epic sandwich. Remember, air fryer creations are best enjoyed immediately while that crust is at its peak crispiness! If you have leftovers, they’ll still taste great but may lose some of that initial crunch—though they make fantastic chicken Parmesan or salad toppers the next day.
Tips and Tricks
For the ultimate crispy coating, try adding a tablespoon of cornstarch to your flour mixture—it creates an extra-crunchy texture that holds up beautifully in the air fryer. If you don’t have buttermilk on hand, make a quick substitute by adding 1 tablespoon of lemon juice or white vinegar to 1 cup of milk and letting it sit for 5 minutes until slightly thickened. This acidity helps tenderize the chicken while aiding in breading adhesion. When preheating your air fryer, don’t skip it! That burst of hot air the moment the food goes in is what gives you that initial sear and prevents sogginess. For even cooking, make sure your chicken pieces are as uniform in thickness as possible—if one end is thicker, you can butterfly it or pound just that section a bit more. If you’re cooking larger batches, keep finished chicken warm in a 200°F oven on a wire rack set over a baking sheet; this prevents steam from making the bottom soggy. For extra flavor, consider adding a teaspoon of your favorite seasoning blend to the breadcrumb mixture—everything bagel seasoning, Cajun spice, or even ranch powder work wonderfully. To make cleanup easier, line your air fryer basket with parchment paper designed for air fryers (with pre-cut holes) or simply give it a quick spray with cooking spray before adding the chicken. If you notice any areas aren’t browning evenly, don’t be afraid to open the basket and rearrange the pieces halfway through cooking—the air flow can sometimes create hot spots. For meal prep, you can bread the chicken ahead of time and refrigerate it on a parchment-lined baking sheet for up to 4 hours before air frying; this can actually help the coating set and adhere even better. Finally, always let your air fryer cool completely before cleaning to avoid warping the basket, and hand-wash it with warm soapy water to preserve the non-stick coating.
Recipe Variations
- Spicy Kick: Add 1 teaspoon of cayenne pepper to the flour mixture and mix ½ teaspoon of crushed red pepper flakes into the panko for those who love heat. Serve with a cool ranch or blue cheese dipping sauce to balance the spice level perfectly.
- Italian Style: Swap the paprika for dried oregano and basil in the flour, and use Italian-seasoned panko if available. After cooking, top with marinara sauce and melted mozzarella for a quick chicken Parmesan—just pop it back in the air fryer for 1-2 minutes to melt the cheese.
- Gluten-Free Option: Replace the all-purpose flour with your favorite gluten-free blend (like Bob’s Red Mill 1-to-1) and use gluten-free panko breadcrumbs. The cooking time remains the same, and you won’t sacrifice any crunch or flavor.
- Asian Twist: Substitute the Italian seasoning with 1 teaspoon of five-spice powder in the panko mixture, and add a tablespoon of sesame seeds. Serve with a sweet chili dipping sauce or over rice with stir-fried vegetables for a fusion meal.
- Lemon Herb: Add the zest of one lemon to the panko mixture, along with fresh chopped dill or thyme. This bright, fresh variation is perfect for spring and summer meals, especially when served with a simple arugula salad.
Frequently Asked Questions
Can I use chicken thighs instead of breasts?
Absolutely! Chicken thighs work wonderfully in this recipe—they’re actually harder to overcook and stay incredibly juicy. Just make sure to pound them to an even ½-inch thickness and remove any excess skin or fat. You may need to add 1-2 minutes to the cooking time since thighs can be slightly thicker, but always check for that 165°F internal temperature. The higher fat content in thighs gives you an even more flavorful result, though the crust might be slightly less crisp due to rendering fat. Either way, you’re in for a delicious meal!
Why did my breading fall off during cooking?
Breading detachment usually happens for two reasons: not shaking off excess flour after the first dredge, or not pressing firmly enough when applying the panko mixture. The flour layer should be light and even—think of it as a primer for the egg wash. When pressing into the breadcrumbs, really use your hands to ensure good adhesion. Also, make sure your chicken is dry before starting; pat it thoroughly with paper towels. If you’re still having issues, try refrigerating the breaded chicken for 15-30 minutes before cooking to help set the coating.
Can I make this recipe without an air fryer?
Yes, though the results will differ! For oven baking, place breaded chicken on a wire rack set over a baking sheet and bake at 425°F for 18-22 minutes, flipping halfway. For pan-frying, heat ¼ inch of oil in a skillet over medium-high and cook 4-5 minutes per side. The air fryer gives you the best combination of healthfulness and crunch, but these methods work in a pinch. Just note that pan-frying will be crispier but higher in calories, while baking might be slightly less crunchy but still delicious.
How do I store and reheat leftovers?
Store leftover breaded chicken in an airtight container in the refrigerator for up to 3 days. To reheat, avoid the microwave—it will make the coating soggy. Instead, use your air fryer at 375°F for 3-4 minutes until heated through and re-crisped. If you don’t have an air fryer, a toaster oven or conventional oven at 375°F for 5-7 minutes works well. The crust won’t be quite as perfect as fresh, but it’s still tasty! You can also chop leftovers and use them in salads, wraps, or pasta dishes.
Can I freeze the breaded chicken before cooking?
Definitely! This is a great meal prep strategy. After breading, place chicken pieces on a parchment-lined baking sheet and freeze until solid (about 2 hours). Then transfer to a freezer-safe bag or container for up to 3 months. When ready to cook, you can air fry directly from frozen—just add 3-5 minutes to the cooking time and check that internal temperature reaches 165°F. No need to thaw, which makes this perfect for quick dinners. The texture might be slightly less crisp than fresh, but still delicious.
Summary
This air fryer breaded chicken delivers incredible crunch with minimal oil, perfect for busy weeknights. Juicy inside, golden outside, and endlessly adaptable—it’s a guaranteed crowd-pleaser!
Breaded Chicken Recipe Air Fryer
6
servings15
minutes12
minutesIngredients
Instructions
- 1 Pound chicken to even ½-inch thickness. Set up three dishes: one with flour and spices, one with whisked eggs and buttermilk, one with panko, Parmesan, and Italian seasoning.
- 2 Dredge each chicken piece in flour, then egg mixture, then press firmly into panko mixture. Place on parchment-lined sheet and spray both sides with cooking spray.
- 3 Preheat air fryer to 400°F for 3 minutes. Arrange chicken in single layer without overlapping. Cook for 6 minutes, flip, then cook 6-8 minutes more until internal temperature reaches 165°F.
- 4 Let chicken rest 5 minutes before slicing. Garnish with parsley and serve with lemon wedges.


