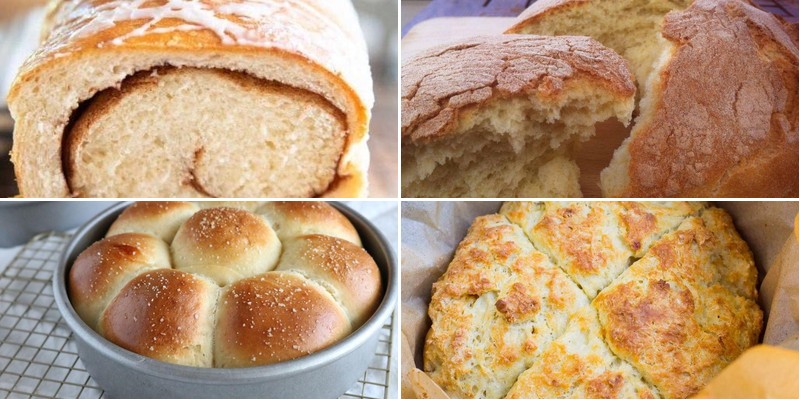
Looking to whip up fresh, homemade bread without the fuss? You’ve come to the right place! Self-rising flour is your secret weapon for quick, easy, and incredibly delicious breads—from fluffy biscuits to golden loaves. Whether you’re a beginner or a seasoned baker, these recipes promise comfort and convenience. Ready to get baking? Let’s dive into 25 mouthwatering breads you’ll love!
Quick Self-Rising Flour Soda Bread
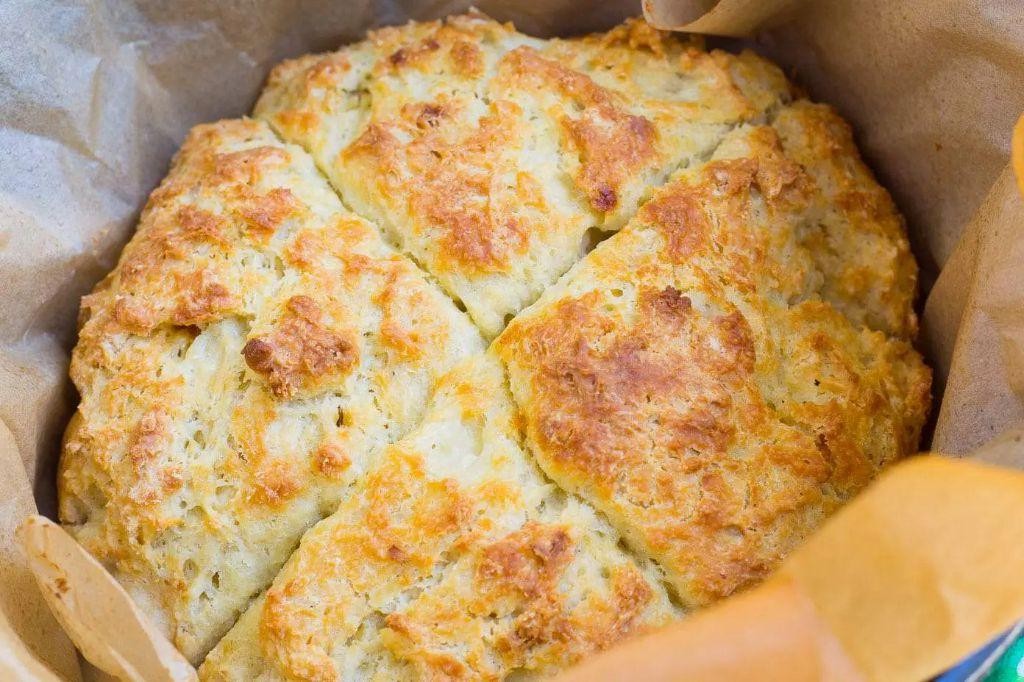
Perfect for those moments when time is precious but quality remains paramount, this self-rising flour soda bread transforms humble pantry staples into a rustic, golden-crusted loaf with minimal effort. Its straightforward preparation belies the sophisticated texture and flavor that emerges from the simple alchemy of basic ingredients, offering both novice and experienced bakers a reliably delicious result.
1
loaf15
minutes30
minutesIngredients
- 2 cups self-rising flour, plus extra for dusting
- 1 cup buttermilk, cold for optimal rise
- 1 tablespoon honey, or maple syrup for variation
- 1 tablespoon unsalted butter, melted for brushing
- ½ teaspoon sea salt, adjust to preference
Instructions
- Preheat your oven to 400°F and lightly flour a baking sheet to prevent sticking.
- In a large mixing bowl, combine 2 cups self-rising flour and ½ teaspoon sea salt using a whisk to ensure even distribution.
- Pour 1 cup cold buttermilk and 1 tablespoon honey into the dry ingredients, stirring gently with a wooden spoon just until a shaggy dough forms—avoid overmixing to keep the bread tender.
- Turn the dough onto a lightly floured surface and knead it 4–5 times until it holds together, shaping it into a round loaf about 6 inches in diameter.
- Score a deep “X” on top of the loaf with a sharp knife, which helps steam escape and promotes even rising during baking.
- Place the loaf on the prepared baking sheet and bake at 400°F for 25–30 minutes, until the crust is golden brown and the bottom sounds hollow when tapped.
- Remove the bread from the oven and immediately brush the top with 1 tablespoon melted unsalted butter for a glossy, flavorful crust.
- Transfer the loaf to a wire rack and let it cool for at least 15 minutes before slicing to allow the crumb to set properly.
Crumbly yet moist, this bread boasts a subtle tang from the buttermilk, balanced by the gentle sweetness of honey. Serve it warm with a smear of cultured butter or alongside a hearty stew, where its rustic charm truly shines.
Simple Self-Rising Flour Yeast Bread

Glistening with golden-brown perfection, this simple self-rising flour yeast bread transforms humble pantry staples into an artisanal loaf that belies its straightforward preparation. The magic lies in the harmonious marriage of instant yeast and self-rising flour, creating a tender crumb with just enough structure to satisfy both novice bakers and seasoned bread enthusiasts alike. With minimal kneading and a forgiving rise, this recipe delivers bakery-quality results from your own kitchen.
1
loaf20
minutes30
minutesIngredients
- 3 cups self-rising flour (scoop and level for accuracy)
- 1 packet (2¼ teaspoons) instant yeast (also called rapid-rise)
- 1¼ cups warm water (110°F, about wrist temperature)
- 1 tablespoon honey (or granulated sugar)
- 1 tablespoon olive oil (or any neutral oil)
- ½ teaspoon fine sea salt (adjust to preference)
Instructions
- Combine self-rising flour, instant yeast, and sea salt in a large mixing bowl, whisking for 30 seconds to ensure even distribution.
- Pour warm water into a liquid measuring cup and stir in honey until fully dissolved, testing the temperature reaches precisely 110°F with an instant-read thermometer.
- Create a well in the center of the dry ingredients and pour in the honey-water mixture along with olive oil.
- Stir with a wooden spoon until a shaggy dough forms and no dry flour remains, about 1 minute of consistent mixing.
- Lightly flour a clean surface and turn the dough out, kneading for exactly 2 minutes until smooth and slightly elastic.
- Place the dough in a lightly oiled bowl, turning once to coat all surfaces, then cover with a damp kitchen towel.
- Let rise in a warm, draft-free area until doubled in size, about 45-60 minutes (the dough should leave an indentation when gently pressed).
- Punch down the dough to release air bubbles and shape into a round loaf on a parchment-lined baking sheet.
- Score the top with a sharp knife in a cross pattern, cutting ¼-inch deep to allow for expansion during baking.
- Preheat oven to 375°F and let the shaped loaf rest for 15 minutes while the oven comes to temperature.
- Bake for 25-30 minutes until the crust is deep golden brown and the bottom sounds hollow when tapped.
- Transfer to a wire rack and cool completely for 1 hour before slicing to prevent a gummy texture.
Marvel at the crackly crust that gives way to a soft, airy interior with subtle sweetness from the honey. This versatile bread shines when toasted and slathered with cultured butter or used for hearty sandwiches, its delicate crumb absorbing flavors without becoming soggy. For an elegant presentation, slice thickly and serve alongside olive oil infused with herbs for dipping.
No-Knead Rosemary Focaccia
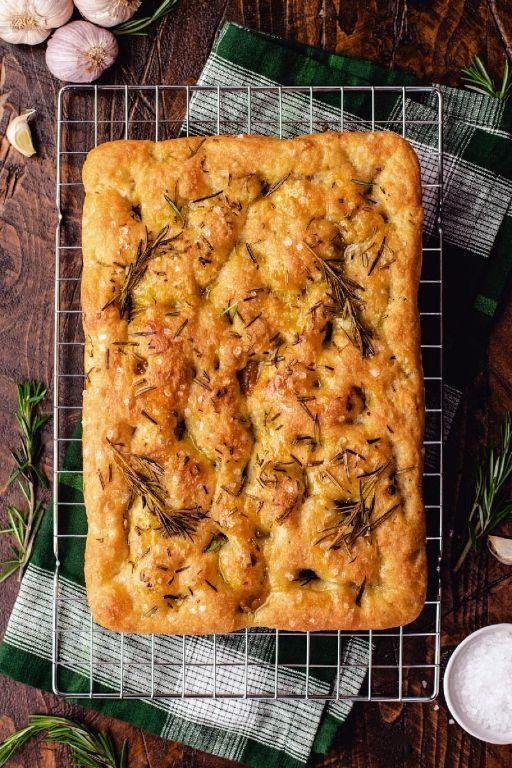
Rustic yet refined, this no-knead rosemary focaccia transforms humble ingredients into a golden, aromatic masterpiece that fills your kitchen with the comforting scent of fresh herbs and toasted olive oil. With its crisp exterior and tender, airy crumb, this bread requires minimal effort yet delivers maximum satisfaction, making it the perfect centerpiece for any gathering or quiet evening at home. The magic lies in the slow fermentation, which develops complex flavors while you simply wait for nature to work its wonders.
8
portions20
minutes25
minutesIngredients
– 4 cups all-purpose flour (or bread flour for chewier texture)
– 2 teaspoons kosher salt
– 1 teaspoon instant yeast
– 2 cups warm water (about 105°F)
– 1/4 cup extra virgin olive oil, plus more for drizzling
– 2 tablespoons fresh rosemary leaves, chopped (or 1 tablespoon dried)
– Flaky sea salt for finishing
Instructions
1. In a large bowl, whisk together 4 cups all-purpose flour, 2 teaspoons kosher salt, and 1 teaspoon instant yeast until thoroughly combined.
2. Pour 2 cups warm water (105°F) and 1/4 cup extra virgin olive oil into the dry ingredients, then stir with a wooden spoon until no dry flour remains and a shaggy dough forms.
3. Cover the bowl tightly with plastic wrap and let the dough rest at room temperature (70-75°F) for 12-18 hours until doubled in size and covered with bubbles.
4. Generously oil a 9×13-inch baking pan with olive oil, then gently transfer the risen dough to the pan without deflating it.
5. Using oiled fingers, gently stretch the dough to fill the pan, then cover with a clean kitchen towel and let rise for 2 more hours until puffy.
6. Preheat your oven to 450°F and position a rack in the center.
7. Press your oiled fingertips deeply into the dough to create characteristic dimples across the entire surface.
8. Drizzle additional olive oil generously over the dimpled dough, ensuring it pools in the indentations.
9. Sprinkle 2 tablespoons chopped fresh rosemary evenly across the surface, then finish with a generous pinch of flaky sea salt.
10. Bake at 450°F for 20-25 minutes until the focaccia is deeply golden brown and crisp around the edges.
11. Transfer the baked focaccia to a wire rack and let cool for 15 minutes before slicing.
Unbelievably tender with a satisfyingly crisp crust, this focaccia features pockets of olive oil that soak into the delicate crumb, while the rosemary infuses every bite with earthy fragrance. Serve it warm alongside a bowl of rich tomato soup for dipping, or tear into generous pieces to accompany charcuterie and cheese boards for an effortless yet impressive presentation.
Self-Rising Flour Banana Bread
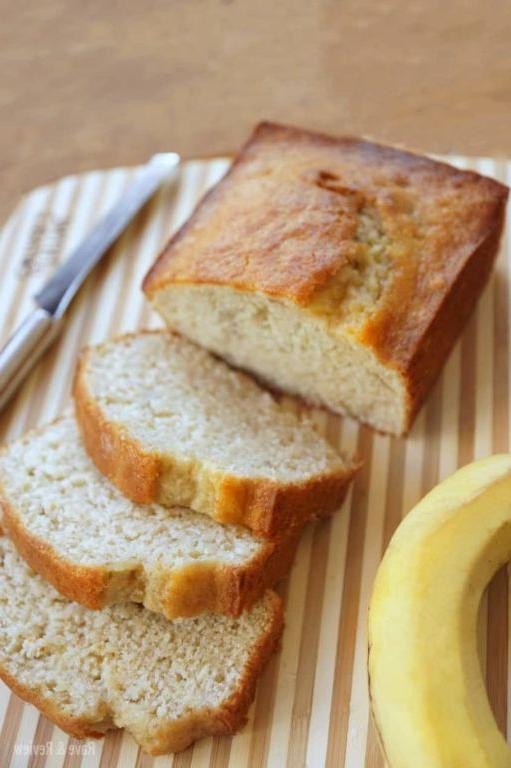
Just when you thought banana bread couldn’t get any simpler, this self-rising flour version elevates the classic with effortless elegance and foolproof results. Juicy, overripe bananas meld with warm spices to create a tender, golden-crowned loaf that requires no complicated measuring or technique. This streamlined approach delivers bakery-quality texture with the comforting familiarity of home baking.
1
loaf15
minutes60
minutesIngredients
– 3 very ripe medium bananas, mashed (about 1½ cups, spotted black skins indicate perfect sweetness)
– 1 cup granulated sugar (or substitute with brown sugar for deeper flavor)
– ½ cup unsalted butter, melted and cooled (or any neutral oil like vegetable or coconut)
– 2 large eggs, at room temperature (for better emulsion)
– 2 cups self-rising flour (do not substitute with all-purpose flour)
– 1 teaspoon vanilla extract (pure recommended over imitation)
– ½ teaspoon ground cinnamon (adjust to preference)
– ¼ teaspoon ground nutmeg (freshly grated preferred)
Instructions
1. Preheat your oven to 350°F and generously grease a 9×5-inch loaf pan with butter or baking spray, ensuring all corners are coated to prevent sticking.
2. In a large mixing bowl, thoroughly mash the bananas with a fork until only small lumps remain, creating a naturally sweet base for moisture.
3. Add the sugar and cooled melted butter to the bananas, whisking vigorously for 60 seconds until the mixture becomes pale and slightly thickened.
4. Crack the eggs into the bowl one at a time, whisking each until fully incorporated before adding the next to maintain a smooth emulsion.
5. Stir in the vanilla extract, cinnamon, and nutmeg until the spices are evenly distributed throughout the wet ingredients.
6. Gently fold the self-rising flour into the wet mixture using a spatula, stopping as soon as the last streaks disappear to avoid overmixing and ensure a tender crumb.
7. Immediately transfer the batter to your prepared loaf pan, spreading it evenly into all corners with the spatula for uniform baking.
8. Bake at 350°F for 55-65 minutes, rotating the pan halfway through, until the top is deep golden brown and a toothpick inserted into the center comes out completely clean.
9. Cool the banana bread in the pan on a wire rack for 15 minutes before carefully running a knife around the edges and transferring it directly to the rack to cool completely, which prevents a soggy bottom.
Remarkably moist with a delicate, cake-like crumb, this banana bread features caramelized banana notes enhanced by warm spice undertones. Rich golden edges give way to a tender interior that slices beautifully when fully cooled. For an indulgent twist, toast thick slices and serve with honey butter or layer with vanilla ice cream for a decadent dessert.
Easy Whole Wheat Self-Rising Bread
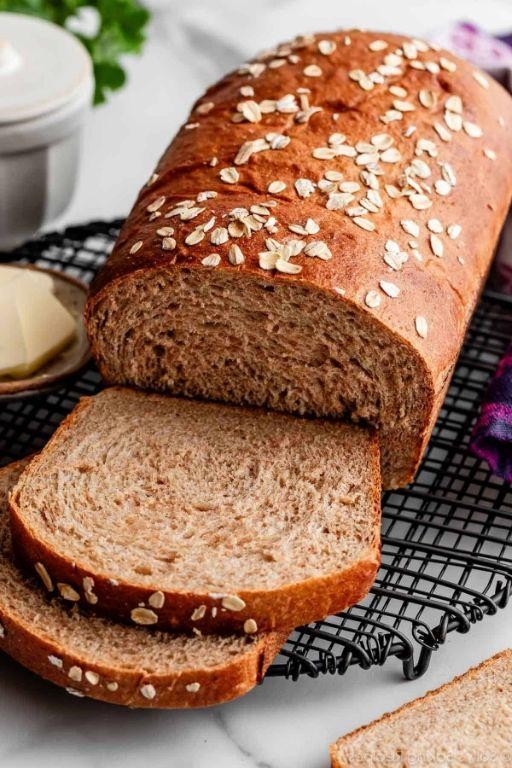
Delightfully simple yet sophisticated, this whole wheat self-rising bread transforms humble ingredients into a golden-crusted masterpiece. Developed for the modern home baker seeking wholesome convenience, it requires no yeast proofing or complicated techniques. The result is a tender, nutty loaf that fills your kitchen with the comforting aroma of freshly baked bread.
1
loaf10
minutes40
minutesIngredients
- 2 cups whole wheat self-rising flour (or make your own by whisking 2 cups whole wheat flour with 3 tsp baking powder and 1 tsp salt)
- 1 cup buttermilk, at room temperature (or 1 cup milk mixed with 1 tbsp lemon juice, rested 5 minutes)
- 2 tbsp honey (or maple syrup for vegan option)
- 2 tbsp unsalted butter, melted (or olive oil for dairy-free)
Instructions
- Preheat your oven to 375°F and generously grease a standard 9×5-inch loaf pan with butter or oil.
- In a large mixing bowl, combine 2 cups whole wheat self-rising flour with a whisk to aerate and break up any lumps.
- Create a well in the center of the flour and pour in 1 cup room-temperature buttermilk, 2 tablespoons honey, and 2 tablespoons melted butter.
- Using a spatula, gently fold the wet ingredients into the dry until just combined—the dough will be slightly sticky and shaggy.
- Transfer the dough to your prepared loaf pan and use wet fingers to smooth the top into an even layer.
- Bake at 375°F for 35-40 minutes, or until the crust is deep golden brown and a toothpick inserted in the center comes out clean.
- Remove the bread from the oven and let it cool in the pan for exactly 10 minutes before transferring to a wire rack.
- Allow the bread to cool completely for at least 1 hour before slicing to prevent crumbling.
Warm from the oven, this bread boasts a crackly crust that gives way to a moist, tender crumb with subtle nutty sweetness. The honey lends a delicate floral note that pairs beautifully with salted butter or artisanal jams. For an elegant twist, toast thick slices and top with ricotta, fresh figs, and a drizzle of lavender honey.
Hearty Self-Rising Flour Multigrain Loaf
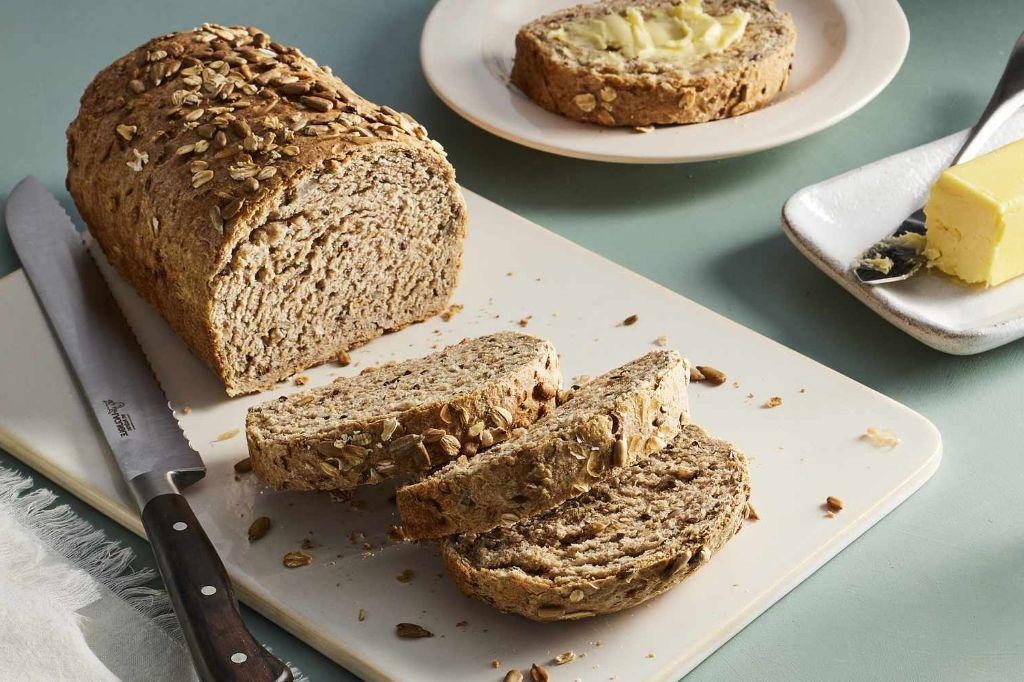
Zestful autumn baking calls for comforting creations that nourish both body and soul, and this multigrain loaf delivers with its rustic charm and wholesome ingredients. Perfectly balanced between hearty texture and tender crumb, it transforms simple self-rising flour into a bakery-worthy centerpiece for any table. The aromatic blend of grains and seeds creates a symphony of flavors that will make your kitchen smell divine.
1
loaf15
minutes50
minutesIngredients
– 2 cups self-rising flour (sifted for lighter texture)
– 1 cup whole wheat flour (or substitute with additional self-rising flour for softer loaf)
– 1/2 cup rolled oats (old-fashioned style preferred)
– 1/4 cup sunflower seeds (raw, unsalted)
– 2 tablespoons flax seeds (golden or brown)
– 1 tablespoon honey (or maple syrup for vegan option)
– 1 1/4 cups buttermilk (shake well before measuring)
– 2 tablespoons olive oil (or any neutral oil)
– 1 large egg, beaten (for egg wash, optional)
Instructions
1. Preheat your oven to 375°F and generously grease a 9×5-inch loaf pan with butter or cooking spray.
2. In a large mixing bowl, whisk together 2 cups self-rising flour, 1 cup whole wheat flour, 1/2 cup rolled oats, 1/4 cup sunflower seeds, and 2 tablespoons flax seeds until thoroughly combined.
3. Create a well in the center of the dry ingredients and pour in 1 1/4 cups buttermilk, 2 tablespoons olive oil, and 1 tablespoon honey.
4. Using a wooden spoon, gently mix the wet and dry ingredients until just combined—be careful not to overmix as this develops gluten and creates a tough loaf.
5. Transfer the dough to your prepared loaf pan and smooth the top with a spatula dipped in water to prevent sticking.
6. For a golden crust, brush the top with beaten egg using a pastry brush, creating an even coating.
7. Bake at 375°F for 45-50 minutes until the loaf is deeply golden brown and sounds hollow when tapped on the bottom.
8. Insert an instant-read thermometer into the center—it should register 190-200°F for perfectly baked bread.
9. Immediately remove the loaf from the pan and transfer to a wire rack to cool completely, which prevents a soggy bottom crust.
10. Let the bread cool for at least 2 hours before slicing to allow the crumb structure to set properly.
This loaf boasts a wonderfully crisp crust that gives way to a moist, tender interior studded with nutty seeds and wholesome grains. The subtle sweetness from honey complements the earthy notes of whole wheat and oats beautifully. Try thick slices toasted with avocado and sea salt, or use it for exceptional turkey sandwiches that elevate everyday lunches into something special.
Savory Self-Rising Bacon and Cheese Bread

Venture into the realm of effortless baking with this savory creation that transforms humble ingredients into a golden, aromatic loaf. Velvety self-rising flour forms the foundation for crisp bacon and melted cheese, yielding a bread that’s both rustic and refined. Perfect for brunch gatherings or a comforting afternoon snack, this recipe delivers impressive results with minimal effort.
1
loaf15
minutes50
minutesIngredients
- 2 cups self-rising flour (scoop and level for accuracy)
- 1 cup whole milk, at room temperature (or buttermilk for tanginess)
- 1 large egg, lightly beaten
- ¼ cup unsalted butter, melted and cooled
- 6 slices thick-cut bacon, cooked until crisp and crumbled
- 1 cup shredded sharp cheddar cheese (or Gruyère for nuttiness)
- 1 teaspoon garlic powder
- ½ teaspoon black pepper
- 1 tablespoon chopped fresh chives (optional garnish)
Instructions
- Preheat your oven to 375°F and generously grease a 9×5-inch loaf pan with butter or non-stick spray.
- In a large mixing bowl, whisk together the self-rising flour, garlic powder, and black pepper until fully combined.
- Pour the whole milk, beaten egg, and melted butter into the dry ingredients, stirring gently with a spatula until just incorporated—do not overmix.
- Fold in the crumbled bacon and shredded cheddar cheese until evenly distributed throughout the batter.
- Transfer the batter to the prepared loaf pan, spreading it evenly with the spatula to create a level surface.
- Bake on the center rack for 45–50 minutes, or until the top is golden brown and a toothpick inserted into the center comes out clean.
- Allow the bread to cool in the pan for 10 minutes before transferring it to a wire rack to cool completely.
- Sprinkle the top with chopped fresh chives for a burst of color and freshness before slicing.
Nothing compares to the warm, pillowy crumb that gives way to smoky bacon and gooey cheese pockets. Notice how the crisp exterior yields to a tender interior, making each slice ideal for pairing with soups or simply enjoyed with a pat of butter. For a delightful twist, toast thick slices and top with a fried egg or avocado for a hearty breakfast upgrade.
Sweet Self-Rising Cranberry Orange Bread
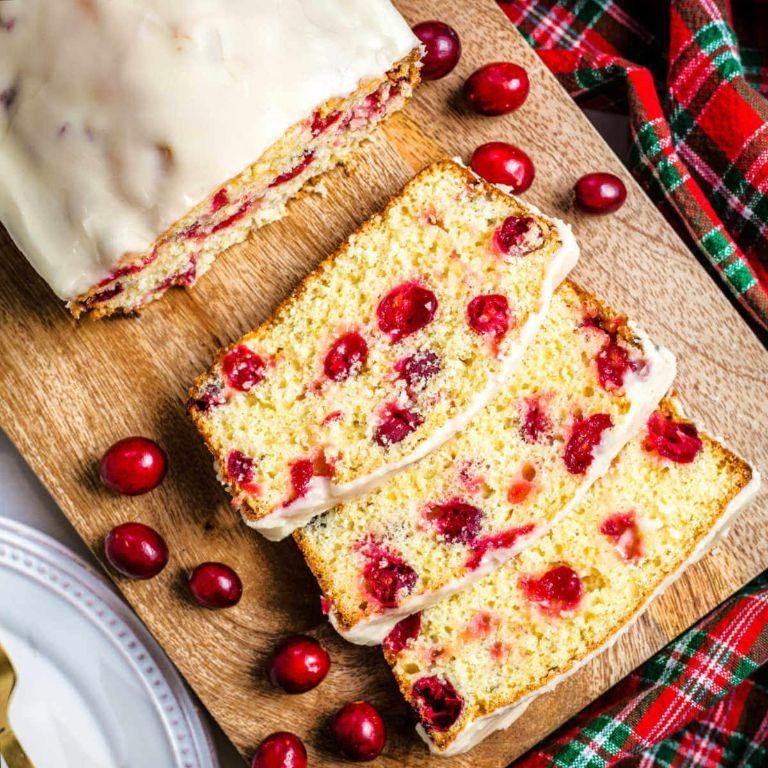
Nestled between the crisp autumn air and cozy kitchen warmth, this sweet cranberry orange bread emerges as the perfect seasonal treat, where tart cranberries dance with bright citrus notes in a tender, golden loaf that fills your home with irresistible aromas. Using self-rising flour simplifies the process while ensuring a light, airy crumb that practically begs for a slather of butter or a drizzle of honey. It’s the kind of effortless elegance that turns an ordinary afternoon into something special, whether enjoyed with tea or as a festive breakfast centerpiece.
1
loaf15
minutes55
minutesIngredients
- 2 cups self-rising flour (scoop and level for accuracy)
- 1 cup granulated sugar (or substitute with coconut sugar for deeper flavor)
- 1 cup fresh cranberries (frozen work too—no need to thaw)
- 2 large eggs, at room temperature (for better emulsion)
- 1/2 cup whole milk (any milk percentage will do)
- 1/2 cup unsalted butter, melted and cooled (or use neutral oil like avocado)
- Zest of 1 large orange (about 1 tbsp, avoid the bitter white pith)
- 1 tsp vanilla extract (pure adds the best flavor)
- Non-stick cooking spray (for greasing the pan)
Instructions
- Preheat your oven to 350°F and generously spray a 9×5-inch loaf pan with non-stick cooking spray, ensuring all corners are coated.
- In a large mixing bowl, whisk together the self-rising flour and granulated sugar until no lumps remain. Tip: Sifting the flour here guarantees a lighter texture.
- Fold in the fresh cranberries and orange zest using a spatula, distributing them evenly to prevent sinking during baking.
- In a separate medium bowl, whisk the eggs vigorously for 30 seconds until pale and frothy, which helps create a tender crumb.
- Pour in the whole milk, melted butter, and vanilla extract, then whisk until the wet ingredients are fully combined and smooth.
- Gently pour the wet mixture into the dry ingredients, stirring with a spatula just until no flour streaks remain—do not overmix to avoid toughness.
- Transfer the batter to the prepared loaf pan, spreading it evenly into the corners with the spatula.
- Bake on the center rack for 50–60 minutes, or until a toothpick inserted into the center comes out clean and the top is golden brown. Tip: Rotate the pan halfway through for even browning.
- Cool the bread in the pan on a wire rack for 15 minutes, then carefully invert it to release and cool completely. Tip: Letting it cool fully prevents a gummy texture when slicing.
Unveil slices of this moist, citrus-kissed bread to reveal a confetti of ruby cranberries, each bite balancing sweetness with a subtle tartness that lingers pleasantly. Its tender, cake-like crumb pairs beautifully with a dollop of mascarpone or a sprinkle of toasted pecans for added crunch. For a festive twist, toast slices lightly and serve alongside a spiced chai latte or as part of a holiday brunch spread, where its vibrant flavors truly shine.
Herbed Self-Rising Flatbread

Vibrant with aromatic herbs and requiring minimal effort, this Herbed Self-Rising Flatbread transforms simple pantry staples into an elegant, rustic loaf. Its golden crust yields to a tender, airy crumb infused with the earthy fragrance of fresh rosemary and thyme. Perfect for tearing and sharing, this bread elevates any meal from ordinary to extraordinary in under thirty minutes.
1
loaf10
minutes20
minutesIngredients
– 2 cups self-rising flour (or make your own with all-purpose flour, baking powder, and salt)
– 1 cup whole milk, at room temperature for better dough consistency
– 1/4 cup olive oil, plus extra for brushing
– 2 tablespoons fresh rosemary, finely chopped (or substitute dried if fresh isn’t available)
– 1 tablespoon fresh thyme leaves, stripped from stems
– 1/2 teaspoon flaky sea salt, for finishing
Instructions
1. Preheat your oven to 425°F and lightly brush a 9-inch cast-iron skillet or baking sheet with olive oil.
2. In a large mixing bowl, whisk together the self-rising flour, chopped rosemary, and thyme leaves until the herbs are evenly distributed.
3. Pour in the whole milk and 1/4 cup olive oil, then stir with a wooden spoon until a shaggy dough forms and no dry flour remains.
4. Turn the dough out onto a lightly floured surface and knead gently for 30 seconds—just until smooth, being careful not to overwork it to maintain a tender texture.
5. Pat the dough into a 1-inch-thick round and transfer it to the prepared skillet, using your fingertips to dimple the surface all over.
6. Brush the top generously with olive oil and sprinkle evenly with flaky sea salt.
7. Bake for 18–20 minutes, until the flatbread is golden brown on top and sounds hollow when tapped on the bottom.
8. Let it cool in the skillet for 5 minutes before slicing to allow the steam to set the crumb. The flatbread emerges with a crisp, herb-speckled crust that gives way to a soft, pillowy interior. Serve it warm alongside soups or salads, or tear it into chunks for dipping into olive oil and balsamic vinegar.
Self-Rising Breadsticks with Garlic Butter

Just when you thought homemade bread couldn’t get any simpler, these self-rising breadsticks arrive to transform your weeknight dinners into something truly special. Their golden, garlic-kissed exterior gives way to a remarkably soft interior that pairs beautifully with everything from pasta to salads. This effortless recipe delivers restaurant-quality results with minimal fuss, making it perfect for both busy evenings and leisurely gatherings.
8
portions10
minutes16
minutesIngredients
– 2 cups self-rising flour (plus extra for dusting)
– 1 cup whole milk, warmed to 110°F (or buttermilk for extra tang)
– 3 tbsp unsalted butter, melted (divided use)
– 2 cloves garlic, minced (or 1 tsp garlic powder)
– 1 tsp dried parsley (fresh parsley works too)
– 1/2 tsp kosher salt (adjust to preference)
Instructions
1. Preheat your oven to 425°F and line a baking sheet with parchment paper.
2. In a large mixing bowl, combine 2 cups self-rising flour and 1/2 tsp kosher salt.
3. Gradually pour in 1 cup warmed milk while stirring with a wooden spoon until a shaggy dough forms.
4. Turn the dough onto a lightly floured surface and knead gently for 1 minute until smooth (tip: avoid over-kneading to prevent toughness).
5. Divide the dough into 8 equal portions and roll each into a 6-inch rope shape.
6. Arrange the breadsticks on the prepared baking sheet, spacing them 1 inch apart.
7. Bake for 12-14 minutes until puffed and lightly golden around the edges.
8. While baking, combine 2 tbsp melted butter with 2 cloves minced garlic and 1 tsp dried parsley in a small bowl.
9. Remove the breadsticks from the oven and immediately brush with the garlic butter mixture (tip: brushing while hot helps the flavor penetrate).
10. Return to the oven for 2-3 minutes until the tops are golden and fragrant.
11. Transfer to a wire rack and brush with remaining 1 tbsp melted butter for extra shine (tip: this final butter layer adds beautiful sheen).
The warm, garlic-infused aroma will fill your kitchen as these breadsticks emerge with a crisp exterior that yields to an incredibly tender, airy crumb. Their buttery finish makes them irresistible straight from the oven, though they’re equally delightful when served alongside a rich tomato soup or as an elegant accompaniment to charcuterie boards.
Homemade Self-Rising Flour English Muffins
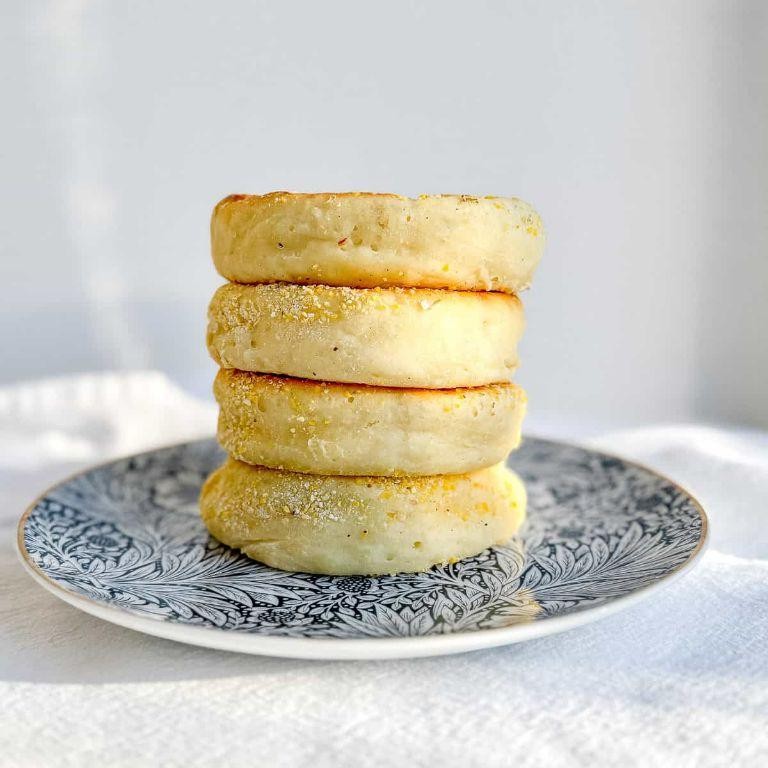
Beneath the humble exterior of these golden-brown rounds lies a world of delicate craters and tender crumb, waiting to be filled with melting butter or your favorite preserves. Homemade self-rising flour English muffins offer that distinctive nooks-and-crannies texture that store-bought versions simply can’t replicate, with a flavor that whispers of gentle fermentation and wholesome grains. Creating these breakfast classics from scratch transforms your morning routine into something truly special, filling your kitchen with the comforting aroma of freshly baked bread.
8
muffins25
minutes16
minutesIngredients
– 2 cups self-rising flour (for lighter texture)
– 1 cup whole milk, warmed to 110°F (or buttermilk for tang)
– 1 tablespoon granulated sugar (helps with browning)
– 1 tablespoon unsalted butter, melted (or coconut oil for dairy-free)
– 1 teaspoon active dry yeast (check expiration date for best rise)
– ½ teaspoon fine sea salt (enhances flavor)
– Cornmeal for dusting (creates classic texture)
Instructions
1. Combine warmed milk, sugar, and yeast in a large bowl and let sit for 5 minutes until foamy.
2. Whisk the self-rising flour and salt together in a separate bowl to ensure even distribution.
3. Pour the melted butter into the yeast mixture and stir gently to combine.
4. Gradually add the flour mixture to the wet ingredients, stirring with a wooden spoon until a shaggy dough forms.
5. Turn the dough onto a lightly floured surface and knead for 8 minutes until smooth and elastic.
6. Place the dough in a greased bowl, cover with a damp kitchen towel, and let rise in a warm place for 1 hour until doubled in size.
7. Punch down the dough gently to release air bubbles, then roll out to ½-inch thickness.
8. Use a 3-inch round cutter to cut out muffins, re-rolling scraps as needed.
9. Dust a baking sheet generously with cornmeal and place cut muffins on it, sprinkling more cornmeal on top.
10. Cover with the damp towel again and let rise for 30 minutes until slightly puffed.
11. Preheat a cast-iron skillet or griddle over medium-low heat (325°F if using thermometer).
12. Cook muffins for 6-8 minutes per side until golden brown and cooked through, adjusting heat if browning too quickly.
13. Transfer to a wire rack and let cool completely before splitting with a fork.
Surprisingly light yet substantial, these English muffins develop that signature porous interior perfect for soaking up honey or supporting poached eggs. Their subtle tang and crisp cornmeal-dusted exterior make them equally wonderful toasted with jam or used as the foundation for breakfast sandwiches. Consider splitting them horizontally and toasting until golden before layering with smoked salmon and cream cheese for an elegant brunch presentation.
Self-Rising Flour Cinnamon Swirl Bread
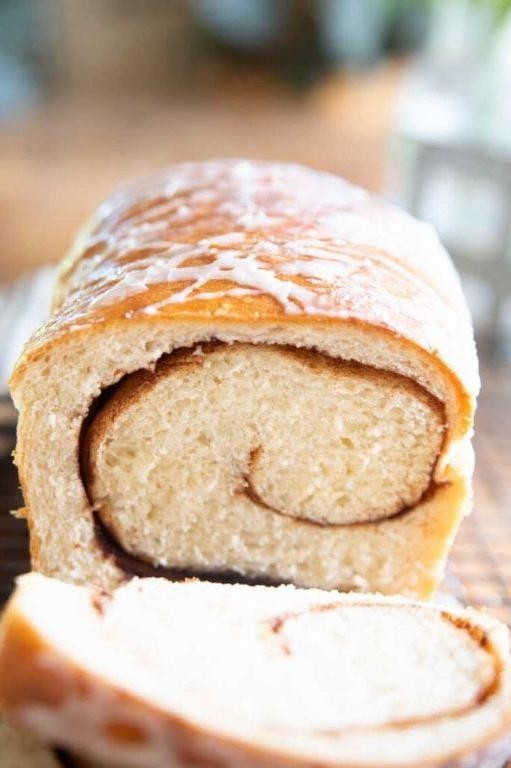
Unveiling the ultimate comfort bake, this self-rising flour cinnamon swirl bread transforms humble ingredients into an aromatic masterpiece. With its golden, crackled crust and tender, spiraled interior, it promises the warmth of a bakery-fresh loaf with remarkable simplicity. Each slice reveals buttery layers delicately perfumed with cinnamon sugar, making it equally sublime for morning toast or afternoon indulgence.
1
loaf15
minutes50
minutesIngredients
- 2 cups self-rising flour (scoop and level for accuracy)
- 1 cup whole milk, slightly warmed to about 100°F (or buttermilk for tang)
- 1/4 cup granulated sugar
- 1/4 cup unsalted butter, melted and cooled (plus extra for greasing)
- 1 large egg, at room temperature
- 2 teaspoons vanilla extract
- 1/4 cup light brown sugar, packed
- 1 tablespoon ground cinnamon
- 1 tablespoon all-purpose flour (for the swirl)
Instructions
- Preheat your oven to 350°F and generously grease a 9×5-inch loaf pan with softened butter.
- Whisk together the self-rising flour and granulated sugar in a large bowl until no lumps remain.
- In a separate bowl, vigorously whisk the warmed milk, melted butter, egg, and vanilla extract until fully emulsified.
- Pour the wet ingredients into the dry ingredients and stir with a spatula just until combined; avoid overmixing to keep the crumb tender.
- Combine the brown sugar, cinnamon, and all-purpose flour in a small bowl to create the swirl mixture.
- Spread half of the batter evenly into the prepared loaf pan using an offset spatula.
- Sprinkle all of the cinnamon-sugar mixture over the first layer of batter, leaving a 1/2-inch border around the edges.
- Carefully dollop the remaining batter over the cinnamon layer and gently smooth it to seal the edges.
- Drag a butter knife through the batter in a zigzag motion 4-5 times to create distinct swirls.
- Bake for 45-50 minutes, until the top is golden brown and a toothpick inserted into the center comes out clean.
- Cool the bread in the pan on a wire rack for 15 minutes before transferring it directly to the rack to cool completely.
Capturing the essence of a cozy morning, this bread boasts a feather-soft crumb that yields to a buttery, spice-kissed swirl. Consider toasting thick slices and crowning them with honeyed mascarpone or layering them into a decadent French toast casserole. Its crackly sugar crust gives way to tender layers that melt delicately with each bite, making it as versatile for elegant brunches as it is for midnight snacks.
Tasty Self-Rising Sun-dried Tomato Loaf
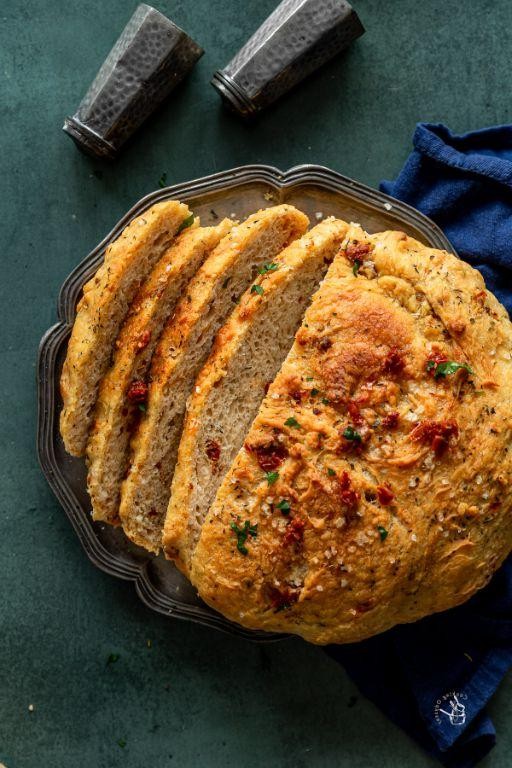
Just when you thought classic bread couldn’t be more delightful, this sun-dried tomato loaf emerges with its rustic charm and Mediterranean flair. Jewel-toned tomatoes nestle within a tender, golden crumb that fills your kitchen with the comforting aroma of herbs and warmth. Each slice promises a savory escape, perfect for elevating everyday meals into something truly special.
1
loaf15
minutes50
minutesIngredients
– 2 cups self-rising flour (sifted for a lighter texture)
– 1 cup buttermilk, at room temperature (or whole milk with 1 tbsp lemon juice)
– ½ cup chopped sun-dried tomatoes in oil, drained (pat dry with paper towels for even distribution)
– 2 tbsp olive oil (or any neutral oil)
– 1 tsp dried oregano (crush between fingers to release oils)
– ½ tsp garlic powder
– ½ tsp fine sea salt
Instructions
1. Preheat your oven to 375°F and lightly grease a 9×5-inch loaf pan with olive oil.
2. In a large mixing bowl, whisk together the self-rising flour, dried oregano, garlic powder, and fine sea salt until fully combined.
3. Create a well in the center of the dry ingredients and pour in the buttermilk and 2 tablespoons of olive oil.
4. Use a spatula to gently fold the wet and dry ingredients together until just combined; do not overmix to avoid a tough loaf.
5. Fold in the chopped sun-dried tomatoes until evenly distributed throughout the batter.
6. Transfer the batter to the prepared loaf pan and smooth the top with the spatula.
7. Bake at 375°F for 45–50 minutes, or until the loaf is golden brown and a toothpick inserted into the center comes out clean.
8. Tip: Rotate the pan halfway through baking for even browning if your oven has hot spots.
9. Remove the loaf from the oven and let it cool in the pan for 10 minutes to set the structure.
10. Tip: Run a knife around the edges before inverting to prevent sticking.
11. Transfer the loaf to a wire rack to cool completely before slicing for clean cuts.
12. Tip: For a crispier crust, leave the loaf in the turned-off oven with the door ajar during cooling.
The loaf boasts a tender, slightly crumbly interior punctuated by chewy, tangy sun-dried tomatoes, while the oregano and garlic lend a subtle herbaceous depth. Serve thick slices toasted with a drizzle of olive oil for breakfast, or pair with a robust soup to soak up every last bit. Its savory profile also makes it an ideal base for sophisticated sandwiches layered with prosciutto and fresh arugula.
Self-Rising Flour Dinner Rolls
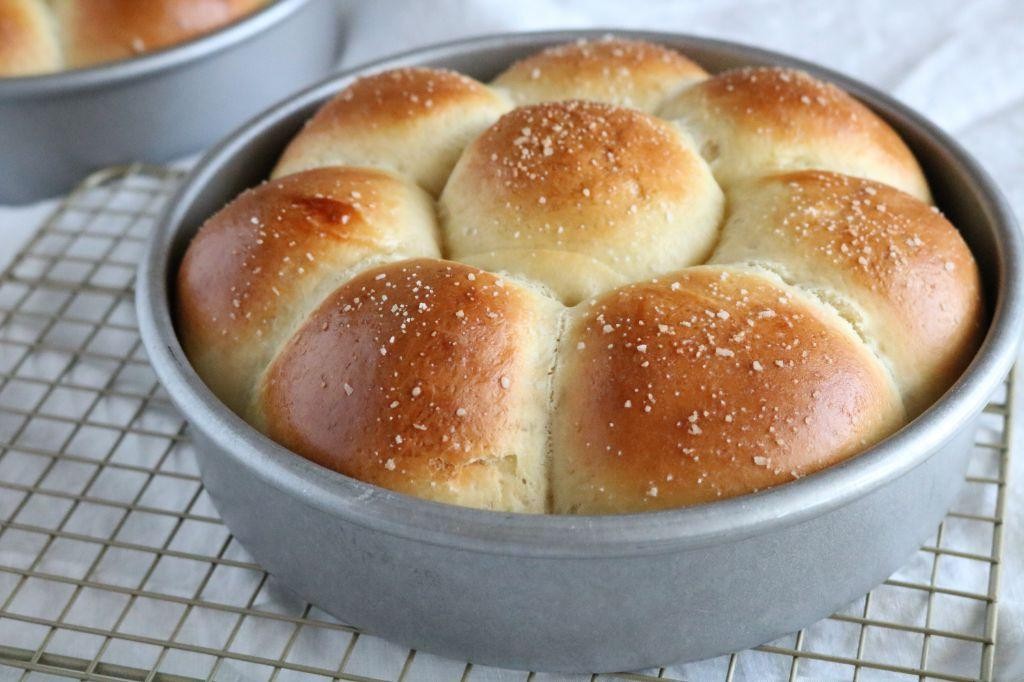
Beneath their golden, pillowy exteriors lies the humble magic of self-rising flour, transforming simple pantry staples into ethereal dinner rolls that rise to any occasion with effortless grace. These tender morsels, with their soft, cloud-like crumb and delicate crust, promise to become the comforting centerpiece of your table, evoking the warmth of a bakery-fresh loaf with minimal fuss. Perfect for both weeknight dinners and celebratory feasts, they bridge the gap between everyday simplicity and elegant indulgence.
12
rolls25
minutes22
minutesIngredients
– 3 cups self-rising flour, plus extra for dusting
– 1 cup whole milk, warmed to about 110°F (or buttermilk for tang)
– ¼ cup unsalted butter, melted and slightly cooled (plus 1 tbsp for brushing)
– 1 tbsp granulated sugar (adjust for subtle sweetness)
– 1 large egg, at room temperature
– ½ tsp fine sea salt (or table salt)
Instructions
1. Preheat your oven to 400°F and lightly grease a 9-inch round baking pan.
2. In a large bowl, whisk together the self-rising flour, sugar, and salt until fully combined.
3. In a separate bowl, whisk the warmed milk, melted butter, and egg until smooth and emulsified.
4. Pour the wet ingredients into the dry ingredients and stir with a wooden spoon until a shaggy dough forms.
5. Turn the dough onto a lightly floured surface and knead gently for 1–2 minutes, just until smooth and no longer sticky—avoid overworking to keep the rolls tender.
6. Divide the dough into 12 equal portions, rolling each into a smooth ball between your palms.
7. Arrange the dough balls in the prepared pan, spacing them evenly so they touch slightly as they rise.
8. Cover the pan with a clean kitchen towel and let the dough rest in a warm, draft-free spot for 20 minutes—this allows the leavening agents in the self-rising flour to activate.
9. Bake for 18–22 minutes, or until the tops are golden brown and the internal temperature reaches 190°F when tested with an instant-read thermometer.
10. Remove the rolls from the oven and immediately brush the tops with the remaining 1 tablespoon of melted butter for a soft, glossy finish.
Fresh from the oven, these rolls boast a featherlight interior that pulls apart in soft, buttery layers, with a subtle sweetness that complements savory mains. For a creative twist, split them warm and fill with herbed compound butter or use as mini sliders for holiday leftovers. Their delicate crust yields to a cloud-like crumb, making each bite a testament to simplicity’s elegance.
Nutty Self-Rising Peanut Butter Bread
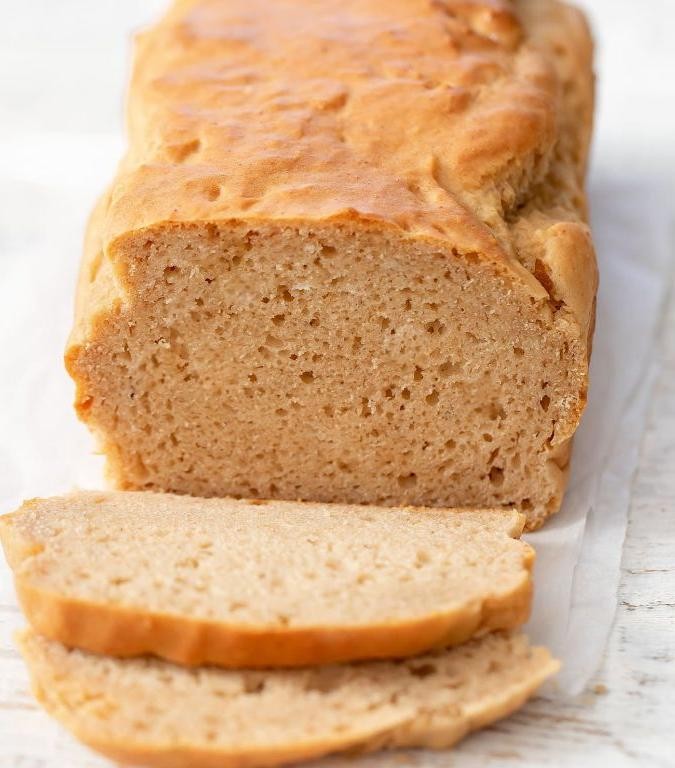
Oftentimes, the most satisfying baked goods emerge from the simplest combinations, and this nutty self-rising peanut butter bread exemplifies that elegant truth. Offering a tender, golden crumb with rich peanut undertones, it requires minimal effort for maximum comfort. Perfect for breakfast or an afternoon treat, this loaf celebrates the humble pantry staple in sophisticated fashion.
1
loaf15
minutes50
minutesIngredients
– 2 cups self-rising flour (scoop and level for accuracy)
– 1 cup creamy peanut butter (natural or conventional both work)
– 1 cup whole milk (room temperature for even mixing)
– 1/2 cup granulated sugar (adjust for preferred sweetness)
– 1 large egg (lightly beaten before adding)
– 1 tsp vanilla extract (pure for best flavor)
– Cooking spray or butter (for greasing the pan)
Instructions
1. Preheat your oven to 350°F and generously grease a 9×5-inch loaf pan with cooking spray or butter.
2. In a large mixing bowl, combine the self-rising flour and granulated sugar, whisking for 30 seconds to aerate and eliminate lumps.
3. Add the creamy peanut butter to the dry ingredients, using a pastry cutter or fork to cut it in until the mixture resembles coarse crumbs.
4. Tip: If your peanut butter is stiff, microwave it for 10–15 seconds to soften slightly for easier incorporation.
5. In a separate medium bowl, whisk together the whole milk, lightly beaten egg, and vanilla extract until fully blended.
6. Pour the wet ingredients into the dry mixture, stirring gently with a spatula just until no flour streaks remain; do not overmix.
7. Tip: A few small lumps are acceptable—overmixing can lead to a tough texture.
8. Transfer the batter to the prepared loaf pan, spreading it evenly with the spatula to level the top.
9. Bake at 350°F for 45–50 minutes, or until the top is golden brown and a toothpick inserted into the center comes out clean.
10. Tip: Rotate the pan halfway through baking for even browning if your oven has hot spots.
11. Remove the bread from the oven and let it cool in the pan on a wire rack for 15 minutes.
12. Carefully turn the loaf out onto the rack to cool completely before slicing, about 1 hour.
Keenly balanced between moist and crumbly, this bread boasts a subtle sweetness that complements its nutty essence. Serve it toasted with a drizzle of honey for breakfast, or pair thick slices with fruit preserves for an elegant afternoon snack. Its versatility makes it a staple worth savoring any time of day.
Self-Rising Flour Pita Bread
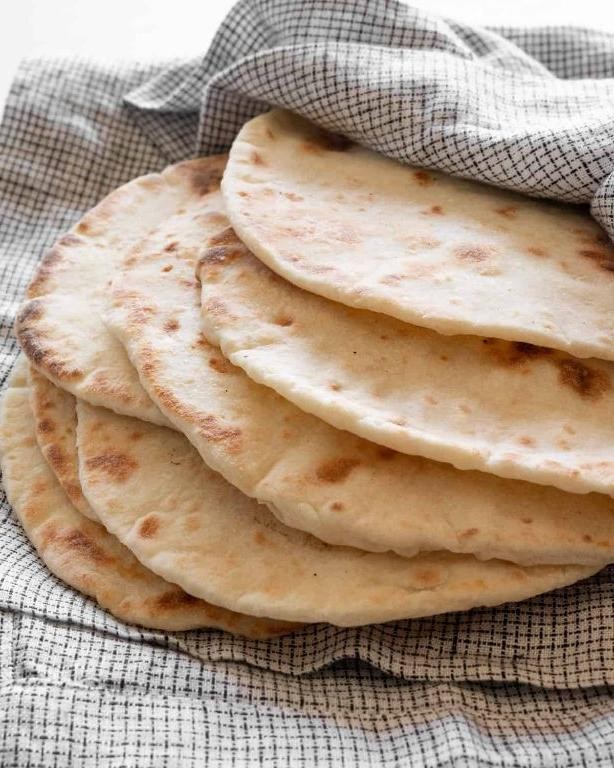
Gracefully bridging ancient tradition with modern convenience, this self-rising flour pita bread transforms humble ingredients into pillowy pockets of warmth. Golden and fragrant straight from the skillet, these soft rounds capture the essence of homemade bread with remarkable simplicity. Their delicate chew and subtle tang make them worthy companions to both casual weeknight meals and elegant gatherings.
6
portions20
minutes11
minutesIngredients
– 2 cups self-rising flour (plus extra for dusting)
– ¾ cup warm water (about 110°F)
– 2 tbsp olive oil (or any neutral oil)
– ½ tsp honey (optional, for subtle sweetness)
– ¼ tsp garlic powder (optional, for savory variation)
Instructions
1. Combine 2 cups self-rising flour, ¾ cup warm water, 2 tbsp olive oil, and ½ tsp honey in a large mixing bowl.
2. Stir the mixture with a wooden spoon until a shaggy dough forms, about 1 minute.
3. Turn the dough onto a lightly floured surface and knead for 5 minutes until smooth and elastic.
4. Divide the dough into 6 equal portions and roll each into a smooth ball.
5. Cover the dough balls with a damp kitchen towel and let rest for 15 minutes to relax the gluten.
6. Heat a cast-iron skillet over medium-high heat until a drop of water sizzles immediately.
7. Roll one dough ball into a 6-inch circle, dusting with flour to prevent sticking.
8. Place the rolled dough in the hot skillet and cook for 60 seconds until bubbles form and the bottom develops golden spots.
9. Flip the pita using tongs and cook for another 45 seconds until the second side is lightly browned and the bread puffs.
10. Transfer the cooked pita to a clean kitchen towel and wrap to keep warm while repeating with remaining dough. The steam trapped inside the towel helps maintain the bread’s soft texture.
11. Serve immediately or store in an airtight container for up to 2 days. These pitas emerge from the skillet with a delicate chew and subtle tang that pairs beautifully with creamy hummus or grilled vegetables. Their soft, pliable texture makes them ideal for wrapping around spiced lamb or folding into warm breakfast pockets with scrambled eggs and feta.
Zesty Self-Rising Jalapeno Cheese Bread
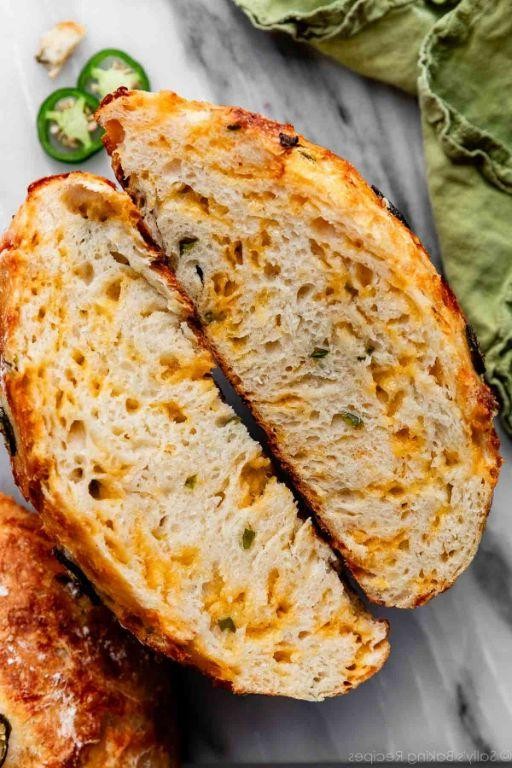
Just when you thought comfort food couldn’t get more irresistible, this zesty self-rising jalapeño cheese bread emerges from the oven with golden-brown perfection. Juxtaposing the gentle heat of fresh peppers against the rich, melty embrace of sharp cheddar creates a symphony of flavors that elevates any meal. Joyfully simple to prepare yet impressively sophisticated, this bread promises to become your new go-to for gatherings or cozy nights in.
1
loaf15
minutes50
minutesIngredients
– 2 cups self-rising flour (scoop and level for accuracy)
– 1 cup buttermilk, at room temperature (or whole milk with 1 tbsp lemon juice)
– 1 cup shredded sharp cheddar cheese (freshly grated melts better)
– 2 medium jalapeños, finely diced (seeds removed for milder heat)
– 1/4 cup unsalted butter, melted (or olive oil for dairy-free)
– 1 large egg, beaten (bring to room temperature)
– 1 tsp honey (or maple syrup to balance heat)
Instructions
1. Preheat your oven to 375°F and generously grease a 9×5-inch loaf pan with butter or non-stick spray.
2. In a large mixing bowl, whisk together the self-rising flour and diced jalapeños until evenly distributed.
3. Create a well in the center of the dry ingredients and pour in the buttermilk, melted butter, beaten egg, and honey.
4. Use a spatula to gently fold the wet ingredients into the dry until just combined; do not overmix to avoid a tough texture.
5. Fold in the shredded cheddar cheese until incorporated, leaving some visible streaks for visual appeal.
6. Transfer the batter to the prepared loaf pan and smooth the top with the spatula.
7. Bake at 375°F for 45–50 minutes, or until the top is golden brown and a toothpick inserted into the center comes out clean.
8. Cool the bread in the pan on a wire rack for 15 minutes before transferring it directly to the rack to cool completely.
Delightfully moist with a tender crumb, this bread boasts a subtle kick from the jalapeños that harmonizes with the sharp cheddar’s richness. Divine when sliced warm and slathered with herb butter, it also makes elegant crostini for appetizers or a standout base for avocado toast.
Classic Self-Rising Flour Sourdough
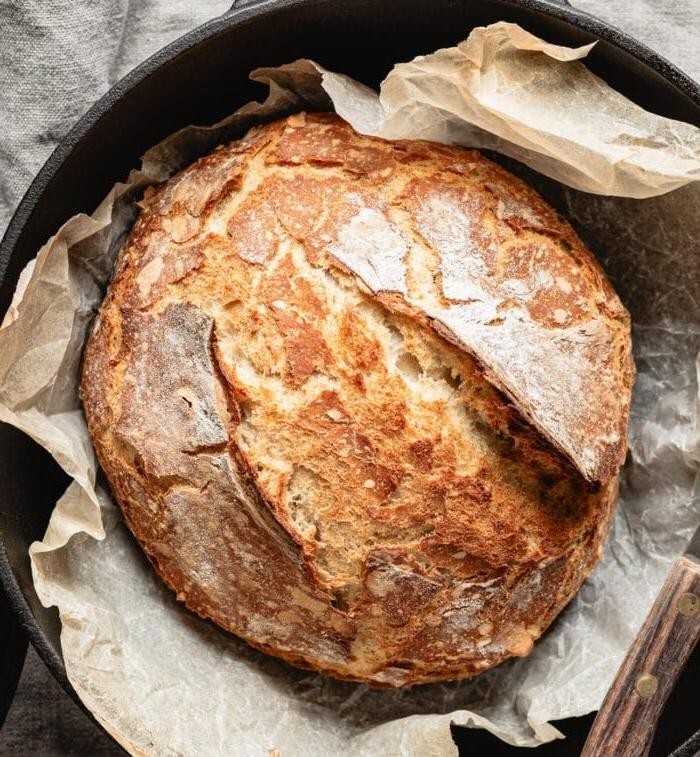
Sourdough baking reaches new heights of accessibility with this elegant adaptation using self-rising flour, transforming the traditionally complex process into an approachable weekend project that yields impressive results. This method preserves the characteristic tang and airy crumb while streamlining preparation for modern home bakers seeking artisanal quality without extensive equipment or expertise. The marriage of time-honored fermentation techniques with contemporary convenience creates a loaf that bridges tradition and innovation in every slice.
1
loaf30
minutes50
minutesIngredients
– 3 cups self-rising flour (plus extra for dusting)
– 1 cup active sourdough starter (at peak activity)
– ¾ cup warm water (about 85°F)
– 1 tablespoon olive oil (or any neutral oil)
– 1 teaspoon honey (optional, for subtle sweetness)
– Cooking spray (for greasing)
Instructions
1. Combine 3 cups self-rising flour, 1 cup active sourdough starter, ¾ cup warm water, 1 tablespoon olive oil, and 1 teaspoon honey in a large mixing bowl.
2. Mix ingredients with a wooden spoon until a shaggy dough forms, about 2 minutes, scraping down the sides to incorporate all flour.
3. Turn dough onto a lightly floured surface and knead for 8-10 minutes until smooth and elastic, adding small amounts of flour if dough becomes sticky.
4. Place dough in a clean, lightly oiled bowl, cover with a damp cloth, and let rise in a warm place (75-80°F) for 4-6 hours until doubled in size.
5. Gently punch down the risen dough to release air bubbles, being careful not to over-deflate the structure.
6. Shape dough into a round loaf by folding edges toward the center and tightening the surface tension with circular motions.
7. Place shaped loaf seam-side up in a proofing basket or bowl lined with a floured kitchen towel.
8. Cover loaf with plastic wrap and refrigerate for 12-16 hours to develop flavor through cold fermentation.
9. Preheat oven to 450°F with a Dutch oven inside during the final 30 minutes of refrigeration.
10. Remove dough from refrigerator and carefully transfer to the preheated Dutch oven, scoring the top with a sharp knife in your desired pattern.
11. Bake covered at 450°F for 25 minutes to create steam and develop oven spring.
12. Remove lid and continue baking uncovered for 20-25 minutes until crust is deep golden brown and internal temperature reaches 205-210°F.
13. Transfer baked loaf to a wire rack and let cool completely for 2-3 hours before slicing to prevent a gummy texture.
Beyond the satisfying crackle of the cooling crust, this bread reveals a tender, open crumb with the perfect balance of tangy complexity and subtle sweetness. Beautifully blistered and golden, it makes exceptional toast or serves as the foundation for elevated sandwiches when sliced thick. For a memorable presentation, tear into warm chunks to accompany olive oil and flaky sea salt, allowing the bread’s nuanced flavors to shine.
Conclusion
Get ready to transform your baking with these 25 delicious bread recipes using self-rising flour! From fluffy biscuits to savory loaves, there’s something here for every occasion. We’d love to hear which recipes become your favorites—leave a comment below and don’t forget to share this roundup on Pinterest so other home cooks can discover these easy, tasty breads too. Happy baking!


