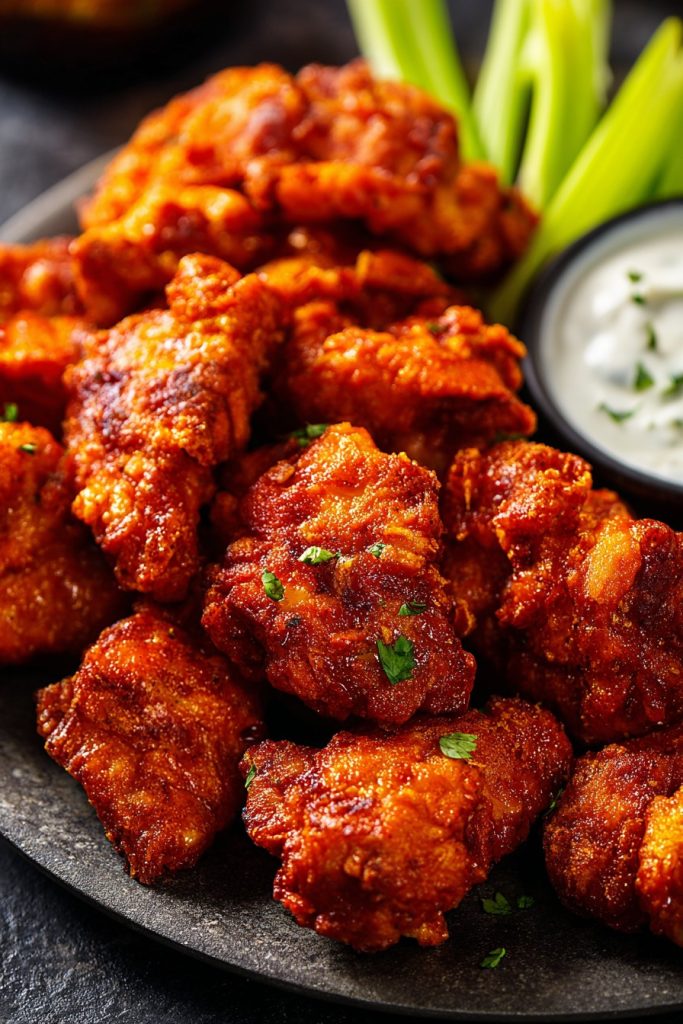
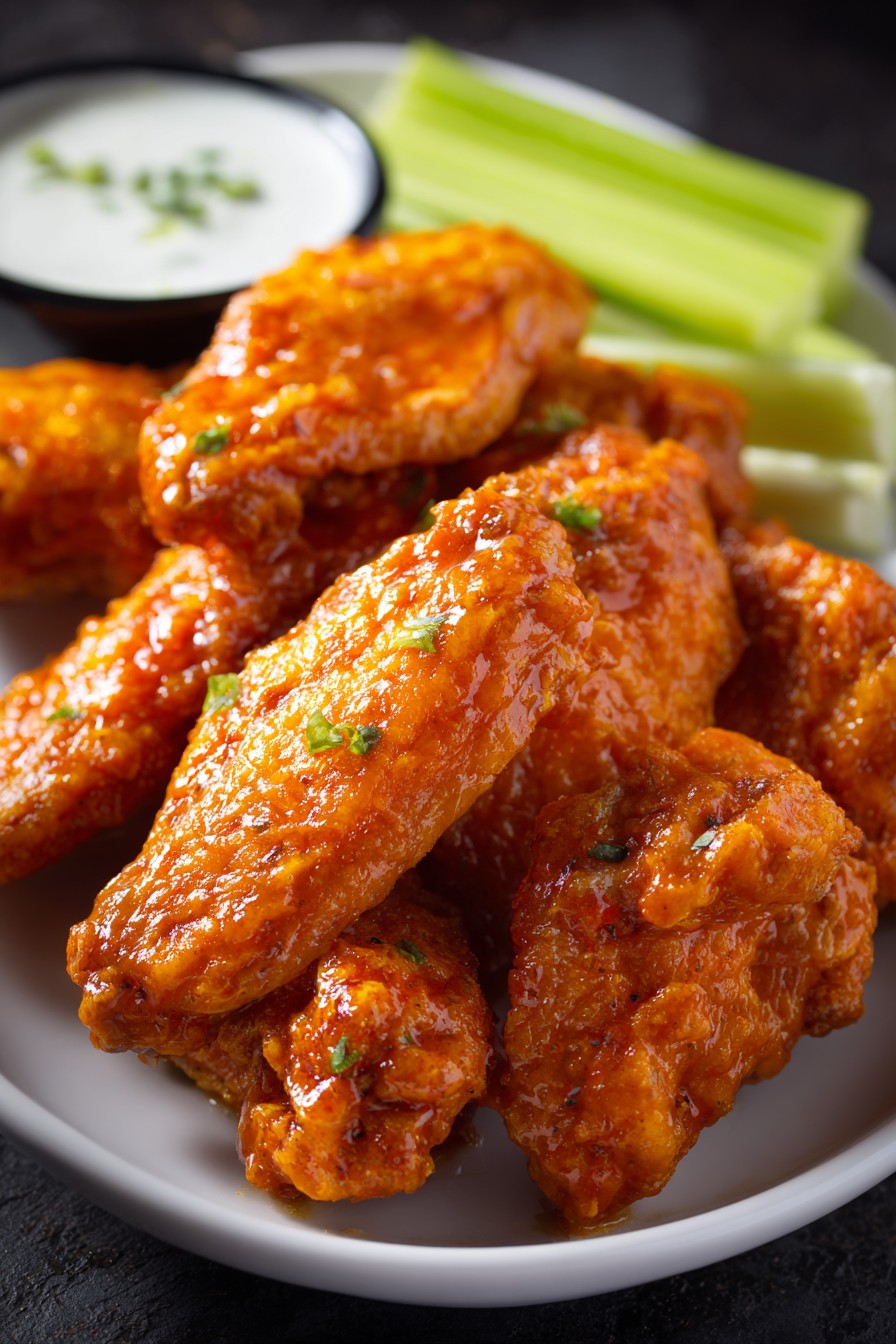
Every football season needs a MVP snack, and these boneless wings are ready to score big at your next gathering. Easy to make and impossible to resist, they’ll have everyone cheering for more!
Why This Recipe Works
- The double-dredging technique creates an incredibly crispy exterior that stays crunchy even after saucing, thanks to the perfect balance of flour and cornstarch in the coating
- Using boneless, skinless chicken thighs instead of breasts ensures juicy, flavorful bites that won’t dry out during frying, giving you tender results every time
- The simple but effective seasoning blend in both the flour mixture and the sauce provides layers of flavor that complement rather than overpower the chicken
- Frying at the precise 375°F temperature guarantees golden brown perfection without greasy residue, creating that ideal crunch we all crave
- The quick resting step after frying allows excess oil to drain while keeping the coating intact, resulting in wings that are crispy outside and moist inside
Ingredients
- 2 pounds boneless, skinless chicken thighs, cut into 1.5-inch pieces
- 1 cup all-purpose flour
- 1/2 cup cornstarch
- 2 teaspoons garlic powder
- 2 teaspoons paprika
- 1 teaspoon onion powder
- 1 teaspoon black pepper
- 1 teaspoon salt
- 2 large eggs, beaten
- 1 cup buttermilk
- 1 cup buffalo sauce
- 1/2 cup unsalted butter, melted
- 1 tablespoon honey
- Vegetable oil for frying (about 4 cups)
- Ranch or blue cheese dressing for serving
- Celery sticks for serving
Equipment Needed
- Large heavy-bottomed pot or Dutch oven
- Deep-fry thermometer
- Wire rack set over baking sheet
- Large mixing bowls (3)
- Tongs or spider strainer
- Paper towels
- Medium saucepan
- Whisk
Instructions
Prepare Your Chicken and Coating Stations
Begin by setting up three separate stations for the perfect breading process. In your first large bowl, combine the all-purpose flour, cornstarch, garlic powder, paprika, onion powder, black pepper, and salt, whisking thoroughly until all ingredients are evenly distributed. The cornstarch is your secret weapon here – it creates that extra crispy texture we’re after. In the second bowl, whisk together the beaten eggs and buttermilk until completely smooth; this wet mixture will help the coating adhere beautifully. Keep your chopped chicken thighs nearby in a separate bowl. Pro tip: Pat the chicken pieces completely dry with paper towels before starting – this removes excess moisture that could prevent the coating from sticking properly. Arrange your stations in assembly line fashion for maximum efficiency during the breading process.
Master the Double-Dredging Technique
Now for the magic technique that creates the crispiest wings imaginable. Working with about 5-6 pieces at a time, place chicken pieces into the flour mixture, pressing firmly to ensure every nook and cranny gets coated. Shake off excess flour, then dip completely into the buttermilk mixture, allowing any excess to drip off. Return the chicken to the flour mixture for a second coating, pressing firmly again to create a thick, even layer that will fry up beautifully crispy. Place each double-dredged piece on a wire rack set over a baking sheet. Important: Let the coated chicken rest for 10-15 minutes before frying – this allows the coating to set and adhere better during cooking. This resting period is crucial for preventing the breading from falling off in the oil.
Heat Oil to Perfect Frying Temperature
Pour vegetable oil into your heavy-bottomed pot or Dutch oven until it reaches about 2-3 inches deep – you need enough oil to fully submerge the chicken pieces. Attach your deep-fry thermometer to the side of the pot, making sure it doesn’t touch the bottom. Heat the oil over medium-high heat until it reaches exactly 375°F. This temperature is non-negotiable – too hot and the outside burns before the inside cooks; too cool and the wings absorb excess oil. Maintain this temperature throughout frying by adjusting your burner as needed. Test the oil temperature by dropping a small bit of coating into the oil – it should immediately sizzle and float to the surface. Always keep a fire extinguisher nearby when deep frying, and never leave hot oil unattended.
Fry to Golden Brown Perfection
Carefully lower 6-8 chicken pieces into the hot oil using tongs or a spider strainer, being cautious not to overcrowd the pot. Overcrowding causes the oil temperature to drop dramatically, resulting in greasy wings. Fry for 4-5 minutes, turning occasionally with tongs, until the coating is deep golden brown and crispy. The internal temperature should reach 165°F when checked with an instant-read thermometer. Remove the wings from the oil and transfer to the wire rack set over a baking sheet – do not place them directly on paper towels as this can make the bottom soggy. Let the wings rest for 2-3 minutes before saucing. This brief resting period allows excess oil to drain while keeping the coating perfectly crisp. Work in batches until all chicken is fried.
Create and Toss in Signature Sauce
While your last batch of wings is frying, prepare the signature buffalo sauce. In a medium saucepan, combine the buffalo sauce, melted unsalted butter, and honey. Heat over medium heat, whisking constantly, until the mixture is smooth and well combined – about 2-3 minutes. The butter adds richness while the honey provides just enough sweetness to balance the heat. Remove from heat and transfer to a large mixing bowl. Using tongs, add the hot fried wings to the sauce bowl and toss gently until each piece is evenly coated. Be quick but gentle – you want full coverage without knocking off that beautiful crispy coating you worked so hard to achieve. Serve immediately while still hot and crispy.
Tips and Tricks
For the ultimate crispy experience, consider using a combination of peanut oil and vegetable oil for frying – peanut oil has a higher smoke point and adds a subtle nutty flavor that complements the chicken beautifully. If you’re watching your oil consumption, you can bake these wings instead: arrange the breaded pieces on a wire rack set over a baking sheet, spray lightly with cooking spray, and bake at 425°F for 18-22 minutes, flipping halfway through. For extra crispy baked wings, place them in the refrigerator for 30 minutes after breading to help set the coating before baking.
When it comes to sauce consistency, remember that the sauce will thicken slightly as it coats the hot wings. If your sauce seems too thick, add a teaspoon of warm water at a time until it reaches your desired consistency. For those who love extra saucy wings, reserve some sauce on the side for dipping rather than tossing all of it with the wings. If you’re making these for a crowd, you can keep finished wings warm in a 200°F oven on a wire rack set over a baking sheet for up to 30 minutes before serving.
For the best flavor development, consider marinating your chicken pieces in the buttermilk mixture for 2-4 hours before breading. The acidity in the buttermilk helps tenderize the chicken while adding subtle tanginess. If you’re short on time, even 30 minutes of marinating will make a difference. When cutting your chicken thighs, aim for uniform sizes to ensure even cooking – I find that 1.5-inch pieces are the perfect bite-sized portion that cooks through without drying out.
Don’t discard your leftover oil! Once cooled completely, strain it through a fine-mesh sieve lined with cheesecloth and store in an airtight container in a cool, dark place. Properly strained oil can be reused 2-3 times for frying. Always check the oil’s freshness before reusing – if it smells off or has developed a dark color, it’s time to replace it. For easier cleanup, line your work area with newspaper or parchment paper before starting the breading process.
Recipe Variations
- For Asian-inspired wings, create a sweet and spicy glaze using 1/2 cup honey, 1/4 cup soy sauce, 2 tablespoons Sriracha, 1 tablespoon grated fresh ginger, and 2 minced garlic cloves. Simmer until slightly thickened, then toss with fried wings and garnish with sesame seeds and sliced green onions. The combination of sweet honey, salty soy, and spicy Sriracha creates an addictive flavor profile that’s perfect for those who enjoy global flavors.
- BBQ lovers can substitute the buffalo sauce with 1 cup of your favorite barbecue sauce mixed with 2 tablespoons apple cider vinegar and 1 tablespoon Worcestershire sauce. Add a teaspoon of smoked paprika to the flour mixture for extra smoky flavor. Finish with a sprinkle of fresh chopped parsley for color and freshness. This variation is particularly great for summer gatherings and pairs beautifully with coleslaw and corn on the cob.
- For a garlic Parmesan version, skip the buffalo sauce and toss hot wings with 3 tablespoons melted butter, 2 minced garlic cloves, 1/2 cup grated Parmesan cheese, and 2 tablespoons chopped fresh parsley. Add a pinch of red pepper flakes for subtle heat if desired. The garlic butter soaks into the crispy coating while the Parmesan creates a delicious cheesy crust that’s absolutely irresistible to cheese lovers.
- If you’re feeding a crowd with varying heat preferences, set up a wing bar with multiple sauce options: classic buffalo, honey BBQ, garlic Parmesan, and a spicy mango habanero. Provide small bowls of each sauce and let guests customize their own wings. Include plenty of celery sticks, carrot sticks, and different dipping sauces to complete the experience. This approach ensures everyone finds something they love and makes your gathering more interactive and fun.
Frequently Asked Questions
Can I use chicken breasts instead of thighs?
While you can technically use chicken breasts, I strongly recommend sticking with thighs for the best results. Chicken thighs have more fat content than breasts, which means they stay juicier and more flavorful during the frying process. Breast meat tends to dry out more quickly and can become tough if even slightly overcooked. Thighs also have a richer flavor that stands up better to the bold buffalo sauce. If you must use breasts, cut them into slightly smaller pieces and reduce the frying time by about 30 seconds to prevent drying out. Regardless of which cut you use, always ensure your oil is at exactly 375°F for optimal cooking.
How can I make these wings gluten-free?
Making gluten-free boneless wings is easier than you might think! Simply substitute the all-purpose flour with your favorite gluten-free flour blend – I recommend one that contains xanthan gum for better binding. Use cornstarch as called for in the recipe, as it’s naturally gluten-free. For the buttermilk, ensure you’re using a certified gluten-free brand, or make your own by adding 1 tablespoon lemon juice or vinegar to 1 cup gluten-free milk. Double-check that your buffalo sauce and other seasonings are gluten-free, as some brands may contain hidden gluten. The cooking process remains exactly the same, and you’ll still achieve wonderfully crispy results.
What’s the best way to reheat leftover wings?
The absolute best method for reheating leftover wings is using your oven or air fryer to restore that crispy texture. Preheat your oven to 375°F and arrange wings on a wire rack set over a baking sheet. Bake for 8-12 minutes, until heated through and crispy again. If using an air fryer, cook at 375°F for 4-6 minutes, shaking the basket halfway through. Avoid using the microwave, as it will make the coating soggy. If your wings seem dry after reheating, you can brush them lightly with additional sauce before serving. For best results, store leftover wings without sauce and add fresh sauce after reheating.
Can I prepare these wings ahead of time?
You can absolutely do some prep work ahead of time to make game day easier! You can cut the chicken and store it in an airtight container in the refrigerator up to 24 hours in advance. The flour mixture can be mixed and stored in a sealed container at room temperature. For even better planning, you can bread the chicken pieces and arrange them on a baking sheet, then cover tightly and refrigerate for up to 4 hours before frying. Some people even freeze breaded raw wings on a baking sheet, then transfer to freezer bags for up to 3 months – fry directly from frozen, adding 1-2 minutes to the cooking time. The sauce can also be prepared ahead and gently reheated before tossing with the hot wings.
Summary
These incredibly crispy boneless wings feature juicy chicken thighs, perfect double-dredging technique, and homemade buffalo sauce for game day perfection that will have everyone coming back for more!
Boneless Wings Recipe
5
servings25
minutes20
minutesIngredients
Instructions
- 1 Set up three stations: flour mixture (flour, cornstarch, spices), wet mixture (eggs and buttermilk), and chopped chicken
- 2 Double-dredge chicken pieces: flour → wet mixture → flour again, then rest on wire rack for 10-15 minutes
- 3 Heat oil to 375°F in heavy pot with thermometer
- 4 Fry wings in batches for 4-5 minutes until golden brown and 165°F internal temperature
- 5 Make sauce by combining buffalo sauce, melted butter, and honey; toss hot wings in sauce and serve immediately


