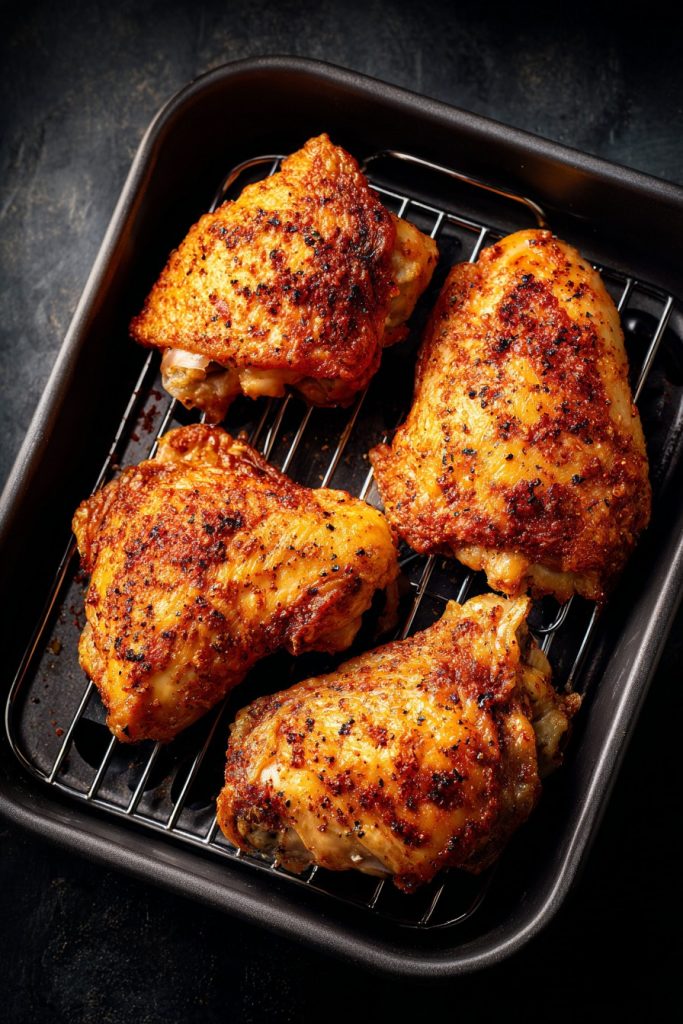
Crispy, juicy, and absolutely foolproof—these boneless skinless chicken thighs are about to become your air fryer’s best friend! Can you believe we’re getting restaurant-quality results with minimal effort and almost no cleanup? Let’s turn that humble package of chicken into something truly spectacular without heating up the whole kitchen.
Why This Recipe Works
- The air fryer’s rapid circulation creates an incredible crust without needing excessive oil, making these thighs crispy outside while staying miraculously juicy inside—no more dry chicken disasters!
- Our simple seasoning blend of smoked paprika, garlic powder, and onion powder delivers big flavor without complicated ingredients, proving that sometimes the simplest combinations work the best.
- Preheating the air fryer ensures that chicken starts cooking immediately upon contact, sealing in those precious juices and creating that perfect golden-brown exterior we all crave.
- Using boneless skinless thighs means faster cooking times and easier eating, while still maintaining that rich chicken flavor that breast meat often lacks—perfect for busy weeknights.
- The optional cornstarch coating creates an extra-crispy texture that’ll make you swear you’re eating fried chicken, but with only a fraction of the oil and guilt.
Ingredients
- 1.5 pounds boneless skinless chicken thighs (about 6-8 pieces), patted completely dry with paper towels
- 2 tablespoons olive oil or avocado oil
- 1 tablespoon smoked paprika
- 2 teaspoons garlic powder
- 2 teaspoons onion powder
- 1 teaspoon kosher salt
- 1/2 teaspoon black pepper, freshly ground
- 1/4 teaspoon cayenne pepper (optional, for heat)
- 2 tablespoons cornstarch (optional, for extra crispiness)
- Fresh chopped parsley or cilantro for garnish (optional)
- Lemon wedges for serving (optional)
Equipment Needed
- Air fryer (any brand or size—we’ll adjust cooking times accordingly)
- Mixing bowls (one large, one medium)
- Measuring spoons
- Tongs
- Paper towels
- Instant-read thermometer (highly recommended for perfect doneness)
- Cutting board
- Knife
Instructions

Preheat and Prepare Your Air Fryer
Begin by preheating your air fryer to 400°F for about 3 minutes—this crucial step ensures immediate cooking action when the chicken hits the basket. While it’s heating, grab your chicken thighs and pat them completely dry with paper towels; moisture is the enemy of crispiness, so be thorough here! In a medium bowl, whisk together the smoked paprika, garlic powder, onion powder, kosher salt, black pepper, and optional cayenne until well combined. If you’re using the cornstarch for extra crunch, place it in a separate shallow dish. Pro tip: Preheating might seem like an extra step, but it makes a dramatic difference in achieving that perfect sear and preventing sticking.
Season and Coat the Chicken
Place your thoroughly dried chicken thighs in a large bowl and drizzle with the olive oil, tossing to coat each piece evenly—this helps the seasoning stick and promotes browning. Sprinkle the spice mixture over the chicken, then use your hands to massage it into every nook and cranny, ensuring maximum flavor penetration. If you’re going for the ultra-crispy version, now’s the time to lightly dredge each thigh in cornstarch, shaking off any excess—this creates a delicate crust that’ll have everyone asking for your secret. Arrange the seasoned thighs in a single layer on a plate or cutting board, making sure they aren’t crowded or overlapping. Insider tip: Letting the seasoned chicken sit for 5-10 minutes allows the flavors to meld and the cornstarch to hydrate slightly for better browning.
Arrange and Cook the First Side
Carefully place the chicken thighs in the preheated air fryer basket in a single layer, leaving some space between each piece for proper air circulation—if your air fryer is small, you might need to cook in batches. Cook at 400°F for 8-10 minutes, then using tongs, flip each thigh over—you should see beautiful golden-brown coloring and some crispy edges forming. The exact time may vary based on your air fryer model and the thickness of your chicken, but look for that perfect caramelization before flipping. Avoid overcrowding the basket at all costs—this is the most common mistake that leads to steamed rather than crispy chicken. Pro tip: If you notice any pale spots after flipping, you can sprinkle a tiny bit more seasoning on those areas for extra flavor and color.
Flip and Finish Cooking
Continue cooking for another 6-8 minutes at 400°F, watching closely during the last few minutes to prevent burning—the chicken should be deeply golden brown and crispy on both sides. To ensure perfect doneness, insert an instant-read thermometer into the thickest part of a thigh; it should register between 165°F and 175°F for juicy, safe-to-eat chicken. If your thighs are particularly thick or you’re cooking multiple batches, you might need an additional 1-2 minutes—trust the thermometer more than the timer. The internal temperature will continue to rise slightly after removing from the air fryer, so pull them at around 165°F for optimal juiciness. Visual cue: Look for crispy, slightly raised edges and no pink juices when pierced with a knife.
Rest and Serve Immediately
Using tongs, transfer the cooked chicken thighs to a clean plate or cutting board and let them rest for 3-5 minutes—this allows the juices to redistribute throughout the meat, ensuring every bite is moist and flavorful. While resting, the crust will firm up slightly, achieving that perfect balance between crispy exterior and tender interior. Garnish with fresh chopped parsley or cilantro if desired, and serve immediately with lemon wedges for squeezing over the top—the acidity brightens all the flavors beautifully. These thighs are fantastic on their own, over salads, in tacos, or alongside your favorite sides. Storage tip: Though best eaten immediately, leftovers can be refrigerated in an airtight container for up to 3 days and reheated in the air fryer at 375°F for 3-4 minutes to restore crispiness.
Tips and Tricks
If you really want to take your air fryer chicken game to the next level, consider brining your thighs before cooking—dissolve 1/4 cup kosher salt and 2 tablespoons sugar in 4 cups warm water, then submerge the chicken for 30-60 minutes before patting dry and proceeding with the recipe. This extra step ensures incredibly juicy results even if you accidentally overcook slightly. For those who love extra crispy edges, try spraying the seasoned chicken lightly with cooking spray before air frying—this helps achieve that crackly texture without adding significant calories. If you’re cooking for a crowd or meal prepping, you can season the chicken thighs up to 24 hours in advance and store them covered in the refrigerator; the longer marinating time allows the flavors to penetrate deeply into the meat. When cleaning your air fryer basket, let it cool completely then soak in warm soapy water—the non-stick coating can be damaged by abrasive scrubbers, so use a soft sponge or brush. For even cooking, try to select chicken thighs that are similar in size and thickness; if you have uneven pieces, place larger thighs in the center of the basket where the heat is most intense. If you notice smoking during cooking, it might be because excess oil is dripping—always pat your chicken thoroughly dry and avoid using oil sprays containing lecithin, which can burn at high temperatures. For perfect meal prep, cooked chicken thighs can be frozen for up to 3 months—cool completely, then wrap individually in plastic wrap before placing in freezer bags; reheat directly from frozen in the air fryer at 375°F for 8-10 minutes. Experiment with different oil types—avocado oil has a higher smoke point than olive oil, while sesame oil adds wonderful nutty flavor (use half sesame, half neutral oil). If your air fryer has a tendency to cook unevenly, rotate the basket halfway through cooking rather than just flipping the chicken—this ensures all sides get equal exposure to the heating elements.
Recipe Variations
- For Asian-inspired flavors, replace the spice blend with 2 tablespoons soy sauce, 1 tablespoon honey, 1 teaspoon grated ginger, and 1 minced garlic clove—marinate for 30 minutes before air frying, and garnish with sesame seeds and sliced green onions.
- Create buffalo chicken thighs by tossing the cooked pieces in 1/4 cup hot sauce mixed with 2 tablespoons melted butter—return to the air fryer for 1-2 minutes to set the glaze, then serve with celery sticks and blue cheese dressing.
- Mediterranean version: Use a blend of 2 teaspoons dried oregano, 1 teaspoon lemon zest, 1 teaspoon garlic powder, and 1/2 teaspoon cumin—after cooking, top with crumbled feta, chopped kalamata olives, and a drizzle of tzatziki sauce.
- BBQ lovers can brush the thighs with your favorite barbecue sauce during the last 3 minutes of cooking—apply two thin layers, allowing each to caramelize slightly between applications for that sticky, finger-licking goodness.
- For a keto-friendly option, replace the cornstarch with 2 tablespoons grated Parmesan cheese mixed with 1 teaspoon almond flour—this creates a deliciously crispy, low-carb crust that’s absolutely addictive.
Frequently Asked Questions
Can I use frozen chicken thighs in this recipe?
Absolutely, but you’ll need to adjust the cooking time significantly—cook frozen boneless skinless chicken thighs at 400°F for 18-22 minutes, flipping halfway through. The key is ensuring they reach an internal temperature of 165°F, as frozen meat takes longer to cook through. I recommend thawing first if possible, as frozen thighs may release more moisture, potentially affecting crispiness. If using frozen, pat them extra dry after thawing and consider increasing the cornstarch slightly to combat excess moisture.
Why are my chicken thighs not getting crispy?
The most common culprits are overcrowding the air fryer basket, not preheating properly, or failing to pat the chicken completely dry before seasoning. Ensure your thighs are in a single layer with space between them for air circulation, and always preheat your air fryer for at least 3 minutes. If you’re still struggling with crispiness, try the cornstarch coating option or lightly spray the chicken with cooking oil before air frying—these tricks make a dramatic difference in achieving that perfect golden crust.
How do I prevent the chicken from sticking to the basket?
Proper preheating and adequate oil are your best defenses against sticking—ensure your air fryer is fully preheated to 400°F before adding the chicken, and make sure each thigh is evenly coated with oil. If your air fryer basket isn’t non-stick, you can lightly spray it with cooking oil before adding the chicken, though most modern baskets don’t require this. When flipping, use tongs and gently loosen any stuck edges—if something does stick, let the basket cool completely before cleaning to avoid damaging the non-stick surface.
Can I use chicken breasts instead of thighs?
You certainly can, but adjust the cooking time downward—boneless skinless chicken breasts typically cook in 12-16 minutes at 400°F, depending on thickness. breasts cook faster and can dry out more easily, so check for doneness starting at 10 minutes and pull them at 165°F internal temperature. I actually prefer thighs for air frying because their higher fat content keeps them juicier and more forgiving, but breasts work well if you’re watching your fat intake—just be extra vigilant about not overcooking.
How do I know when the chicken is properly cooked?
The most reliable method is using an instant-read thermometer—insert it into the thickest part of the thigh, avoiding the bone if present, and look for 165°F minimum. Visual cues include firm texture when pressed, clear juices (not pink) when pierced, and no visible pink meat when cut into. Remember that carryover cooking will increase the temperature about 5 degrees after removal, so pulling at 160-165°F ensures perfectly juicy chicken. If you don’t have a thermometer, cut into the thickest piece to check that no pink remains—better safe than sorry!
Summary
These crispy air fryer chicken thighs deliver restaurant-quality results with minimal effort—juicy inside, perfectly seasoned, and wonderfully crispy without deep frying. Perfect for busy weeknights, meal prep, or impressing guests with your air frying prowess!
Crispy Air Fryer Chicken Thighs
4
servings10
minutes16
minutesIngredients
Instructions
- 1 Preheat air fryer to 400°F for 3 minutes
- 2 Pat chicken dry, coat with oil and spices
- 3 Optional: dredge in cornstarch
- 4 Arrange in single layer, cook 8-10 minutes
- 5 Flip, cook another 6-8 minutes until 165°F
- 6 Rest 5 minutes before serving


