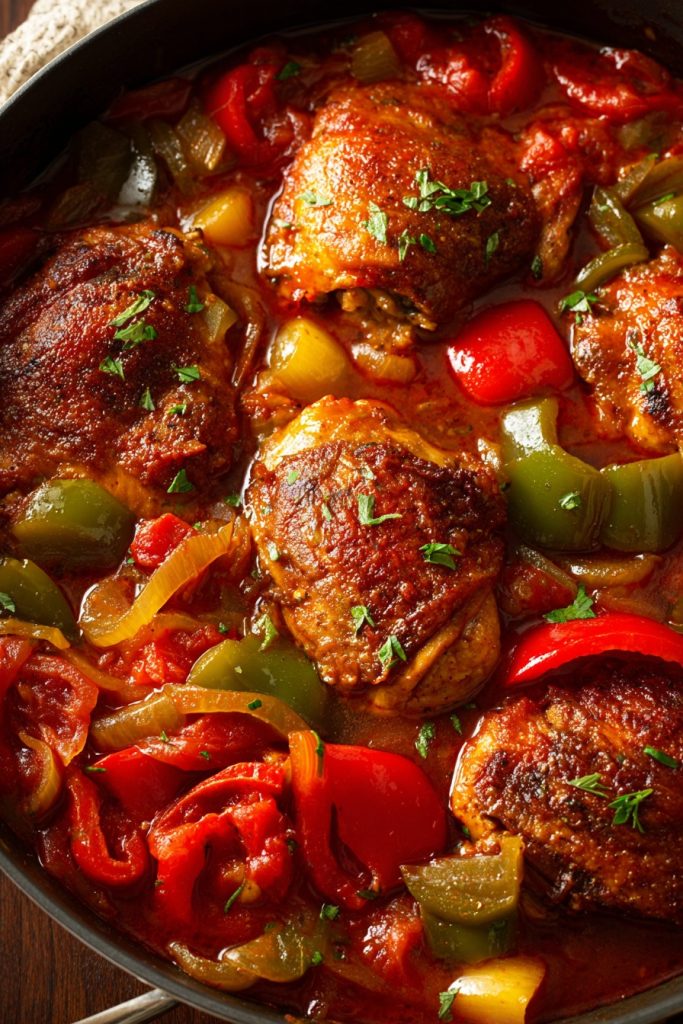
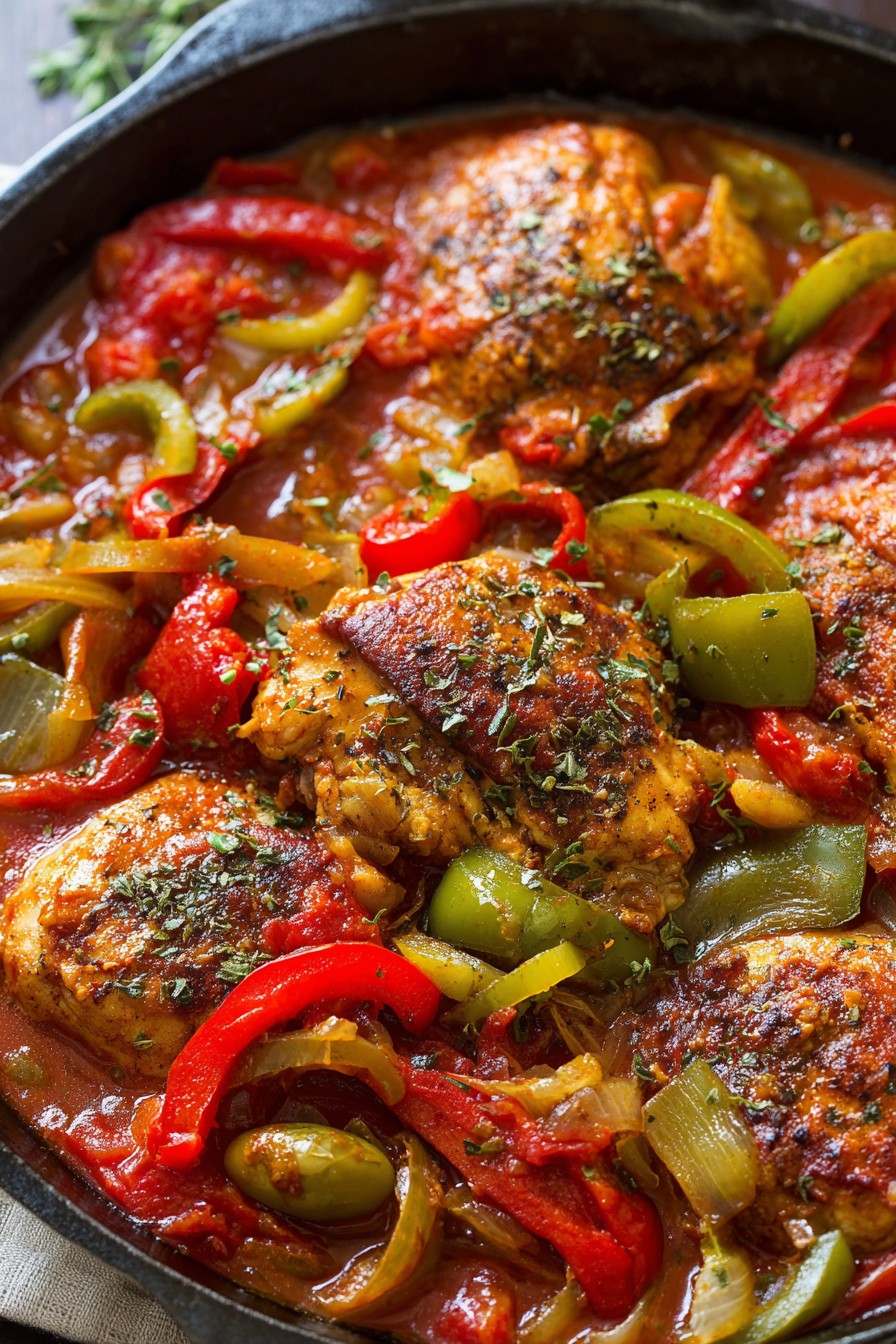
My fellow food lovers, get ready to transform your kitchen into an Italian trattoria with this incredible boneless chicken cacciatore! Many home cooks think they need hours to achieve that authentic Italian flavor, but I’m about to show you how to create magic in under an hour. This rustic hunter-style chicken dish will have your family begging for seconds and your taste buds doing the happy dance.
Why This Recipe Works
- The combination of boneless chicken thighs and breasts creates the perfect balance of tender, juicy meat and quick cooking time, eliminating the need for lengthy braising while still delivering incredible flavor and texture that will make you think you’ve been cooking all day.
- Using both fresh and canned tomatoes provides layers of flavor complexity – the fresh tomatoes add brightness and acidity while the canned San Marzano tomatoes contribute that deep, rich tomato base that Italian grandmothers swear by, creating a sauce that’s both vibrant and deeply satisfying.
- The strategic layering of aromatics (garlic, onions, bell peppers) and herbs (fresh basil, oregano) builds flavor from the bottom up, ensuring every bite is packed with the authentic Italian taste that makes this dish so memorable and restaurant-quality.
- Finishing with a splash of red wine and a pat of butter at the end creates a luxurious, glossy sauce that clings perfectly to the chicken and pasta, transforming simple ingredients into an elegant, company-worthy meal that looks and tastes far more complicated than it actually is.
Ingredients
- 2 pounds boneless, skinless chicken thighs (trimmed of excess fat)
- 1 pound boneless, skinless chicken breasts (cut into 2-inch pieces)
- 3 tablespoons olive oil (divided)
- 1 large yellow onion (diced)
- 1 red bell pepper (seeded and sliced)
- 1 green bell pepper (seeded and sliced)
- 4 cloves garlic (minced)
- 1 cup dry red wine (such as Chianti)
- 1 can (28 ounces) whole San Marzano tomatoes (hand-crushed)
- 2 large fresh tomatoes (diced)
- 1/2 cup chicken broth
- 2 tablespoons tomato paste
- 1 tablespoon fresh oregano (chopped)
- 1/4 cup fresh basil leaves (torn)
- 1 teaspoon red pepper flakes
- 2 teaspoons kosher salt
- 1 teaspoon black pepper
- 1/2 cup all-purpose flour
- 2 tablespoons unsalted butter
- 1/4 cup fresh parsley (chopped, for garnish)
Equipment Needed
- Large Dutch oven or heavy-bottomed pot
- Cutting board and sharp chef’s knife
- Measuring cups and spoons
- Wooden spoon or spatula
- Tongs
- Mixing bowls
- Can opener
- Kitchen timer
Instructions
Prepare and Brown the Chicken
Begin by patting your boneless chicken thighs and breast pieces completely dry with paper towels – this is crucial for achieving that beautiful golden-brown sear rather than steaming the meat. In a large bowl, combine the flour with 1 teaspoon of kosher salt and 1/2 teaspoon black pepper, then dredge each piece of chicken thoroughly, shaking off any excess flour. Heat 2 tablespoons of olive oil in your Dutch oven over medium-high heat until it shimmers and easily slides around the pan, about 2-3 minutes. Working in batches to avoid overcrowding, brown the chicken pieces for 3-4 minutes per side until they develop a deep golden-brown crust, transferring them to a clean plate as they finish. This initial browning creates fond (those delicious browned bits) on the bottom of the pot that will flavor your entire sauce.
Sauté the Aromatics and Vegetables
Reduce the heat to medium and add the remaining tablespoon of olive oil to the same pot, then add your diced onion and sliced bell peppers. Cook for 6-8 minutes, stirring occasionally, until the vegetables have softened and the onions become translucent with slightly golden edges. Add the minced garlic and cook for just 60 seconds until fragrant – be careful not to burn it as burnt garlic will make your entire sauce bitter. Stir in the tomato paste and cook for another minute until it darkens slightly and becomes aromatic, which helps eliminate any canned flavor. This step builds the flavor foundation, so take your time here – properly cooked aromatics make all the difference between a good sauce and a great one.
Deglaze and Build the Sauce
Pour in the red wine, using your wooden spoon to scrape up all those delicious browned bits from the bottom of the pot – this is where magic happens as you’re incorporating all that flavor into your sauce. Let the wine reduce by half, which should take about 3-4 minutes of simmering, until the alcohol smell dissipates and you’re left with a rich, concentrated liquid. Add the hand-crushed San Marzano tomatoes, fresh diced tomatoes, chicken broth, red pepper flakes, remaining salt, and black pepper, stirring everything together thoroughly. Bring the sauce to a gentle simmer, then reduce the heat to low, partially cover, and let it cook for 15 minutes to allow the flavors to meld together beautifully.
Simmer the Chicken in Sauce
Return all the browned chicken pieces and any accumulated juices back to the pot, nestling them into the sauce so they’re mostly submerged. Partially cover the Dutch oven and maintain a gentle simmer over low heat for 20-25 minutes, until the chicken is cooked through and tender but not falling apart. The internal temperature should reach 165°F when checked with an instant-read thermometer inserted into the thickest part of the largest chicken piece. Avoid stirring too vigorously – gentle occasional nudges with your spoon are enough to prevent sticking without breaking up the chicken pieces. The sauce will thicken slightly as it cooks, coating the chicken beautifully.
Finish and Serve the Dish
Remove the pot from heat and stir in the fresh oregano, torn basil leaves, and unsalted butter, swirling until the butter melts completely and creates a glossy, luxurious sauce. Taste and adjust seasoning with additional salt and pepper if needed – remember, sauces often need more seasoning than you might think. Let the cacciatore rest for 5 minutes off the heat to allow the flavors to fully incorporate and the chicken to absorb more of the sauce. Serve immediately over pasta, polenta, or crusty bread, garnished generously with fresh chopped parsley. The resting time is crucial as it allows the chicken to reabsorb some of the juices it released during cooking.
Tips and Tricks
For the most flavorful results, consider marinating your chicken pieces in the red wine with a couple of crushed garlic cloves for 30 minutes to 2 hours before cooking – this not only tenderizes the meat but infuses it with deeper wine flavor throughout. When browning the chicken, make sure your oil is properly heated by testing with a small piece of chicken – if it sizzles immediately upon contact, you’re good to go. If you prefer a smoother sauce, you can use an immersion blender to partially puree the tomato mixture after sautéing the vegetables but before adding the chicken back in. For extra depth of flavor, add a Parmesan rind to the sauce while it simmers – it will melt into the sauce, adding incredible umami richness without making it cheesy. If your sauce seems too thin after cooking, you can create a quick slurry by mixing 1 tablespoon of cornstarch with 2 tablespoons of cold water, then stirring it into the simmering sauce and cooking for 2 minutes until thickened. Conversely, if the sauce becomes too thick, simply thin it with additional chicken broth or even a splash of the pasta cooking water if serving with pasta. Don’t skip the fresh herbs at the end – they provide bright, fresh notes that balance the rich tomato sauce, but if you must substitute dried herbs, use one-third the amount and add them earlier in the cooking process. Leftovers actually improve in flavor overnight as the ingredients continue to meld, so consider making this a day ahead for even better results – just reheat gently on the stove top rather than microwaving to maintain texture.
Recipe Variations
- For a mushroom lover’s version, add 8 ounces of sliced cremini mushrooms when sautéing the bell peppers – their earthy flavor complements the tomatoes beautifully, and they release moisture that enhances the sauce. You could also use a mix of wild mushrooms for extra depth, but be sure to cook them until they’ve released their liquid and started to brown for maximum flavor impact.
- Create a spicy arrabbiata-style cacciatore by increasing the red pepper flakes to 1 tablespoon and adding 1-2 chopped fresh chili peppers with the garlic. For even more heat, include a teaspoon of Calabrian chili paste or your favorite hot sauce when building the sauce, adjusting to your preferred spice level while maintaining the Italian flavor profile.
- Transform this into a creamy tomato version by stirring in 1/2 cup of heavy cream or mascarpone cheese during the final minutes of cooking, creating a rich, pink sauce that’s incredibly decadent. Finish with extra fresh basil and a grating of Parmesan cheese for a restaurant-quality dish that will impress even the most discerning dinner guests.
- Make it heartier by adding 1 cup of sliced Italian sausage or pancetta when sautéing the vegetables – the rendered fat will add incredible flavor to the entire dish. Brown the sausage or pancetta first, remove it from the pot, then proceed with the recipe and add it back with the chicken for layers of meaty goodness.
- For a vegetarian alternative, substitute the chicken with 2 pounds of sliced portobello mushrooms and 1 can of drained cannellini beans, adding the beans during the last 10 minutes of cooking. The mushrooms provide meaty texture while the beans add protein and creaminess, creating a satisfying plant-based version that still delivers all the classic cacciatore flavors.
Frequently Asked Questions
Can I use bone-in chicken instead of boneless?
Absolutely! Bone-in chicken thighs will actually yield even more flavor since the bones contribute to a richer sauce, but you’ll need to adjust the cooking time. Increase the simmering time to 35-45 minutes to ensure the chicken near the bone cooks thoroughly, and check that the internal temperature reaches 165°F. The bones will need to be removed before serving, which adds an extra step, but many cooks find the enhanced flavor worth the additional effort.
What’s the best wine to use for deglazing?
Choose a dry, medium-bodied red wine that you would actually enjoy drinking – Chianti is traditional and perfect, but Pinot Noir, Merlot, or Sangiovese work beautifully too. Avoid cooking wines or very sweet varieties, as they can make your sauce cloying. The alcohol cooks off during reduction, leaving behind complex flavors that elevate the entire dish. If you prefer not to use wine, substitute with additional chicken broth mixed with 1 tablespoon of red wine vinegar.
Can I make this recipe in a slow cooker?
Yes, with some modifications – brown the chicken and sauté the vegetables on the stove first to develop flavor, then transfer everything to your slow cooker. Cook on low for 6-7 hours or high for 3-4 hours, adding the fresh herbs and butter during the last 30 minutes. The sauce may be thinner than the stovetop version, so you might need to thicken it with a cornstarch slurry at the end.
How long will leftovers keep in the refrigerator?
Properly stored in an airtight container, your chicken cacciatore will keep for 3-4 days in the refrigerator. The flavors actually improve overnight as the ingredients continue to meld. When reheating, do so gently on the stove over medium-low heat, adding a splash of broth or water if the sauce has thickened too much. Avoid microwaving if possible, as it can make the chicken rubbery.
Can I freeze this dish for later?
This recipe freezes exceptionally well for up to 3 months – cool completely before transferring to freezer-safe containers, leaving about an inch of headspace for expansion. Thaw overnight in the refrigerator before reheating gently on the stove. The texture may change slightly after freezing, but the flavor remains excellent. Consider freezing without pasta if you typically serve it that way, and cook fresh pasta when ready to serve.
Summary
This boneless chicken cacciatore delivers authentic Italian flavor with weeknight ease. Browning creates fond, layered aromatics build depth, and fresh herbs finish perfectly. Versatile and freezer-friendly, it’s sure to become a family favorite.
Boneless Chicken Cacciatore
6
servings20
minutes45
minutesIngredients
Instructions
- 1 Dredge chicken in flour mixture and brown in batches
- 2 Sauté onions, peppers, then garlic and tomato paste
- 3 Deglaze with wine, add tomatoes and broth, simmer
- 4 Return chicken to pot, simmer until cooked through
- 5 Finish with herbs and butter, adjust seasoning