
Zesty, zippy, and absolutely zero-drama—this boneless chicken breast recipe is about to become your weeknight superhero! Forget everything you thought you knew about dry, boring chicken because we’re turning that bland bird into the most succulent, flavor-packed main dish you’ve ever tasted. Get ready to have your taste buds do a happy dance while your family begs for seconds!
Why This Recipe Works
- The brine solution (saltwater soak) works magic by allowing the chicken to absorb extra moisture before cooking, resulting in incredibly juicy meat that stays tender even if you accidentally overcook it slightly
- Using a meat thermometer takes all the guesswork out of cooking—you’ll know exactly when your chicken reaches the perfect 165°F internal temperature without cutting into it and losing precious juices
- The high-heat sear followed by oven finishing creates a beautiful golden-brown crust while locking in moisture, giving you restaurant-quality texture without any fancy equipment
- The simple seasoning blend of garlic powder, paprika, and black pepper enhances the natural chicken flavor without overwhelming it, making this recipe versatile enough for any sauce or side dish
- Resting the chicken after cooking allows the juices to redistribute throughout the meat, ensuring every single bite is moist and flavorful rather than having all the goodness pool on your cutting board
Ingredients
- 4 boneless, skinless chicken breasts (about 1.5 pounds total), pounded to even ¾-inch thickness
- ¼ cup kosher salt for brining
- 4 cups cold water for brining solution
- 2 tablespoons olive oil, divided for cooking
- 1 teaspoon garlic powder
- 1 teaspoon smoked paprika
- ½ teaspoon freshly ground black pepper
- ½ teaspoon onion powder (optional but recommended)
- Fresh parsley or thyme for garnish (optional)
Equipment Needed
- Large bowl or container for brining
- Meat mallet or rolling pin for pounding
- Plastic wrap or parchment paper
- Large oven-safe skillet (cast iron preferred)
- Instant-read meat thermometer
- Tongs for flipping chicken
- Cutting board
- Small bowl for mixing spices
Instructions
Prepare and Brine the Chicken
Place your chicken breasts between two pieces of plastic wrap or parchment paper and gently pound them to an even ¾-inch thickness using a meat mallet or heavy rolling pin—this ensures uniform cooking so no part dries out while waiting for thicker sections to cook through. In a large bowl, dissolve ¼ cup kosher salt in 4 cups cold water, then submerge the pounded chicken breasts completely. Let them brine at room temperature for exactly 30 minutes—this saltwater soak allows the meat to absorb moisture and seasoning deep into the fibers. While waiting, mix your spice blend in a small bowl: combine 1 teaspoon garlic powder, 1 teaspoon smoked paprika, ½ teaspoon black pepper, and ½ teaspoon onion powder if using. Tip: Don’t skip the pounding step! Even thickness is the secret to perfectly cooked chicken without dry spots.
Pat Dry and Season Generously
After 30 minutes, remove chicken from brine and pat completely dry with paper towels—I mean REALLY dry, like desert-at-noon dry, because moisture is the enemy of a good sear. Use fresh paper towels and press firmly to remove all surface liquid; this step is crucial for achieving that beautiful golden-brown crust rather than steaming the chicken. Drizzle both sides lightly with about 1 tablespoon olive oil, then rub the spice mixture evenly over all surfaces, making sure every nook and cranny gets some love. Let the seasoned chicken sit at room temperature for 15-20 minutes while you preheat your oven and skillet—this takes the chill off and helps with even cooking. Tip: Room temperature chicken cooks more evenly than cold-from-the-fridge meat, reducing the risk of overcooked exteriors and undercooked centers.
Sear to Golden Perfection
Preheat your oven to 400°F and place an oven-safe skillet (cast iron works beautifully) over medium-high heat for about 3 minutes until properly hot. Add remaining 1 tablespoon olive oil and swirl to coat the pan, then carefully place chicken breasts in the hot oil—they should sizzle immediately upon contact. Cook undisturbed for exactly 3-4 minutes until a deep golden-brown crust forms on the bottom—resist the urge to peek or move them around! You’ll know it’s ready to flip when the edges start to look opaque and the chicken releases easily from the pan. Use tongs to flip each breast—they should have beautiful grill-like marks and that irresistible crispy exterior that makes everyone ask “is that really chicken?”
Finish in the Oven
Immediately transfer the entire oven-safe skillet to your preheated 400°F oven to finish cooking through. Bake for 8-12 minutes depending on thickness—start checking at 8 minutes with your instant-read thermometer inserted into the thickest part of the breast. You’re aiming for exactly 165°F internal temperature, which is the USDA-recommended safe temperature for poultry. If you don’t have a thermometer, look for firm-but-springy texture and clear juices—but seriously, get a thermometer; they’re cheap and life-changing! Remove from oven when thermometer reads 160°F—the temperature will continue rising about 5 degrees during resting. Tip: Invest in a good instant-read thermometer—it’s the difference between perfectly juicy chicken and dry disappointment.
Rest and Serve Beautifully
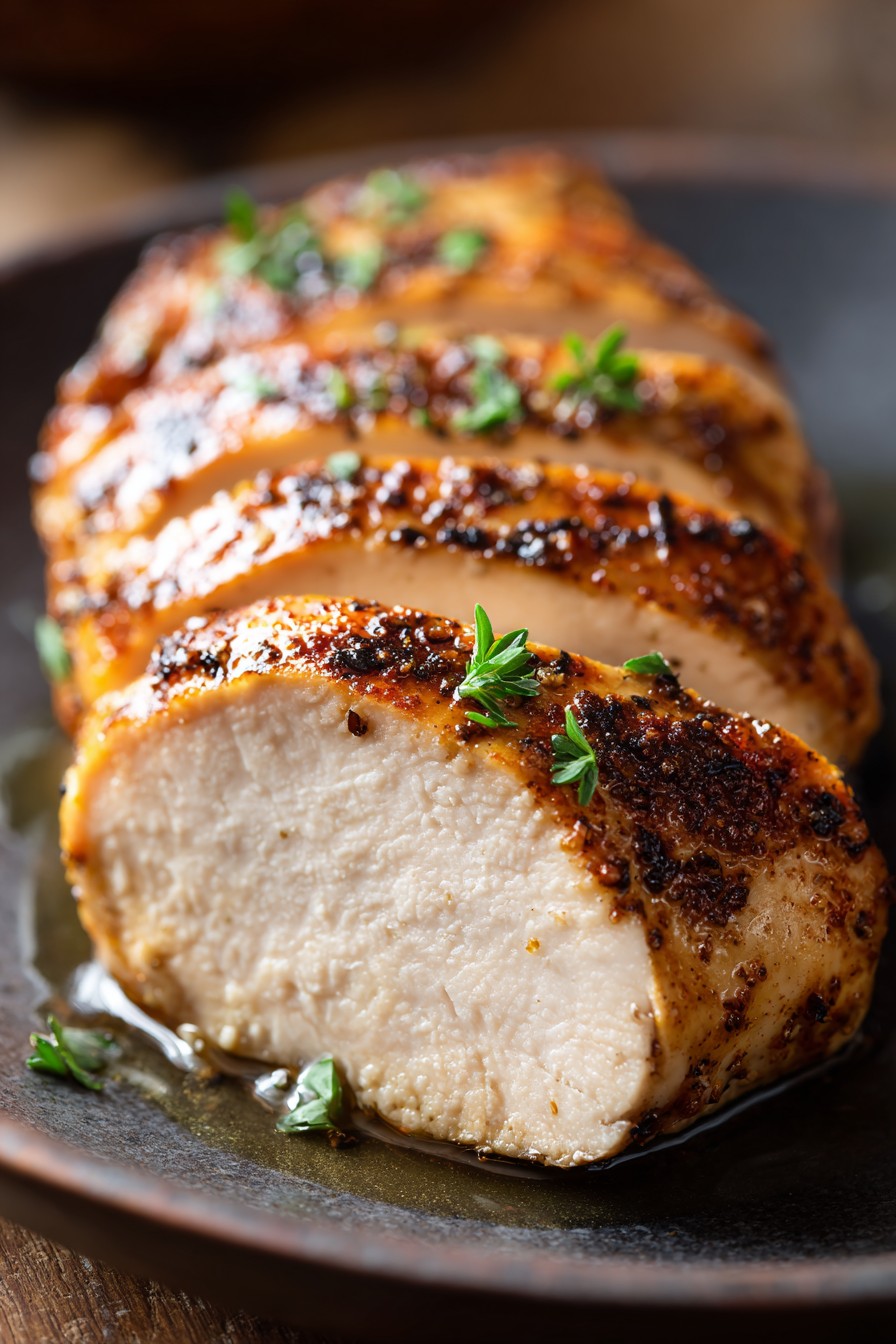
Transfer the cooked chicken to a clean cutting board or plate and let it rest for at least 5-7 minutes—this is non-negotiable for juicy results! During this time, the muscle fibers relax and reabsorb all those precious juices that would otherwise end up on your plate. While resting, the internal temperature will reach the safe 165°F mark and the carryover cooking will ensure doneness without dryness. After resting, slice against the grain into ½-inch thick slices or serve whole, garnished with fresh parsley or thyme if desired. Serve immediately with your favorite sides—this chicken pairs beautifully with everything from mashed potatoes to fresh salads.
Tips and Tricks
For the absolute best results, consider brining your chicken for longer—up to 2 hours in the refrigerator if you have time. The extended brine allows even more moisture absorption and deeper seasoning penetration throughout the meat. If you’re watching sodium intake, you can reduce the salt in the brine by half or use a low-sodium alternative, though the results won’t be quite as juicy. When pounding chicken, place it smooth-side down first to create a more even surface and prevent tearing—the rough side handles the pounding better. If you don’t have an oven-safe skillet, you can sear in a regular pan then transfer to a baking sheet lined with parchment paper for the oven finish—just make sure to preheat the baking sheet too for better browning. For extra flavor, add herbs like rosemary or thyme to the brine, or include a tablespoon of honey or sugar to help with browning. If your chicken breasts are particularly large or thick, you can butterfly them instead of pounding—slice horizontally almost through and open like a book for even cooking. Always bring your chicken to room temperature before cooking—about 20 minutes out of the fridge makes a significant difference in cooking uniformity. For meal prep, cook slightly under to 160°F since reheating will continue the cooking process—this prevents dryness when warming leftovers. If you want extra crispy skin-like texture, pat the dried chicken with a little cornstarch mixed into the spices before searing. For garlic lovers, add minced fresh garlic to the pan during the last minute of searing—just watch carefully to prevent burning. If using frozen chicken, thaw completely in the refrigerator overnight—never at room temperature—and pat extra dry to remove excess moisture from thawing.
Recipe Variations
- Lemon Herb Version: Add zest of one lemon to the spice mix and substitute dried oregano for paprika. After resting, squeeze fresh lemon juice over the chicken and garnish with fresh thyme—perfect for summer meals and pairs beautifully with roasted vegetables or light pasta dishes.
- Spicy Southwest Style: Replace paprika with chili powder and add ½ teaspoon cumin to the spice blend. Serve with avocado slices, salsa, and lime wedges for a Tex-Mex twist that’s fantastic in tacos, burrito bowls, or alongside Mexican rice.
- Creamy Mushroom Sauce: After removing cooked chicken, sauté sliced mushrooms in the same skillet, add ½ cup chicken broth, ¼ cup heavy cream, and 1 tablespoon Dijon mustard. Simmer until slightly thickened and pour over chicken—elevates simple chicken to dinner party status.
- Parmesan Crusted: After patting dry, dip chicken in beaten egg then press into a mixture of ½ cup grated Parmesan, ¼ cup breadcrumbs, and your spices. Pan-fry as directed—creates a delicious cheesy crust that kids and adults love equally.
- Asian Glaze Variation: Replace spice mix with 1 tablespoon grated ginger and 2 minced garlic cloves. After oven finishing, brush with mixture of 2 tablespoons soy sauce, 1 tablespoon honey, and 1 teaspoon sesame oil—broil for 1-2 minutes for sticky, glossy perfection.
Frequently Asked Questions
Can I use chicken thighs instead of breasts?
Absolutely! Bone-in, skin-on thighs will require longer cooking time—about 10-12 minutes per side for searing and 15-20 minutes in the oven at 400°F until they reach 175°F internal temperature. The higher fat content in thighs makes them more forgiving, but still use a thermometer for best results. Boneless, skinless thighs cook faster—reduce oven time to 6-8 minutes after searing. Adjust seasoning as thighs have stronger flavor that can handle more robust spices like cayenne or smoked paprika.
How long does cooked chicken breast last in the refrigerator?
Properly stored in an airtight container, cooked chicken breast lasts 3-4 days in the refrigerator. Make sure it cools completely before storing—never put hot chicken directly into the fridge as it can raise the temperature of other foods. For best quality, slice before storing and reheat gently in a skillet with a splash of broth or water to prevent drying out. You can also freeze cooked chicken for up to 3 months—thaw in refrigerator overnight before reheating.
Why did my chicken turn out tough and rubbery?
This usually happens from overcooking—chicken breast proteins tighten and squeeze out moisture when cooked beyond 165°F. Always use a meat thermometer and remove at 160°F since carryover cooking will continue. Not resting the chicken adequately also causes juice loss—always rest for at least 5 minutes. Another common mistake is cooking cold chicken straight from fridge—bring to room temperature first for even cooking. Finally, avoid pressing down on chicken while cooking—this squeezes out precious juices!
Can I make this recipe without brining?
Yes, but you’ll sacrifice some juiciness and flavor penetration. If skipping brine, increase salt in spice rub to 1 teaspoon and consider marinating in buttermilk or yogurt for 30 minutes instead—the acidity helps tenderize. Without brine, be extra careful not to overcook and definitely use a thermometer. You can also try the “dry brine” method: salt chicken heavily and refrigerate uncovered for 1 hour—this draws out moisture then reabsorbs it with salt.
What’s the best way to reheat leftover chicken?
Never microwave—it turns chicken rubbery! Instead, reheat gently in a 325°F oven for 10-15 minutes until warmed through, or place in a skillet with a tablespoon of broth or water over medium-low heat, covered, for 5-7 minutes. For salads, use cold straight from fridge—the texture holds up better than reheated. If using in soups or casseroles, add during last few minutes of cooking just to warm through.
Summary
This foolproof boneless chicken breast recipe guarantees juicy, flavorful results every time through brining, proper searing, and precise temperature control. Perfect for weeknights or company!
Perfect Juicy Boneless Chicken Breast
4
servings45
minutes15
minutesIngredients
Instructions
- 1 Pound chicken to ¾-inch even thickness
- 2 Brine in saltwater for 30 minutes
- 3 Pat dry, season with spices
- 4 Sear 3-4 minutes per side in hot skillet
- 5 Finish in 400°F oven for 8-12 minutes until 165°F
- 6 Rest 5 minutes before serving


