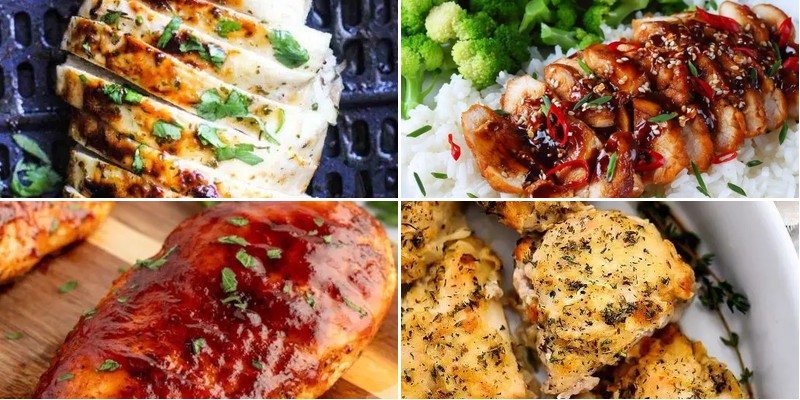
Unlock the full potential of your air fryer with these mouthwatering boneless chicken breast recipes! Whether you’re craving quick weeknight dinners, healthy family meals, or indulgent comfort food, we’ve gathered 34 delicious creations that will transform your cooking routine. Get ready to discover new favorites that are crispy, juicy, and incredibly easy to make—your taste buds are in for a treat!
Garlic Parmesan Air Fried Chicken Breasts
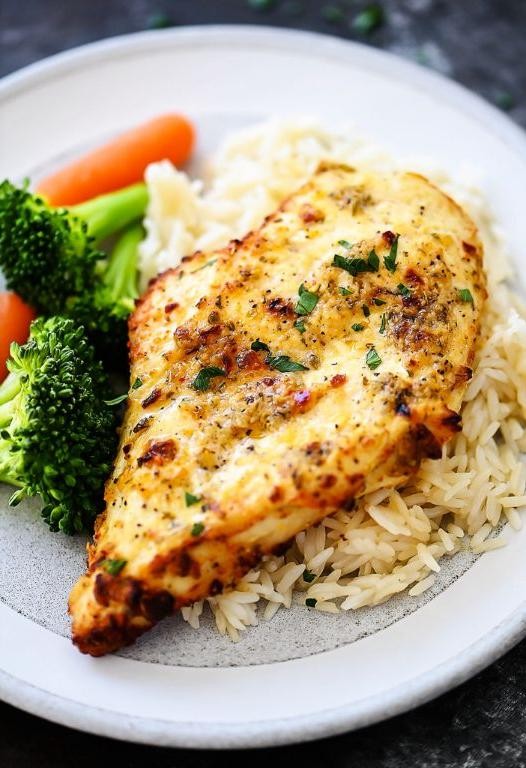
Often, the simplest recipes yield the most satisfying results, and these Garlic Parmesan Air Fried Chicken Breasts are no exception. Our methodical approach ensures even beginners achieve perfectly crispy, juicy chicken every time. Let’s walk through each step together to create this flavorful dish.
2
servings10
minutes23
minutesIngredients
– 2 large boneless, skinless chicken breasts (about 1.5 lbs total)
– 1/4 cup grated Parmesan cheese (freshly grated melts best)
– 1/4 cup panko breadcrumbs (or regular breadcrumbs for finer texture)
– 2 tbsp olive oil (or any neutral oil)
– 2 cloves garlic, minced (about 2 tsp)
– 1 tsp Italian seasoning
– 1/2 tsp salt
– 1/4 tsp black pepper
Instructions
1. Preheat your air fryer to 380°F for 3 minutes to ensure even cooking from the start.
2. Pat the chicken breasts completely dry with paper towels to help the coating adhere better.
3. In a medium bowl, combine Parmesan cheese, panko breadcrumbs, minced garlic, Italian seasoning, salt, and black pepper.
4. Brush both sides of each chicken breast evenly with olive oil using a pastry brush.
5. Press the Parmesan mixture firmly onto both sides of each chicken breast, ensuring full coverage.
6. Place the coated chicken breasts in a single layer in the air fryer basket, leaving space between them for air circulation.
7. Air fry at 380°F for 12 minutes, then carefully flip each chicken breast using tongs.
8. Continue air frying for another 8-10 minutes until the internal temperature reaches 165°F and the coating is golden brown.
9. Remove the chicken from the air fryer and let it rest on a cutting board for 5 minutes before slicing.
Expect wonderfully crispy, golden-brown exteriors that give way to tender, juicy chicken inside. The garlic and Parmesan create a savory, aromatic crust that’s deeply satisfying. Try slicing the chicken over pasta or serving it alongside roasted vegetables for a complete meal that feels both comforting and elegant.
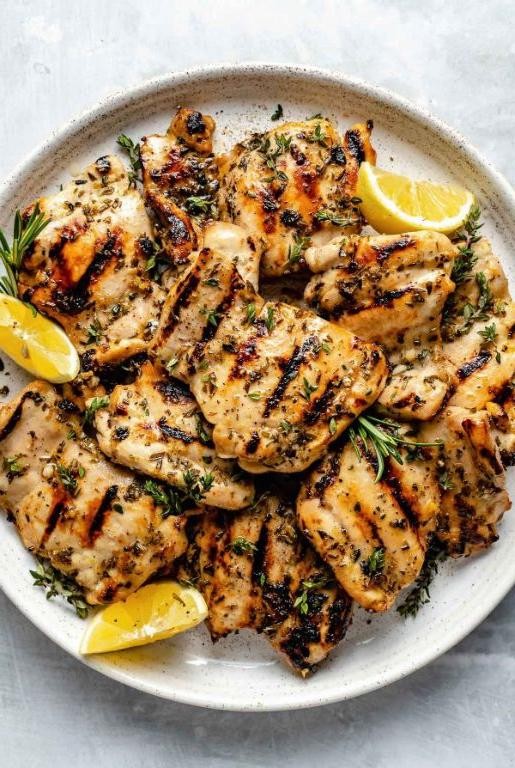
Lemon Herb Marinated Chicken Breasts
Cooking perfectly juicy chicken breasts starts with a flavorful marinade that does all the work for you. Let’s walk through this simple method that transforms basic chicken into a tender, herb-infused main dish anyone can master. Follow each step carefully for restaurant-quality results right in your own kitchen.
4
servings15
minutes25
minutesIngredients
– 4 boneless, skinless chicken breasts (about 1.5 lbs total, pat dry with paper towels for better browning)
– 1/4 cup olive oil (or any neutral oil like avocado or vegetable)
– 1/4 cup fresh lemon juice (about 2 medium lemons, freshly squeezed for brightest flavor)
– 3 cloves garlic, minced (about 1 tablespoon)
– 1 tablespoon fresh rosemary, finely chopped (or 1 teaspoon dried rosemary)
– 1 tablespoon fresh thyme leaves (or 1 teaspoon dried thyme)
– 1 teaspoon salt (adjust based on preference)
– 1/2 teaspoon black pepper (freshly ground preferred)
Instructions
1. Place chicken breasts between two sheets of plastic wrap and pound to an even 1/2-inch thickness using a meat mallet or rolling pin.
2. Whisk together olive oil, lemon juice, minced garlic, chopped rosemary, thyme leaves, salt, and black pepper in a medium bowl until fully combined.
3. Transfer chicken breasts and marinade to a large resealable plastic bag, ensuring all chicken surfaces are coated.
4. Refrigerate marinating chicken for at least 30 minutes and up to 4 hours—marinating longer than 4 hours may cause texture changes due to the acid in lemon juice.
5. Preheat oven to 400°F and place an oven-safe skillet in the oven to heat for 10 minutes.
6. Remove hot skillet from oven using oven mitts and place over medium-high heat on the stovetop.
7. Add marinated chicken breasts to the hot skillet, reserving excess marinade, and cook for 3-4 minutes until golden brown crust forms.
8. Flip chicken breasts using tongs and cook for another 3-4 minutes until second side develops golden brown color.
9. Transfer skillet to preheated oven and bake for 15-18 minutes until internal temperature reaches 165°F when tested with an instant-read thermometer in the thickest part.
10. Remove chicken from oven and let rest on a clean cutting board for 5 minutes—this allows juices to redistribute throughout the meat.
11. Slice chicken against the grain into 1/2-inch thick pieces before serving.
Serve this lemon herb chicken sliced over a fresh garden salad or alongside roasted vegetables for a complete meal. The exterior develops a beautiful golden crust while the interior remains remarkably moist and infused with bright citrus and earthy herbs. For a creative twist, use the sliced chicken in wraps or grain bowls, where the vibrant flavors complement other ingredients beautifully.
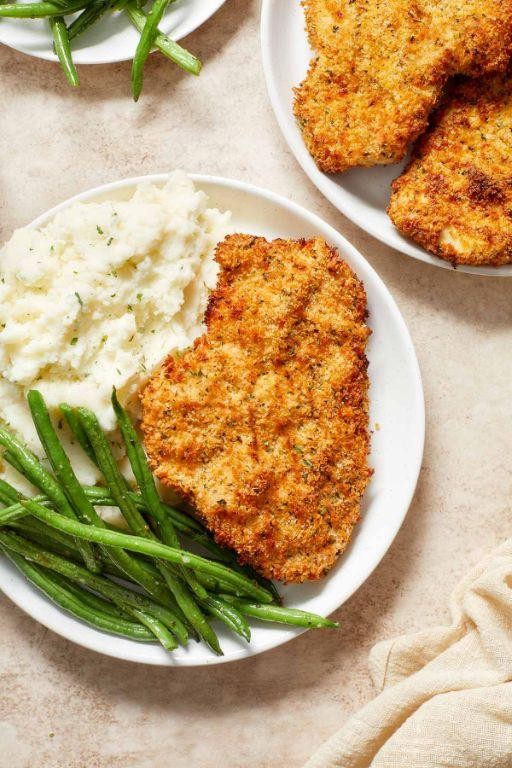
Crispy Air Fryer Chicken Schnitzel
Perfecting crispy chicken schnitzel at home just got easier with your air fryer. This method delivers that satisfying crunch without the mess of deep frying, using simple pantry staples you likely already have. Let me walk you through each step to ensure golden, perfectly cooked schnitzel every time.
2
servings15
minutes20
minutesIngredients
– 2 boneless, skinless chicken breasts (about 1 pound total, pounded to ½-inch thickness)
– ½ cup all-purpose flour (for even coating)
– 2 large eggs (lightly beaten for binding)
– 1 cup panko breadcrumbs (for extra crunch)
– 1 teaspoon garlic powder (or onion powder for variation)
– 1 teaspoon paprika (adds color and mild flavor)
– 1 teaspoon salt (adjust to taste)
– ½ teaspoon black pepper (freshly ground preferred)
– Cooking spray or 1 tablespoon olive oil (or any neutral oil)
Instructions
1. Place one chicken breast between two sheets of plastic wrap and pound it evenly to ½-inch thickness using a meat mallet or rolling pin.
2. Repeat the pounding process with the second chicken breast to ensure uniform cooking.
3. In a shallow bowl, combine the flour, garlic powder, paprika, salt, and black pepper, whisking thoroughly to distribute spices evenly.
4. Pour the beaten eggs into a second shallow bowl, creating your wet station for coating.
5. Spread the panko breadcrumbs in a third shallow bowl, keeping your breading station organized.
6. Pat the first chicken breast dry with paper towels to help the flour adhere better.
7. Dredge the chicken breast in the flour mixture, coating both sides completely and shaking off excess.
8. Dip the floured chicken into the beaten eggs, ensuring full coverage on all surfaces.
9. Press the egg-coated chicken into the panko breadcrumbs, firmly adhering crumbs to both sides.
10. Repeat the flour, egg, and breadcrumb process with the second chicken breast.
11. Lightly spray both sides of each breaded chicken breast with cooking spray or brush with olive oil.
12. Preheat your air fryer to 400°F for 3 minutes to ensure proper cooking temperature.
13. Place the chicken schnitzels in a single layer in the air fryer basket, leaving space between them for air circulation.
14. Air fry at 400°F for 10 minutes, then carefully flip each schnitzel using tongs.
15. Continue air frying for another 6-8 minutes until the internal temperature reaches 165°F and the coating is golden brown.
16. Remove the schnitzels from the air fryer and let them rest on a wire rack for 3 minutes before serving.
Ultimate crispiness meets tender chicken in this schnitzel, with the panko creating a light, shatteringly crisp exterior that gives way to juicy, well-seasoned meat. Serve it classic-style with lemon wedges for squeezing over the top, or get creative by slicing it into strips for salads or stuffing it into crusty rolls with pickles and mustard for a satisfying sandwich.
Buffalo-Style Air Fried Chicken Breasts
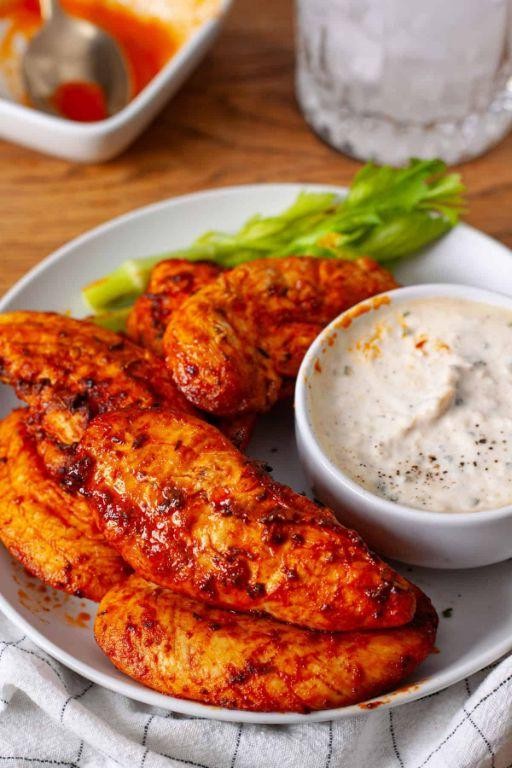
Diving into air frying brings restaurant-quality Buffalo chicken right to your kitchen with minimal effort and maximum flavor. This method creates perfectly crispy chicken without deep frying, making it both healthier and less messy to prepare. Follow these clear steps for juicy, spicy chicken breasts that will become your new weeknight favorite.
5
portions15
minutes20
minutesIngredients
– 1.5 lbs boneless, skinless chicken breasts (pounded to ½-inch thickness for even cooking)
– 1 cup all-purpose flour (for optimal crispiness)
– 1 tsp garlic powder (enhances savory notes)
– 1 tsp paprika (adds color and mild sweetness)
– ½ tsp salt (adjust to preference)
– ½ tsp black pepper (freshly ground preferred)
– 2 large eggs (beaten until uniform)
– ¾ cup Buffalo sauce (such as Frank’s RedHot)
– 2 tbsp unsalted butter (melted, helps sauce cling to chicken)
– Cooking spray (avocado or canola oil works well)
Instructions
1. Preheat your air fryer to 400°F for 5 minutes to ensure even cooking from the start.
2. Place chicken breasts between two sheets of plastic wrap and pound to ½-inch thickness using a meat mallet or rolling pin.
3. Combine flour, garlic powder, paprika, salt, and pepper in a shallow bowl, mixing thoroughly with a fork.
4. Beat eggs in a separate shallow bowl until no streaks of white remain.
5. Dip each chicken breast first into the flour mixture, coating all sides and shaking off excess.
6. Immediately dip the floured chicken into the beaten eggs, ensuring complete coverage.
7. Return the egg-coated chicken to the flour mixture for a second coating, pressing gently to adhere.
8. Lightly spray both sides of the breaded chicken with cooking spray to promote browning.
9. Arrange chicken in a single layer in the air fryer basket, leaving space between pieces for air circulation.
10. Air fry at 400°F for 10 minutes, then flip chicken using tongs.
11. Continue air frying for another 8-10 minutes until internal temperature reaches 165°F on an instant-read thermometer.
12. While chicken cooks, whisk together Buffalo sauce and melted butter in a medium bowl.
13. Immediately toss hot cooked chicken in the Buffalo sauce mixture until fully coated.
14. Return sauced chicken to the air fryer basket and cook for 2 more minutes to set the glaze.
Mouthwateringly crispy on the outside while remaining incredibly juicy inside, these chicken breasts deliver that classic Buffalo tang with just the right amount of heat. The air fryer creates a satisfying crunch that holds up beautifully against the bold sauce. Serve them sliced over a crisp salad, stuffed into warm pita bread with cool ranch dressing, or alongside celery sticks and blue cheese dip for the full Buffalo experience.
Honey Mustard Glazed Chicken Breasts
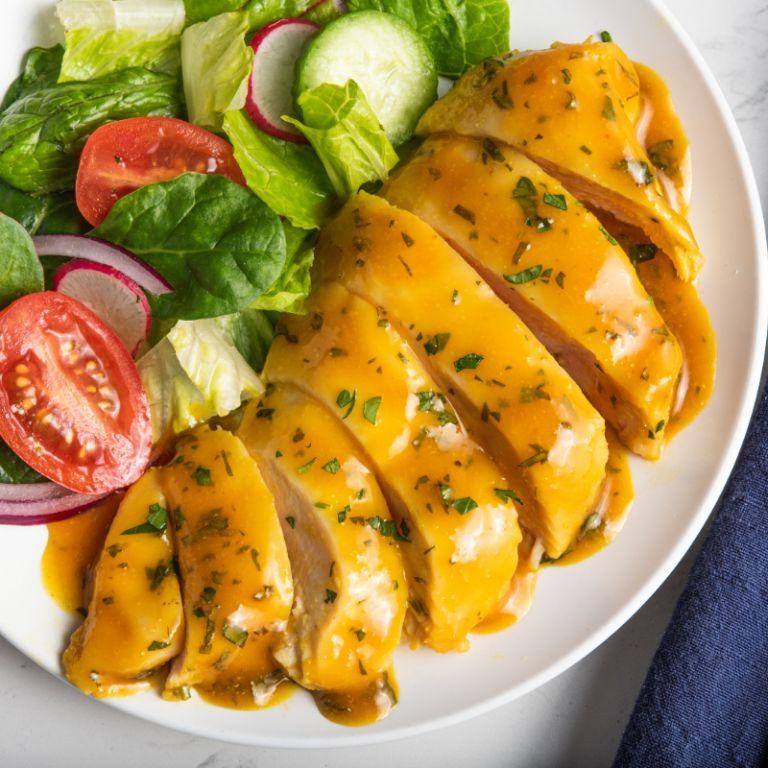
Finally, let’s master a weeknight favorite that transforms simple chicken breasts into something extraordinary with minimal effort. Follow these precise steps to achieve perfectly cooked chicken with a glossy, flavorful glaze that balances sweet and tangy notes beautifully. This method ensures juicy results every time, even for those new to cooking.
5
servings10
minutes26
minutesIngredients
– 4 boneless, skinless chicken breasts (about 6 oz each, pat dry with paper towels)
– 1/4 cup honey (warm slightly if crystallized)
– 3 tbsp Dijon mustard (or whole grain for texture)
– 2 tbsp olive oil (or any neutral oil)
– 1 tbsp apple cider vinegar (balances sweetness)
– 1 tsp garlic powder (not garlic salt)
– 1/2 tsp smoked paprika (adds depth)
– 1/4 tsp black pepper (freshly ground preferred)
– 1/2 tsp kosher salt (adjust if using table salt)
Instructions
1. Preheat your oven to 400°F and line a baking sheet with parchment paper.
2. Pat chicken breasts completely dry with paper towels to ensure proper browning.
3. In a small bowl, whisk together honey, Dijon mustard, olive oil, apple cider vinegar, garlic powder, smoked paprika, black pepper, and kosher salt until smooth.
4. Brush both sides of each chicken breast generously with half of the honey mustard mixture, reserving the remainder.
5. Arrange chicken on the prepared baking sheet with at least 1 inch between pieces for even cooking.
6. Bake at 400°F for 18-22 minutes, until internal temperature reaches 155°F on an instant-read thermometer.
7. Remove baking sheet and brush chicken with reserved glaze, coating all surfaces.
8. Return to oven and bake 3-5 more minutes until internal temperature reaches 165°F and glaze is bubbly.
9. Transfer chicken to a clean plate and let rest 5 minutes before slicing to retain juices.
Glazed chicken emerges with a caramelized, sticky-sweet crust giving way to remarkably tender meat. The honey mustard creates a beautiful sheen while the vinegar cuts through the richness perfectly. Try serving over creamy polenta or slicing thin for salad toppers—the glaze doubles as a delicious dressing when whisked with any pan juices.
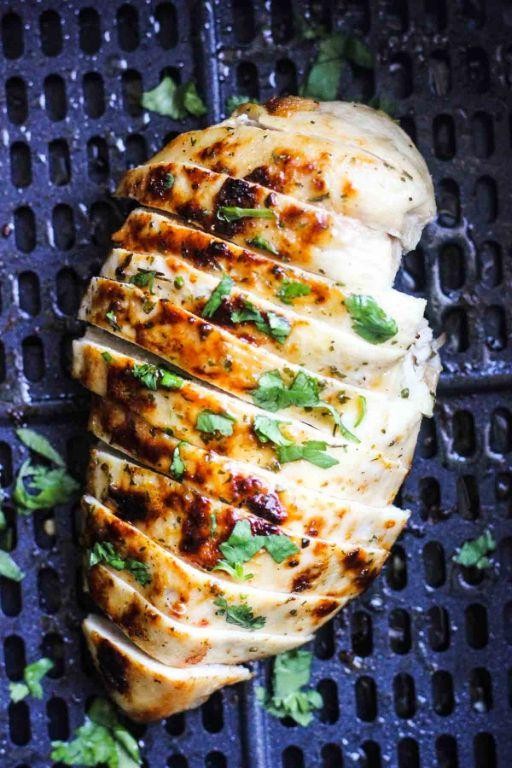
Spicy Cajun Air Fried Chicken Breasts
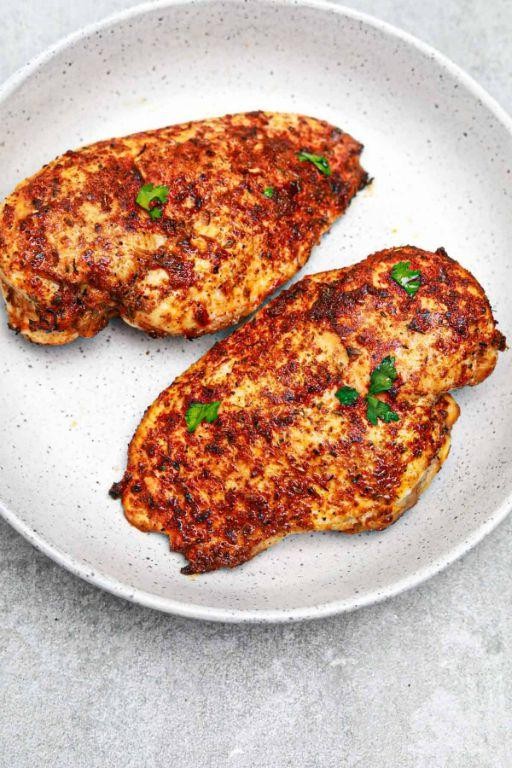
Diving into air frying opens up a world of crispy, flavorful possibilities without the mess of deep frying. Today we’ll master Spicy Cajun Air Fried Chicken Breasts using a methodical approach that guarantees juicy interiors and perfectly seasoned, crispy exteriors every single time. Follow these steps precisely for restaurant-quality results right from your kitchen counter.
2
servings15
minutes20
minutesIngredients
– 2 large boneless, skinless chicken breasts (about 1.5 lbs total)
– 2 tablespoons olive oil (or any neutral oil)
– 2 tablespoons Cajun seasoning blend
– 1 teaspoon garlic powder
– 1/2 teaspoon smoked paprika
– 1/4 teaspoon cayenne pepper (adjust for heat preference)
– Cooking spray
Instructions
1. Pat chicken breasts completely dry with paper towels to ensure maximum crispiness.
2. Place chicken breasts between two sheets of plastic wrap and pound to an even 3/4-inch thickness using a meat mallet or heavy pan.
3. Drizzle olive oil over both sides of each chicken breast, rubbing to coat evenly.
4. In a small bowl, combine Cajun seasoning, garlic powder, smoked paprika, and cayenne pepper.
5. Sprinkle seasoning mixture generously over both sides of each chicken breast, pressing gently to adhere.
6. Preheat air fryer to 375°F for 3 minutes while chicken rests.
7. Lightly spray air fryer basket with cooking spray to prevent sticking.
8. Arrange chicken breasts in a single layer in the air fryer basket, leaving space between them.
9. Air fry at 375°F for 12 minutes, then flip chicken breasts using tongs.
10. Continue air frying for another 8-10 minutes until internal temperature reaches 165°F when tested with a meat thermometer.
11. Transfer chicken to a cutting board and let rest for 5 minutes before slicing.
Succulent and bursting with bold Cajun flavors, these chicken breasts emerge with a satisfying crispy crust that gives way to incredibly juicy meat. The smoky paprika and cayenne create a beautiful heat that builds gradually with each bite. Serve sliced over creamy grits, tucked into warm tortillas with fresh slaw, or alongside roasted vegetables for a complete meal that will have everyone asking for seconds.
Pesto Stuffed Chicken Breasts

Stuffed chicken breasts might sound fancy, but with a simple pesto filling and a methodical approach, they’re surprisingly achievable for any home cook. Start by gathering your ingredients and prepping your workspace to ensure a smooth cooking process.
5
servings15
minutes30
minutesIngredients
– 4 boneless, skinless chicken breasts (about 6 oz each, pounded to ½-inch thickness for even cooking)
– ½ cup prepared basil pesto (store-bought or homemade, adjust to taste)
– ½ cup shredded mozzarella cheese (low-moisture works best for melting)
– ¼ cup grated Parmesan cheese (freshly grated for better flavor)
– 1 tbsp olive oil (or any neutral oil)
– 1 tsp Italian seasoning (or a mix of dried oregano, basil, and thyme)
– ½ tsp garlic powder (optional, for extra flavor)
– ½ tsp salt (adjust based on pesto saltiness)
– ¼ tsp black pepper (freshly ground preferred)
Instructions
1. Preheat your oven to 375°F (190°C) and lightly grease a 9×13-inch baking dish with olive oil.
2. Lay each chicken breast flat on a cutting board and use a sharp knife to slice a horizontal pocket through the thickest side, being careful not to cut all the way through.
3. In a small bowl, combine the basil pesto, mozzarella cheese, Parmesan cheese, Italian seasoning, garlic powder, salt, and black pepper until well mixed.
4. Spoon about 2 tablespoons of the pesto mixture into each chicken pocket, spreading it evenly without overfilling to prevent leakage.
5. Secure the openings of the chicken pockets with toothpicks to hold the filling in place during baking.
6. Brush the outside of each stuffed chicken breast lightly with the remaining olive oil and sprinkle with extra salt and pepper if desired.
7. Arrange the chicken breasts in the prepared baking dish, ensuring they are not touching for even air circulation.
8. Bake in the preheated oven for 25–30 minutes, or until the internal temperature reaches 165°F (74°C) when checked with a meat thermometer.
9. Remove the baking dish from the oven and let the chicken rest for 5 minutes before carefully removing the toothpops.
Here’s the final touch: the chicken emerges juicy with a golden exterior, while the pesto and cheese meld into a creamy, herbaceous center. Serve slices over a bed of pasta or alongside roasted vegetables to soak up the flavorful juices, making it a versatile centerpiece for weeknight dinners or casual gatherings.
Teriyaki Glazed Chicken Breasts
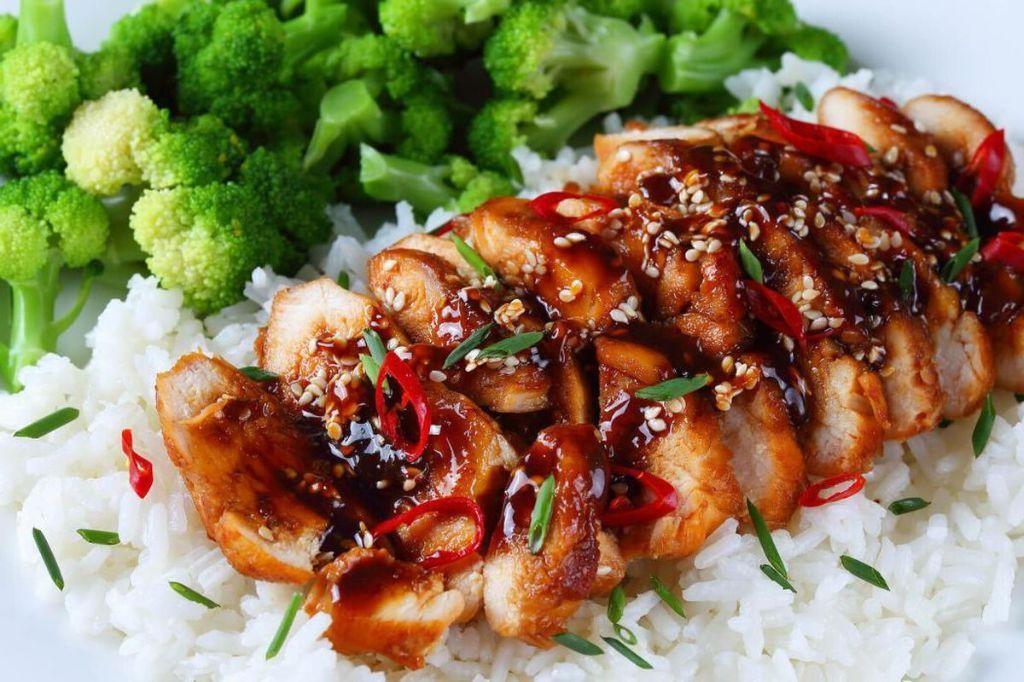
Frequently, home cooks search for that perfect balance of sweet and savory in a simple weeknight meal. Following these methodical steps will guide you through creating perfectly glazed chicken breasts with restaurant-quality results. Let’s begin with gathering our ingredients and preparing our workspace.
2
servings15
minutes20
minutesIngredients
– 4 boneless, skinless chicken breasts (about 1.5 lbs total, pat dry with paper towels for better browning)
– 1/2 cup soy sauce (low-sodium works well for better control)
– 1/4 cup brown sugar (packed firmly for consistent sweetness)
– 2 tbsp rice vinegar (or substitute apple cider vinegar)
– 2 tbsp honey (warm slightly if too thick to measure)
– 2 garlic cloves, minced (about 2 tsp, fresh preferred over powdered)
– 1 tsp grated fresh ginger (or 1/2 tsp ground ginger)
– 1 tbsp cornstarch (mixed with 2 tbsp cold water to create slurry)
– 2 tbsp vegetable oil (or any neutral high-heat oil like canola)
– 2 green onions, sliced (for garnish, optional but recommended)
Instructions
1. Place chicken breasts between two sheets of plastic wrap and pound to even 3/4-inch thickness using a meat mallet or heavy pan.
2. Combine soy sauce, brown sugar, rice vinegar, honey, minced garlic, and grated ginger in a medium bowl, whisking until sugar dissolves completely.
3. Heat vegetable oil in a large skillet over medium-high heat until shimmering but not smoking, about 2 minutes.
4. Place chicken breasts in the hot skillet, leaving space between each piece to ensure proper browning rather than steaming.
5. Cook chicken for 5-6 minutes without moving until golden brown crust forms on the bottom side.
6. Flip chicken using tongs and cook for another 4-5 minutes until internal temperature reaches 155°F on an instant-read thermometer.
7. Transfer chicken to a clean plate, tent loosely with foil, and let rest while preparing the glaze.
8. Pour teriyaki sauce mixture into the same skillet, scraping up any browned bits from the chicken with a wooden spoon.
9. Bring sauce to a simmer over medium heat and cook for 2 minutes until slightly reduced.
10. Whisk cornstarch slurry into the simmering sauce and continue cooking for 1-2 minutes until thickened to a glaze consistency that coats the back of a spoon.
11. Return chicken and any accumulated juices to the skillet, turning to coat completely in the glaze.
12. Cook for 1 final minute, basting chicken constantly with the glaze until internal temperature reaches 165°F.
Now you have beautifully glazed chicken with a sticky, caramelized exterior. Notice how the resting period allows the juices to redistribute throughout the meat, resulting in exceptionally tender bites. Next time, try serving it over steamed rice to catch every drop of the savory-sweet sauce or slice it for colorful salad bowls.
Mediterranean Herb-Crusted Chicken Breasts

Now, let’s create perfectly seasoned Mediterranean Herb-Crusted Chicken Breasts that will become your new weeknight favorite. This methodical approach ensures even cooking and maximum flavor development, guiding you through each essential step for restaurant-quality results at home.
2
servings15
minutes25
minutesIngredients
– 4 boneless, skinless chicken breasts (about 6 ounces each, pounded to ¾-inch thickness)
– 2 tablespoons olive oil (or any neutral oil)
– ½ cup panko breadcrumbs (for extra crunch)
– ¼ cup grated Parmesan cheese (freshly grated melts better)
– 2 teaspoons dried oregano (crush between fingers to release oils)
– 1 teaspoon dried thyme
– 1 teaspoon garlic powder
– ½ teaspoon onion powder
– ½ teaspoon salt (adjust to preference)
– ¼ teaspoon black pepper (freshly ground preferred)
– 1 large egg
– 1 tablespoon water
Instructions
1. Preheat your oven to 400°F and line a baking sheet with parchment paper.
2. Pat chicken breasts completely dry with paper towels to ensure the coating adheres properly.
3. In a shallow bowl, combine panko breadcrumbs, Parmesan cheese, oregano, thyme, garlic powder, onion powder, salt, and pepper.
4. In a separate shallow bowl, whisk the egg with 1 tablespoon of water until fully combined.
5. Dip each chicken breast into the egg mixture, coating both sides thoroughly.
6. Press the chicken firmly into the breadcrumb mixture, ensuring complete coverage on all surfaces.
7. Place the coated chicken breasts on the prepared baking sheet, spacing them 2 inches apart for even air circulation.
8. Drizzle 2 tablespoons of olive oil evenly over the top of each chicken breast.
9. Bake at 400°F for 20-25 minutes until the internal temperature reaches 165°F when measured with an instant-read thermometer.
10. Remove from oven and let rest for 5 minutes on the baking sheet before slicing.
Resting allows the juices to redistribute throughout the meat, resulting in incredibly moist chicken with a satisfyingly crisp, golden-brown crust. The Mediterranean herb blend creates aromatic notes that pair beautifully with roasted vegetables or a simple lemon-dressed salad, making this dish versatile enough for both casual dinners and entertaining.
BBQ Air Fryer Chicken Breasts
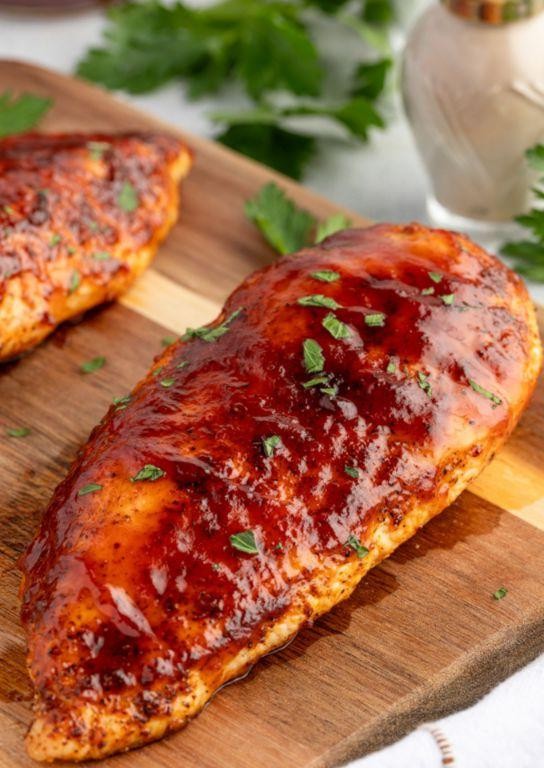
Baking chicken breasts in the air fryer with BBQ seasoning creates incredibly juicy, flavorful results with minimal effort—perfect for busy weeknights when you want that grilled taste without firing up the barbecue. This method delivers tender, evenly cooked chicken every time, and I’ll walk you through each simple step to ensure success.
2
servings10
minutes17
minutesIngredients
- 2 boneless, skinless chicken breasts (about 1 lb total, pat dry for better browning)
- 1 tbsp olive oil (or any neutral oil, to help seasoning stick)
- 1 tsp smoked paprika (for smoky depth)
- 1 tsp garlic powder
- 1/2 tsp onion powder
- 1/2 tsp salt (adjust based on preference)
- 1/4 tsp black pepper
- 1/4 cup BBQ sauce (use your favorite brand, for brushing)
Instructions
- Pat the chicken breasts completely dry with paper towels to ensure a crisp exterior.
- Brush both sides of each chicken breast evenly with 1 tablespoon of olive oil.
- In a small bowl, combine 1 teaspoon smoked paprika, 1 teaspoon garlic powder, 1/2 teaspoon onion powder, 1/2 teaspoon salt, and 1/4 teaspoon black pepper.
- Sprinkle the seasoning mixture evenly over both sides of the chicken, pressing gently to adhere.
- Preheat your air fryer to 375°F for 3 minutes so the chicken starts cooking immediately.
- Place the seasoned chicken breasts in a single layer in the air fryer basket, leaving space between them for air circulation.
- Air fry at 375°F for 12 minutes, flipping the chicken halfway through using tongs for even cooking.
- Check the internal temperature with a meat thermometer—it should read 165°F in the thickest part.
- Brush the top of each chicken breast with 2 tablespoons of BBQ sauce total, reserving the rest for serving.
- Return the chicken to the air fryer and cook at 375°F for 2–3 more minutes until the sauce is slightly caramelized.
- Transfer the chicken to a cutting board and let it rest for 5 minutes before slicing to retain juices.
Perfectly cooked, these BBQ air fryer chicken breasts boast a slightly crisp exterior with a tender, juicy interior that pairs wonderfully with the smoky-sweet glaze. Pile slices onto toasted buns for quick sandwiches, or serve alongside roasted potatoes and a fresh green salad for a complete meal that’s sure to become a regular in your rotation.
Sesame Soy Chicken Breasts
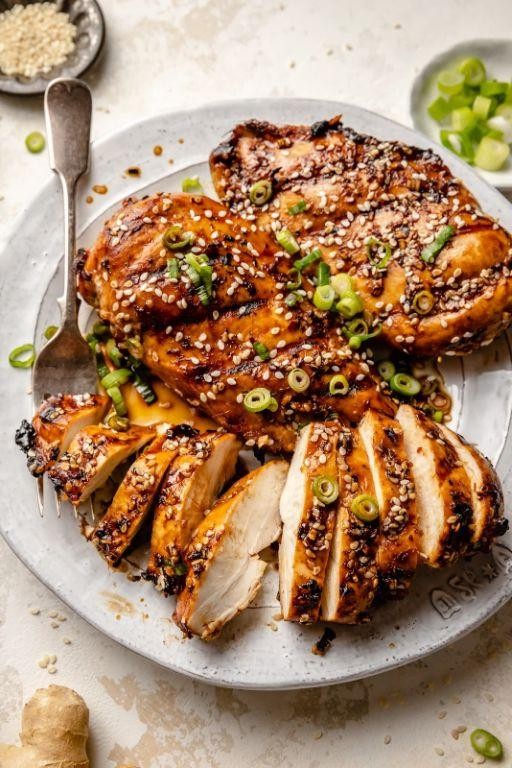
Versatile and packed with flavor, these sesame soy chicken breasts transform simple ingredients into a restaurant-quality meal right in your own kitchen. We’ll walk through each step methodically to ensure perfectly cooked, juicy chicken every time, even if you’re new to cooking with Asian-inspired flavors. This approachable recipe builds confidence while delivering impressive results for weeknight dinners or casual entertaining.
5
servings25
minutes20
minutesIngredients
– 4 boneless, skinless chicken breasts (about 1.5 lbs total, pat dry for better browning)
– 1/4 cup low-sodium soy sauce (or tamari for gluten-free)
– 2 tbsp toasted sesame oil (don’t substitute regular sesame oil)
– 2 tbsp honey (or maple syrup for vegan option)
– 2 cloves garlic, minced (about 2 tsp)
– 1 tbsp fresh ginger, grated (or 1 tsp ground ginger)
– 1 tbsp rice vinegar (adds brightness to balance flavors)
– 1 tsp cornstarch (creates glossy sauce consistency)
– 2 tbsp vegetable oil (or any neutral high-heat oil)
– 2 tbsp sesame seeds (toasted for maximum flavor)
– 2 green onions, thinly sliced (for fresh garnish)
Instructions
1. Pat chicken breasts completely dry with paper towels to ensure proper browning.
2. Whisk together soy sauce, sesame oil, honey, minced garlic, grated ginger, and rice vinegar in a medium bowl until fully combined.
3. Place chicken breasts in a shallow dish and pour 3/4 of the marinade over them, reserving the remaining 1/4 in a separate bowl.
4. Marinate chicken at room temperature for 20 minutes (no longer to prevent texture changes).
5. Whisk cornstarch into the reserved marinade until no lumps remain to create your finishing sauce.
6. Heat vegetable oil in a large skillet over medium-high heat until shimmering, about 2 minutes.
7. Place chicken breasts in the hot skillet and cook undisturbed for 6-8 minutes until deep golden brown crust forms.
8. Flip chicken using tongs and cook another 6-8 minutes until internal temperature reaches 165°F on an instant-read thermometer.
9. Transfer cooked chicken to a clean cutting board and let rest 5 minutes to redistribute juices.
10. Pour the cornstarch-thickened sauce into the still-hot skillet and cook 1-2 minutes until slightly thickened and bubbly.
11. Slice rested chicken against the grain into 1/2-inch thick pieces for maximum tenderness.
12. Arrange sliced chicken on a serving platter and drizzle with the warm sauce.
13. Sprinkle toasted sesame seeds and sliced green onions evenly over the top.
Exceptional both warm and at room temperature, these chicken breasts boast a perfect balance of savory soy and nutty sesame with subtle sweetness. The cornstarch-thickened sauce clings beautifully to each slice, while resting ensures every bite remains remarkably juicy. For a complete meal, serve over steamed jasmine rice with quick-pickled vegetables or slice thin for flavorful lunch wraps the next day.
Ranch-Seasoned Air Fryer Chicken Breasts
You’ve probably stared at plain chicken breasts wondering how to make them exciting without much effort. Your air fryer and a trusty packet of ranch seasoning are about to become your best friends for creating a juicy, flavorful main course with minimal cleanup.
2
servings5
minutes23
minutesIngredients
– 2 large boneless, skinless chicken breasts (about 1.5 lbs total)
– 1 (1 oz) packet dry ranch seasoning mix (or 3 tbsp homemade blend)
– 2 tbsp olive oil (or any neutral oil like avocado or canola)
– Cooking spray (optional, for extra crispiness)
Instructions
1. Pat the chicken breasts completely dry with paper towels to ensure the seasoning sticks properly.
2. Drizzle olive oil evenly over both sides of each chicken breast, using your hands to coat thoroughly.
3. Sprinkle the entire packet of ranch seasoning evenly over all surfaces of the chicken, pressing gently to adhere.
4. Preheat your air fryer to 375°F for 3 minutes to ensure even cooking from the start.
5. Lightly spray the air fryer basket with cooking spray to prevent sticking and promote browning.
6. Place the seasoned chicken breasts in a single layer in the air fryer basket, leaving space between them for air circulation.
7. Air fry at 375°F for 12 minutes, then carefully flip each chicken breast using tongs.
8. Continue cooking for another 8-10 minutes until the internal temperature reaches 165°F when tested with a meat thermometer.
9. Remove the chicken from the air fryer and let it rest on a cutting board for 5 minutes before slicing to retain juices.
Very tender and juicy inside with a perfectly seasoned, slightly crispy crust, these chicken breasts deliver that classic ranch flavor in every bite. Versatile enough to slice over salads, stuff into sandwiches, or serve alongside roasted vegetables for a complete meal that feels far from basic.
Italian Herb Baked Chicken Breasts
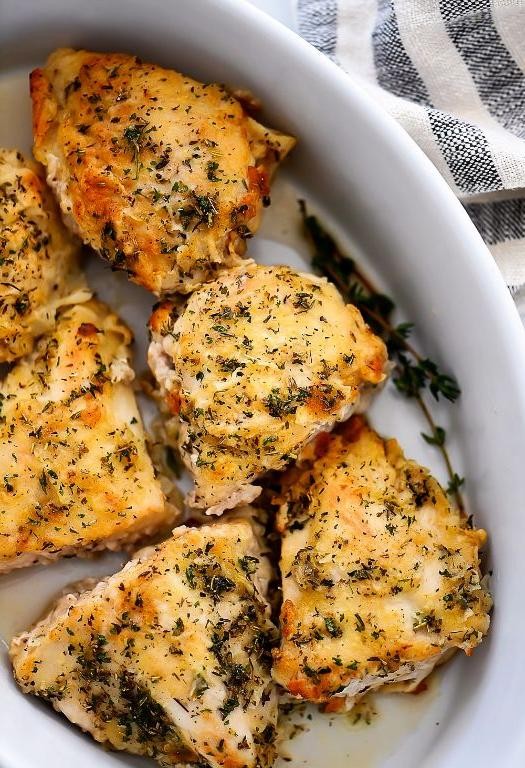
Many home cooks find chicken breasts challenging to keep moist, but this Italian herb baked method delivers perfectly juicy results every time. Mastering this simple technique will give you a versatile protein that pairs beautifully with pasta, salads, or roasted vegetables. Let’s walk through each step together to ensure your chicken turns out flavorful and tender.
4
servings10
minutes22
minutesIngredients
– 4 boneless, skinless chicken breasts (about 6 ounces each, pat dry with paper towels)
– 2 tablespoons olive oil (or avocado oil for higher heat tolerance)
– 1 teaspoon dried oregano (crush between fingers to release oils)
– 1 teaspoon dried basil
– 1 teaspoon garlic powder (not garlic salt)
– ½ teaspoon onion powder
– ½ teaspoon salt (fine sea salt distributes evenly)
– ¼ teaspoon black pepper (freshly ground for best flavor)
– ¼ teaspoon red pepper flakes (optional, for mild heat)
Instructions
1. Preheat your oven to 400°F and position the rack in the center of the oven for even heating.
2. Pat the chicken breasts completely dry with paper towels to ensure the seasoning sticks properly and promotes browning.
3. Place the dried chicken breasts in a single layer on a rimmed baking sheet lined with parchment paper or aluminum foil for easy cleanup.
4. Drizzle the olive oil evenly over all sides of each chicken breast, using your hands to coat them thoroughly.
5. In a small bowl, combine the dried oregano, dried basil, garlic powder, onion powder, salt, black pepper, and red pepper flakes if using.
6. Sprinkle the herb mixture evenly over both sides of each chicken breast, pressing gently to help the seasoning adhere.
7. Arrange the seasoned chicken breasts with at least 1 inch of space between them on the baking sheet to allow for proper air circulation.
8. Bake at 400°F for 18-22 minutes, until the internal temperature reaches 165°F when measured with an instant-read thermometer inserted into the thickest part.
9. Remove the baking sheet from the oven and let the chicken rest undisturbed for 5 minutes before slicing to allow juices to redistribute.
That perfectly baked chicken emerges from the oven with a golden herb crust that crackles slightly when cut. The interior remains remarkably juicy and tender, infused with the classic Italian herb flavors that complement so many side dishes. Try slicing it over a bed of creamy polenta or chopping it into a vibrant Mediterranean salad for a complete meal that feels both comforting and fresh.
Conclusion
Excitingly versatile, these 34 boneless chicken breast recipes prove your air fryer is a kitchen superstar! From quick weeknight dinners to impressive meals, there’s something for every craving. We’d love to hear which recipes become your favorites—drop us a comment below and share this roundup on Pinterest to inspire fellow home cooks. Happy air frying!