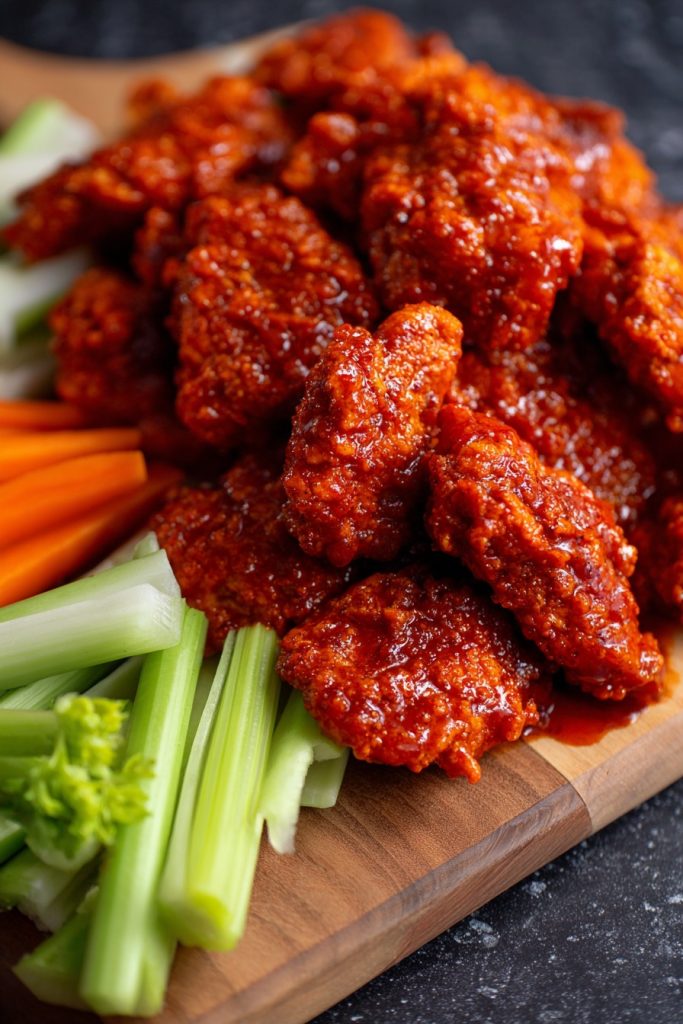
Oh my goodness, folks, get ready for the ultimate game day snack or weeknight dinner that’ll have everyone begging for seconds! This boneless buffalo chicken recipe delivers that perfect combination of crispy exterior, juicy interior, and that signature tangy-spicy buffalo sauce we all crave. Once you try this homemade version, you’ll never go back to takeout again!
Why This Recipe Works
- The double-dredging technique creates an incredibly crispy crust that stays crunchy even after saucing, thanks to the perfect balance of flour and cornstarch in the coating
- Using boneless, skinless chicken thighs instead of breasts ensures maximum juiciness and flavor retention throughout the cooking process, preventing dry chicken disasters
- The homemade buffalo sauce strikes the ideal balance between tangy vinegar notes and spicy heat, allowing you to customize the spice level to your personal preference
- Baking instead of deep-frying provides a healthier alternative without sacrificing that satisfying crunch we all love in buffalo chicken
- The resting period after cooking allows the chicken to reabsorb its juices, resulting in tender, flavorful meat that doesn’t dry out when served
Ingredients
- 2 pounds boneless, skinless chicken thighs, trimmed of excess fat
- 1 cup all-purpose flour
- 1/2 cup cornstarch
- 2 teaspoons garlic powder
- 2 teaspoons paprika
- 1 teaspoon cayenne pepper (adjust to taste)
- 1 teaspoon black pepper
- 2 teaspoons salt
- 2 large eggs
- 1/4 cup milk
- 1 cup Frank’s RedHot Original Cayenne Pepper Sauce
- 1/2 cup unsalted butter, melted
- 1 tablespoon white vinegar
- 1 teaspoon Worcestershire sauce
- 1/2 teaspoon garlic powder
- 1/4 teaspoon cayenne pepper (optional, for extra heat)
- Cooking spray or vegetable oil for baking
- Fresh parsley, chopped (for garnish)
- Ranch or blue cheese dressing (for serving)
- Celery sticks (for serving)
- Carrot sticks (for serving)
Equipment Needed
- Large mixing bowls (3)
- Whisk
- Measuring cups and spoons
- Rimmed baking sheet
- Wire rack that fits inside baking sheet
- Parchment paper
- Tongs
- Small saucepan
- Meat thermometer
- Paper towels
- Cutting board
- Sharp knife
Instructions
Prepare Your Chicken and Setup
First things first, let’s get our station ready! Pat your chicken thighs completely dry with paper towels – this is crucial for achieving maximum crispiness. Set up three large bowls: in the first bowl, whisk together the flour, cornstarch, garlic powder, paprika, cayenne pepper, black pepper, and salt until thoroughly combined. In the second bowl, beat the eggs with milk until smooth and homogeneous. Leave the third bowl empty for now – this will be for your coated chicken. Line a baking sheet with parchment paper and place a wire rack on top, then give it a light spray with cooking oil. This setup ensures air circulation for even cooking and prevents soggy bottoms. Having everything organized before you start dipping will make the process smooth and mess-free!
Create the Perfect Coating
Now for the fun part – the dredging dance! Take each chicken thigh and dip it first into the flour mixture, making sure to coat every nook and cranny. Shake off any excess flour, then dip it into the egg mixture, ensuring complete coverage. Let the excess egg drip off, then return it to the flour mixture for a second coating, pressing gently to help the coating adhere. This double-dredging technique is what creates that incredible, shatteringly crisp crust that holds up to the sauce. Place each coated piece on your prepared wire rack as you go, making sure they don’t touch each other. Let them rest for about 10 minutes – this allows the coating to set and adhere better during baking. The resting period helps prevent the coating from falling off when you flip the chicken later!
Bake to Golden Perfection
Preheat your oven to 400°F – this high temperature is key for achieving that beautiful golden brown color and crispy texture. Once the oven reaches temperature, place your baking sheet on the middle rack and bake for 15 minutes. After 15 minutes, carefully flip each piece using tongs – they should be lightly golden on the bottom. Continue baking for another 12-15 minutes until the internal temperature reaches 165°F when measured with a meat thermometer inserted into the thickest part of the chicken. The coating should be deep golden brown and crisp to the touch. If you want extra crispiness, you can broil for the last 1-2 minutes, but watch carefully to prevent burning. The high heat ensures the chicken cooks quickly while maintaining moisture inside!
Whip Up the Signature Sauce
Combine and Serve Immediately
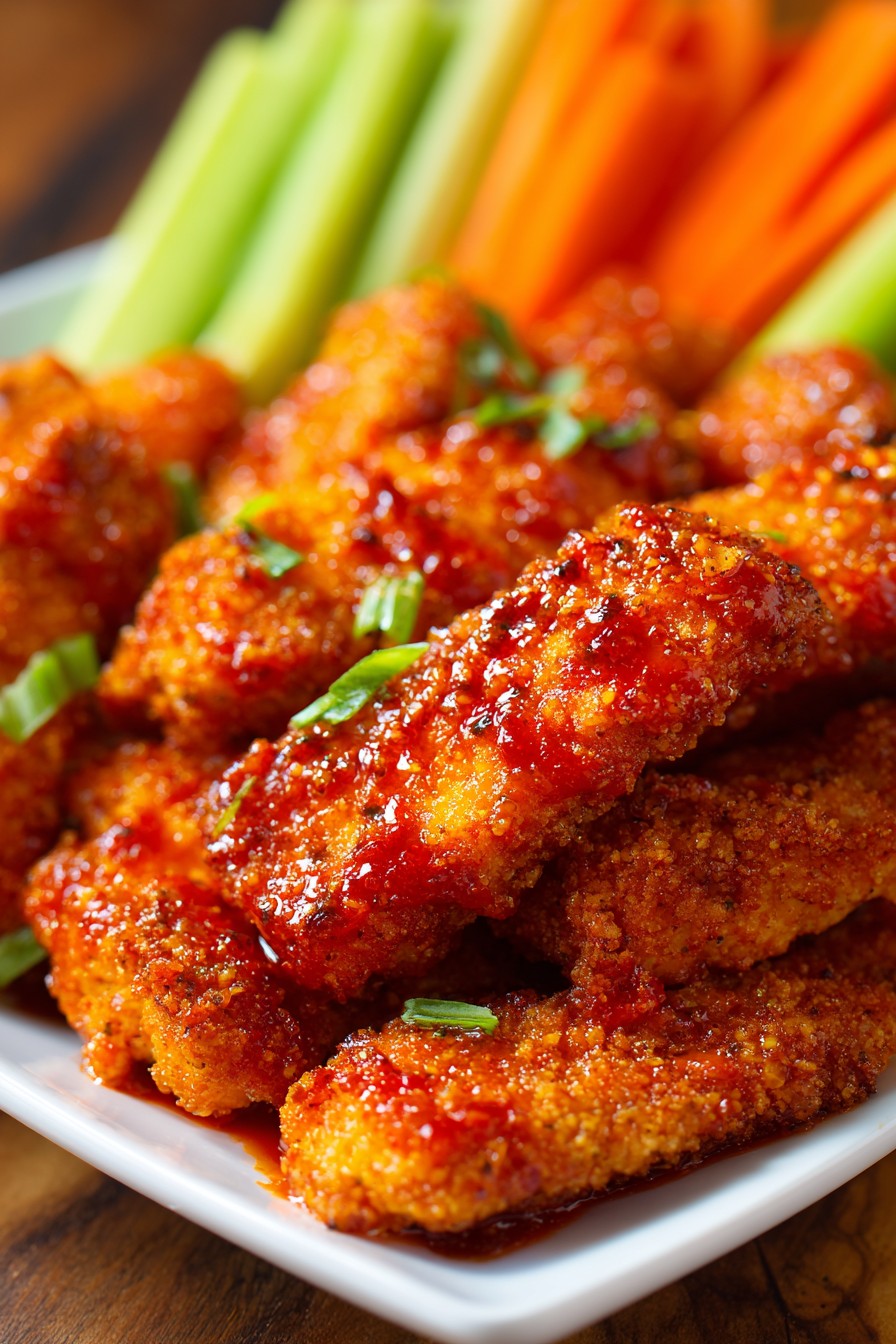
Once the chicken reaches 165°F internally, remove it from the oven and let it rest on the wire rack for exactly 3 minutes – this allows the juices to redistribute while keeping the coating crisp. Now, working quickly, place the slightly cooled chicken in a large bowl and pour about half of the warm buffalo sauce over it. Using tongs, gently toss to coat each piece evenly, adding more sauce as needed until you achieve your desired coverage. Be gentle to maintain that beautiful crispy coating! Serve immediately while hot and crispy, garnished with fresh parsley and accompanied by celery sticks, carrot sticks, and your choice of ranch or blue cheese dressing for dipping. The contrast between the spicy chicken and cool dressing is absolutely divine!
Tips and Tricks
For the absolute crispiest results, consider using a light spray of oil on the coated chicken before baking – this helps achieve that fried-like texture without the grease. If you’re really serious about crunch, you can use a combination of panko breadcrumbs and flour for an even more substantial crust. When making the sauce, feel free to experiment with different hot sauces – while Frank’s is traditional, you can try Cholula for a slightly different flavor profile or even mix in some sriracha for extra garlic notes. If you prefer baking without a wire rack, you can place the chicken directly on a parchment-lined baking sheet, but be sure to flip halfway through and expect slightly less crispiness on the bottom side. For those who love extra sauce, make a double batch and serve extra on the side for dipping – the sauce keeps well in the refrigerator for up to two weeks. If you’re meal prepping, keep the sauce and chicken separate until ready to serve to maintain maximum crispiness. When testing for doneness, always use a meat thermometer rather than relying on time alone, as oven temperatures can vary significantly. For an extra flavor boost, you can add a teaspoon of onion powder or smoked paprika to your flour mixture. If you find the sauce too spicy, balance it with a tablespoon of honey or brown sugar – the sweetness complements the heat beautifully. For the best texture, serve immediately after saucing, but if you must make ahead, keep the baked chicken and sauce separate, then reheat the chicken in a 375°F oven for 10 minutes before saucing. Don’t overcrowd your baking sheet – leaving space between pieces ensures proper air circulation and even browning. If you’re using chicken breasts instead of thighs, reduce the baking time by 3-4 minutes per side since breasts cook faster and can dry out more easily. For a gluten-free version, use gluten-free flour blend and cornstarch, and ensure your hot sauce and other ingredients are gluten-free certified.
Recipe Variations
- For a healthier alternative, try air frying instead of baking – cook at 380°F for 12-15 minutes, flipping halfway through, until internal temperature reaches 165°F. The air fryer creates an incredibly crispy exterior with even less oil, and the circulating hot air ensures perfect browning on all sides. You may need to work in batches depending on your air fryer size, but the results are worth it!
- Create Asian-inspired buffalo chicken by adding 2 tablespoons of soy sauce, 1 tablespoon of grated fresh ginger, and 1 teaspoon of sesame oil to your sauce mixture. Garnish with toasted sesame seeds and sliced green onions for a fusion twist that maintains the spicy kick while introducing umami depth and aromatic complexity.
- Make buffalo chicken sliders by serving the sauced chicken on small brioche buns with crisp lettuce, tomato slices, and a generous drizzle of blue cheese dressing. This party-friendly variation is perfect for game day gatherings or casual dinners, and the soft buns provide a nice contrast to the crispy chicken texture.
- For a sweet and spicy version, add 2 tablespoons of honey or maple syrup to your buffalo sauce along with a teaspoon of smoked paprika. The sweetness balances the heat beautifully while the smoked paprika adds depth, creating a more complex flavor profile that appeals to those who might find traditional buffalo sauce too intense.
- Transform this into a buffalo chicken salad by letting the cooked chicken cool slightly, then chopping it and tossing with mixed greens, cherry tomatoes, cucumber, red onion, and crumbled blue cheese. Drizzle with ranch dressing mixed with a tablespoon of your leftover buffalo sauce for a complete meal that’s both refreshing and satisfying.
Frequently Asked Questions
Can I use chicken breasts instead of thighs?
Absolutely! Chicken breasts work well, but require some adjustments since they’re leaner and can dry out more easily. Use 1.5 pounds of boneless, skinless chicken breasts cut into uniform pieces about the size of your palm. Reduce the baking time to 12 minutes per side, and check for doneness at 160°F since the temperature will continue to rise during resting. The result will be slightly less juicy than thighs but still delicious, especially if you don’t overcook them.
How do I make the sauce less spicy?
There are several ways to tame the heat while maintaining flavor. Increase the butter to 3/4 cup, which will mellow the spice significantly. You can also add 2 tablespoons of honey or brown sugar for sweetness that balances heat, or use half Frank’s RedHot and half mild wing sauce. Another option is to reduce the cayenne pepper in both the coating and sauce, or serve with extra cooling elements like additional ranch dressing or cucumber slices.
Can I prepare this recipe ahead of time?
You can prepare components ahead but I don’t recommend saucing until ready to serve. The baked chicken can be refrigerated for up to 3 days or frozen for 3 months. Reheat in a 375°F oven for 10-12 minutes until crispy and heated through. The sauce can be made up to 2 weeks ahead and refrigerated – simply reheat gently before using. For best results, always sauce right before serving to maintain that perfect crispy texture.
What’s the best way to store leftovers?
Store sauced leftovers in an airtight container in the refrigerator for up to 3 days. The coating will soften due to the sauce, but you can revive some crispiness by reheating in a 375°F oven for 8-10 minutes on a wire rack. Alternatively, chop the leftover chicken and use it in salads, wraps, or sandwiches where the softened texture works well. I don’t recommend freezing sauced chicken as the texture becomes mushy when thawed.
Why did my coating fall off during baking?
Coating separation usually happens for three main reasons: not patting the chicken dry enough before coating, not letting the coated chicken rest before baking, or moving the chicken too much during the initial baking period. Ensure your chicken is thoroughly dried, let the coated pieces rest for 10 minutes to set the coating, and avoid moving them during the first 15 minutes of baking. Also make sure your oven is fully preheated before baking to set the coating quickly.
Summary
This boneless buffalo chicken delivers restaurant-quality results with a crispy coating, juicy interior, and perfect spicy-tangy sauce. Easy to make and endlessly customizable, it’s sure to become a family favorite for game days or any night of the week!
Boneless Buffalo Chicken
6
servings25
minutes30
minutesIngredients
Instructions
- 1 Preheat oven to 400°F and set up wire rack on parchment-lined baking sheet
- 2 Pat chicken dry and set up three bowls for flour mixture, egg mixture, and coated chicken
- 3 Dredge chicken in flour, then egg, then flour again, placing on wire rack
- 4 Bake for 15 minutes, flip, bake 12-15 more minutes until 165°F internal temperature
- 5 Make sauce by combining all sauce ingredients in saucepan over medium heat
- 6 Rest chicken 3 minutes, toss with warm sauce, and serve immediately with sides


