Hey there, wing lovers! How many times have you craved that perfect barbecue wing experience but dreaded the messy bone situation? How about we solve that problem forever with these incredible boneless BBQ wings that deliver all the flavor without any of the fuss? Honestly, these might just become your new game day obsession!
Why This Recipe Works
- Using boneless chicken thighs instead of breasts ensures juicier, more flavorful results that won’t dry out during cooking
- The double-coating technique creates an extra crispy exterior that holds up beautifully against the sticky barbecue sauce
- Baking at high heat mimics the texture of fried wings while keeping things healthier and less messy
- The homemade barbecue sauce strikes the perfect balance between sweet, tangy, and smoky flavors that complement the chicken perfectly
- Resting the coated chicken before baking allows the breading to set up properly for maximum crunch factor
Ingredients
- 2 pounds boneless, skinless chicken thighs, cut into 1.5-inch pieces
- 1 cup all-purpose flour
- 2 teaspoons garlic powder
- 2 teaspoons smoked paprika
- 1 teaspoon onion powder
- 1 teaspoon black pepper
- 1 teaspoon salt
- 2 large eggs, beaten
- 1 cup buttermilk
- 1 cup barbecue sauce (your favorite brand or homemade)
- 2 tablespoons honey
- 1 tablespoon apple cider vinegar
- 1 teaspoon Worcestershire sauce
- 1/2 teaspoon liquid smoke (optional but recommended)
- 2 tablespoons vegetable oil for brushing
- Fresh parsley or cilantro for garnish (optional)
- Ranch or blue cheese dressing for serving
Equipment Needed
- Large mixing bowls (2-3)
- Whisk
- Rimmed baking sheet
- Wire rack that fits inside baking sheet
- Parchment paper or aluminum foil
- Measuring cups and spoons
- Sharp knife and cutting board
- Small saucepan
- Tongs or fork for turning chicken
- Instant-read thermometer
Instructions
Prepare the Chicken and Coating Stations
Let’s get everything set up for maximum efficiency! First, pat your chicken thigh pieces completely dry with paper towels – this is crucial for helping the coating stick properly. In one medium bowl, whisk together the flour, garlic powder, smoked paprika, onion powder, black pepper, and salt until well combined. In another bowl, whisk the eggs and buttermilk together until smooth. Now you’ve got your dredging station ready: dry mixture, wet mixture, and then dry mixture again. This double-dredging technique might seem like extra work, but trust me, it creates that incredible crunchy texture that makes these wings so addictive. Line a baking sheet with parchment paper and place a wire rack on top – this will be your landing spot for the coated chicken pieces.
Coat the Chicken Pieces Thoroughly
Time to get your hands dirty! Working with one piece at a time, dip each chicken piece first into the flour mixture, shaking off any excess. Then dip it into the buttermilk mixture, letting the excess drip off. Finally, dip it back into the flour mixture, pressing gently to ensure an even, thorough coating. Place each coated piece on the wire rack as you go. Here’s a pro tip: let the coated chicken rest on the rack for at least 15 minutes before baking. This allows the coating to hydrate properly and creates a much crispier final product. Don’t rush this step – while you’re waiting, you can preheat your oven to 425°F and make the barbecue sauce glaze. The resting time makes a noticeable difference in texture, I promise!
Prepare the Barbecue Glaze
While your chicken is resting, let’s whip up that amazing barbecue glaze that will take these wings to the next level. In a small saucepan over medium heat, combine the barbecue sauce, honey, apple cider vinegar, Worcestershire sauce, and liquid smoke if using. Whisk constantly until the mixture comes to a gentle simmer, then reduce heat to low and continue cooking for 3-4 minutes until slightly thickened. Remove from heat and set aside – the glaze will continue to thicken as it cools. Taste and adjust seasoning if needed – if you like it spicier, add a pinch of cayenne pepper. This homemade glaze approach lets you control the sweetness and tanginess exactly to your preference, unlike store-bought sauces that can sometimes be too one-dimensional.
Bake to Golden Perfection
Now for the magic! Once your oven reaches 425°F and your chicken has rested, lightly brush the wire rack with vegetable oil to prevent sticking. Arrange the chicken pieces in a single layer with a little space between each piece – don’t crowd them! Lightly brush the tops of the chicken pieces with more vegetable oil – this helps them brown beautifully. Bake on the middle rack for 15 minutes, then carefully flip each piece using tongs. Continue baking for another 10-12 minutes until the coating is golden brown and crispy. For extra assurance, check that the internal temperature reaches 165°F using an instant-read thermometer inserted into the thickest part of a few pieces. The high heat creates that fantastic crunch while keeping the chicken incredibly juicy inside.
Glaze and Serve Immediately
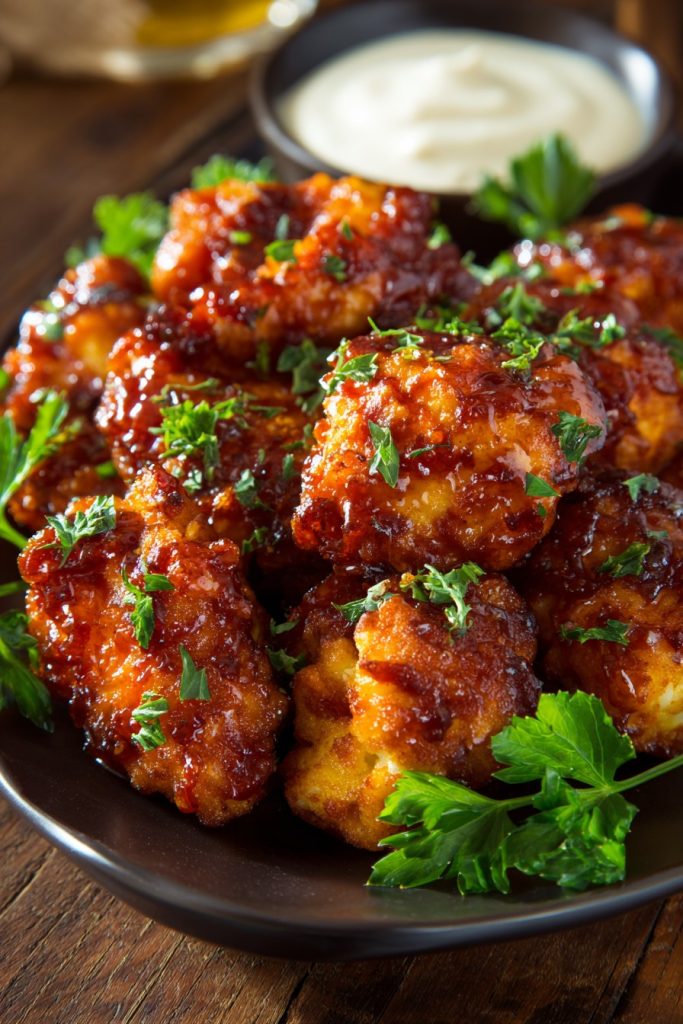
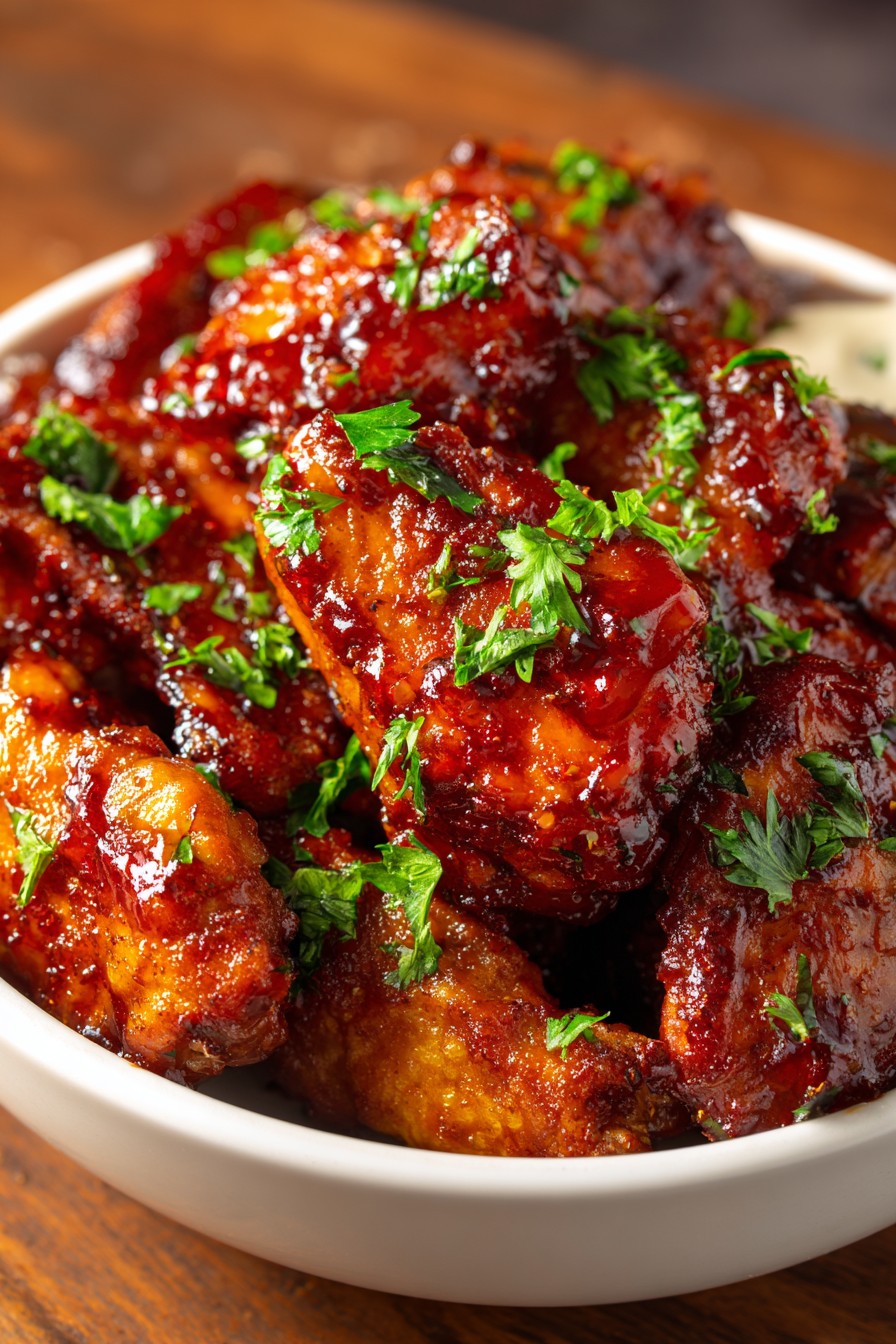
The moment we’ve been waiting for! Remove the baking sheet from the oven and immediately brush each piece generously with the warm barbecue glaze using a pastry brush. Work quickly while the chicken is hot – the heat will help the glaze adhere perfectly. You can serve them as is, or for extra sauciness, return them to the oven for 2-3 minutes to set the glaze. Transfer to a serving platter, garnish with fresh parsley or cilantro if desired, and serve immediately with ranch or blue cheese dressing on the side. These are best enjoyed right away while they’re still hot and crispy – though I won’t judge if you sneak a few cold ones from the fridge later! The combination of the crunchy coating, juicy chicken, and sticky-sweet barbecue sauce is absolutely irresistible.
Tips and Tricks
If you really want to take these boneless BBQ wings to legendary status, here are some advanced tips that will elevate your game. First, consider brining your chicken before cooking – dissolve 1/4 cup salt and 2 tablespoons sugar in 4 cups warm water, then submerge your chicken pieces and refrigerate for 1-2 hours. This extra step ensures incredibly moist and flavorful chicken that stays juicy even if you accidentally overcook it slightly. Rinse and pat dry thoroughly before proceeding with the recipe. For the coating, you can experiment with different flour blends – try replacing half the all-purpose flour with cornstarch for an even crispier texture, or add a tablespoon of baking powder to the dry mixture for extra lift and crunch. The baking powder reacts with the buttermilk to create tiny air pockets that result in a lighter, crispier coating.
When it comes to baking, positioning matters more than you might think. Make sure your oven rack is in the center position for even heating, and if your oven has hot spots, rotate the baking sheet halfway through cooking. For maximum crispiness, some cooks swear by starting with a very hot baking sheet – place your empty baking sheet with the wire rack in the oven while it preheats, then carefully arrange the chicken on the hot rack. This gives an immediate sear to the bottom of the chicken pieces. If you’re making a large batch, work in two batches rather than overcrowding the pan – crowded chicken will steam rather than bake, resulting in soggy coating. You can keep the first batch warm in a 200°F oven while the second batch cooks.
Don’t overlook the importance of your barbecue sauce selection or customization. If using store-bought sauce, choose one with a thicker consistency, or simmer it for 10-15 minutes to reduce and concentrate the flavors. For homemade sauce enthusiasts, consider adding a tablespoon of bourbon or whiskey to your glaze – the alcohol cooks off but leaves behind wonderful complexity. If you prefer spicy wings, add 1-2 teaspoons of your favorite hot sauce or a pinch of cayenne to the glaze. For storage and reheating, these wings are best fresh but can be refrigerated for up to 3 days. Reheat in a 375°F oven for 10-12 minutes to restore crispiness – microwaving will make them soggy. You can also freeze the baked but unglazed wings for up to 3 months, then glaze after reheating.
Recipe Variations
- Spicy Buffalo Style: Replace the barbecue sauce with a mixture of 1 cup hot sauce (like Frank’s RedHot), 1/2 cup melted butter, 1 tablespoon white vinegar, and 1/2 teaspoon garlic powder. Toss the baked wings in this sauce instead of brushing for full coverage. Serve with celery sticks and blue cheese dressing for the classic Buffalo wing experience without the bones.
- Asian-Inspired Glaze: Create a teriyaki-style glaze with 1/2 cup soy sauce, 1/4 cup honey, 2 tablespoons rice vinegar, 1 tablespoon minced ginger, 2 minced garlic cloves, and 1 teaspoon sesame oil. Simmer until slightly thickened, then brush on during the last few minutes of baking. Garnish with toasted sesame seeds and sliced green onions for an Asian fusion twist.
- Honey Mustard Variation: Mix 1/2 cup Dijon mustard, 1/4 cup honey, 2 tablespoons mayonnaise, 1 tablespoon apple cider vinegar, and 1/2 teaspoon paprika for a tangy-sweet alternative. This version is particularly kid-friendly and great for those who find traditional barbecue sauce too sweet or smoky.
- Dry Rub Option: Skip the wet glaze entirely and create a flavorful dry rub with 2 tablespoons brown sugar, 1 tablespoon smoked paprika, 1 teaspoon each of garlic powder, onion powder, and chili powder, plus 1/2 teaspoon cayenne for heat. Rub this mixture onto the chicken after the final flour coating for a crispy, seasoned exterior without the sticky sauce.
- Air Fryer Method: For an even crispier result with less oil, cook these in an air fryer at 400°F for 12-15 minutes, shaking the basket halfway through. The circulating hot air creates an exceptionally crispy coating while using significantly less oil than traditional baking or frying methods.
Frequently Asked Questions
Can I use chicken breasts instead of thighs?
While you can technically use chicken breasts, I strongly recommend sticking with thighs for several reasons. Chicken thighs have more fat content than breasts, which means they stay juicier and more flavorful during the high-heat baking process. Breasts tend to dry out more easily, especially when cut into smaller pieces that have more surface area exposed to heat. If you must use breasts, consider brining them first for 30 minutes and reducing the baking time by 2-3 minutes to prevent dryness. You might also want to pound the breasts to an even thickness before cutting into pieces to ensure uniform cooking.
How do I make these gluten-free?
Making gluten-free boneless BBQ wings is quite simple with a few substitutions. Replace the all-purpose flour with your favorite gluten-free flour blend – look for one that contains xanthan gum or add 1/2 teaspoon xanthan gum to help with binding. For the buttermilk, you can make your own by adding 1 tablespoon lemon juice or vinegar to 1 cup of regular milk or non-dairy alternative and letting it sit for 5 minutes. Always check that your barbecue sauce and Worcestershire sauce are certified gluten-free, as some brands contain hidden gluten. The cooking method remains exactly the same, and you’ll still achieve that delicious crispy coating.
Can I prepare these ahead of time?
You can absolutely do some prep ahead of time to make game day or party preparation easier. You can cut the chicken and store it covered in the refrigerator for up to 24 hours before cooking. You can also mix the dry coating ingredients and prepare the barbecue glaze ahead of time – store both in separate airtight containers in the refrigerator. However, I don’t recommend coating the chicken more than an hour before baking, as the coating can become gummy and won’t crisp up properly. The best approach is to do all your prep work in advance, then coat and bake right before serving for optimal texture and freshness.
Why use a wire rack instead of baking directly on the sheet?
The wire rack serves several important purposes that significantly improve your final results. First, it allows hot air to circulate completely around each chicken piece, promoting even browning and crisping on all sides rather than just the top. Second, it elevates the chicken above any rendered fat or moisture that might accumulate during baking, preventing the bottom from becoming soggy. Without the rack, the bottom of your wings would steam in their own juices, resulting in a soft, less appealing texture. If you don’t have a wire rack, you can create a makeshift one by crumpling aluminum foil into long snakes and arranging them to support the chicken pieces above the baking sheet surface.
How do I know when the chicken is fully cooked?
The most reliable way to ensure your chicken is safely cooked is by using an instant-read thermometer inserted into the thickest part of a few pieces – it should register 165°F. Visual cues include the coating turning golden brown and crispy, and the chicken pieces feeling firm to the touch rather than soft or squishy. If you cut into a piece, the juices should run clear, not pink. Remember that chicken continues to cook slightly after removal from the oven, so you can remove it at 160°F and let carryover cooking bring it to the safe temperature. Undercooked chicken is not worth the risk, so when in doubt, use that thermometer!
Summary
These boneless BBQ wings deliver incredible flavor and perfect texture without the mess of bones. The double-coating technique creates a crispy exterior that holds up to the sticky-sweet barbecue glaze, while juicy chicken thighs ensure every bite is moist and delicious. Perfect for game day, parties, or anytime you crave restaurant-quality wings at home!
Boneless BBQ Wings
6
servings25
minutes27
minutesIngredients
Instructions
- 1 Preheat oven to 425°F. Set up dredging station: flour with spices, eggs with buttermilk.
- 2 Coat chicken pieces: flour, buttermilk mixture, then flour again. Place on wire rack over baking sheet.
- 3 Let coated chicken rest 15 minutes. Meanwhile, make glaze by simmering barbecue sauce, honey, vinegar, Worcestershire, and liquid smoke.
- 4 Bake chicken 15 minutes, flip, bake 10-12 more minutes until golden and internal temperature reaches 165°F.
- 5 Brush immediately with warm glaze. Serve hot with dressing and garnish.
